 TurkeyDev
Changes I'd Make:
- Mess around with the bitrate and other image quality settings to try and boost the image quality
- Switch out socket.io for regular web sockets. I used Socket.io because I had experience with that with Flask, but I think as a whole it's way overkill and regular Web Sockets would probably be better suited
*Note: This project is marked as completed, as I don't plan to do any more major updates at the moment, but I still may sometime in the future. Who knows.
Summary:
There were 2 overarching issues with my previous proof of concept. My DIY Google Cardboard headset was not very good and the video I was attempting to show through it was not correctly setup for viewing in VR. The first problem was an easy fix. I went onto Facebook marketplace and found a Google Daydream headset for pretty cheap. I actually got 2 of them for $30, which given that I have Google phones makes this all a perfect solution for me. So with the headset sorted out now I needed to move onto the more difficult task of splitting the video into 2 parts and applying some slight alterations to them so that when viewed by each eye independently they would match up and seem as if they were one.
Before that though, In the previous video I used a separate piece of software call Raspberry-Pi-Cam-Web-Interface to provide the live video, but after doing some digging I found that at the heart of this live video stream was a program called RaspiMJPEG and essentially it's like a hybrid between raspistill and raspivid. For this use case it’s configured to capture images at a specified frame rate and put the captured image into a ram buffer. This ram buffer is of course much faster than saving it to the SD Card slot and allows me to continually access the image in the ram buffer and send it over the air to the connected device giving the perception of live video. Now there are a lot more things that RaspiMJPEG can do, but this is it’s core functionality. This time instead of using Raspberry-Pi-Cam-Web-Interface I decided to bake support for RaspiMJPEG into my raspberry pi action camera project code. This gives me a much better solution for the camera preview in the web control panel. After some fiddling around and searching for how to actually use the RaspiMJPEG program, I finally had it working and powering the now redesigned camera preview page previously mentioned.
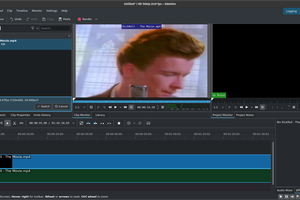
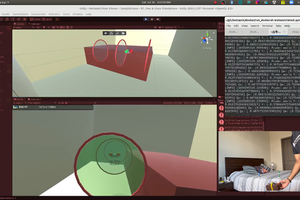
Ok, so we have the video feed, but now we have to split it and apply some filters so that it can be perceived correctly in the Google Daydream headset. For that I went looking around Google and came across an article which actually goes over doing exactly what I am trying to do of taking video off a raspberry pi and make it into a VR output in JavaScript. Bonus points as well as they are using the Raspberry-Pi-Cam-Web-Interface that I am basically branching from. It was a little confusing as the article does reference some base code that was created into another article to actually create the VR environment, but after doing a lot of copying and pasting and then tweaking for my use case, I had the video up and working.
Now all that was left was to basically reassemble everything from my previous proof of concept video! I did make a change and printed out different extension for the camera in order to make everything lighter, but also to not have the weird 90 degree connecting ends. Another change I made was that I wanted to use a cheaper and lighter HDMI cable because it’s much easier to manage as it’s not as stiff. The only problem is that, like I mentioned in my previous video, these passive CSI to HDMI converters don’t work with all cheaper HDMI cables if they are missing a ground wire in them, but like I mentioned again in my previous video there is a possible solution. By soldering a connecting wire between the ground on the PCB and the HDMI plug housing we can fix that missing ground and allow the cheaper HDMI cables to work!
So now it’s time to test...
Read more »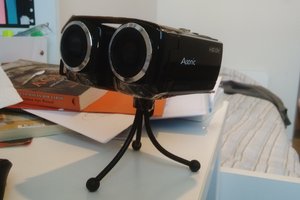
The Real Life 3rd Person Camera is a concept that has gained popularity in recent years in the gaming industry. It involves a camera perspective that mimics the viewpoint of a third person, as if the player were controlling a character in a game. The camera is positioned behind the player, providing a wider view of the surroundings and allowing the player to see their character from a different angle. Well, the article https://talkradionews.com/pro-choice-vs-pro-life-what-it-means-and-why-it-is-important/ starts by defining the two terms: pro-choice and pro-life. Pro-choice supporters believe that a woman should have the right to choose whether or not to have an abortion. On the other hand, pro-life advocates believe that abortion is equivalent to taking a life and should be illegal.