To get a better idea how to improve my pellet grinder, I had a closer look at the energy needed to turn pellets into powder:
With the simple experiments carried out in the video, you get a better idea of what material throughput a low power router turned into a plastic mill can deliver.
My lazy Sunday afternoon project of 3D printing sugar is followed by a more in depth view on what can be done with that exotic material and what can't be done:
Sugar isn't plastics
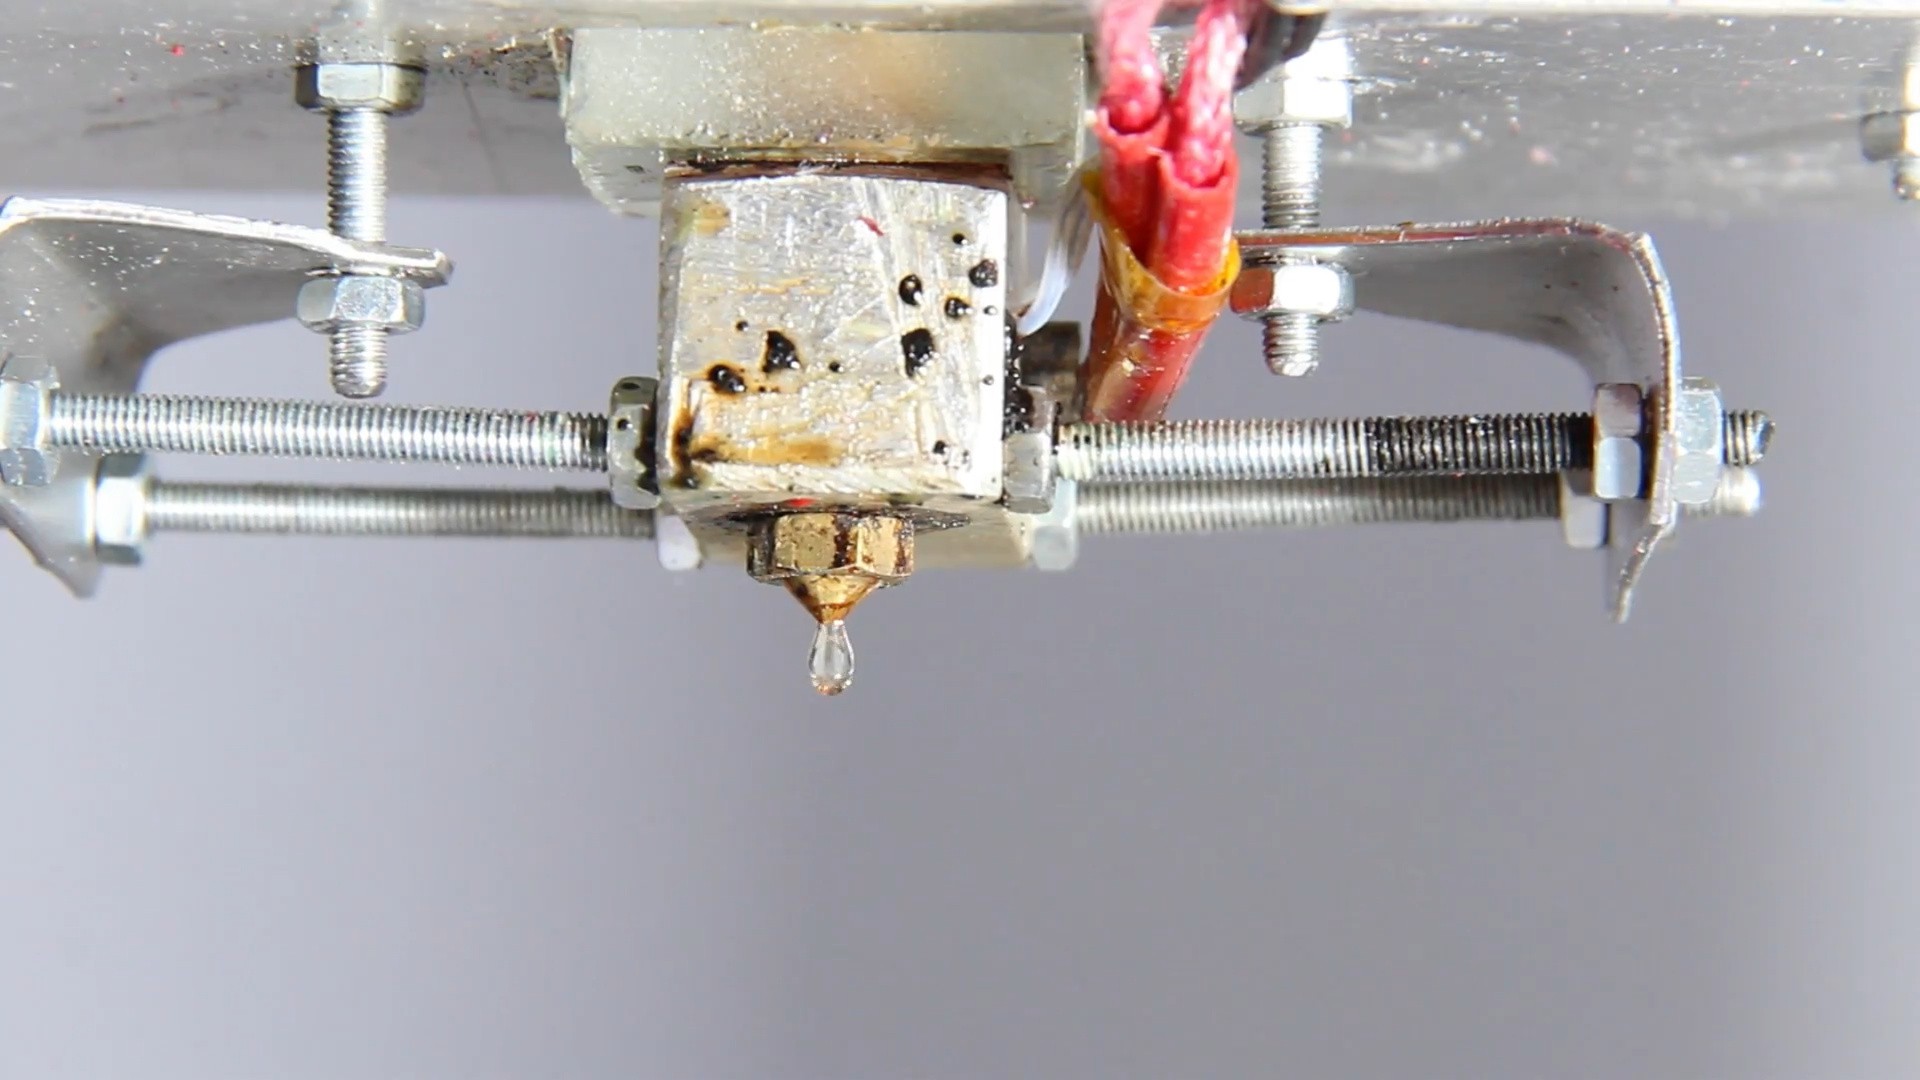
Due to a different chemical composition, the physical properties of sugar are totally different from that of common plastics used in FDM printing. A glass temperature exists, but only academically speaking. The transition from solid to liquid appears almost instantly. The viscosity is clearly lower than that of common plastics and the surface tension is higher. With that, sucrose, as used in my experiments, drips out of the extruder without forming strings.
It works in general
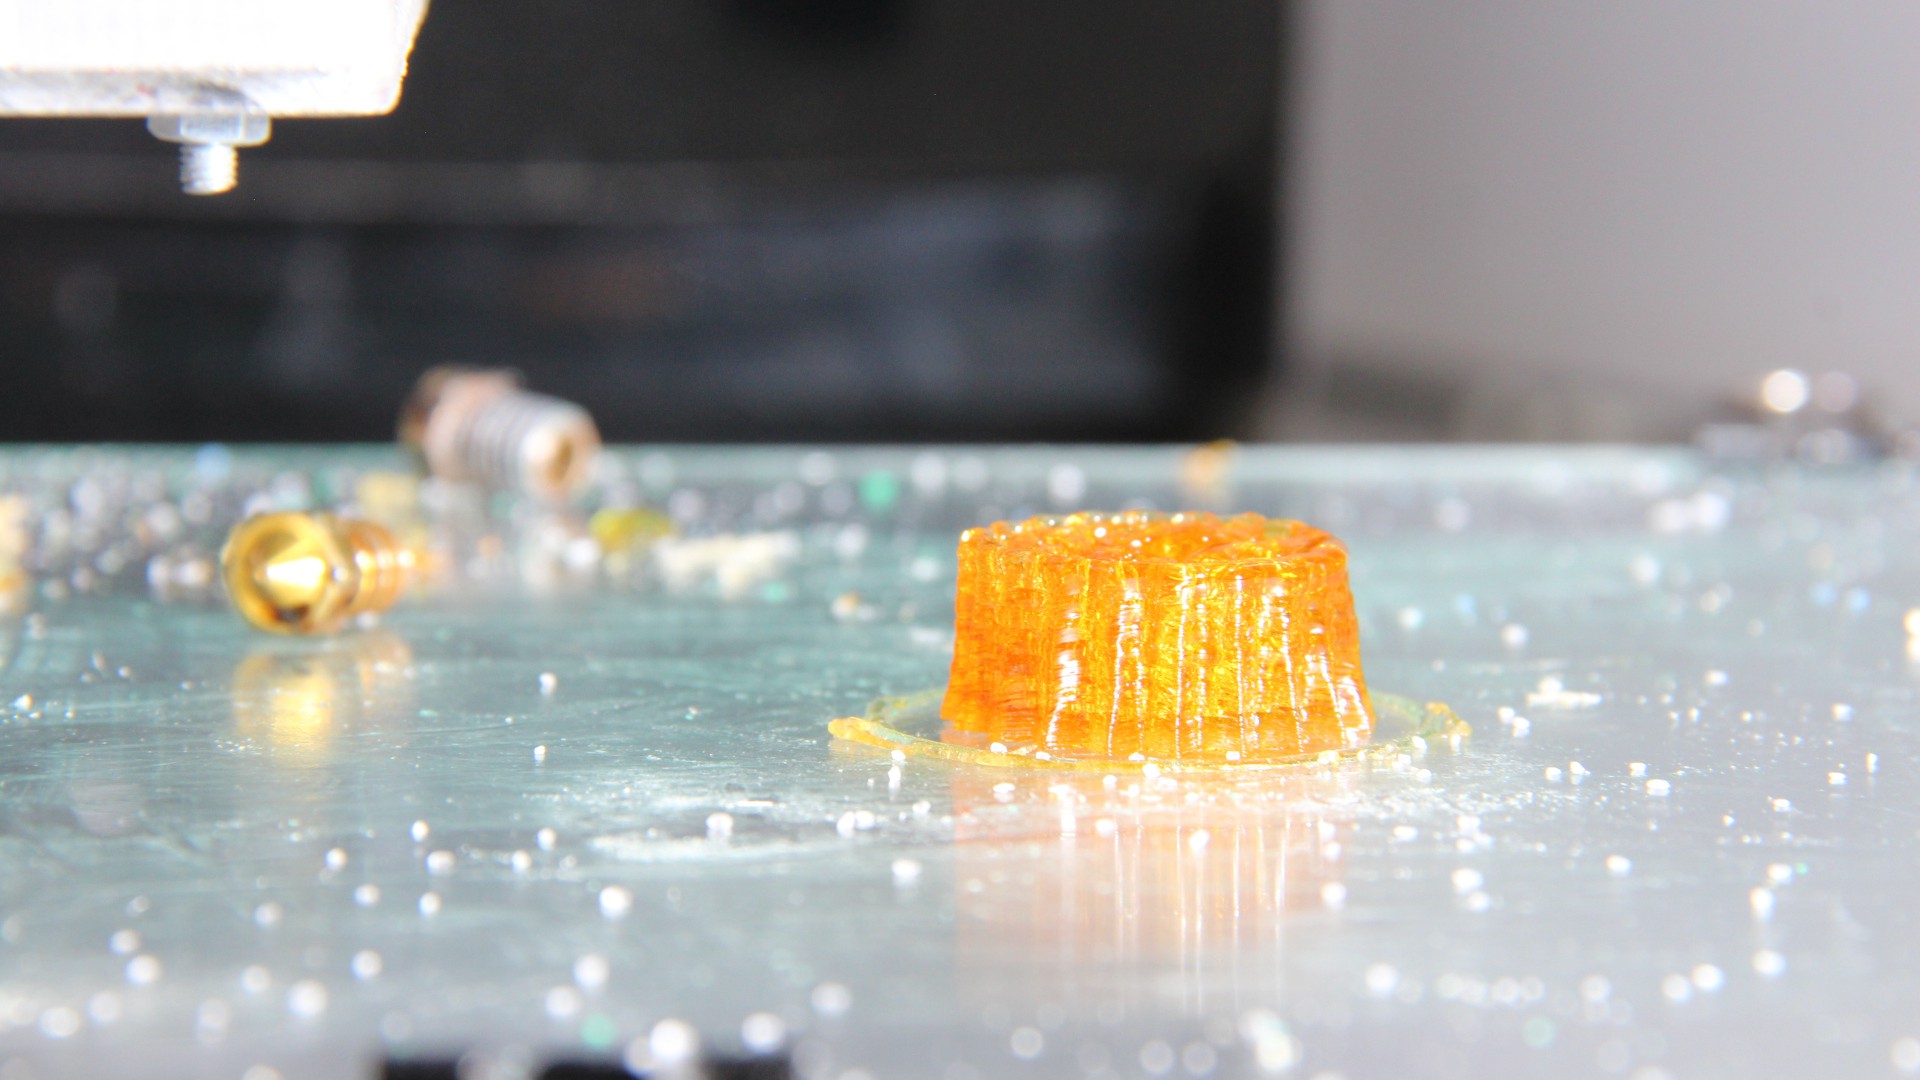
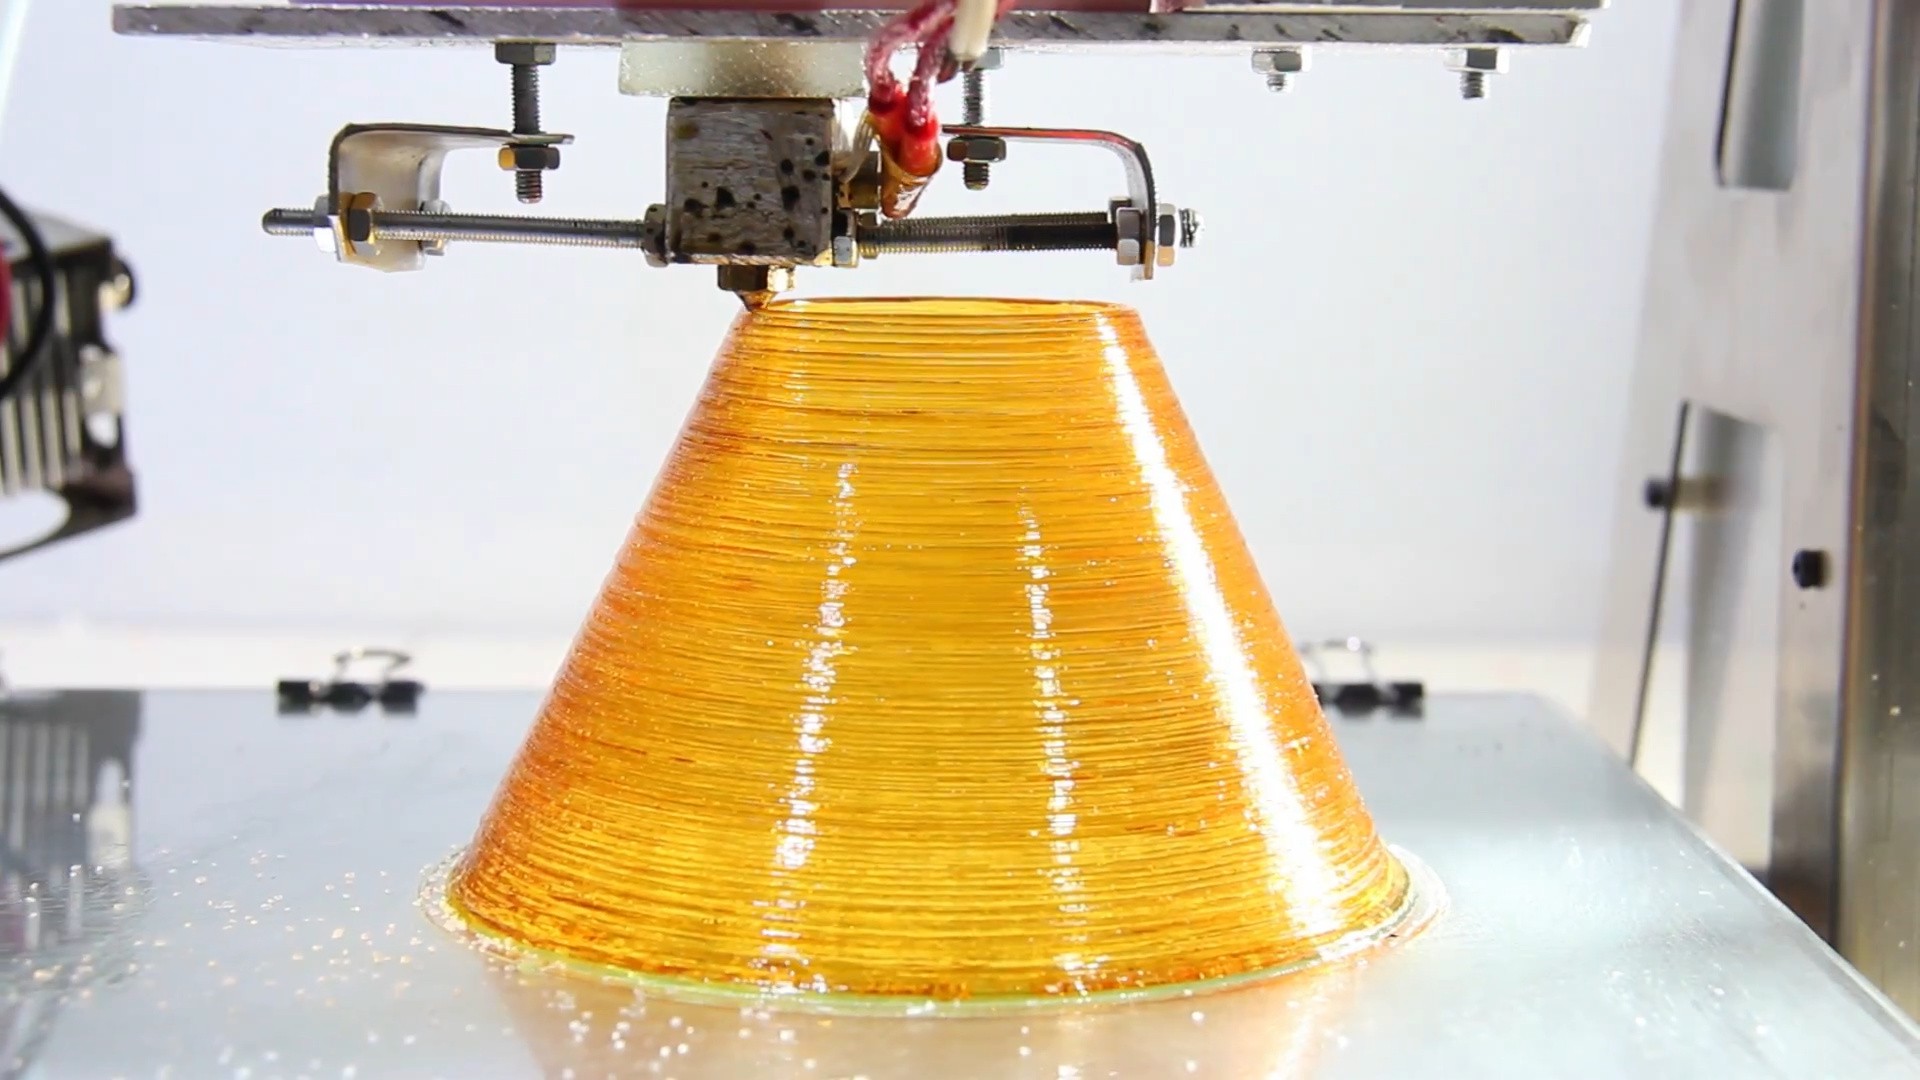
The very first try was a copy of the pinion on the stepper motor of my extruder. You can recognize it as being a gear, even the 3mm teeth can be seen, also the layering. The top surface is very rough. That's due to the low viscosity and the surface tension of molten sugar. At low print speeds, there is always a drop of sugar sticking to the tip of the nozzle and droplets form on the top layer.
Print it fast to get rid of droplets on the surface:
You need to print sugar with a higher print speed (30mm/s) to give the molten sugar not enough time to form droplets while cooling down.
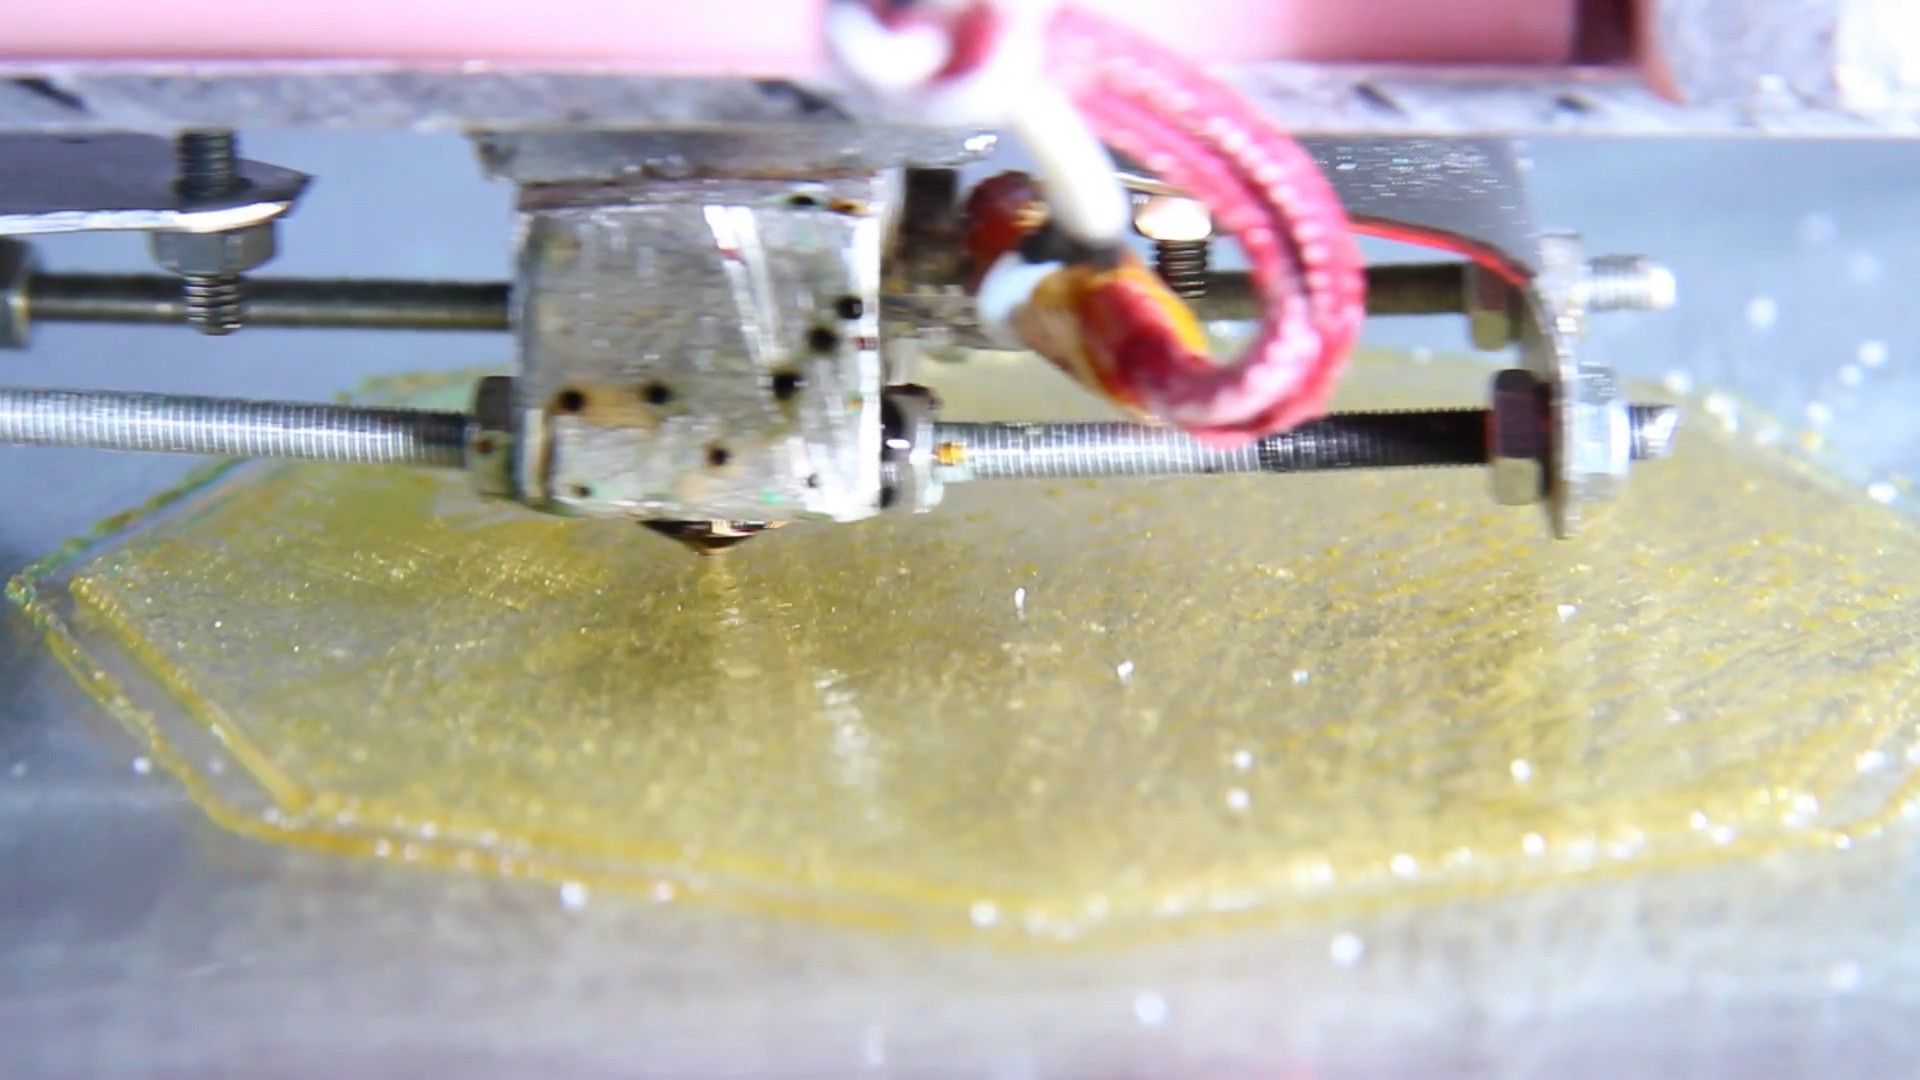
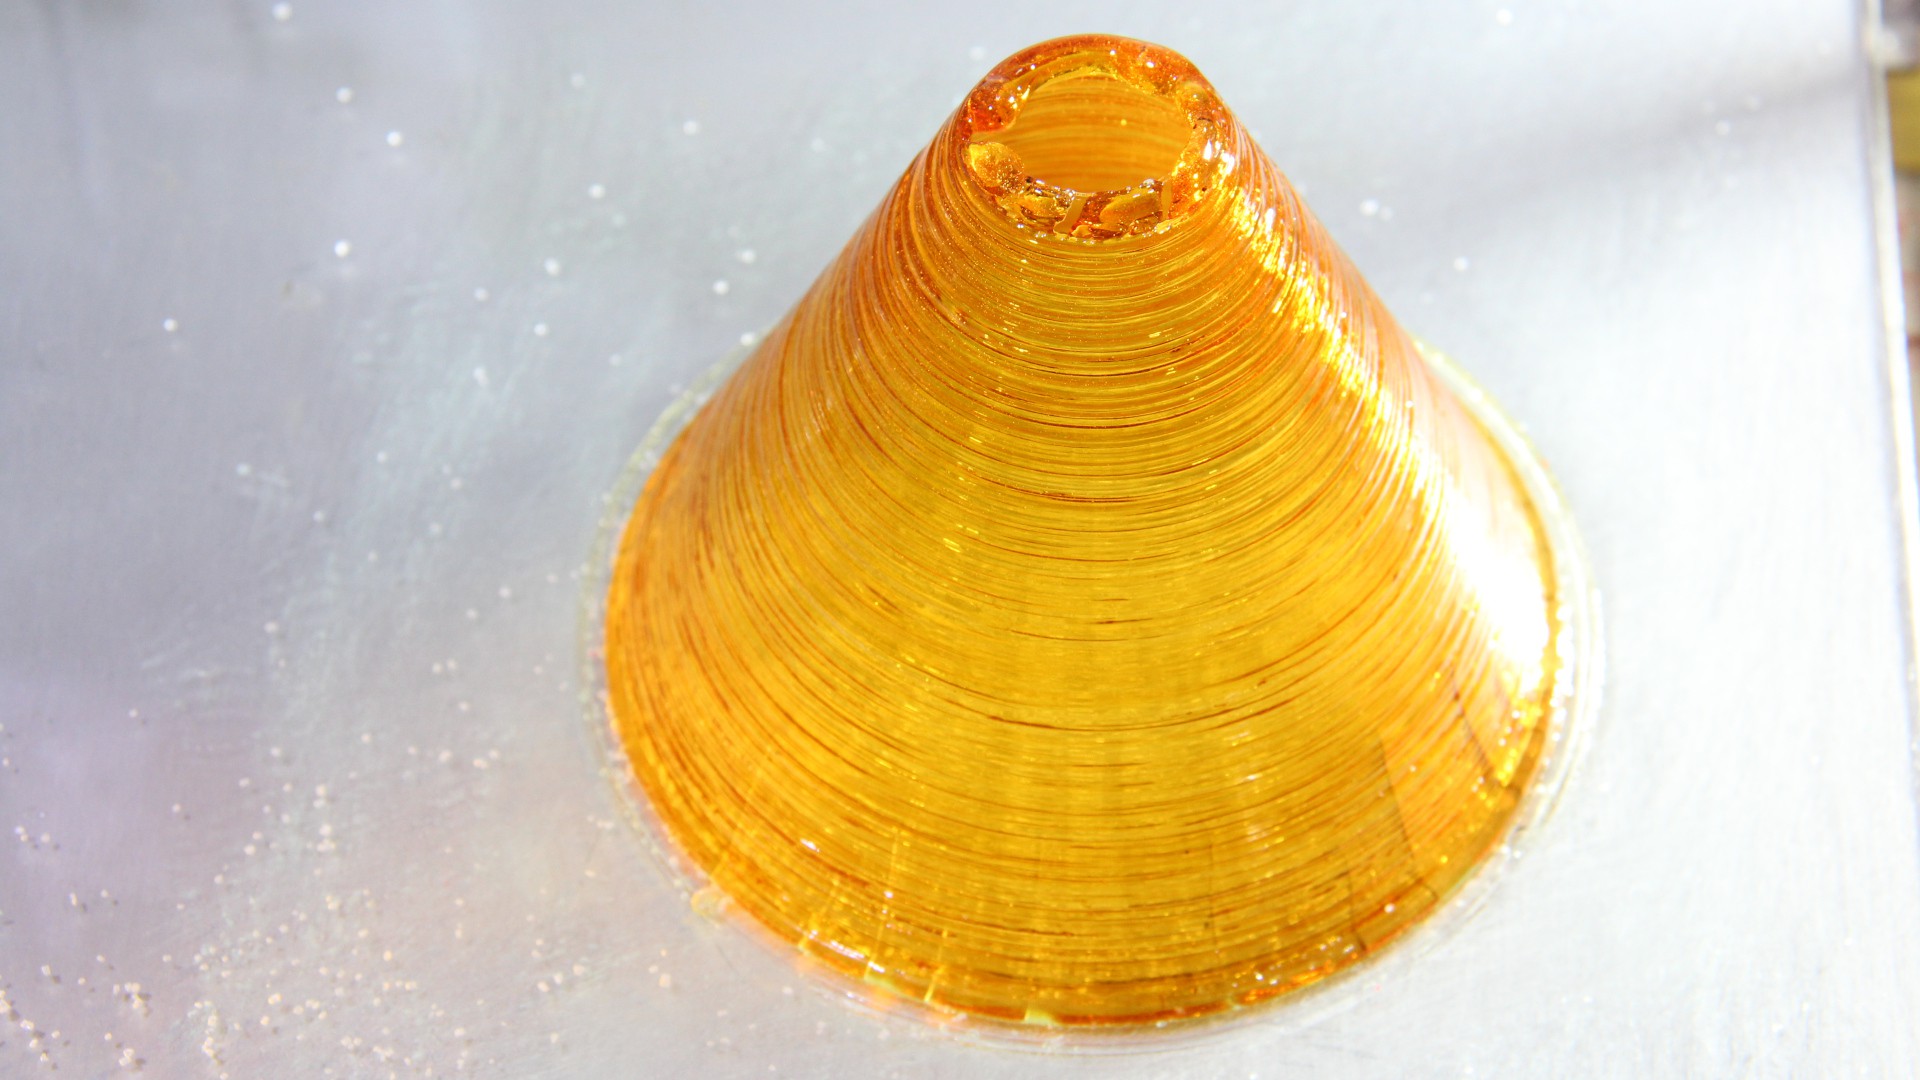
Print it slow to avoid cracking
even when printed, sugar is still a very brittle material. With high print speeds, tensions build up in the material which can lead to cracks in thin walls. With a low print speed of just 10mm/s I could print 1.8mm walls without any problems.
The more you know about a material, the better the results
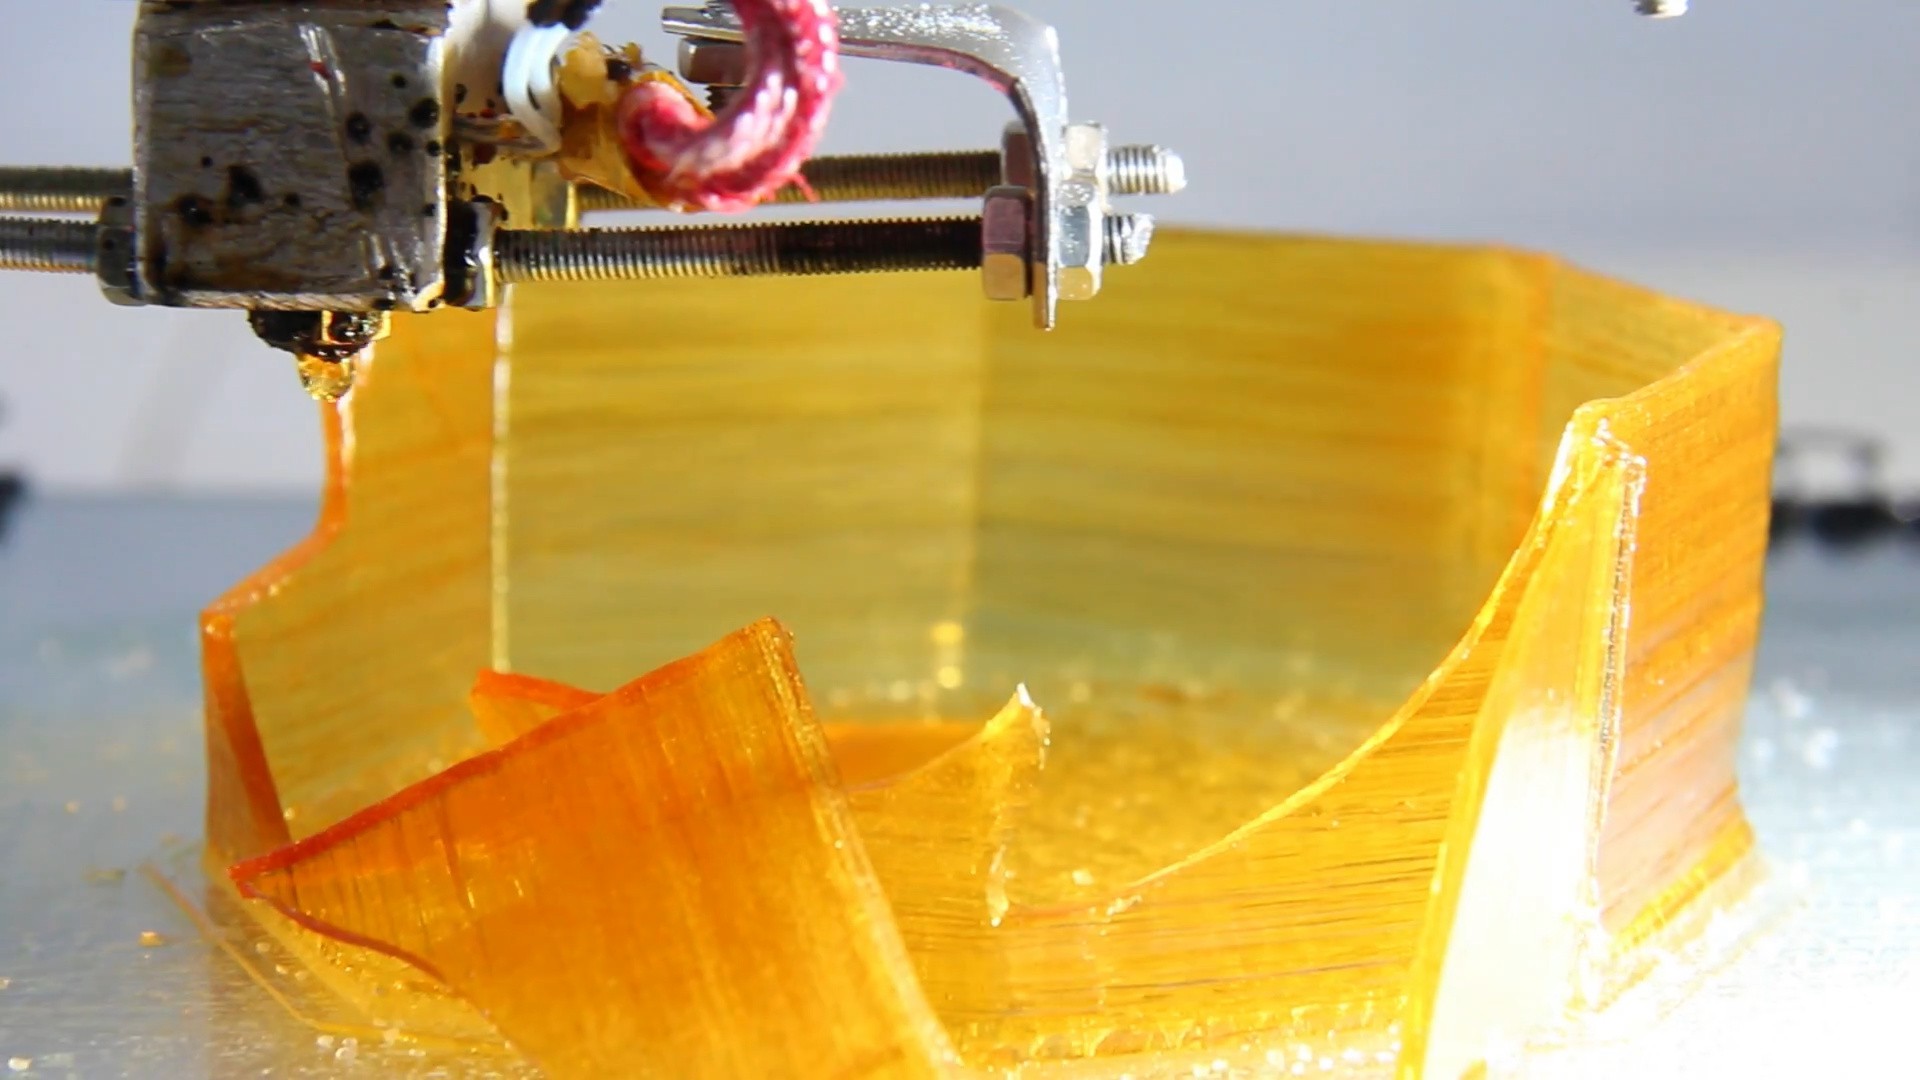
Part cooling and heated build chamber will make things better
The diameter of the cone at the base is 100mm., the angle is 45degrees. The closer the print came to the tip, the less time there was for the sugar to solidify. That caused the forming of droplets and finally to an aborted print. Part cooling for small structures could be an improvement. Also a heated build chamber can help to avoid tensions in the material. There is more experimentation to be carried out, but not yet...
Hackaday Prize 2021 comes to an end today. My project was voted into the final round and as part of the competition, an up to 5 minutes video for the jury has to be recorded. Here is mine:
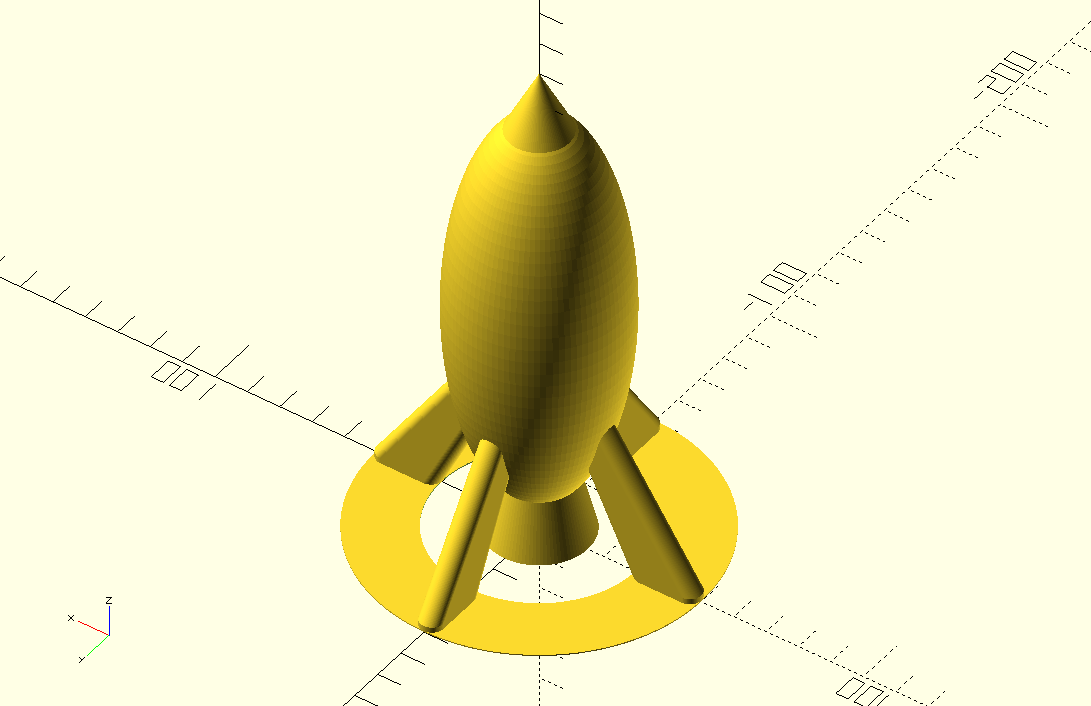
For this video I have created a "Rocket" in openSCAD ((see files section):
The printer settings were:
Hotend temperature: 181°C
Bed temperature: 65°C
Layer height: 0.2mm
Layer width: 0.5mm
Infill: 0%
Rocket dimensions: 100x100x150mm
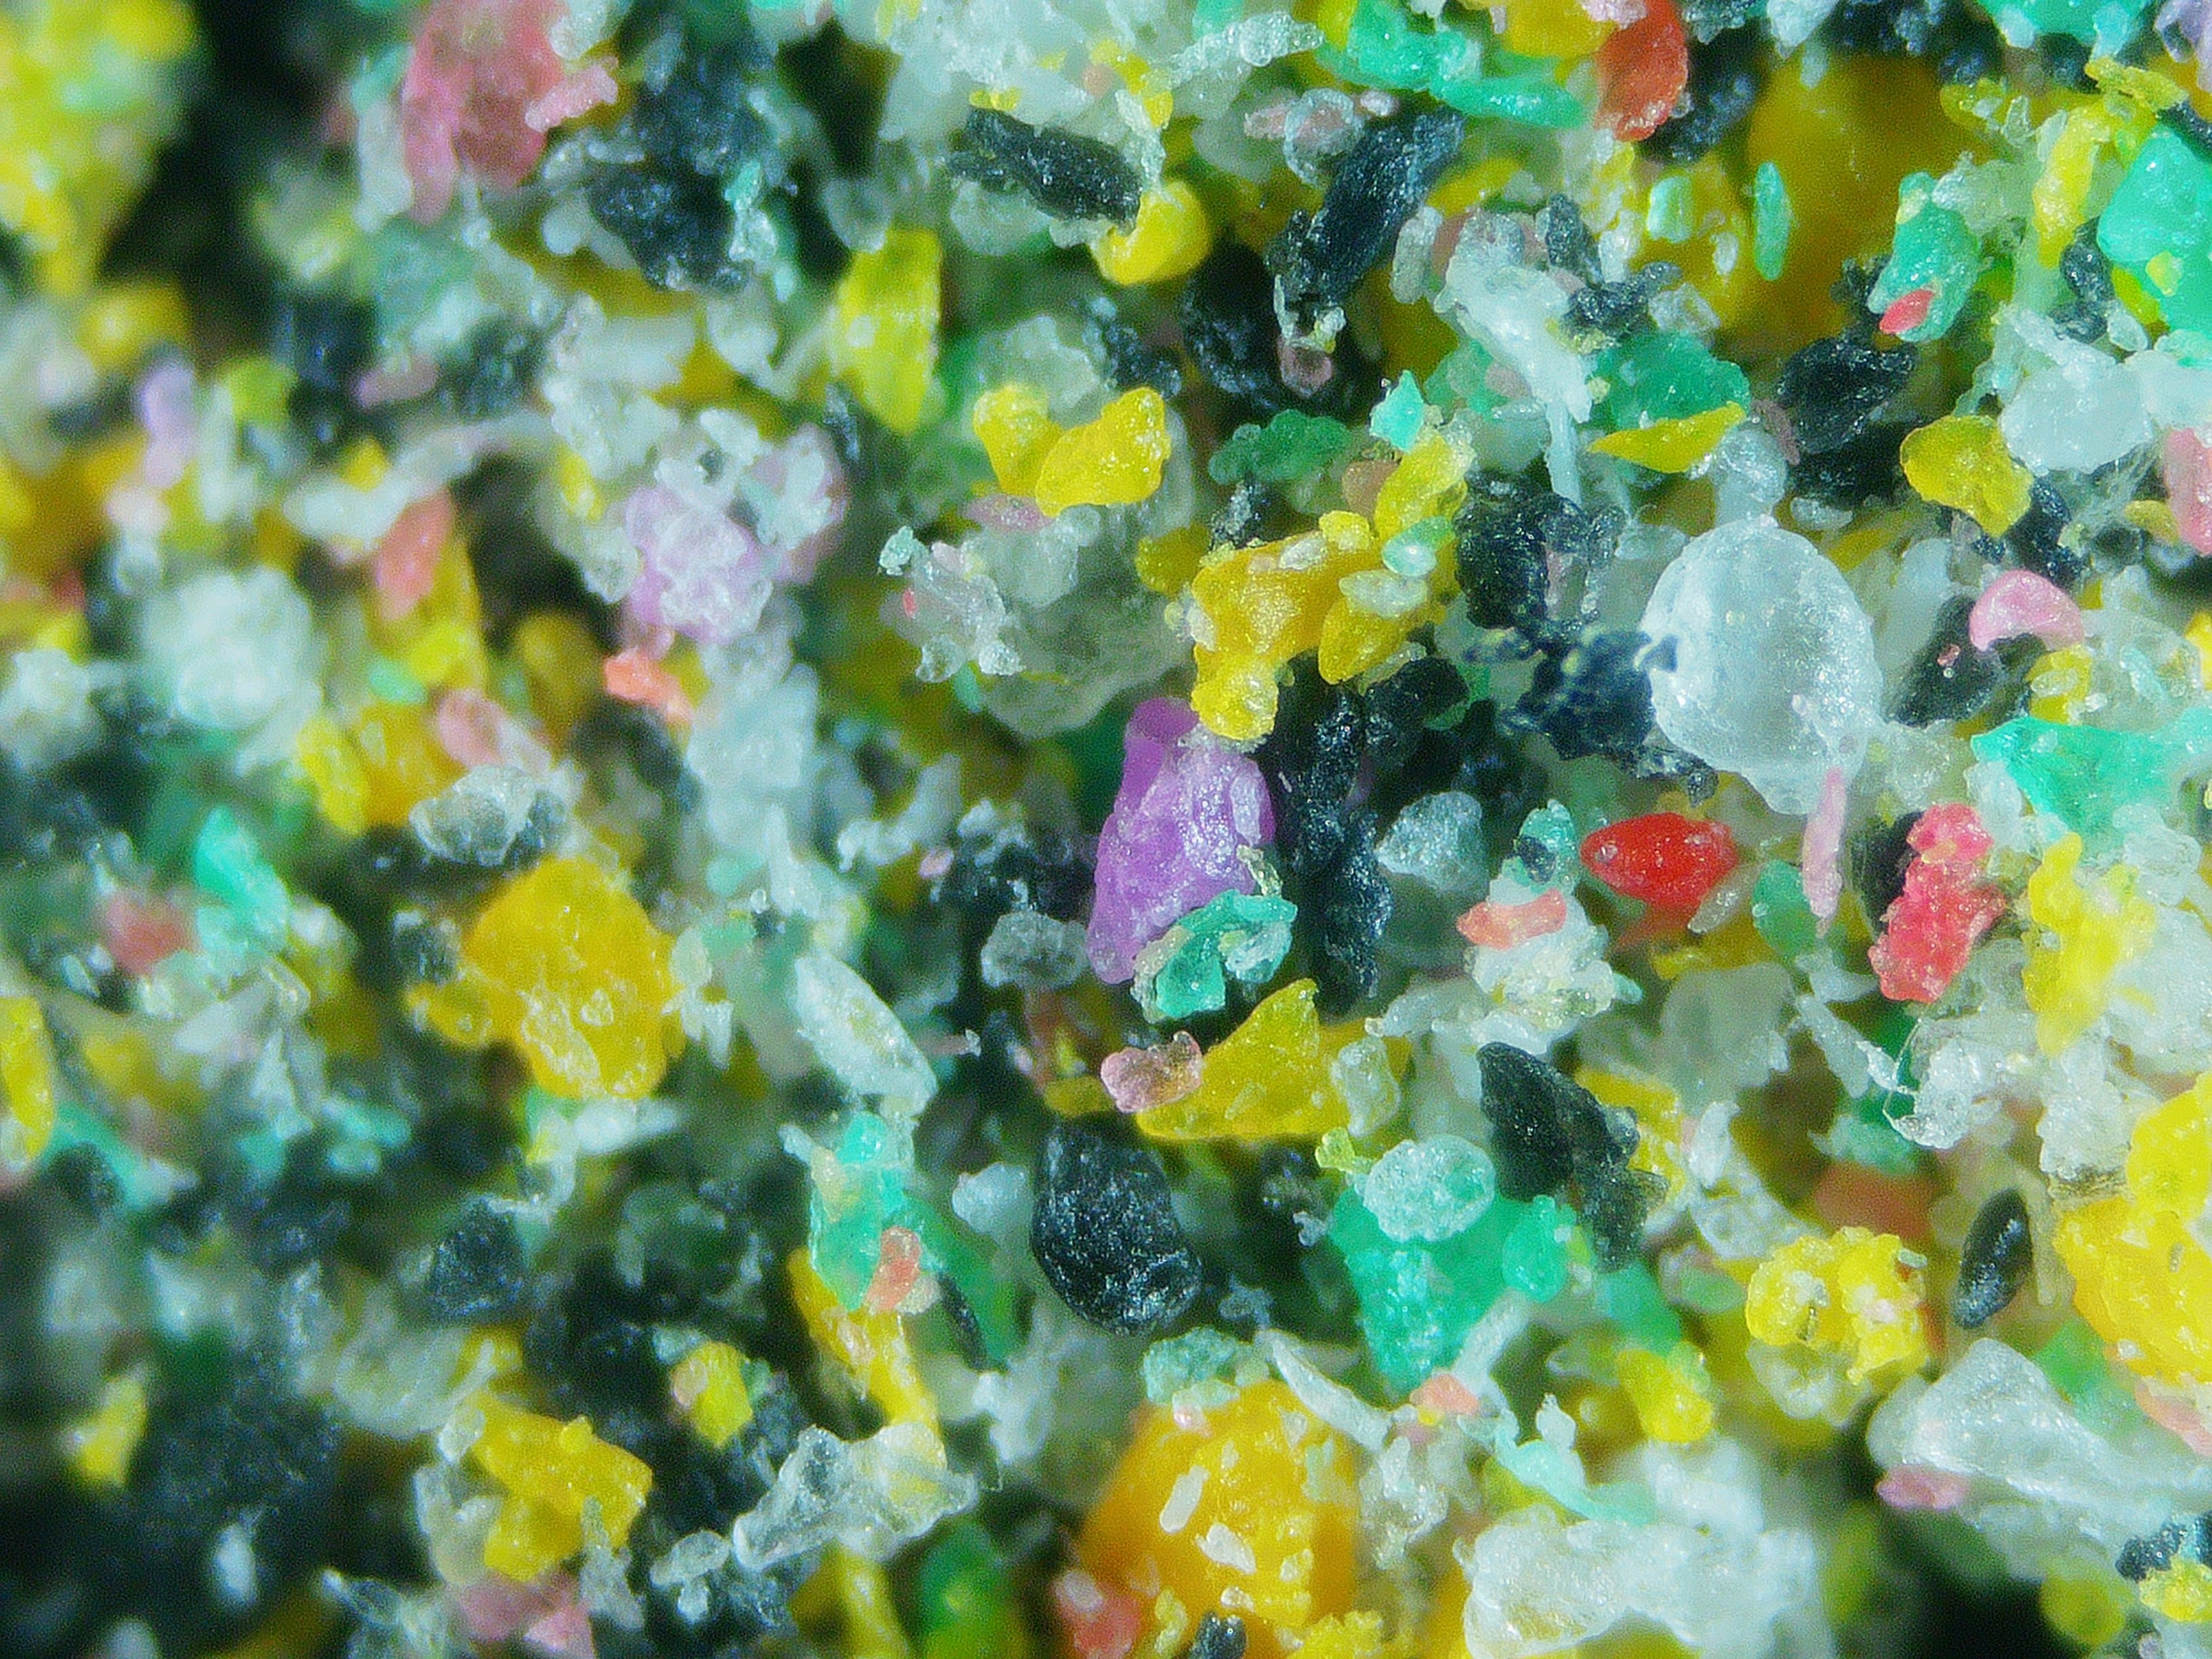
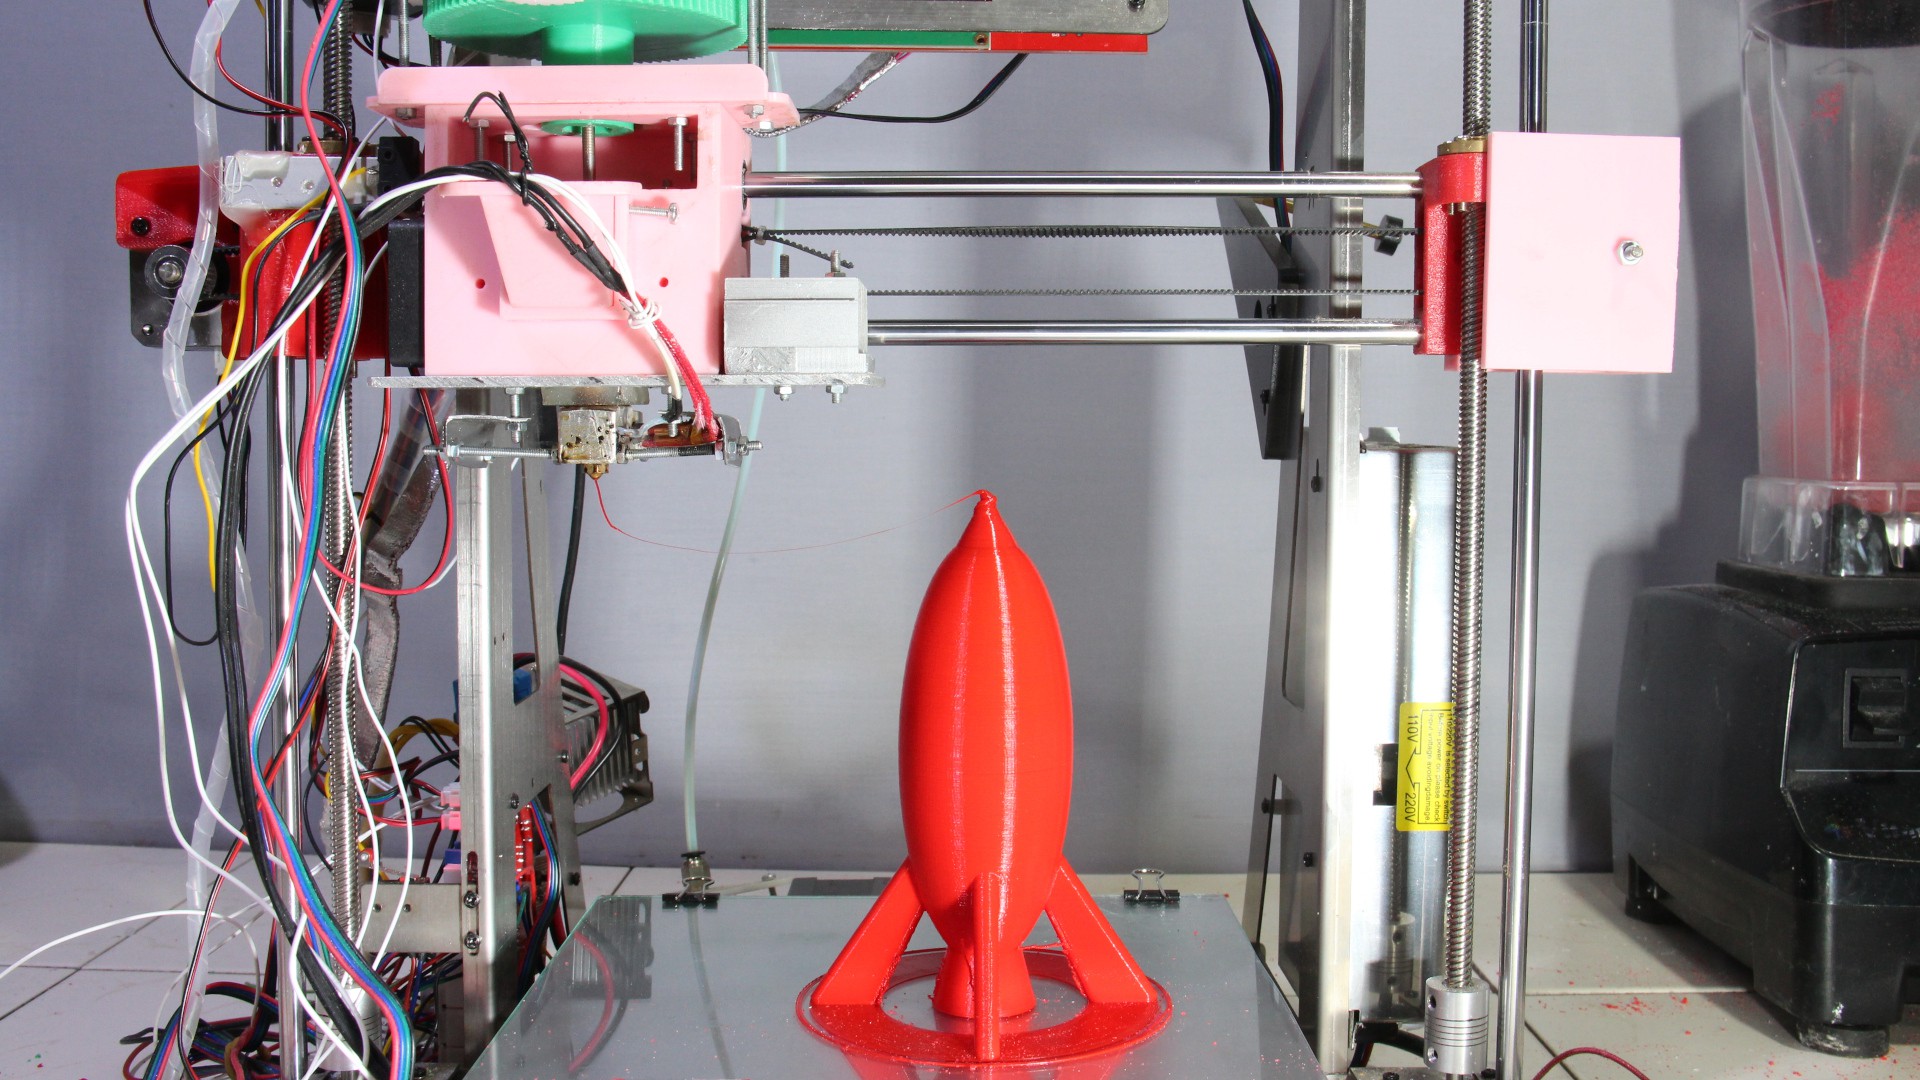
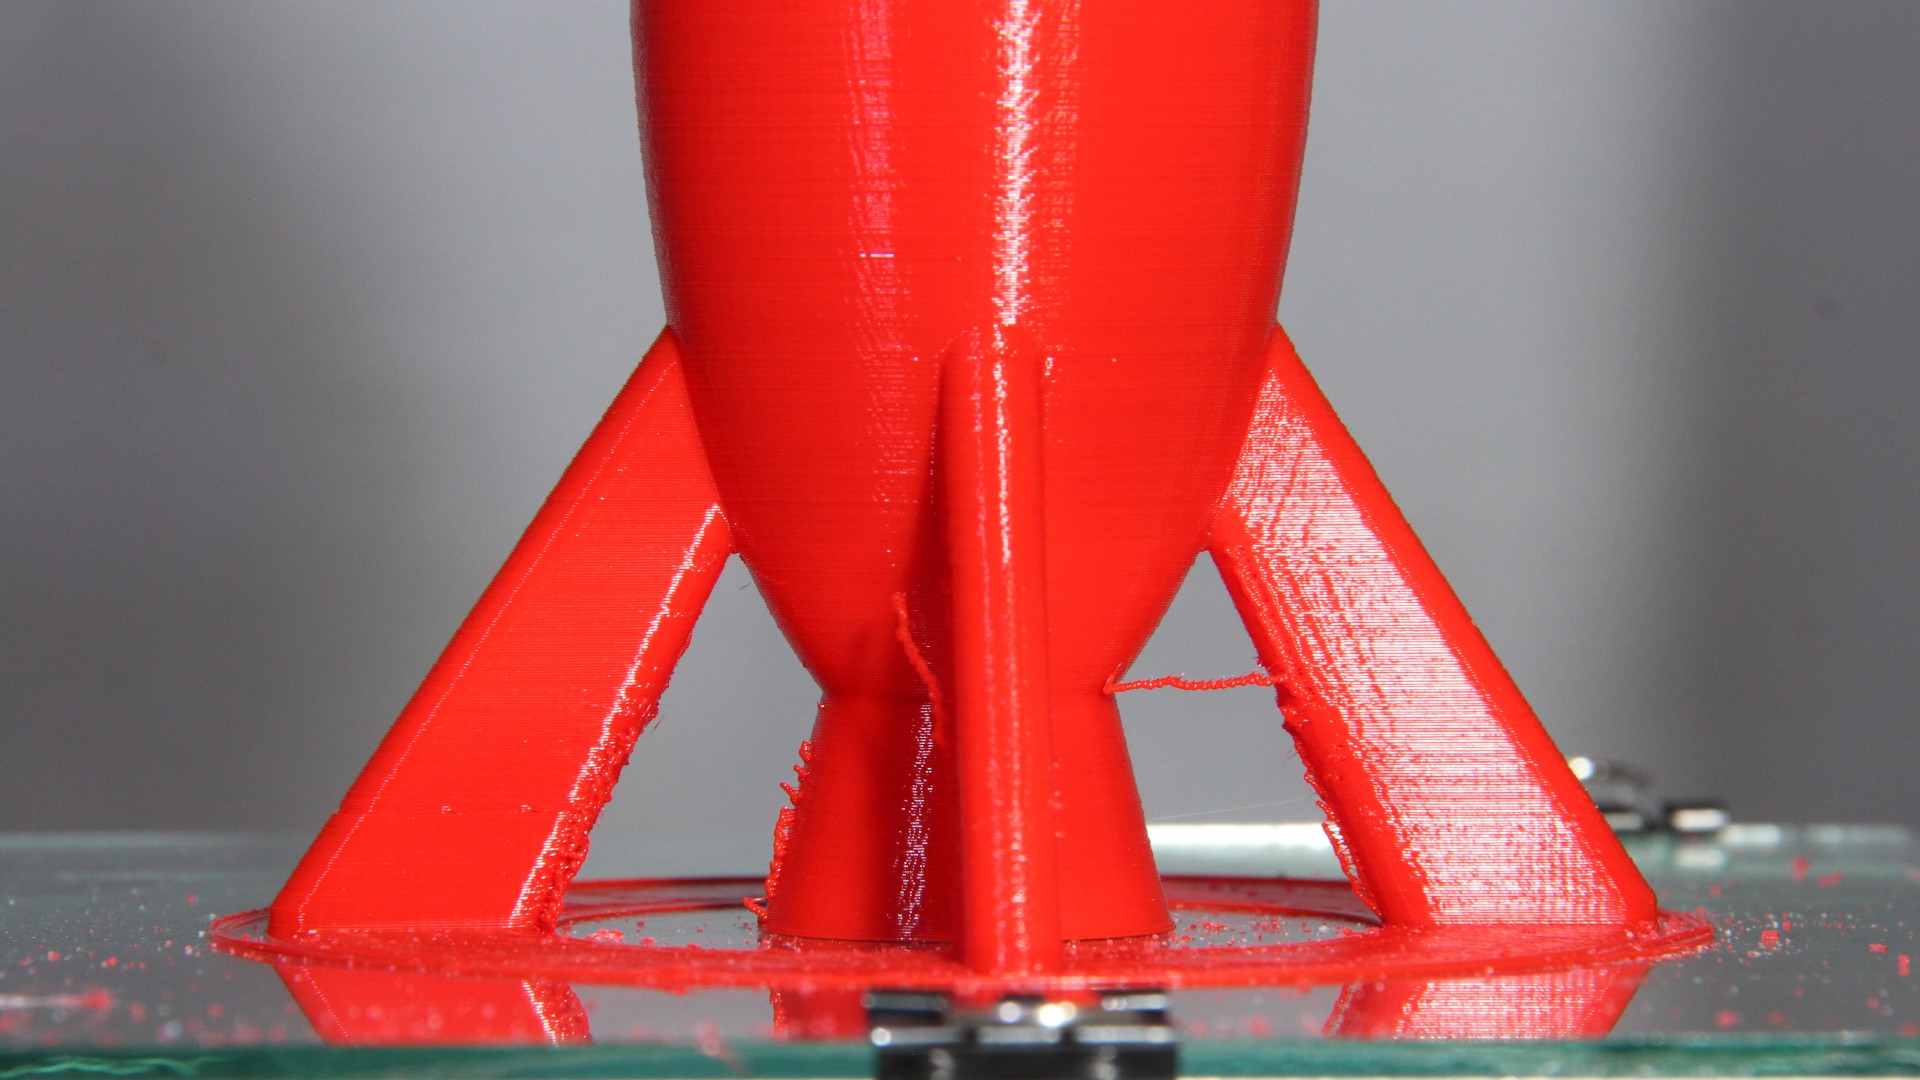
Lets have a closer look at the result, my extruder delivered:
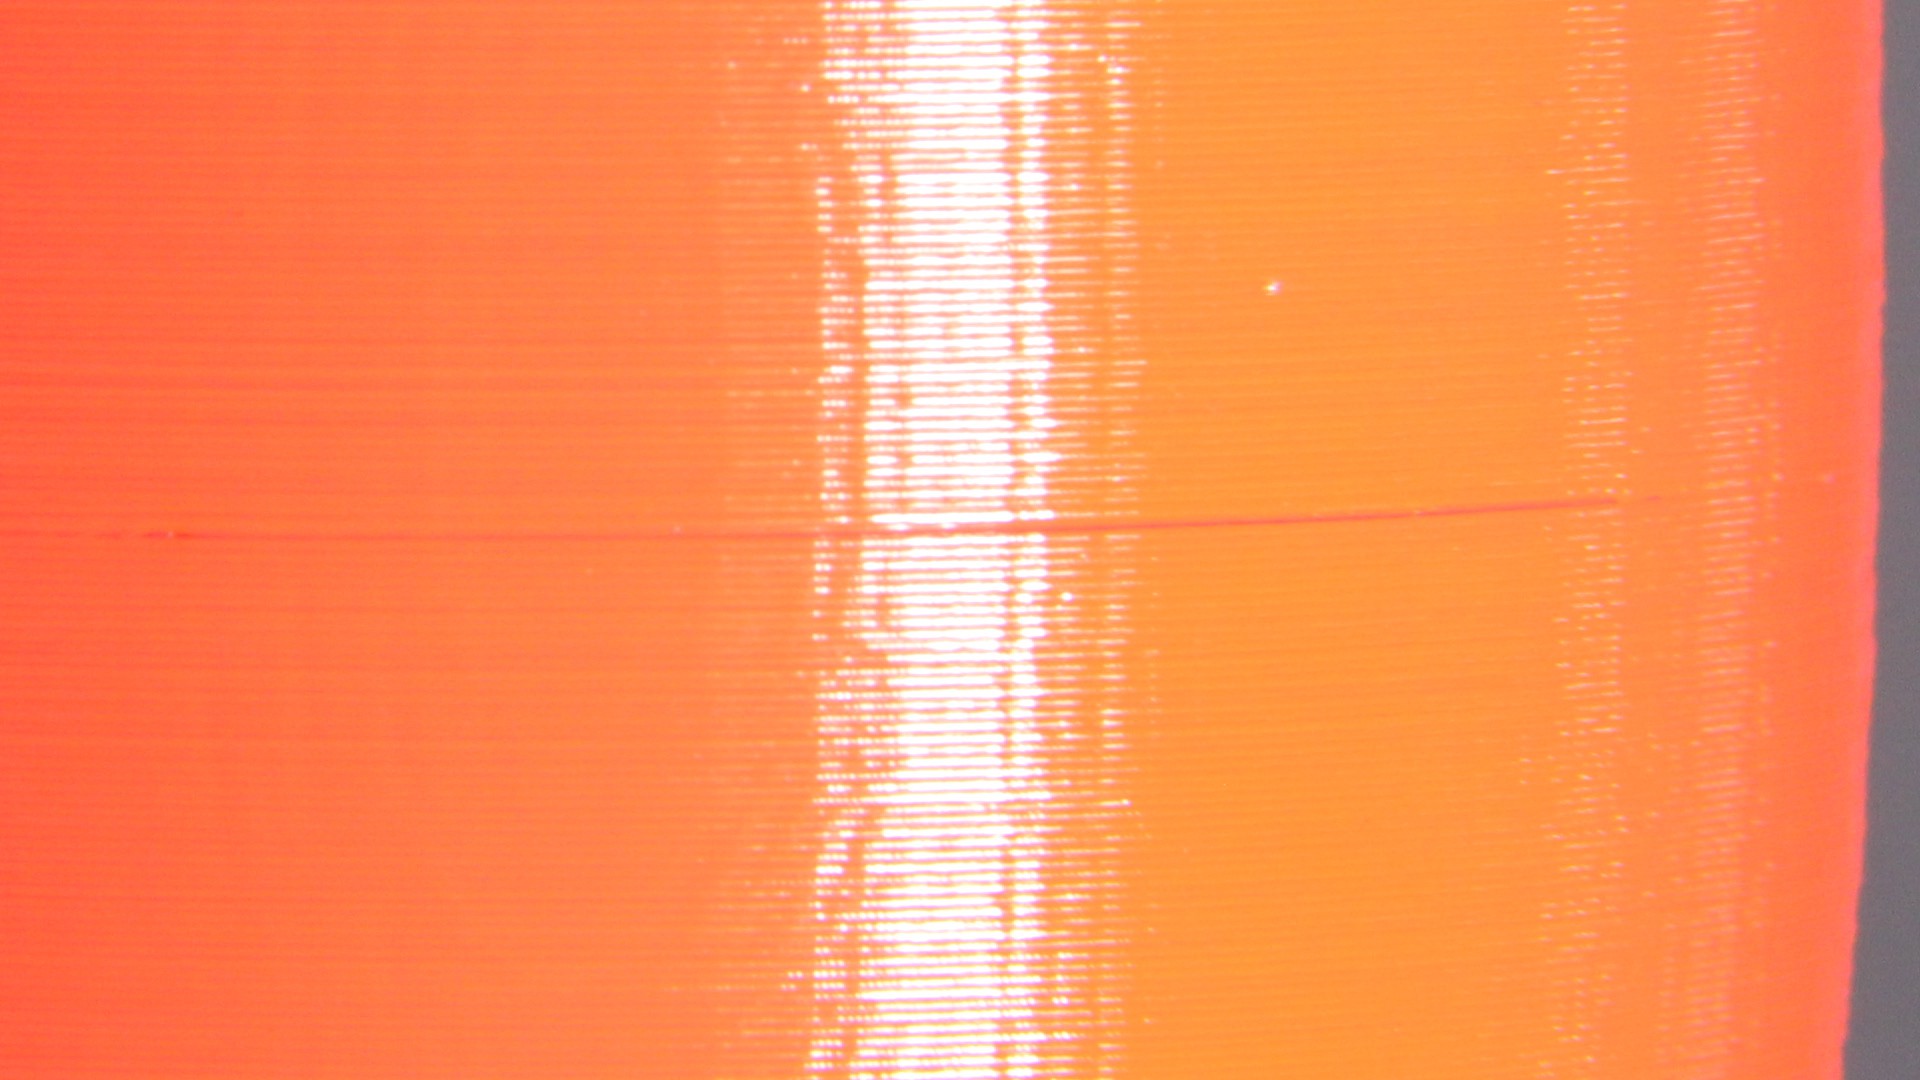
First thing you will notice is the tip of the rocket:
This is definitely where a part cooling fan would be helpful. Even though there is one implemented in my Extruder design, I did not screw it in place. The reason is, that is blocks the view on the nozzle and this is why I rarely used it during my test runs. These tests were always about the extruding capabilities, rather than about the overall print quality of the whole printer. So forgive me not to have added the fan before starting the print...
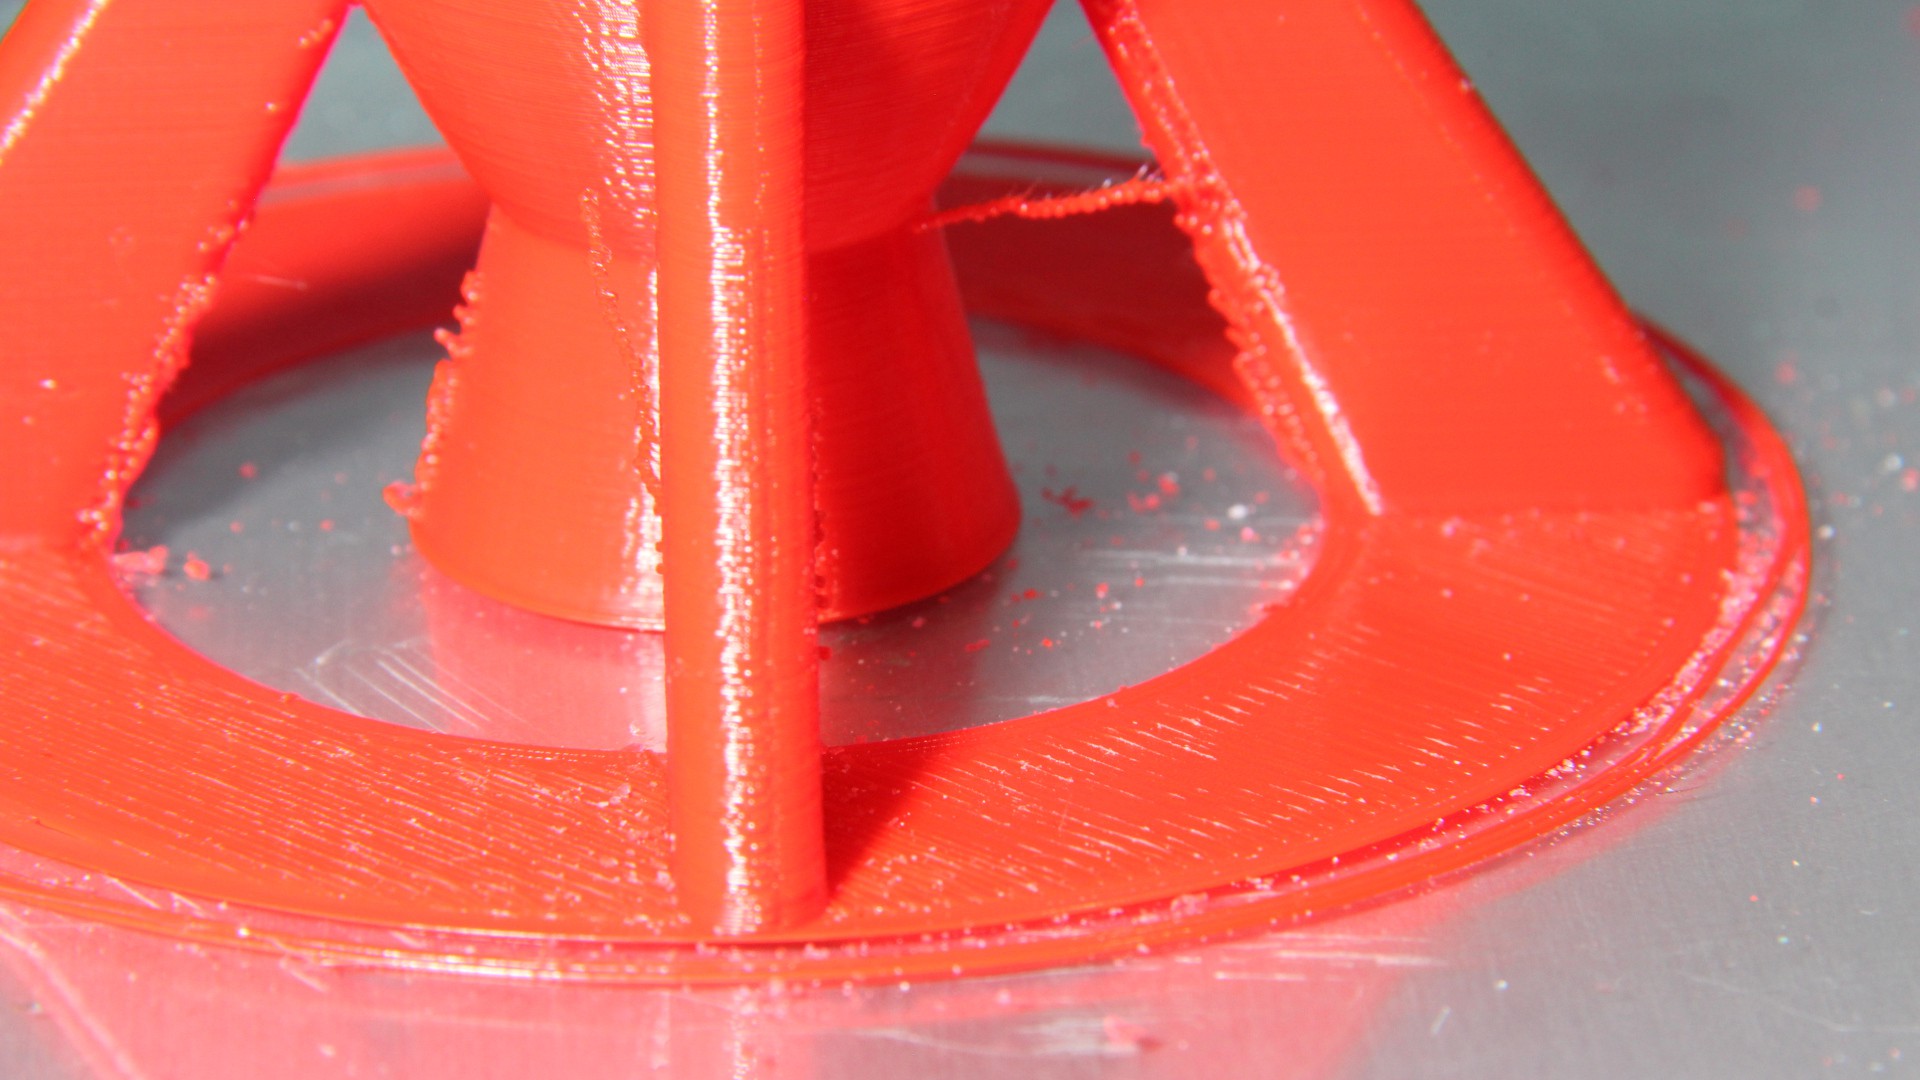
While talking about the extruding capabilities, a smooth surface is a result of constant extrusion and that is what a good extruder MUST deliver.
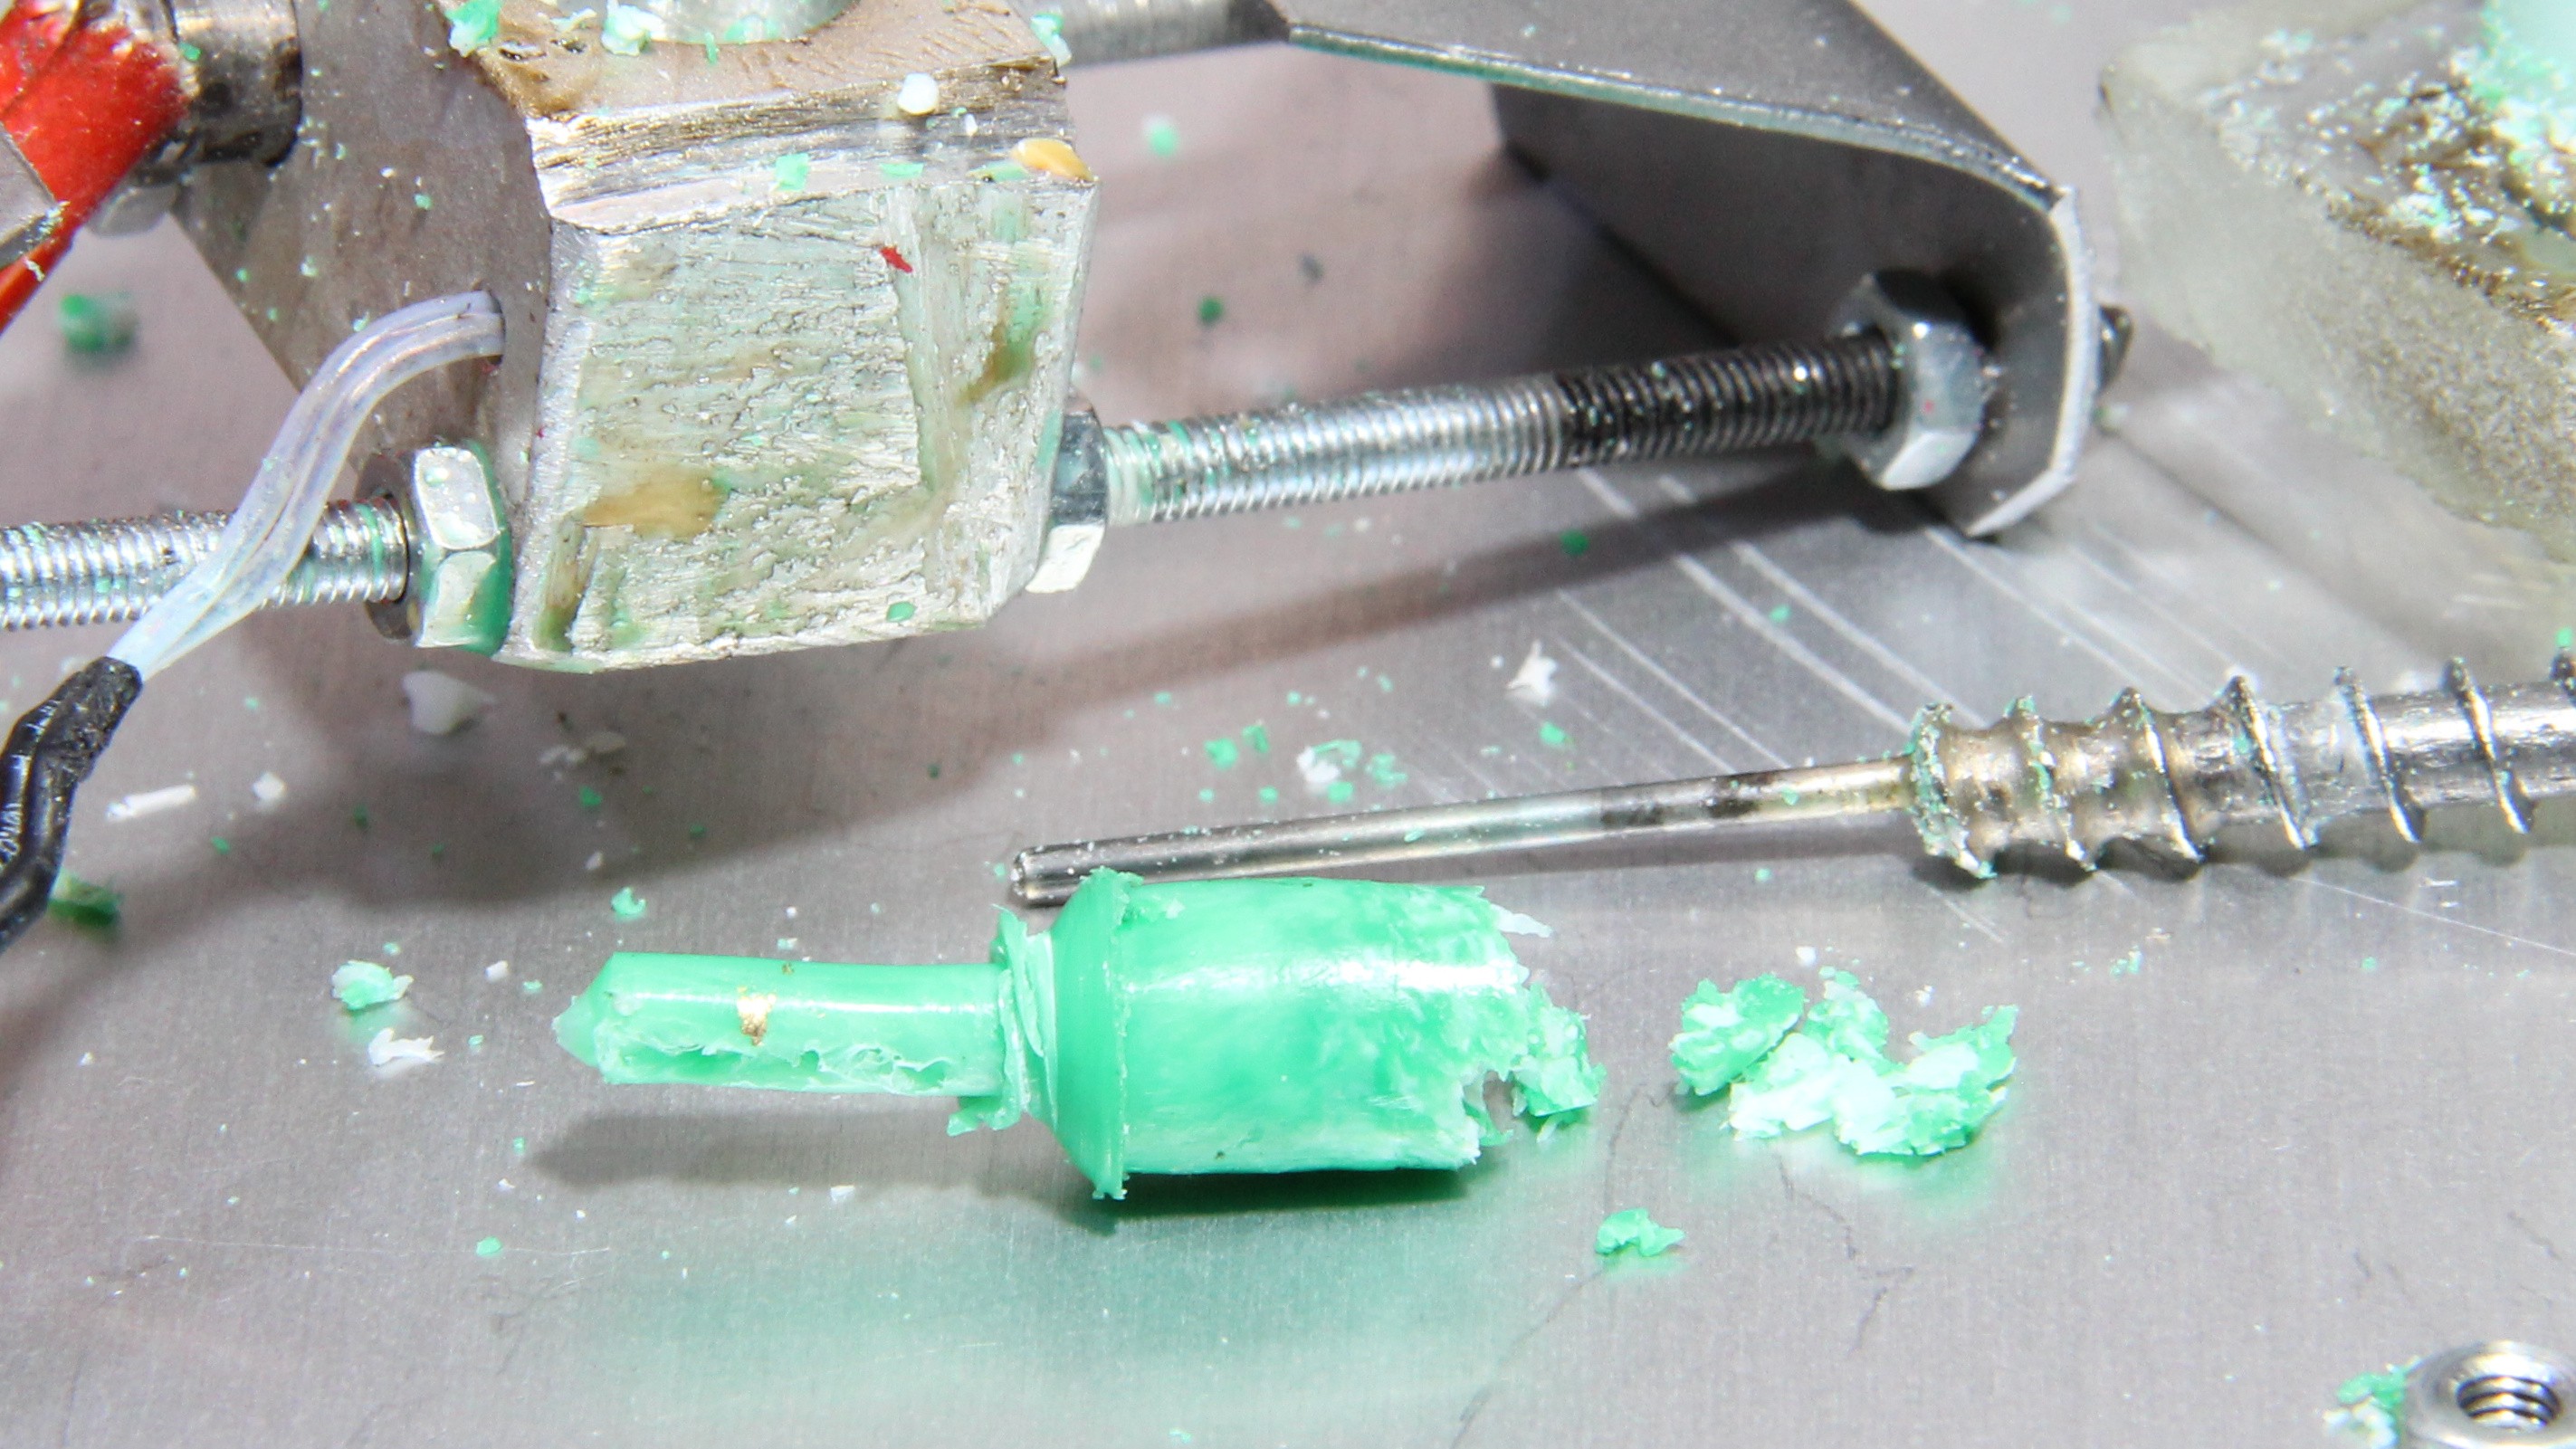
The detailed look at the surface demonstrates, that the surface is a it should be. What seems to be a crack in the surface at a first look is in fact nothing else than a single grain of non red color that entered the extruder (I didn't clean the blender nor the hopper that carefully).
Stringing is not addressed, yet:
In the video about the construction details (see previous blog entry), I have demonstrated how it works. The issue is that the screw squeezes out an extra portion of plastics when going intro reverse. That must be addressed in an additional parameter in the slicing software, but doesn't exist, yet. More on that in a coming video/blog entry.
Ghosting can be seen on the right fin of the rocket. This is due to the weak printer mechanics, not due to inconsistent extrusion.
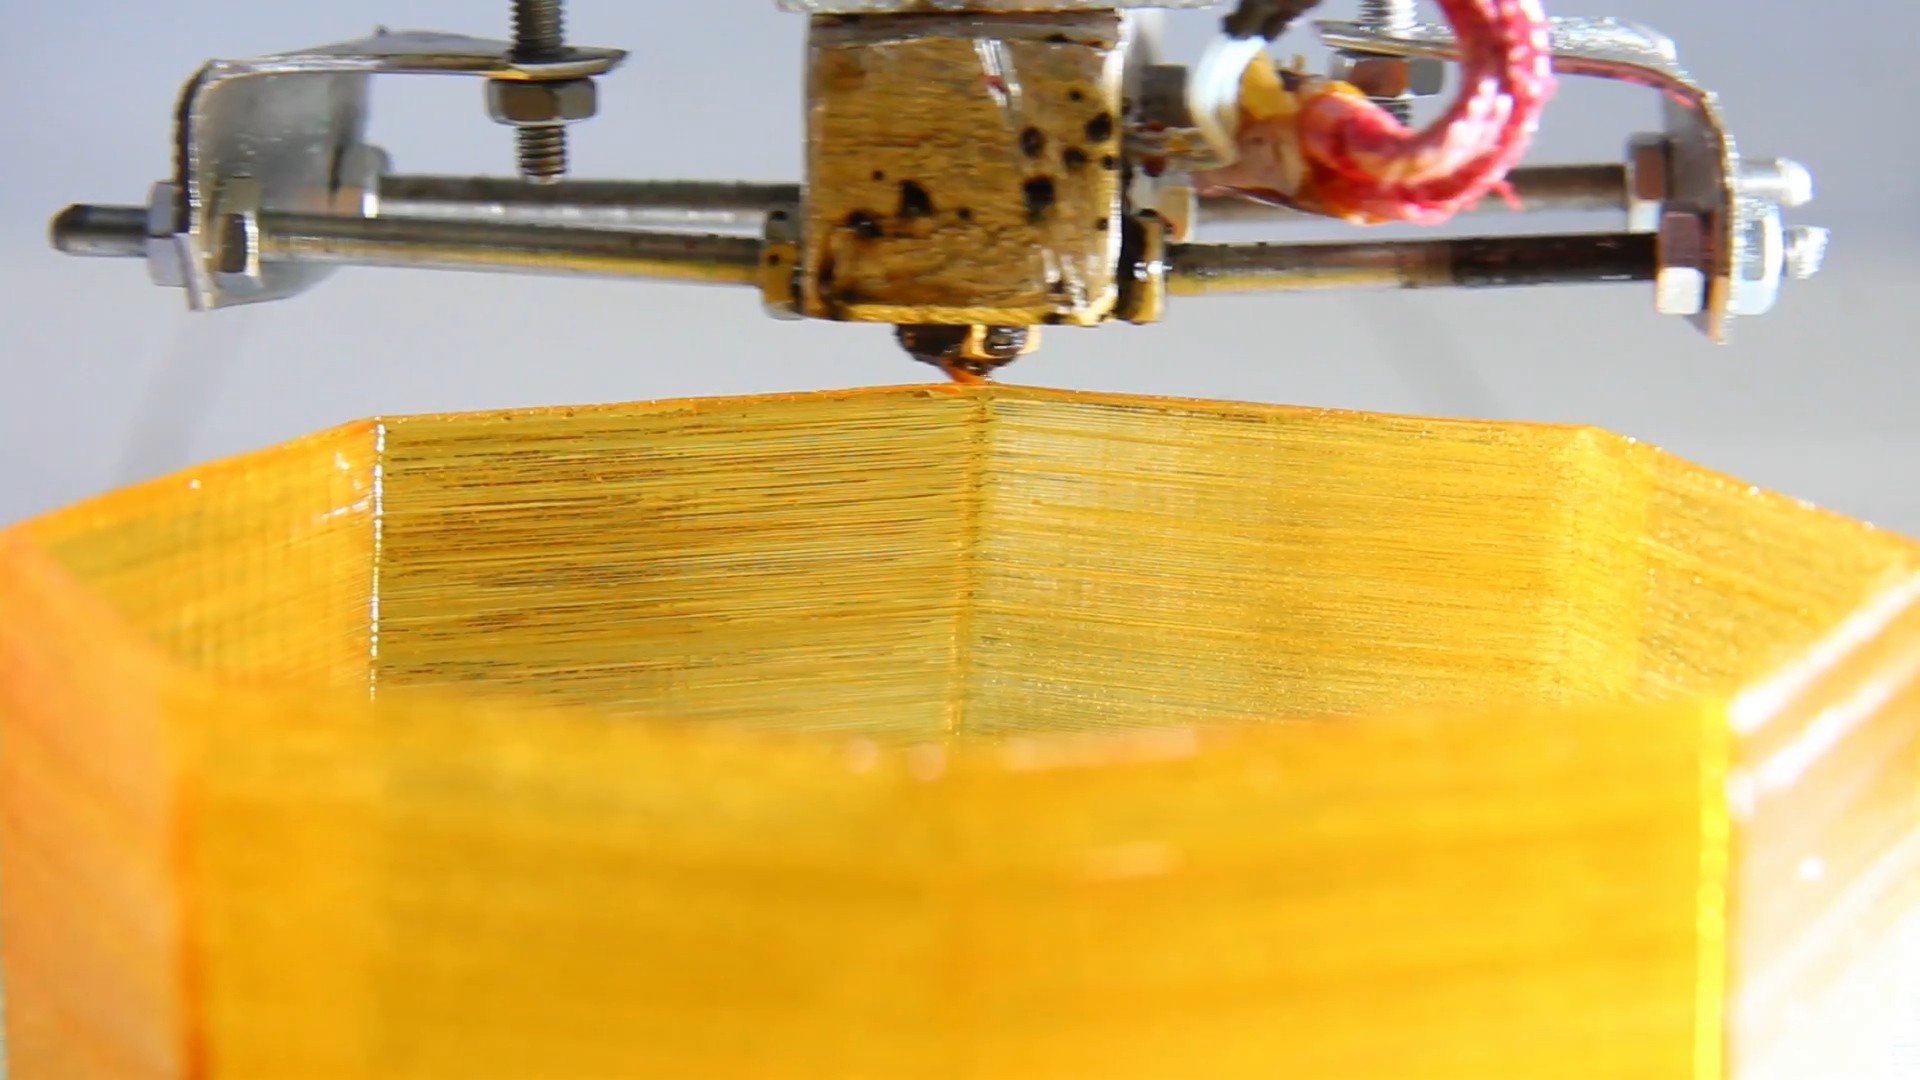
The first layer looks good, which is also an indication of constant extrusion:
All in all, the quality, this handmade prototype delivers, is better than anything I have seen from a direct pellet/granules extruder. It only can get better with a better printer mechanics, a part cooling fan and a more precise machined extruder following this design (that is under construction).
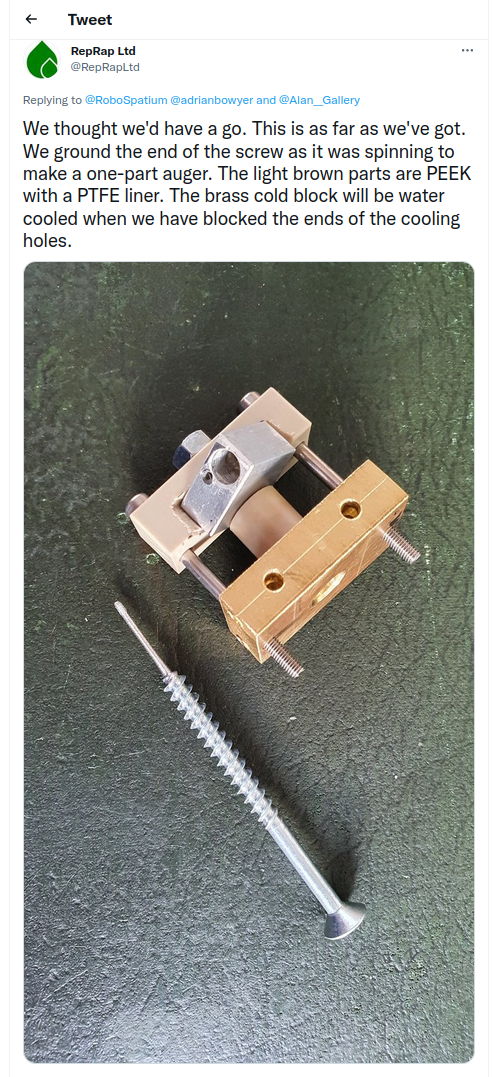
I got in contact with Adrian Bowyer and now he tries to make a "copy" of my design, publishing the process on twitter via the RepRap account. As experienced 3D expert, the copy is of course no 1:1 rebuild of my drawings. It is also ruled by the materials he has in stock (e.g. the Teflon tube has an inner diameter of 7mm, not 8mm as I recommend).
With the steps forward, I made during the months of this year's Hackaday Prize and the deeper insight that I gave into my experimentations, lots of feedback comes in from people being highly interested in my extruder V3. I am proud that Adrian Bowyer, the father of the RepRap movement, which finally gave all tinkerers a 3D factory on their desk, is among those who gave feedbak via Twitter:
TweetTo make my extruder replace filament printing, there is still a lot more to tell about what I have figured out. Previous attempts, using "classic" extruders have failed. I must explain in more detail, what my extruder is different in and why I used the design I am using. The knowledge about the working principles must become more mainstream. Open source doesn't end in publishing CAD files or drawings...
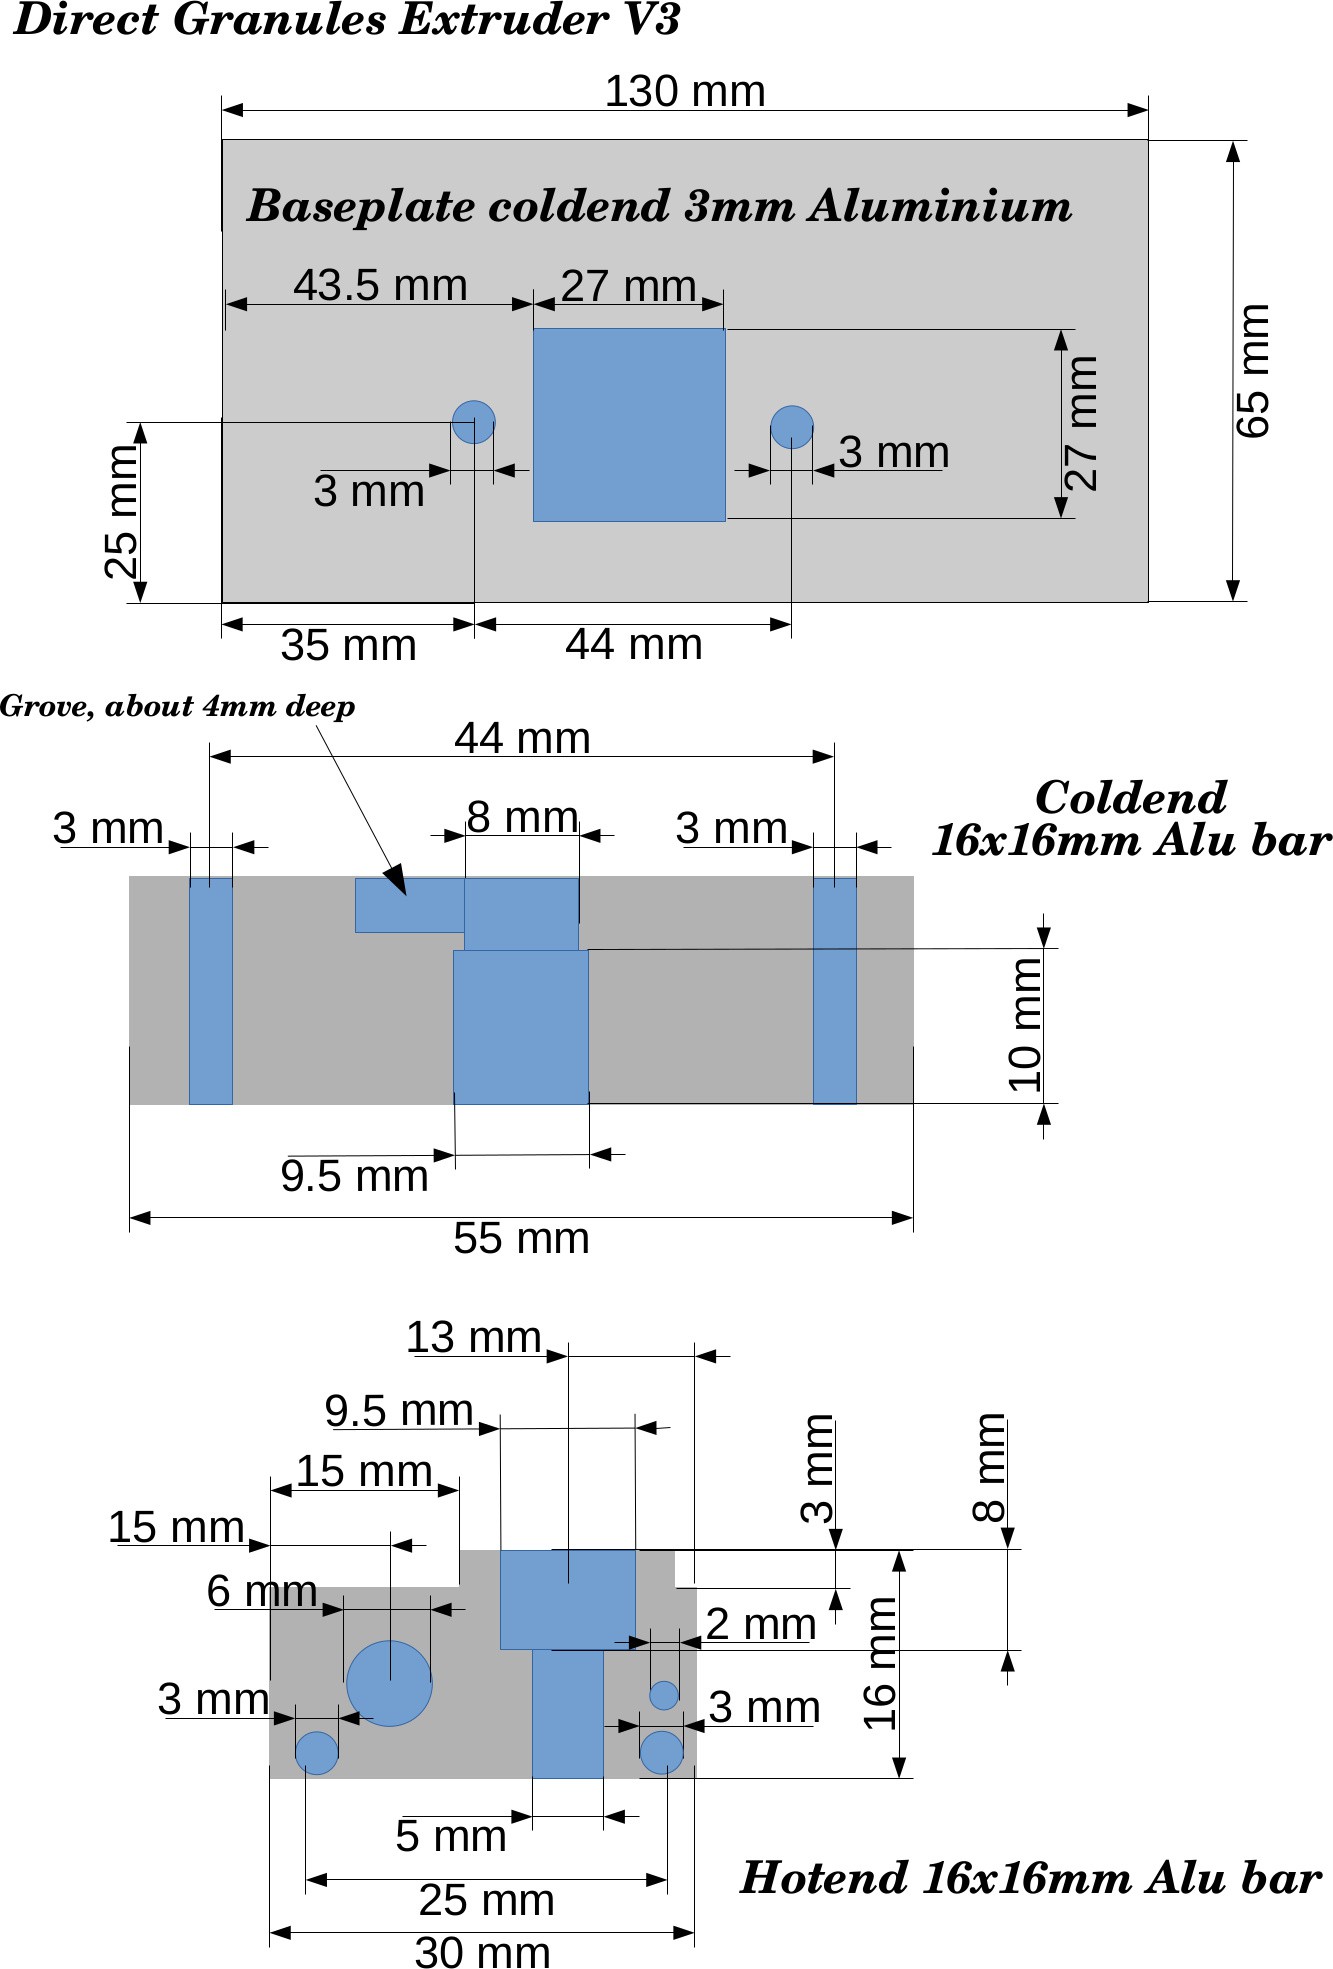
Requests are coming in from people that are interested in making a copy of my extruder prototype. That's why I have revised the build instruction and also added drawings with more exact dimensions. I have built the extruder prototype more or less following my intuition, so I had to do a couple of measurements to give you some more numbers:
CAD files will be available for the coming stage of my extruder evolution since this is meant to be created by machines...
 Norbert Heinz
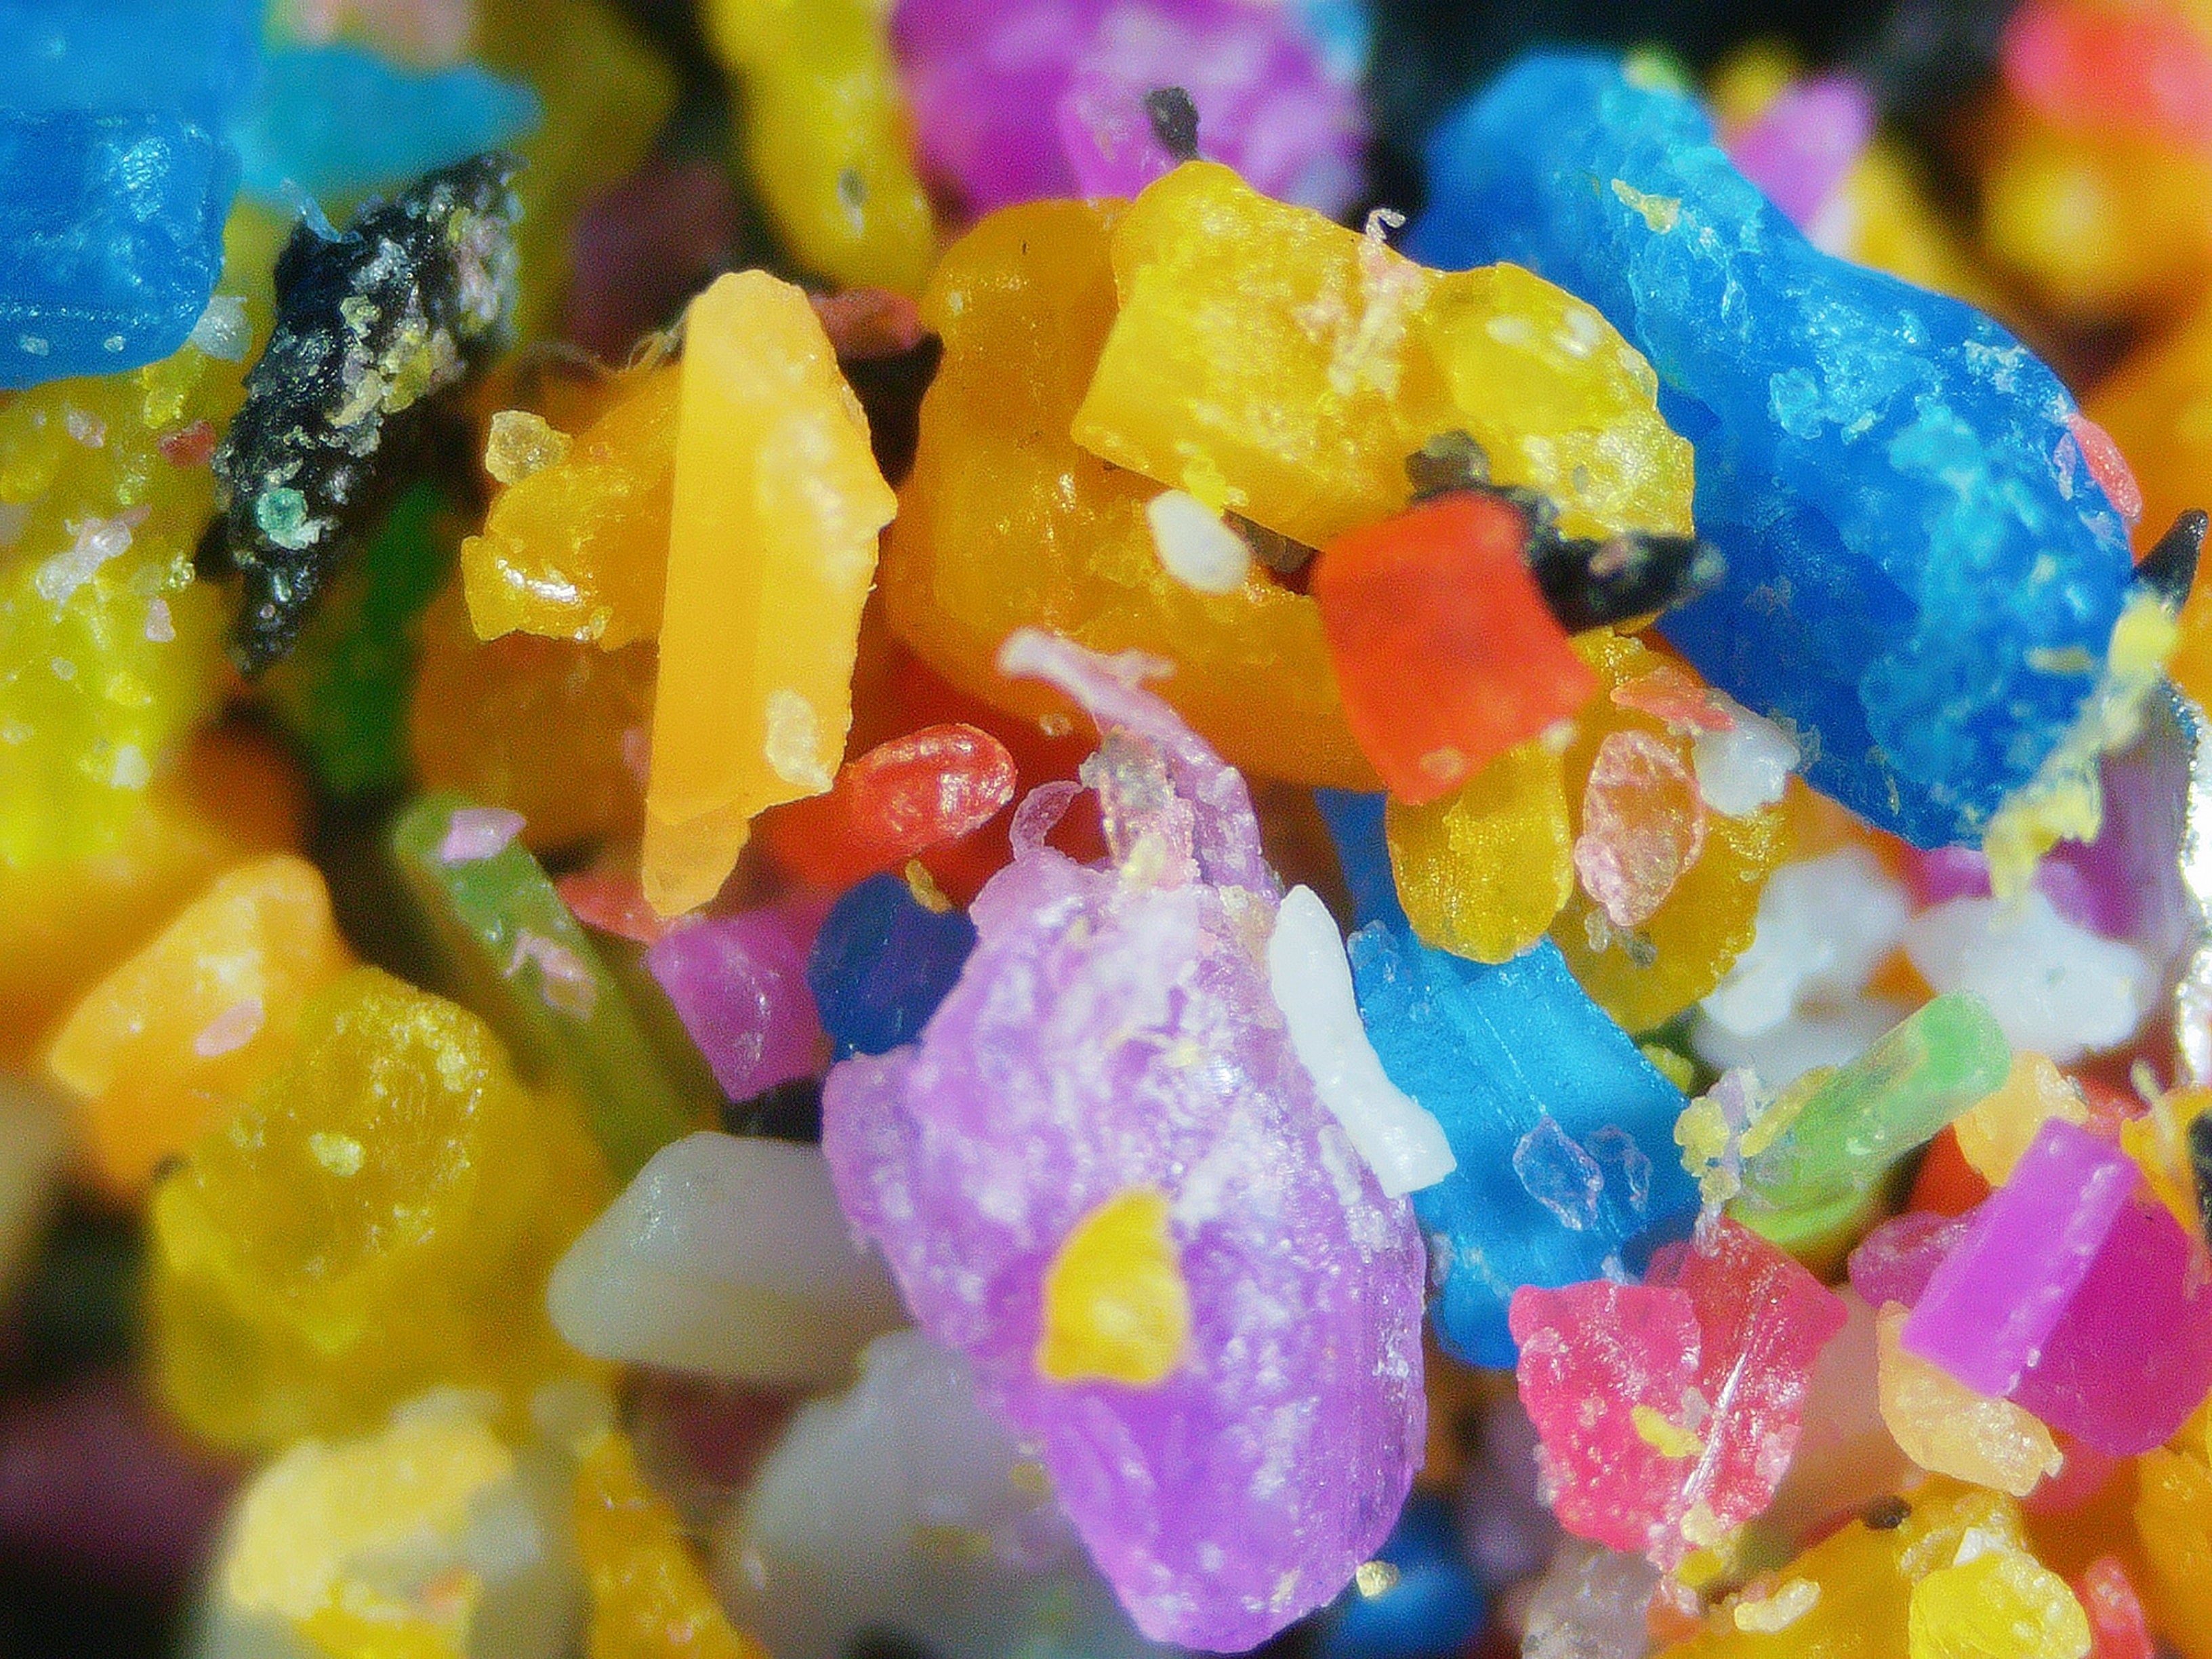

 Can't wait to see it working!
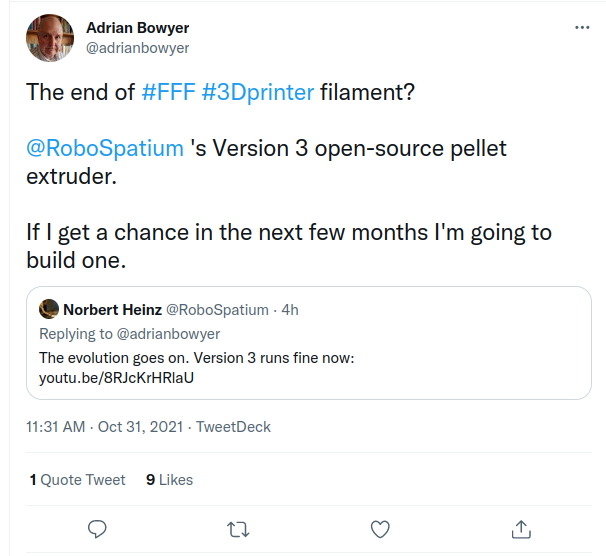 To make my extruder replace filament printing, there is still a lot more to tell about what I have figured out. Previous attempts, using "classic" extruders have failed. I must explain in more detail, what my extruder is different in and why I used the design I am using. The knowledge about the working principles must become more mainstream. Open source doesn't end in publishing CAD files or drawings...