 Alexander Dvorkovyy
- Can run for 6 months on 2x AAA batteries
- Zigbee 3.0
- Zigbee2mqtt device support file provided
- Works with Home Assistant (via zigbee2mqtt)
- Holder for Elster V200 meter, contact me if you want your meter to be supported as well
0%
0%
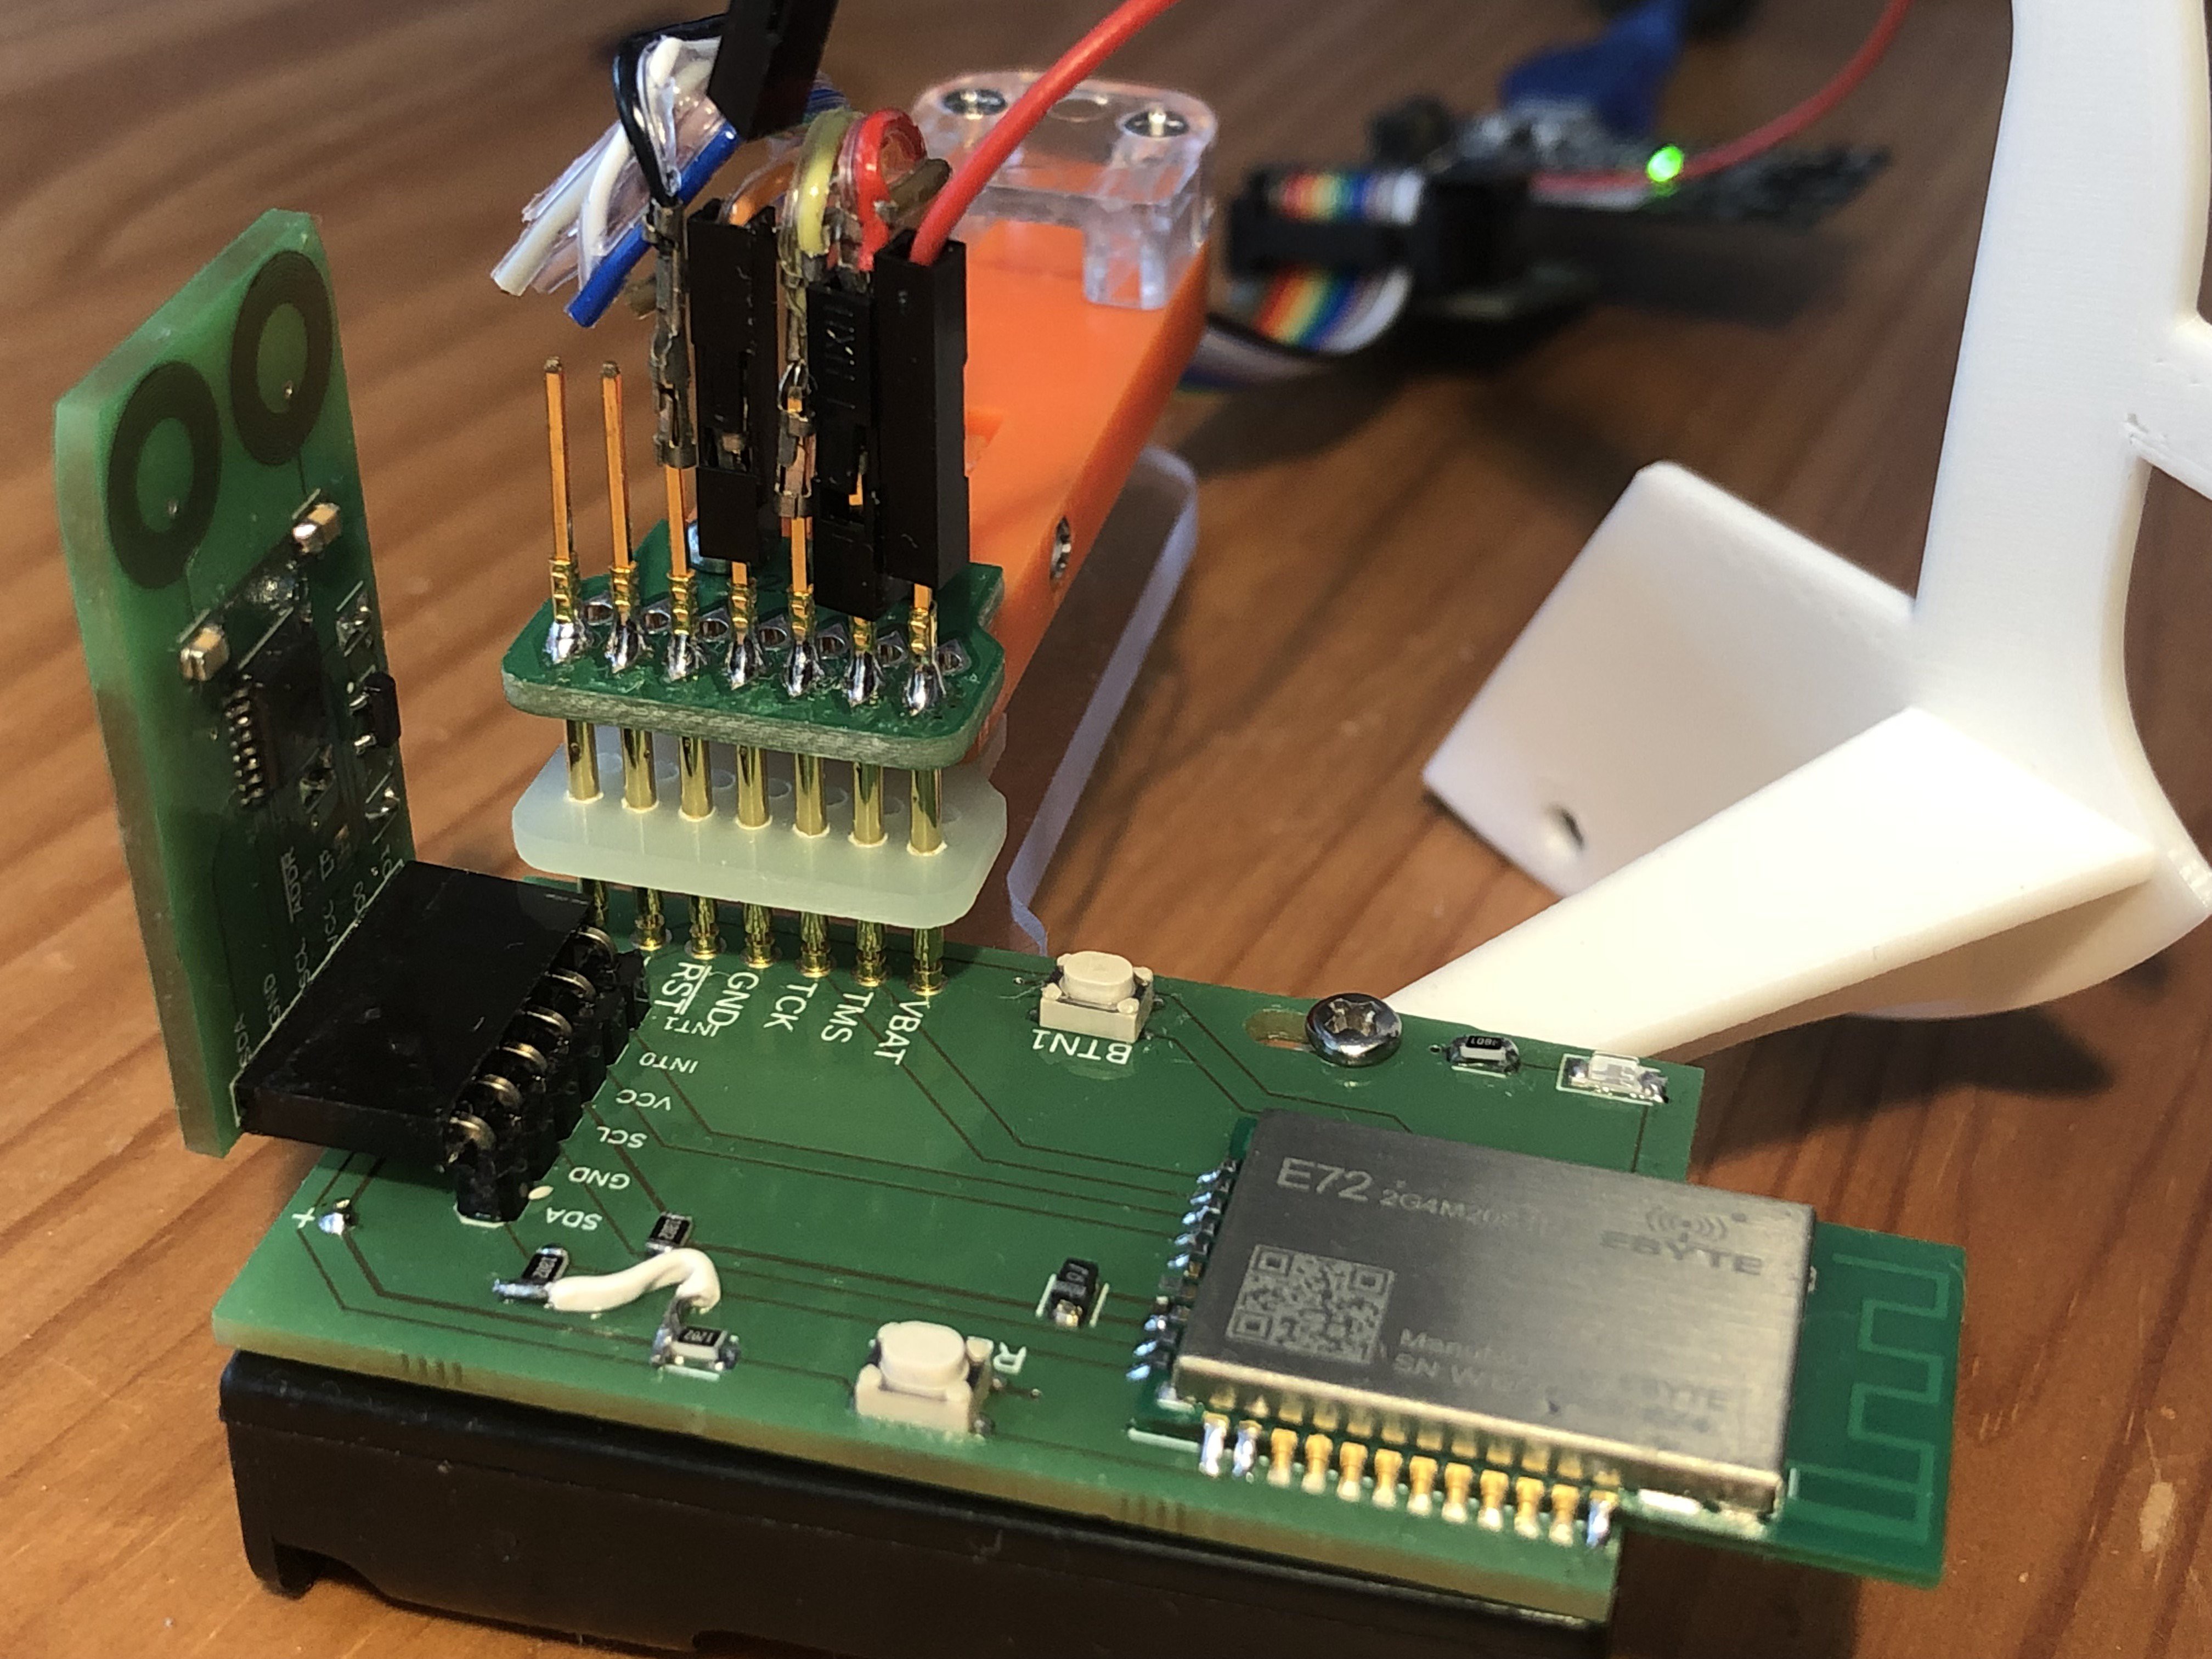
Hacking Water Meter
Turn Elster V200 meter into a smart water meter
Become a Hackaday.io member
Already have an account? Log in.
Just one more thing
To make the experience fit your profile, pick a username and tell us what interests you.
Pick an awesome username
hackaday.io/
Your profile's URL: hackaday.io/username. Max 25 alphanumeric characters.
Pick a few interests
Projects that share your interests
People that share your interests


 Ben Brooks
 Reinier van der Lee
 Florian Ellsäßer
unable to detect i2c .. do i need connect solder Jumper?