Close
0%
0%

3D Printed Vortex Particle Separator for Shop Vac

A small(er) Vortex Particle separator that can be easily 3D printed. Use with a 2" or 1.25" (adapters needed - can be printed) vacuum hose.

Public Chat
Similar projects worth following
I was looking for a vortex for my small shopvac, and although there are options as inexpensive as $39.99 I thought it would be a great way to learn some more skills in CAD and in using my 3D printer for larger pieces. I had never printed a part that was larger than my Anycubic Mega X could print (300mm x 300mm x 300mm) in one shot. Nor had I ever designed a part for 3D printing that had so many overhangs. So I was curious to learn if I could design it such that I could print it without needing any support structures (saving time and material).

I achieved all this (with a single caveat explained later) and was able to keep the final print volume to around 600 grams of PLA. Final cost for printing using PLA ~$18USD. Total print time ~72 hrs.

Intro & Project Goals

I have a wee sized shop measuring a measly 12' long 8' wide and 9' tall. So, I need a small dust collection system. I also wanted the system to be more efficient than just having a shopvac alone. Also, since my shopvac is so tiny (only 2.5 gal w/ 1.25" pressure fit hose) and I dislike having to buy filter bags, I decided adding an inline vortex particle separator and a 5-gal bucket would be just the ticket.

Also, knowing that someday I might want to upgrade my shop size, and that I may need to use a larger vacuum system if/when I do, I decided it would be prudent to design the vortex to support a 2" vacuum hose. Obviously this can be adapted down to the 1.25" hose I currently have very easily with either a purchase reducer or a 3D printed one (to be included in this project).

Other goals include:

  • Reduce / eliminate the need for supports when 3D printing
  • Keep the cost to print under the ~$30 mark I would spend if I were to purchase a commercial one
  • Design the parts to fit together easily, and to stay together even if not glued together

Results:

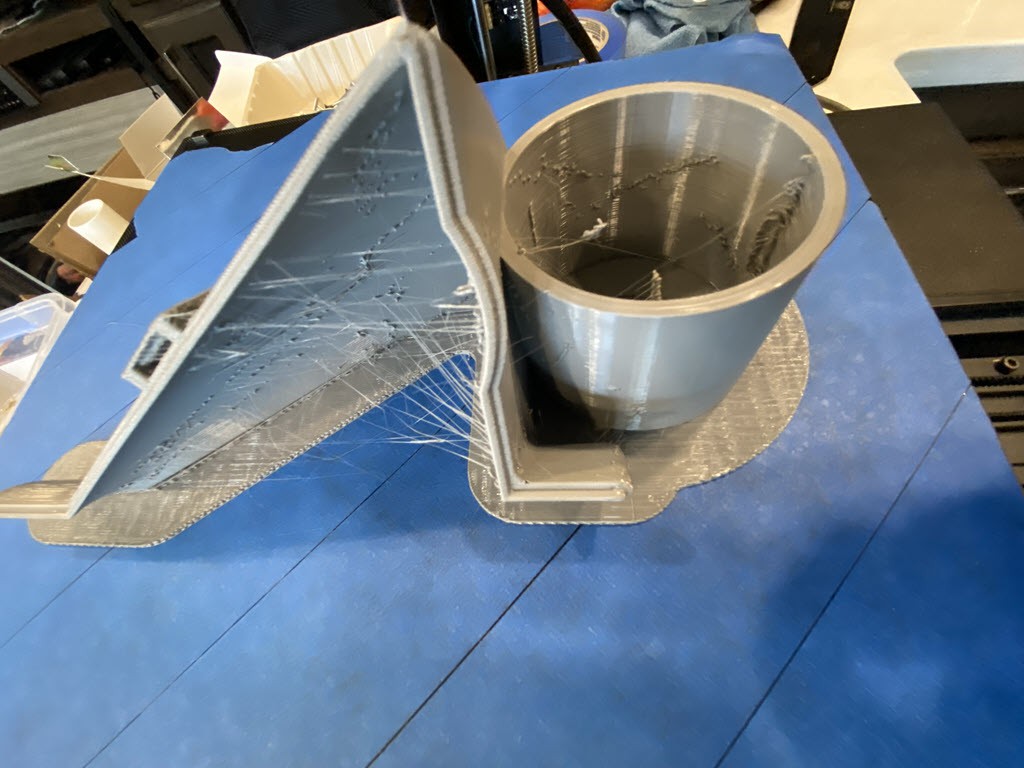
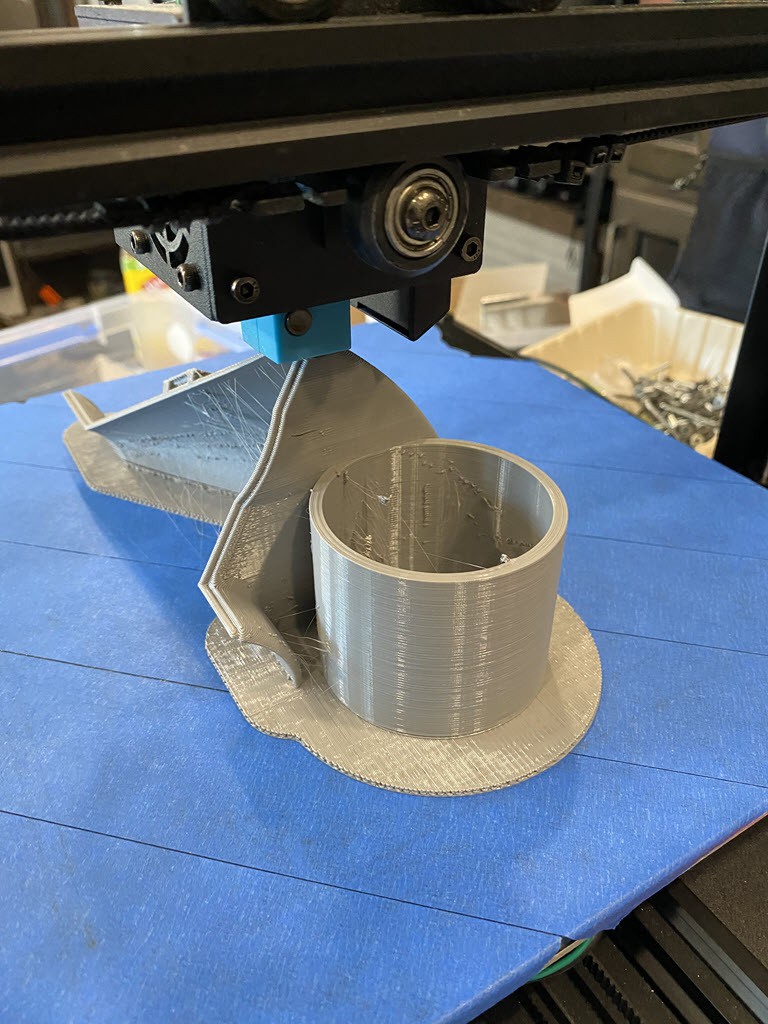
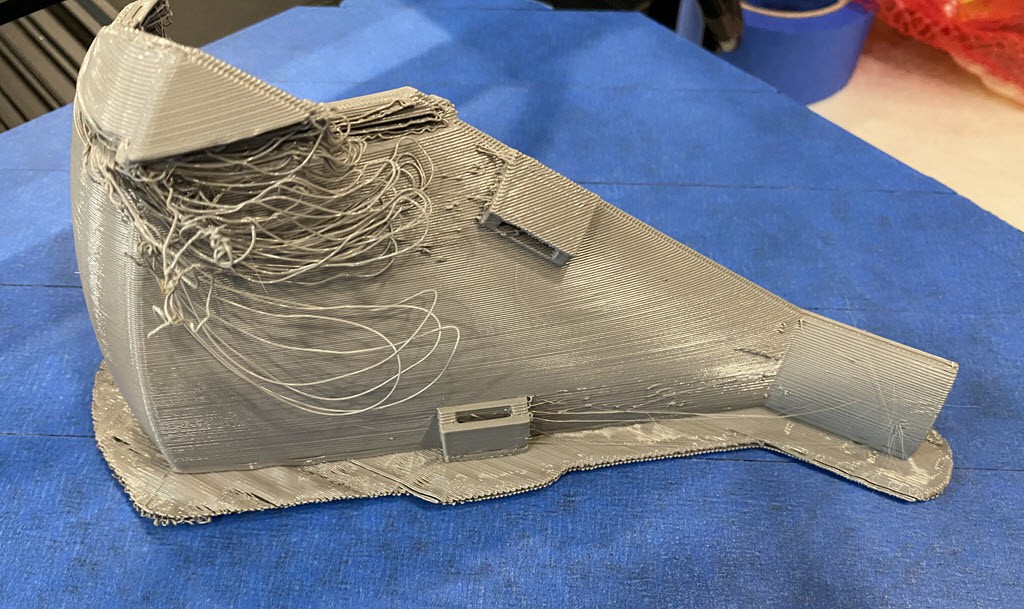
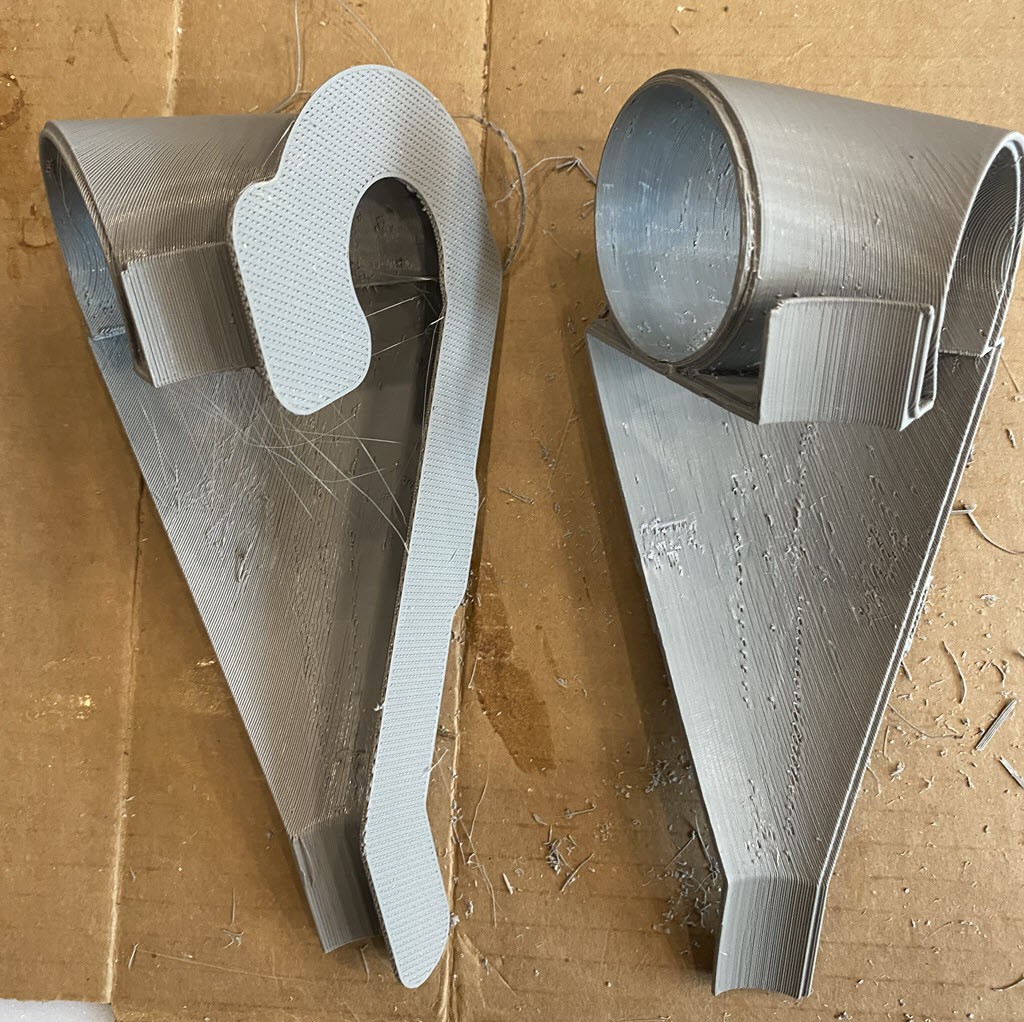
  • No supports are needed...with a single exception. Using a raft when printing the Vortex and snap arm parts is HIGHLY recommended. I have a glass top bed that can be heated so I thought I should be good with printing normally (i.e. no raft, just a small brim w/ the bed at 60 degrees C). However, when I first tried printing the parts it would get to about layer 3 and then the part would detach from the bed! The parts were just too thin to have enough surface area to hold to the bed. This is especially true for the Snap arms. They won't have a chance of staying upright without a raft. And, if you lay them flat to print they will require supports which will necessitate much work after print to clean up. The solution (after much trial and error) was to use a 10mm raft 5 layers thick. It's possible it would have worked with a smaller width and less layers, but this is what I ended up using without any further issues. Note, I also added blue tape and (following a failed print of one of the larger slices) I sprayed the tape with hairspray! Overkill? Maybe! Solid! Definitely!
  • Total PLA volume is roughly 600g. Seeing as how I paid $28 for 1kg, this puts the final build cost at ~$16.80. Of course this didn't include all the trial and error, and the fact that one of my pieces got bumped out of alignment in the middle of the night (still not sure what ghost did that!) causing it to fail.
  • Partially successful at making it all go together easily. Here are the main issues:
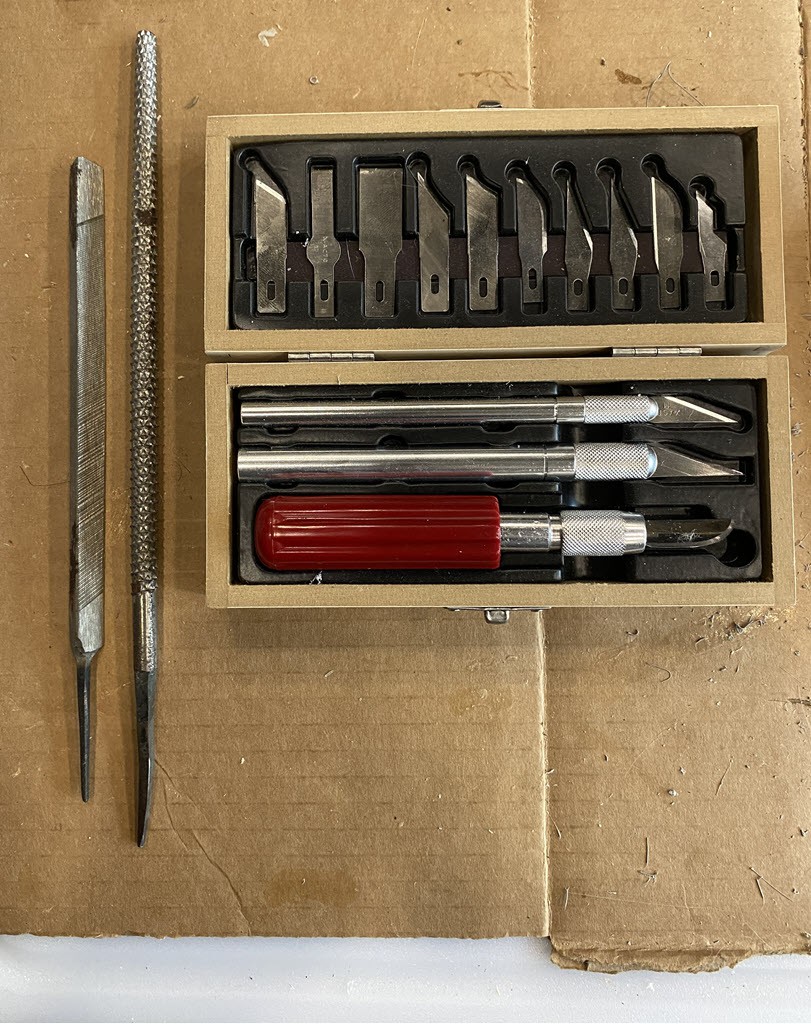
    • PLA tends to warp. This was minimized by using the raft, but still, some warping is likely to occur. I suspect this is due (at least in part) to how thin the pieces are (1/8"). I didn't want to make them any thicker to keep print volume down, nor did I think they needed to be any stiffer. This means I ended up with a minor amount of warping. As you'll see in the build process notes, this was overcome by trimming / sanding the parts after print to get a snug fit.
    • Print resolution insufficient to make angles ideal - In other words, some trimming and sanding was needed after printing because the angles between pieces didn't match perfectly. As you'll see, this really isn't a big deal either.
    • Though functional, the Snap design could use some improvements - If I were to try and sell this design commercially, I'd iterate a few more times on the snap design. In particular I think it might be easier to assemble if the snap arm wasn't a free-floating part. In other words, I think I would make it so the snap arm was connected permanently to one side of each slice. However, as you'll see this is easily overcome by gluing the arm into place during assembly. Still, I would design it differently if I did it over. Maybe I will at some point. Feel free to do so yourself!

3D Printer Requirements and Recommended Settings:

These settings (in Ultimaker Cura slicer) worked very well for me:

  • Material:
    • 1.75mm PLA (roughly 600g worth!)...
Read more »

Vortex Layers Overview.mp4

19s clip showing the layers of the vortex bowl. This is from CAD and not a slicer.

MPEG-4 Video - 2.15 MB - 04/18/2022 at 21:38

Download

Standard Tesselated Geometry - 4.50 MB - 04/18/2022 at 16:50

Download

Standard Tesselated Geometry - 3.88 MB - 04/18/2022 at 16:50

Download

Standard Tesselated Geometry - 3.30 MB - 04/18/2022 at 16:50

Download

Standard Tesselated Geometry - 2.99 MB - 04/18/2022 at 16:50

Download

View all 9 files

  • 1 × 5 Gallon Bucket w/ Lid Any generic 5 gallon bucket should do so long as 1) the lid fits in an air-tight manner and 2) there aren't any existing cracks or holes (except, perhaps in the very center of the lid).
  • 1 × Shop Vacuum Any size, but ideally one with a 2" hose. Other hoses can be adapted to fit.
  • 1 × Silicone Silicone is helpful for sealing around holes and in between parts.
  • 1 × Glue Use a glue strong enough to hold, thick enough not to run, and flexible so it doesn't get brittle over time.
  • 1 × Wood Rasps Helps in the part cleanup after 3D printing

View all 8 components

  • 1
    3D Printer Setup

    These settings (in Ultimaker Cura slicer) worked very well for me:

    • Material:
      • 1.75mm PLA (roughly 600g worth!)
    • I have an Anycubic Mega X printer. It has a print area capacity of 300mm x 300mm x 300mm. You will need at least 238mm (9.37") x 234mm (9.22") in the XY plane, and 89mm (3.5") in the Z (height) axis to print these parts as I've designed them (this includes a 10mm raft on all sides). Remember that you can rotate the part so it prints diagonally! In summary:
      • Print Length Max (includes 10mm Raft): 238mm (9.37")
      • Print Width Max (includes 10mm Raft): 234mm (9.22")
      • Print Height Max: 89mm (3.5")
    • Raft HIGHLY Recommended:
      • Raft width (aka Extra Margin): 10mm
      • Raft air gap: 3mm (to make it easier to remove the raft!)
      • Raft top layers: 2
      • Raft top layer thickness: 0.4mm
      • Raft top line width: 0.4mm
      • Raft top spacing: 0.4mm
      • Raft middle thickness: 0.6mm
      • Raft middle line width: 0.8mm
      • Raft middle spacing: 1.0mm
      • Raft base thickness: 0.48mm
      • Raft base line width: 0.8mm
      • Raft base line spacing: 1.6mm
      • Raft top print speed: 7.5mm/s
      • Raft middle print speed: 5.625mm/s
      • Raft base print speed: 5.635mm/s
    • Walls:
      • Wall thickness: 1.2mm
      • Wall line count: 3
      • Fill gaps between walls: Everywhere
    • Quality:
      • Layer Height: 0.4mm (same as my extruder diameter)
      • Initial Layer Height: 0.4mm
      • Line Width (including ALL sub-settings in this category): 0.4mm
      • Initial Layer Line Width: 100>#/li###
    • Top/Bottom:
      • Top Surface Skin Layers: 2
      • Top/Bottom Thickness: 1.2mm (= 0.4mm height/layer * 3 layers)
      • Top Layers: 3
      • Bottom Layers: 3
    • Infill
      • Infill Density: 100% (because I want it as strong as possible and it's only 0.25" thick to begin with!)
      • Infill Line Distance: 0.4mm
      • Infill Pattern: Lines
      • Infill Layer Thickness: 0.4mm
    • Support:
      • Note: I didn't need any supports. This was a design decision and it worked out very well. However, generally I have my Support settings set to the following so it will detect when I need overhangs:
      • Support Overhang Angle: 65 degrees

    The goal is to get them to come out at least as good as these...

    Don't let the gremlins move your cheese in the middle of the night...

  • 2
    Cleanup of Printed Parts

    Huzzah! It's done printing! Now it's time to clean it up. I used a wood rasp, a metal rasp, a Dremel with a sanding drum, an xacto knife, and of course a cutting board.

    Here's a side-by-side comparison of before and after using the knife and rasps only:

    Work in progress...Stay tuned!

  • 3
    Vortex Bowl Assembly

    TBD

View all 5 instructions

Enjoy this project?

Share

Discussions

Similar Projects

Does this project spark your interest?

Become a member to follow this project and never miss any updates