 w_k_fay
I was looking for a cheap and accurate way to drill holes in my PCBs. There are a few interesting low budget mini drill ideas on YouTube. Then there is Dremel and lastly there are the high end precision drill presses at about $1000. I wanted something as cheap as the YouTube drills with higher accuracy than Dremel and a few extra features found on the expensive machines.
After a bit of head scratching I managed to cobble up something that is pretty cheap, very accurate and has a couple nice features. If you are looking for a budget PCB drill this might be just the ticket, or maybe it will inspire you to head out to the shop and build something better. So, "How cheap is cheap ?" I hear you say. I spent less than $50 for the entire project.
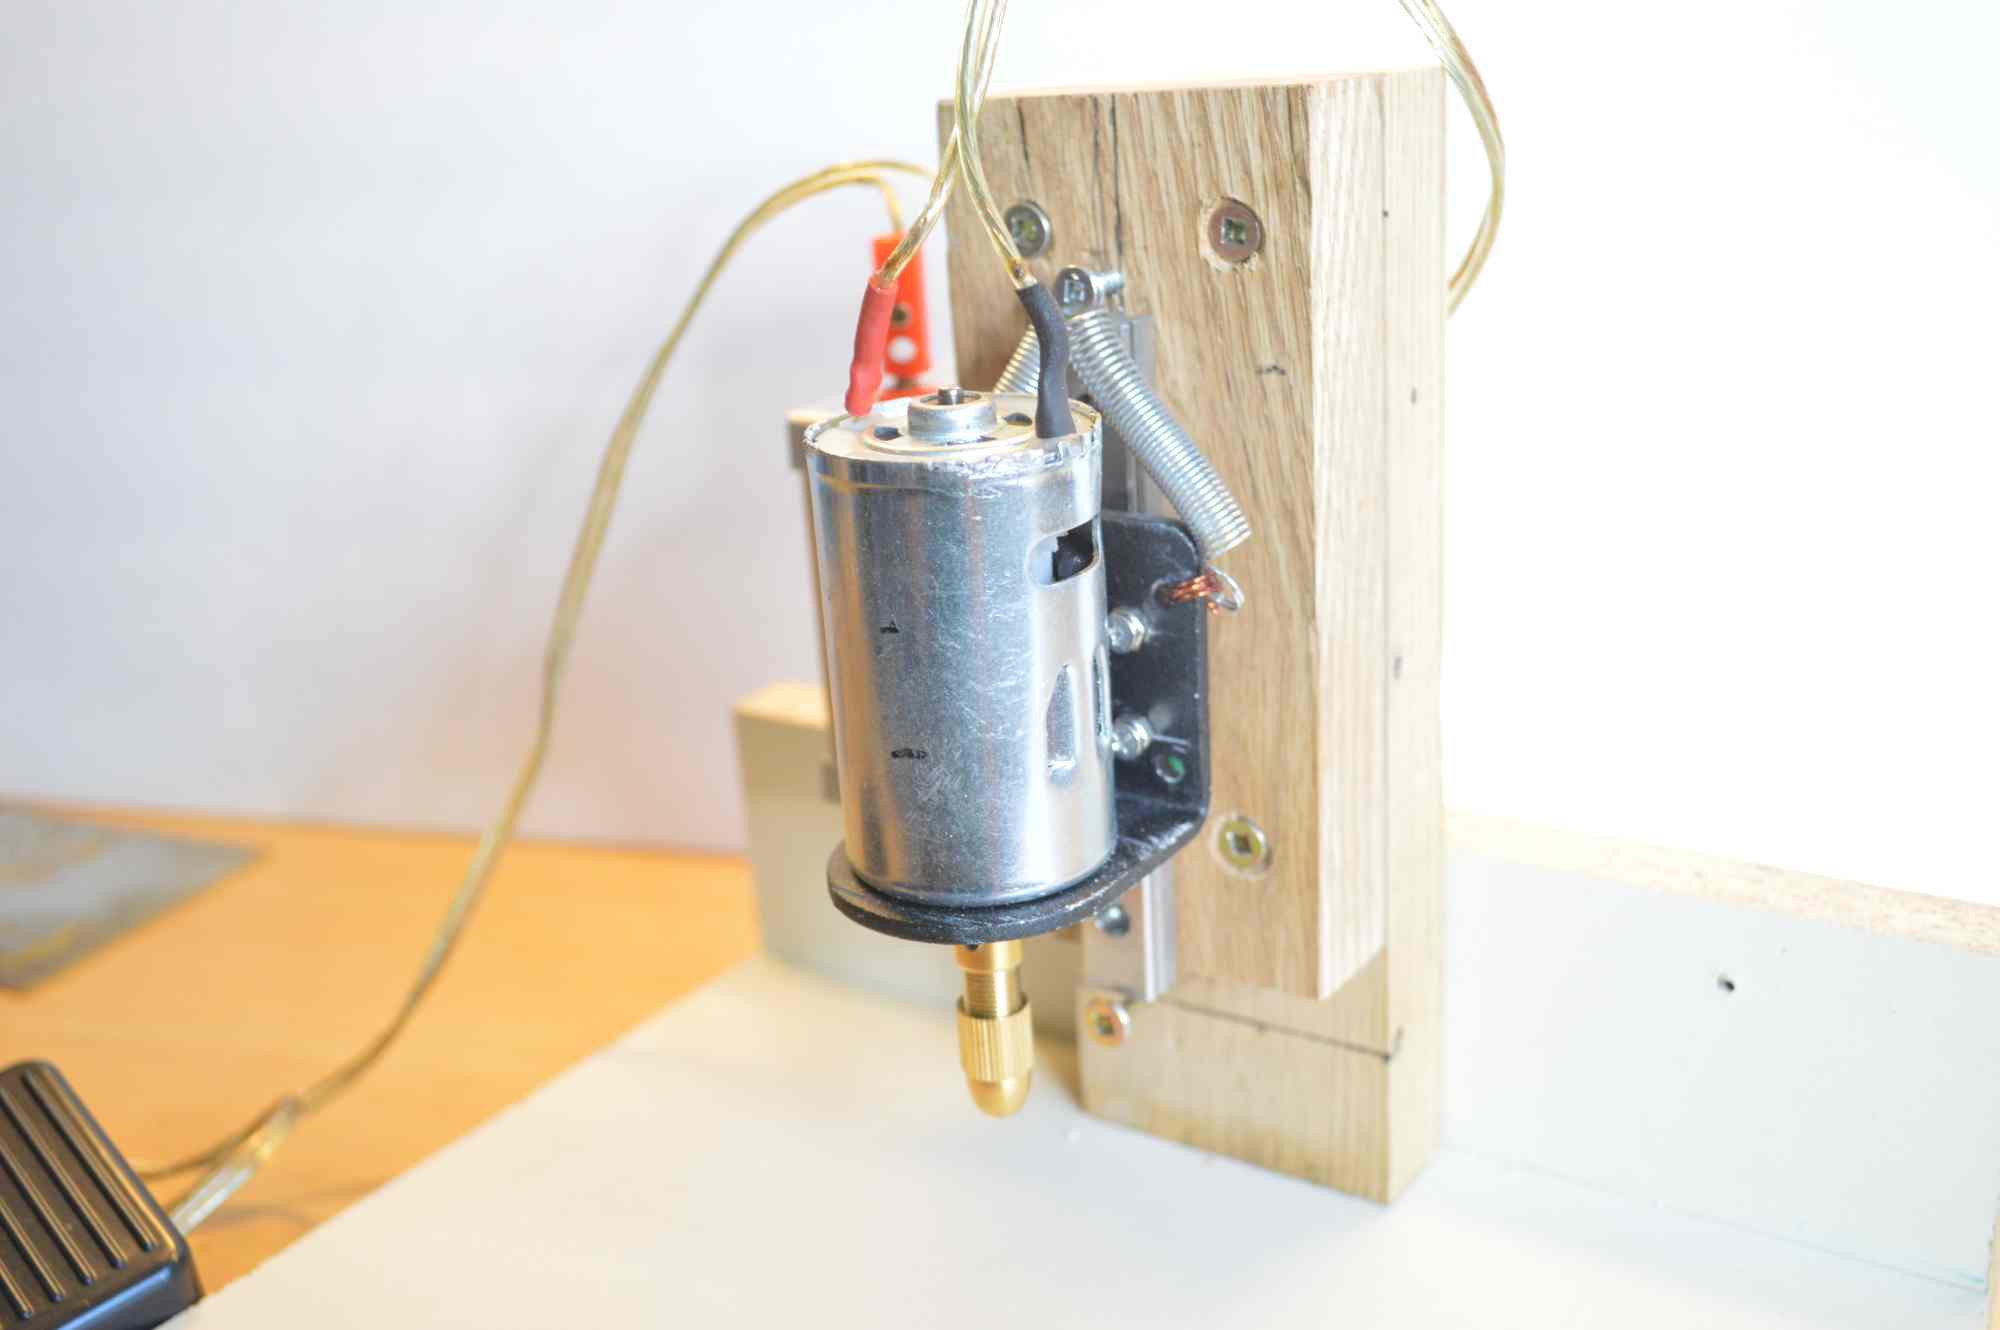
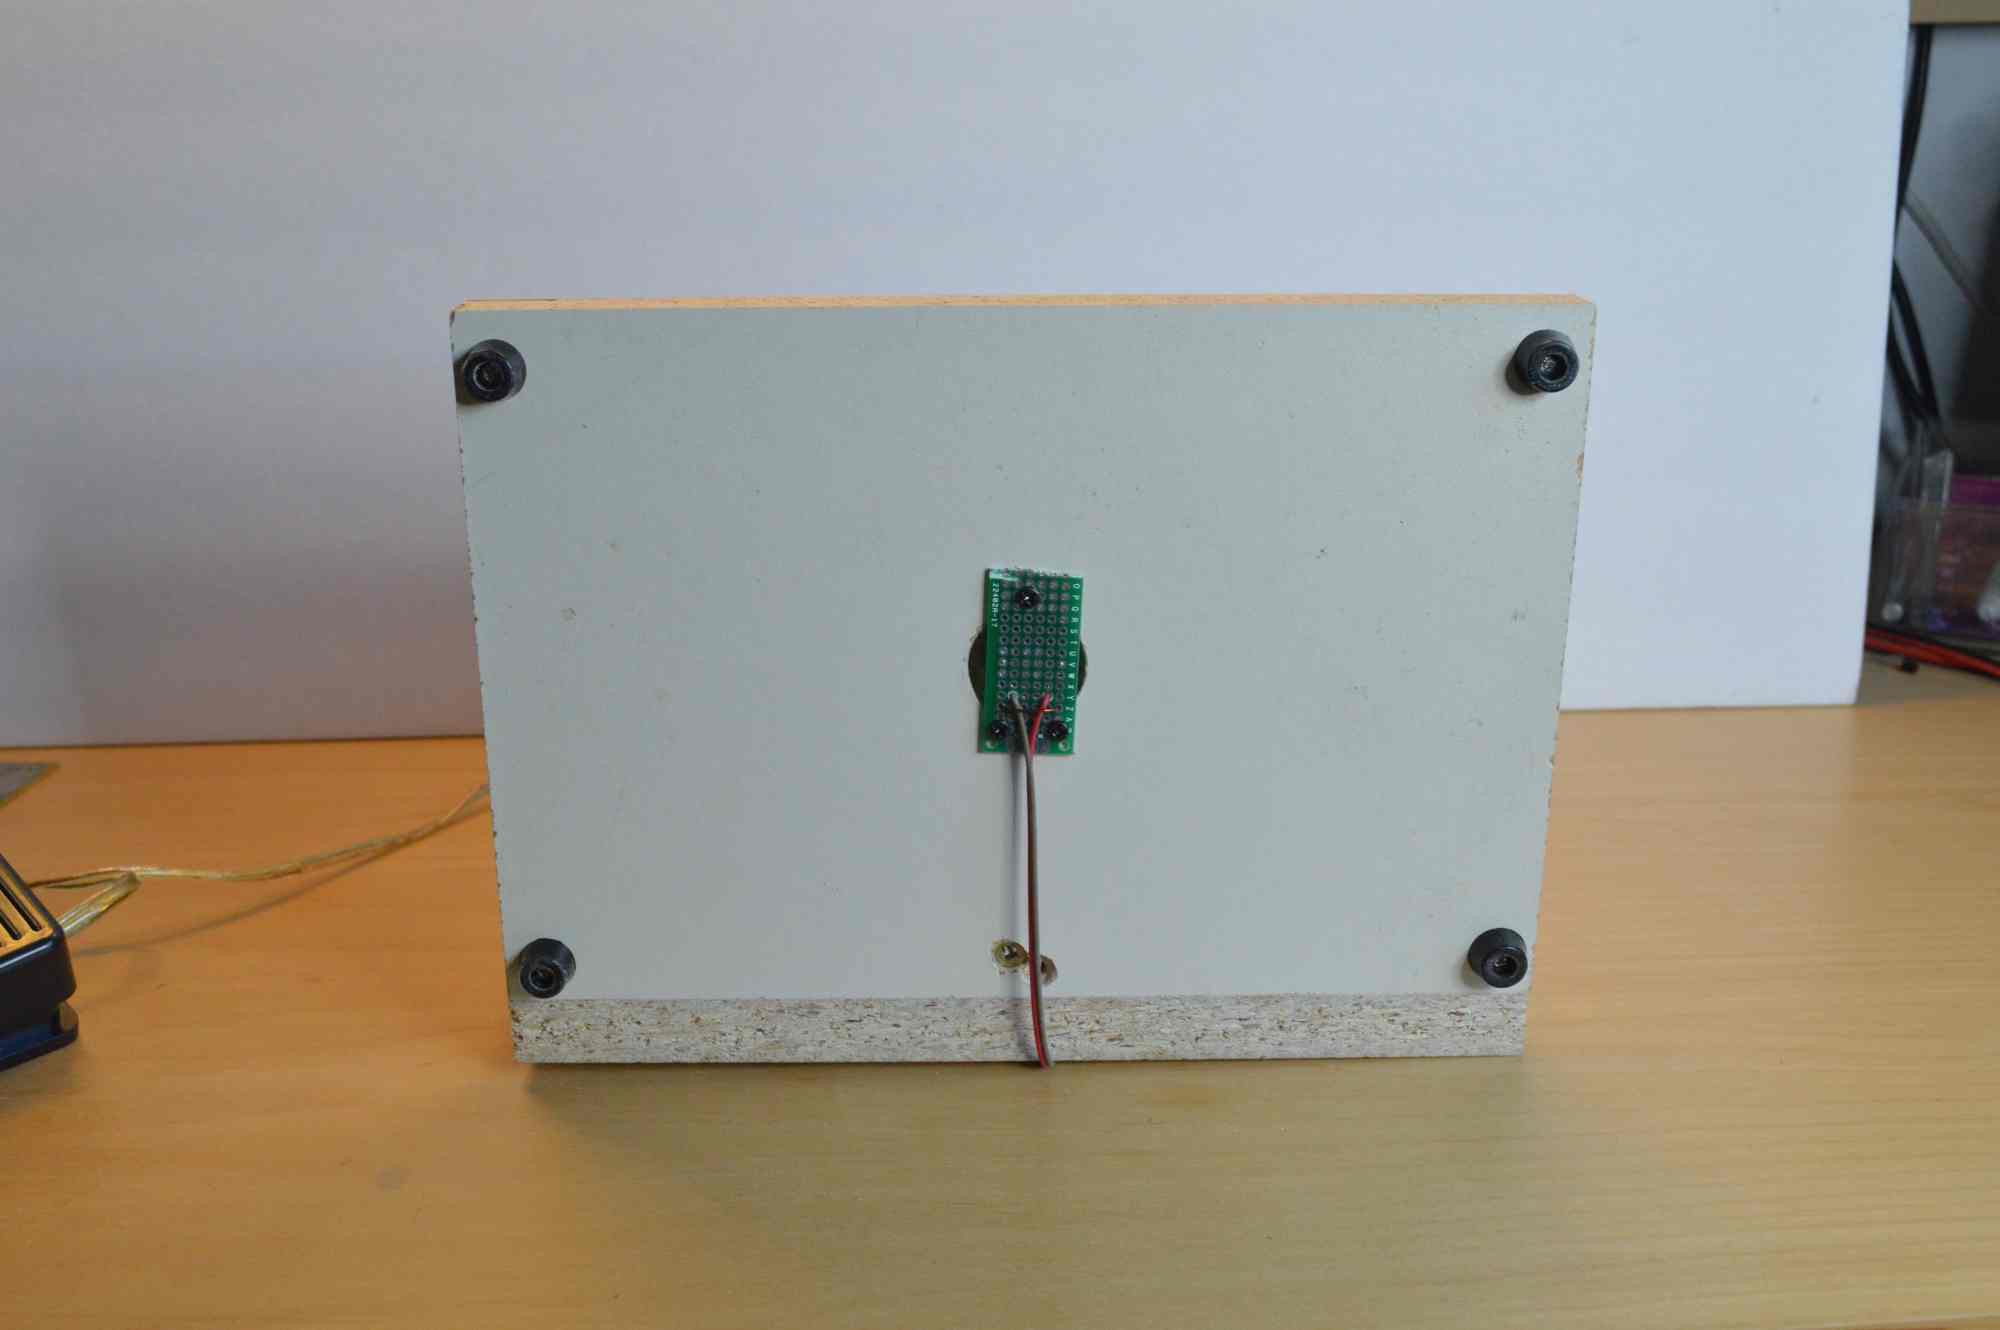
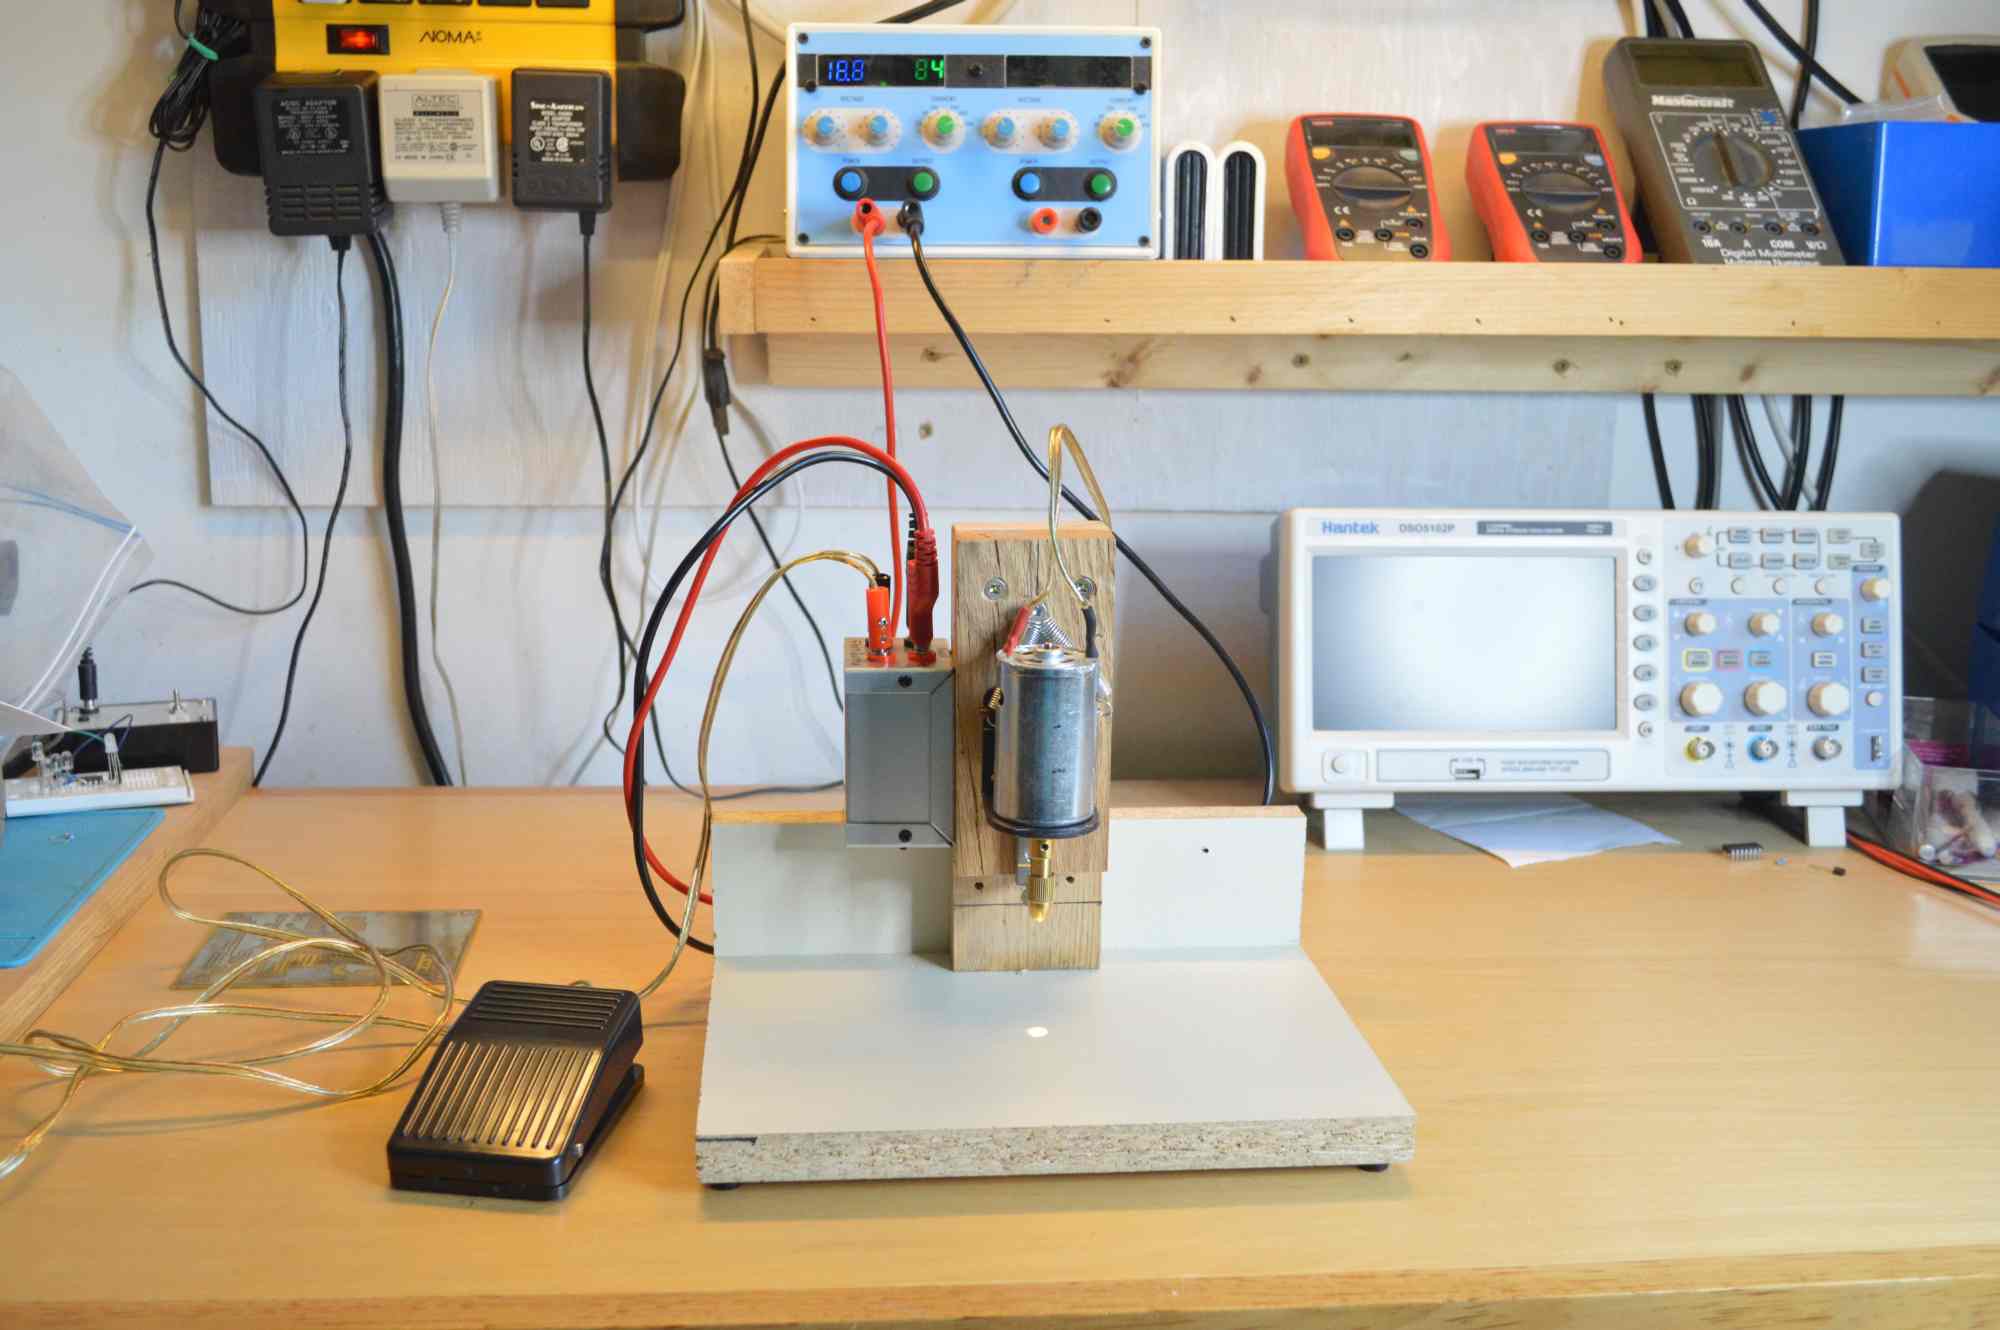
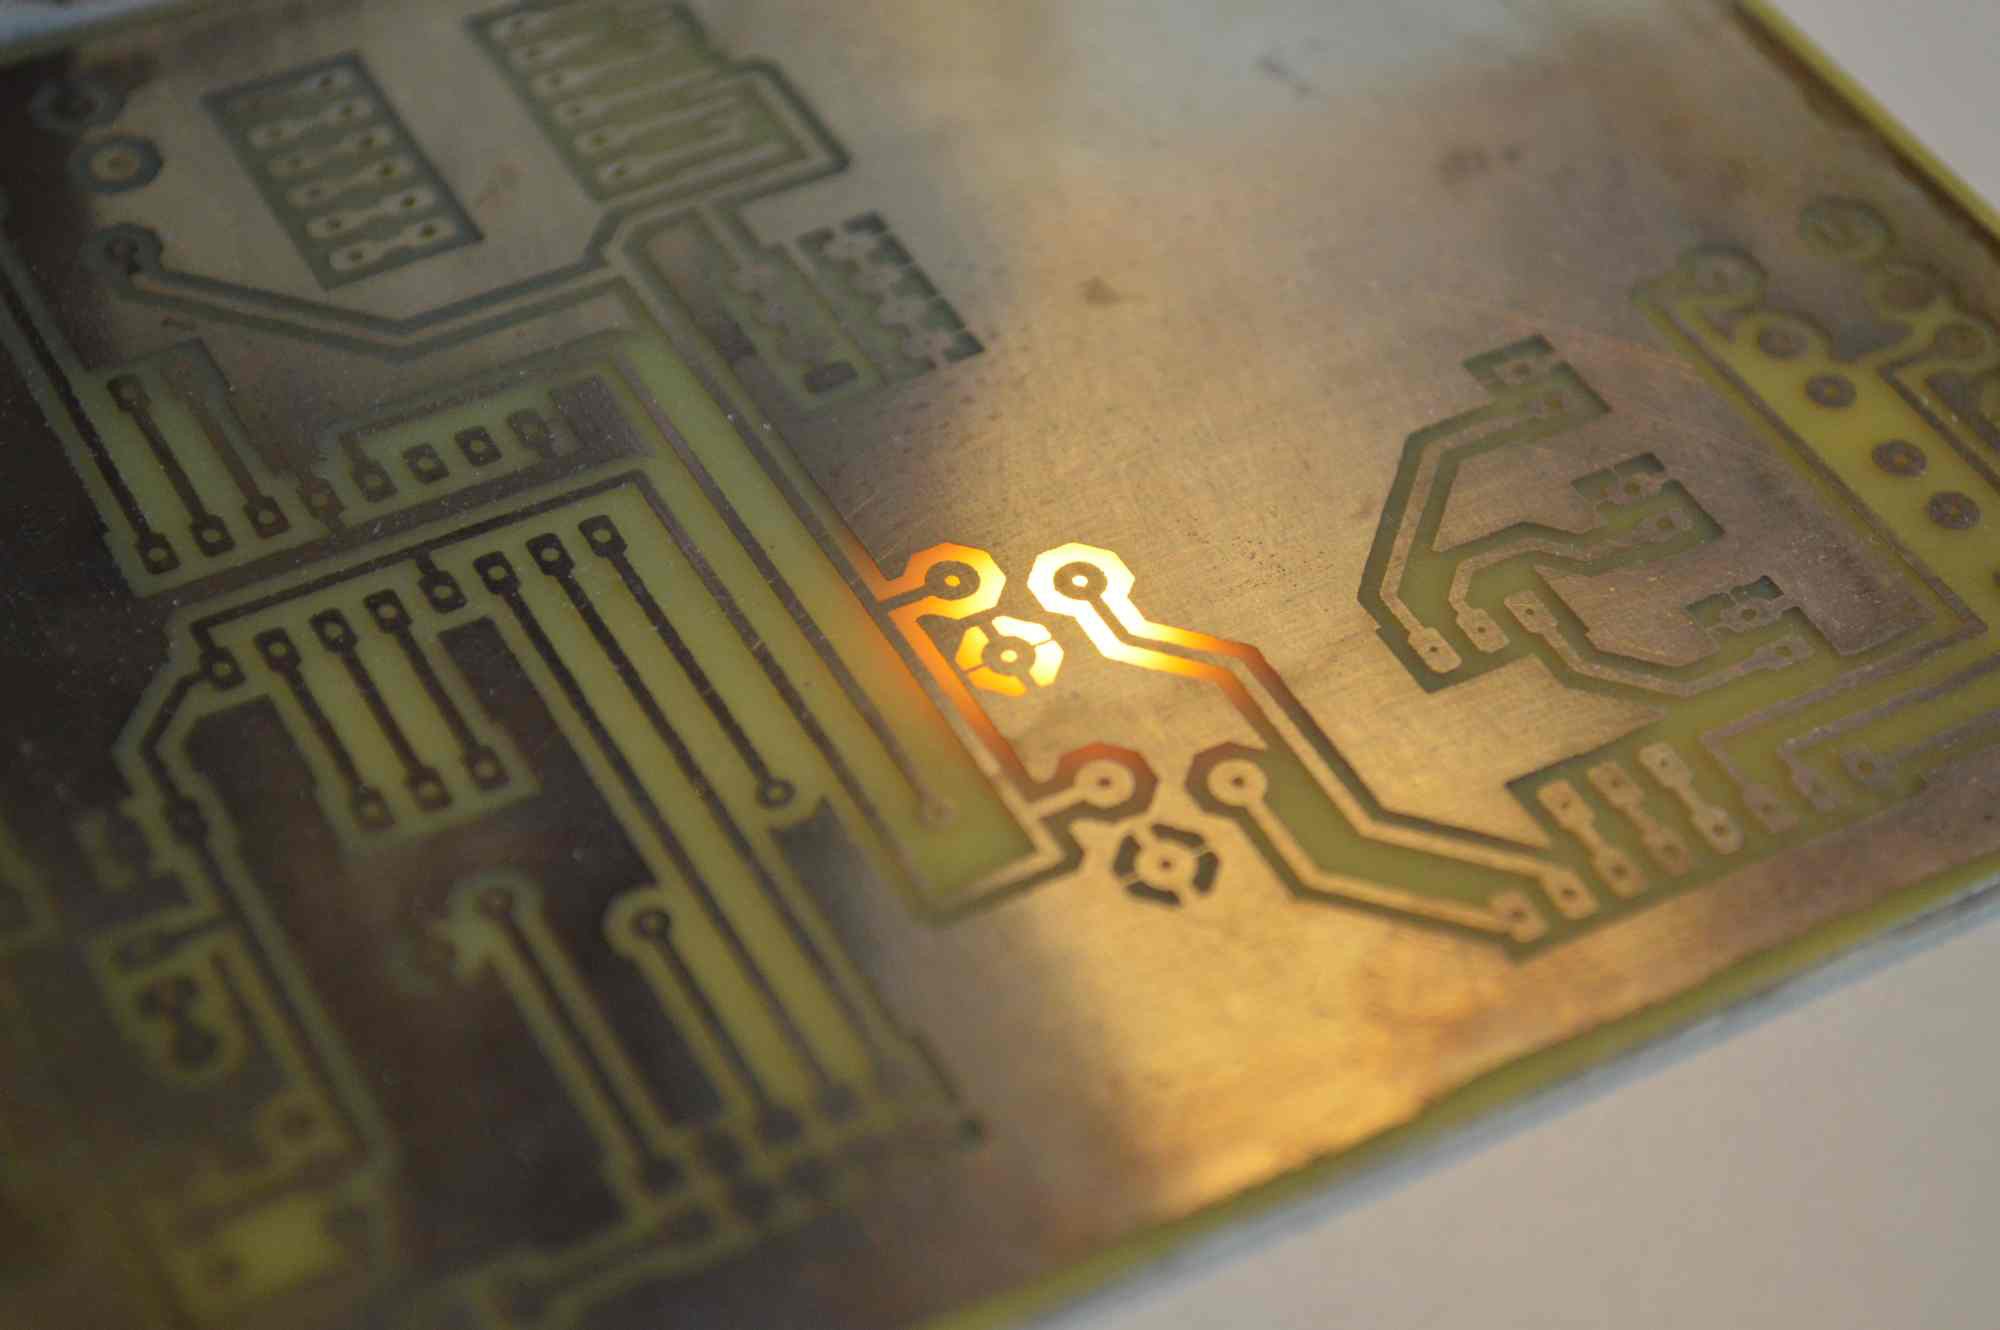
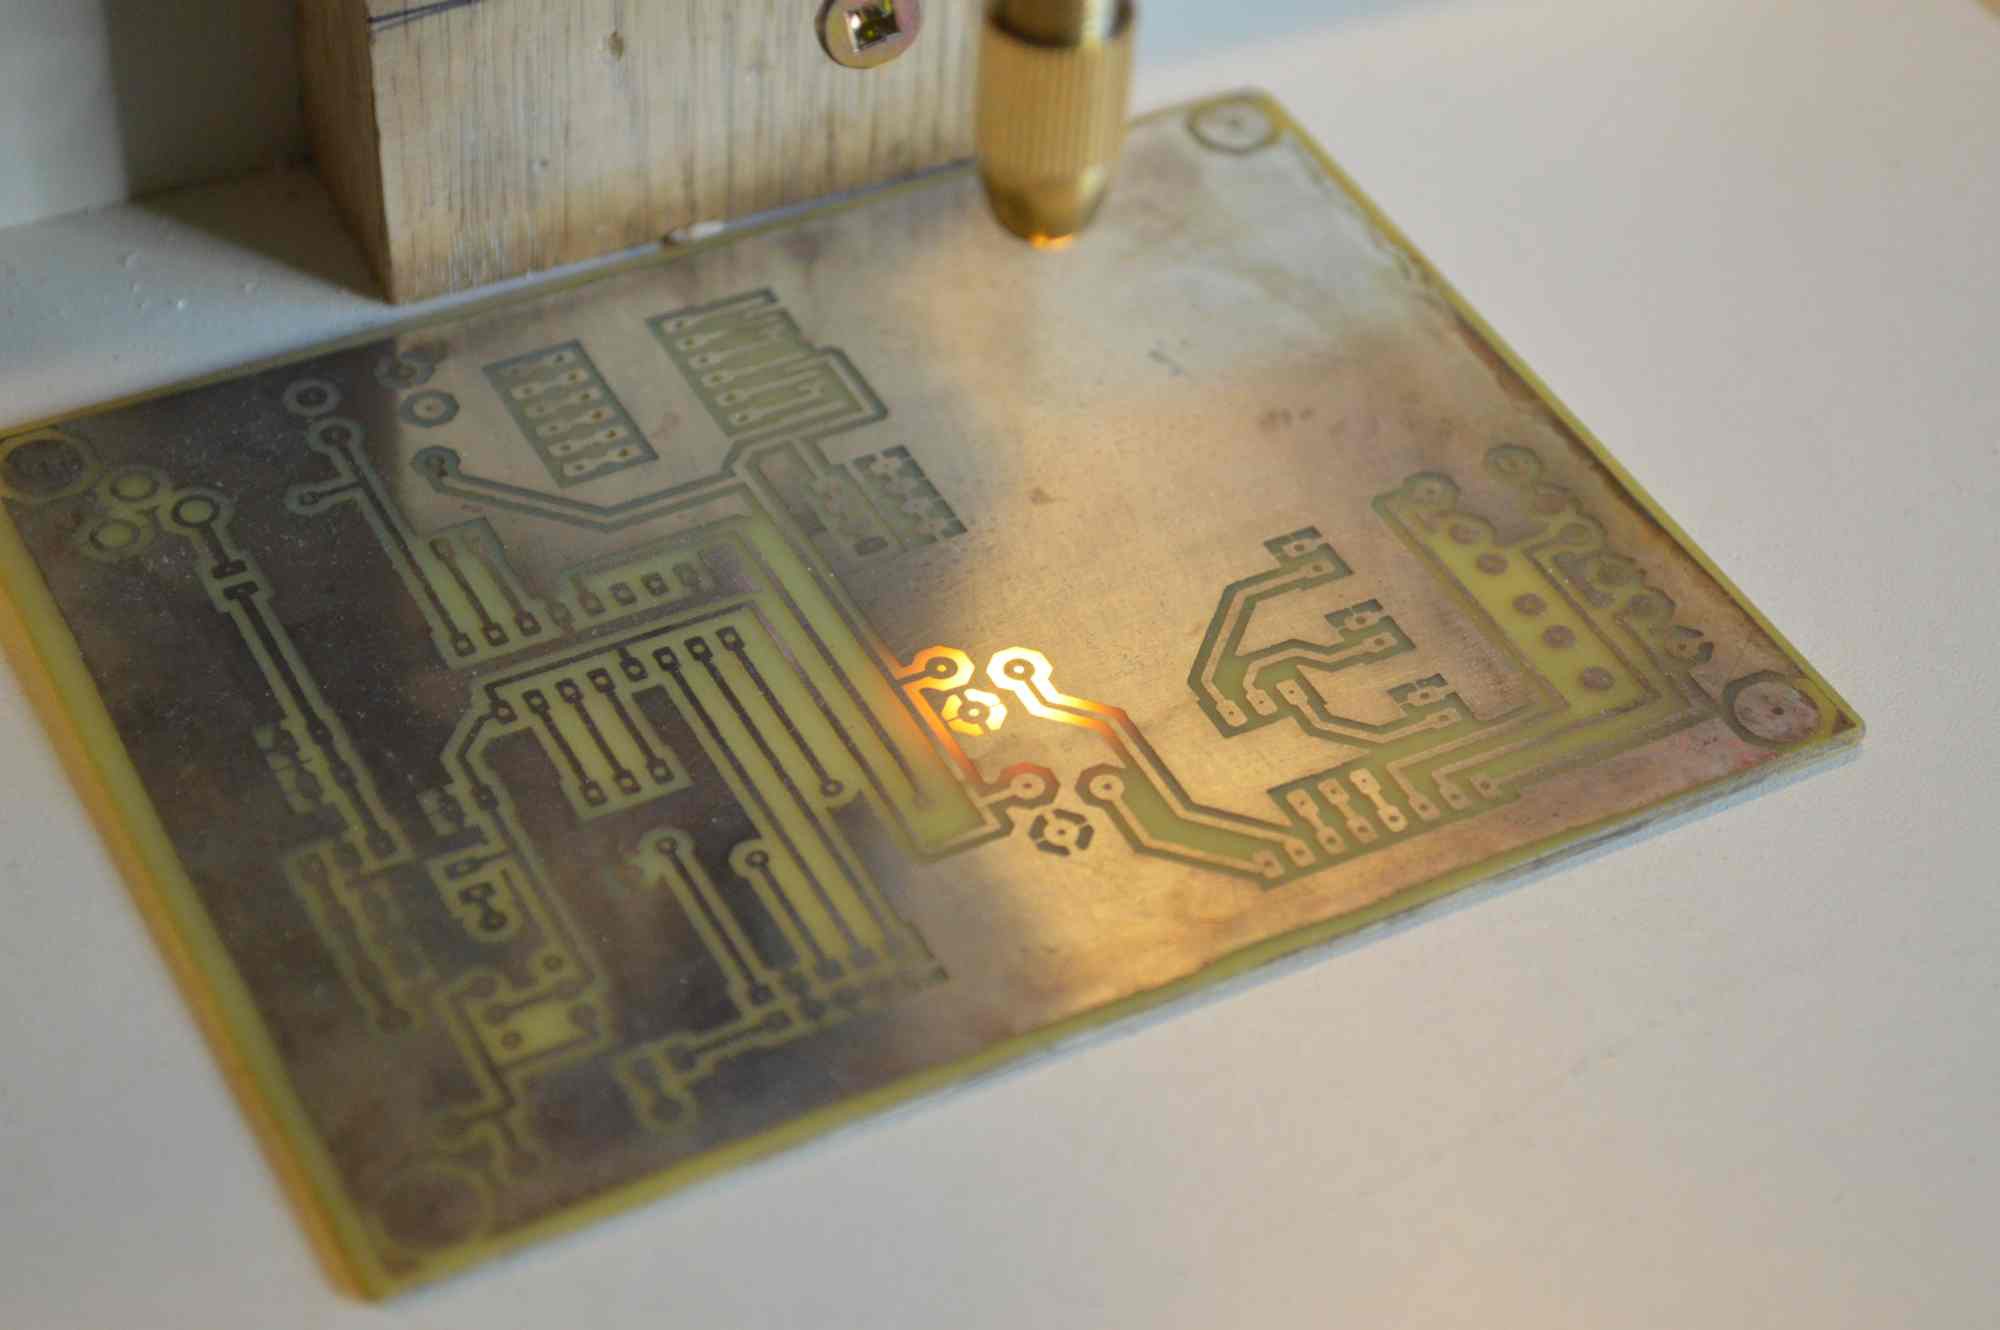
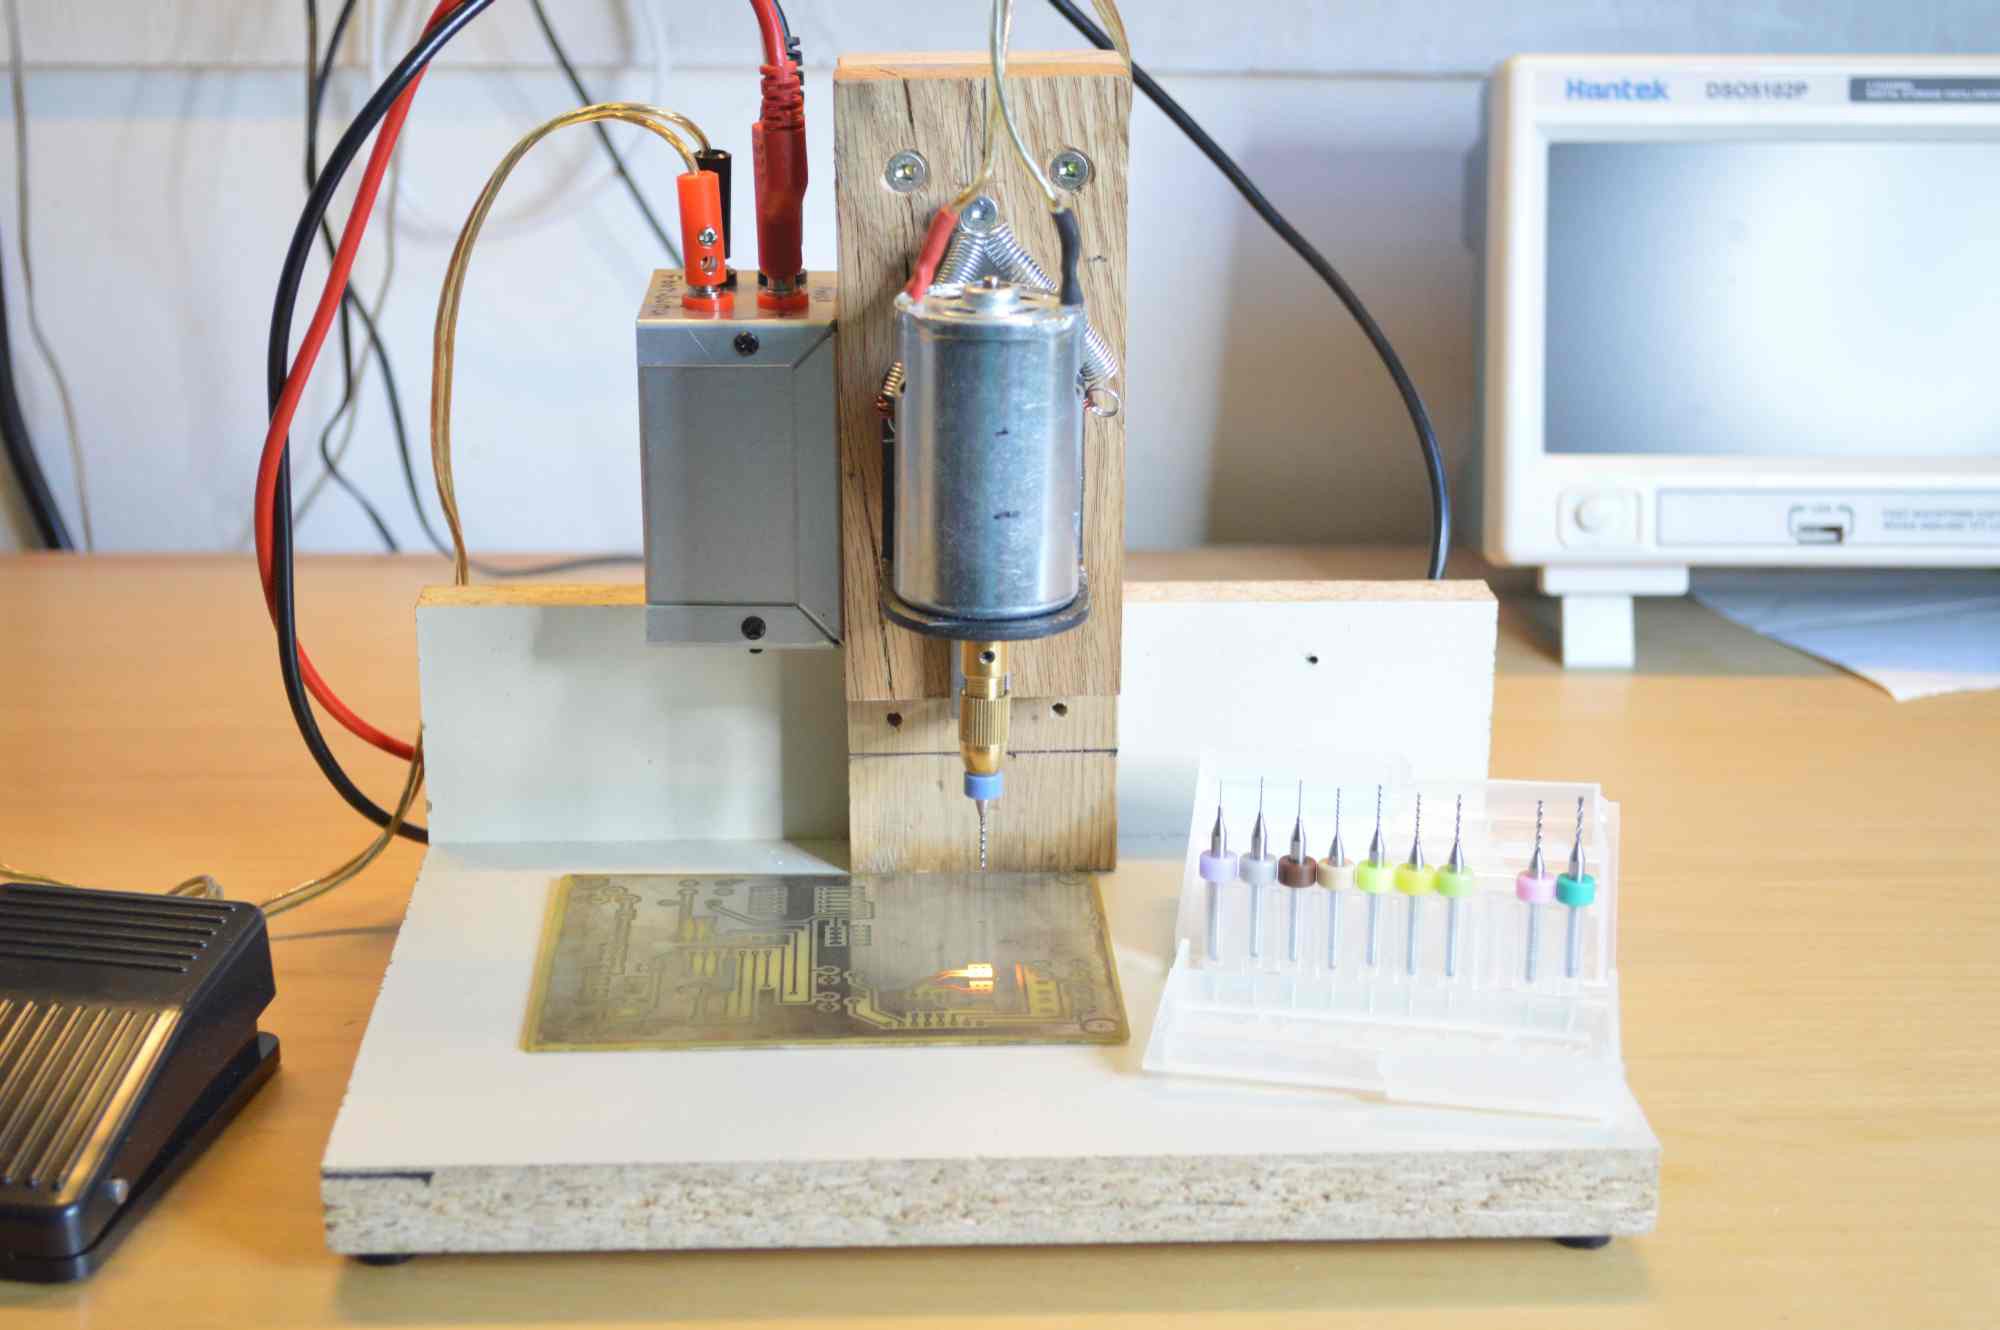
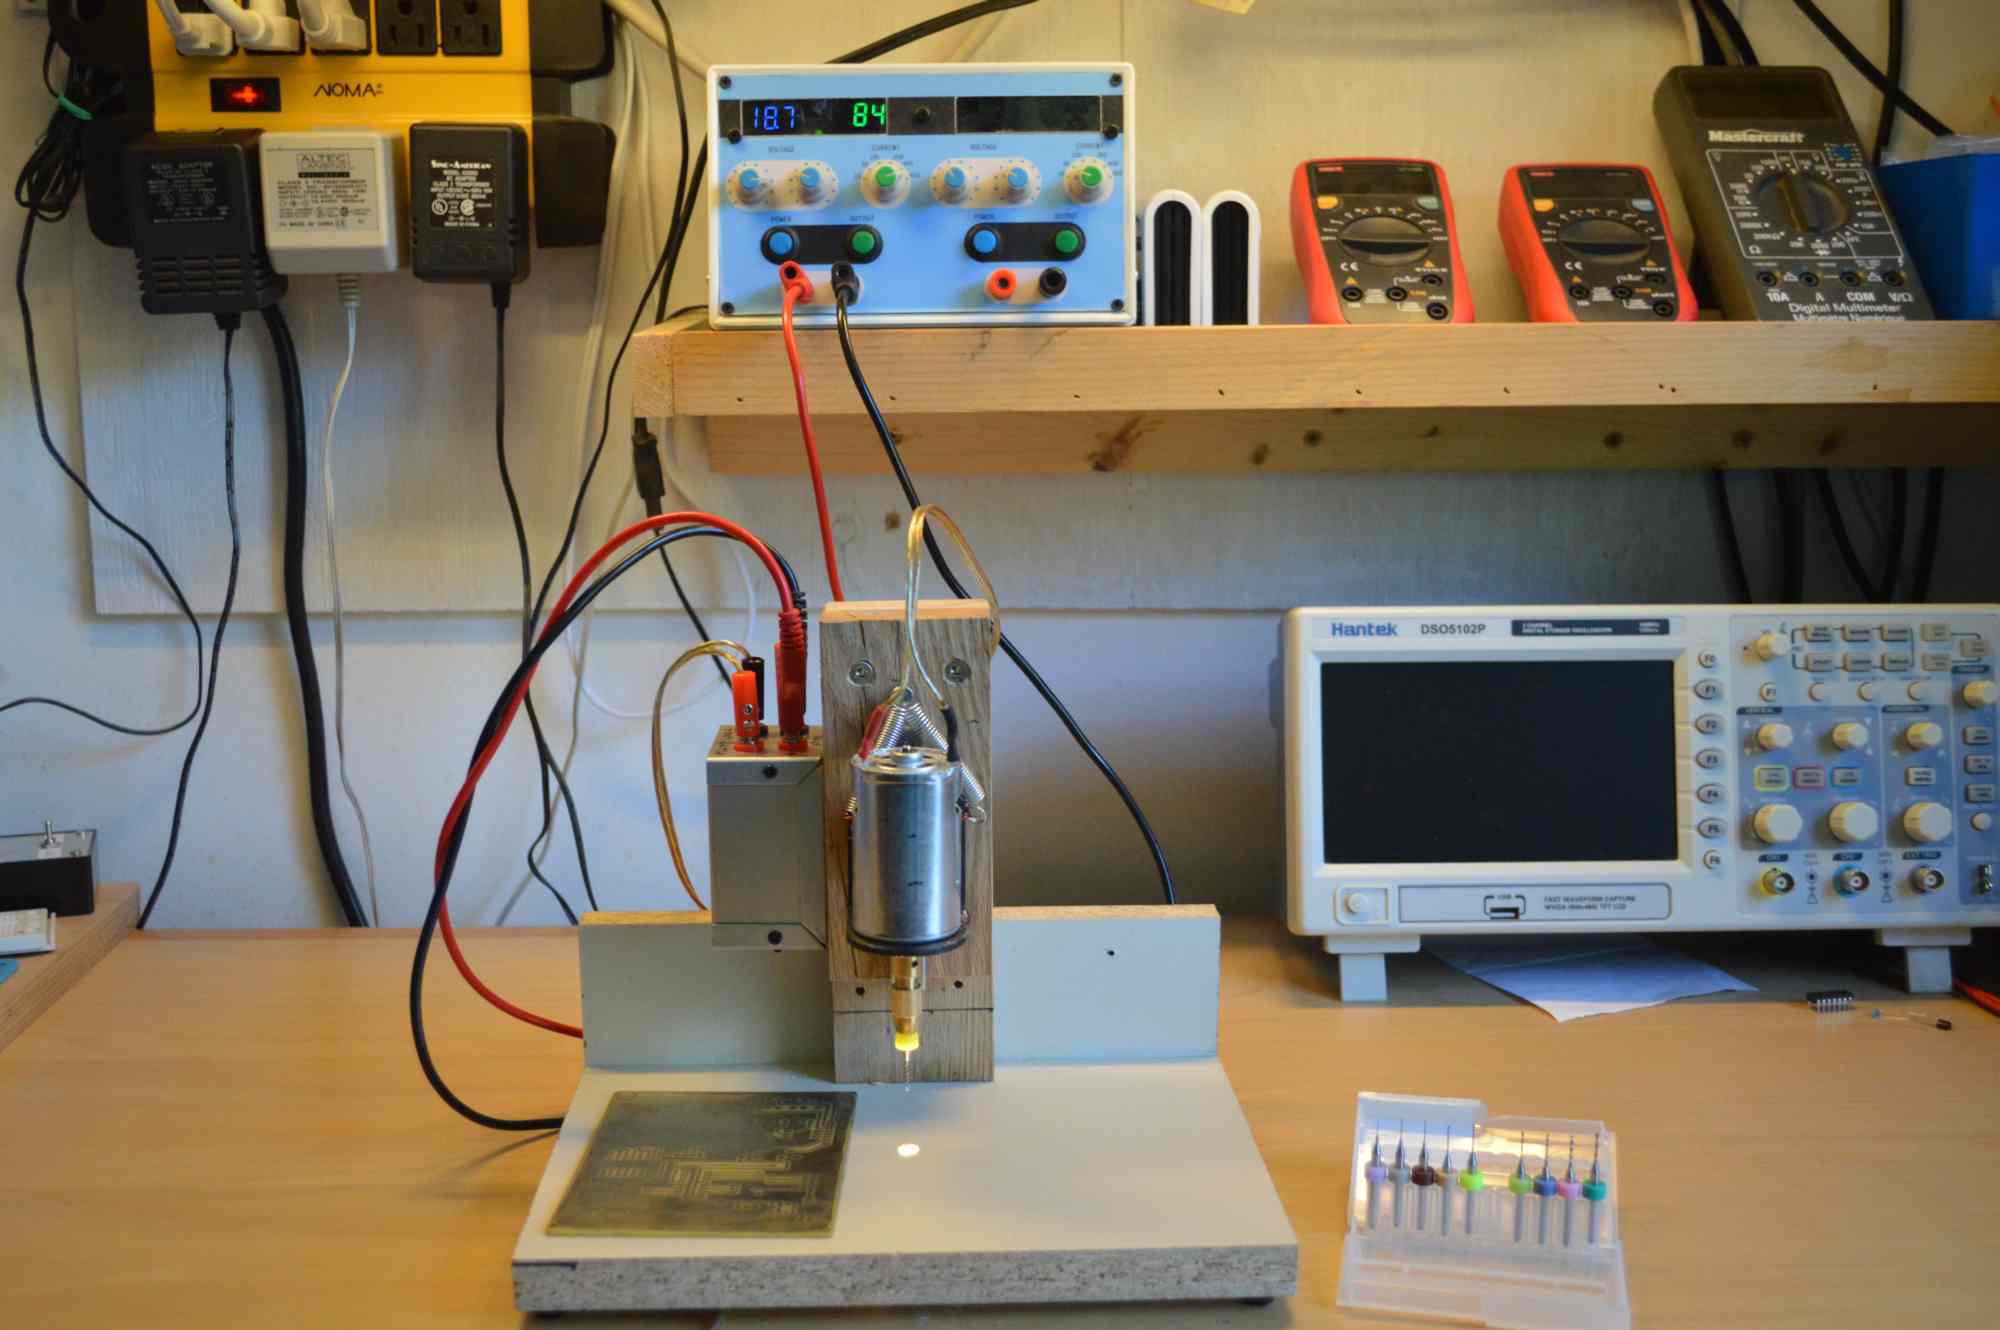
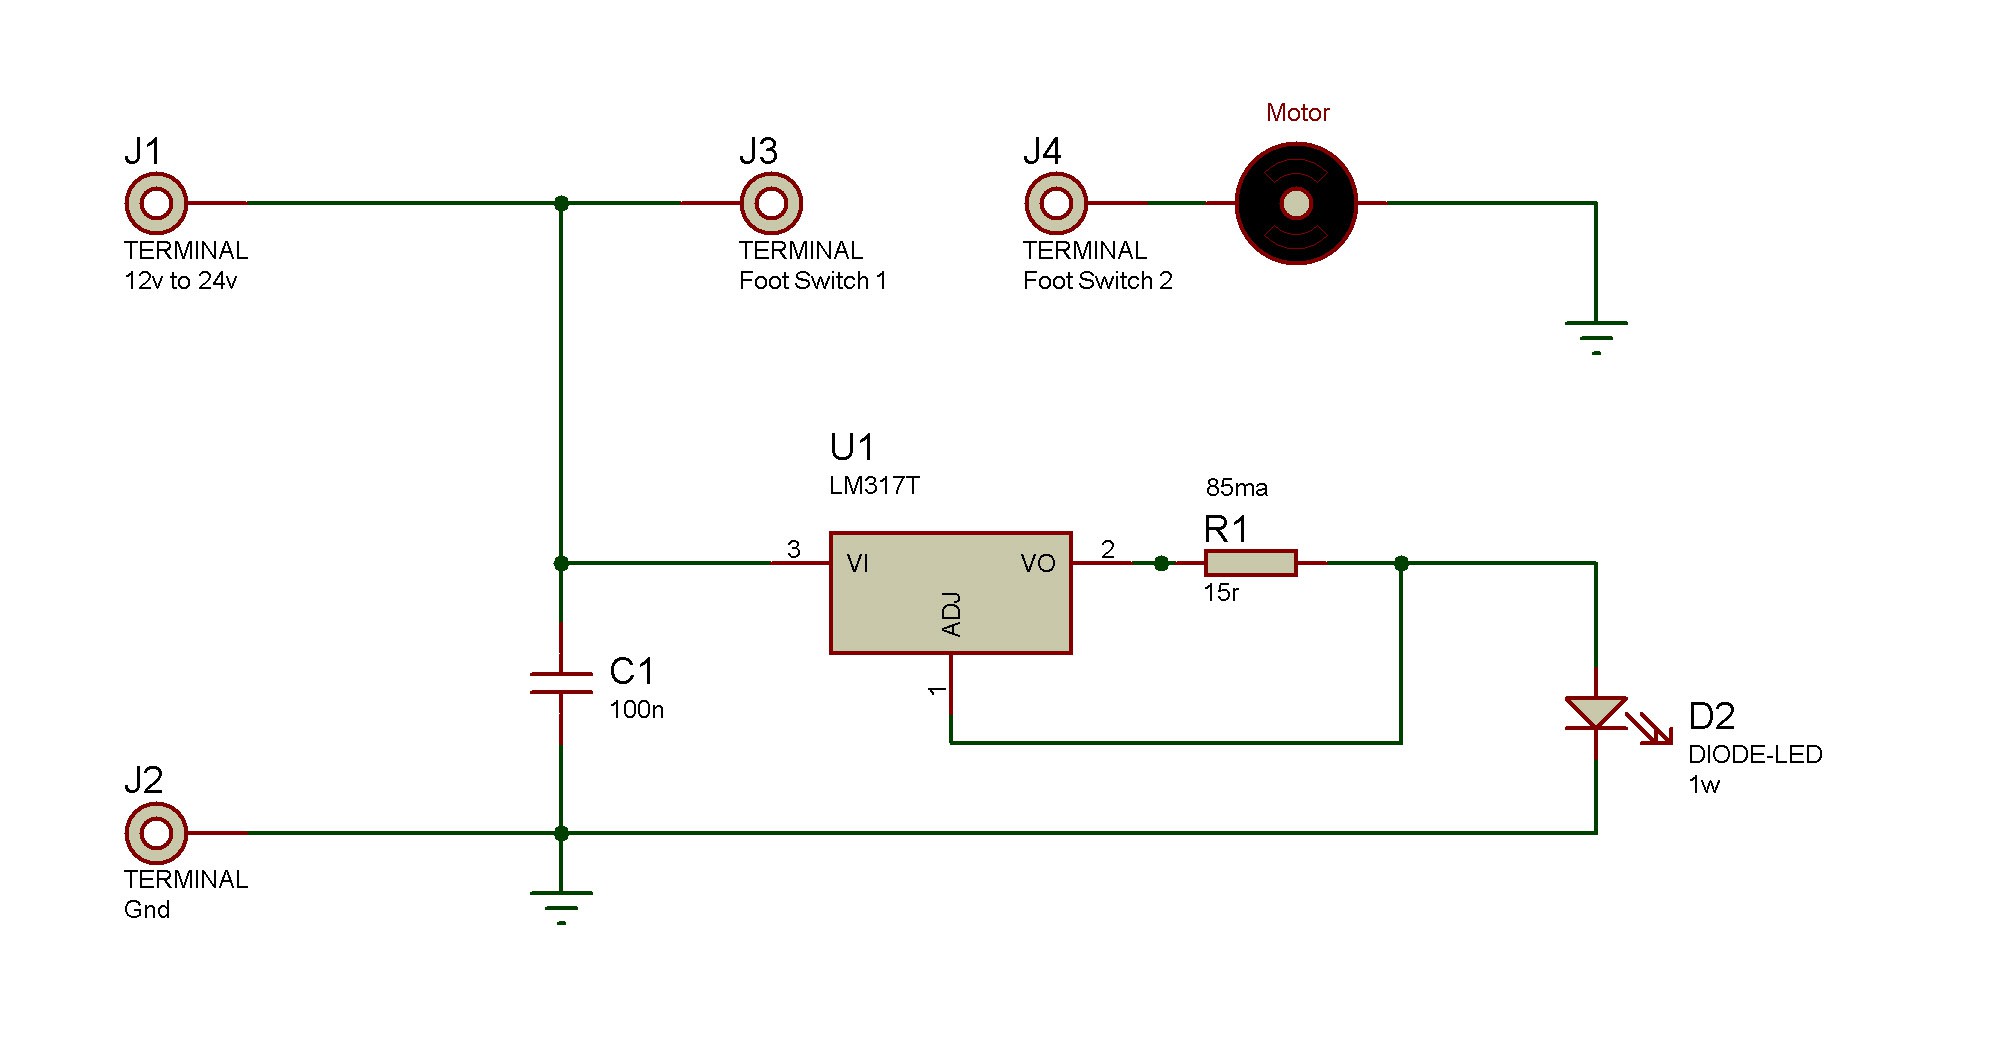
The base has two concentric holes, 5mm center hole and a 25mm hole part way through. This allows some space for the 1w LED bead, mounted under the base. The LED is powered by a 85ma constant current source, made up of a LM317 and a resistor. I have found this to be the best way to drive these LED beads without overheating them. The schematic is shown in the last picture. Light transmitted through the PCB from below is much more effective than lighting the work from above.
The motor is a 555 with matching bracket I bought from Aliexpress. The motor bracket holes did not lineup with the threaded holes in the linear bearing block, so I had to drill new holes in the bracket to attach it to the linear bearing block. I took extra care to make sure that the motor moves perpendicular to the base. There is almost no X or Y axis play in the linear bearing so the drill doesn't wander off center, making it quite accurate.
I tried a number of cheap 3 jaw mini chucks and found that none of them would reliably center the drill bit. The collet chuck on the other hand centers the bit very accurately and costs less. I use carbide bits with a 3.15mm shank, which easily fit into the collet's 3mm insert. I rarely use twist drills (with different shank sizes) so I rarely have to change the collet insert.
The foot pedal allows me to position the work with both hands and double check the alignment before I drill. I position the work with my thumbs and then pull the drill down with my index fingers. I have found this method to be both quick and accurate, but you may want to rig up some sort of a handle.
The drill is powered from my bench supply. This gives me variable speed and saves me the cost of building a dedicated power source for the drill. The constant current source for the light maintains the illumination level regardless of the motor speed.
Below are a few pictures of the parts and the assembled drill press. There is not too much more to say about this project. Happy Building !
The Parts:

$15 Linear Rail MGN12 x100mm
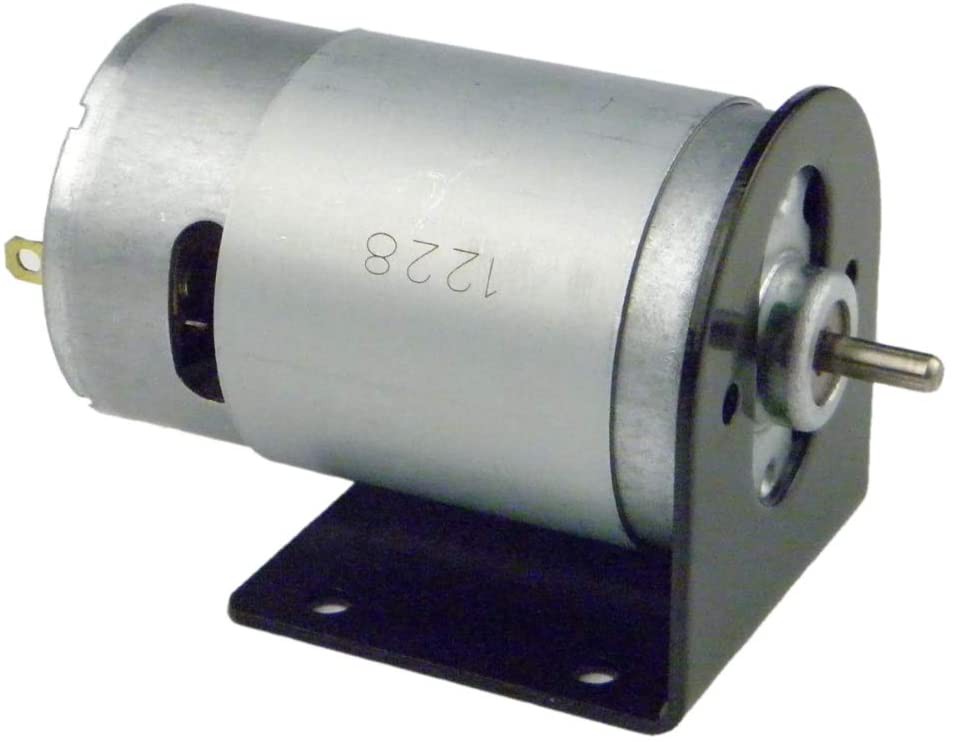
$15 555 motor and bracket 24v 5000 RPM
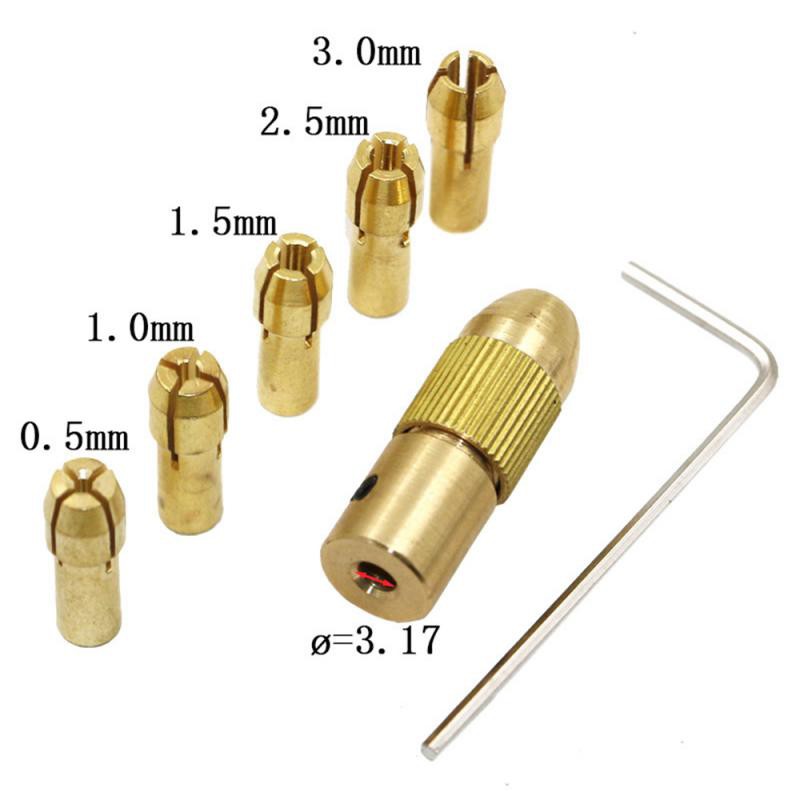
$2 Collet Chuck
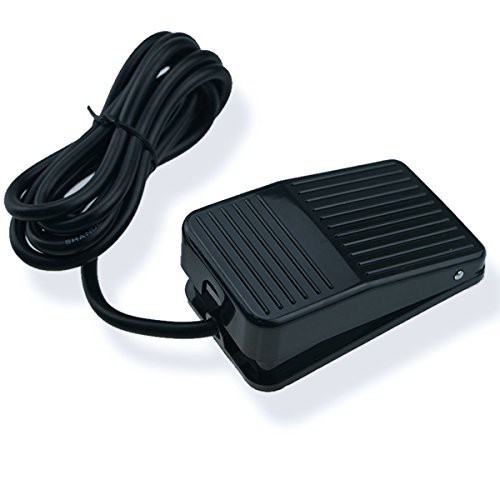
$5 Foot Pedal
$10 for a small project box, LM317, 1w LED bead, resistor, capacitor, banana jacks, 4 rubber feet, springs, and some scrap wood.
The Drill :


 Hacker404
 dekutree64
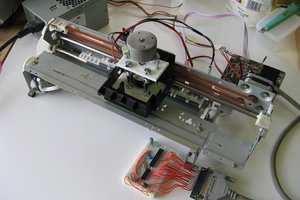
 shlonkin
I like the through-lighting! Very nice touch.