Alejandro Mora
-
03: Refreshing Air Quality (Carbon Filter Mod)
08/12/2023 at 13:49 • 0 comments![]()
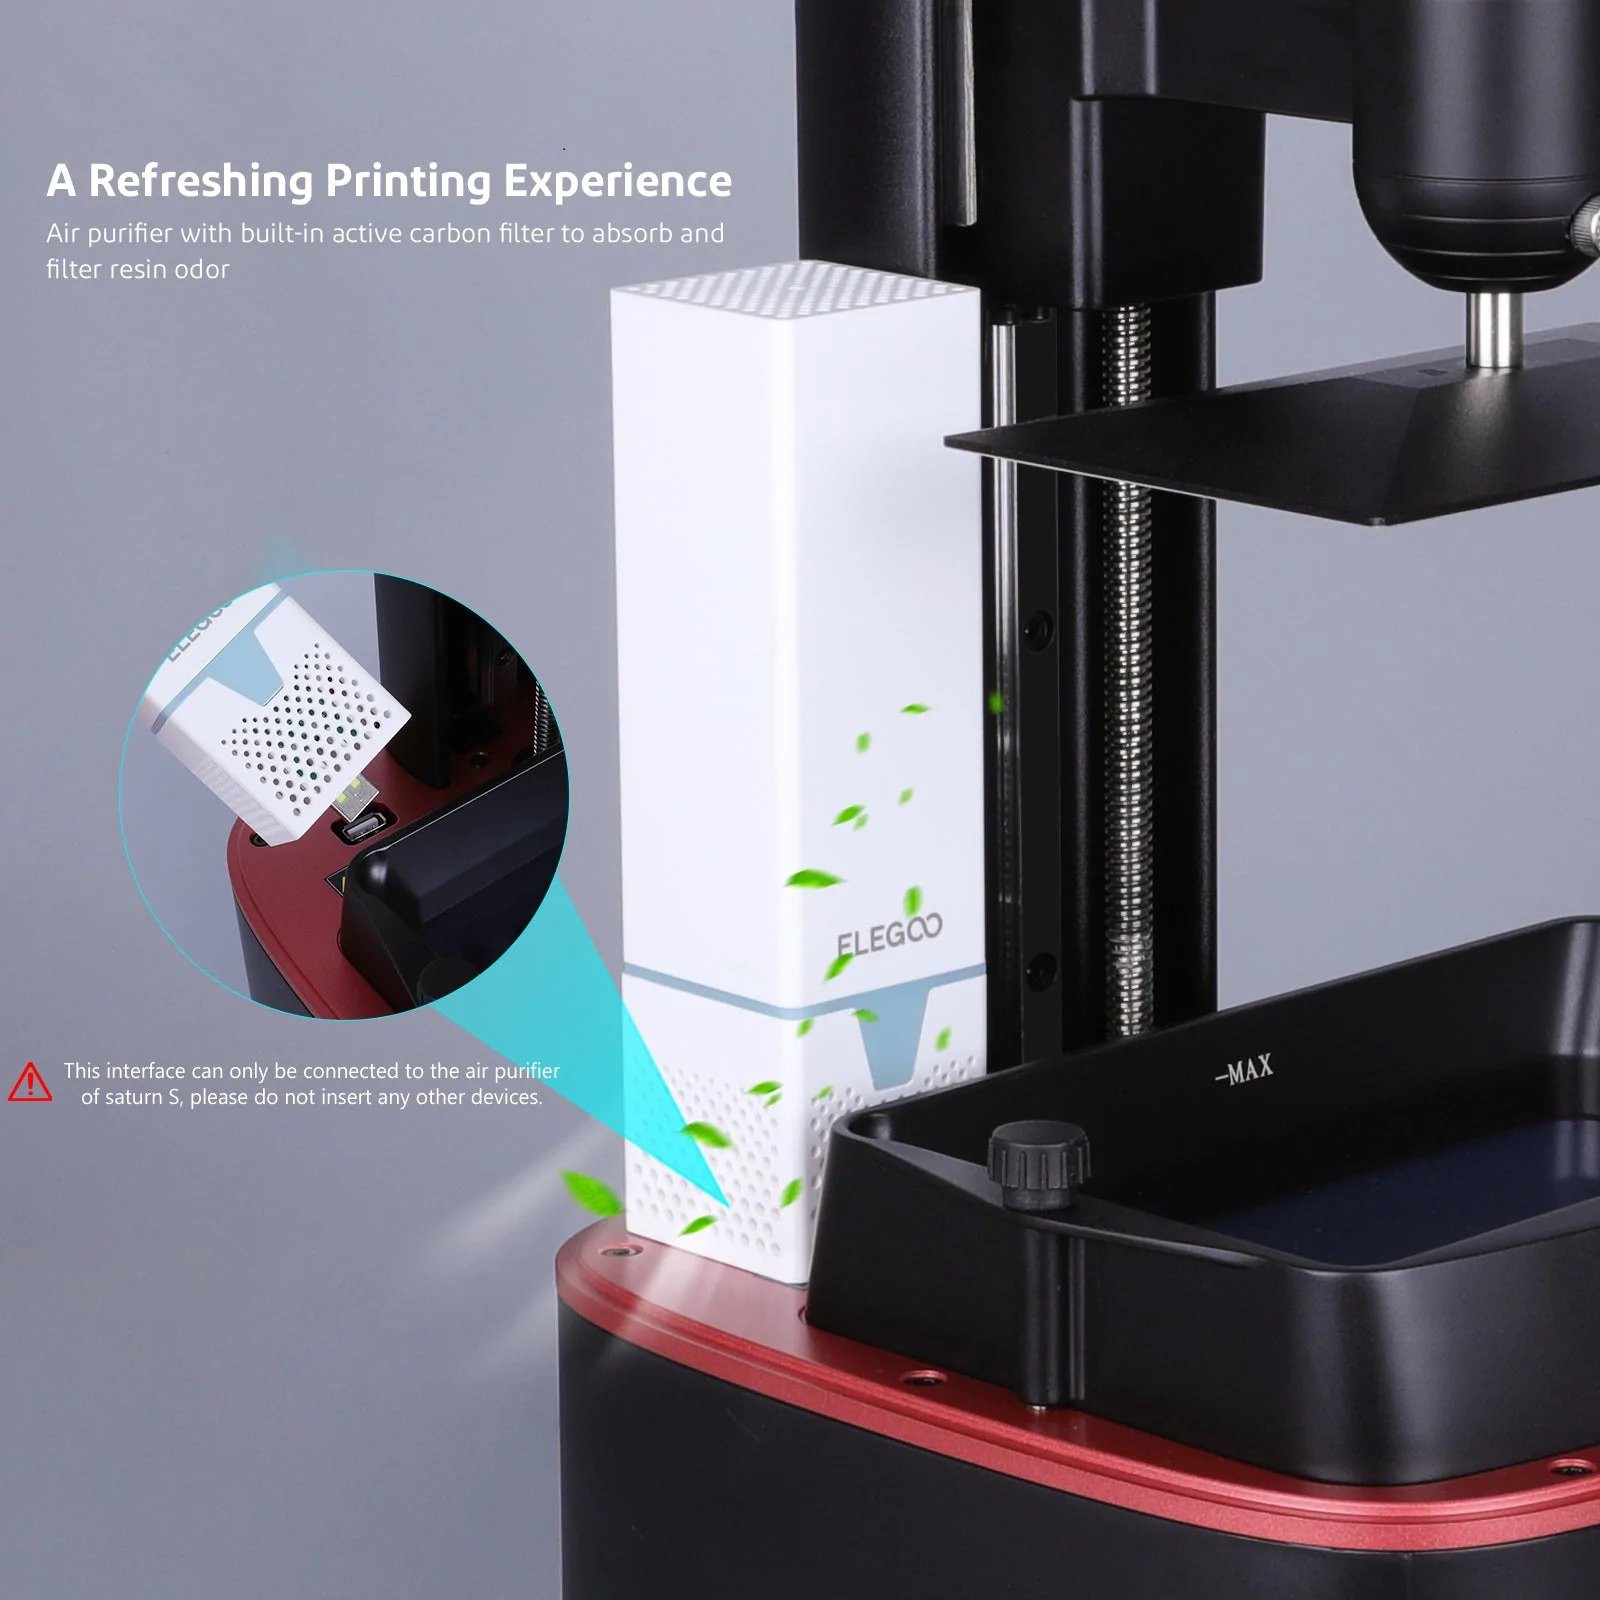
The new Pro printer comes with carbon activated filters that can remove some (all?) of the resin smell. While some people think that these filters are useless. It wouldn't be called Pro if we wouldn't at least try to replicate the same feature in our base model.
Luckily for us, the process is half done since Elegoo decided to sell these as either stand-alone filters or replacement filters for Mars Pro 3 / Saturn 2. Both products have been added to the components list for your convenience. The gist of it is that for around $20-$30 you will get 2 filters. And a couple of replacement carbon filter blocks.
---------- more ----------You got a few options. The first filter -and the one that I bought back then when it was the only one available- comes with a rechargeable battery and you can just prop it inside the printer's cover to do its thing while printing. And while that basically could be the easiest mod in existence. It comes with the drawback of needing to be recharged at some point. And you know how it goes. It will be drained when you need it. If I wanted 1:1 feature parity with the Mars 3 Pro. I needed to mod the filter to be powered from USB as well. I call this normal difficulty.
Fast forward a year since I did this mod, and it turns out Elegoo now sells the second filter, the same one that comes with the newer Pro printer. This version would be the one that I go with if I had to do this mod again as it simplifies this mod a lot. This version is supposed to plug in directly to a USB port on top of the printer's chassis, getting power constantly, so you don't have to worry about charging it ever again. I call this way Easy difficulty. Disclaimer: While I believe this is the way to go, since I did not buy this air filter version. I don't really know how much voltage they use. Make sure that you use the proper voltage required for it.
The DIY and last way would be to just 3D print the filter. If you have the components lying around. This device is honestly a joke at how easy it is to make. Plenty of versions made by the community out there. You can just by the carbon filter blocks and be good to go. I linked them in the components section. I call it Hard difficulty.
Either way you go, the issue here is that we need to create a way to power the filter the same way that Elegoo did. From a USB port in the top of the chassis. If you go with the "second filter" you can skip to the next section. I will go over first on modifying the "first filter" to be USB powered.
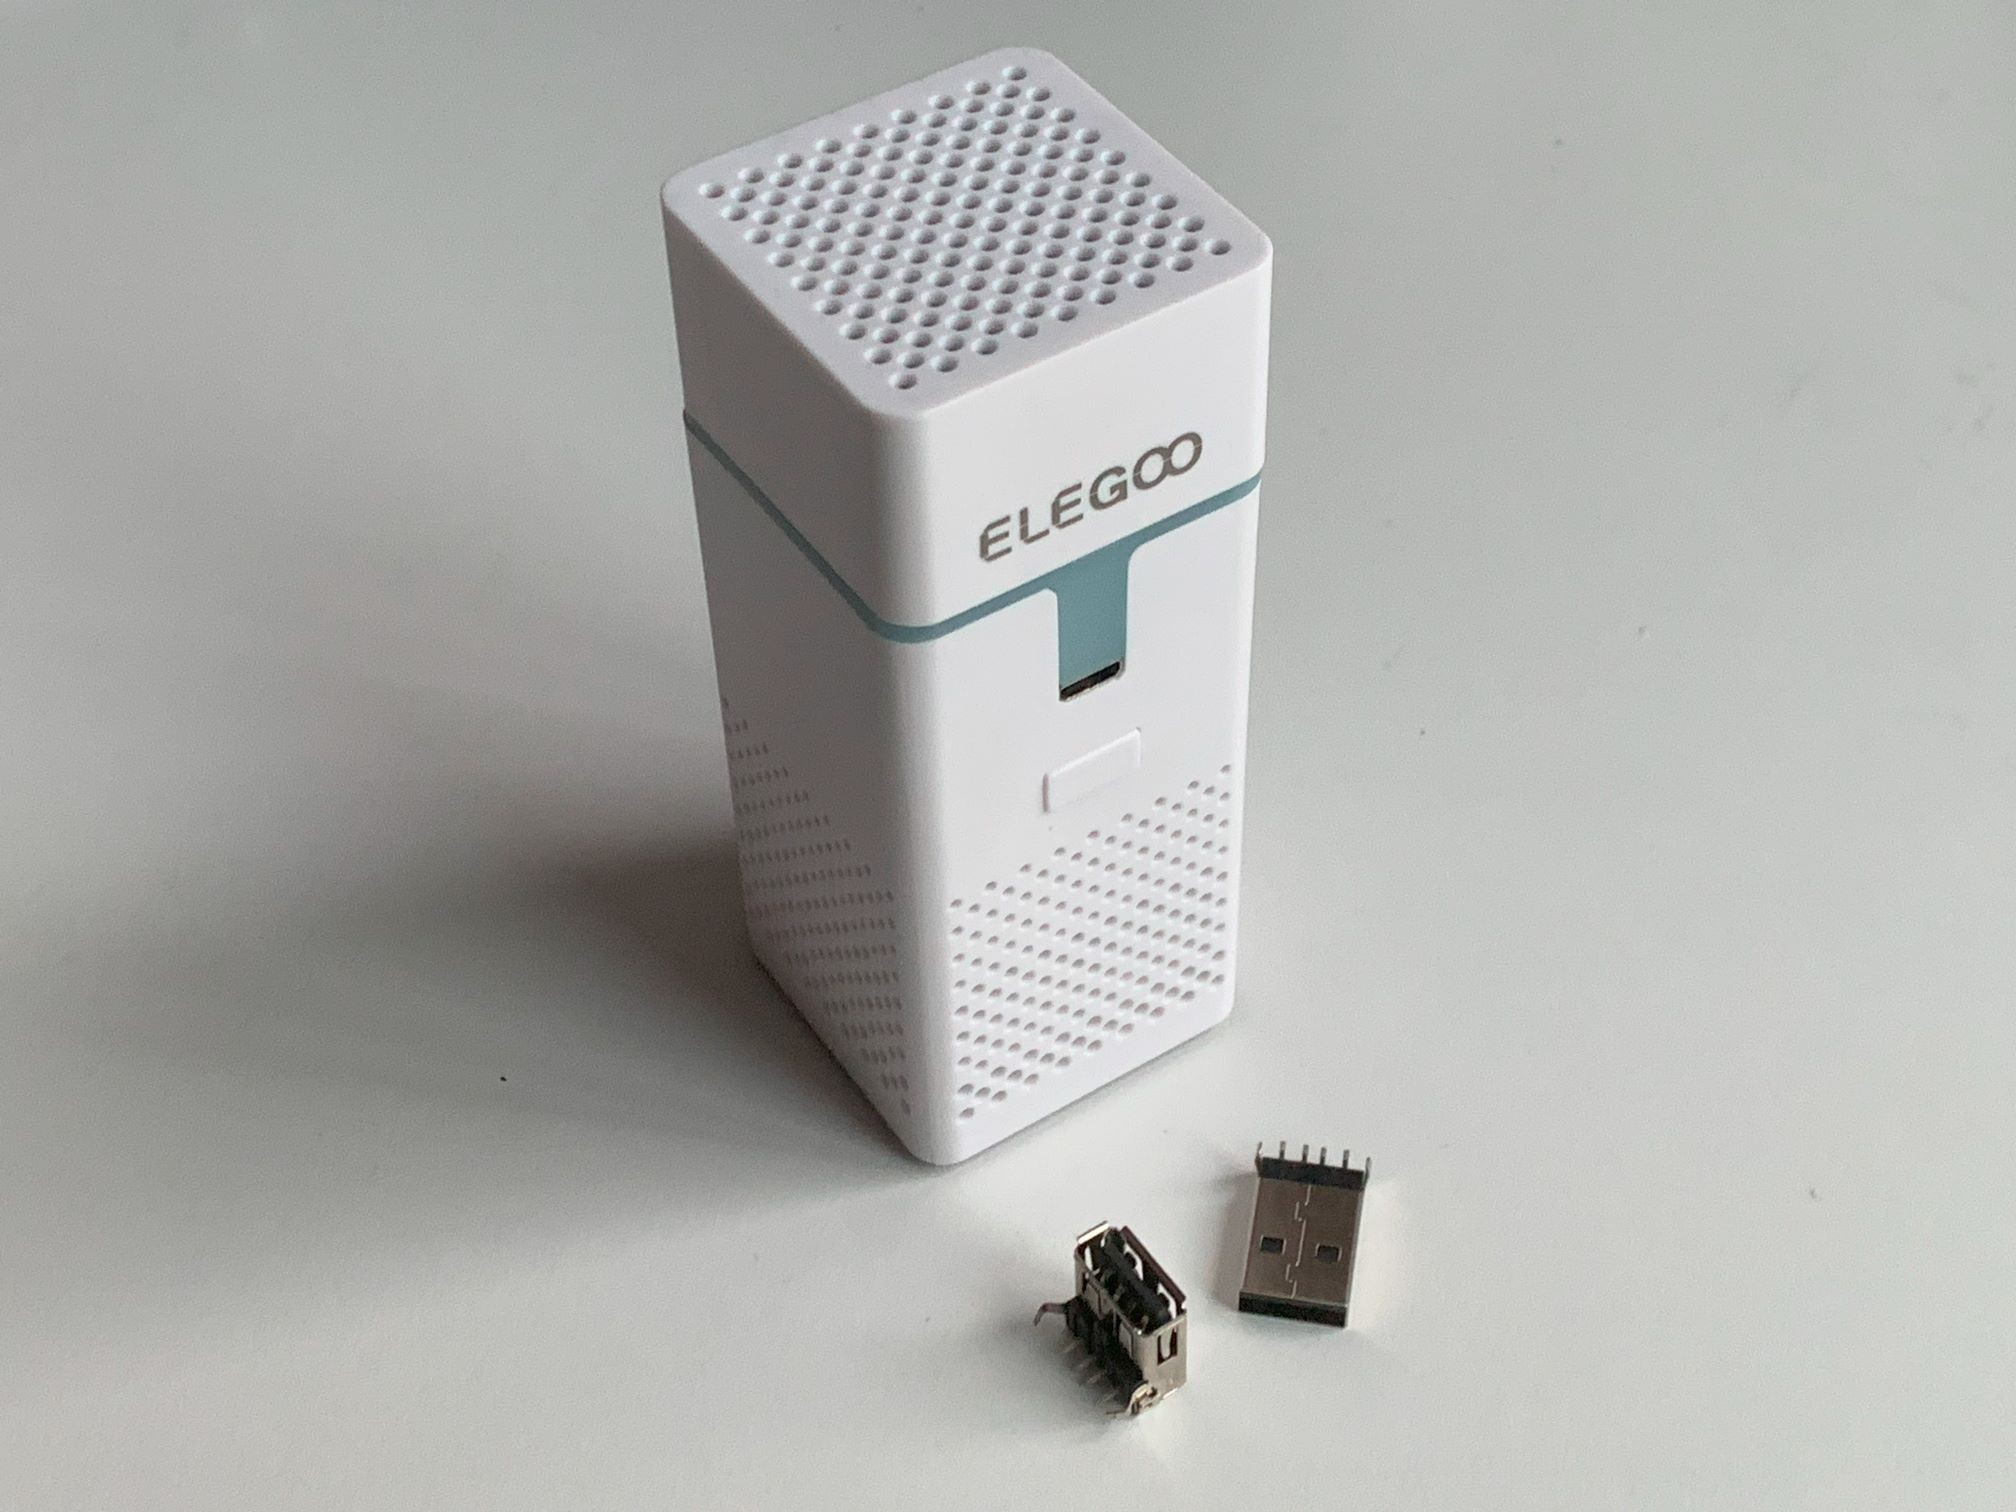
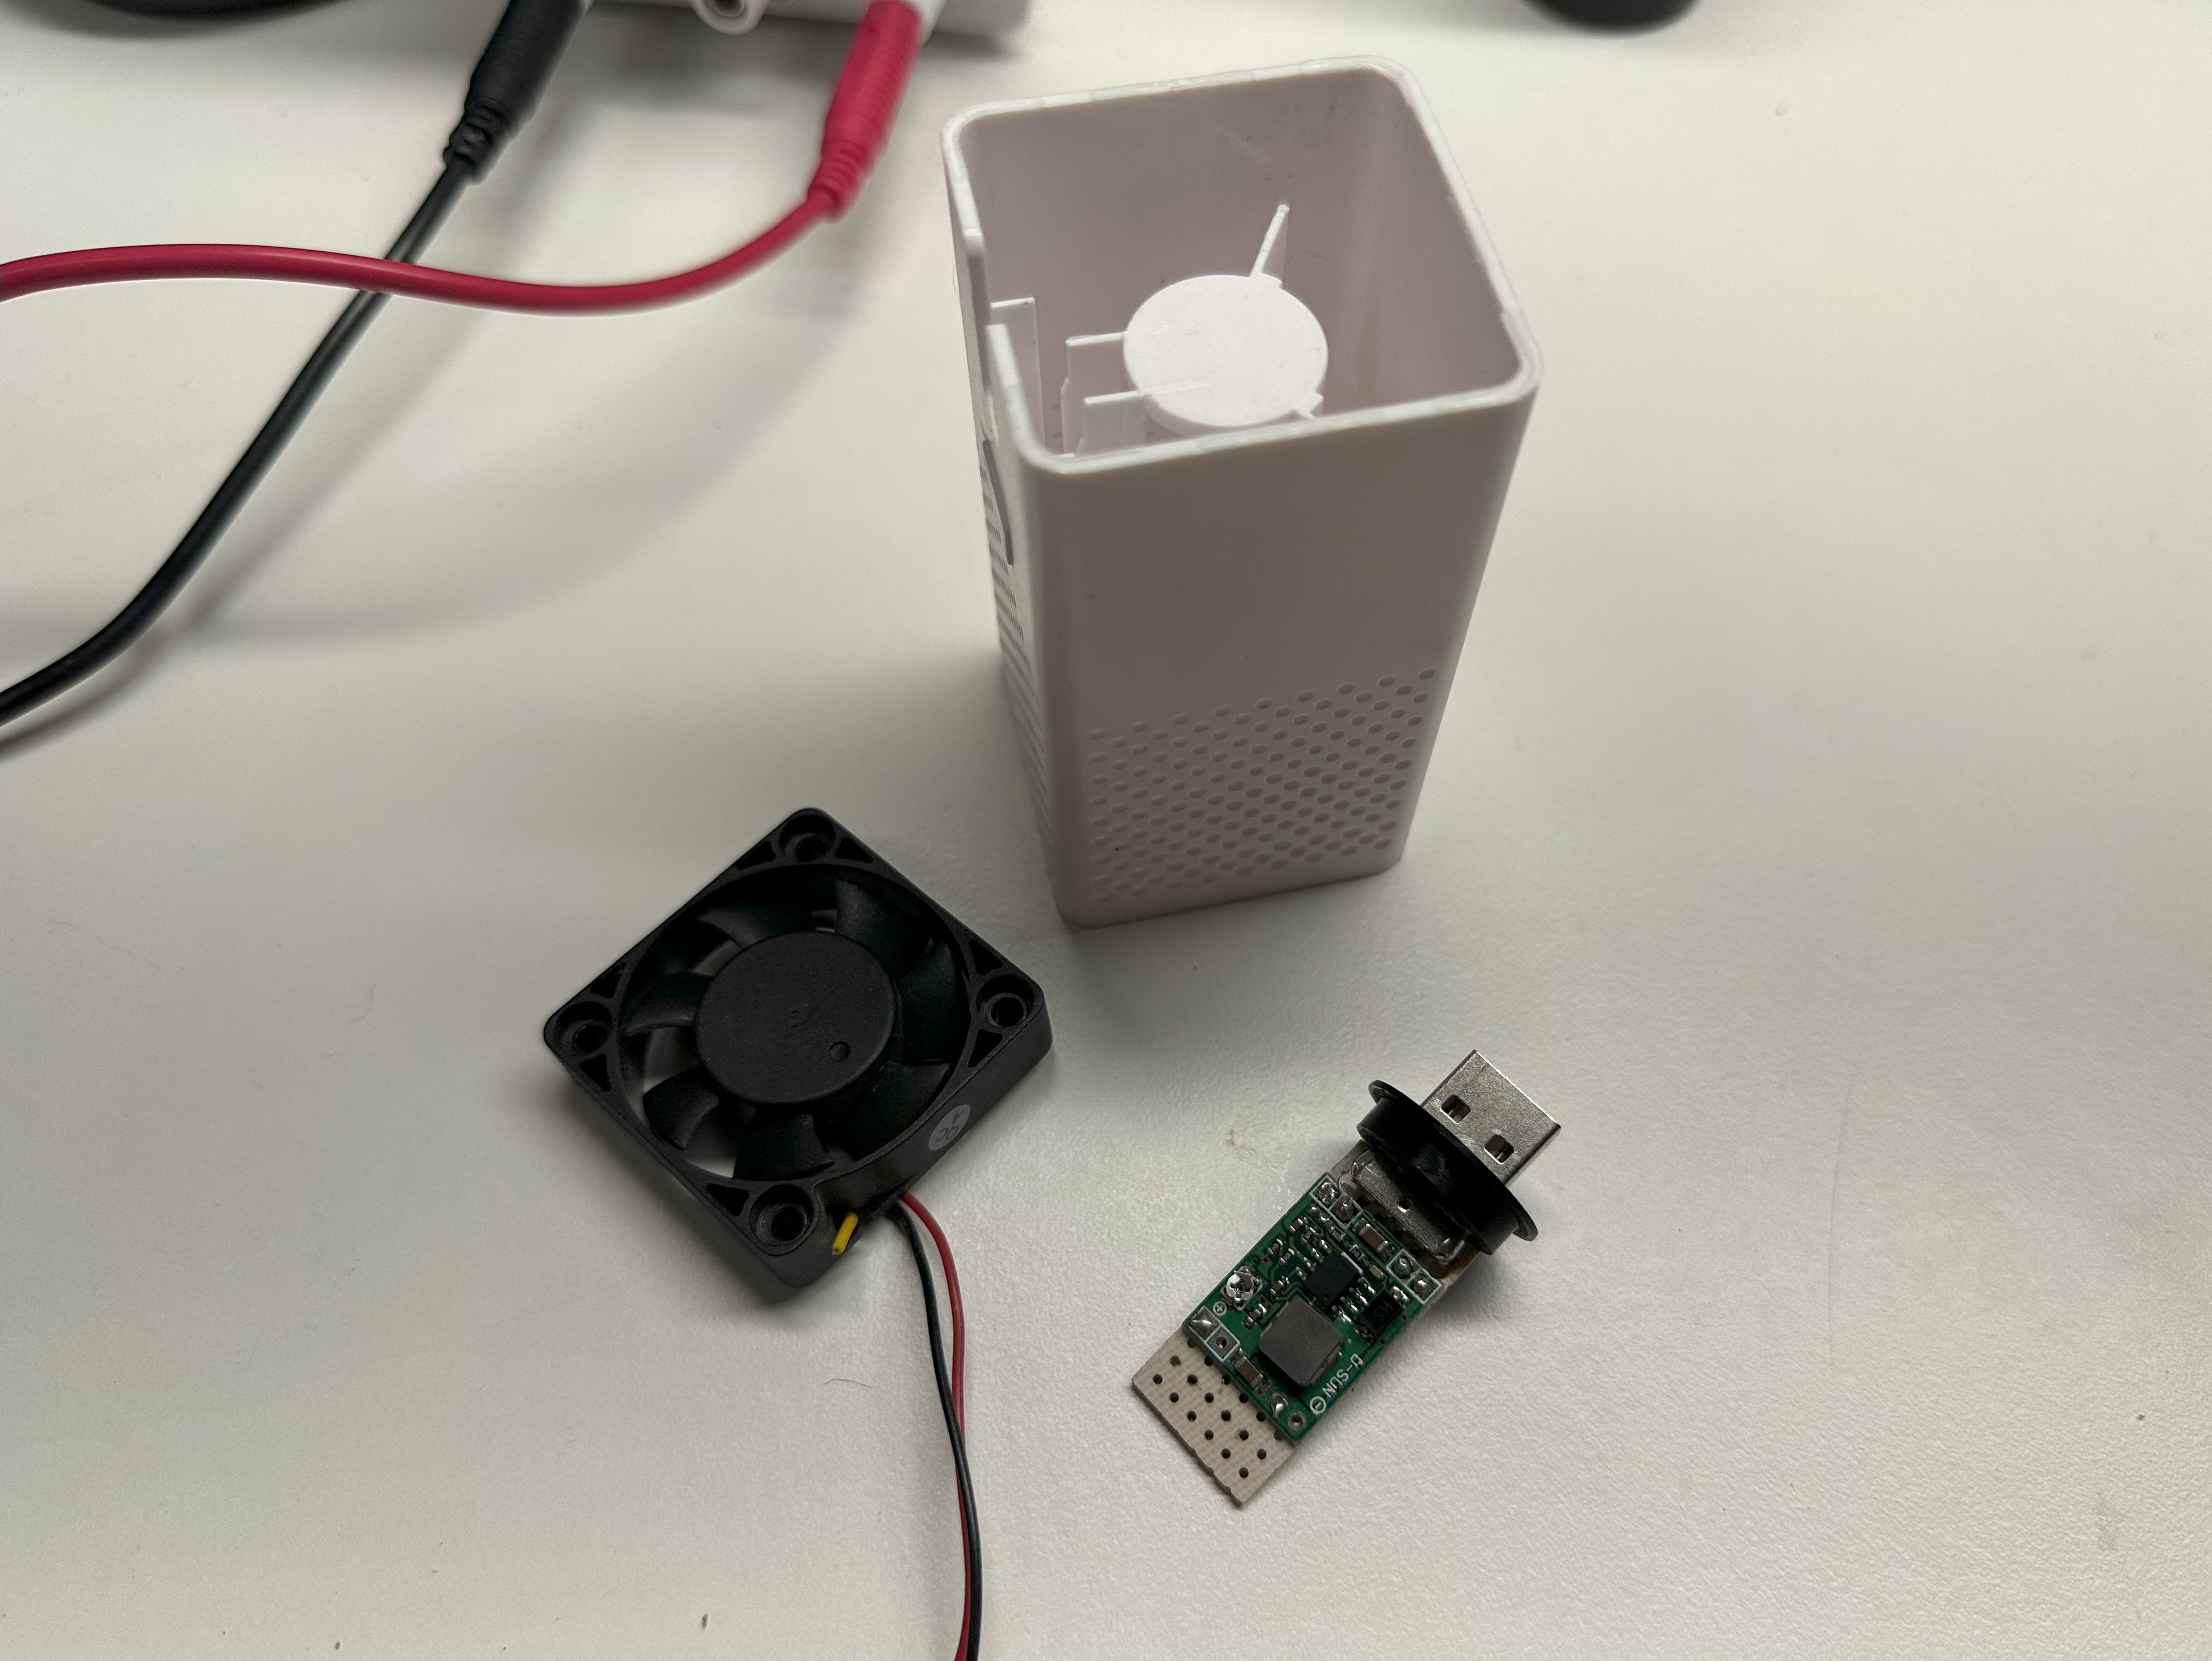
Powered Filter
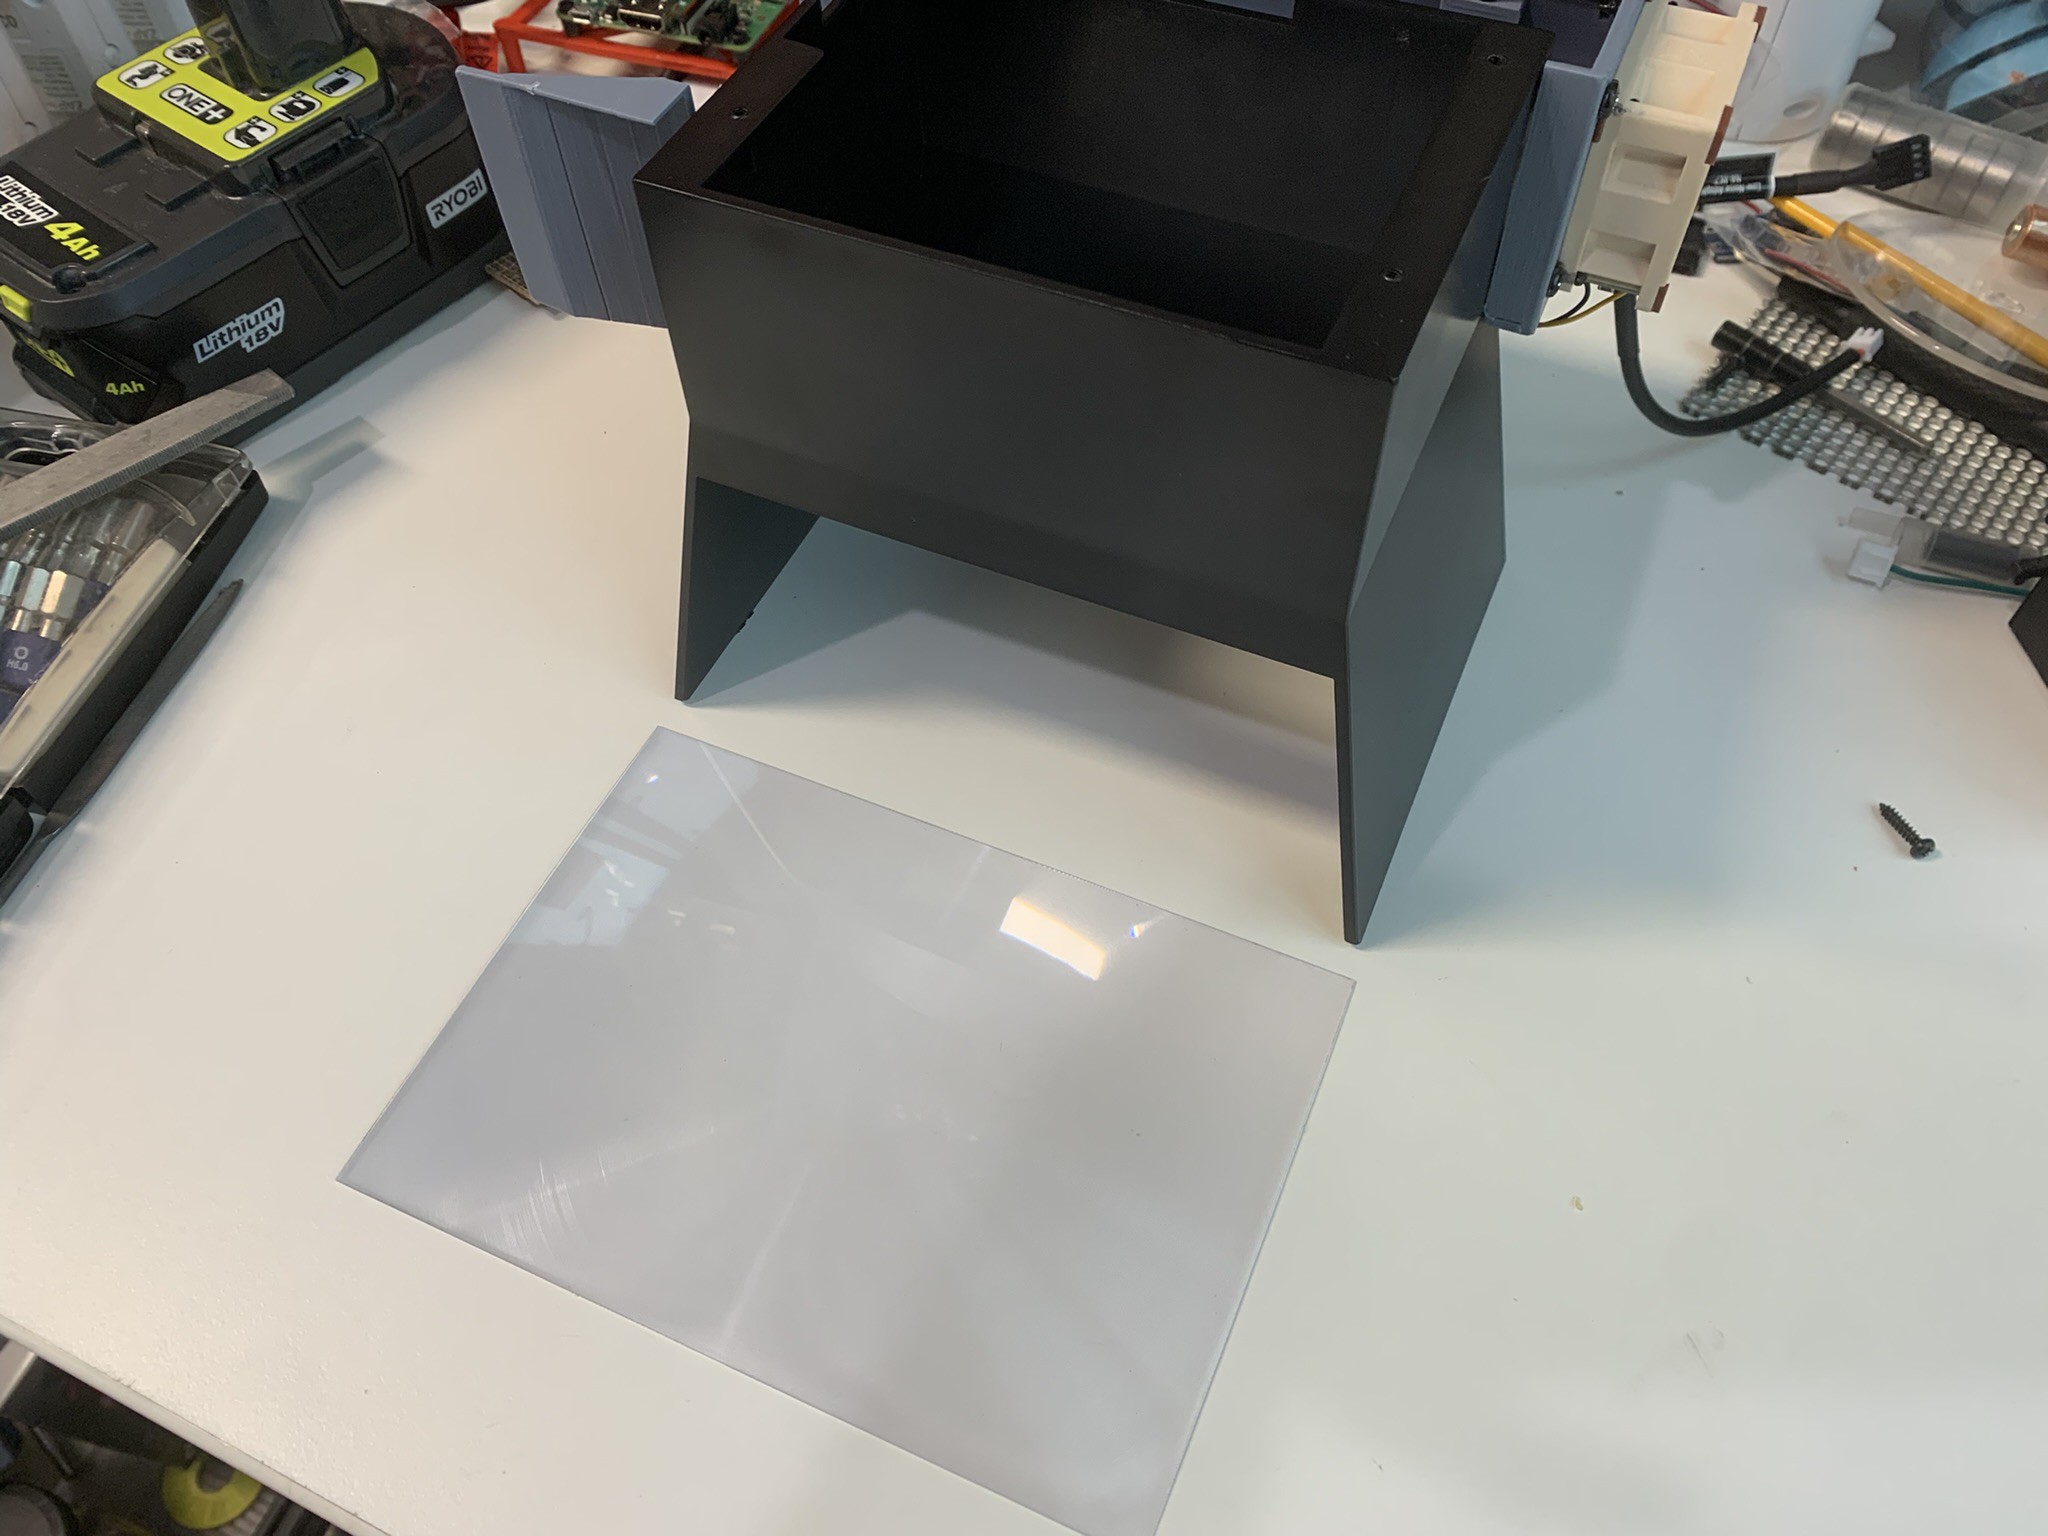
![]()
Parts needed.
- DC-DC buck converter. (24V to 3.3V/12V)
- USB 2.0 A port
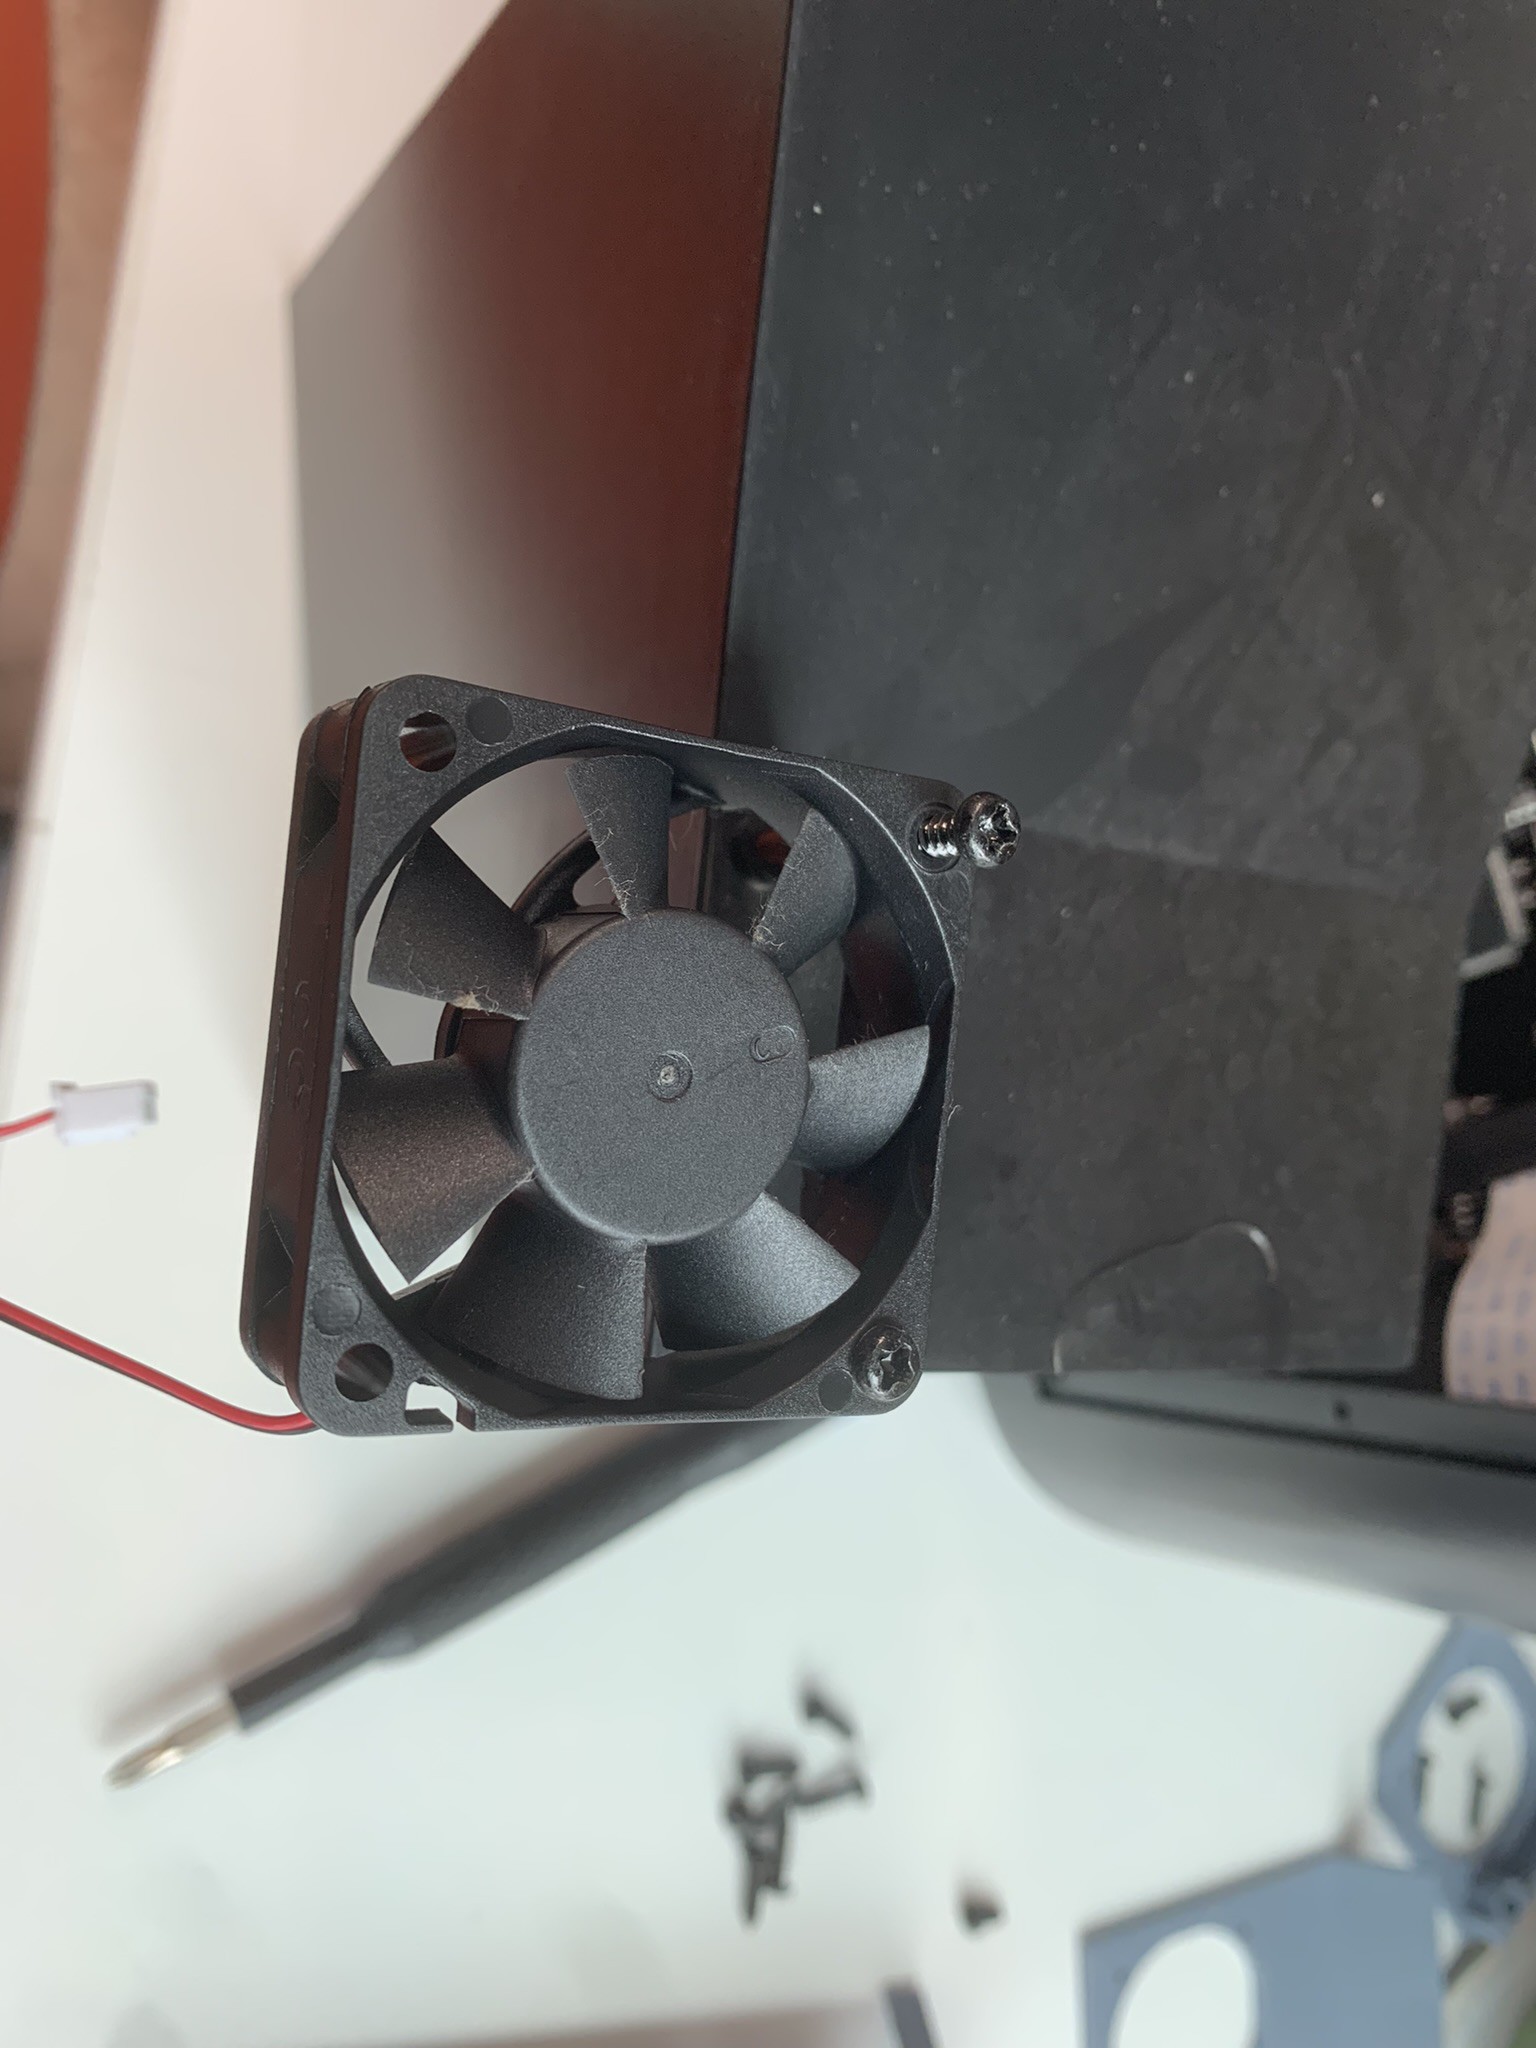
- Stock 40x40 filter fan (3.3v) or "upgrade" to a 40x40 12v fan
The gist of it is that you need to disassemble the filter, remove the battery and charging circuit and replace it with a buck converter and USB port. I created a little 3D printed adapter that holds the USB port in place that screws on the bottom of the filter. Connect everything with wire and you are done. You can upgrade the fan from 3.25v stock to 12v if you have one lying around for extra airflow? more noise? I guess. Don't forget to regulate the DC-DC converter to the appropriate voltage. Go a little less Volts if you want quieter operation.
![]()
Powered Port
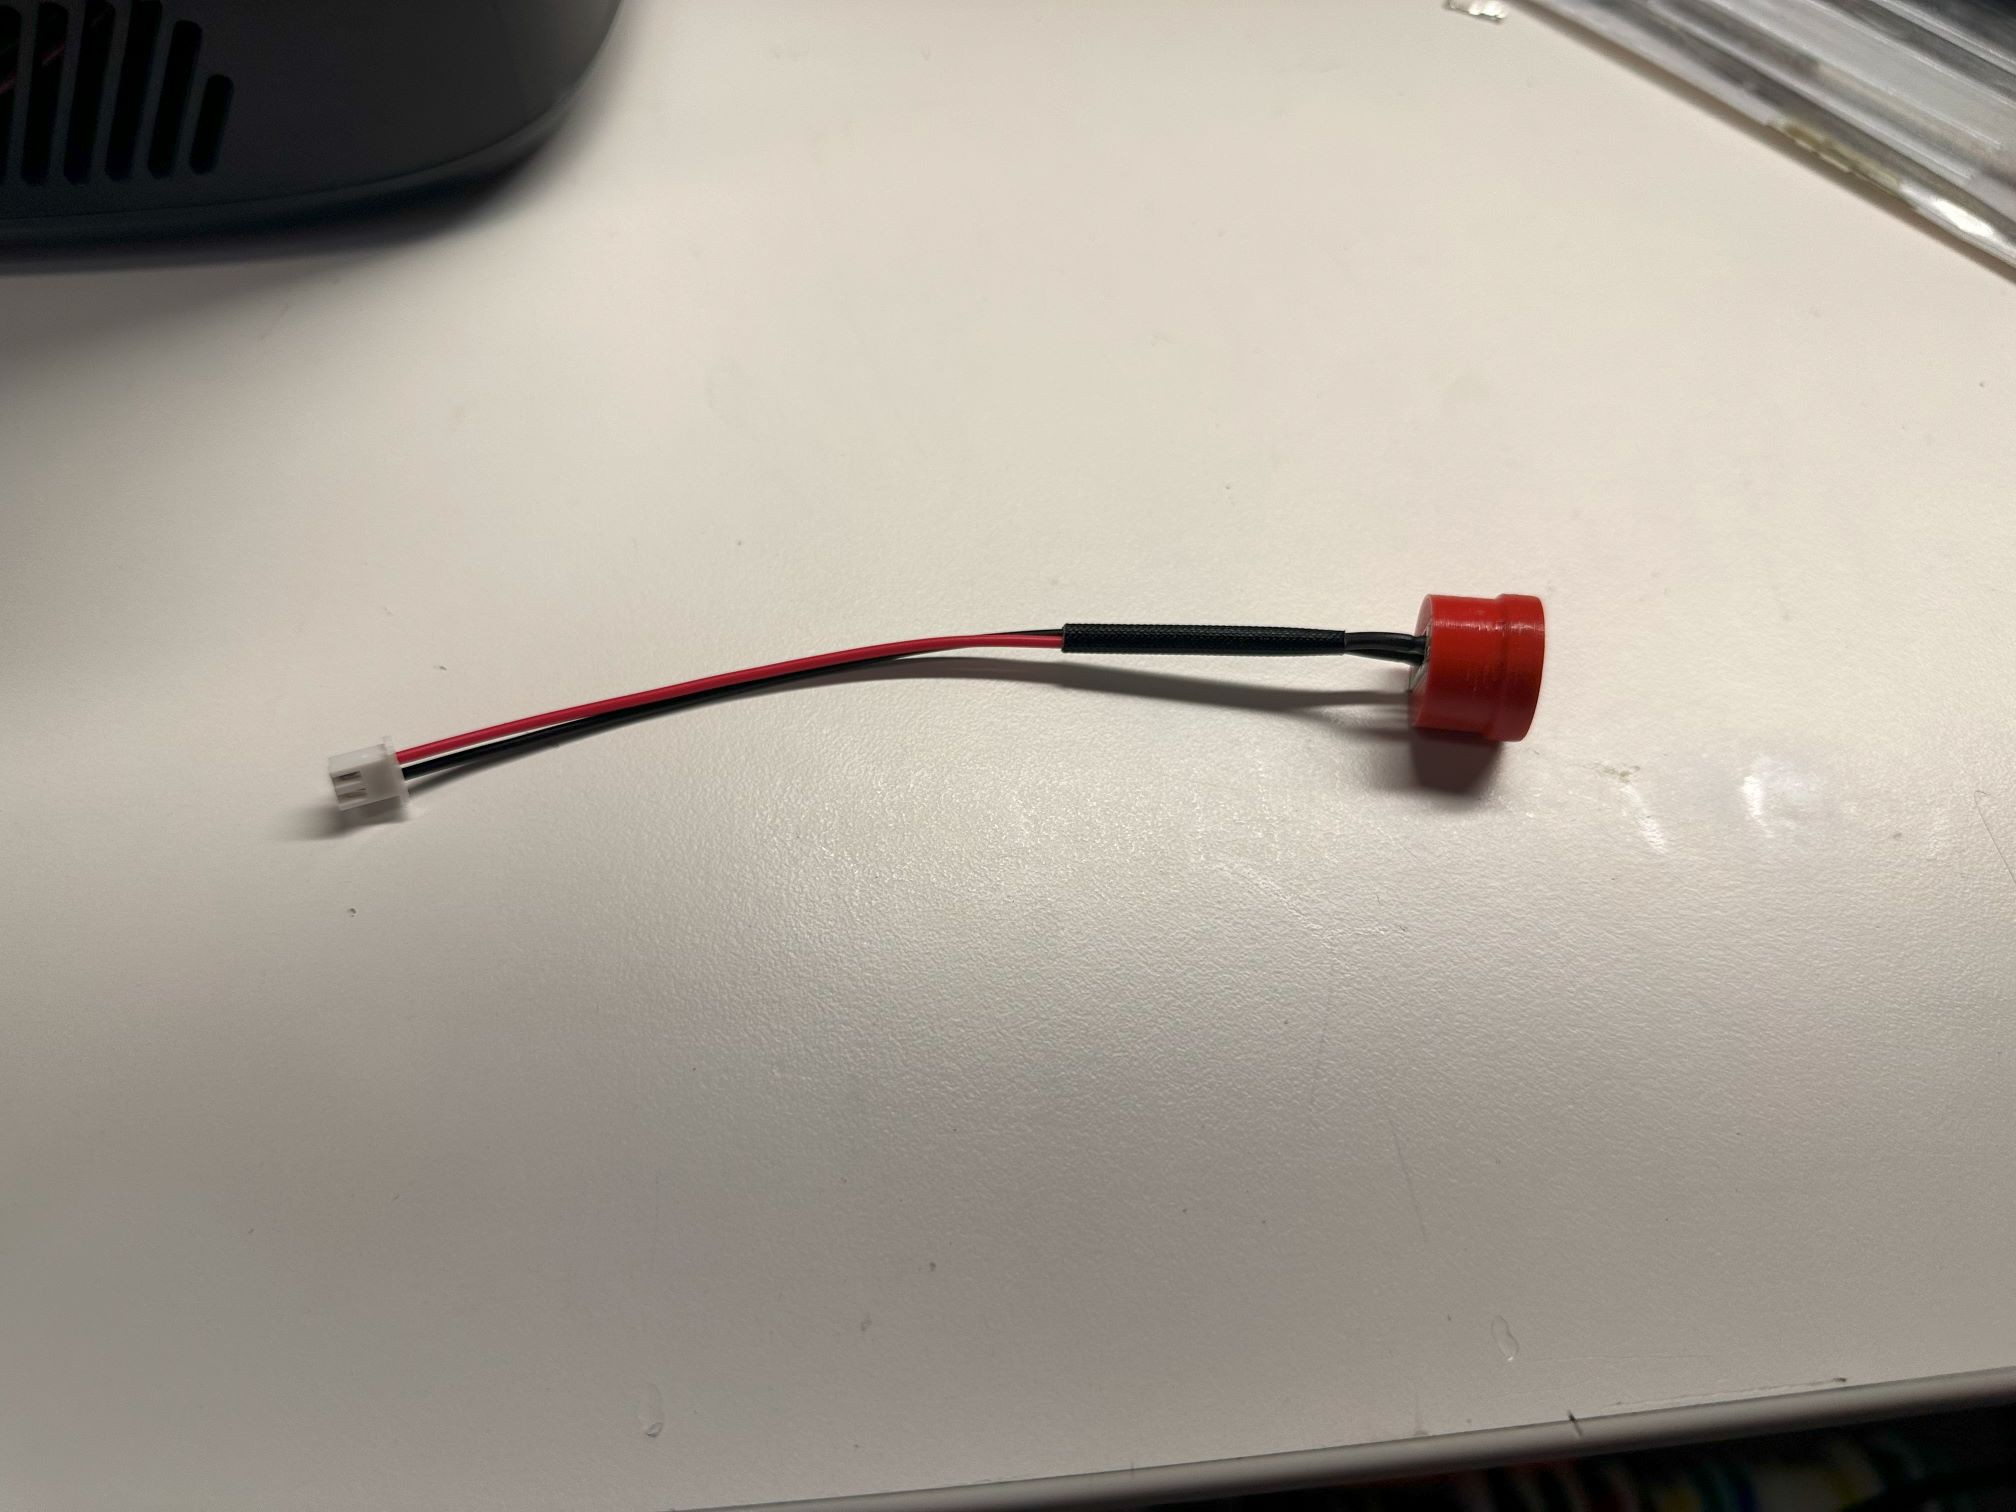
Parts needed:
- Drill
- Stepped Drill bit all the way to 3/4"
- USB type B port
- Male JST 2.54mm 2-pin connector
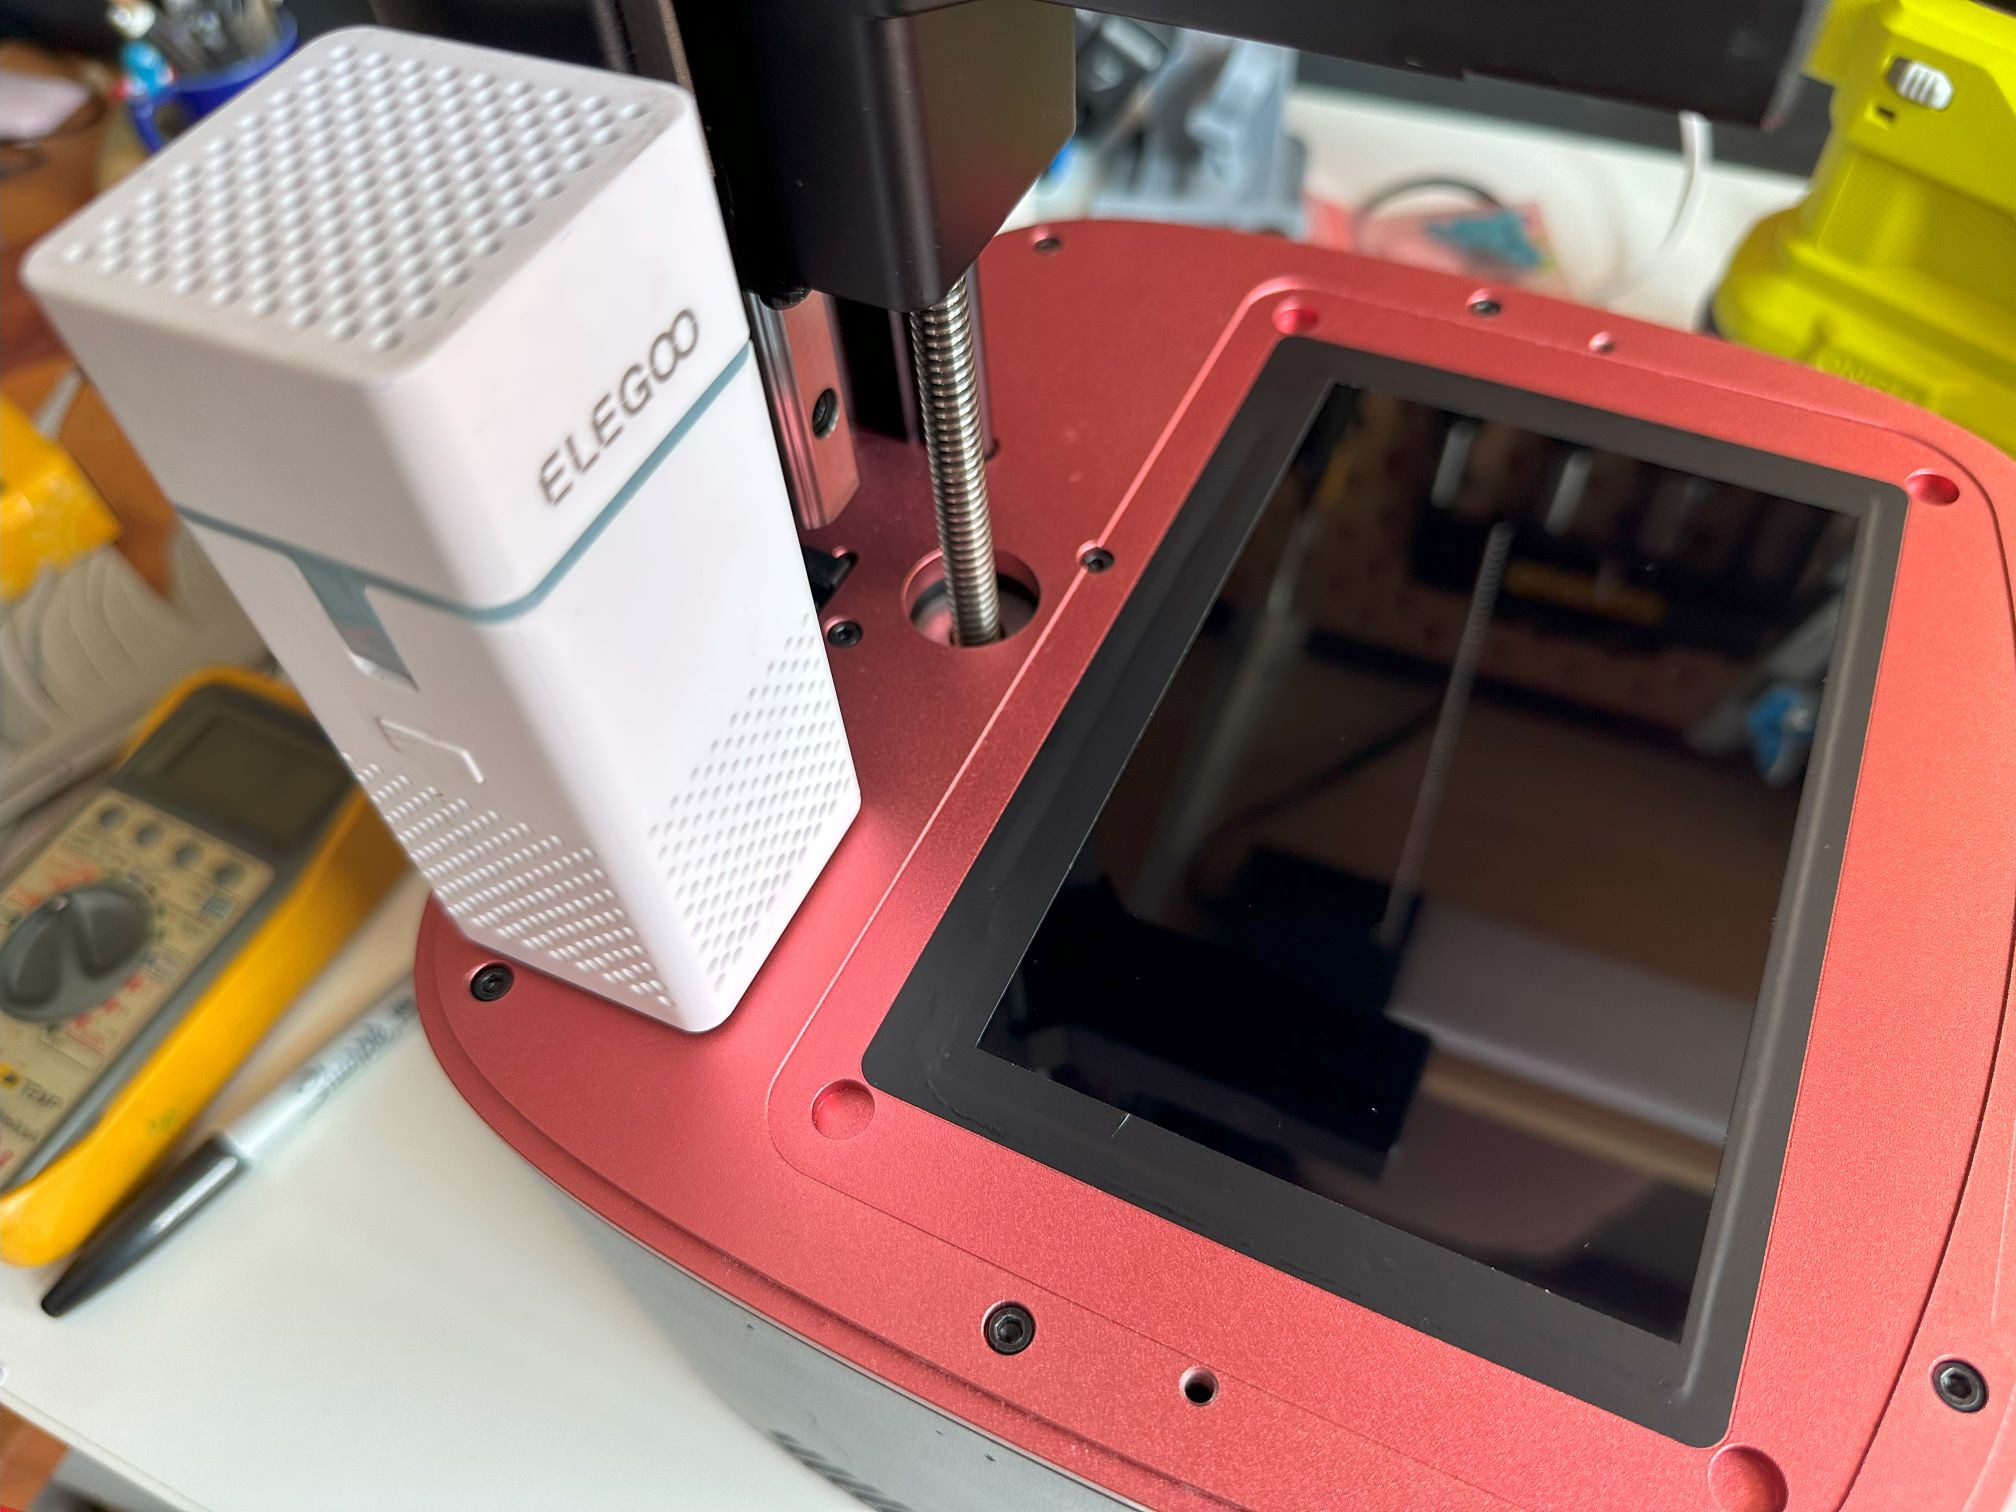
- Elegoo Air Filter USB powered.
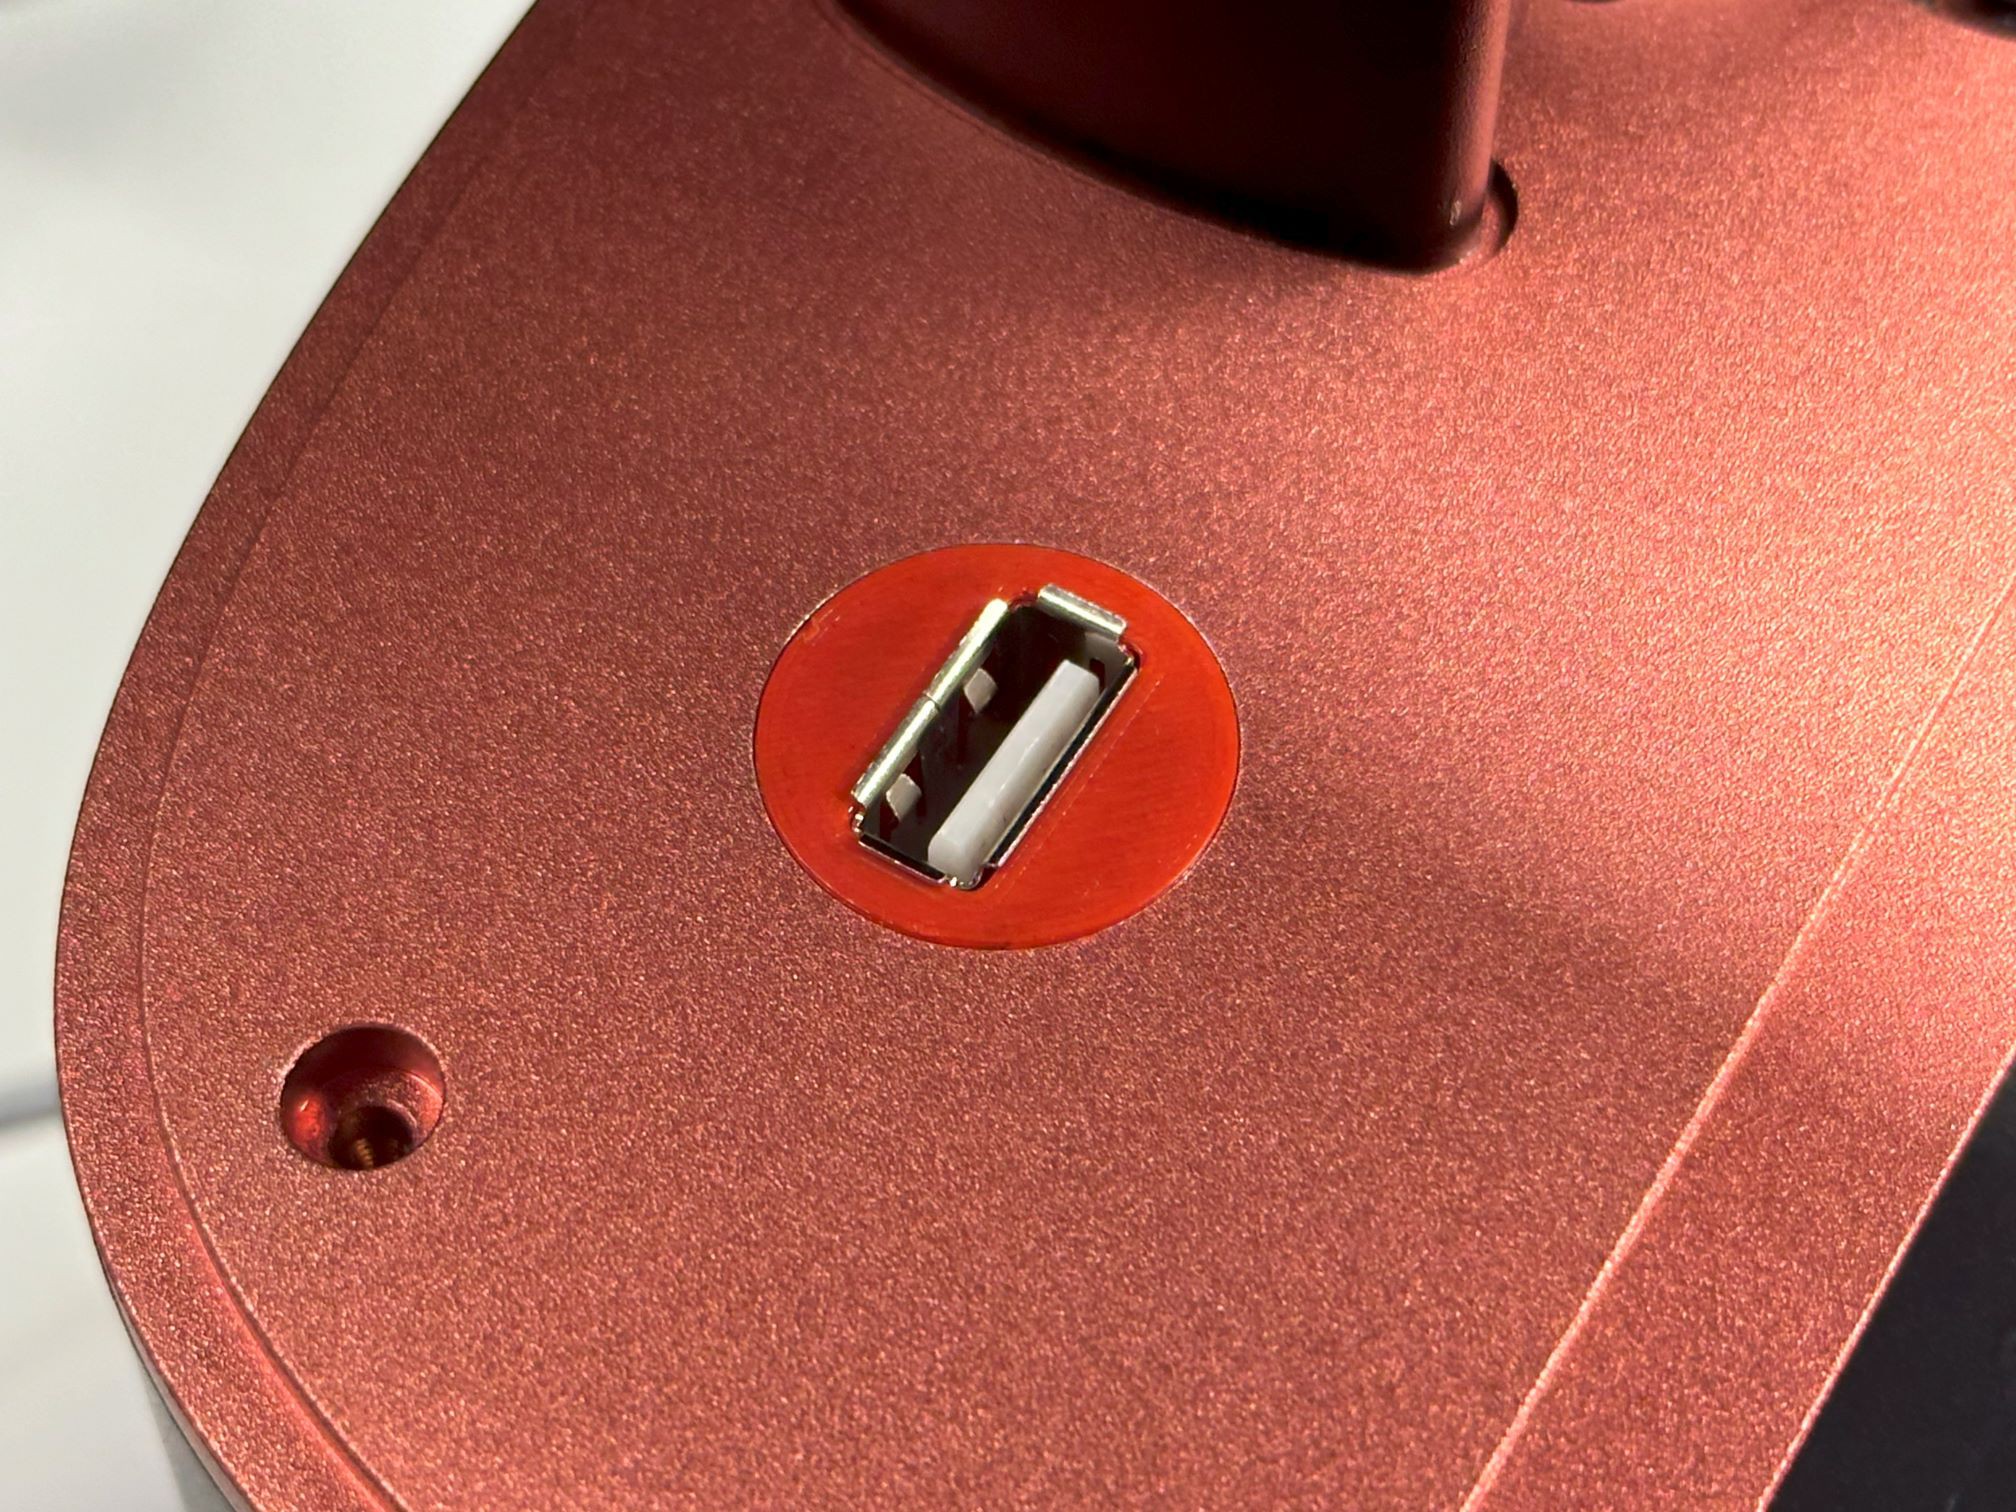
Onto the scary part. Now we need to make a hole on top of the chassis to house our USB 2.0 B port. For this part you can disassemble your printer or not. Work as you feel more comfortable. I did everything in place taking care of covering stuff to avoid accidents.
- Cover things with masking tape, protect the LCD in case something goes wrong. Open the back of the printer and cover motherboard with something to catch the shavings. Mark the general location of the filter. Make sure you account for the printer tray and the printer cover while marking the location.
![]()
- Use the step drill bit to drill a hole. I happened to have one that would go to all the way to 3/4 in. This was enough diameter to hold the USB port in place. I decided not to go all the way through the last step. That created a small "lip" inside the hole that will create a mechanical support for the USB adapter and prevent it from going all the way through in case it is pushed from the top too hard. I let the last step go into the chassis around 4mm before stopping.
![]()
- 3D Print the adapter to hold the USB B port. Wire it with around 20 cm of wire, terminate with a 2 Pin 2.54mm JST connector.
![]()
- Insert the adapter in the hole. Marvel at the power of 3D Printing. Such precision.
![]()
- Connect the adapter to the MB Fan connector in the motherboard. Set the printer settings to turn on the MB fan while printing. I go over this in more detail during my 01: Fan Service mod. This will provide 24V to the air filter every time you print something.
;【风扇1控制】
M8030    I-2
;【风扇2控制】
M8030    T-2
- Plug in your air filter and enjoy the fresh air.
![]()
Conclusion
The beauty of this mod is that it can be done as easy or as hard as you want it. Whatever you decide, you hopefully will end up with a way to avoid the unpleasant smells that resin gives off. If you want extra purifying power, just do the same mod on the other side of the printer and wire it in parallel with the first one. More filtering, more doing... That's the power of the activated charcoal. lol
-
02: 8% shy of perfection (Fresnel Lens mod)
09/13/2022 at 03:42 • 0 comments![]()
Okay, the previous update wasn't so much about being "pro", after all the new Mars 3 Pro has the same fan... But!! you will feel this way was how this printer should have been from the start.
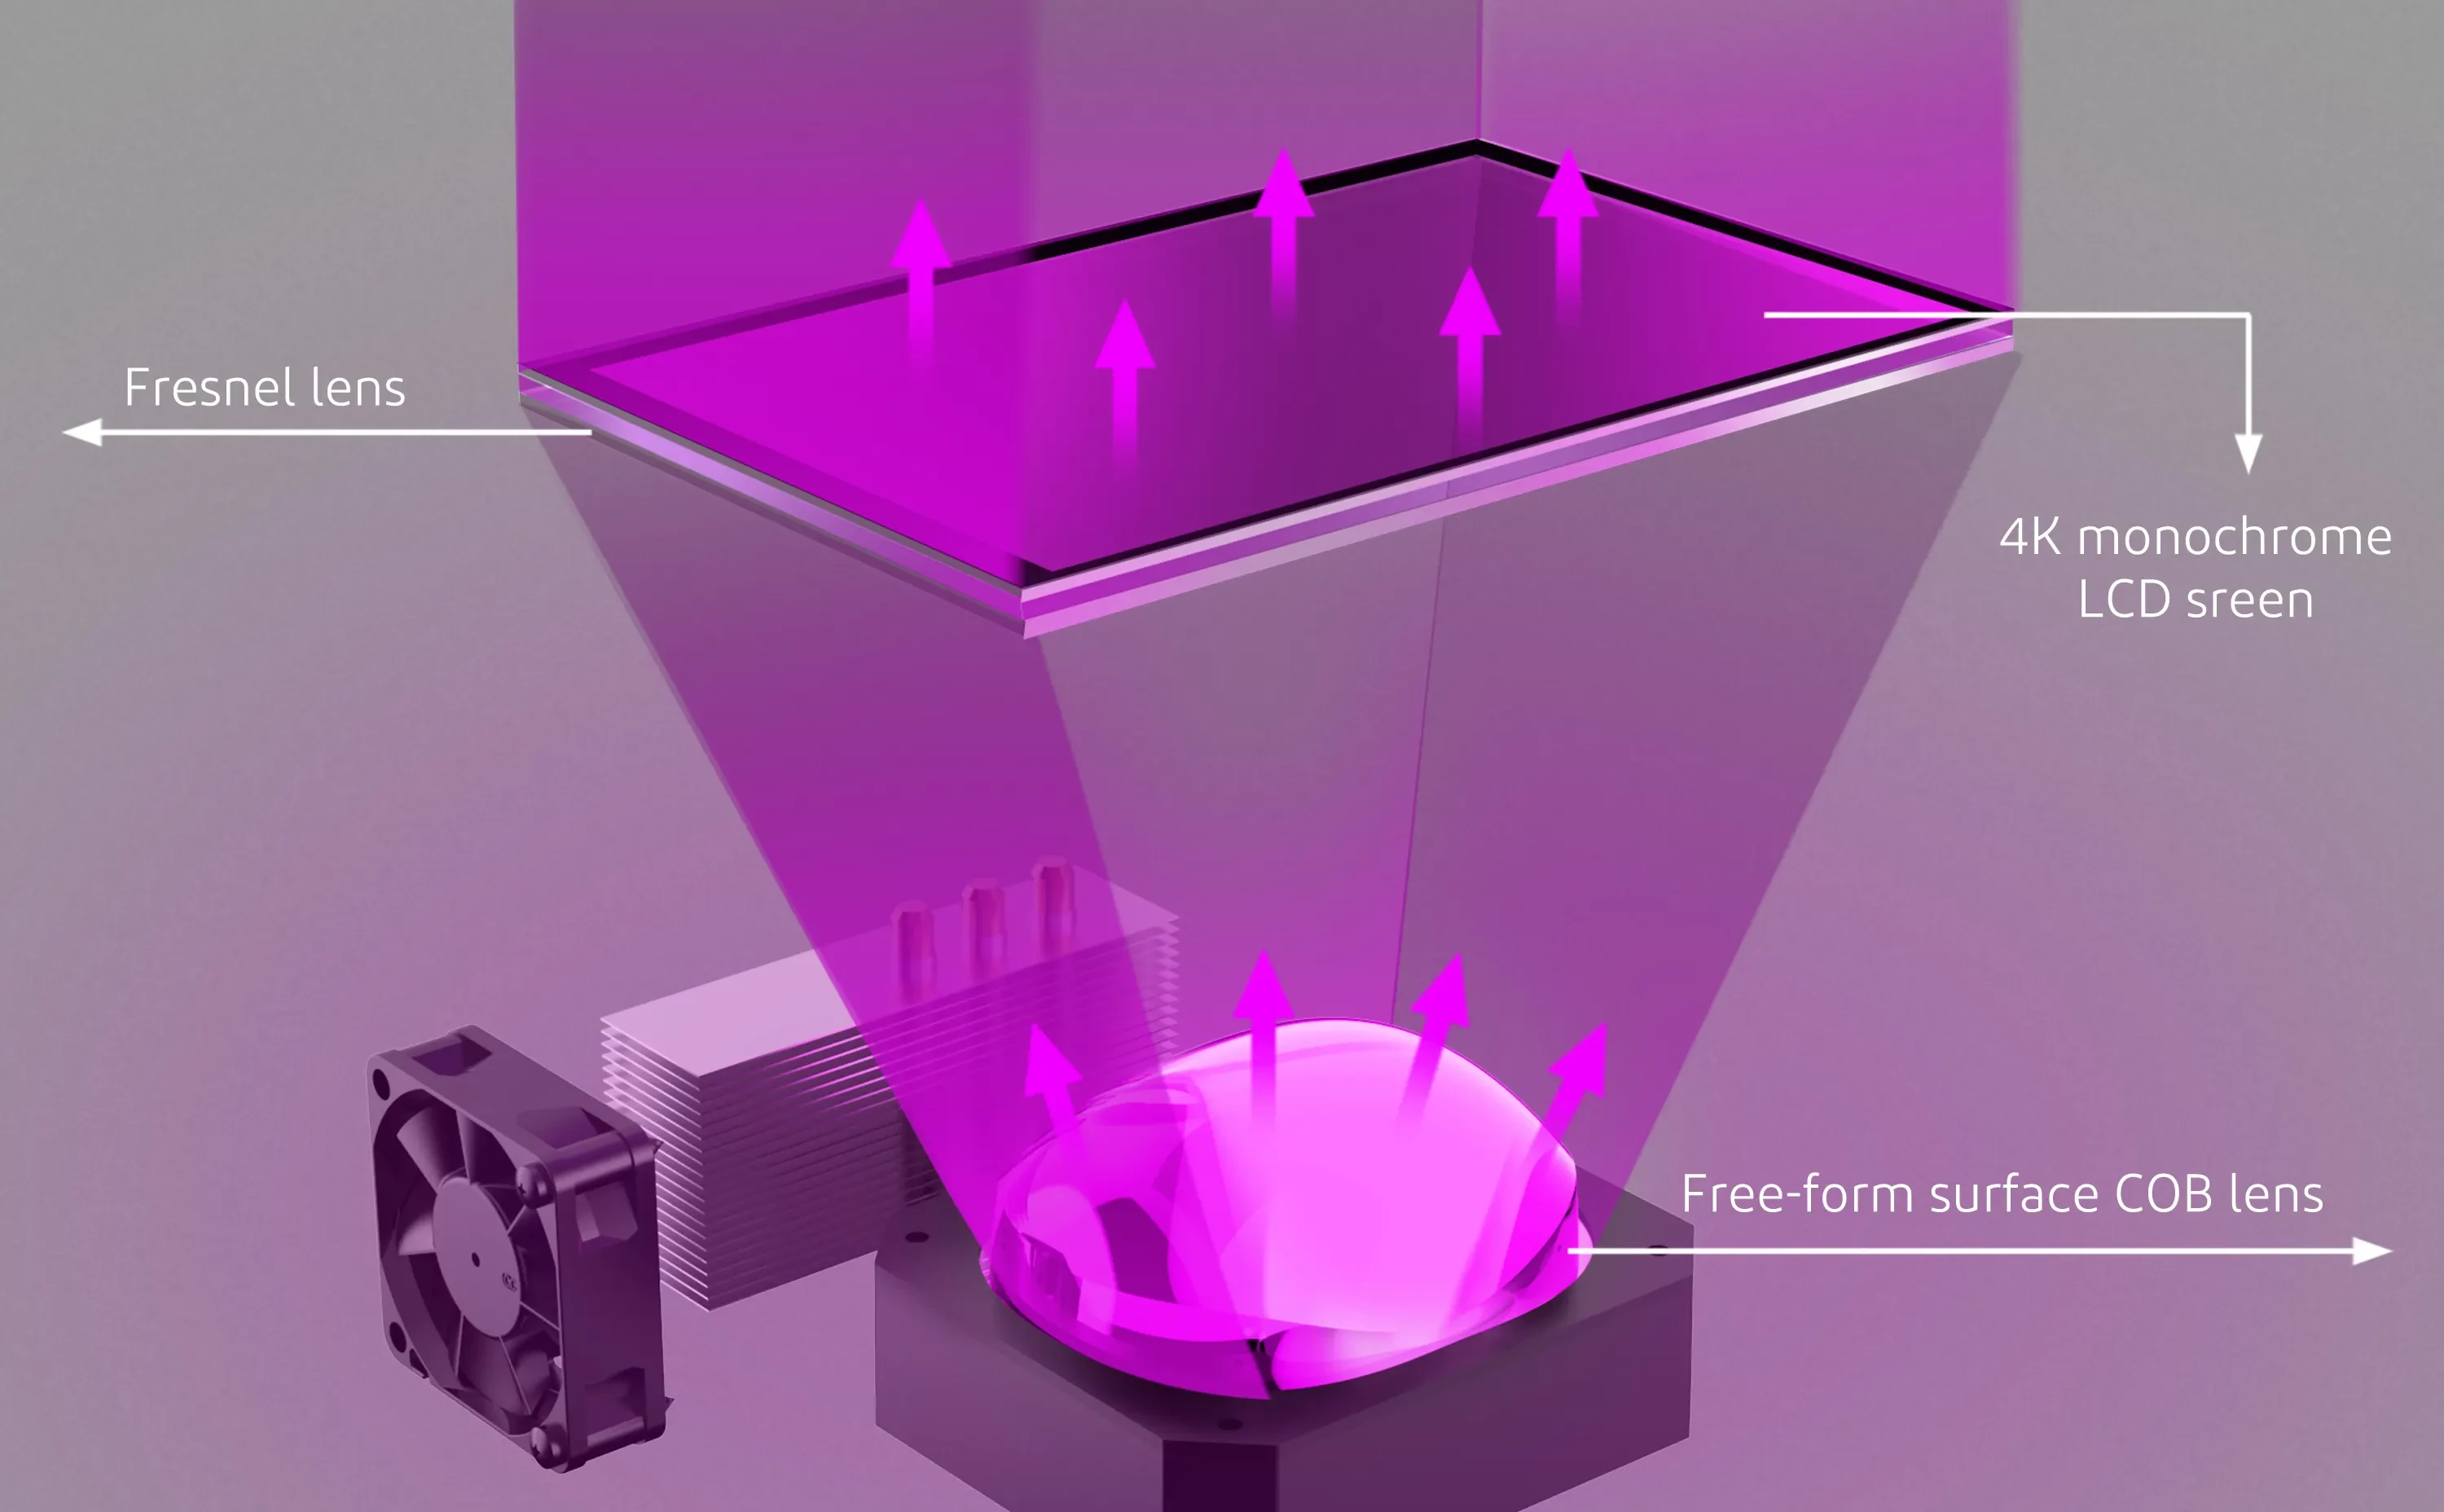
Back to being on topic. Next in the list is the so-called Fresnel lens that it's supposed to give more light uniformity, by bending the light rays to be parallel to each other instead of scattering all over the place.
For this mod, I believe I'm maybe 90% there. While the resullt appears to work fine, I think there is room for more improvement, which I Intend to go back to at some point in case things take a turn for the worse.
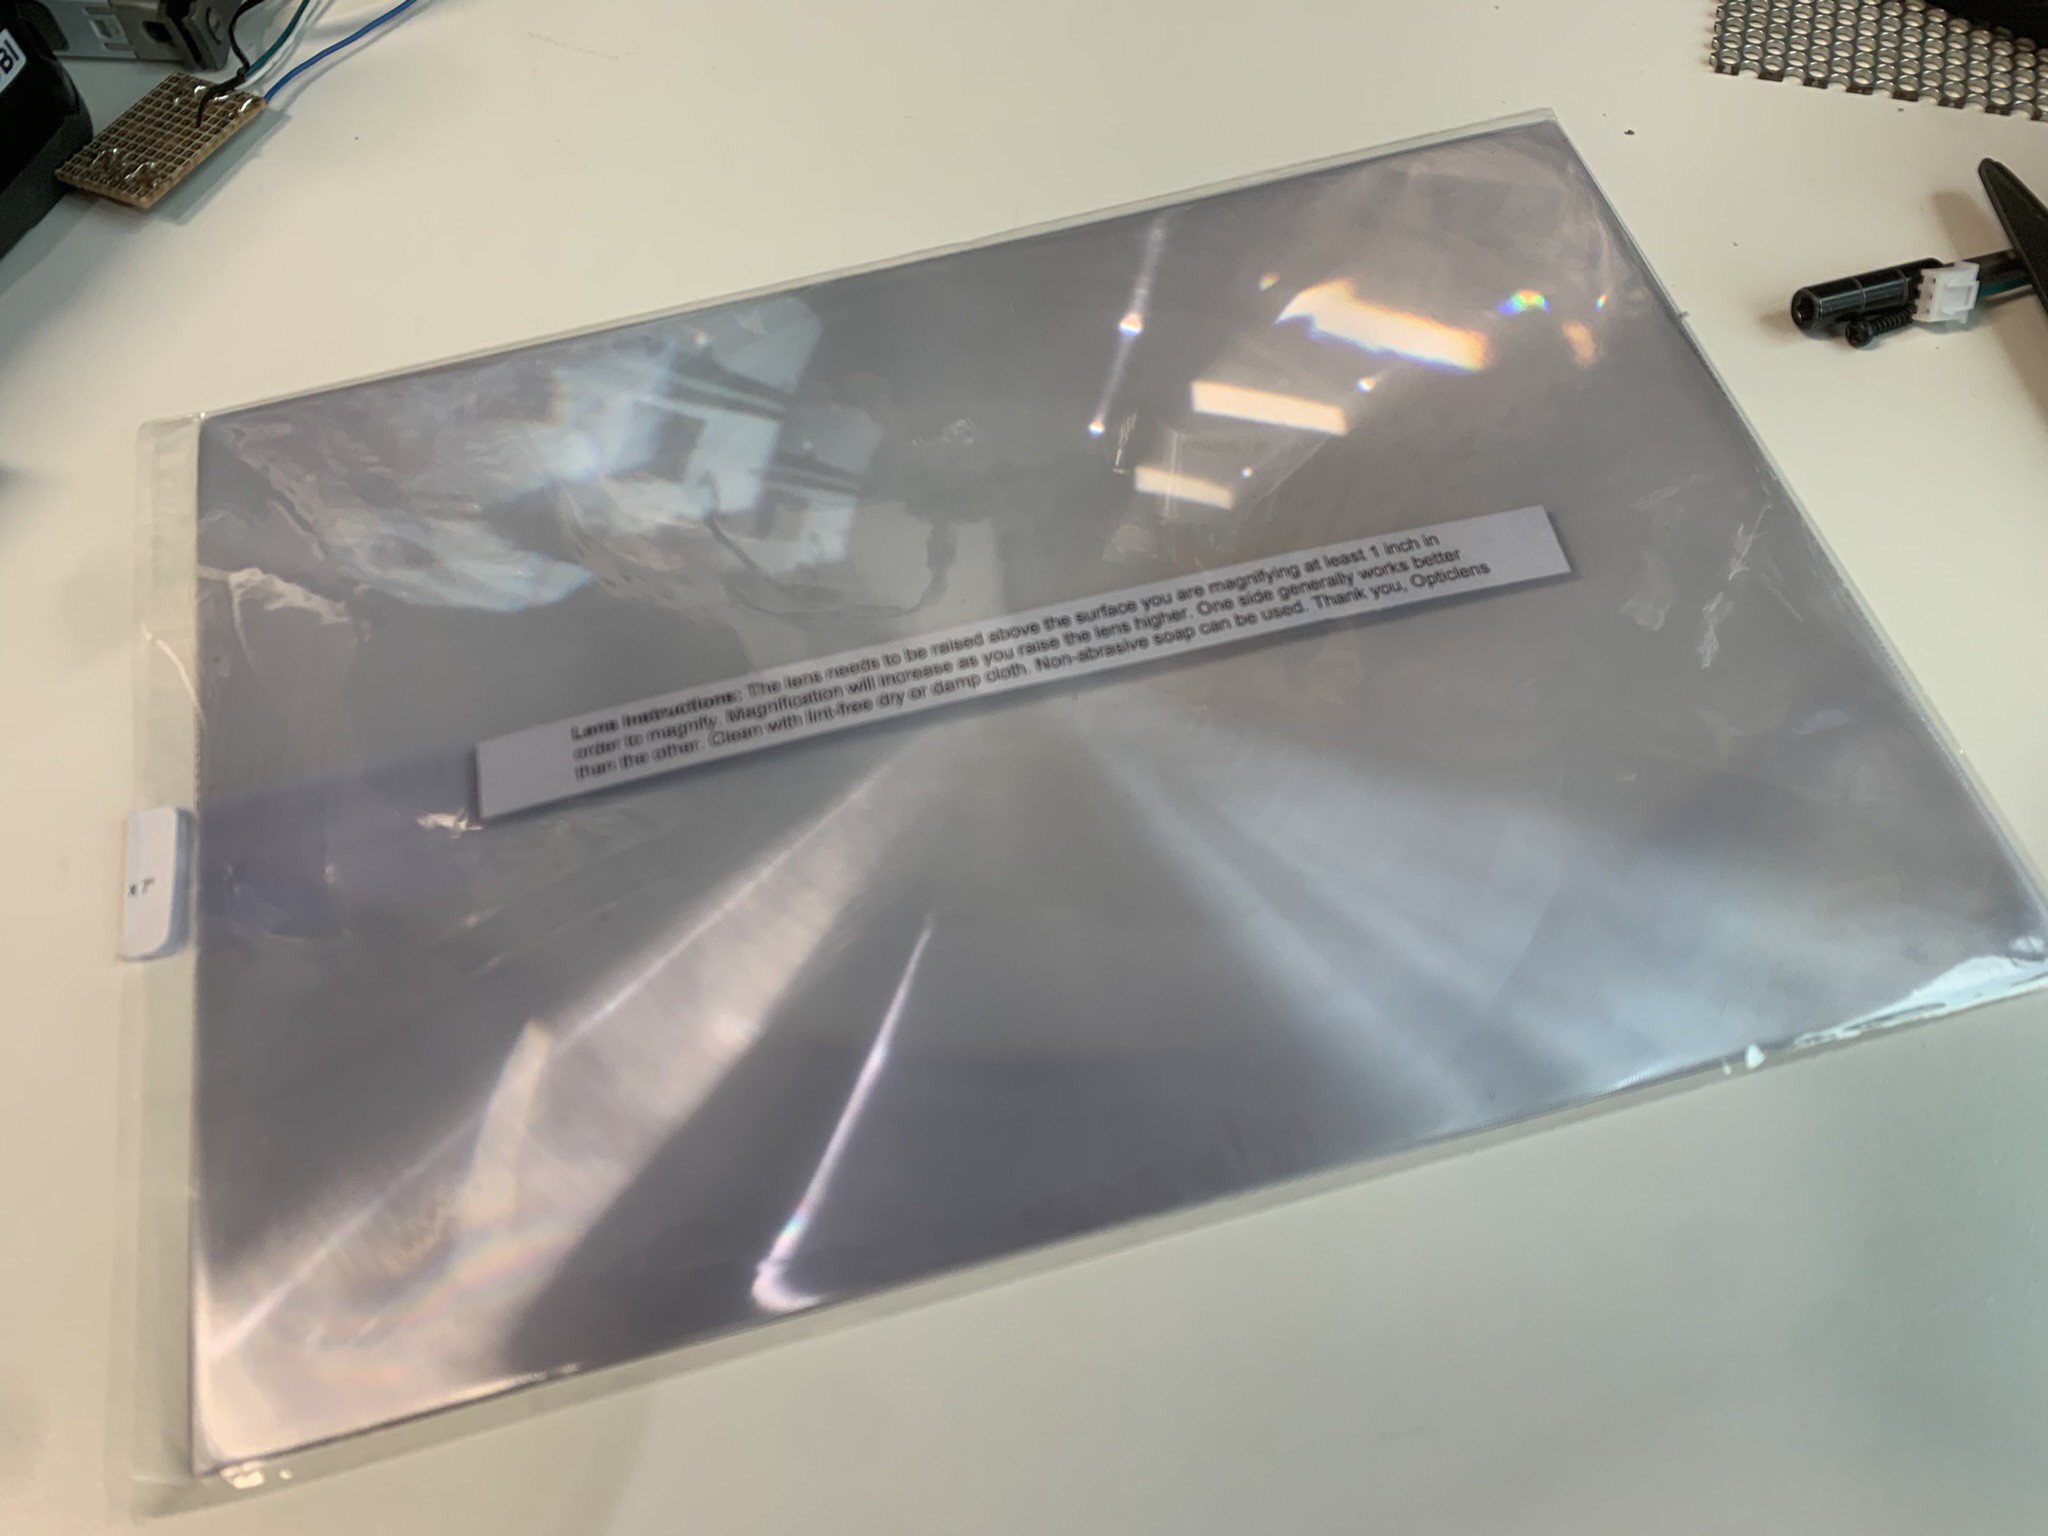
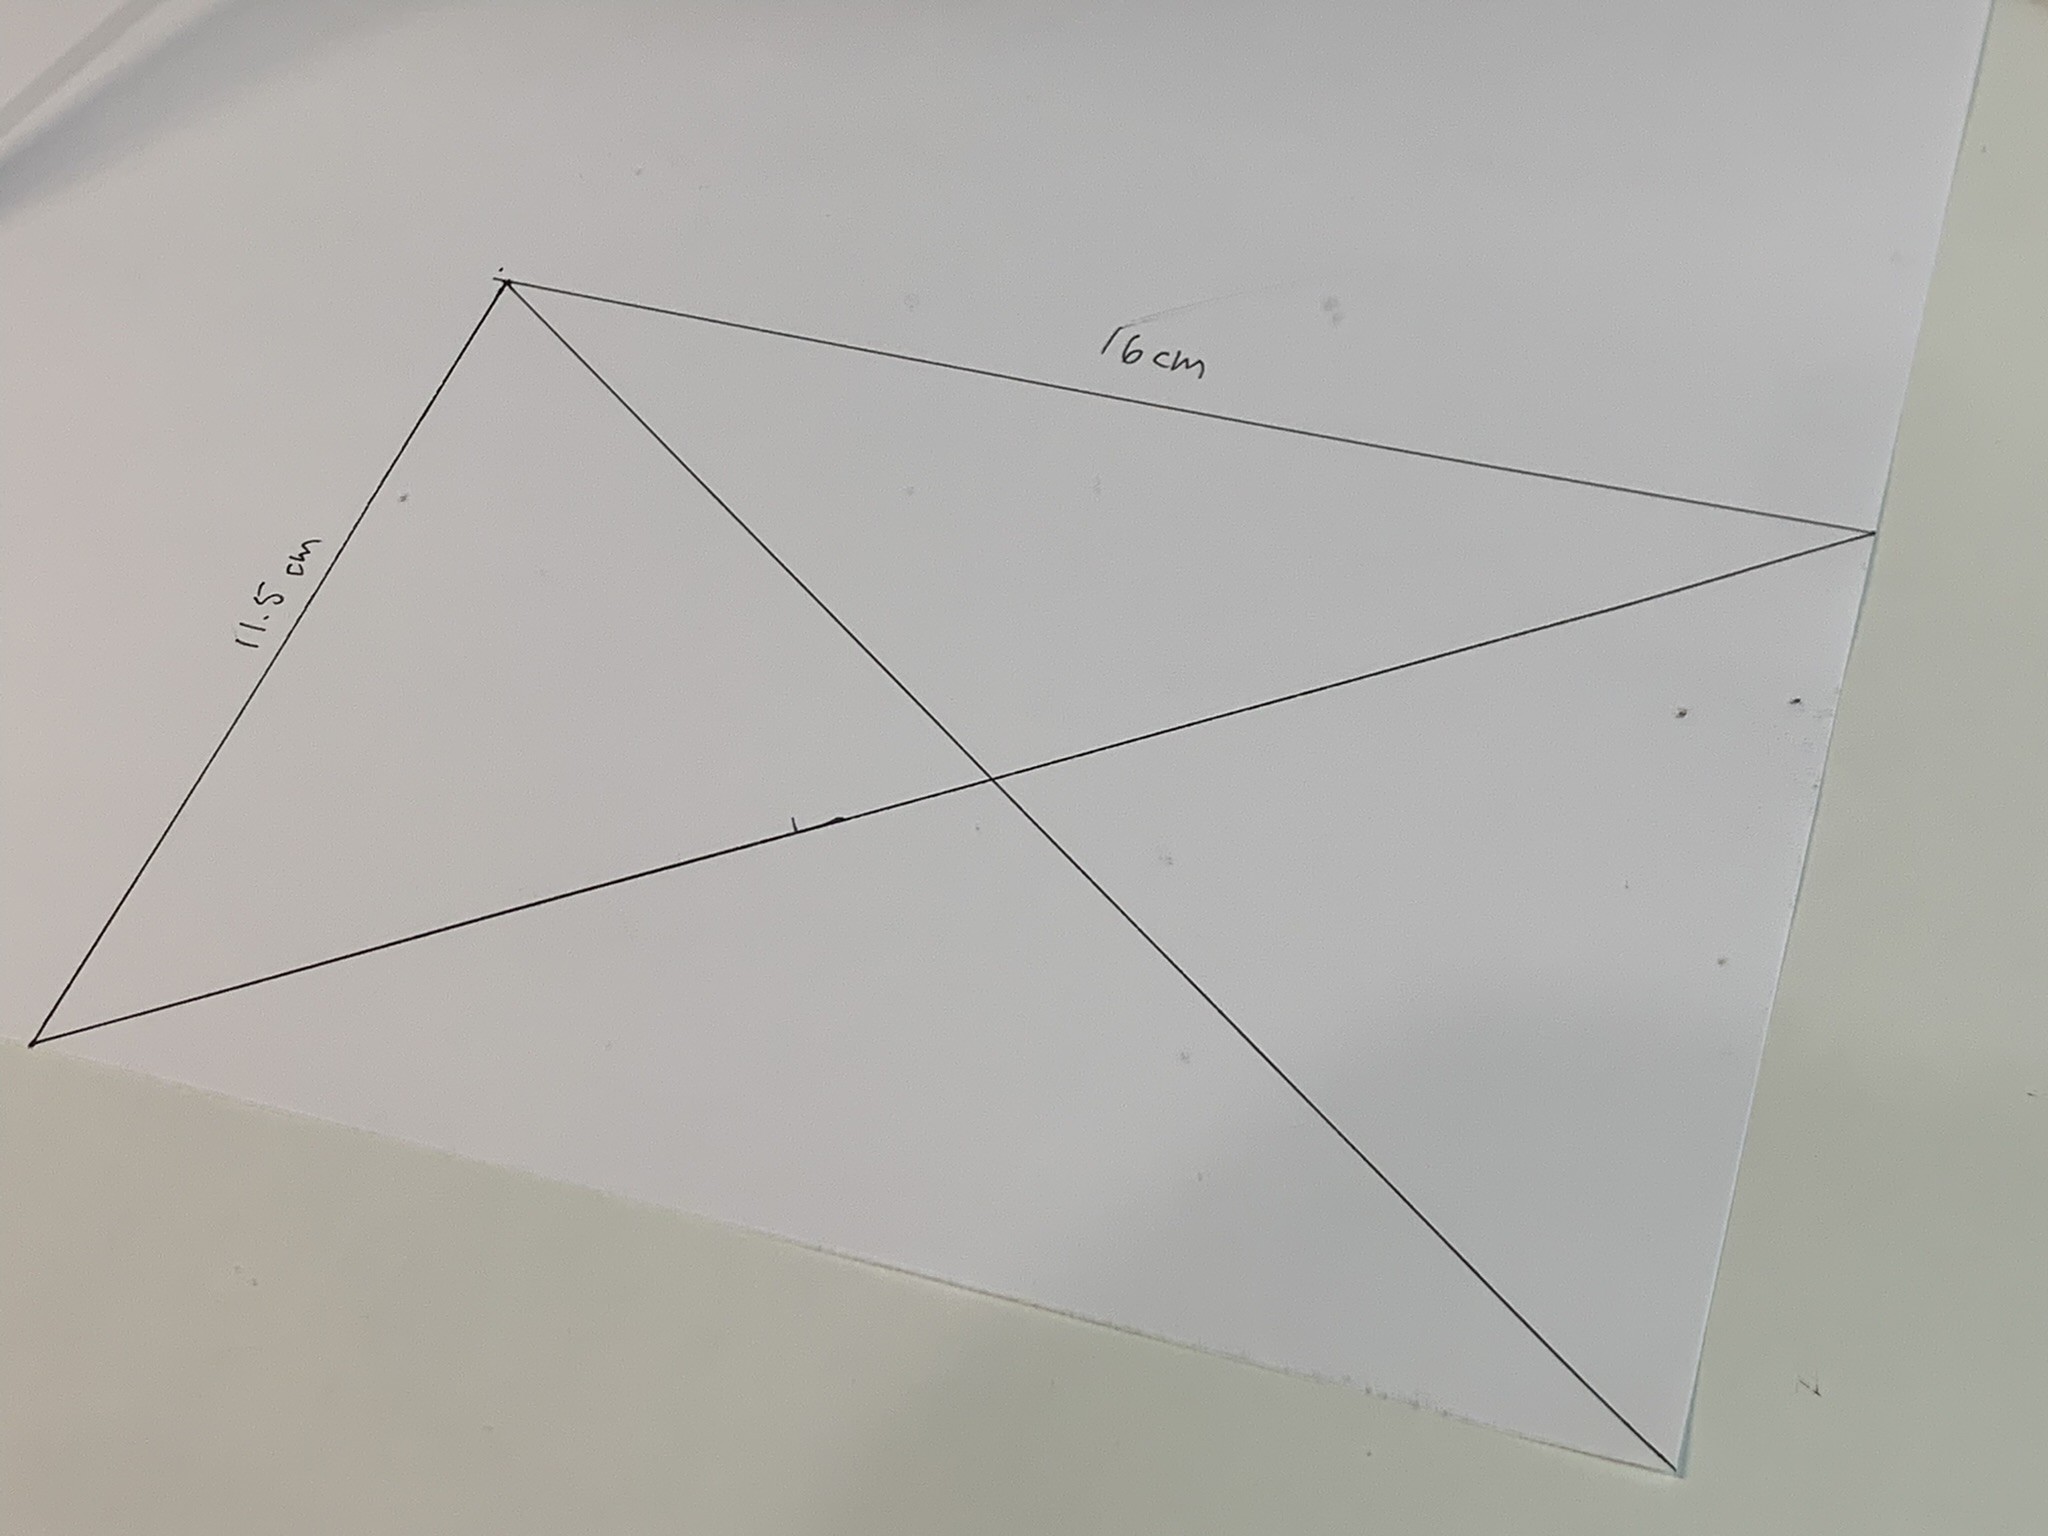
---------- more ----------This mod can be done at the same time as the previous fan mod, since the printer is already taken apart. For this we need to purchase some relatively cheap Fresnel lens from either Amazon or eBay. I anticipate some craft stores might also sell them. The important part is that it needs to be at least 16x11.5 cm (6.29921 in x 4.527559 in) so that it covers the whole LCD screen.
Here's what I did:
![]()
The Fresnel lens 10in x 7in Using the printer assembly, trace the aperture in a piece of paper and mark the center. This is important because we have to center the Fresnel lens in the opening to fully take advantage of the lens.
![]()
Aperture 11.5cm x 16 cm Cut the template and trace it in the center of the lens. The lens has a center point that is easy to spot against the light, align that point with the cross in the template
![]()
Template traced Use a craft knife and a ruler to cut through the lens, a few passes and its done.
![]()
Last step is to glue it to the printer shroud/assembly thingy. Making sure the textured side is facing up away from where the UV LEDs are. Just like this:
![]()
That will ensure the light rays are straightened against the back of the LCD panel.
Glue it with some CA glue or whatever you prefer, make sure that the lens is as straight as it can be. The ones I bought tend to bend a little bit. since they are very thin. Try to get something with some 1-2mm thickness if possible.
Here is where I think I could have done a better job; Fresnel lenses have focal points that need to be found to optimize the light as much as possible. That can be done by shining a light in the "textured" side and finding how close the light should be to create a very sharp point in the other side. Just like when you use a magnifying glass to burn things with...
I decided to yolo it for now, with the idea to come back and figure out the proper focus point length later. I maybe want to create a frame for the lens once I find that distance to ensure it stays there.. #TODO
However, special care should be taking when testing for this distance if you decide to do it yourself. Apparently looking at the UV light can be dangerous for your eyes. So, make sure to use all the PPE available. Protect your eyes or use a different source to find out the focal point!
![]()
Glued in the top, close to the LCD panel Put it all back and you should be earning that extra 2% of light uniformity that Elegoo is claiming this lens provides...
![]()
Fresnel and Air duct mods installed Put your printer back together and test it out!
-
01: Fan Service
09/12/2022 at 12:36 • 0 comments![]()
One of the biggest annoyances of this printer is that the UV LED array cooling fan runs 100% of the time. Even when there isn't anything being printed on.
It wouldn't bother me so much if the fan wasn't so loud. Which at full speed, distracts from the printer's elegant operation.
Thankfully there is an easy fix. Using the printer's configuration file, we can tell the printer to turn on the fan only when it is actively printing. But, if you're like me and still feel the noise is too much, lets mod the printer to use a whisper quiet Noctua Fan.
---------- more ----------Just shush if you are slacking...
![]()
To run the fan only when printing, you need to find the printer's configuration file in the root of the USB drive that came included with it. If you have deleted the file, or have lost the drive, no worries you can download it directly from Elegoo's website. It should be under Mars 3 > USB Drive Files > English Language
The file in question is called mars3ChiTu Mainboard SpecificationV3.0.920210812.gcode.txt. Despite being files in "English" you'll find the following lines within... For me it was close to lines 95-104:
;【风扇1控制】
M8030    I-1    ;>0: 如果需要强制风扇1大于某温度时自动开启风扇,设置一个大于0的温度.
            ;0: 如果设为0,默认不转
            ;-1:一直开            MF
            ;-2:文件打印时开,没打印时关闭    EF
;【风扇2控制】
M8030    T-1    ;0: 如果设为0,默认不转
            ;1: >0一旦曝光,风扇2就转,不曝光,风扇就停止  LED
            ;-1:<0一直开            MF
            ;-2:文件打印时开,没打印时关闭   EF
Using google translate we can decipher a little bit of what this does:
;【Fan 1 Control】
M8030  I-1        ;>0: If you need to force fan 1 to automatically turn on the fan when the temperature is greater than a certain temperature, set a temperature greater than 0.
                  ;0: If set to 0, the default does not turn
                  ;-1: Always open MF
                  ;-2: open when the file is printing, close EF when not printing
;【Fan 2 Control】
M8030  T-1        ;0: If set to 0, it will not turn by default
                  ;1: >0 Once exposed, fan 2 turns on, no exposure, fan stops LED
                  ;-1:<0 always on MF
                  ;-2: open when the file is printing, close EF when not printing
Here there's talks about two fans, however there is only one fan in the printer. There is an unpopulated header in the Motherboard named LED, that might be related to this, maybe well come back to that one later.
I ended up switching both lines to -2 for both instances:
;【风扇1控制】
M8030    I-2
;【风扇2控制】
M8030    T-2
This will turn on the fan only when the printer is printing.
Save the file to your USB Drive, plug it in the printer, and browse for the .txt file and print it as if it was a 3D object. It will set the printer settings and it should stop the fans from going all the time.
Whisper quiet operation...
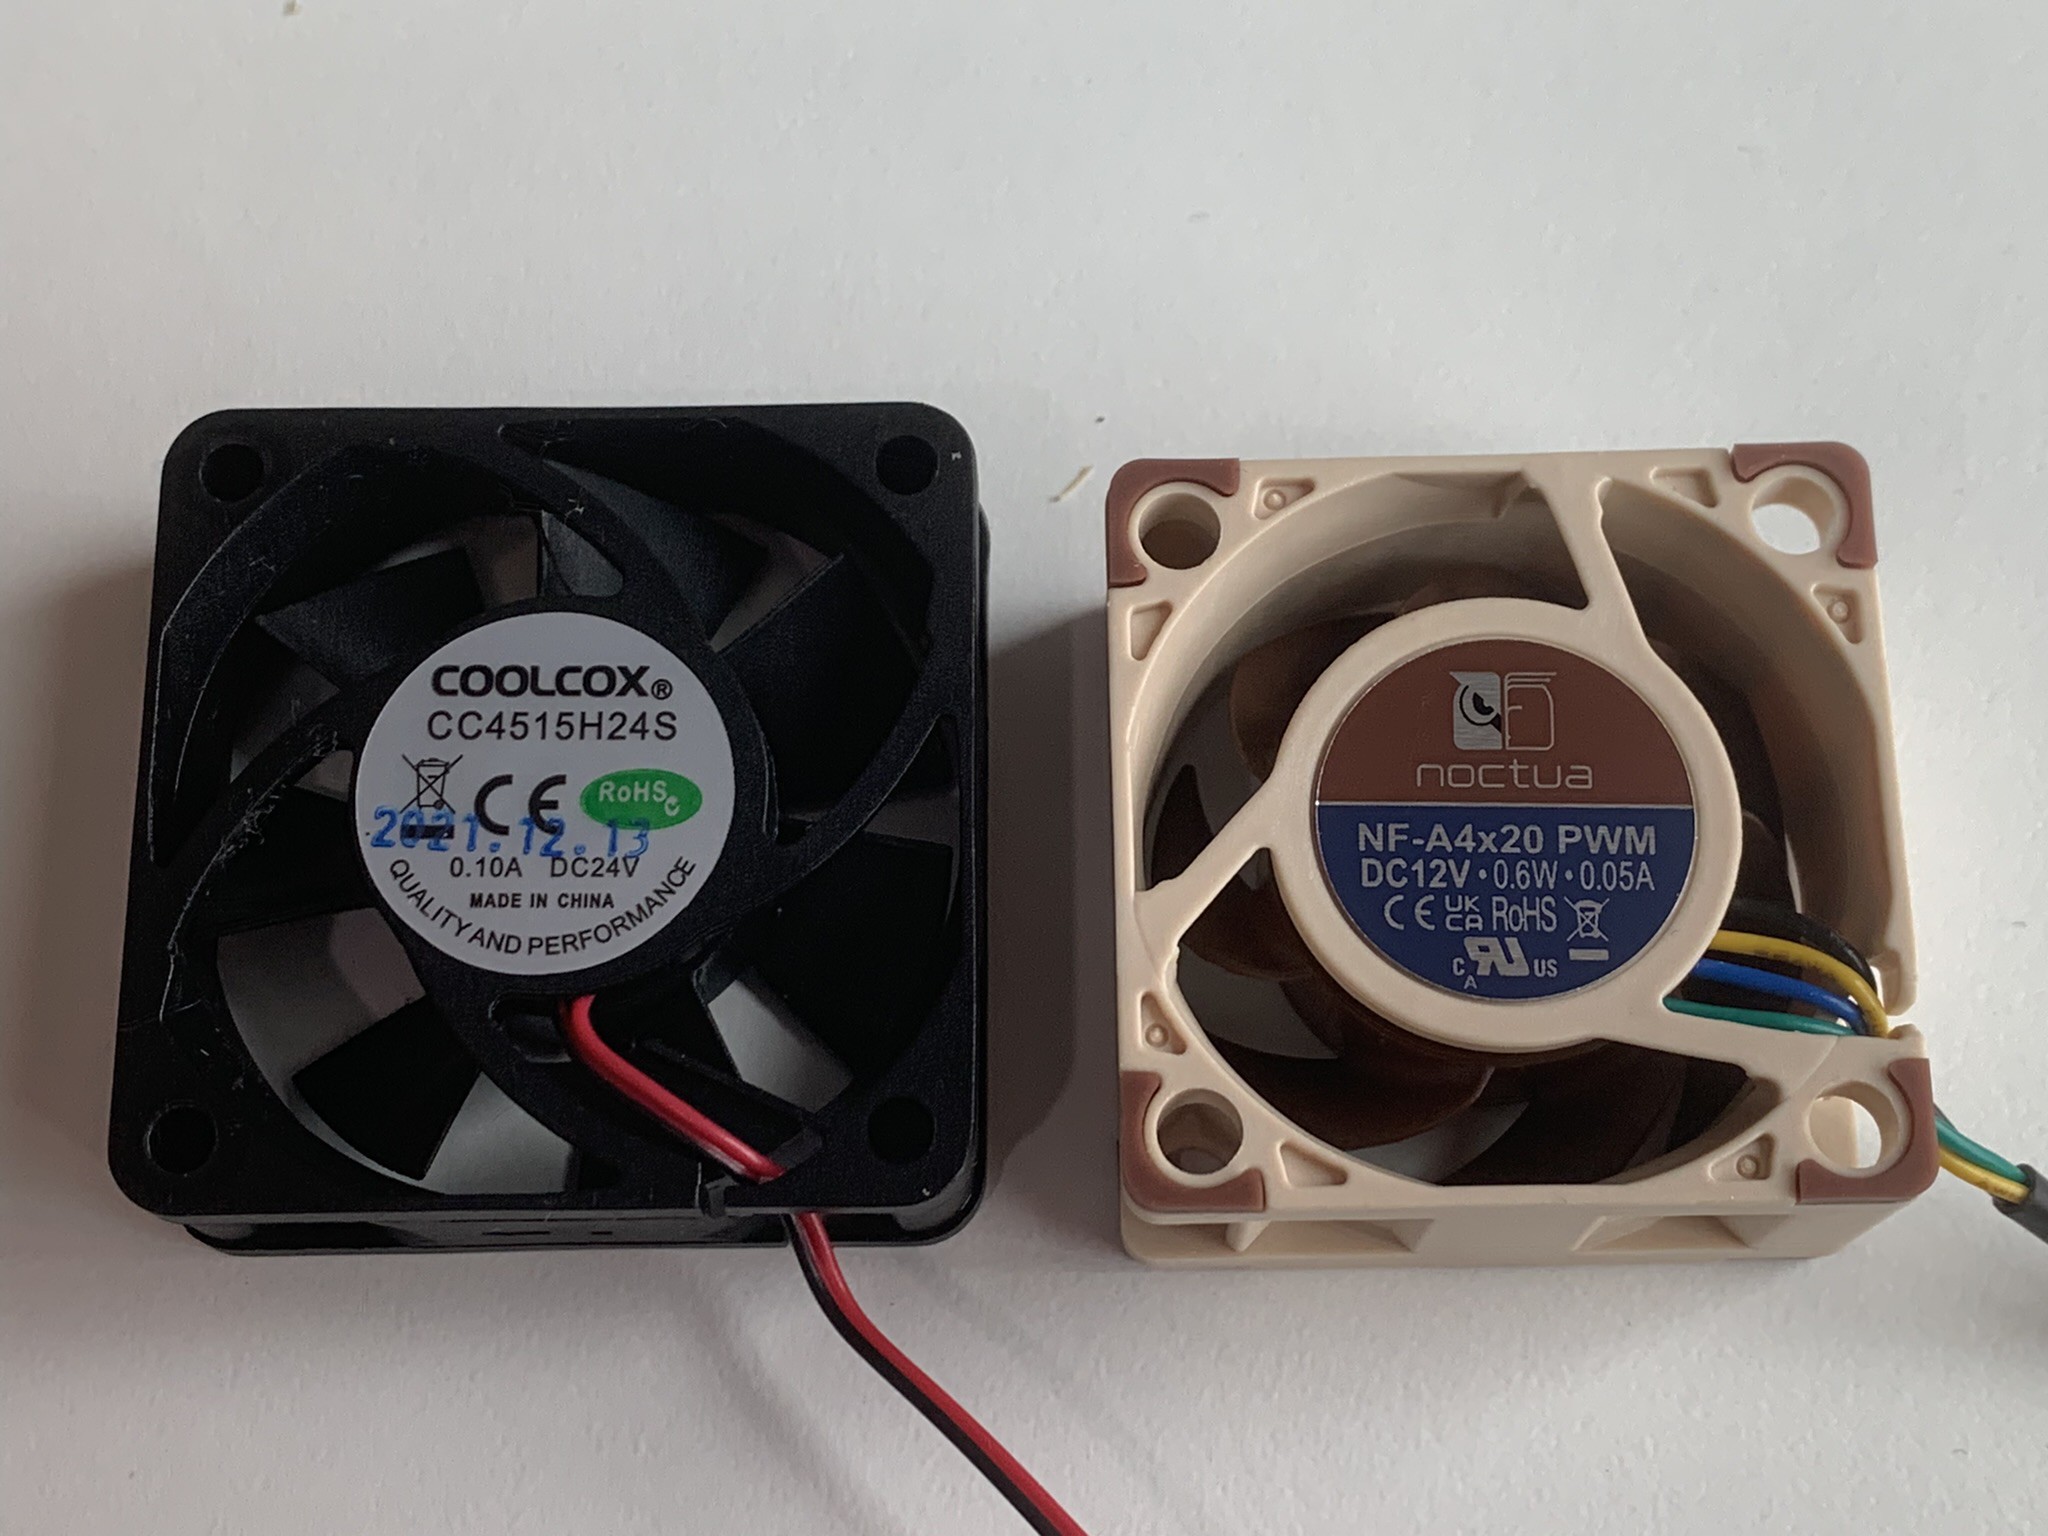
Now let's work on replacing the fan. The process here is straight forward, I'm not going to go into much detail as it has been covered in the past., after all is just replacing one fan for another. There is only one caveat to this mod, the fan header and the fan this printer uses are 24V, and, most often than not, the Noctua Fan is 12V. Therefore, we need a small DC-DC converter to lower the voltage, or if you desire you can also use a voltage divider using a couple resistors.
During this process I decided to also use the excellent air duct from Thomas Linke. I will attach some of the steps I followed for this process. While he used TPU filament, I decided to print everything in PLA. According to him it doesn't get too hot in there, we'll see...
![]()
Old noisy fan ![]()
Out with the old, in with the new ™ ![]()
DC-DC converter 24V => 12V ![]()
Final Assembly. I wanted this duct to be semi-permanent. I decided to glue it in place in most places. assembling the unit outside is much easier. but it requires complete disassembly of the printer. (Which is easier than I anticipated this printer is so simple!)
Conclusion
After this air duck, fan mod and settings combo, the printer is whisper quiet during operations. You can't even tell it's on! if it wasn't for the motor humming along, you'll think it stopped. If you want to make it even quieter, you can adjust the DC-DC converter to output less than 12v, about 7.5v is usually a good value for slower speeds and noise.
Highly recommended mod!
Let me know in the comments if you have any questions!
Elegoo Mars 3 "Pro"
Get the Pro badge without buying the printer a second time...