 Fabien-Chouteau
Original post at blog.adacore.com.
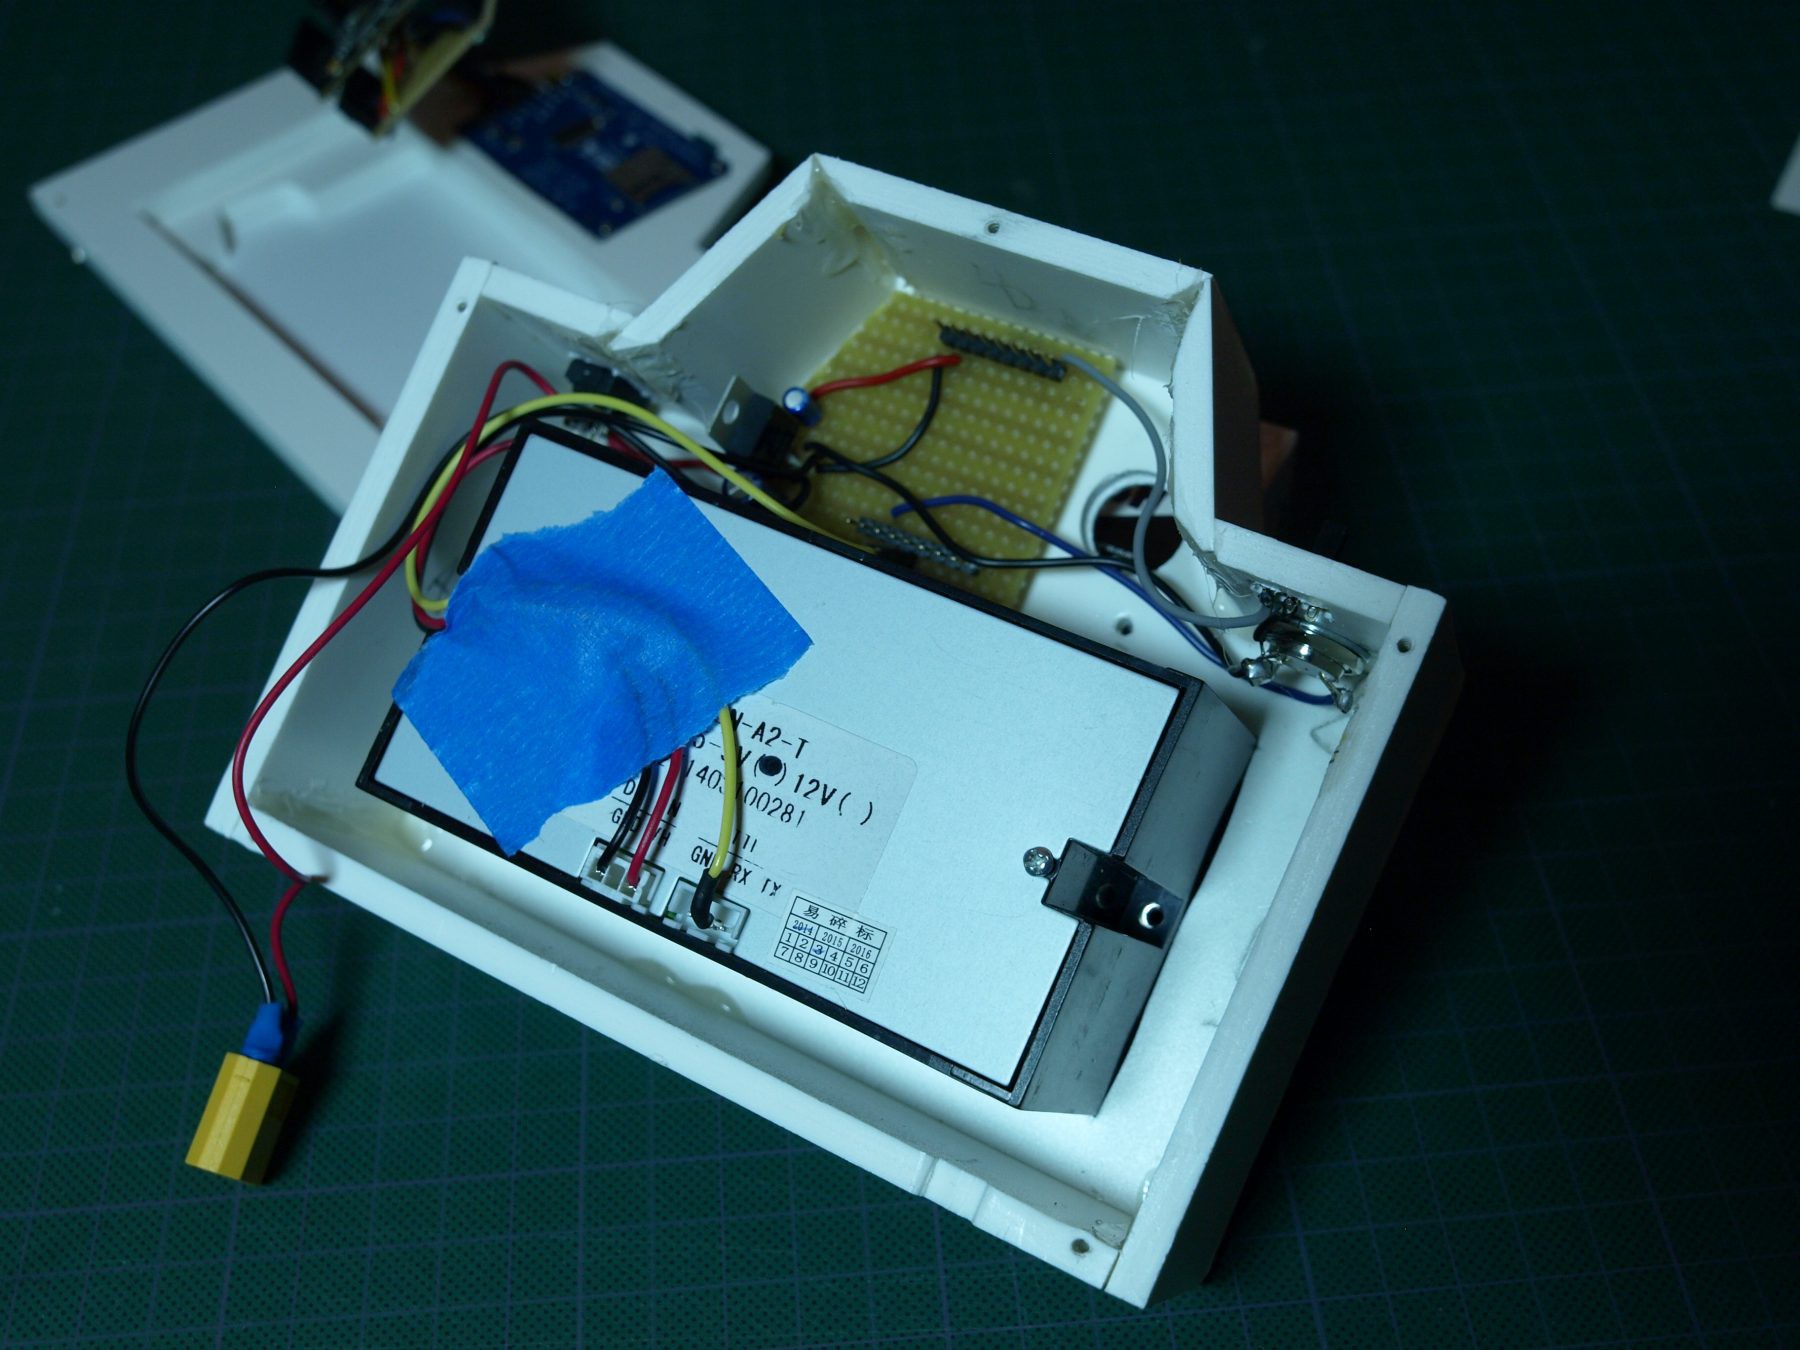
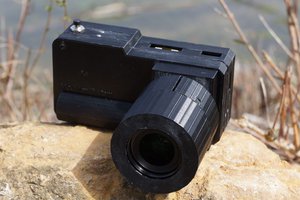
The HardwareOn the hardware side, there’s nothing too fancy. I use a 2 cell LiPo battery from my drone. It powers the thermal printer and a 5V regulator. The regulator powers the OpenMV module and the LCD screen. There’s a push button for the trigger and a slide switch for the mode selection, both are directly plugged in the OpenMV IOs. The thermal printer is connected via UART, while the LCD screen uses SPI. Simple.
 The Software
For this project I added support for the OpenMV in the Ada_Drivers_Library. It was the opportunity to do the digital camera interface (DCMI) driver as well as two Omnivision camera sensors, ST7735 LCD driver and the thermal printer.
The thermal printer is only capable of printing black or white pixel bitmap (not even gray scale), this is not great for a picture. Fortunately, the printing head has 3 times more pixels than the height of a QQVGA image, which is the format I get from the OpenMV camera. If I also multiply the width by 3, for each RGB565 pixel from the camera I can have 9 black or white pixels on the paper (from 160x120 to 480x360). This means I can use a dithering algorithm (a very naive one) to produce a better quality image. A pixel of grayscale value X from 0 to 255 will be transformed in a 3x3 black and white matrix, like this:
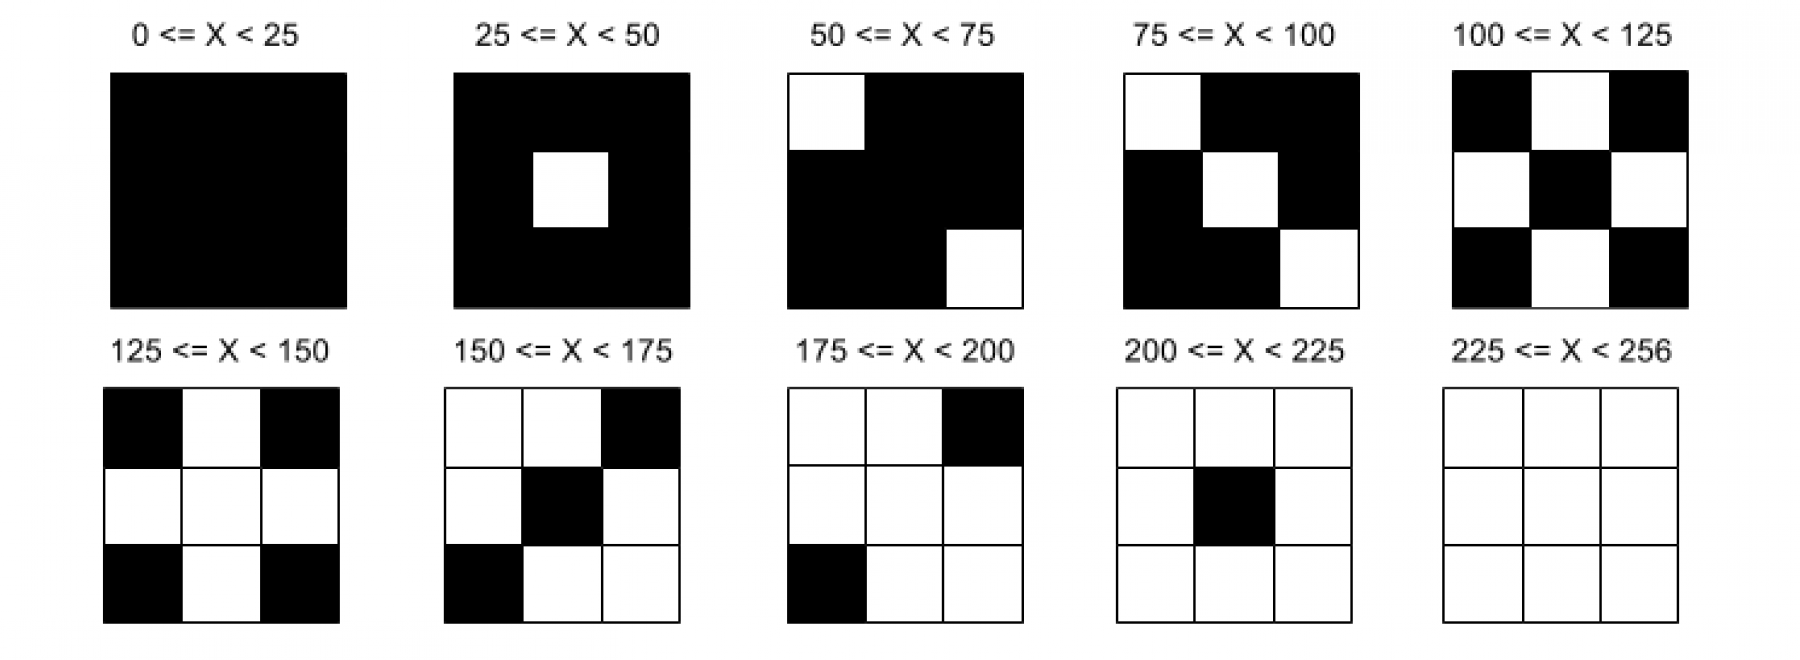
This is a quick and dirty dithering, one could greatly improve image quality by using the Floyd–Steinberg algorithm or similar (it would require more processing and more memory).
As always, the code is on GitHub.
Have fun!
 Jacob David C Cunningham
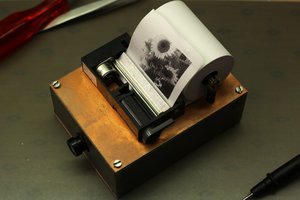
 fruchti
 AIRPOCKET