Close
0%
0%

Slot Machine

A box with different minigames with a design based of a slot machine. This project was made using Arduino.

Similar projects worth following
The system all begins by pressing the button on the right face. After pressing the button, you will have different instructions on the screen, telling you which minigame you have to complete at a time. This and the number of minigames you have to complete are chosen randomly. If you manage to complete all minigames, the screen shows a message of congratulations and that you won a random amount of money (it's fake). On the other hand, if you lose, the screen shows a message telling you to retry. Either way, the minigames will be reseted. The minigames are:
- A keypad where you have to enter a code displayed on the screen before the time runs out
- A laser sensor with mirrors where you need to rotate the mirrors to make the laser reach the receptor
- An ultrasonic sensor where you need to figure out the right distance you need to put your hand

- For the mirrors, we broke a disk in pieces that we then sticked on circles-shaped pieces of cardboard and to allow the user to move/rotate the said circles we glued a magnet to the cardboard and put the complementary magnet inside the box which allows the user to move freely the mirror and rotate it without it falling appart. 

- The door to open the box also uses a magnet to keep it closed.

- The potentiometer is used for the screen's lighting.

-A photoresistor is used as the receptor of the laser for the said minigame.
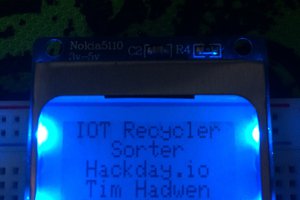
ino - 5.44 kB - 06/17/2023 at 11:55

Download

  • 6 × Oak wood 6 faces
  • 1 × Carboard
  • 2 × Arduino UNO
  • 30 × Wires
  • 1 × Breadboard Electronic Components / Misc. Electronic Components

View all 12 components

  • 1
    1. Prepare the planks

    Make sure to have 6 faces ready with the sizes of your likings, just make sure there is enough space for the holes and the wiring inside the box.

  • 2
    2. Make your holes

    For the screen and the buttons, you need to respect their sizes while making the holes. For the rest, holes are for wiring so mark where you put your component and then mark the wires' hole right under, make sure they won't end up twisted. We used a drill to make them but you could probably do them with a laser cut.

  • 3
    3. Assemble the parts

    You can use a hammer and nails to do so.

View all 8 instructions

Enjoy this project?

Share

Discussions

fersadilala wrote 09/30/2023 at 16:09 point

The idea is actually very cool. I would like to manufacture such things. I recently downloaded the application myself, you can look here if you want. But everything is online for me. If I had such a box at home, then fortunately there would be no chapel!

  Are you sure? yes | no

stevenaughtonnsx11 wrote 09/30/2023 at 16:06 point

you are funny

  Are you sure? yes | no

David Turner wrote 09/30/2023 at 16:06 point

What a difference it makes! The main thing is that it works, don’t fumble, don’t lie.

  Are you sure? yes | no

stevenaughtonnsx11 wrote 09/30/2023 at 16:05 point

doesn't look very good

  Are you sure? yes | no

Similar Projects

Does this project spark your interest?

Become a member to follow this project and never miss any updates