 simon
simonMY Project More
https://maker.wiznet.io/simons/projects/we-are-chat-iot-engineer/?serob=4&serterm=month
PROJECT DESCRIPTION
No coding! iot developers you can do it (with GPT) Project
Key technologies: AI, IoT
Tools used: GPT Engineer
Project type: Software development, Code generation
Application: IoT device and system development
Project Overview
I'm interested in AI technology, so I've been following the Git Trend, and when I saw an innovative open source that makes prompted engineering more convenient for engineers using GPT, I decided to apply it to IoT projects.
I want to build an IOT environment where anyone can easily develop with prompted engineering by utilizing the above reference open source.
Reference Open Source
- AntonOsika / gpt-engineer (Github)
- https://github.com/AntonOsika/gpt-engineer
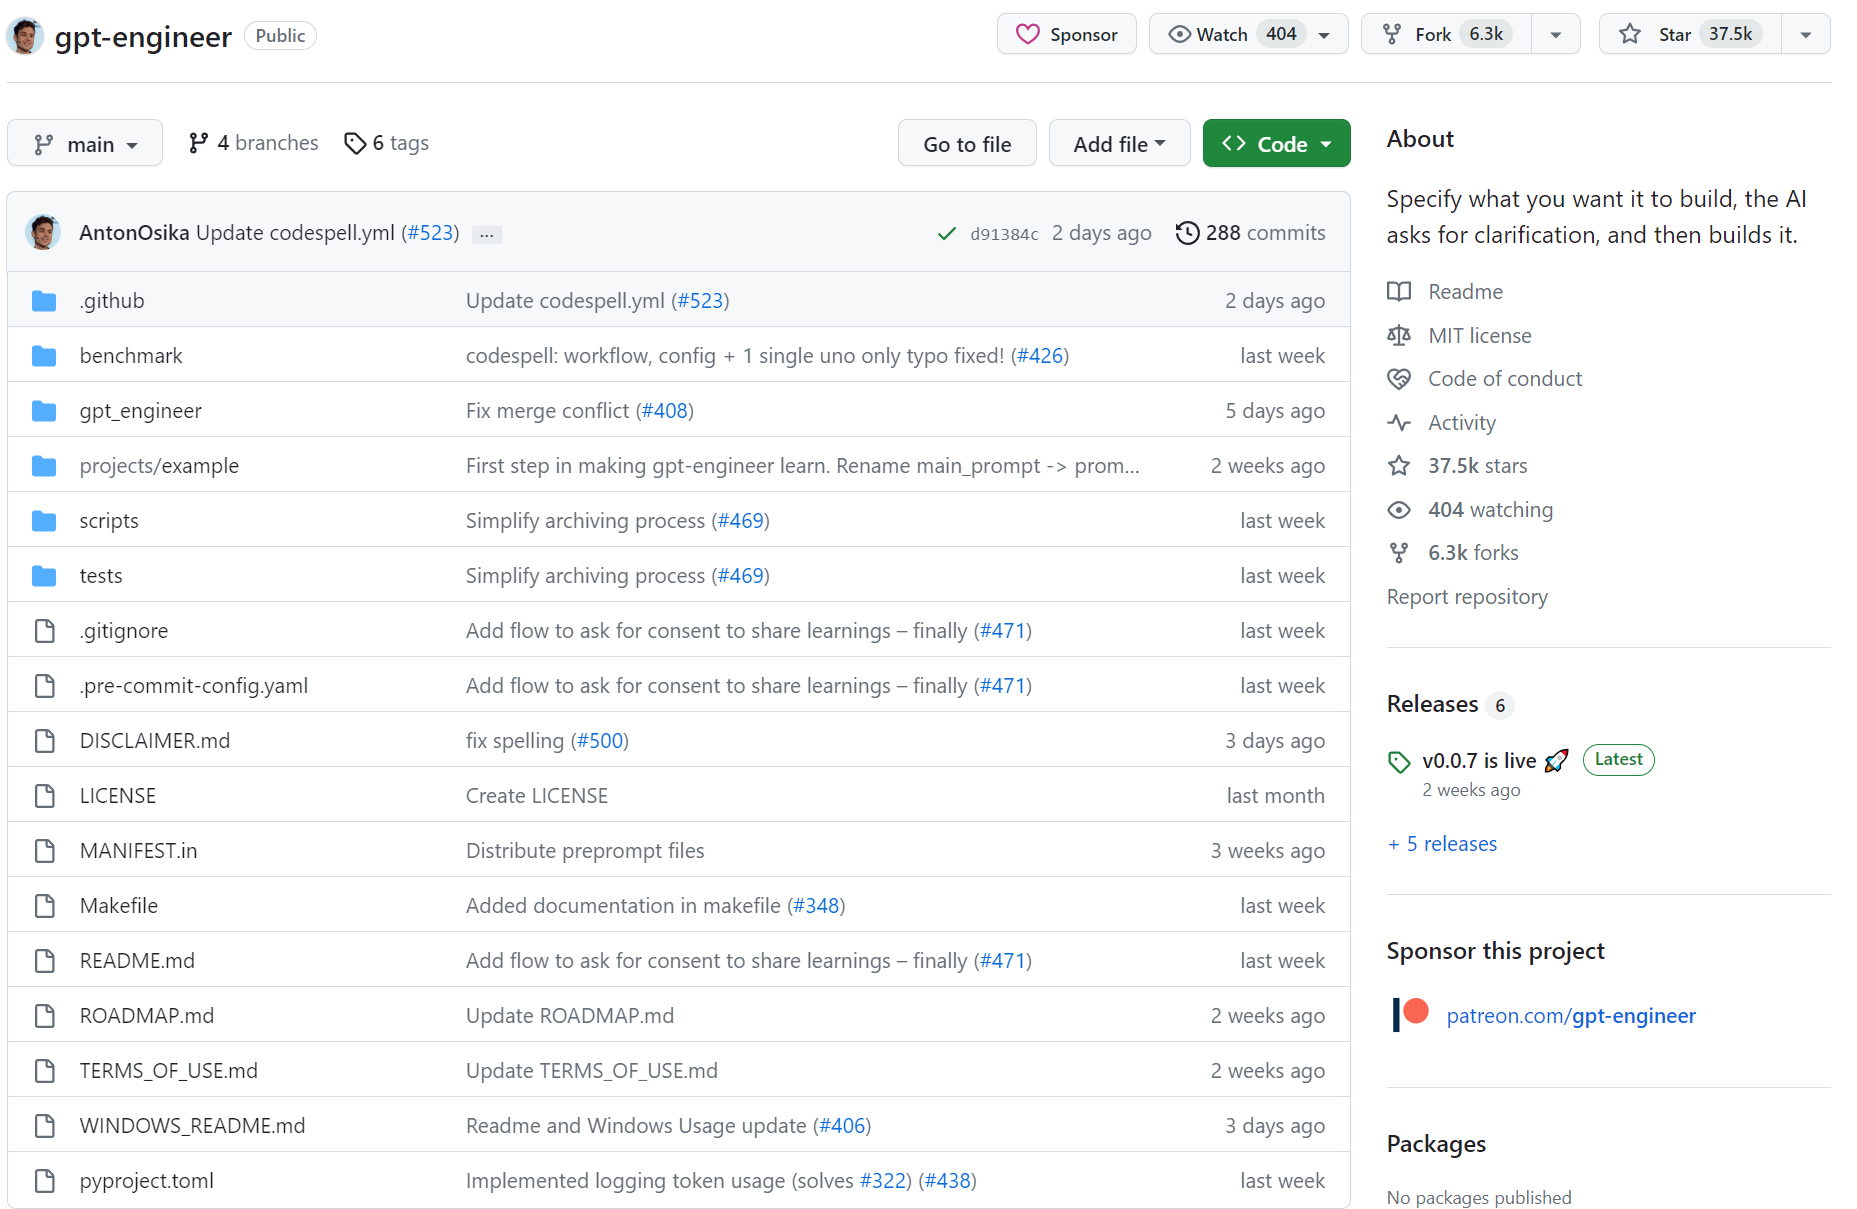
<GPT-Engineer Github page>
I will utilize this open source to build my GPT engineering environment on my local machine and work on my projects.
Project Usage
Proceed in a Windows environment where Python can run. (Mac is fine)
Here's how to use it:
If you want a stable release, run pip install gpt-engineer.
If you want a development version, run the following command.
git clone https://github.com/AntonOsika/gpt-engineer.git
cd gpt-engineer
pip install -e .
(Alternatively, you can use a virtual environment by running make install && source venv/bin/activate).
Once you have your OpenAI API key (preferably with GPT-4 access, but we'll be running the project with GPT-3.5 Turbo), run the following:
export OPENAI_API_KEY=[your api key]
On Windows, run it as follows:
set OPENAI_API_KEY=[your api key] on cmd
$env:OPENAI_API_KEY="[your api key]" on powershell
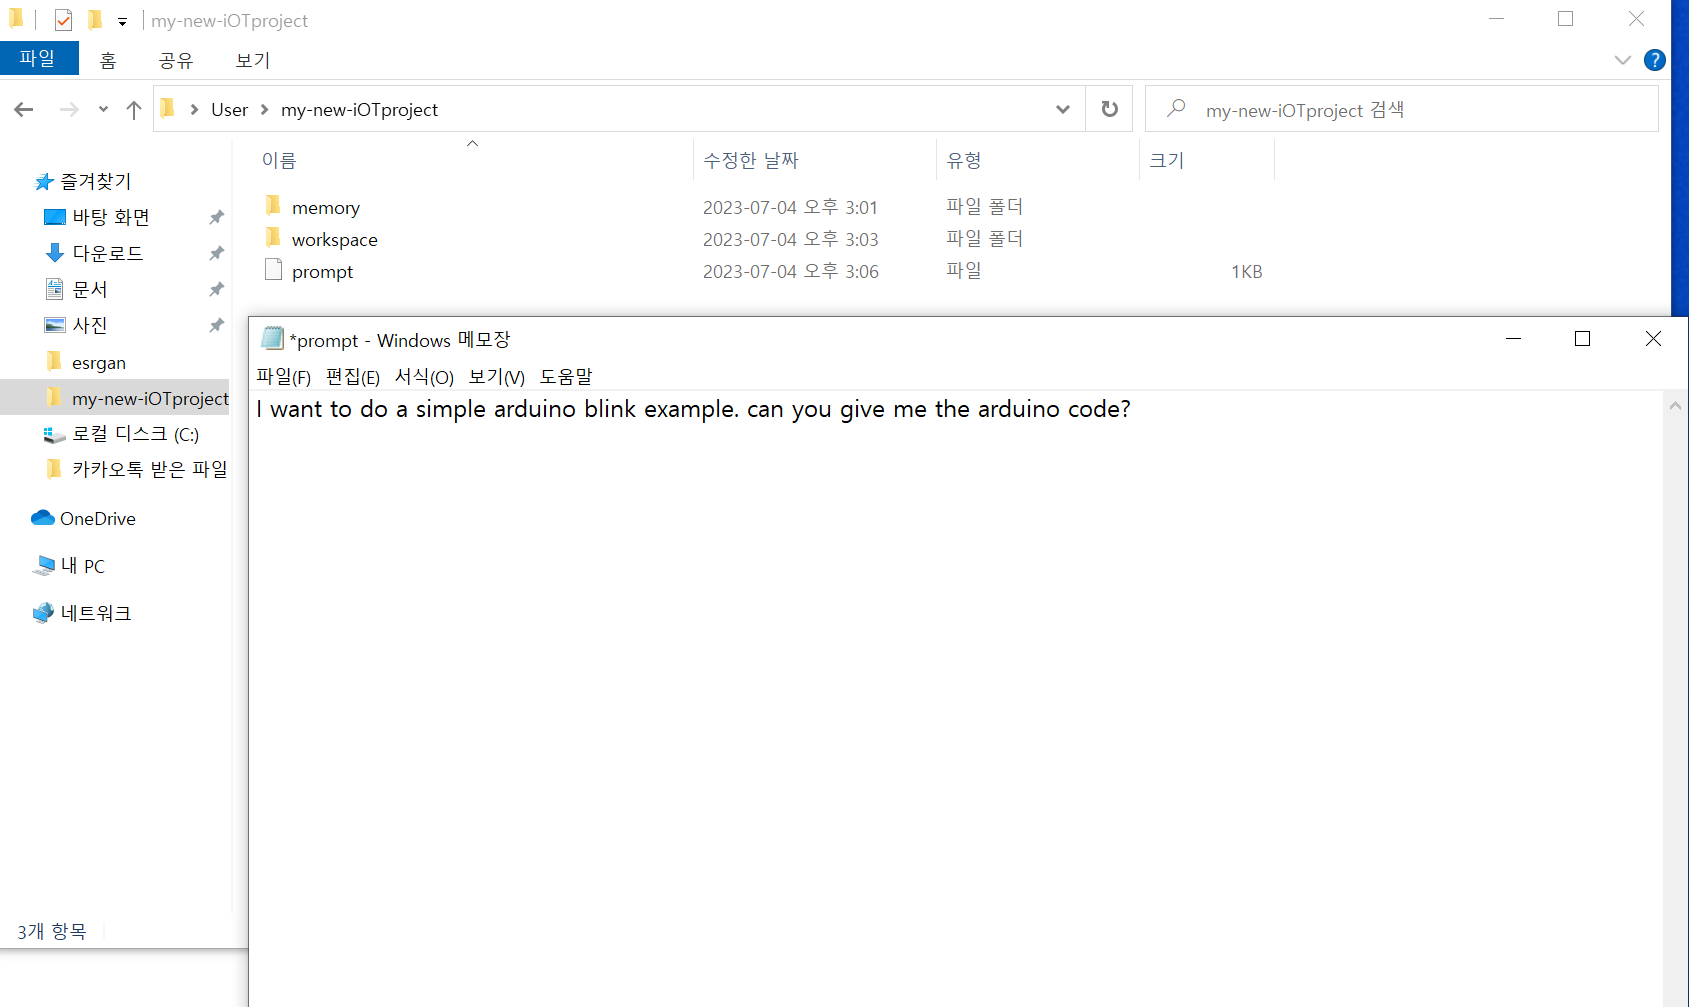
Create an empty folder. If you're inside the repository, you can do the following:
cp -r projects/example/ projects/my-new-iOTproject
Create a prompt file in a new folder.
Run the following:
gpt-engineer projects/my-new-iOTproject
Note that the file that writes the prompt should not be a txtfile. It should be an executable file that the Python script can read.
Running
Step_1.
After Git Clone(download), configure the folder as above, add the syntax for prompting with Notepad, and save it as a regular file instead of saving as a txtfile.
Step_2.
After running the cmd window, run gpt engineer and enter open AI key like below to start the project.
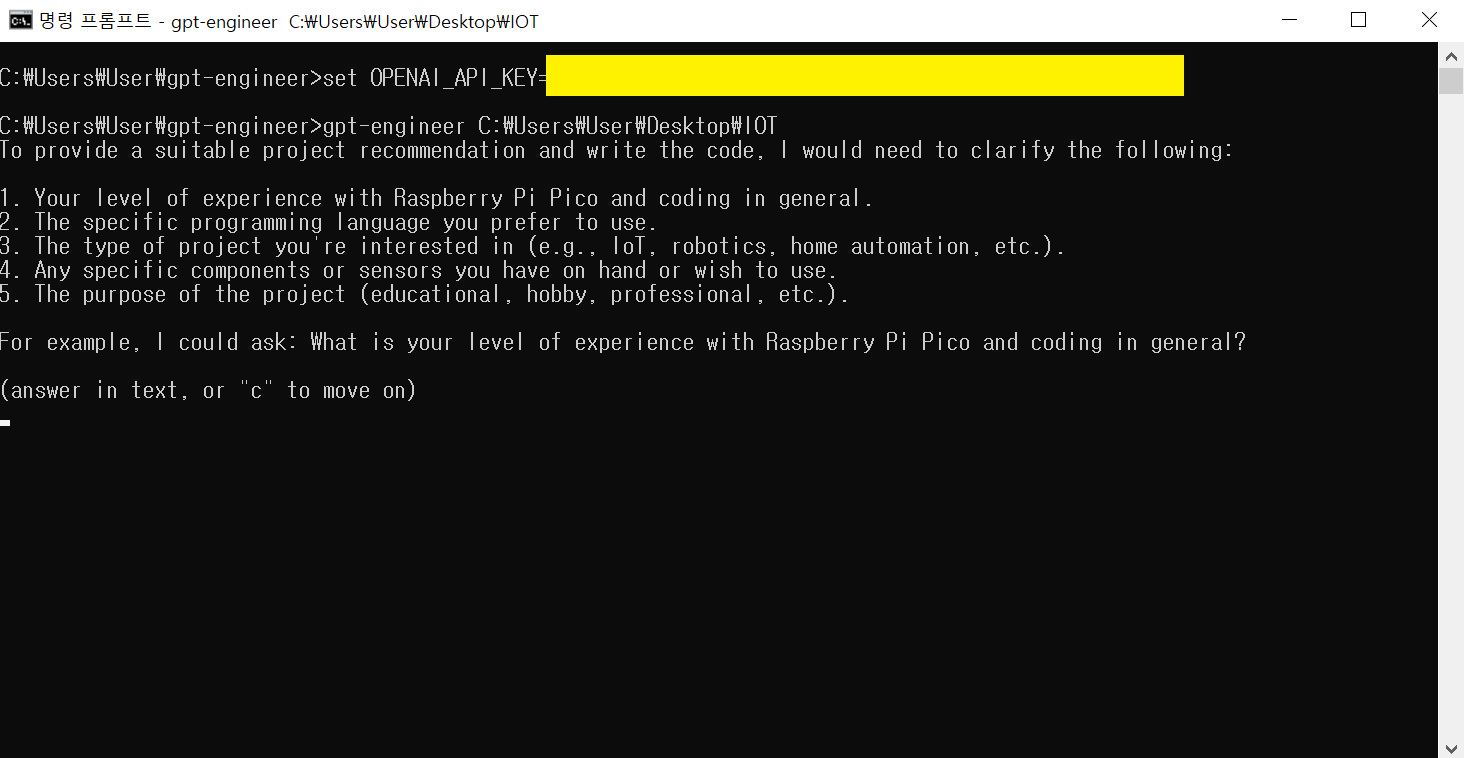
The message above is from "GPT Engineer" asking you for information they need in order to recommend a project and write code for you. They need the following information
- Your level of experience with the Raspberry Pi Pico and coding in general.
- Your preferred programming language
- The type of project you are interested in (e.g. IoT, robotics, home automation, etc.)
- Specific components or sensors you have or want to use
- The purpose of the project (educational, hobby, professional, etc.)
- For example, we might ask, "What is your experience level with the Raspberry Pi Pico and coding in general?"
(Answer in text, or type "C" to move on to the next question)
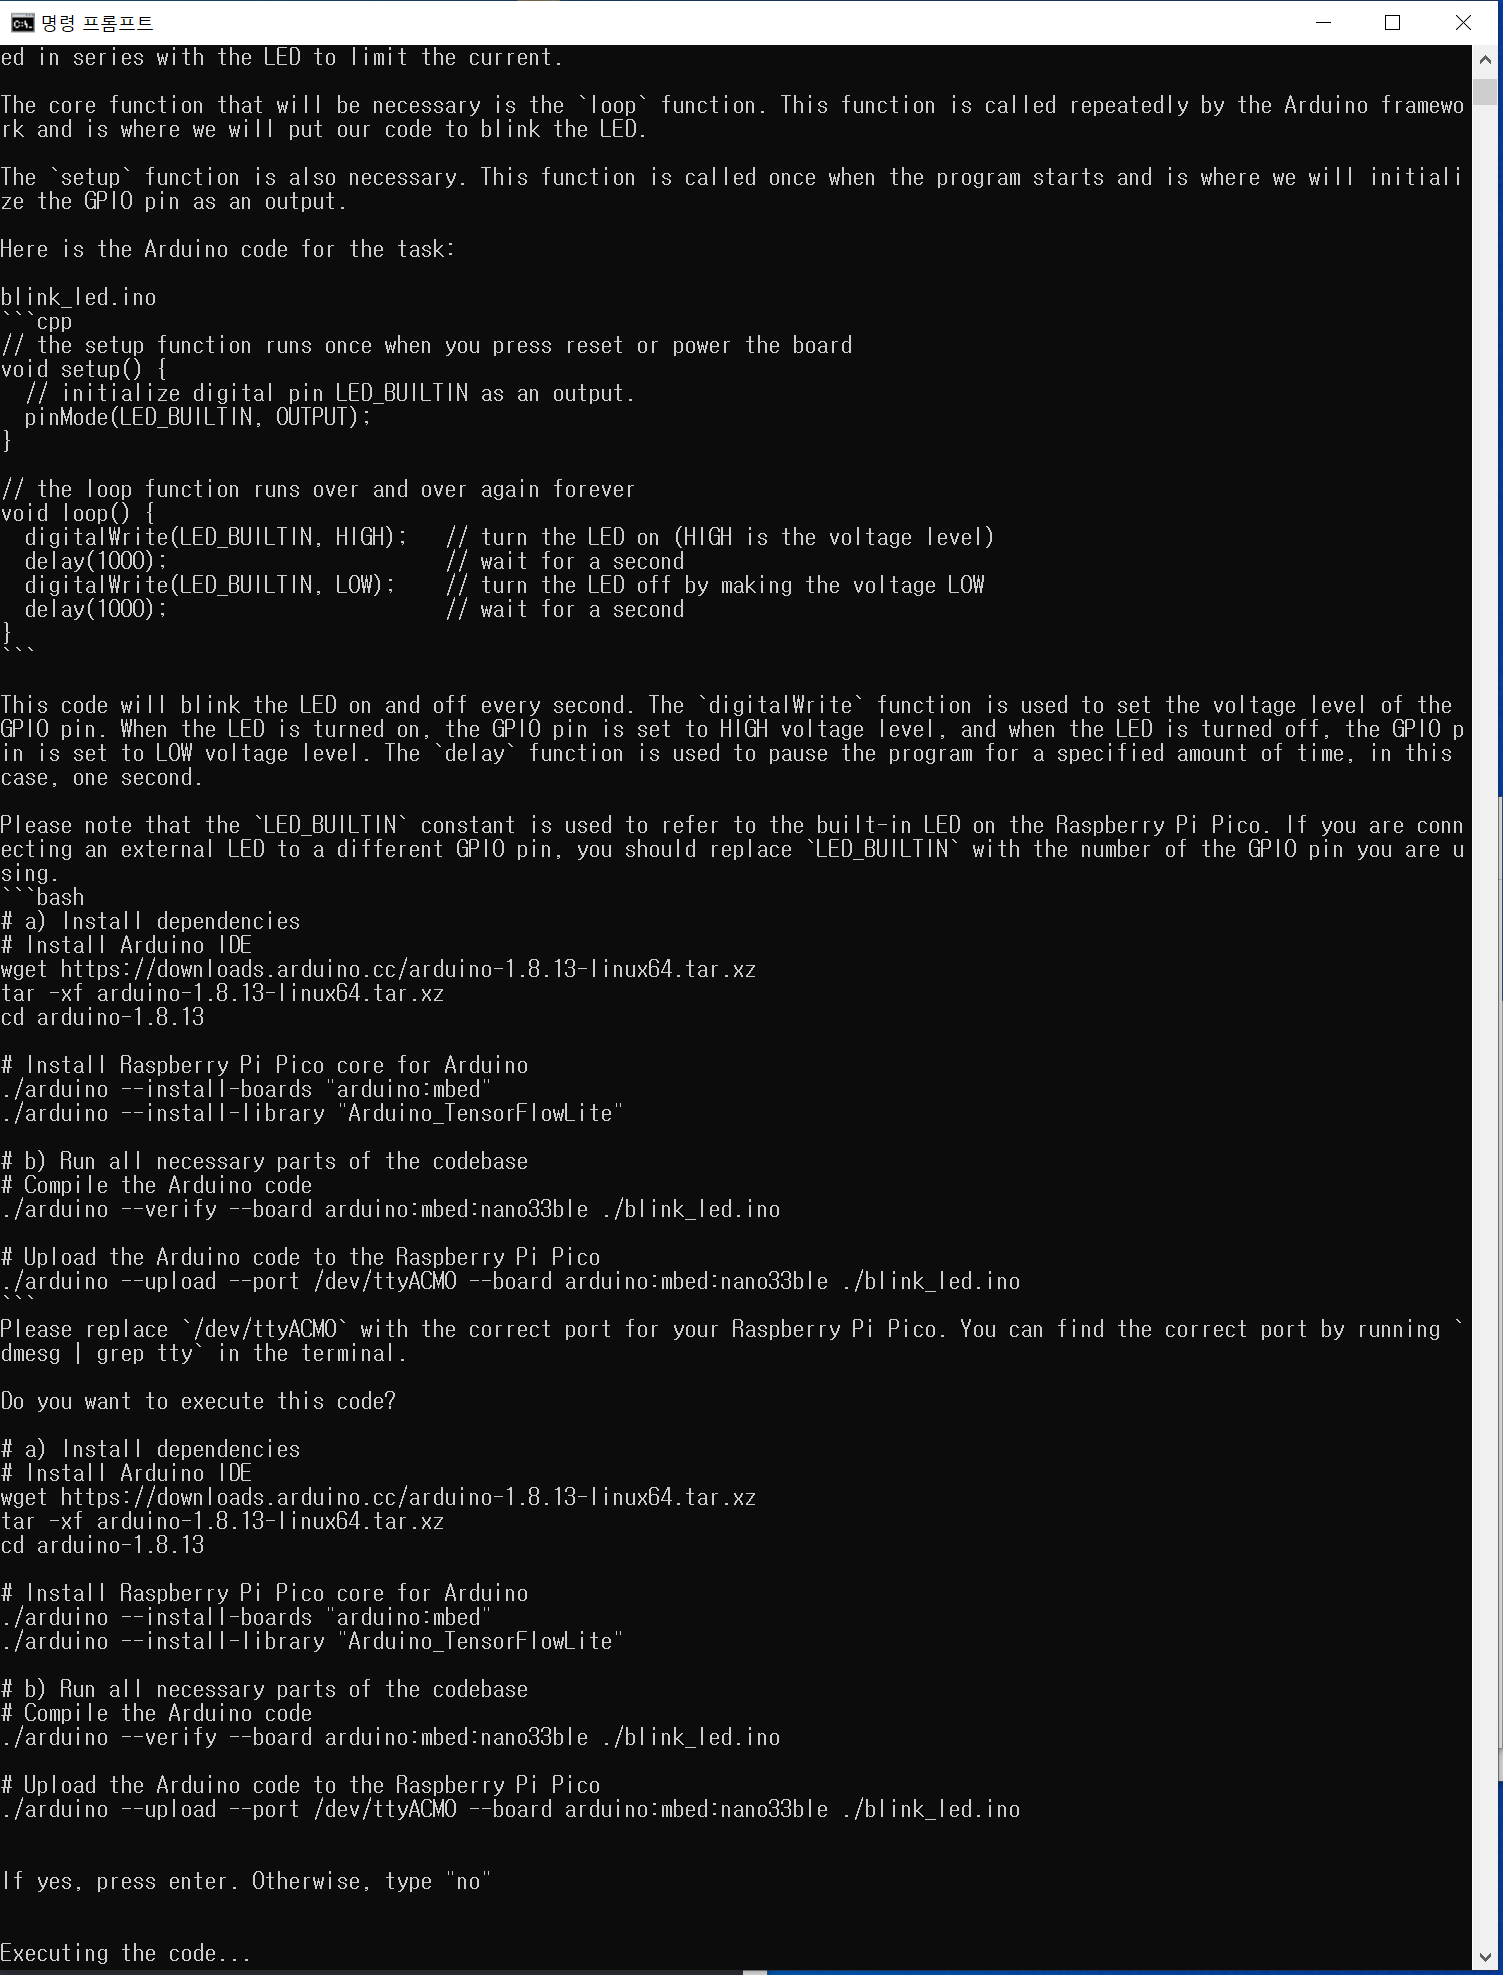
Step_3.
GPT will prompt you for any questions you have.
GPT curates your code for you
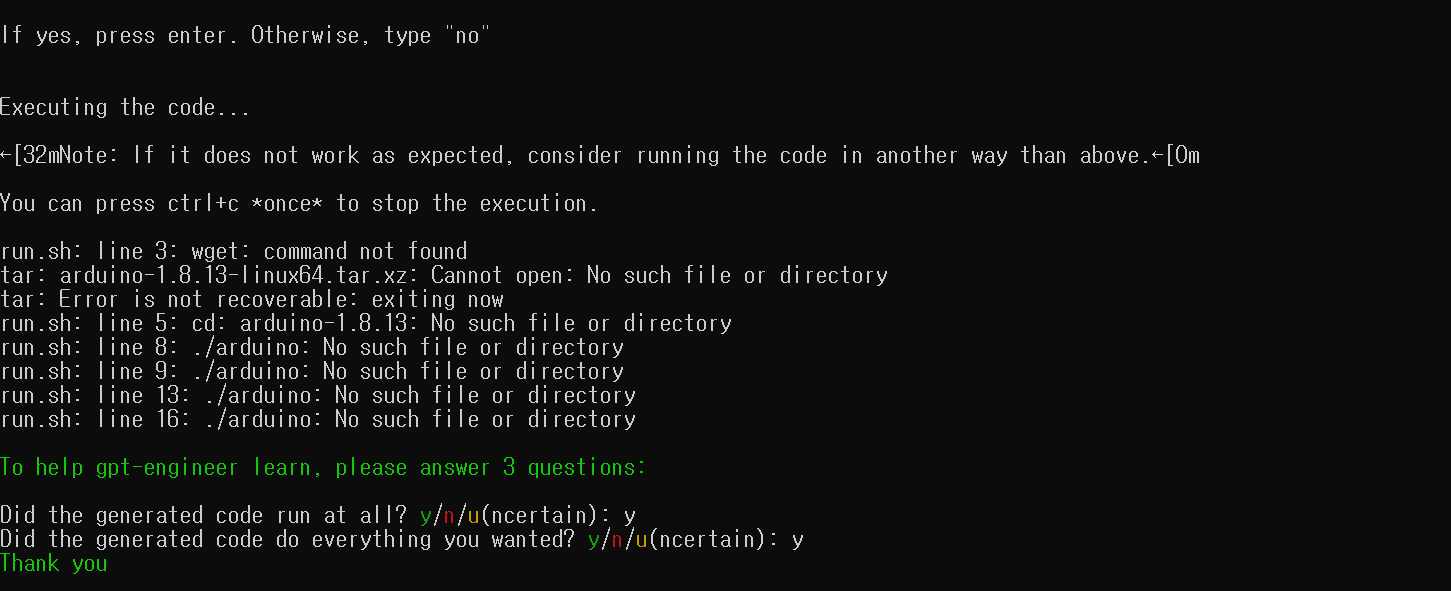
Step_4.
If you get the answer and code you want, press Enter, otherwise type no to prompt try again. After that, you can answer whether you want to export the source code by typing y/n/u.
"y": Yes, the code has been executed.
"n": No, the code was not executed.
"u": Not sure.
Step_5.
Go back to the folder where you saved and check the result.
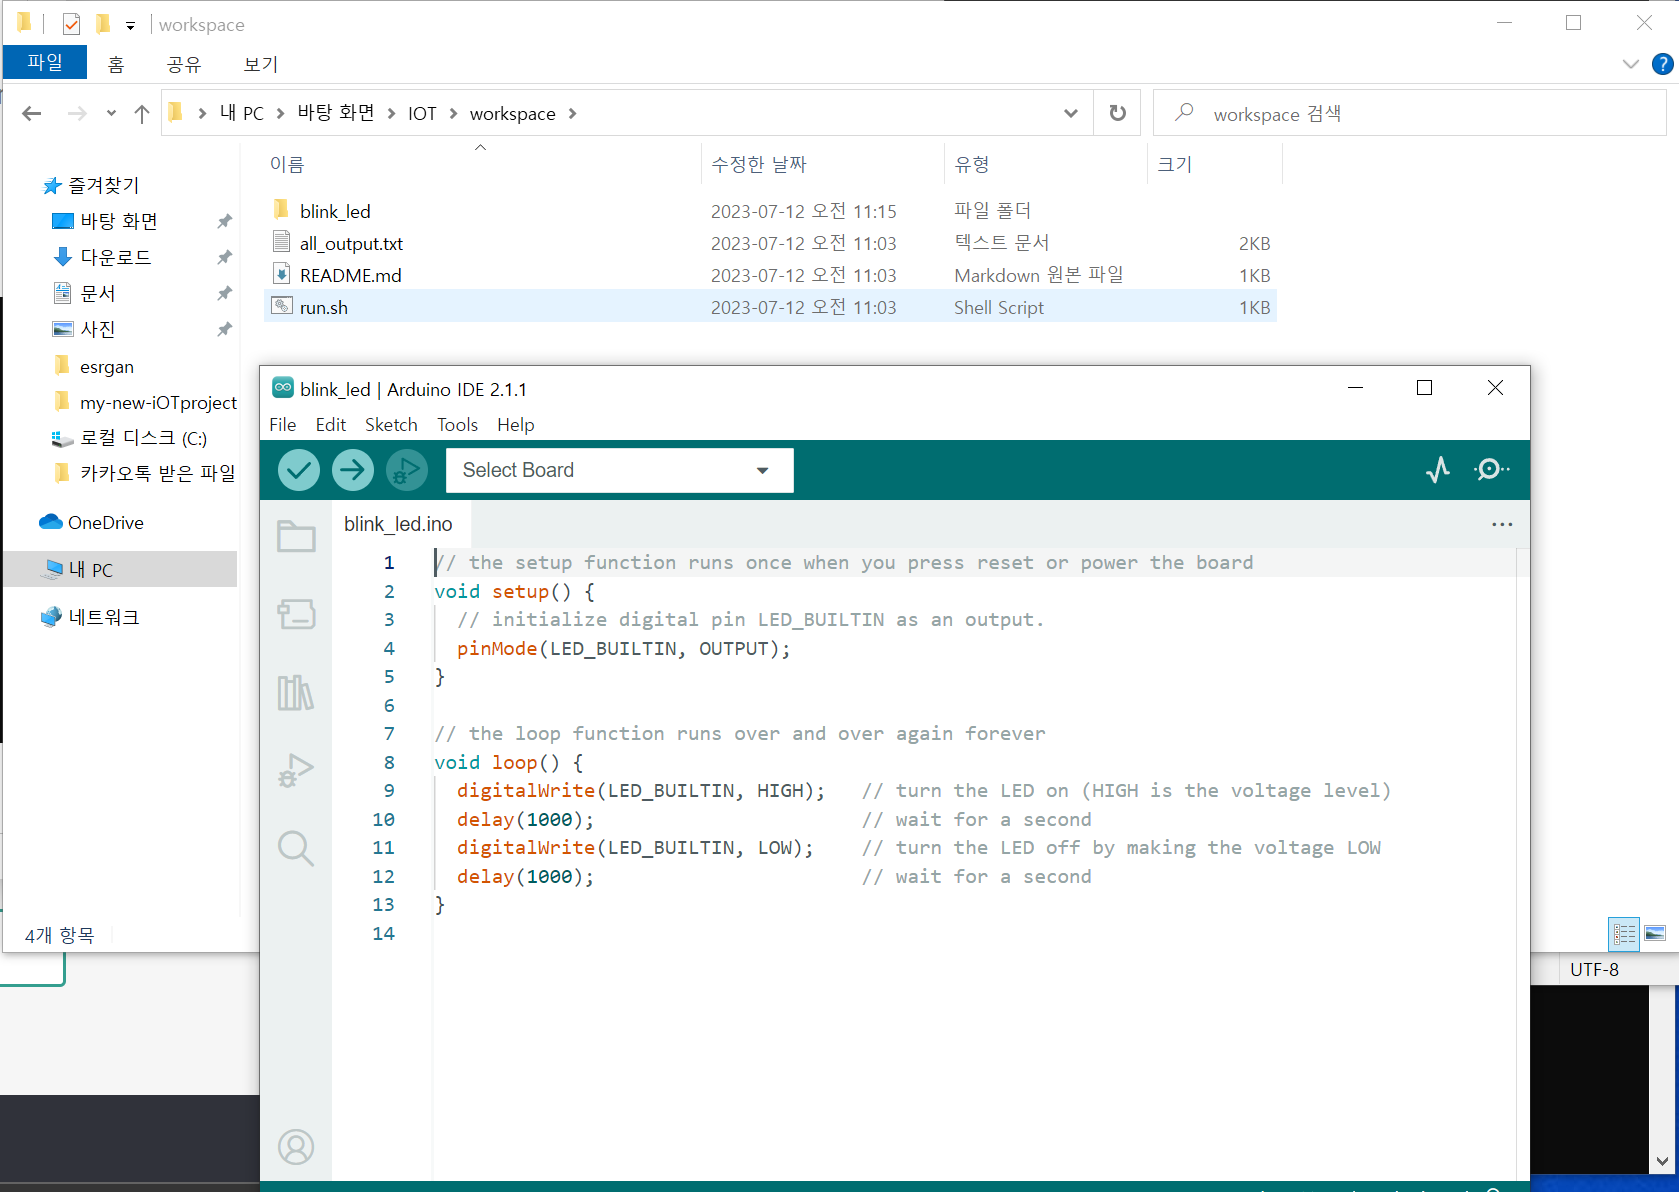
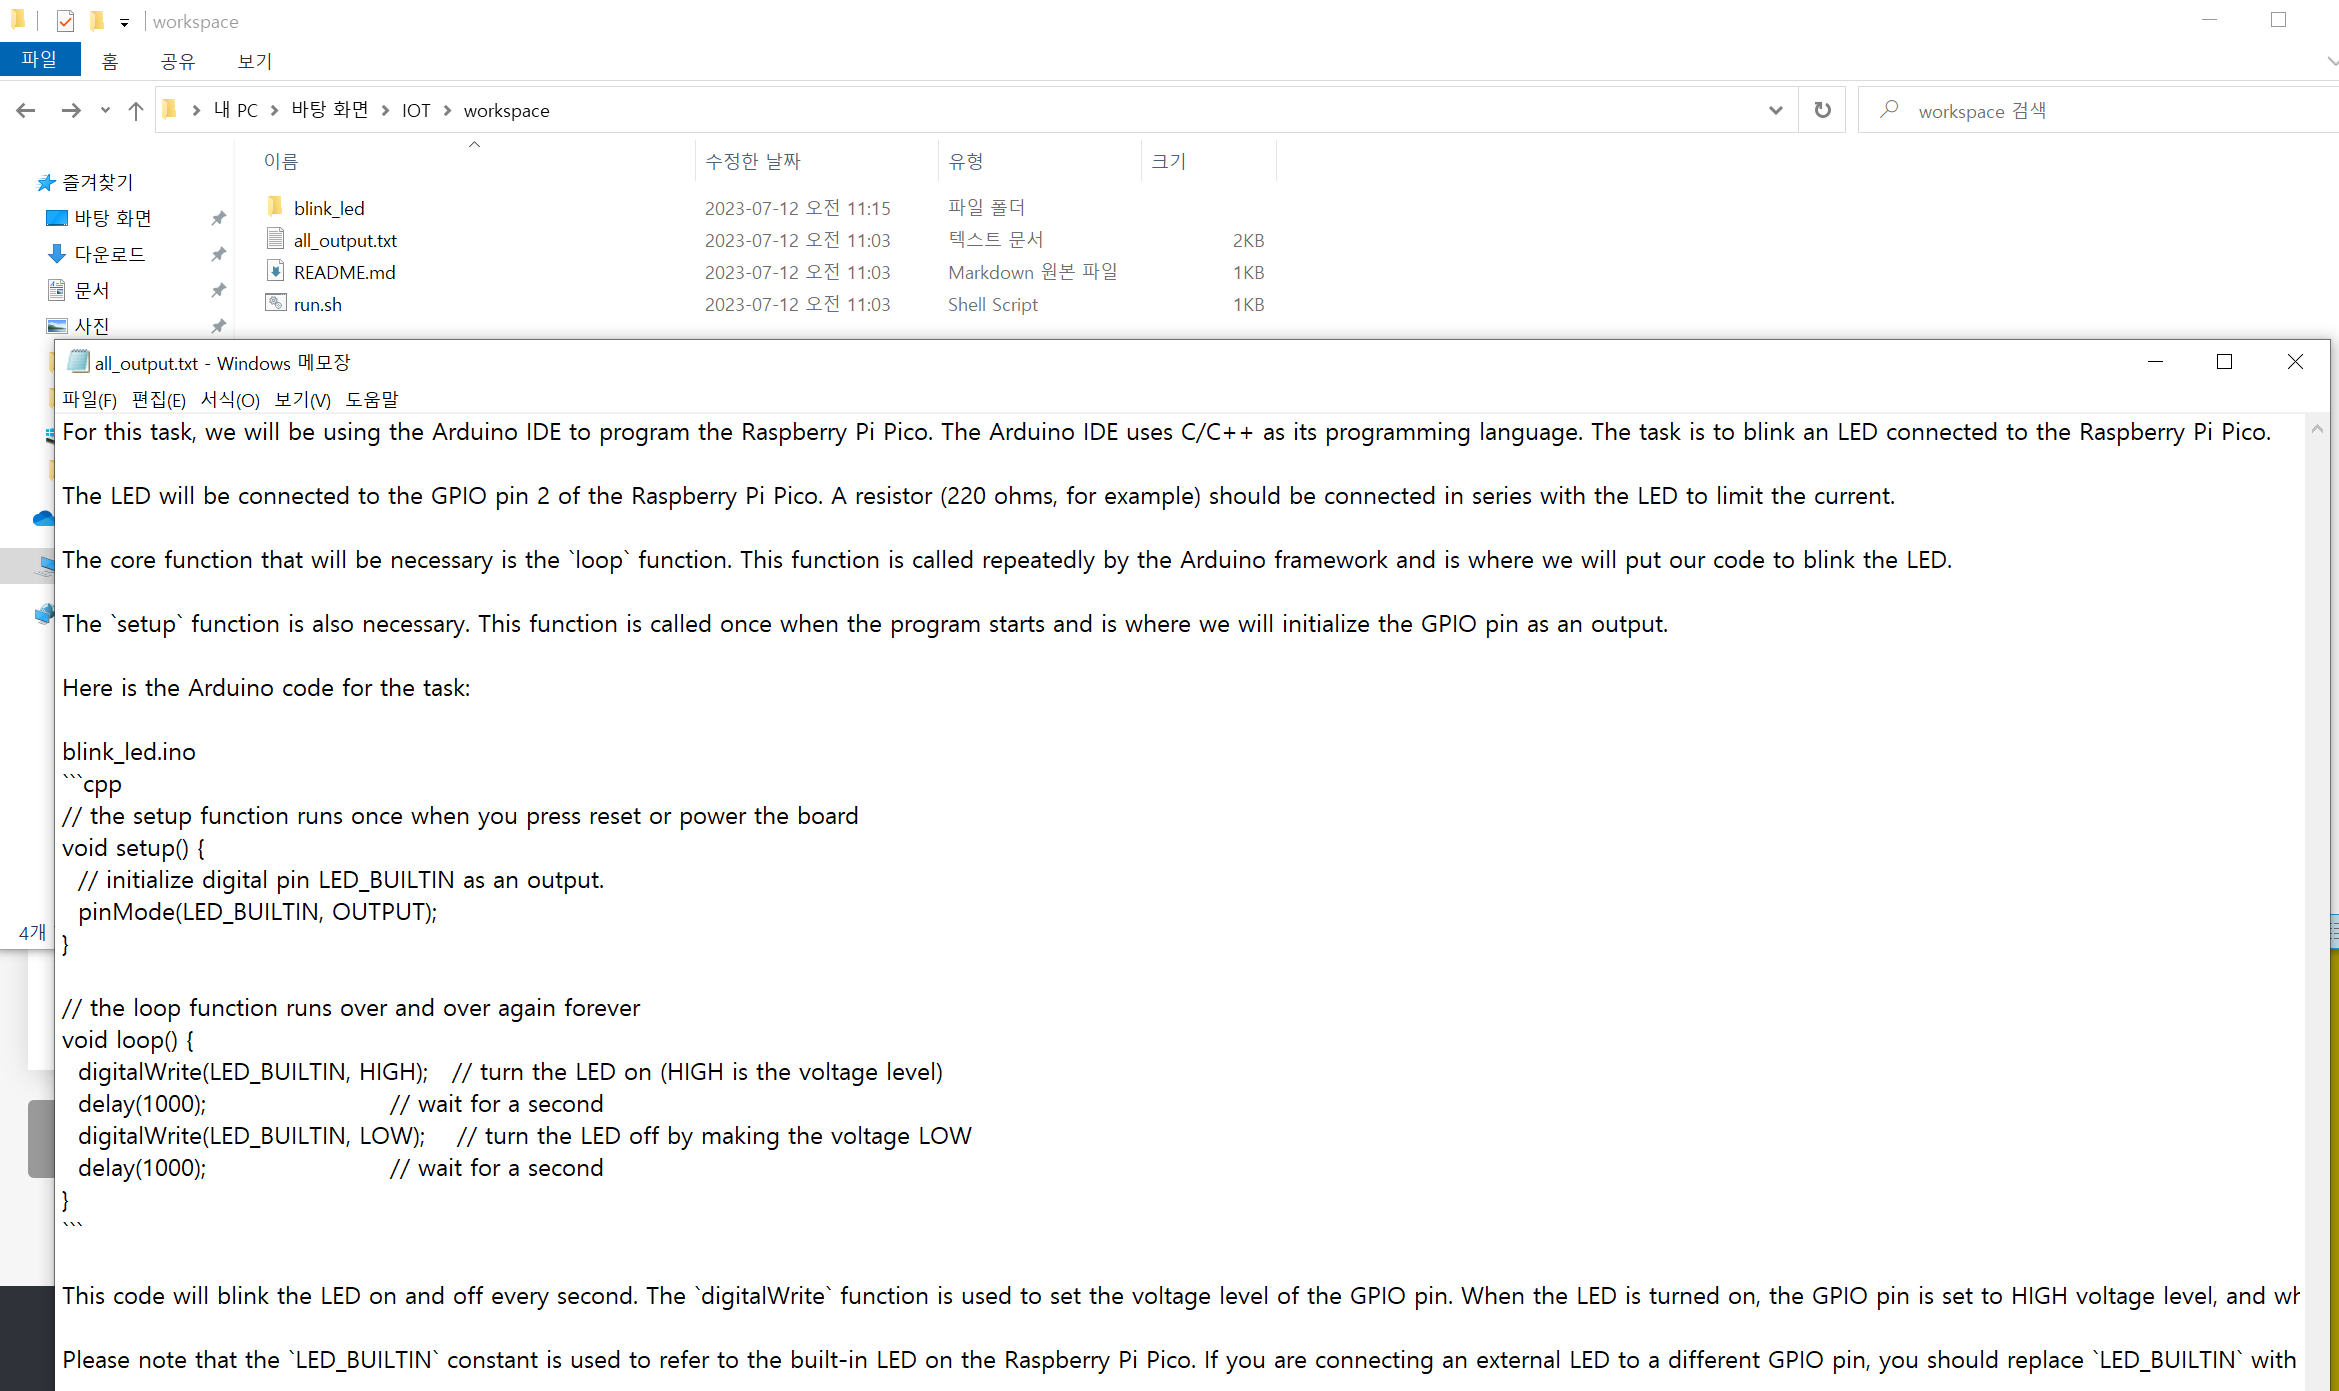
As shown above, GPT generates all the source code for you, so you should be able to comfortably develop within the template with only a little debugging.
Examples
Let's import the source...
Read more »
 Jerry Isdale
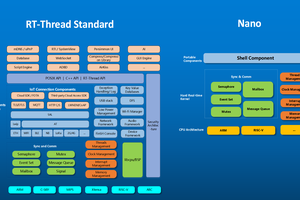
 RT-Thread IoT OS
 matt oppenheim