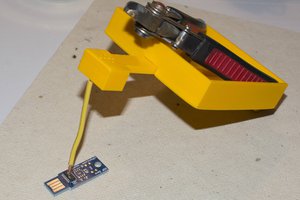
I created 3D printed cases for turning inexpensive digital soldering station controllers into a battery operated soldering stations (HACKADAY.IO project). I first made a version for Milwaukee M18 batteries (because those are my batteries of choice) but very soon friends asked for versions to work with Dewalt and Ryobi batteries. I have been using mine for a while now, and have loaned it out to quite a few people, as a result I've gotten even more requests for soldering stations of one version or another. Mostly the stations are very easy to build using the 3D printed parts and the controller kit from Amazon, but it required quite a bit of effort with needle nose pliers (and maybe a band-aid or two) to form wire soldering iron holder. After seeing some youtube videos about bending key chain clips out of wire I was inspired to find a better way, or at least some better tools. In the videos they use some very nice custom cool tools. These tools can be bought but as they are custom and specialty tools you might guess that they don't come cheap (some sets sell for $600). But I have a 3D printer so...
After a few design iterations I have created a set of tools for bending wire coat hangers into a soldering iron holder accurately and with minimal effort. Other than the 3D printed parts you only need length of 8mm and 3mm shafts, some M3 thermal inserts, and M3 x 20 flat head screw. I used a scrap of 8mm linear shaft an a 3mm drill bit for the two required shafts.

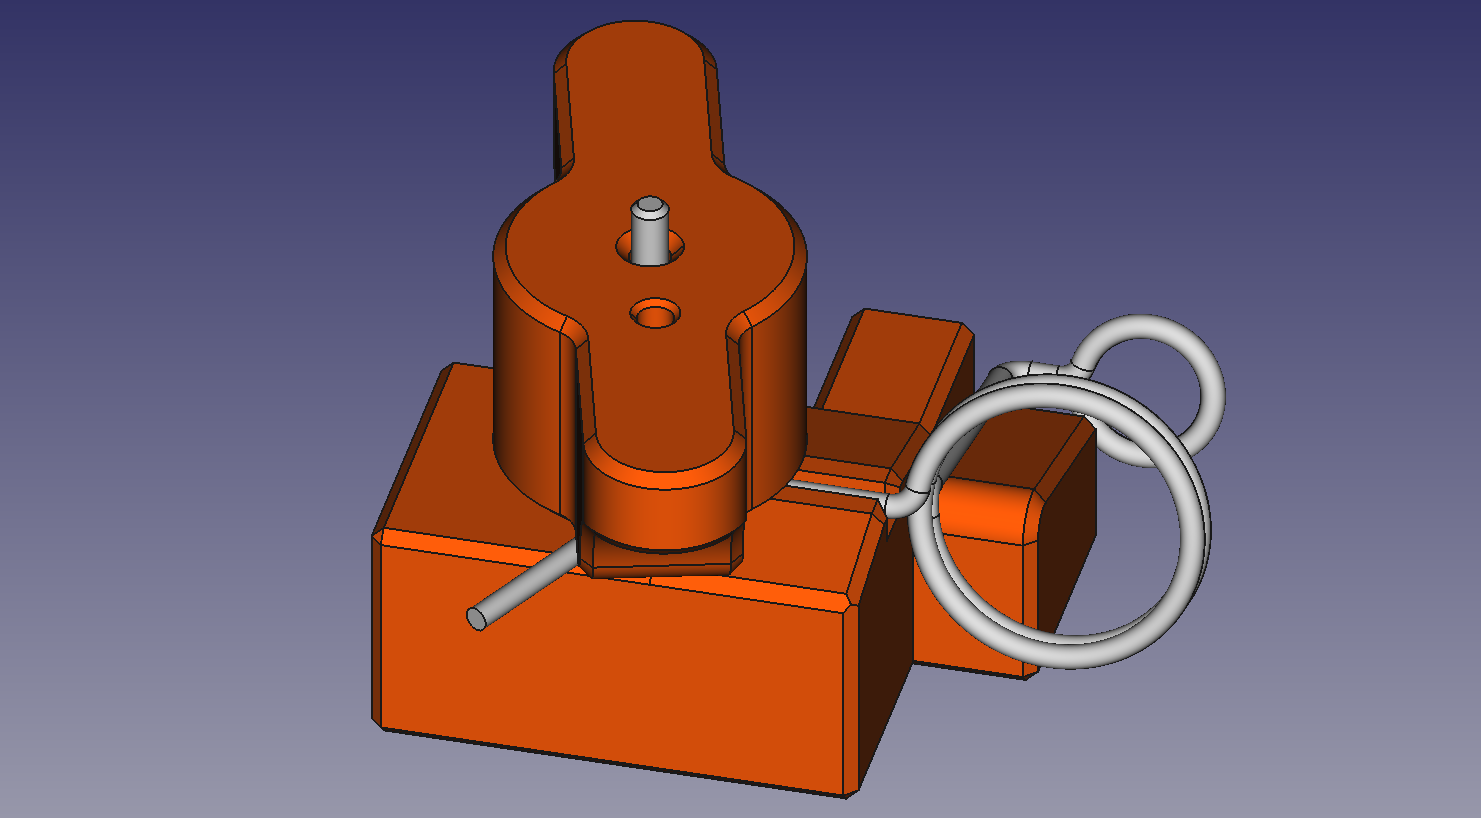
The process starts with straight wire that you clamp into the Bender Base and then bending 3 simple right or almost right angle bends.


Then you use the double sided Knob to bend the tails of the wire around the Insert and 8mm rod.

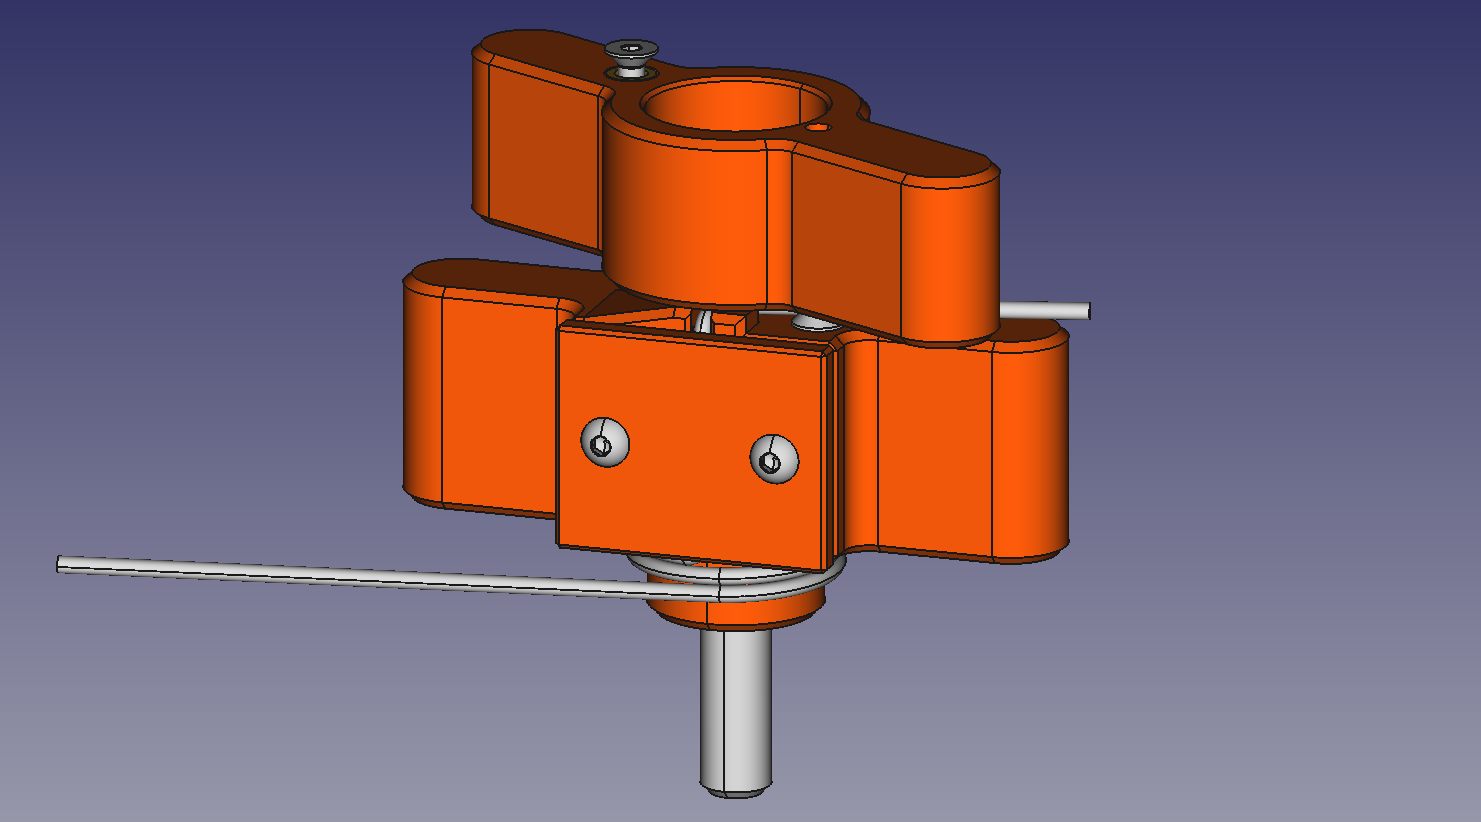
Next replace the clamp plate with the second clamp plate to provide an edge around which to bend the tail out from the large coil.

Removing the clamping plate, 8mm mandrel and the Insert from the Bending Base allows the formed wire to be removed from the Base. Wire cutters can be used to cut the extra wire from the small loop once the formed wired has been removed from the Base.

The Tail Base can be used to create the initial bend in the tail at the correct angle and at the right position. Then the 3mm shaft can be inserted into the base.

The Tail Knob can then be used to form the mounting screw loop.
The last operation is to trim the excess wire from the mounting screw loop.

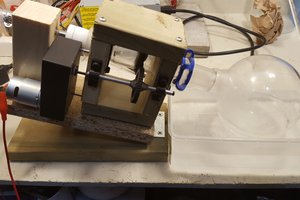
And voilà you have a perfectly sized wire soldering iron holder.
 conorpp