 electronicsworkshops
Introduction
An Arduino-based CNC (Computer Numerical Control) machine is a versatile and cost-effective solution for automating precision tasks like milling, 3D printing, laser cutting, engraving, and more. Arduino, a popular open-source micro controller platform, serves as the brain of the CNC machine, enabling it to interpret computer-generated instructions (usually in the form of G-code) and precisely control the movement of motors and tools.
For Full project : https://electronicsworkshops.com/2023/09/18/arduino-based-cnc-machine/
Bill Of Materials
| SN | COMPONENTS NAME | DESCRIPTION | QUANTITY | |
|---|---|---|---|---|
| 1 | Arduino Board | Arduino nano | 1 | https://amzn.to/3Qe71y5 |
| 2 | Connecting wires | jumper wire | some | https://amzn.to/3fMoSw7 |
| 3 | Breadboard | Normal | 1 | https://amzn.to/3FUQlXe |
| 4 | Stepper motor | 5V | 1 | https://amzn.to/48mVza3 |
| 5 | Motor Driver L293D | L293D | 1 | https://amzn.to/47bnuZN |
| 6 | Servo Motor | 5V | 1 | https://amzn.to/3RqNivM |
Basic Workflow of an Arduino-based CNC Machine
- Design: Create a digital design or model of the object you want to produce using CAD (Computer-Aided Design) software.
- G-code Generation: Convert the CAD design into G-code, which is a series of commands that specify the tool’s movements, speeds, and other parameters. Specialized software or slicers (e.g., for 3D printing) generate this G-code.
- Arduino Programming: Write or upload firmware (e.g., Grbl, Marlin) to the Arduino that can interpret G-code commands and control the stepper motors and other machine components.
- Assembly: Build the physical structure of the CNC machine, including mounting the motors, tool head, and any additional components.
- Electrical Wiring: Connect the Arduino, stepper motors, motor drivers, limit switches, and power supplies, ensuring proper grounding and safety measures.
- Calibration: Calibrate the machine by setting parameters such as steps per millimeter, acceleration, and maximum speed for each axis.
- Software Setup: Install CNC control software on your computer and configure it to communicate with the Arduino. This software allows you to send G-code commands to the CNC machine.
- Operation: Load your G-code file into the CNC control software and start the machine. The Arduino interprets the G-code commands, and the motors move the toolhead accordingly to create the desired object.
Connections
Stepper Motor Connections (X and Y Axes)
X-Axis Stepper Motor:
- Connect the four of the X-axis stepper motor to a dedicated stepper motor driver board .
- Connect the the input of the motor diver to D2, D3, D4, D5 pin of Arduino nano.
- Connect the ENABLE pin of the stepper motor driver to 5V.
- Connect the stepper motor driver’s GND and VCC (power supply) pins to the Arduino’s GND and +5V pins, respectively.
Y-Axis Stepper Motor:
Connect the four of the Y-axis stepper motor to a dedicated stepper motor driver board .
Connect the the input of the motor diver to D8, D9, D10, D11 pin of Arduino nano.
Connect the ENABLE pin of the stepper motor driver to 5V.
Connect the stepper motor driver’s GND and VCC (power supply) pins to the Arduino’s GND and +5V pins, respectively.
Schematic Diagram

PCB Diagram

3D Diagram


Manufacturing Files
Gerber File
Gerber_NEW_PCB_2023-09-17Download
Bill Of Materials
BOM_NEW_PCB_2023-09-17Download
Position File
PickAndPlace_NEW_PCB_2023-09-17Download
Order Directly from PCB WAY
I have already uploaded all these required manufacturing files in PCBWAY website. You can easily go to the below link and place you order, and get your Own Home Automation PCB manufactured from one of the best pcb manufacturer PCBWAY.
ORDER IT DIRECTLY FROM PCBWAY********
Conclusion
Arduino-based CNC machines offer flexibility, affordability, and the opportunity for customization, making them suitable for hobbyists, makers, and small-scale manufacturing operations. They can be used for a wide range of applications and provide a valuable platform for learning about CNC technology and automation.


 peterbdavenport
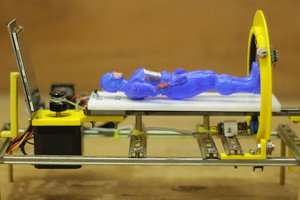
 Mrinnovative
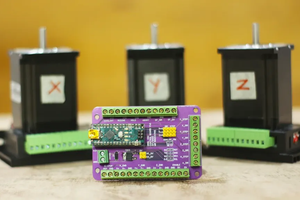
 sandy
sandy
 DIY GUY Chris
Nice! Are there photos or videos of the machine you built?