 JP Gleyzes
14 years ago I built my own CNC machine. At that time, CNC were running with Xp PC using parallel port. Gcode eaten by Mach3 software and sent to steppers controller board using the parallel port pins.
This machine, although dusty and rusty, still runs on an old PC... but it is time to design something more up to date.
This project is how I reused most of my setup and simply replaced Mach3 (and the old PC) by a modern laptop, controlling a FluidNC (GRBL) board via USB.
CNC parallel port control boards
Mach3, EMC2 and most of CNC softwares were using the parallel port in an (almost) standardized way. They all were outputing step and dir signals to control stepper motors directly on the port using 5v TTL logic.
Typically here is the wiring diagram of one of these control boards:
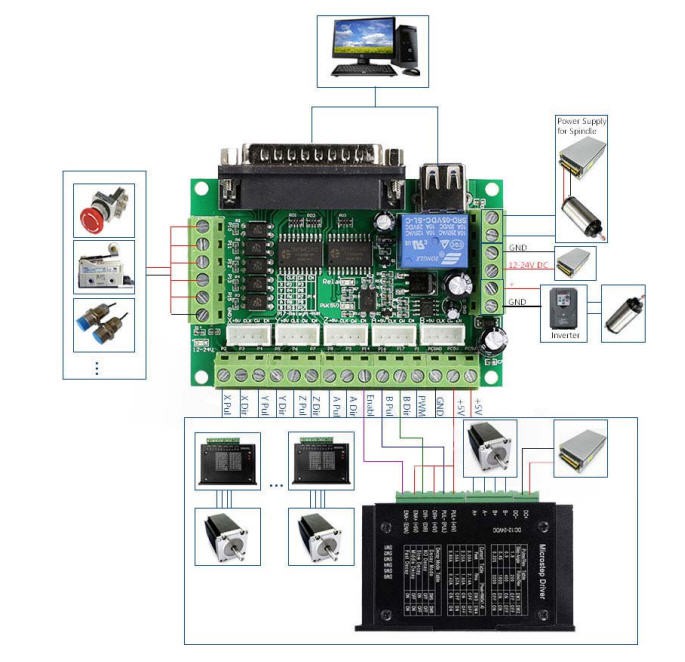
So all the control signals were sent to the parallel port and configured under Mach3 software.
My control board followed these guidelines and more specifically this wiring scheme:

It is thus a board with the following specifications:
- able to drive 4 axis steppers (X, Y, Z and A)
- able to control 4 more outputs (Out1, 2, 3 and 4)
- able to read 3 home switches (HomeX, Y and Z)
- able to read one probe
This board should be generic enough to fit most (not to say all) "parrallel port" CNC controllers.
Converting my CNC control board to FluidNC
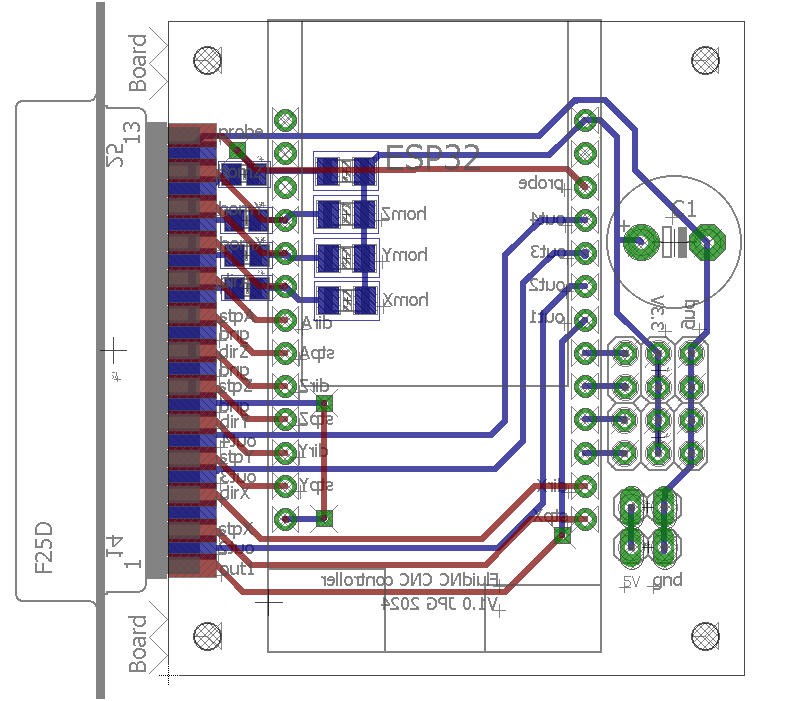
To design a "pass though" board from FluidNC to my control board I needed to "open" my board to check the logic interface after the parallel port.
Here are the schematics:
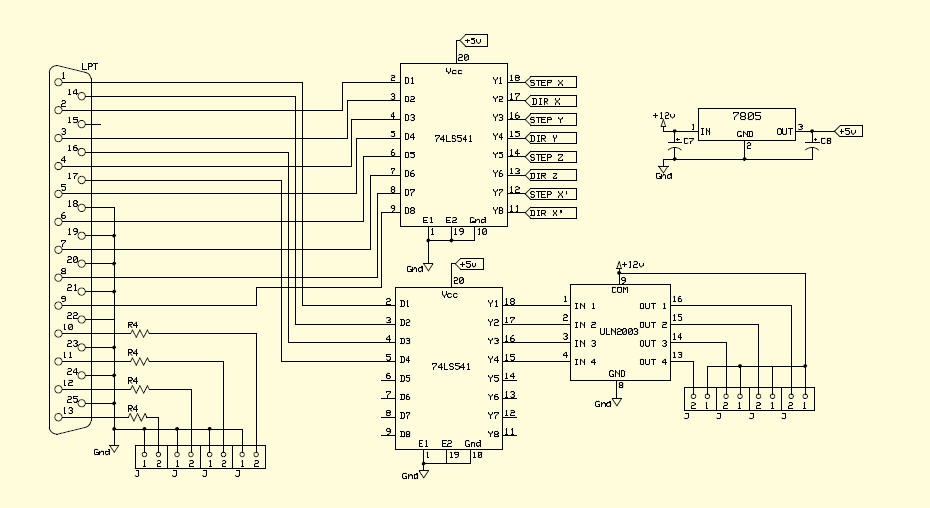
You recognize the parallel port (left) followed by 74LS541 chips. These chips are octal buffers and line drivers which are used to "clean" the step, dir and out signals coming from the parallel port. Perfect, if I input 3.3V logic signal instead of 5V one it will work thanks to these drivers!
And the outputs of this board (home signals + probe) are simple switches with a 420 Ohm resistor (named R4).
So nothing complex!
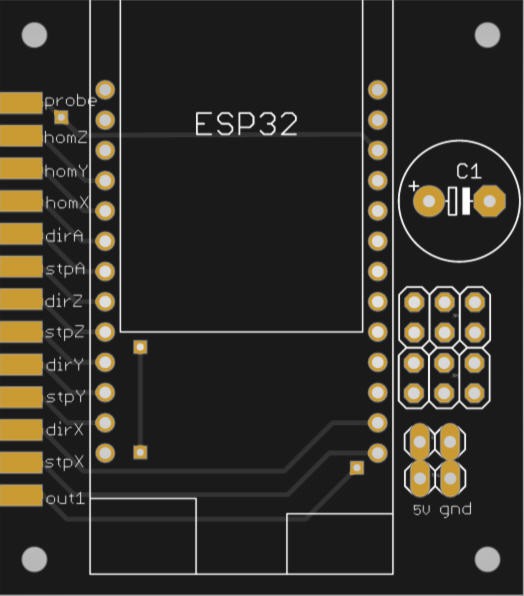
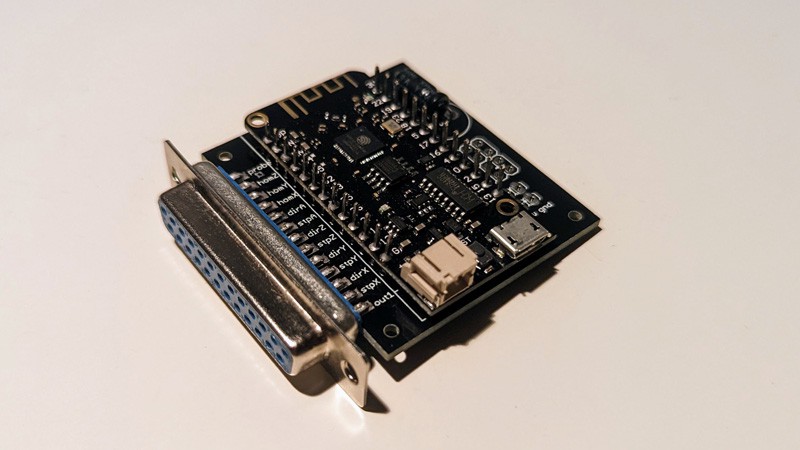
The FluidNC control board
The idea is thus to replace Mach3 software by an ESP32 on which will be flashed FluidNC/GRBL firmware.
Then this board will be connected to the parallel port connector of my old Mach3 controller board. This old board will thus be converted to a modern USB/GRBL/control board. (but could still work using the parallel port as nothing will be modified)
And trust me the new interface board cannot be simpler!

As you can see this board is almost empty! The only added electronics are 4 pull up resistors + capacitors on the "home/probe" lines.
They form RC filtering to debounce the inputs. And trust me these RC filters are more than useful. See here for details : http://wiki.fluidnc.com/en/support/controller_design_guidelines
So I chose R = 10k and C = 100nF to have a RC time constant close to 10ms.
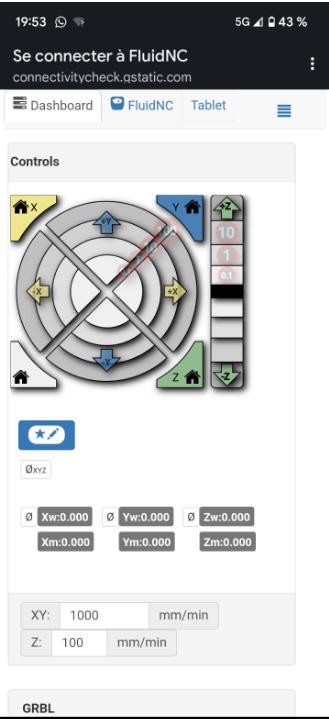
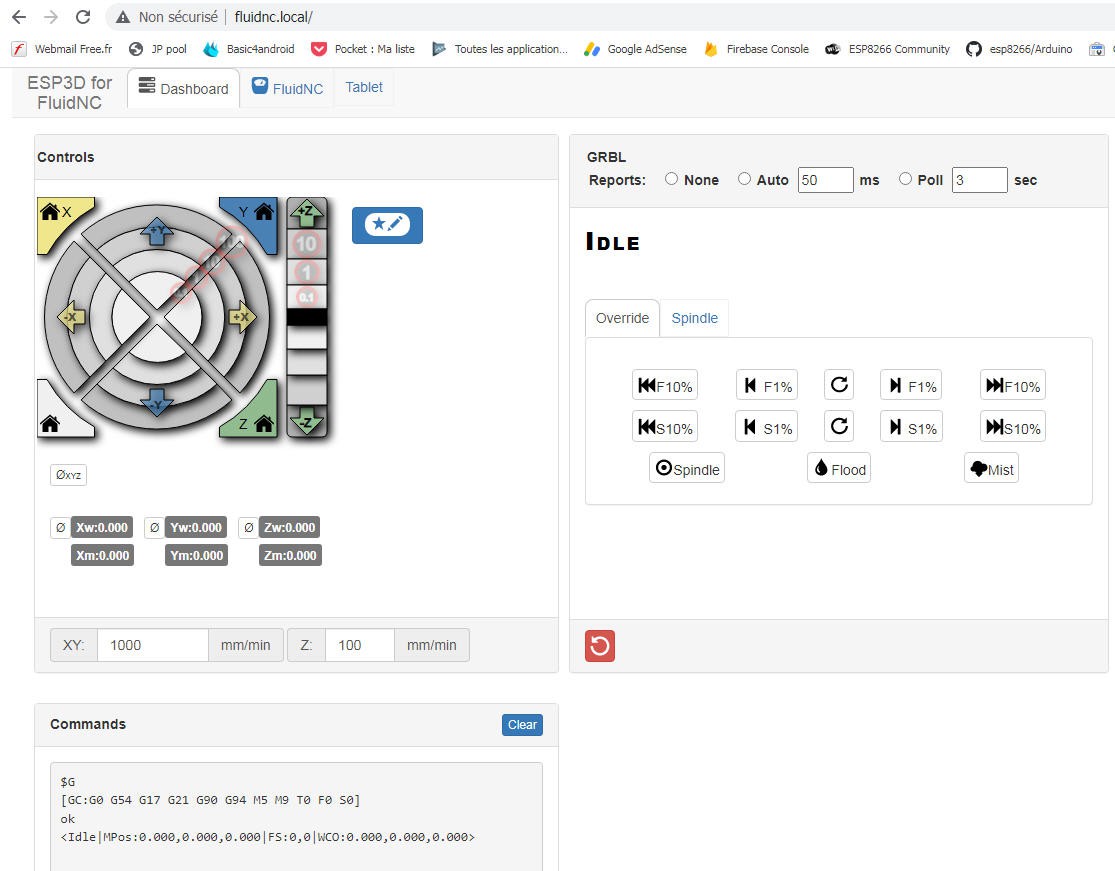
And that's it, the ESP32 does all the rest with FluidNC.
PCB
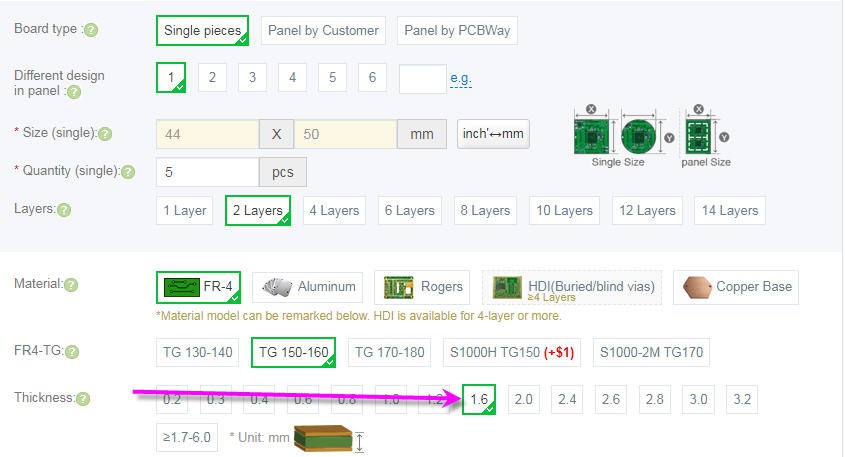
The PCB was produced and kindly sponsored by PCBWay.
Here is a little video to explain everything!
Follow this log to get more information about how to order your PCB
Eagle files and Bill of Material are available here : eagle files and BoM
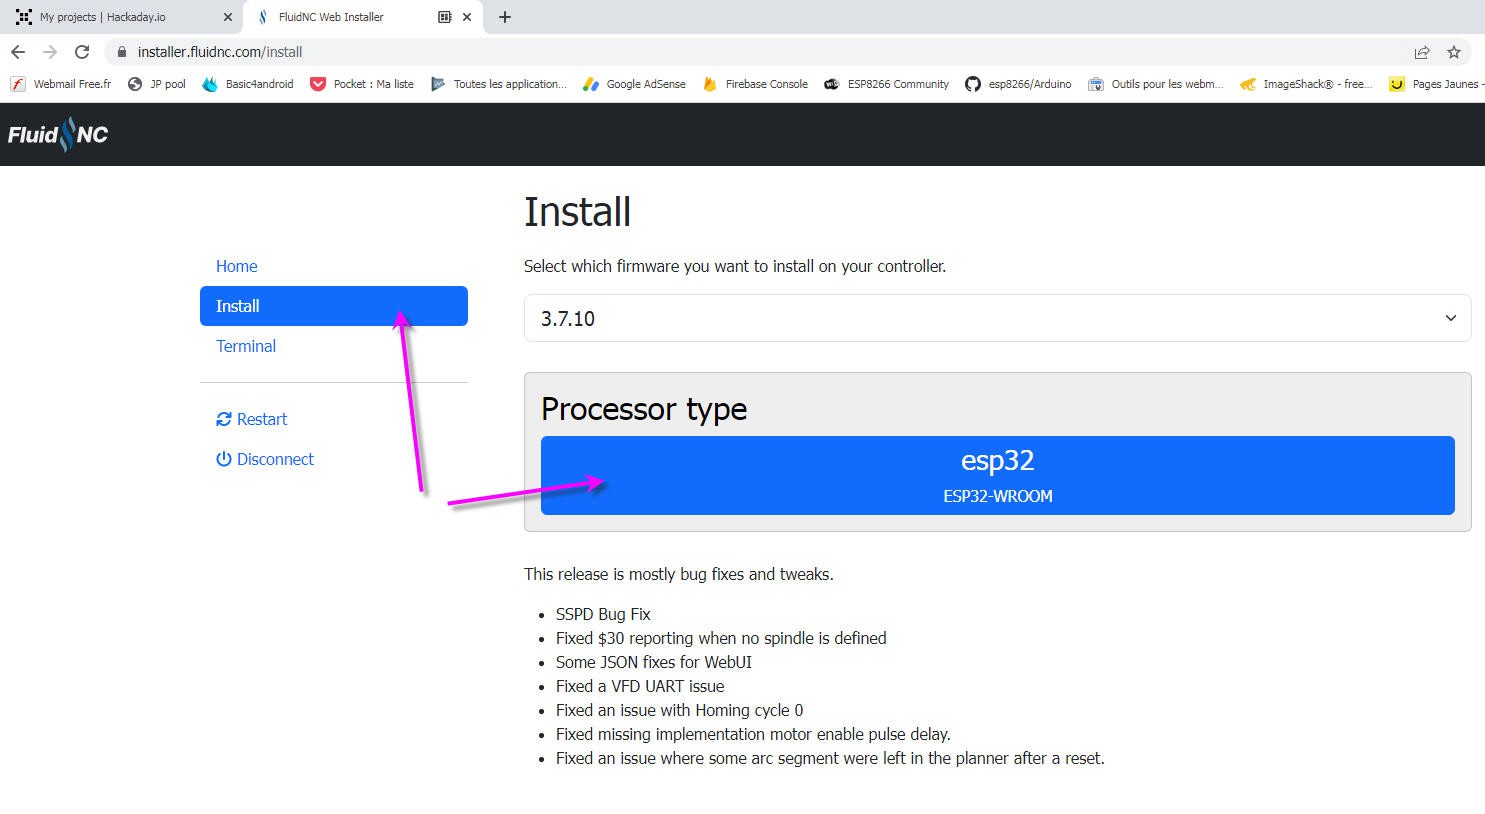
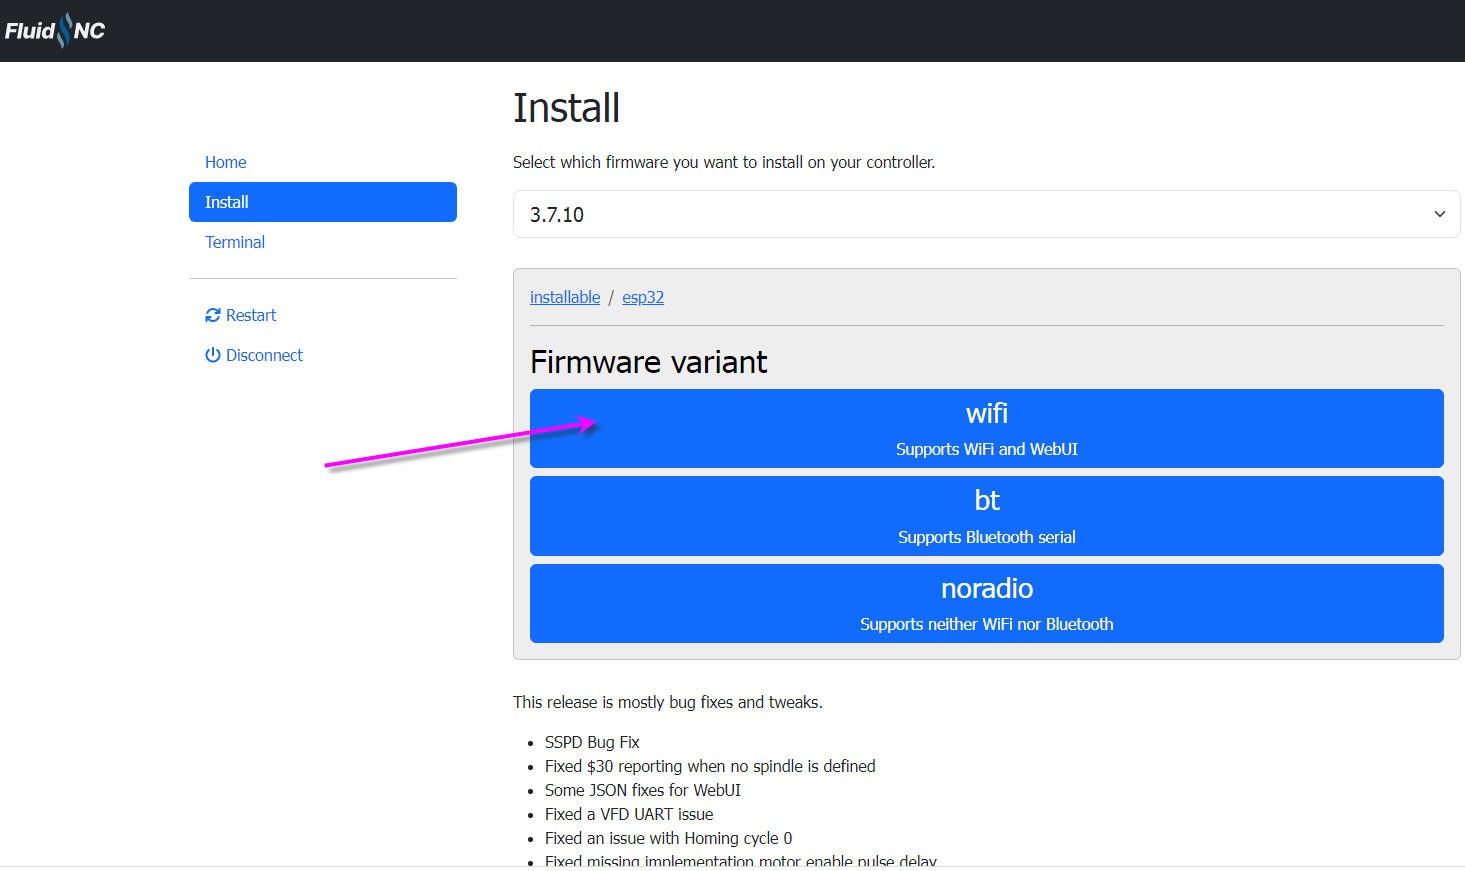
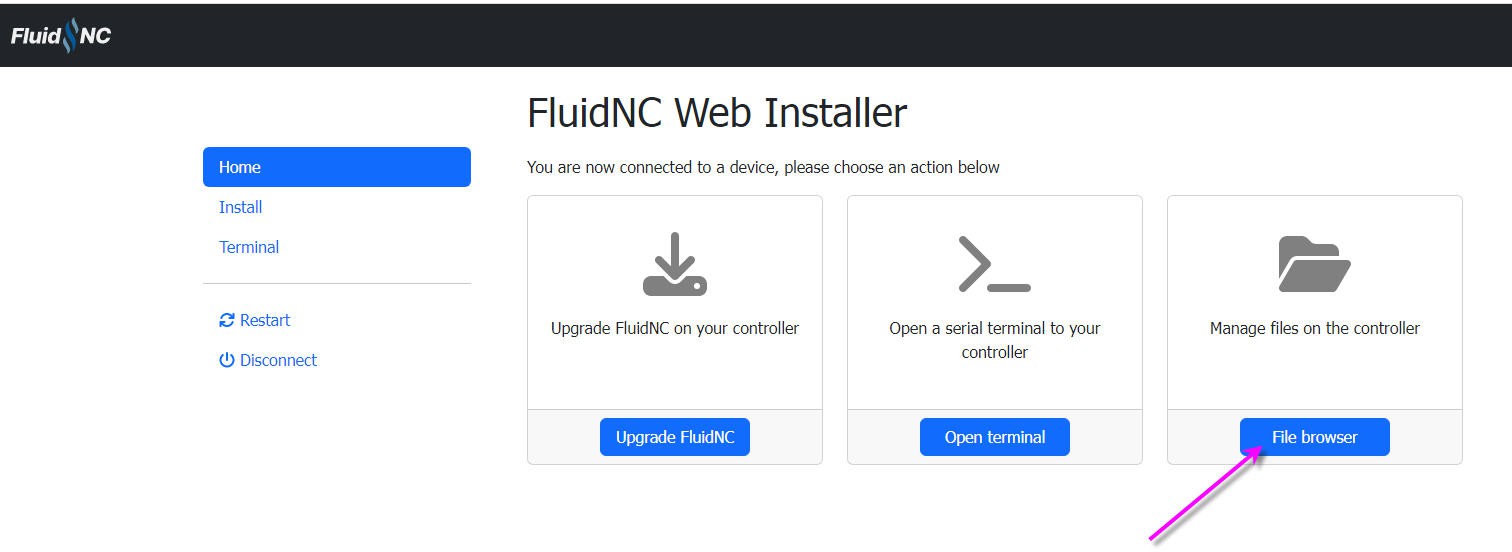
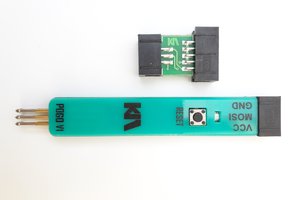
FluidNC installation and configuration
Installing FluidNC is fairly easy. Follow this log
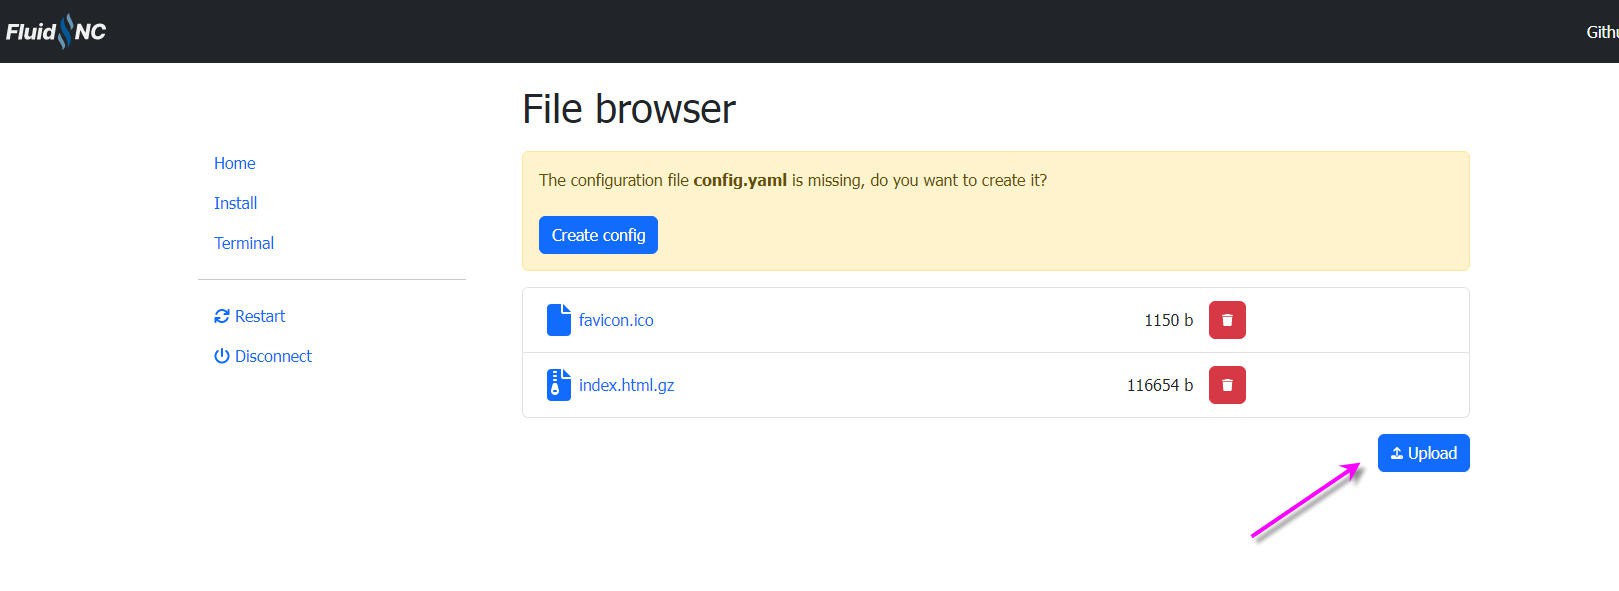
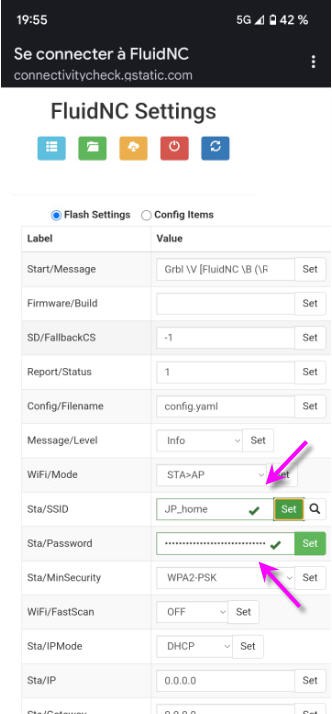
Once done and your config.yaml installed you should be able to run your controller.
But let's have a closer look at this config file:
name: CNC
start:
  must_home: false
axes:
  x:
    steps_per_mm: 80
    max_rate_mm_per_min: 4000
    acceleration_mm_per_sec2: 100
    max_travel_mm: 1000
    motor0:
      limit_all_pin: NO_PIN
      limit_neg_pin: NO_PIN
      limit_pos_pin: NO_PIN
      hard_limits: false
      pulloff_mm: 1
      standard_stepper:
        step_pin: gpio.13:pu
        direction_pin: gpio.15:pu
        disable_pin: NO_PIN
  y:
    steps_per_mm: 80
    max_rate_mm_per_min: 4000
    acceleration_mm_per_sec2: 100
    max_travel_mm: 1000
    motor0:
      limit_all_pin: NO_PIN
      limit_neg_pin: NO_PIN
      limit_pos_pin: NO_PIN
      hard_limits: false
      pulloff_mm: 1
      standard_stepper...
Read more »


 Ben Mo
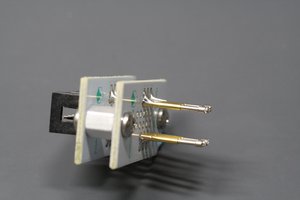
 Alpenglow Industries
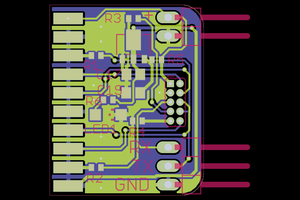
Where can I download the control software?