Aldwin
More details can be found in Plantpal Github.
Teapotlabs Plantpal is part of Teapotlabs open-hardware project.
Sponsorship
Huge thanks to PCBWay to sponsored this project! All PCB and Assembly in this project is using their services.
Acknowledgement
The project won't be possible without the amazing work from people across the globe. The following are the reference to those awesome projects!
- Soil moisture design from b-parasite
- Solar energy Harvesting from TSEM
- Antenna design from Picoclick-C3
Specification
- ESP32-C6FH4: ESP32-C6 with 4 MB in-package flash
- AEM10941: Solar energy harvesting
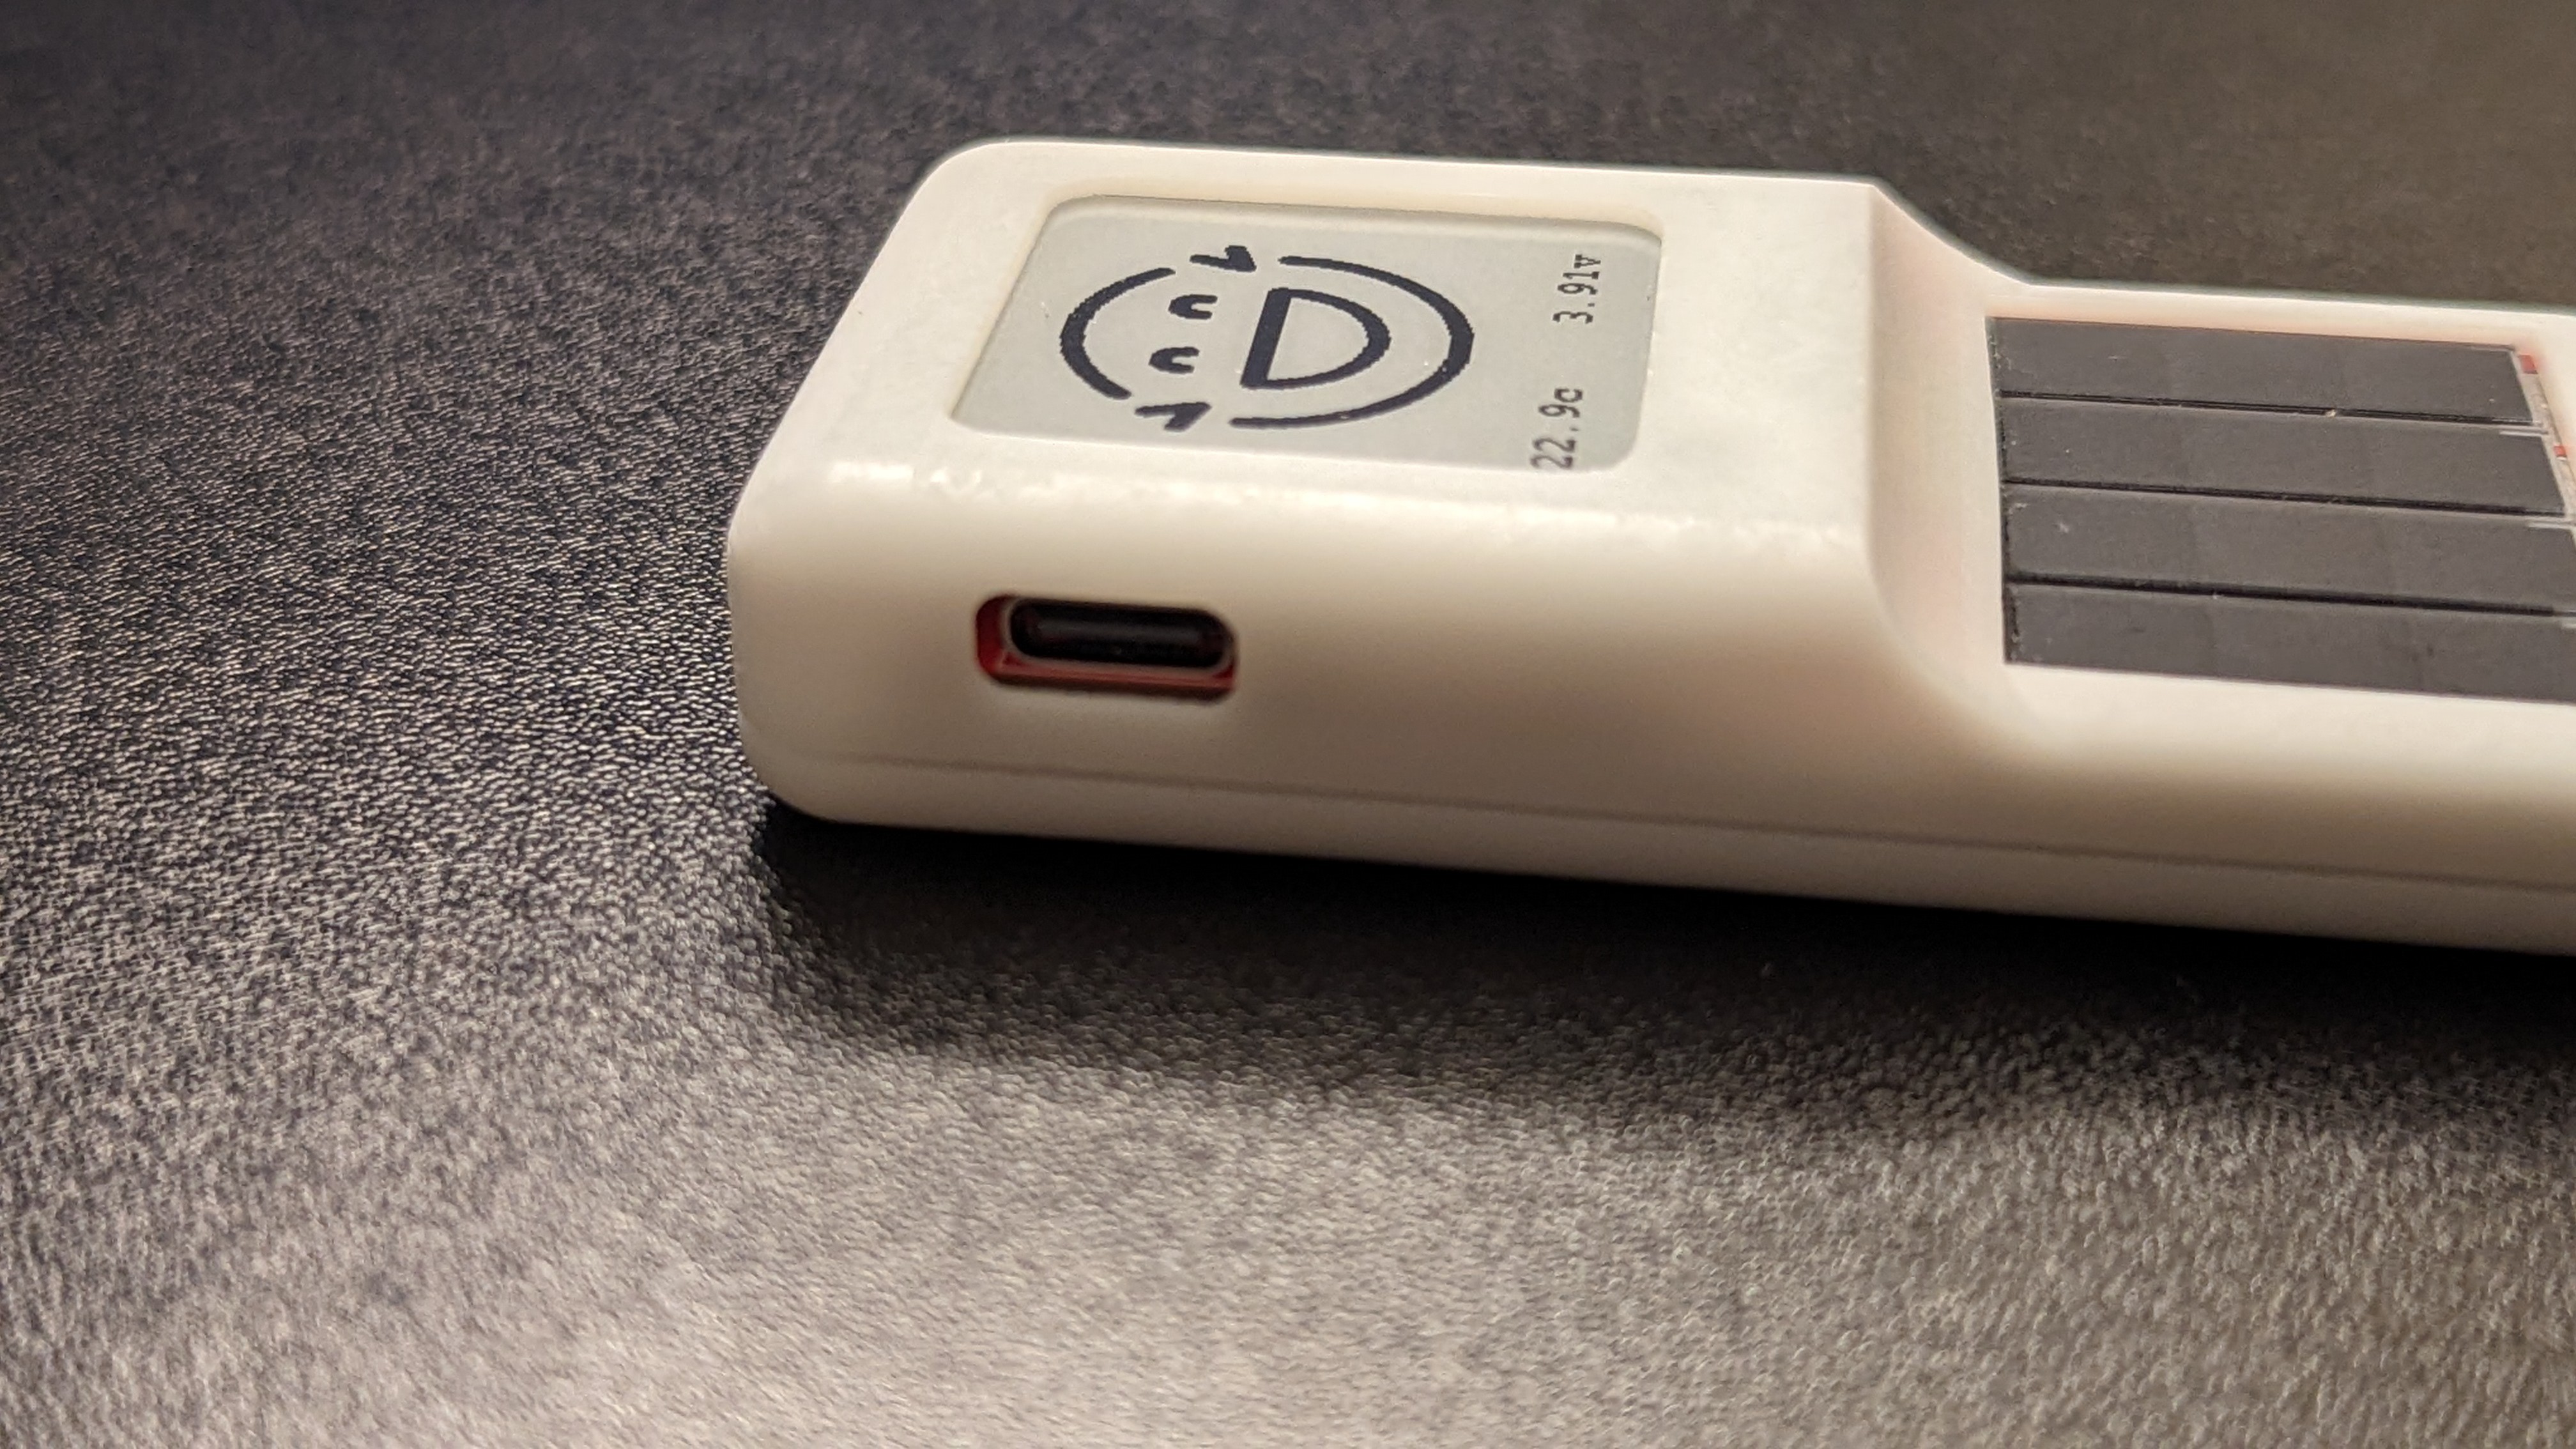
- USB-C for charging and programming
- ~20uA Deep-Sleep
- 1.54 Inch E-Paper Display
- Sensor:
BME688for Environmental Sensing- Built-in
Soil Moisturesensor Battery voltagesensing
- 1A charge rate via USB
- 3.7 Volts LiPo Battery
Revision
- Revision 1: Initial public release
- Revision 2: Remove via in pad
- Revision 3:
- Fix incorrect BOM component for D1
- Fix D6 Polarity
- Remove Power Gate
- Change Soil Sensor
SENSE_OUTpin - Add EPD power switch
- Change to 4-layer board
- Move BME688 to bottom layer
- Improve antenna layout
- Revision 4: Re-wire EPD remaining power to +3V3D
Schematics

Built using KiCAD 7.0.5 A detailed schematic can be found here
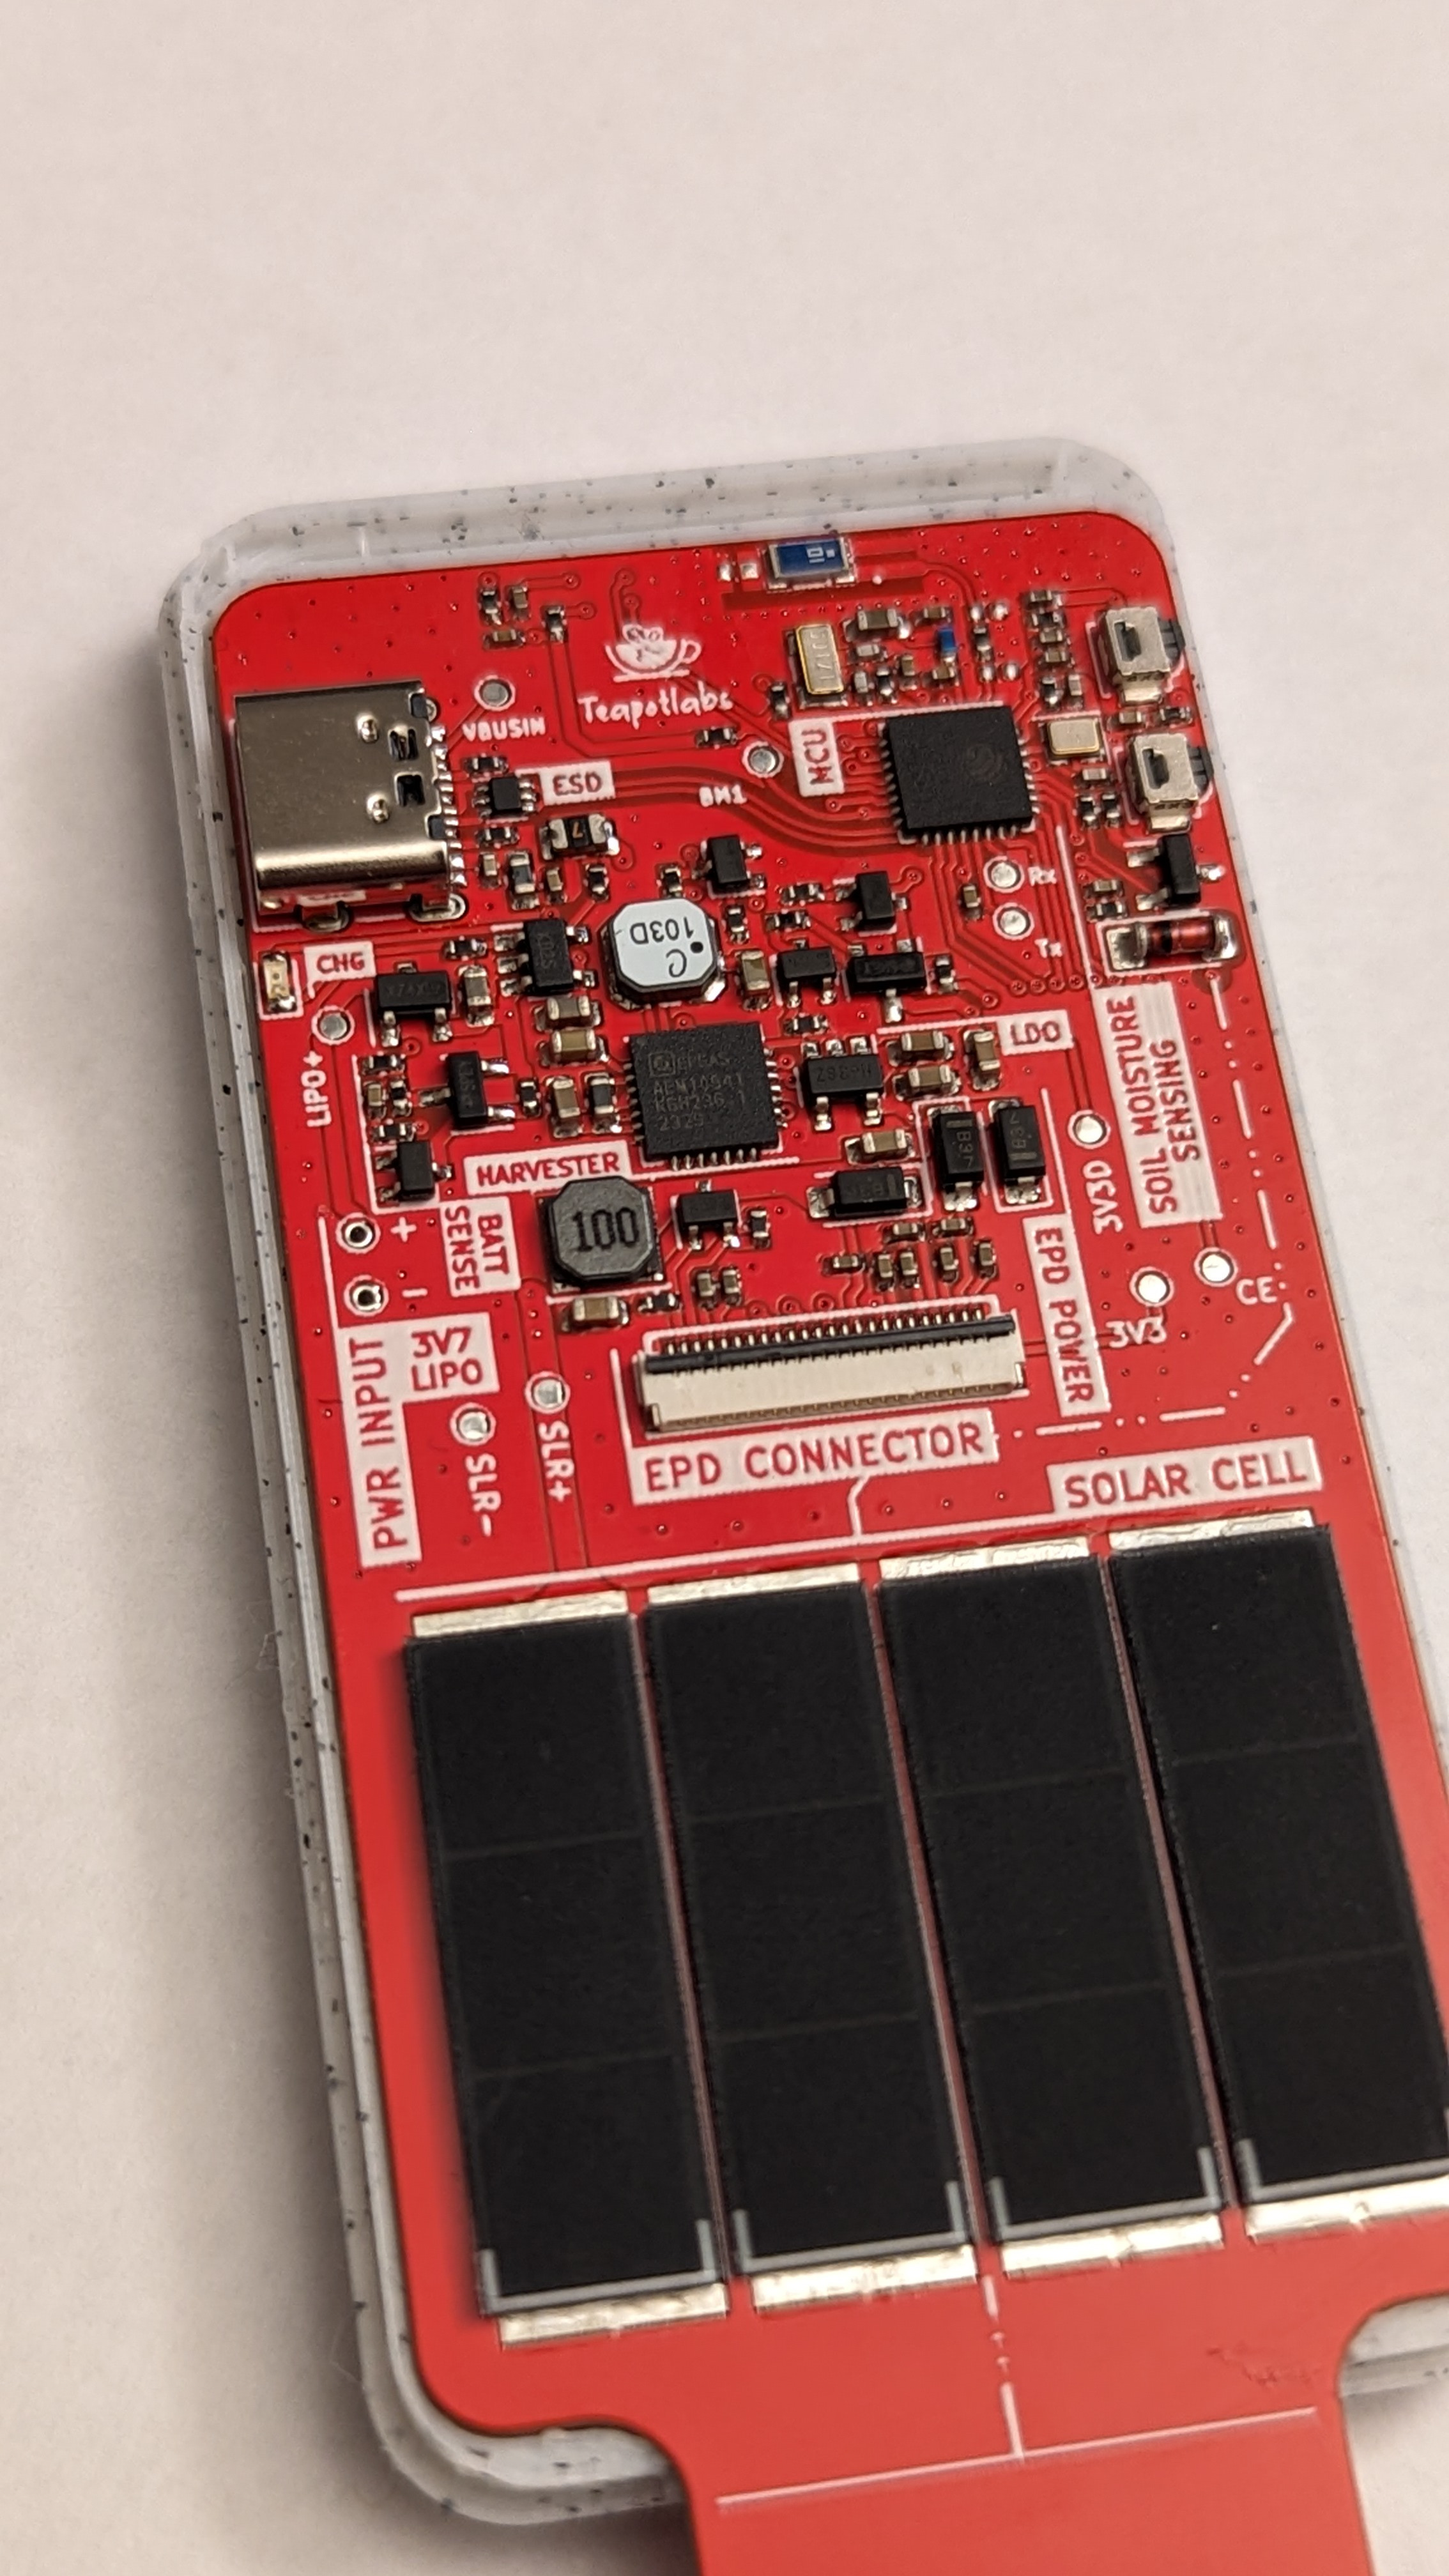
Board
Built using KiCAD, the board is design to be as small as possible with all components placed on the top side of the PCB.
⚠️ The following design are based on revision 3 but is similar to revision 4.
More images can be found here
| Top Board | Bottom Board |
|---|---|
|
|
|
|


PCB Top and Bottom Layout

Assembled Front
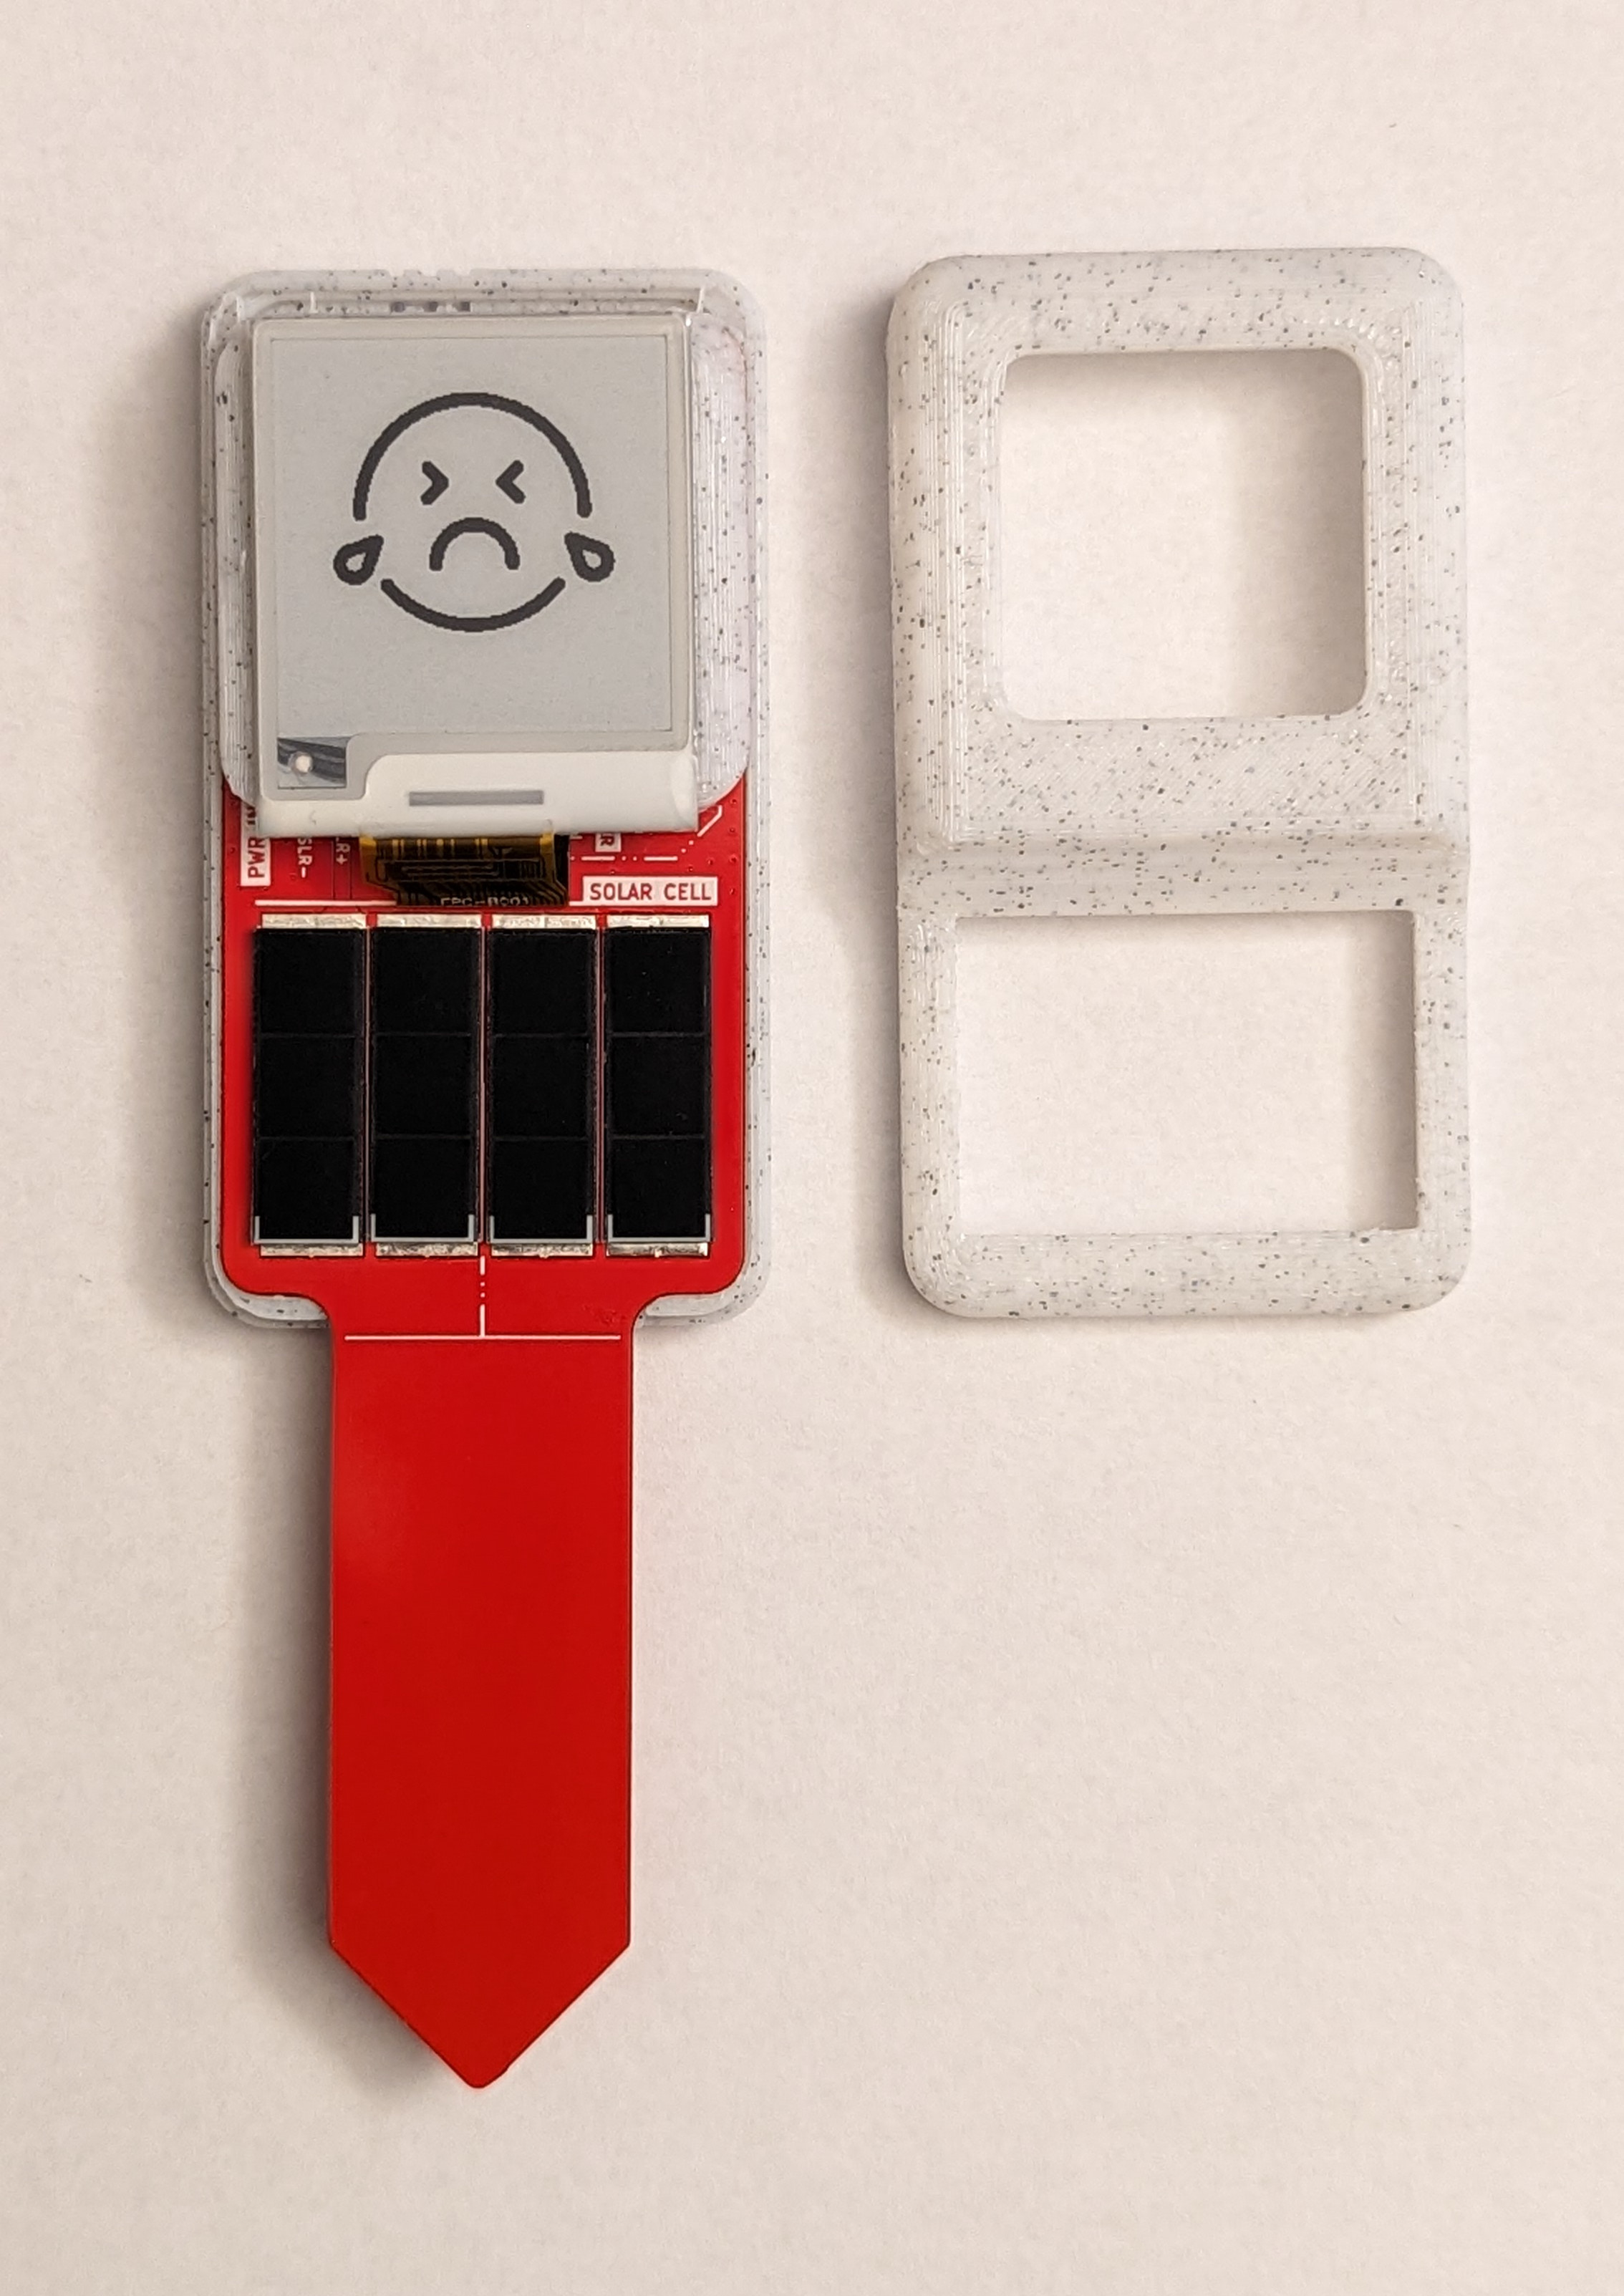
Case and Showcase
Built using TinkerCAD. The case are 3D printable with any generic 3D printer with/without support. The STL files are available here
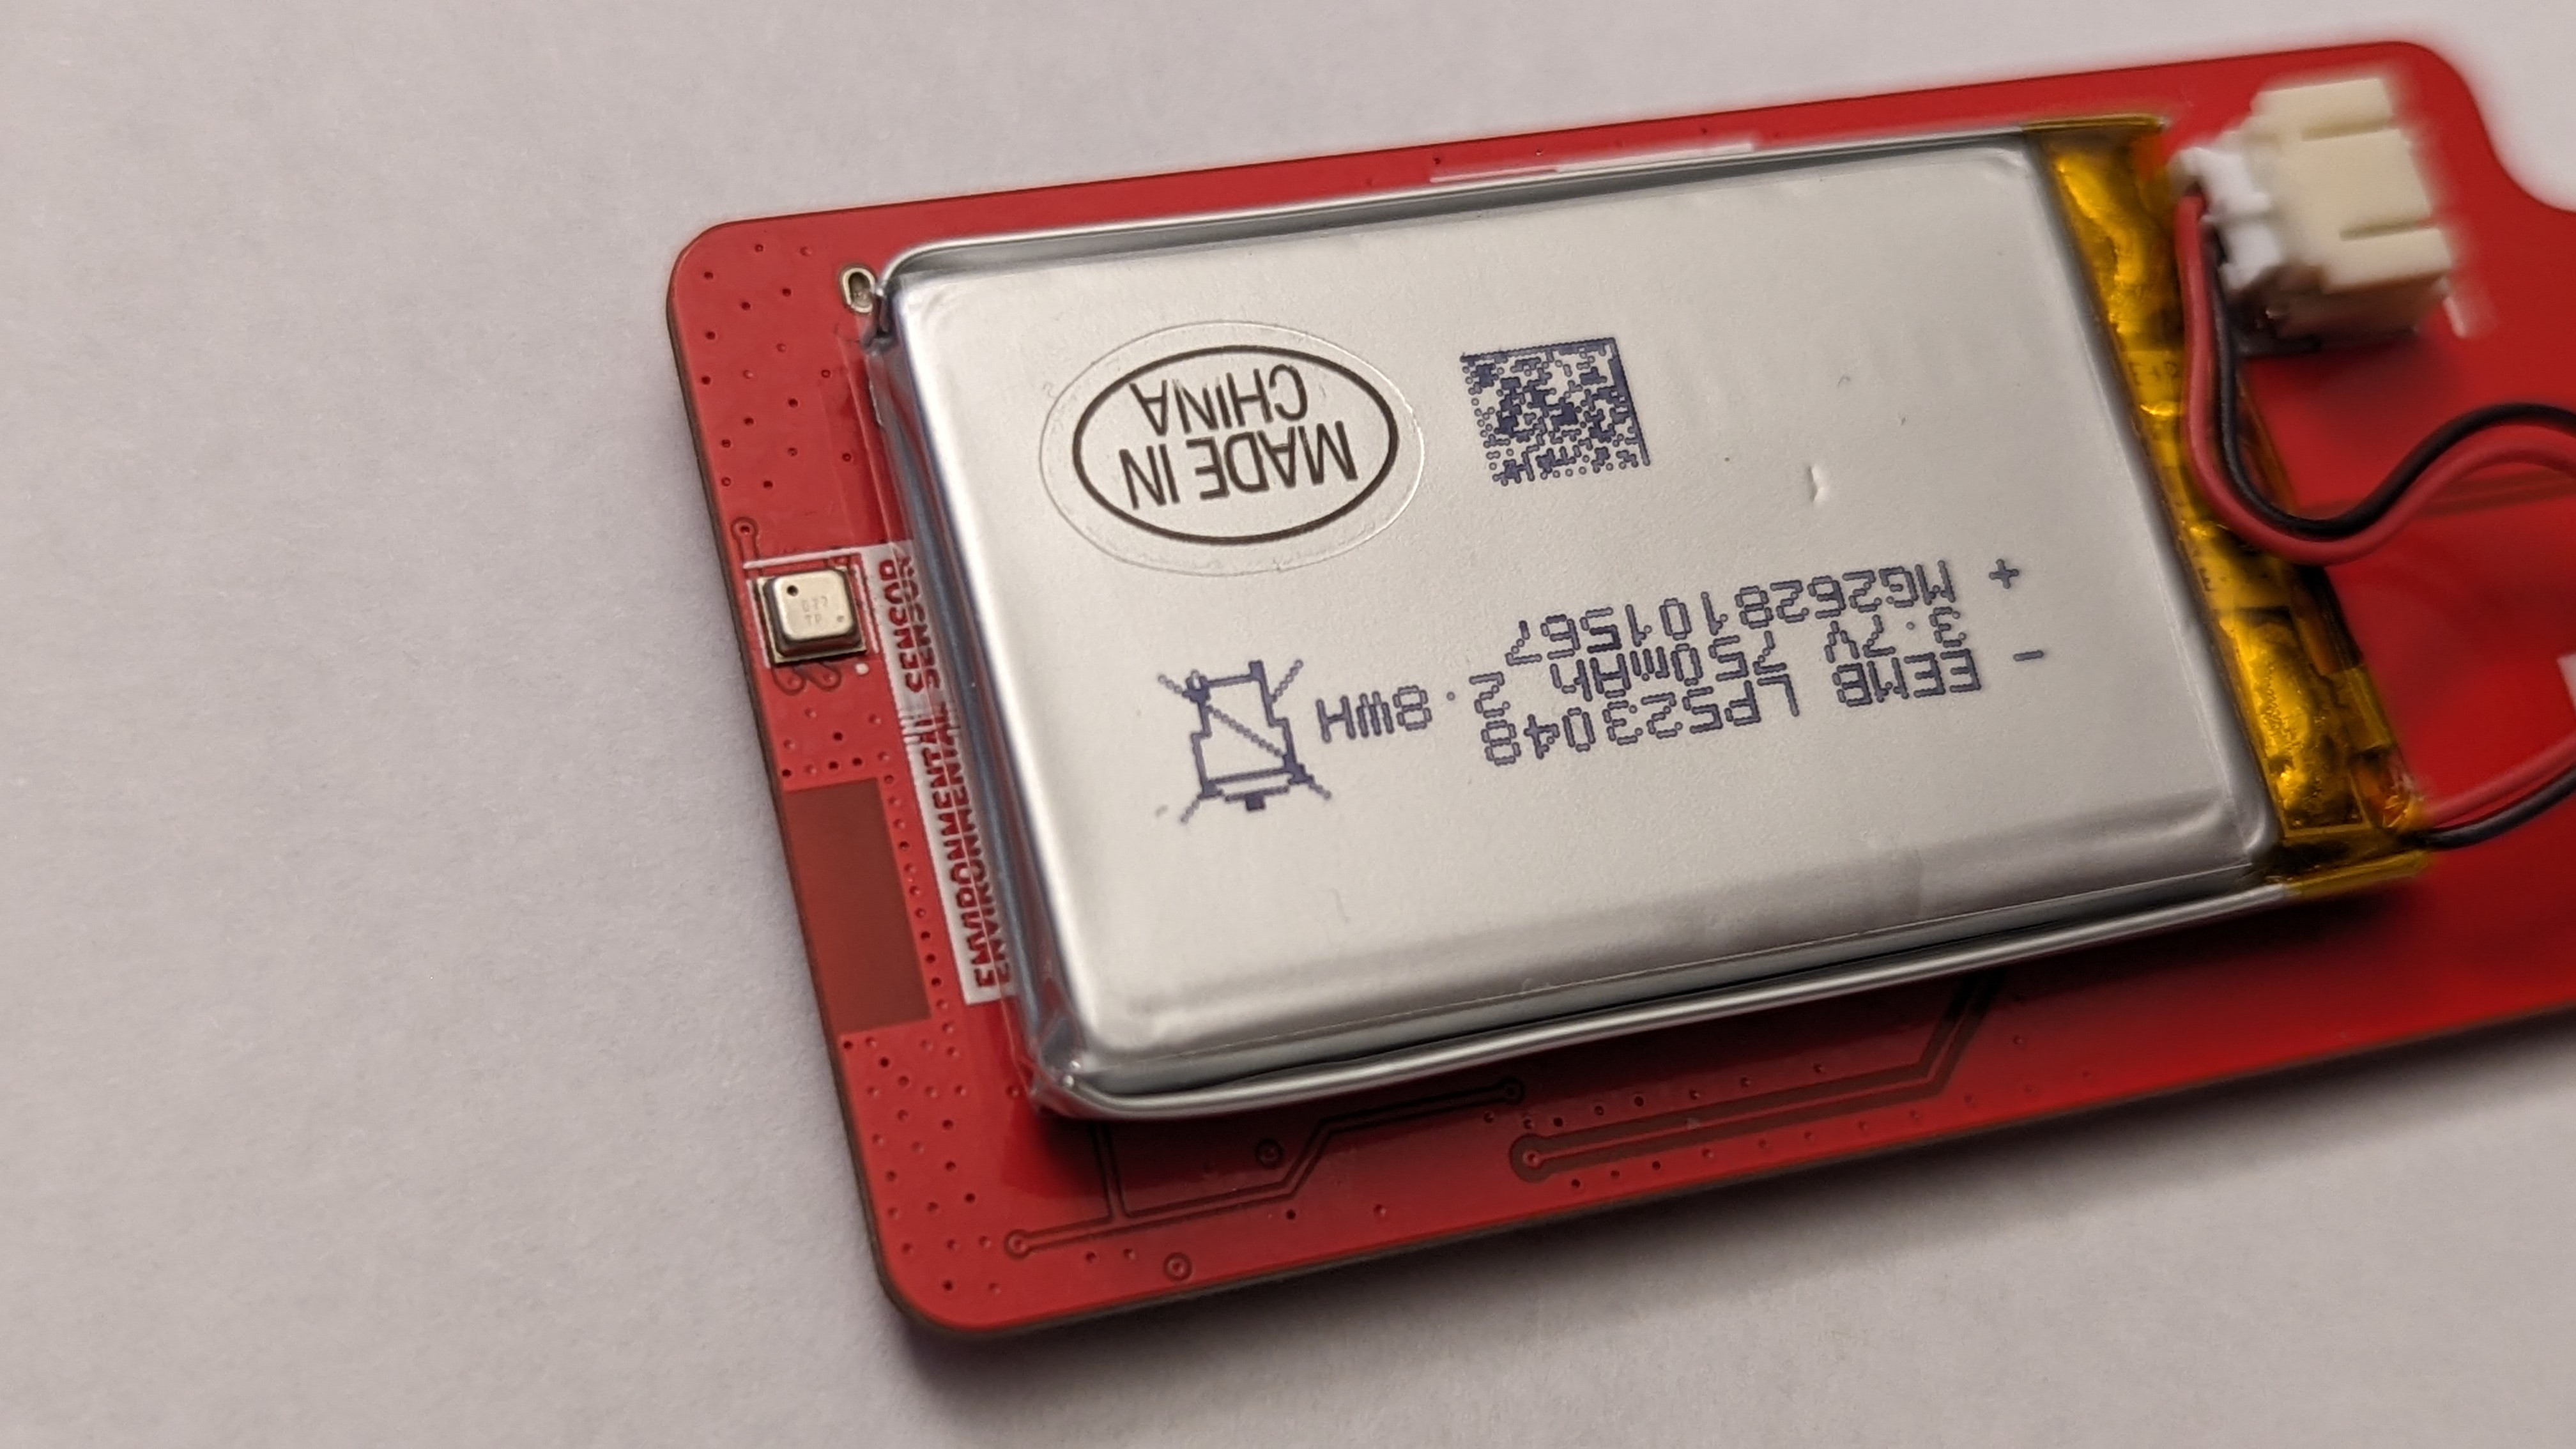
Case Open
BME688 sensor is available in the back, facing 3 small vents in the back of the case
Measurement
Power consumption and solar charging current are measured using Nordic PPK2 and Joulescope. The following are the summary of the measurement:
- Deep-sleep : 22uA
- Read Sensor, Update Display, and Store Data to Flash: 31mA @ 2.5s
- Read Sensor, Update Display, Store Data to Flash, and Publish to MQTT: 54mA @ 3.77s
- Direct Sunlight Solar Charge: 7.5mA
- Indirect Sunlight Solar Charge: 400uA
⚠️ Tested on Revision 4-equivalent board, but should be similar to Revision 4
Deep-sleep

Read Sensor, Update Display, and Store Data to Flash

Read Sensor, Update Display, Store Data to Flash, and Publish to MQTT

Solar Charge - Direct Sunlight

Solar Charge - Indirect Sunlight

More measurement can be found here
Bill Of Materials
Most of the components are generic and can be bought from any electornics/semi-conductor distributor. The bill of materials can be downloaded here. The EPD display used and tested is GDEY0154D67 from GoodDisplay. The following display should be compatible, but the example code would need to be adjusted:
- GDEW0154T8
- GDEW0154Z17
- GDEW0154Z04
- GDEW0154C39
- GDEW0154I9F
Those displays are available from AliExpress
Programming
Programming the device can be done easily over the USB-C. Out of factory, the ESP32-C6 will be blank and need to be put in bootloader mode. The following is a step-by-step guide to initially program the device
- Plug-in the USB-C to host computer and check if the device is detected
- If not, check that you have the battery plug-in and try to shine the solar cell using any source of bright light ( phone flashlight, sun, lamp )
- Wait until the USB is detected in the host computer
- Press and Hold
BOOTandRESETbutton - Release
RESETbutton - Wait couple seconds
- Release
BOOTbutton - Plantpal should be in
bootloadermode and you can flash it viaESP-IDForArduino
A more detailed information about USB behavior on ESP32-C6 can be here


 Brian Whitsett

 Matias N.