 Roni Bandini
Parts required
Outside Unit
Inside Unit
- Unihiker
- 2 x Led Switch
- Relay
- Speaker
- 3 watts PAM8403 AMP
- 3d printed case
Circuit
For outdoor unit, just 4 female jumper cables to connect the Ultrasonic sensor.
- Sensor echo to Beetle D8
- Sensor trig to Beetle D9
- Sensor vcc to Beetle 3.3v
- Sensor gnd to Beetle GND
Unihiker buttons and relay use the cables that comes with the hardware.
- Relay to P23
- White Button to P22
- Green Button to P21
For USB Sound Board, make sure that you connect the board with lights to the back.
There is a simple cable connection to be made in order to power up the amp with the relay and use the same power source to the USBC cable.
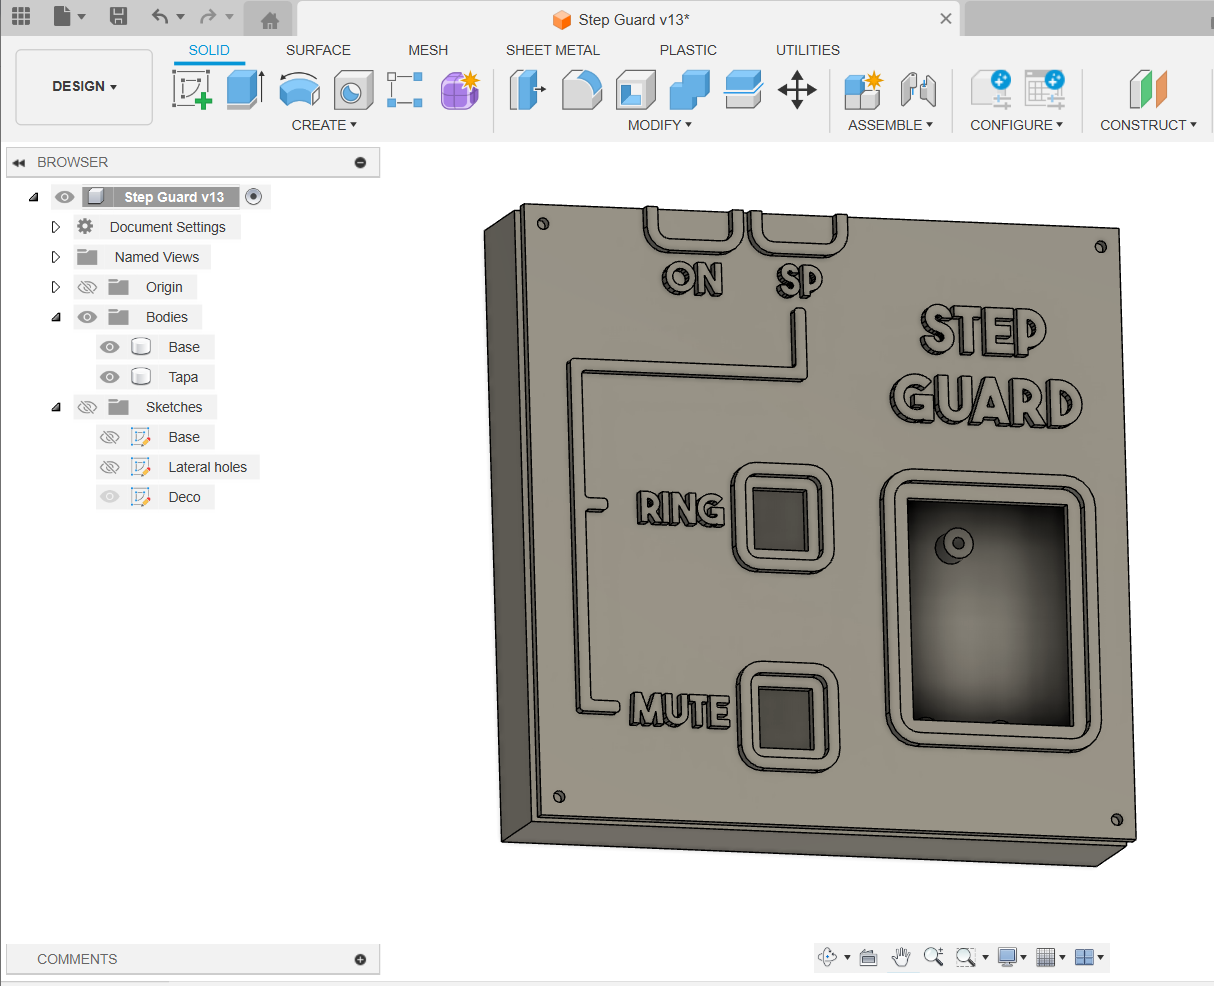
Enclosure
For the external unit a generic waterproof case was used. For the Indoor Unit I have designed a custom enclosure with Fusion 360.
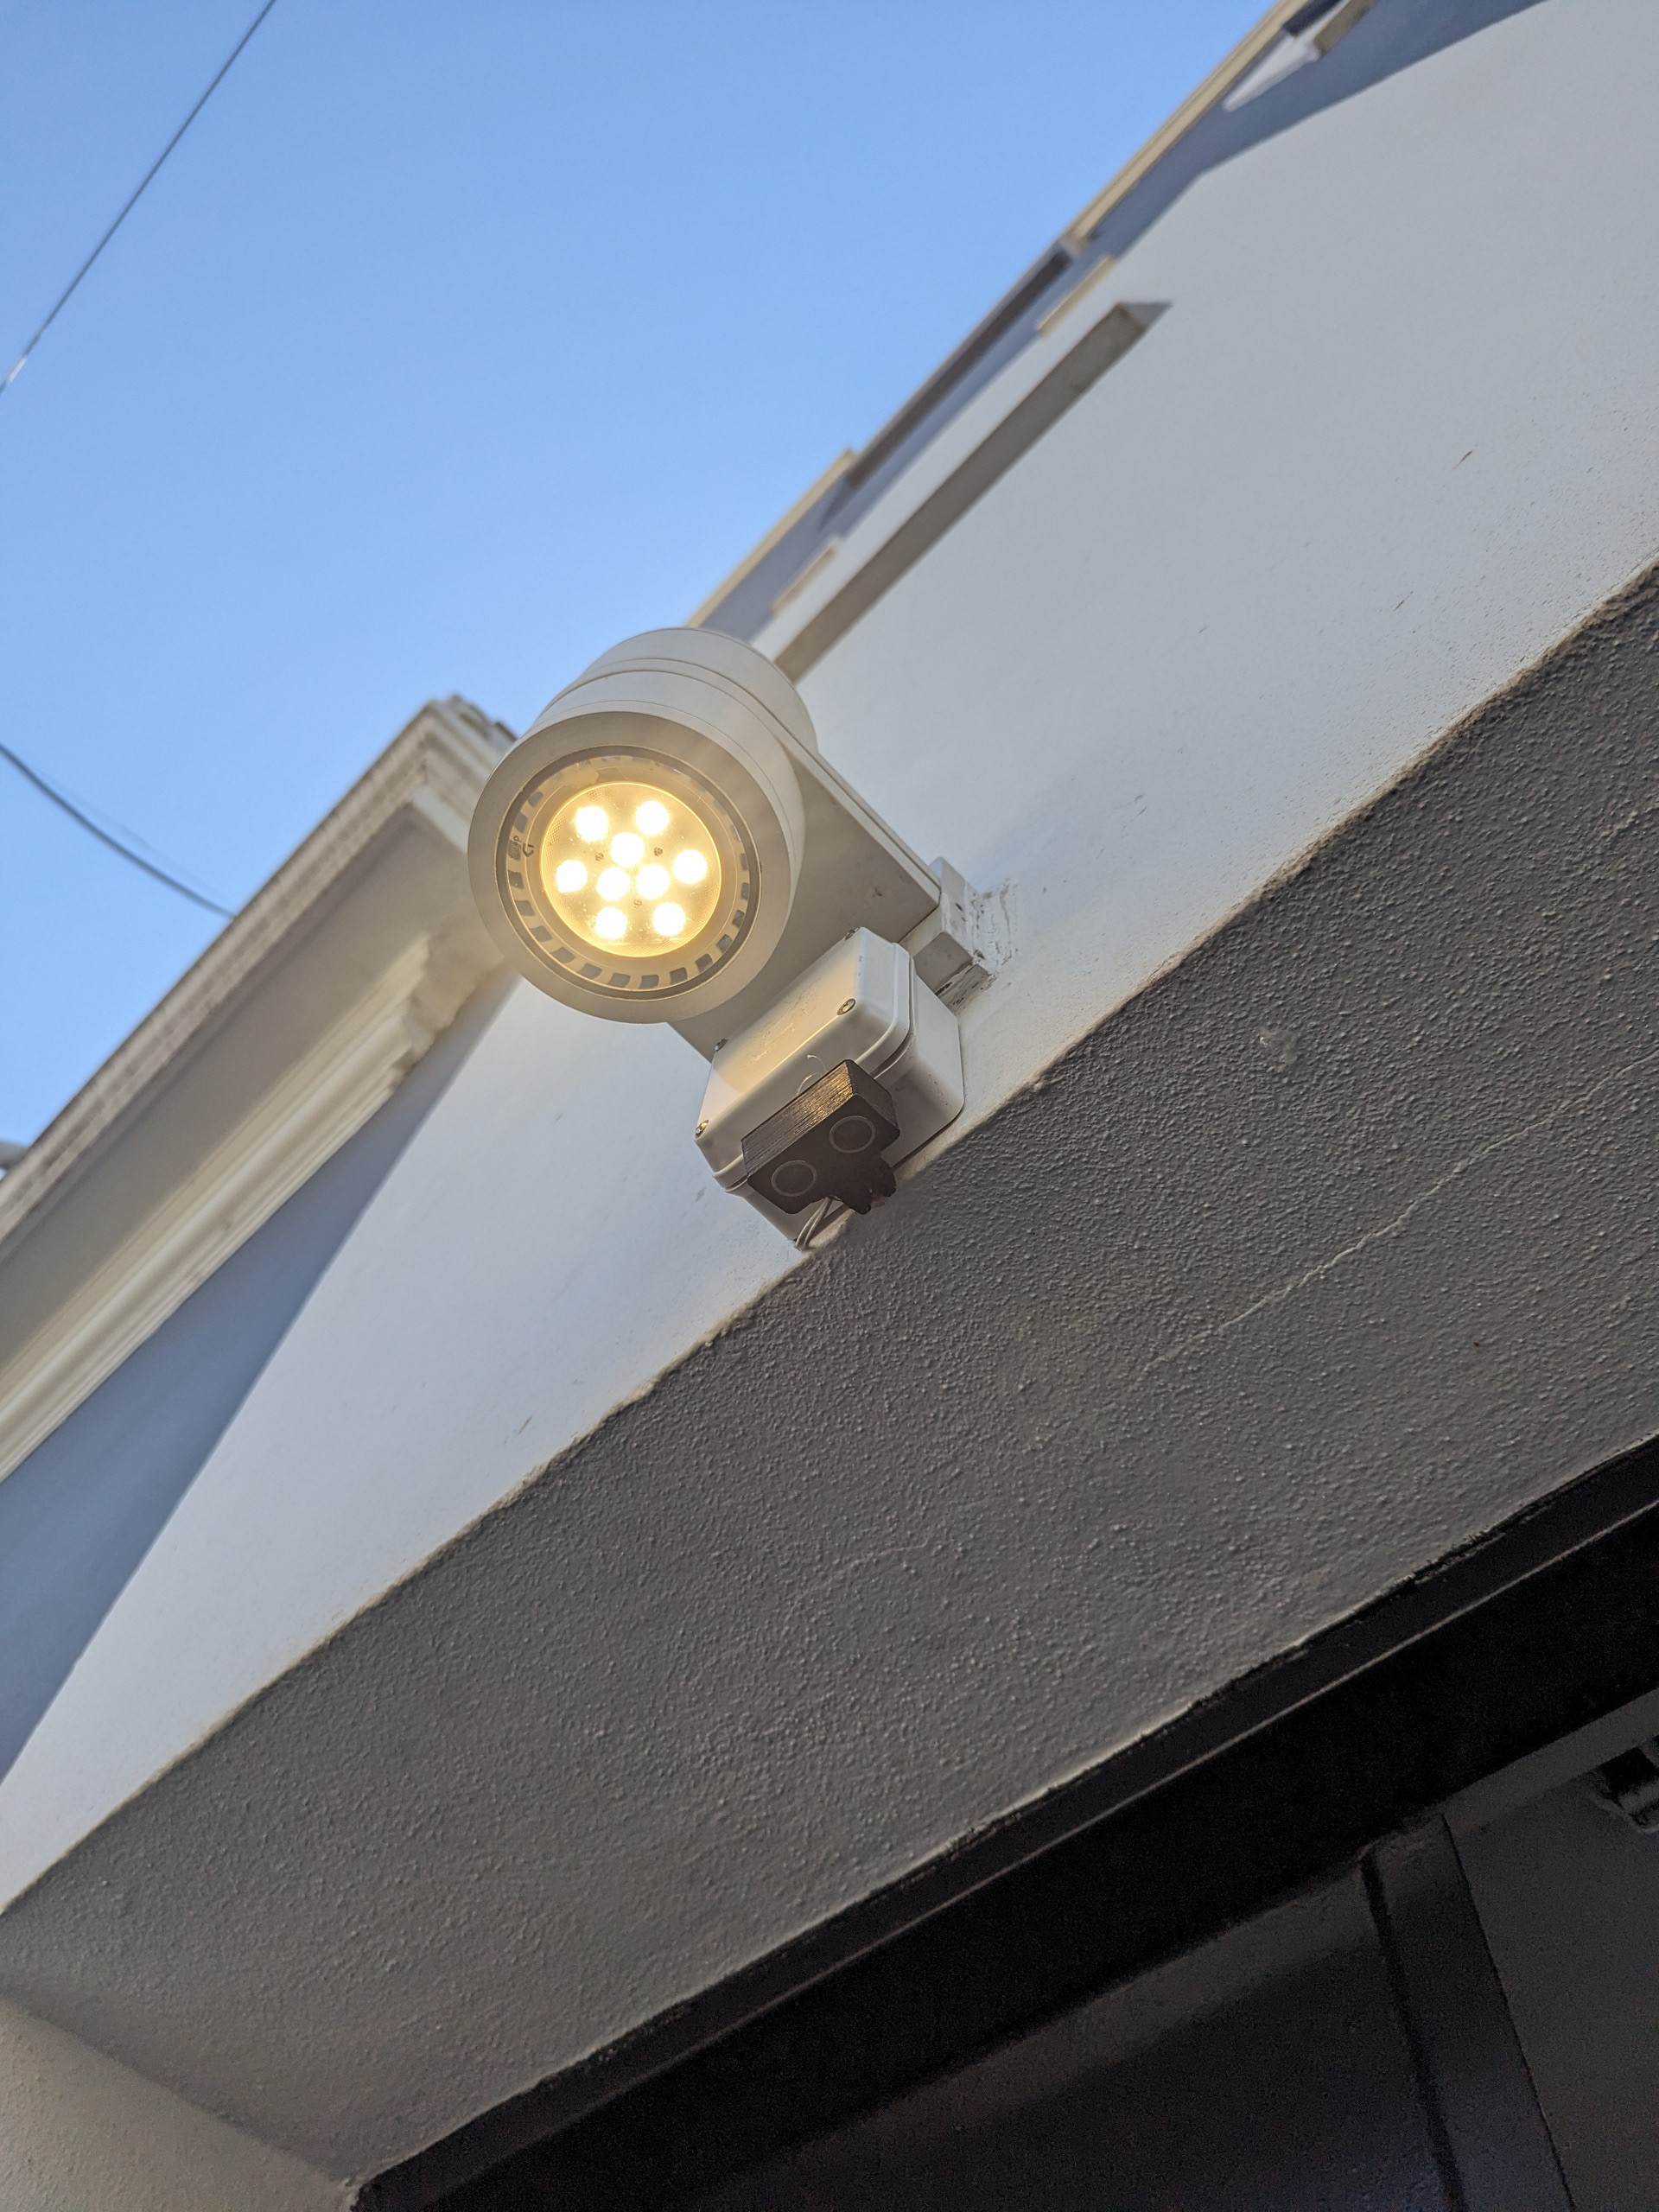
Outside unit
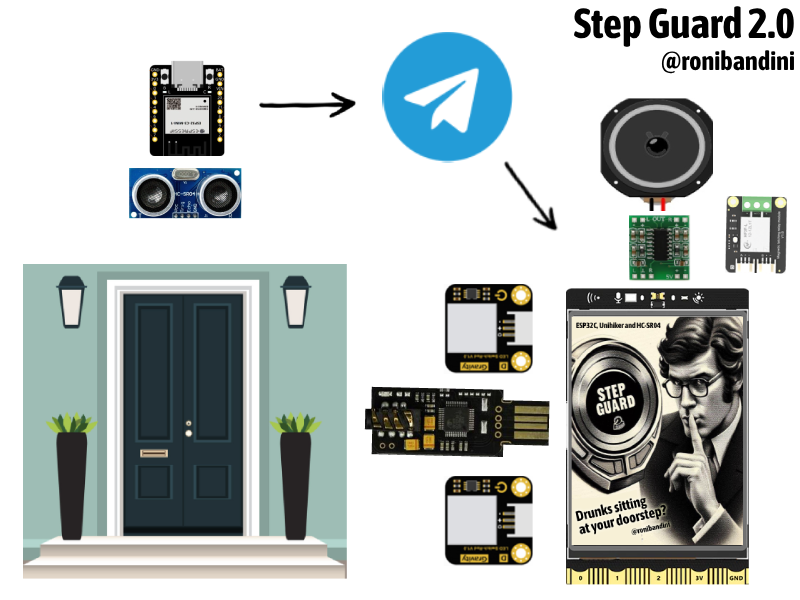
A DFRobot Beetle ESP32C3 with an Ultrasonic distance sensor was placed above the doorstep. Whenever a presence is detected notifications are sent to the family Telegram group and also to a private data channel queried by the Indoor Unit.
Inside Unit
The Indoor Unit is based on a Unihiker board. A Python code is executed at start and to monitor the Telegram data channel. Whenever a new message is received, it will trigger one of 3 sounds:
1. Small ring for regular in-out
2. A “Clear the door” recorded message
3. A horn with an annoying sound
The Indoor Unit has two LED buttons connected to GPIO for sounds customizations.
Audio is played through a small USB sound board connected to a 3 watts amp. A relay, also connected to GPIO, is used to power the amp right before the playback.
All Indoor Unit operations are recorded in a text log and presented in the Unihiker screen.

Unihiker Setup
Connect the USBC Cable from the PC to the Unihiker. Connect with SSH to the assigned IP 192.168.1.39
The user is root. The password is dfrobot
Run
pip install telethon pandas nltk
Using SFTP with the same SSH credentials, upload server.py /images /sounds
For Autorun, you are not able to use cronjobs or rc.local, the trick for Unihiker is to run the Python script using the touch screen utility and enable "auto boot"
Telegram Setup
Go to the Telegram API website https://my.telegram.org/apps and log in with your Telegram account.
Click on the “API development tools” link.
Create a new application by filling out the form. You’ll receive an API ID and API hash. Replace the placeholders in the server.py script with your actual API ID and API hash.
Go to Telegram App, search botfather, send /start send /newbot
Send also /setprivacy disable
Go to t.me/botNameHere and get your token
Create 2 groups, one for notification and other for control, search the name of the bot created
and add it to the groups.
Load https://api.telegram.org/botXXXXXXX:YYYYYYY/getUpdates
Extract the ID of each group, like id: -1234567890
Enter that info in the .ino script
Remote Commands
By sending these commands from your Phone to the communications Telegrams group, you will be able to
ring: manually playback the ring sound
despeje: manually playback the “clear the doorstep” in Spanish, sorry
horn: manually playback the horn sound
disable: disable all sounds
enable: enable all sounds
Code settings
Outdoor unit has the following settings
Outdoor unit has the following settings

const char* host = "ESP32C3"; // host name for OTA programming

const int trigPin = 9; // Ultrasonic sensor

const int echoPin = 8; // Ultrasonic sensor

#define BOT_TOKEN "" // Telegram Token

String chatOperativo=""; // Telegram group for indoor-outdoor communications

String chatNotification=""; // Telegram group for familiy notifications

#define WIFI_SSID "" // Router SSID

#define WIFI_PASSWORD "" // Router Pass

String img_url = "YOURSERVERHERE.COM/stepguard.png"; // place stepguard.png in a web server...
Read more »
 Vinch
Vinch
 kutluhan_aktar
 JP Gleyzes
 Wassim