0%
0%
BlackberryPi Handheld
Handheld Gameboy style full Linux computer, like Clockwork Pi, but with a Blackberry keyboard/mouse, and nothing proprietary!
 Taylor Hay
Become a Hackaday.io member
Already have an account? Log in.
Just one more thing
To make the experience fit your profile, pick a username and tell us what interests you.
Pick an awesome username
hackaday.io/
Your profile's URL: hackaday.io/username. Max 25 alphanumeric characters.
Pick a few interests
Projects that share your interests
People that share your interests

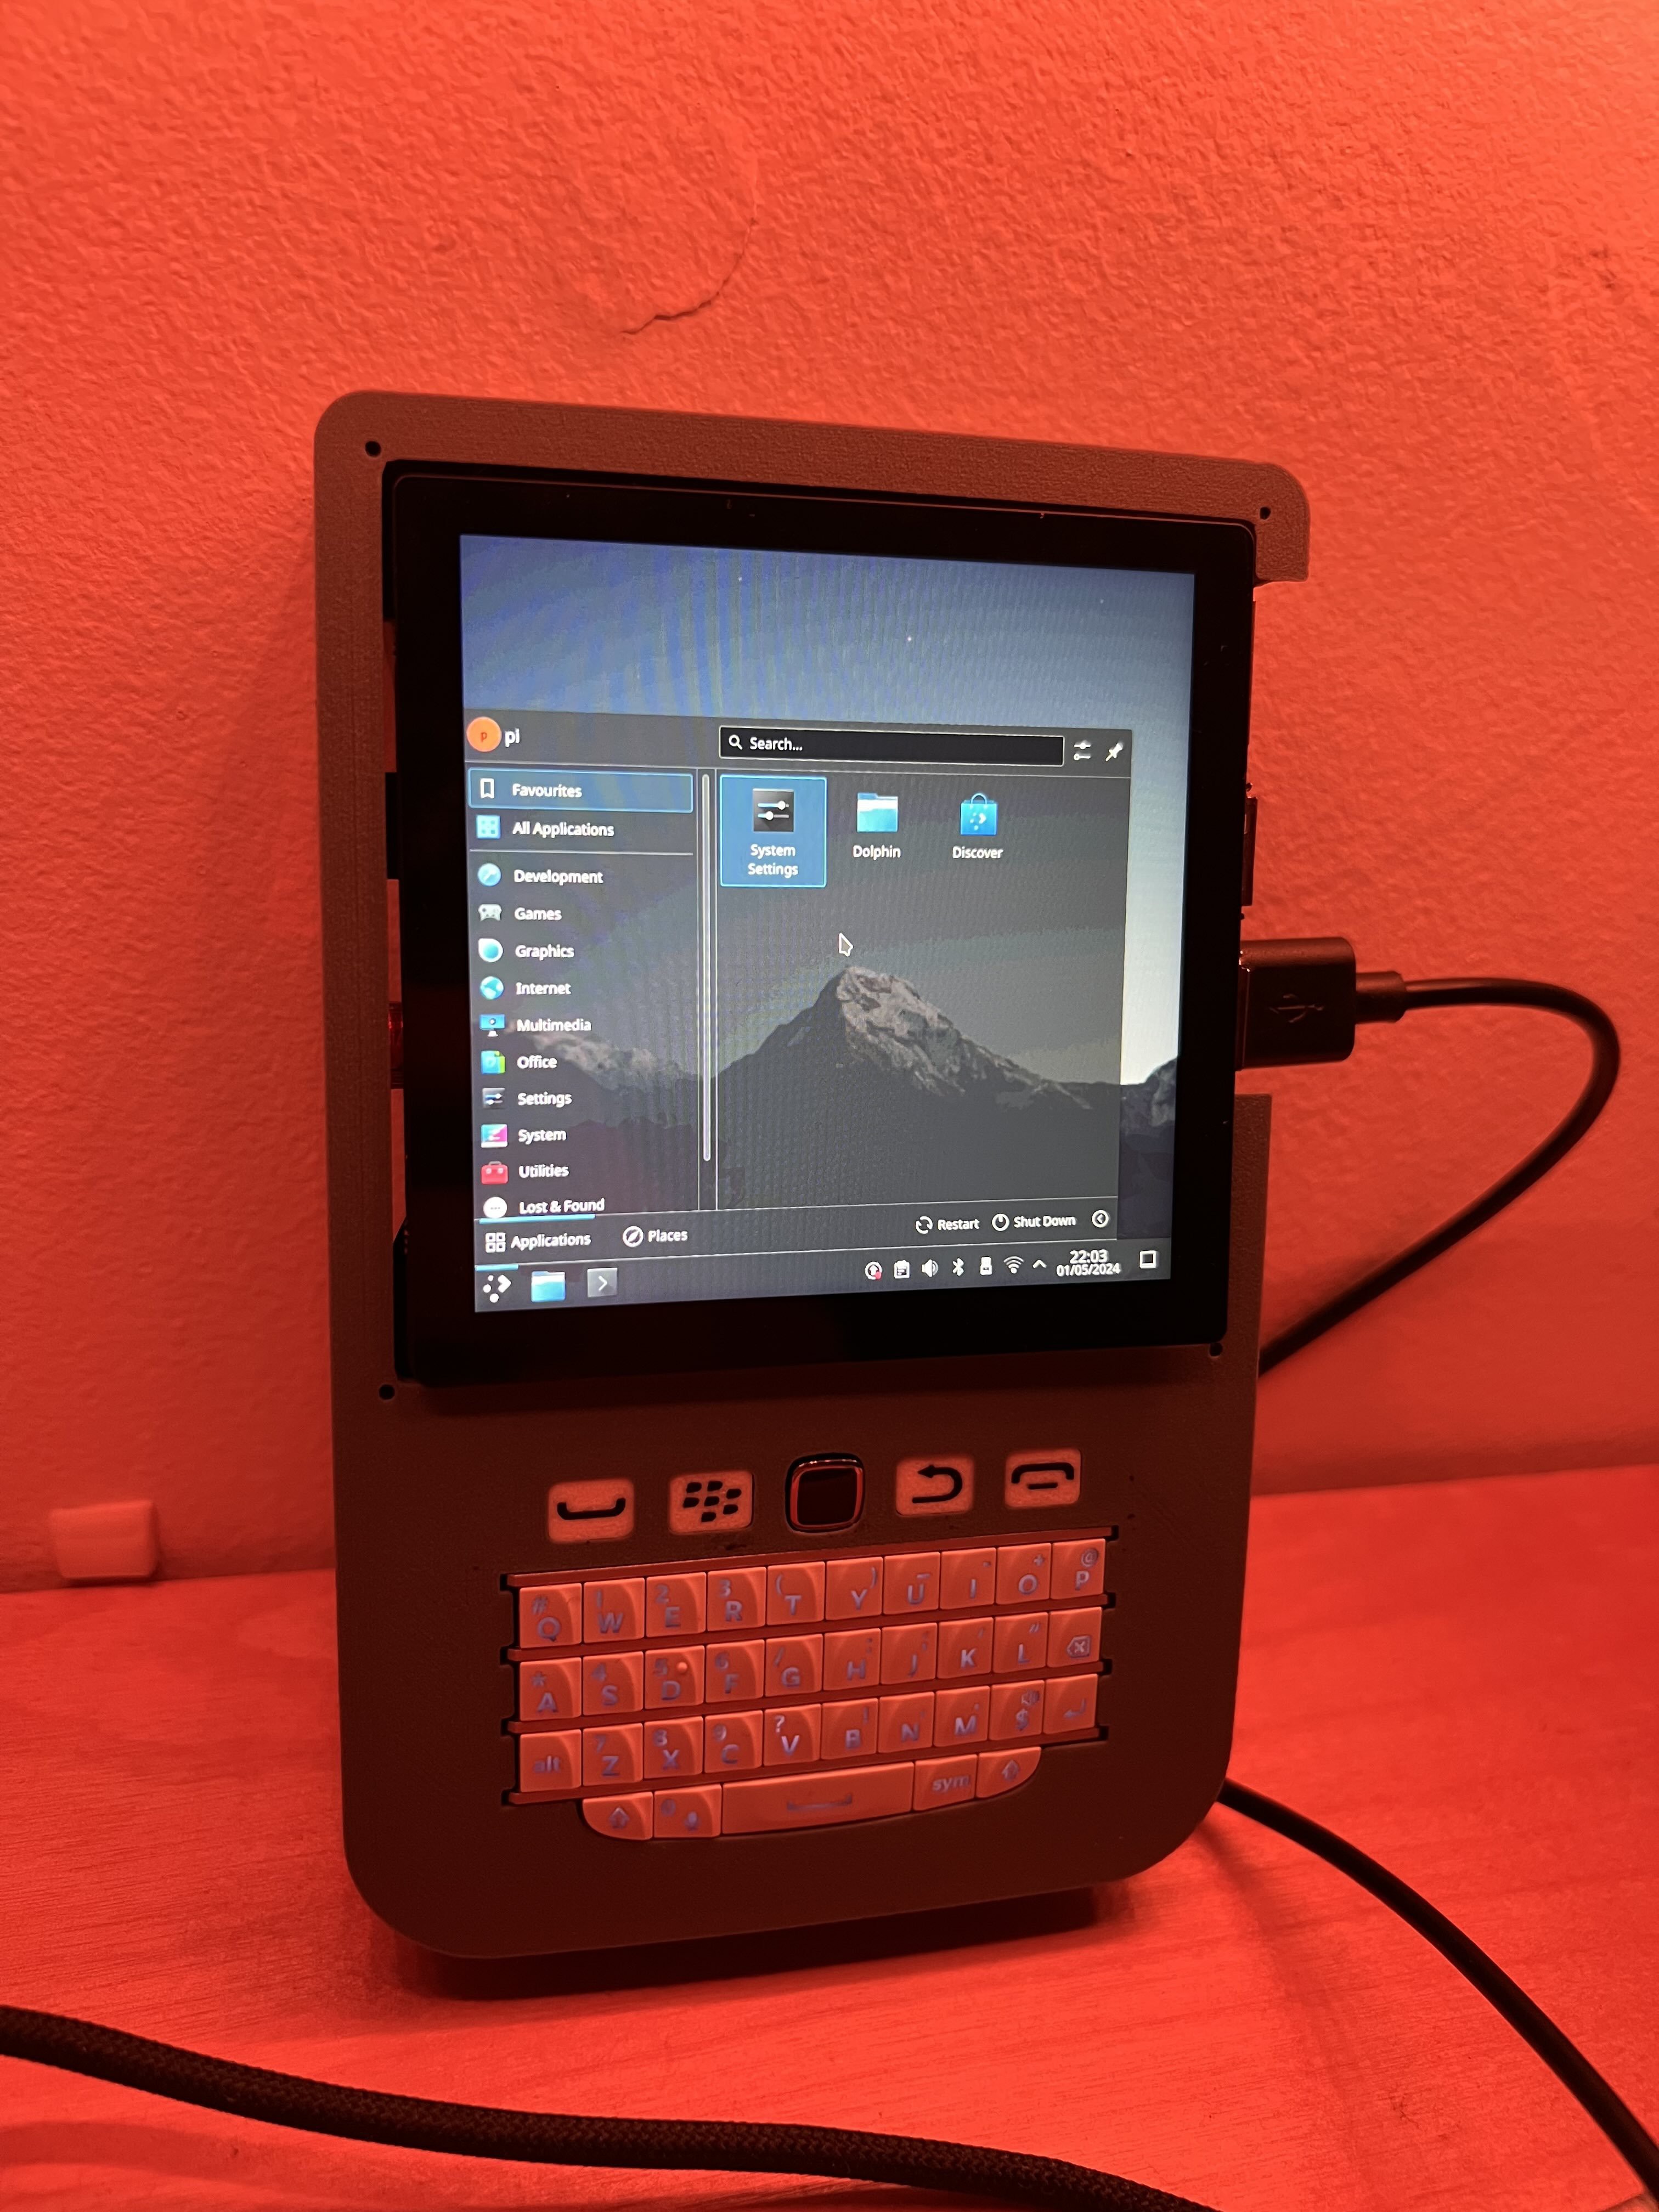
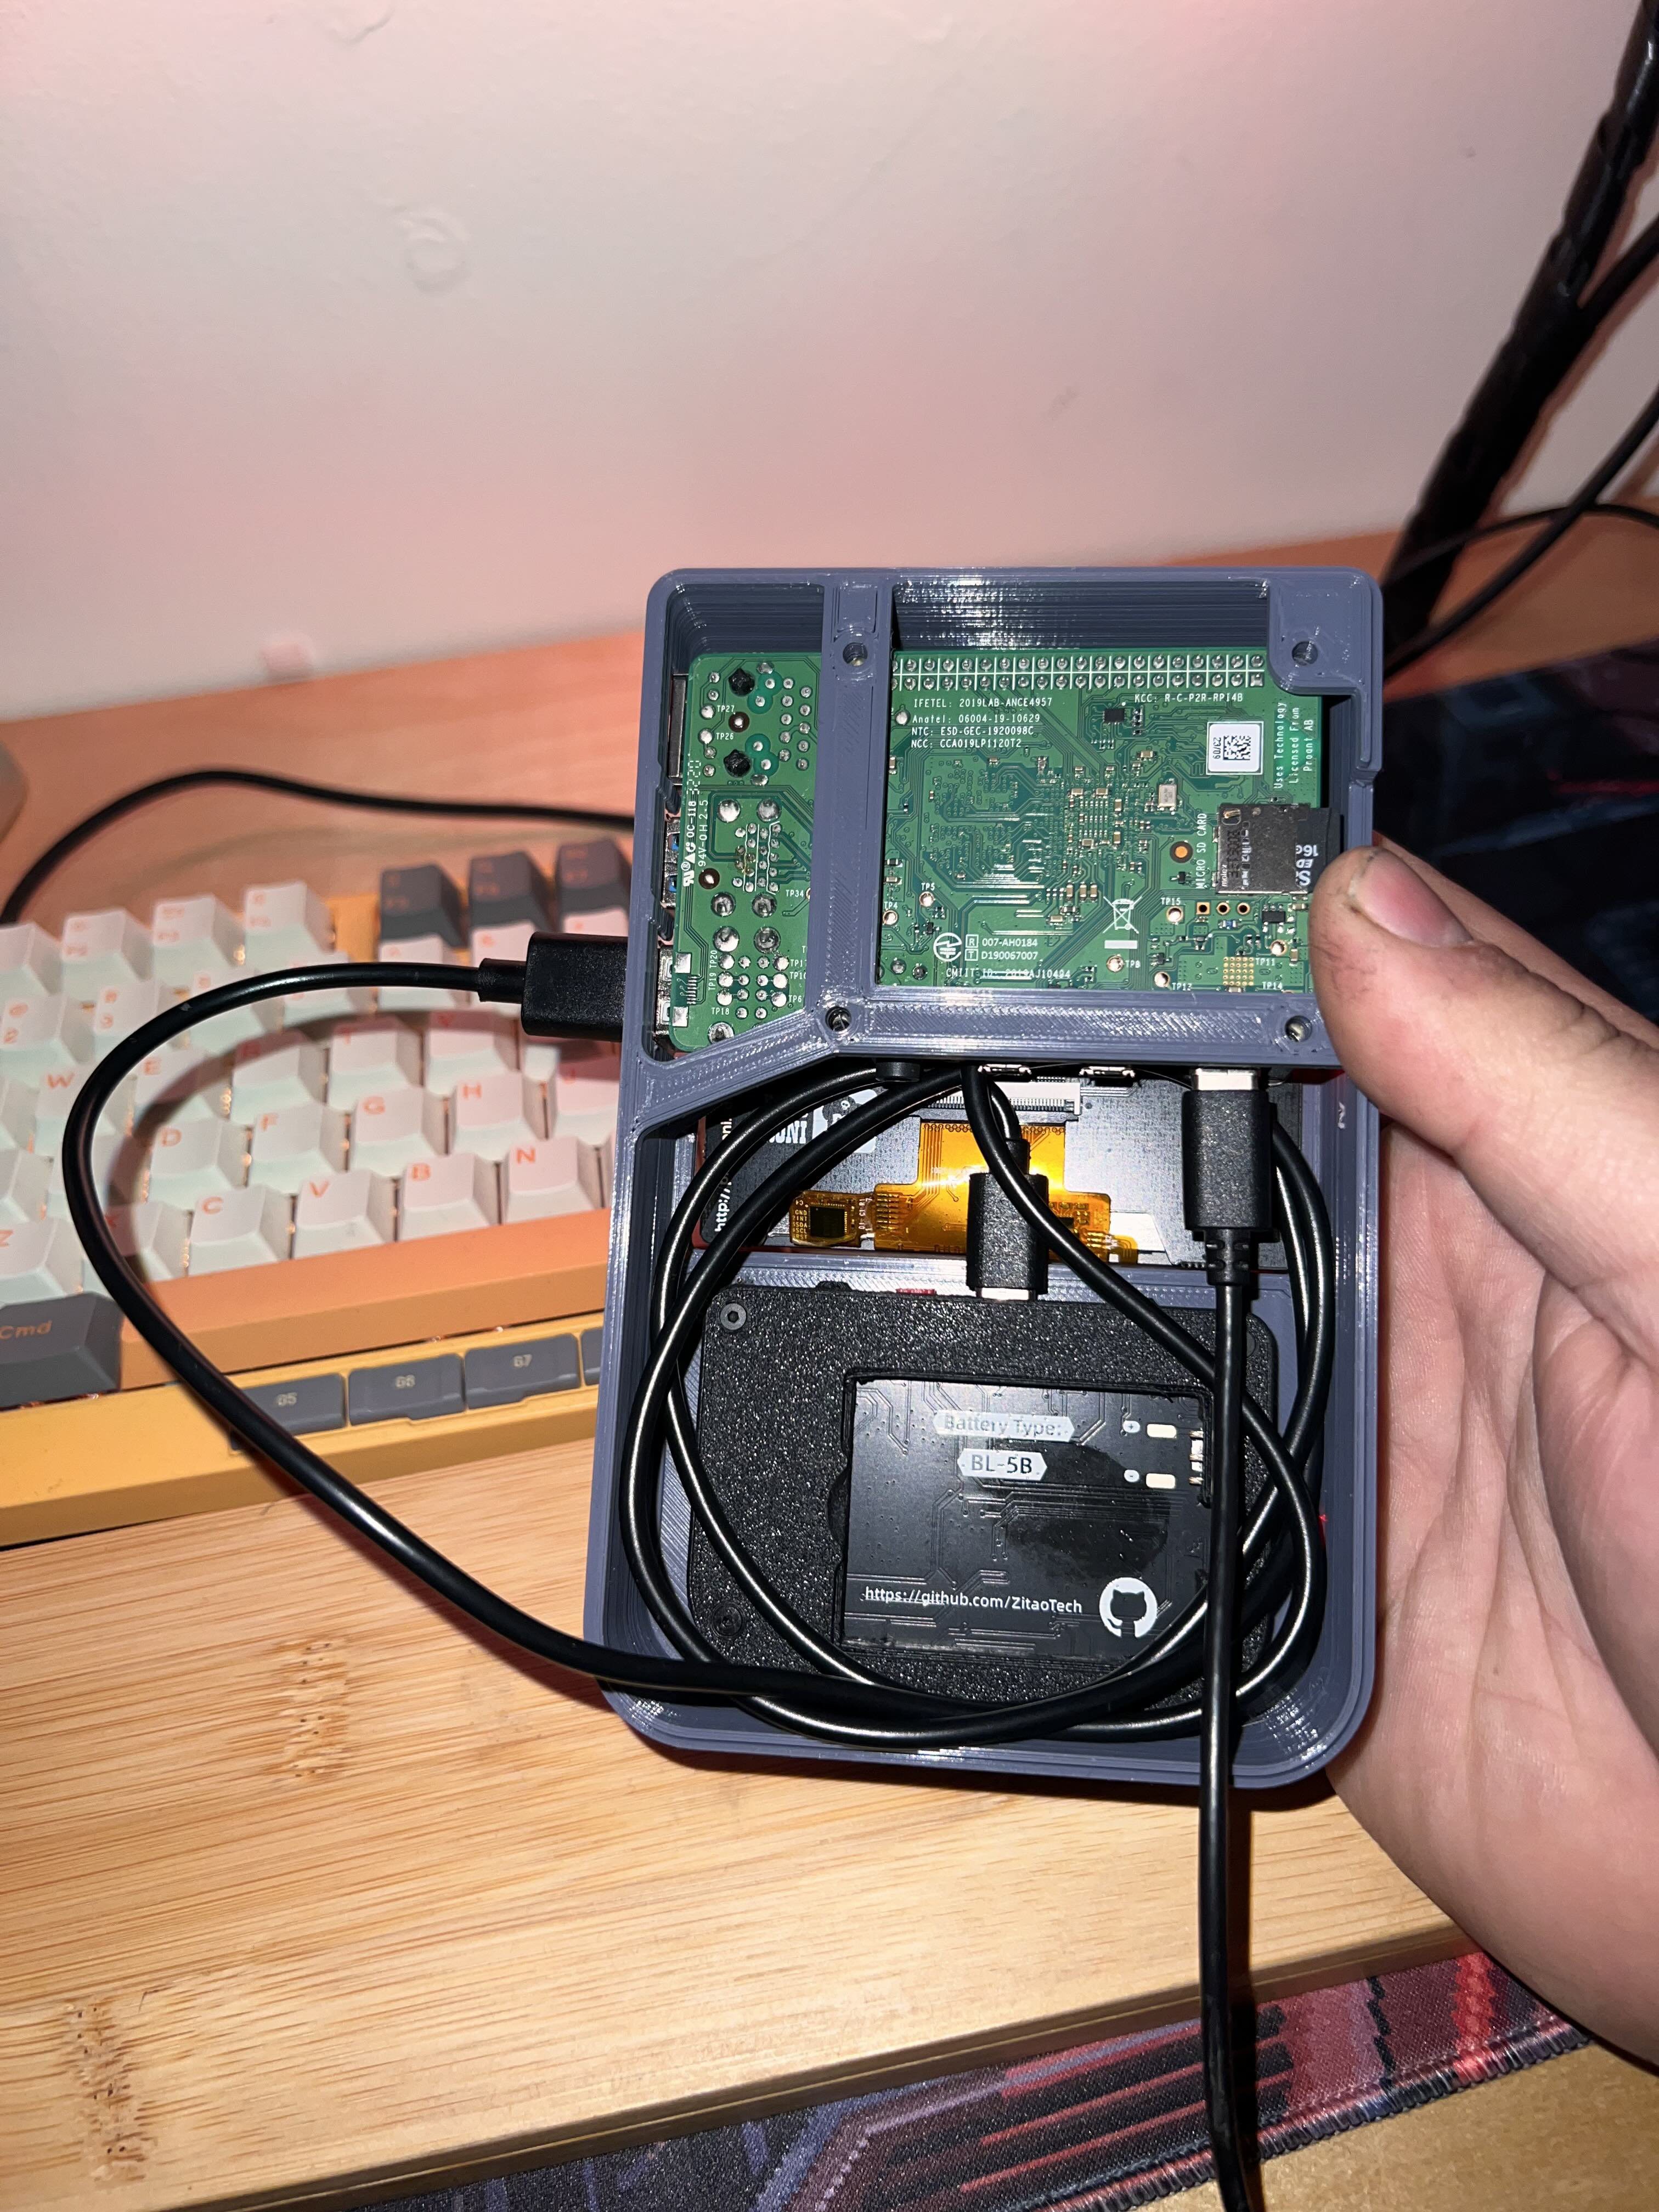
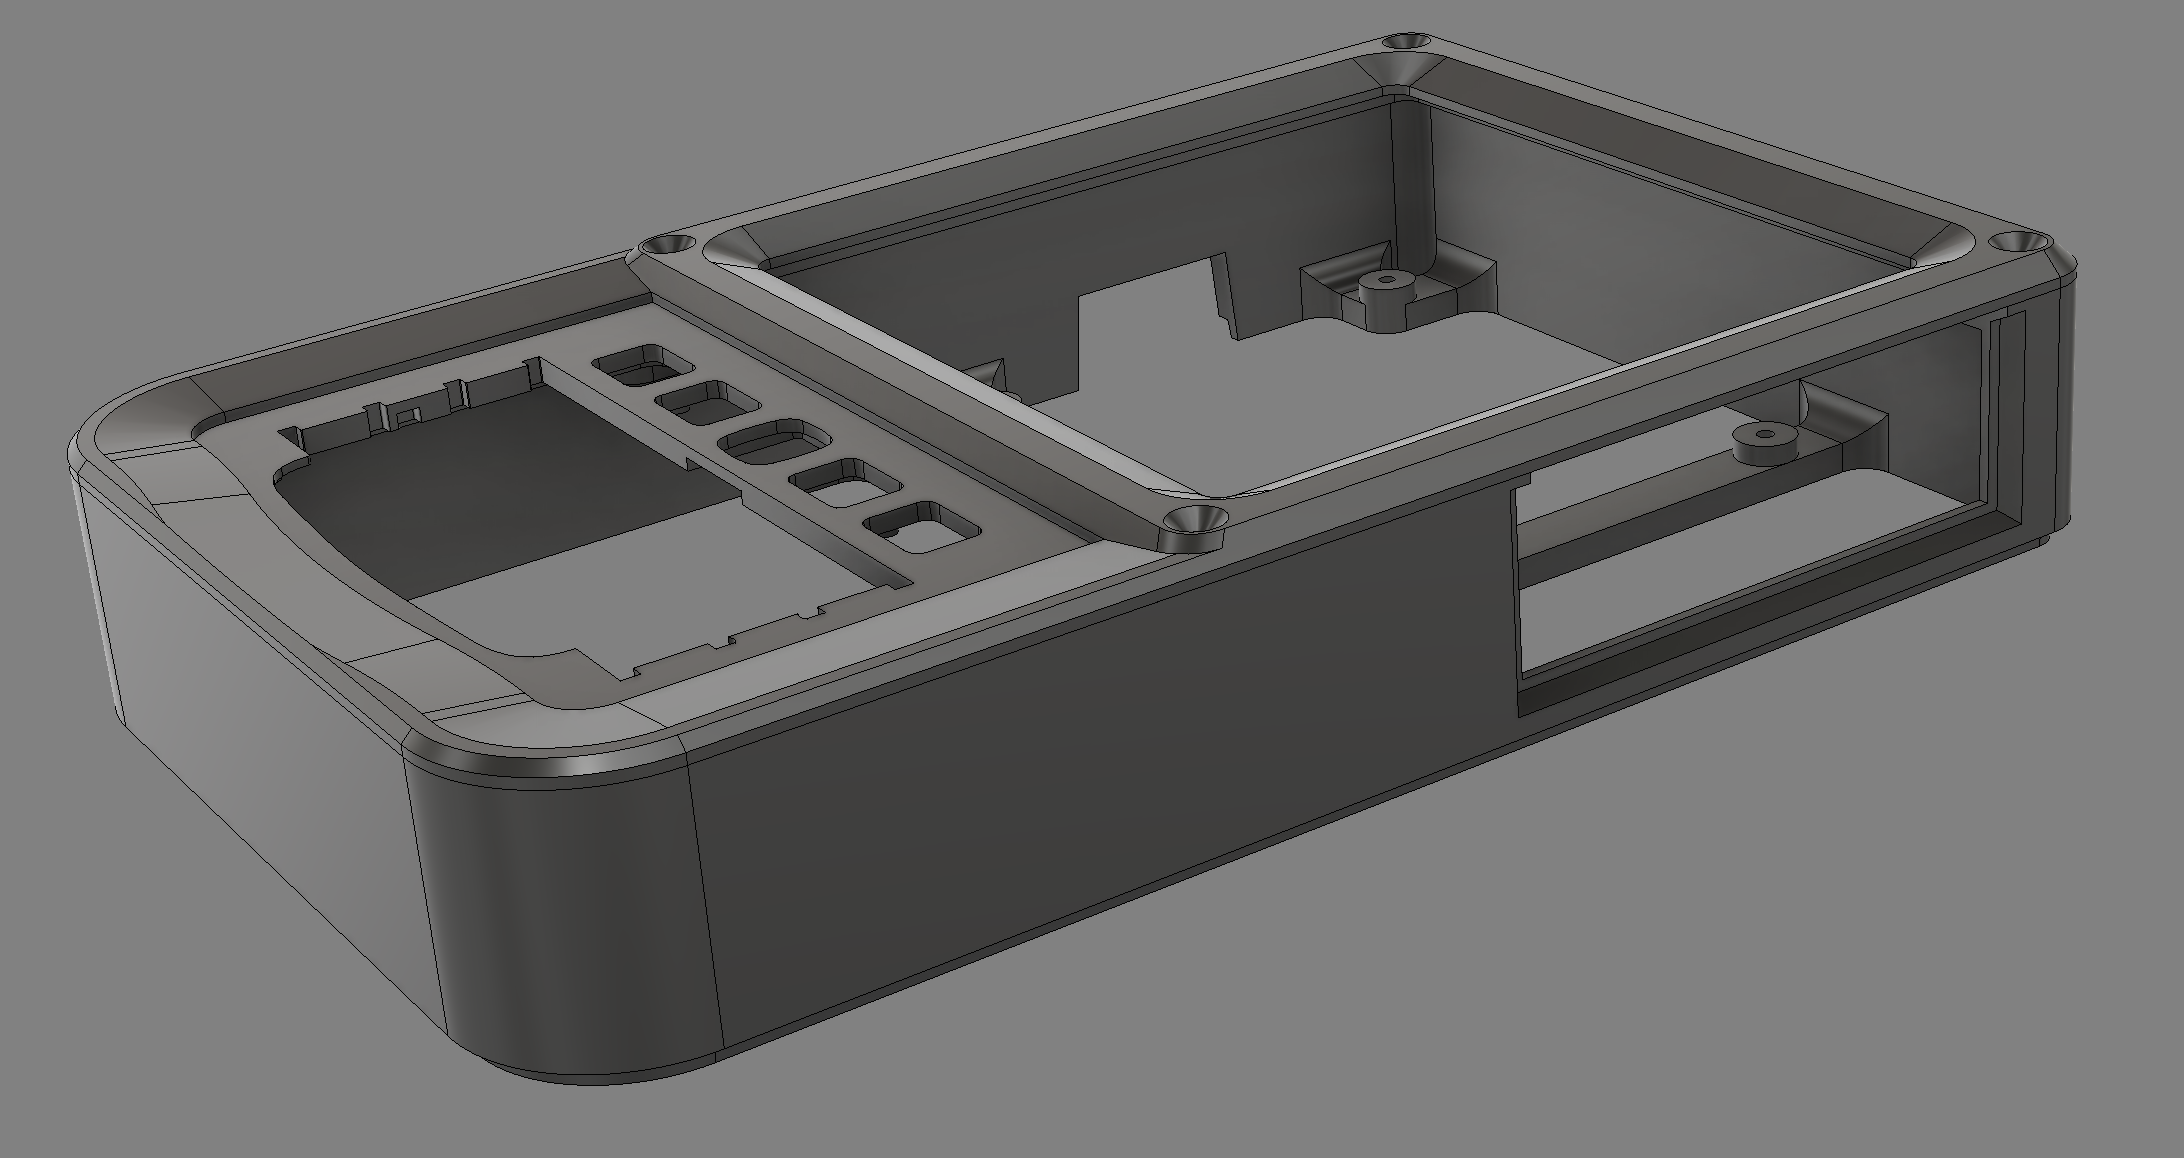
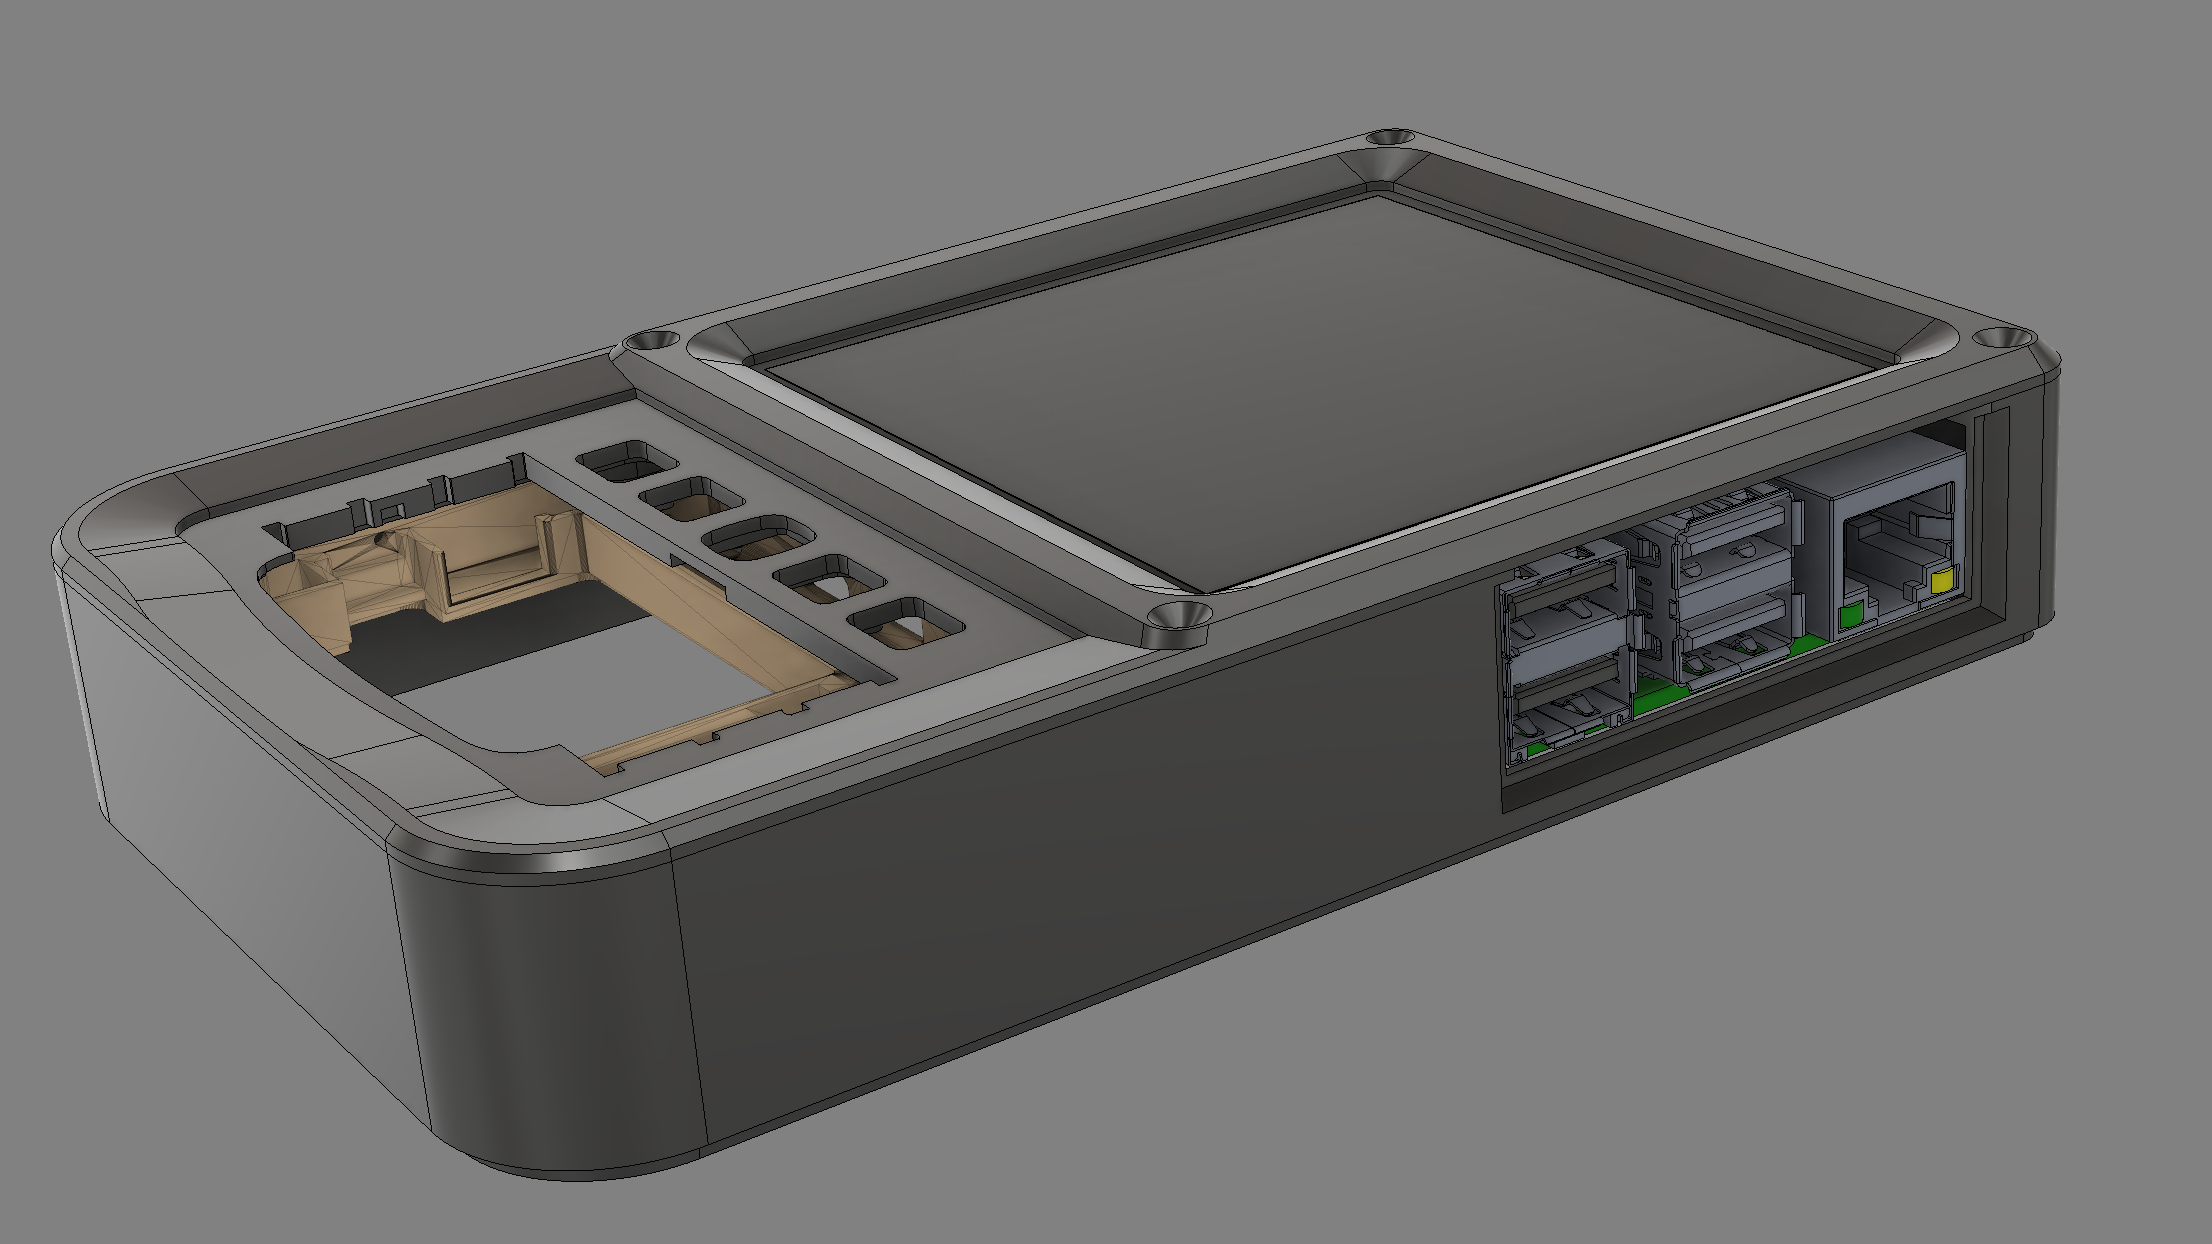
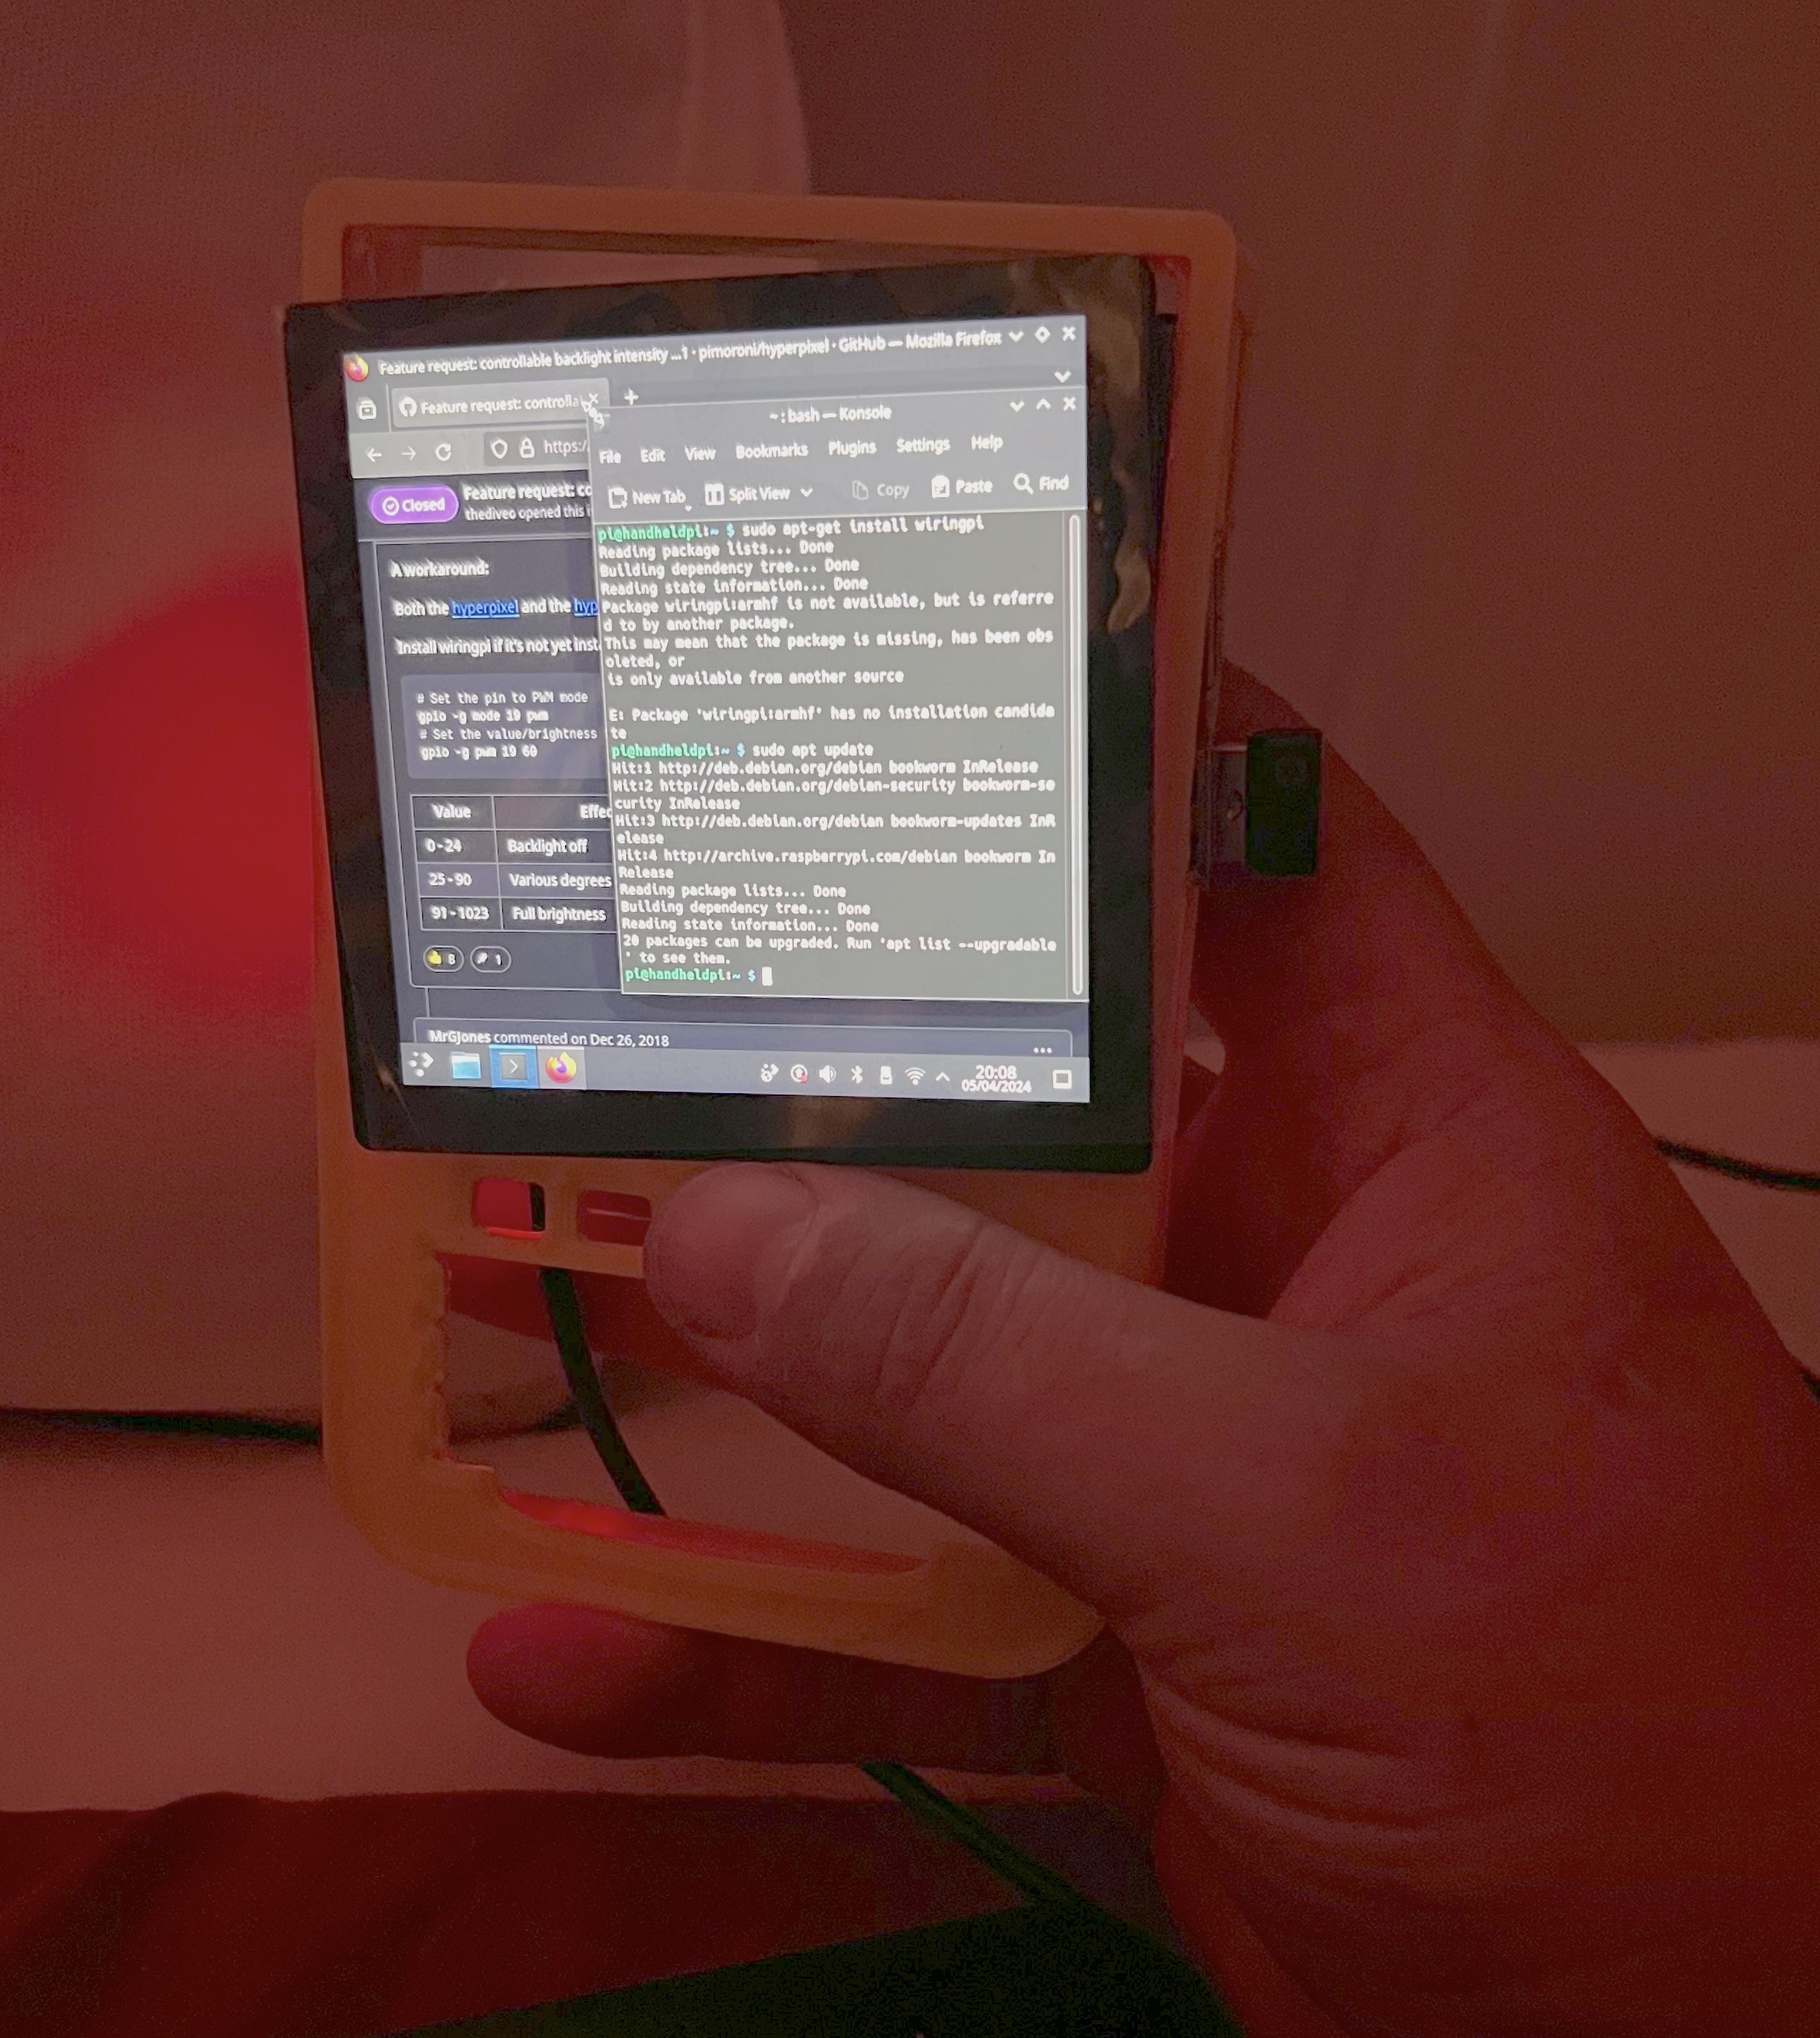
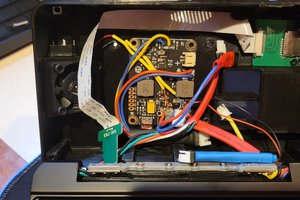
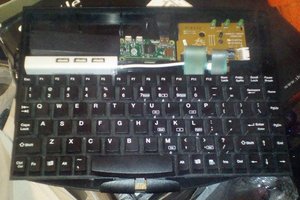
 I once again had to remove the usb ports on the power bank board, and solder a chopped usbc cable on, but I like that the back can be removed, unplugged, and the pi can be powered externally (I already had to use this feature to hook up an external monitor to get Kali Linux working on the Pimaroni screen)
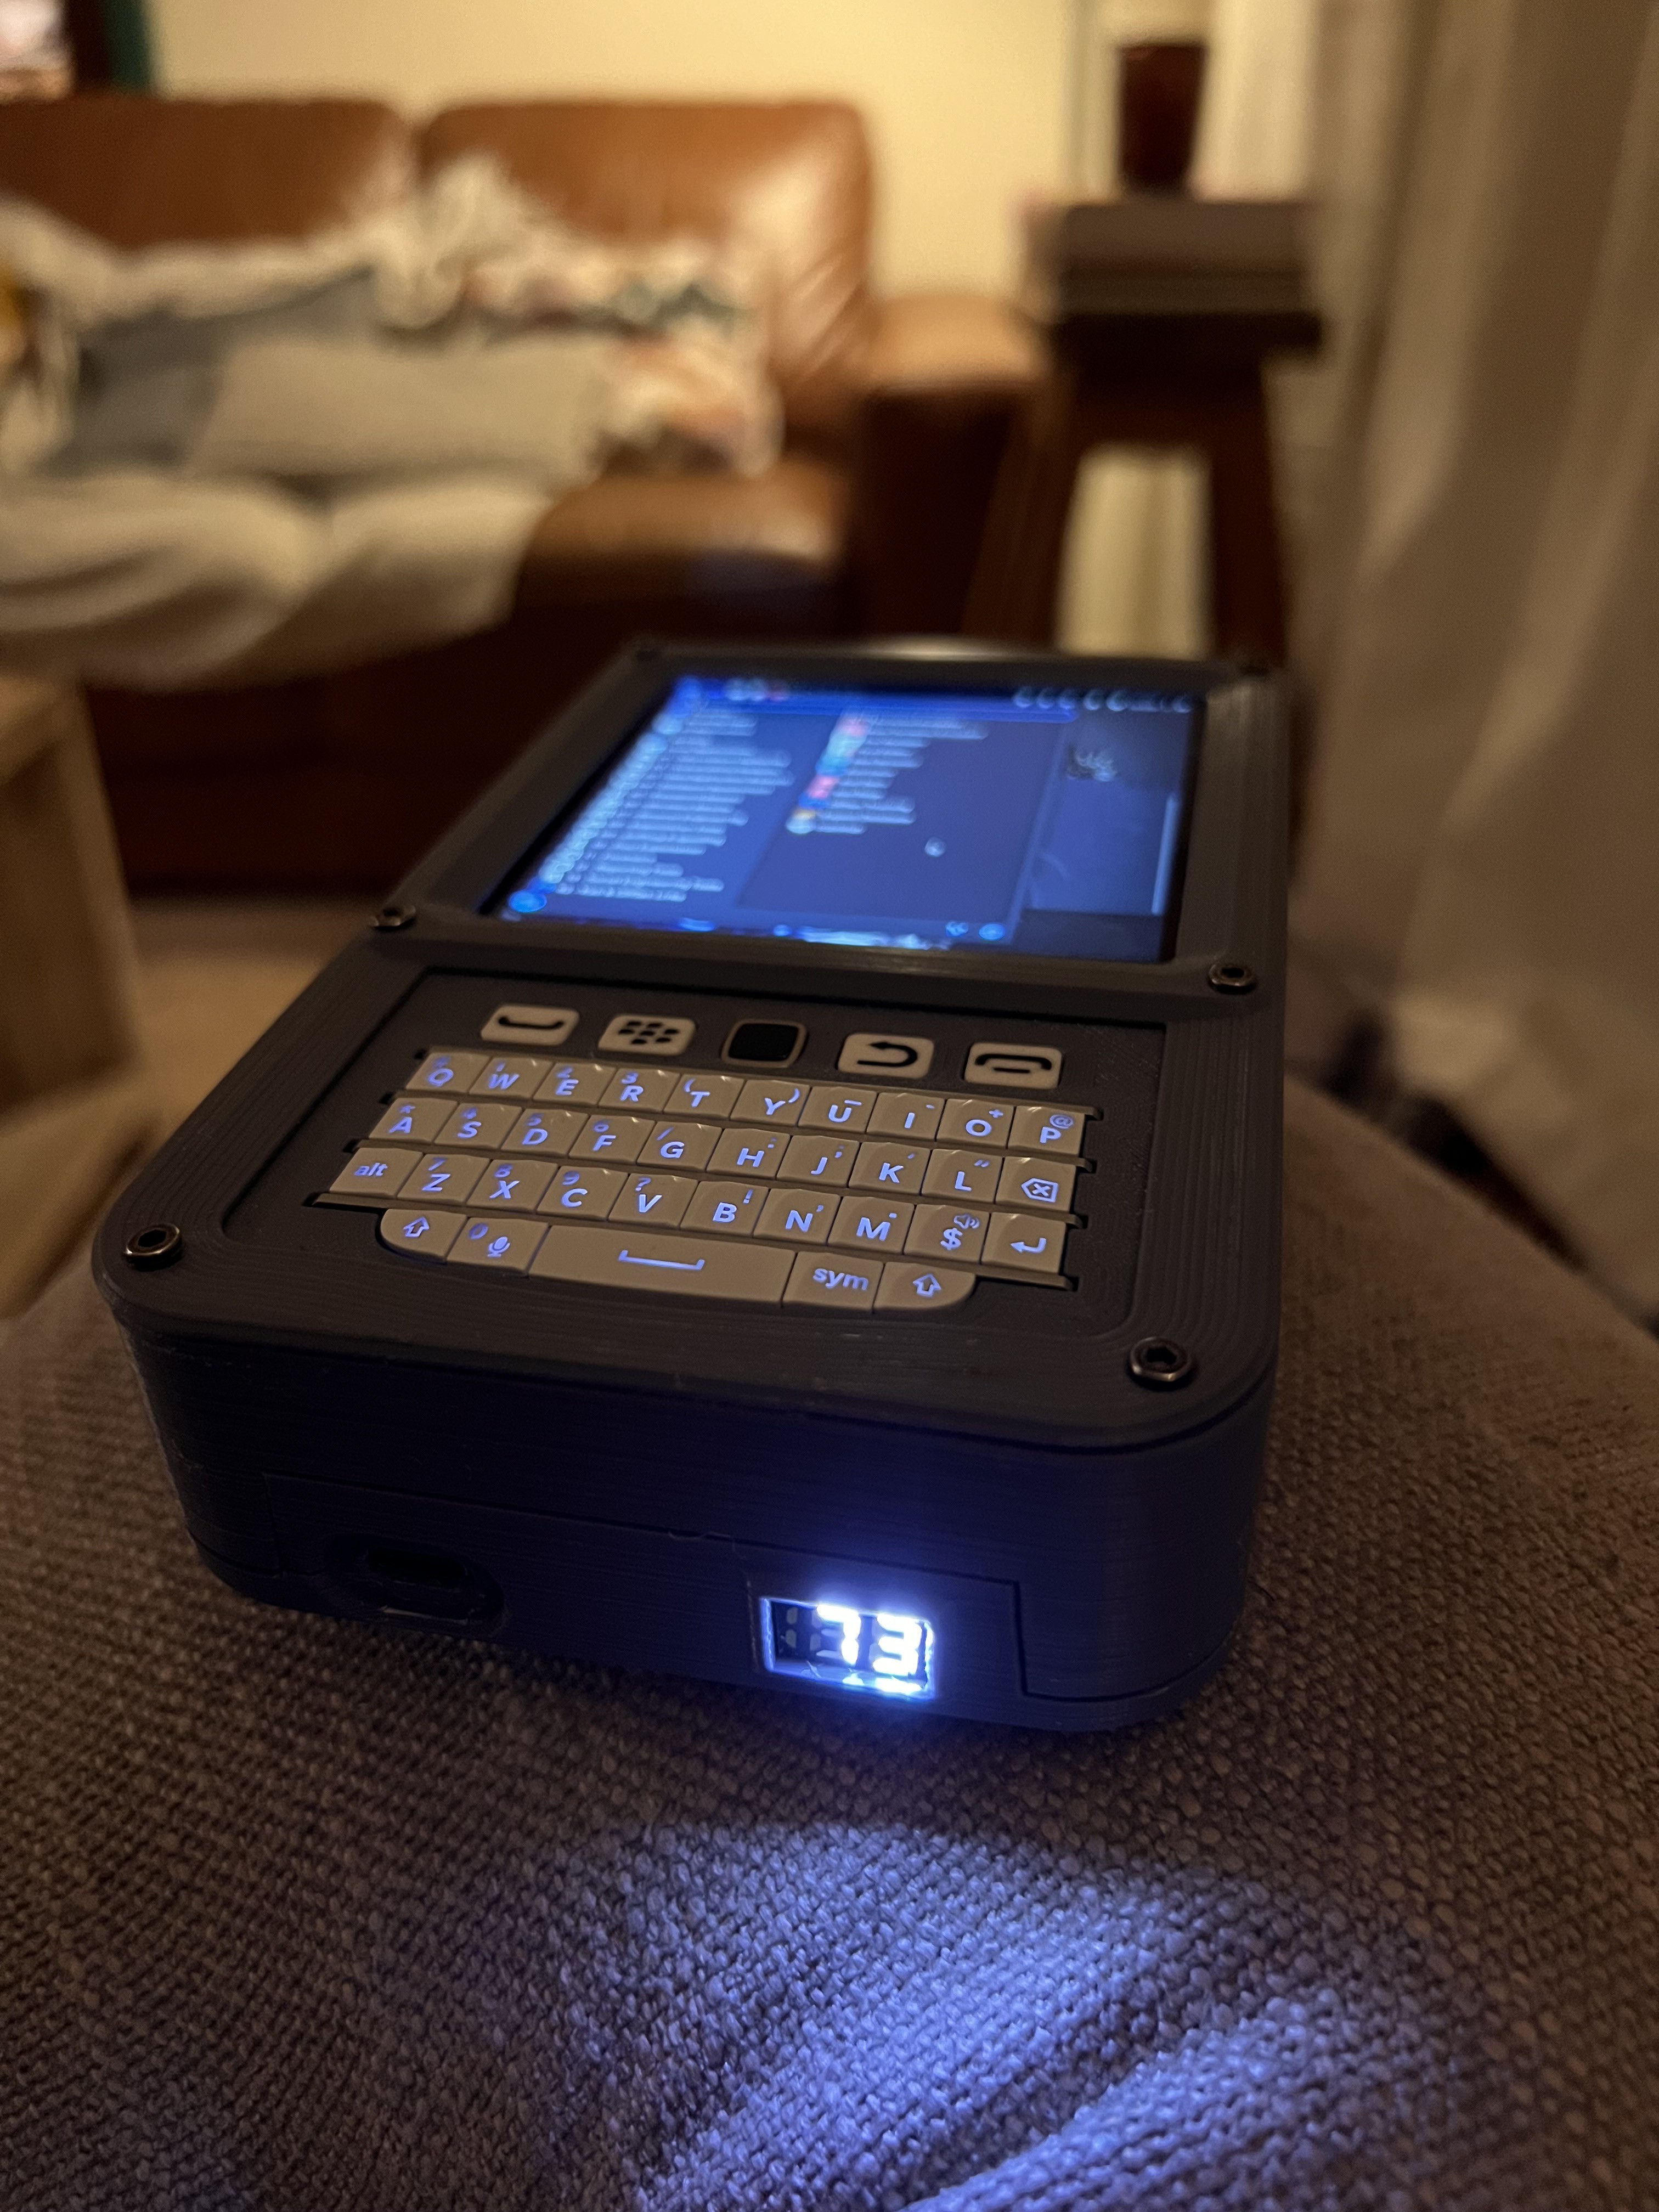


 Welsh Mullet
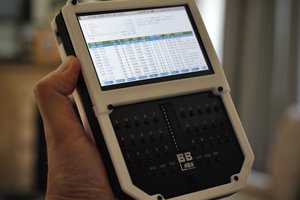
 Richard
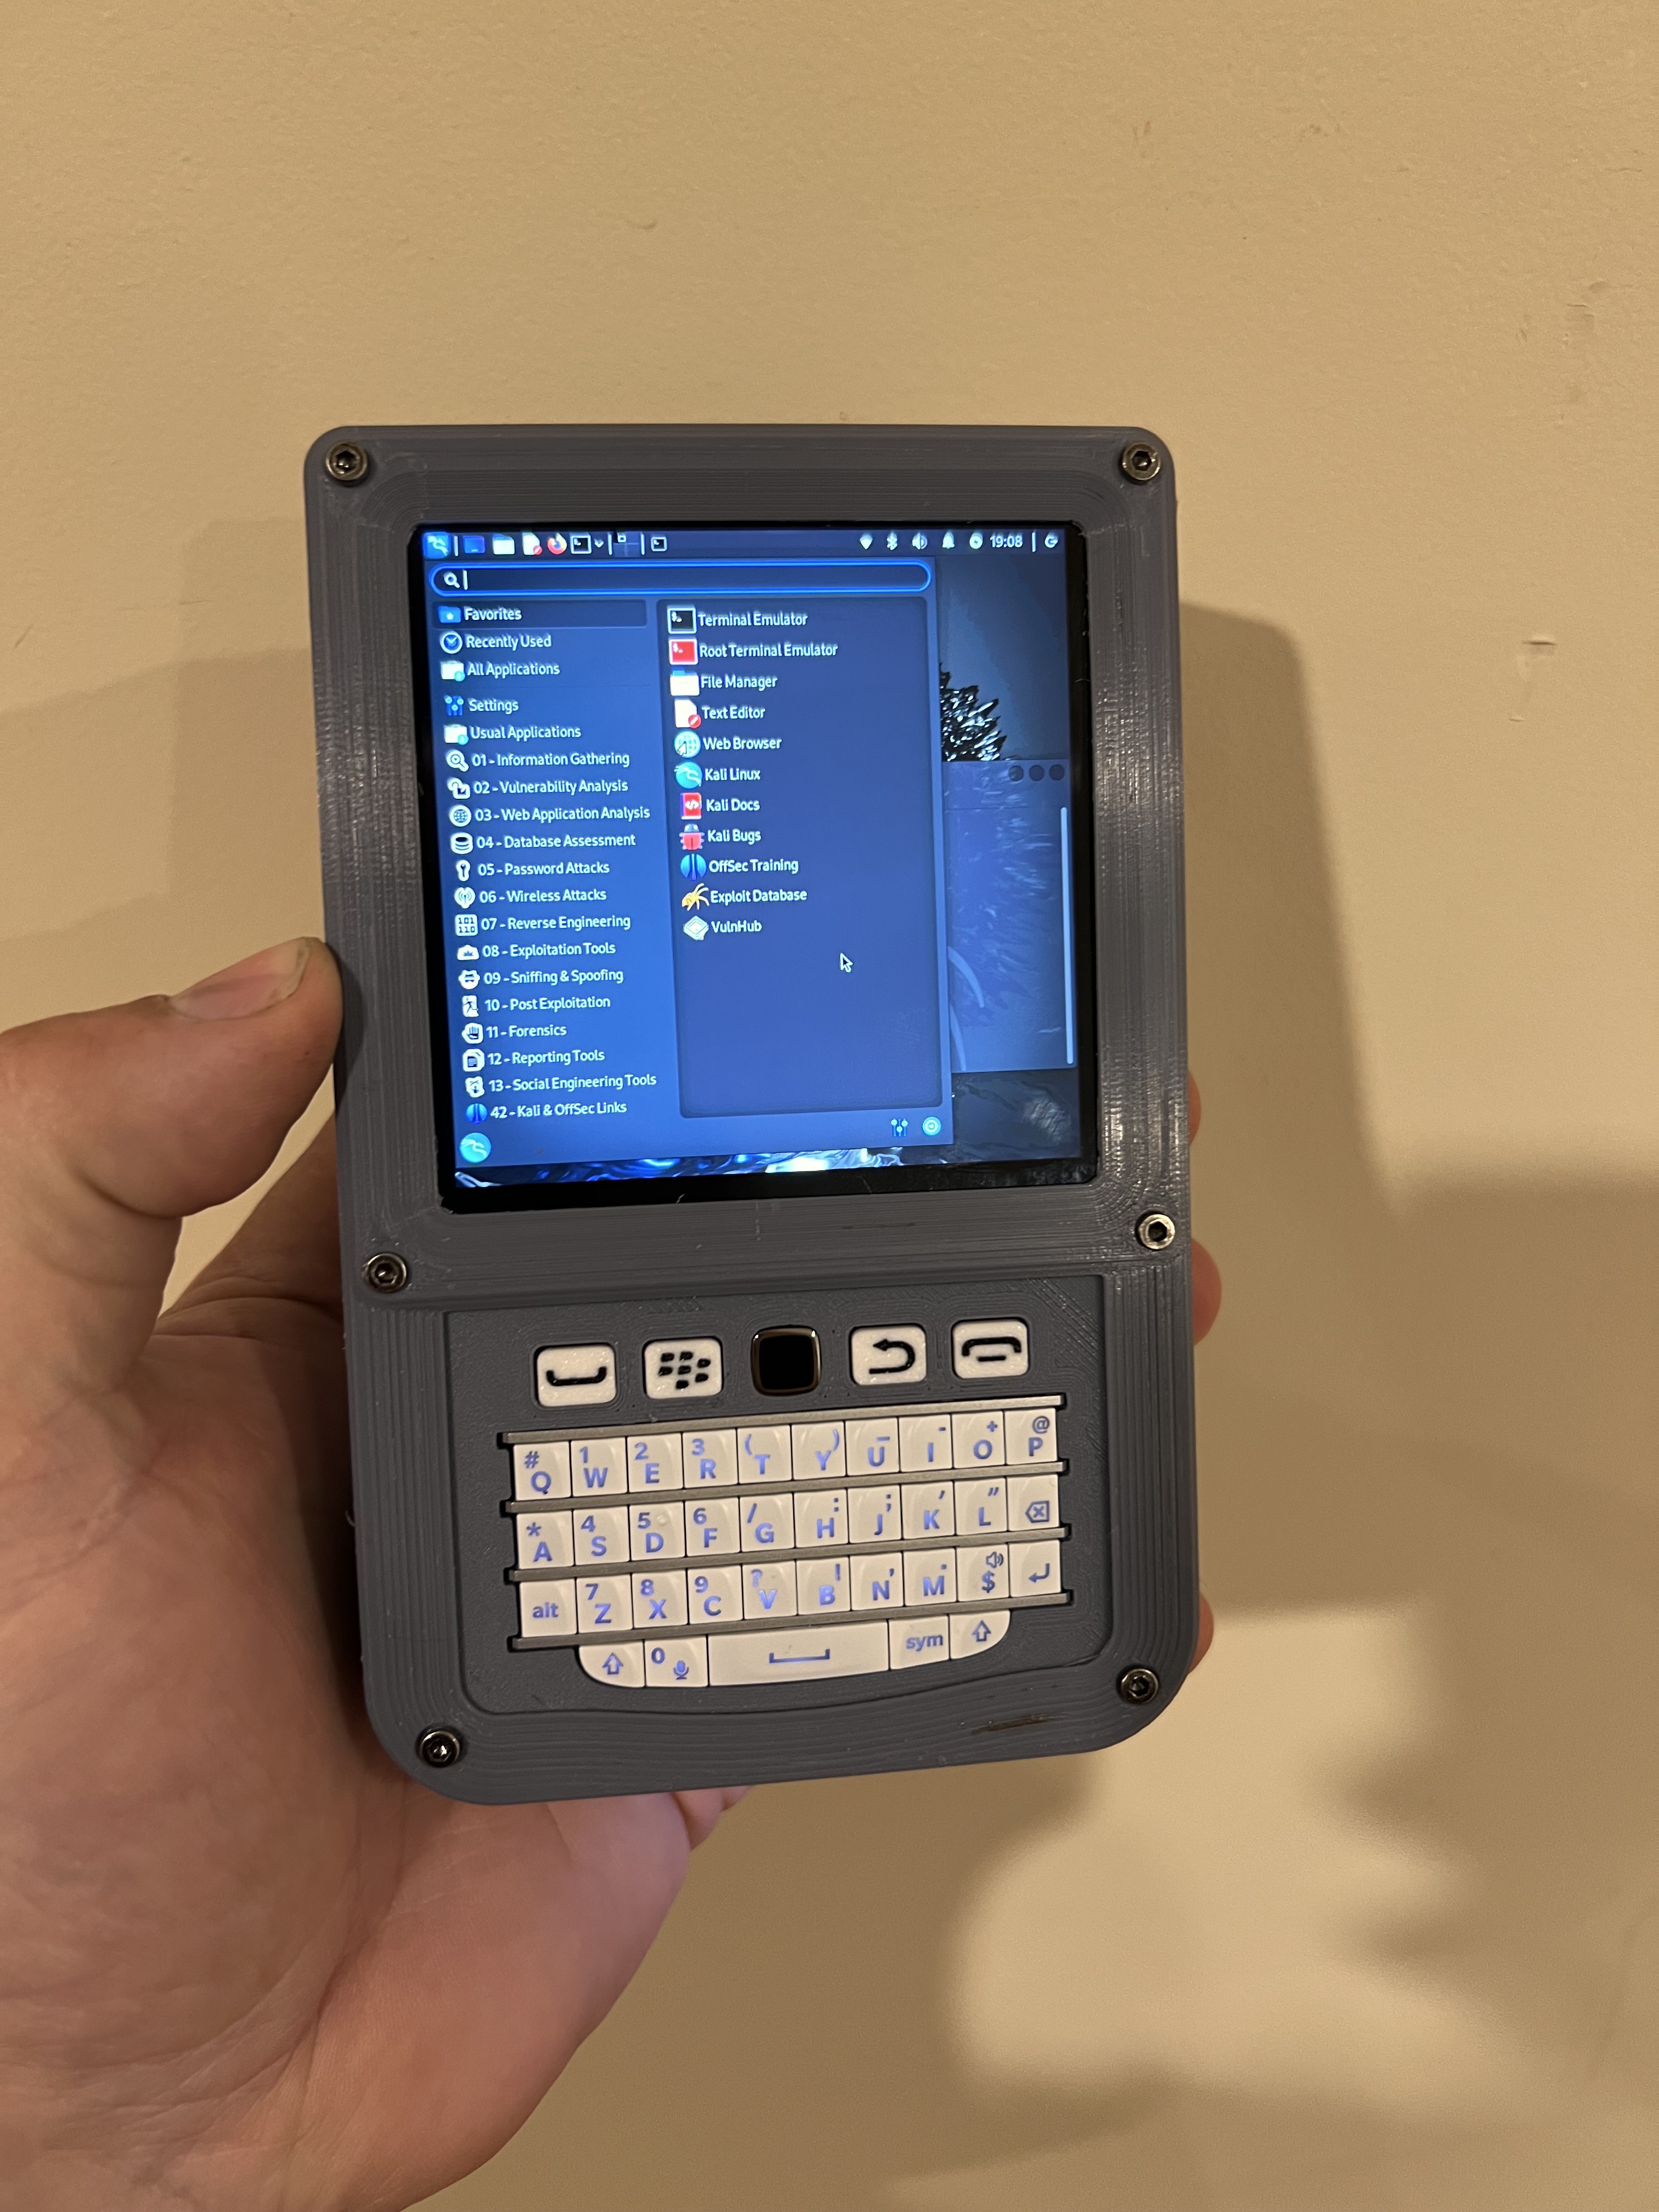
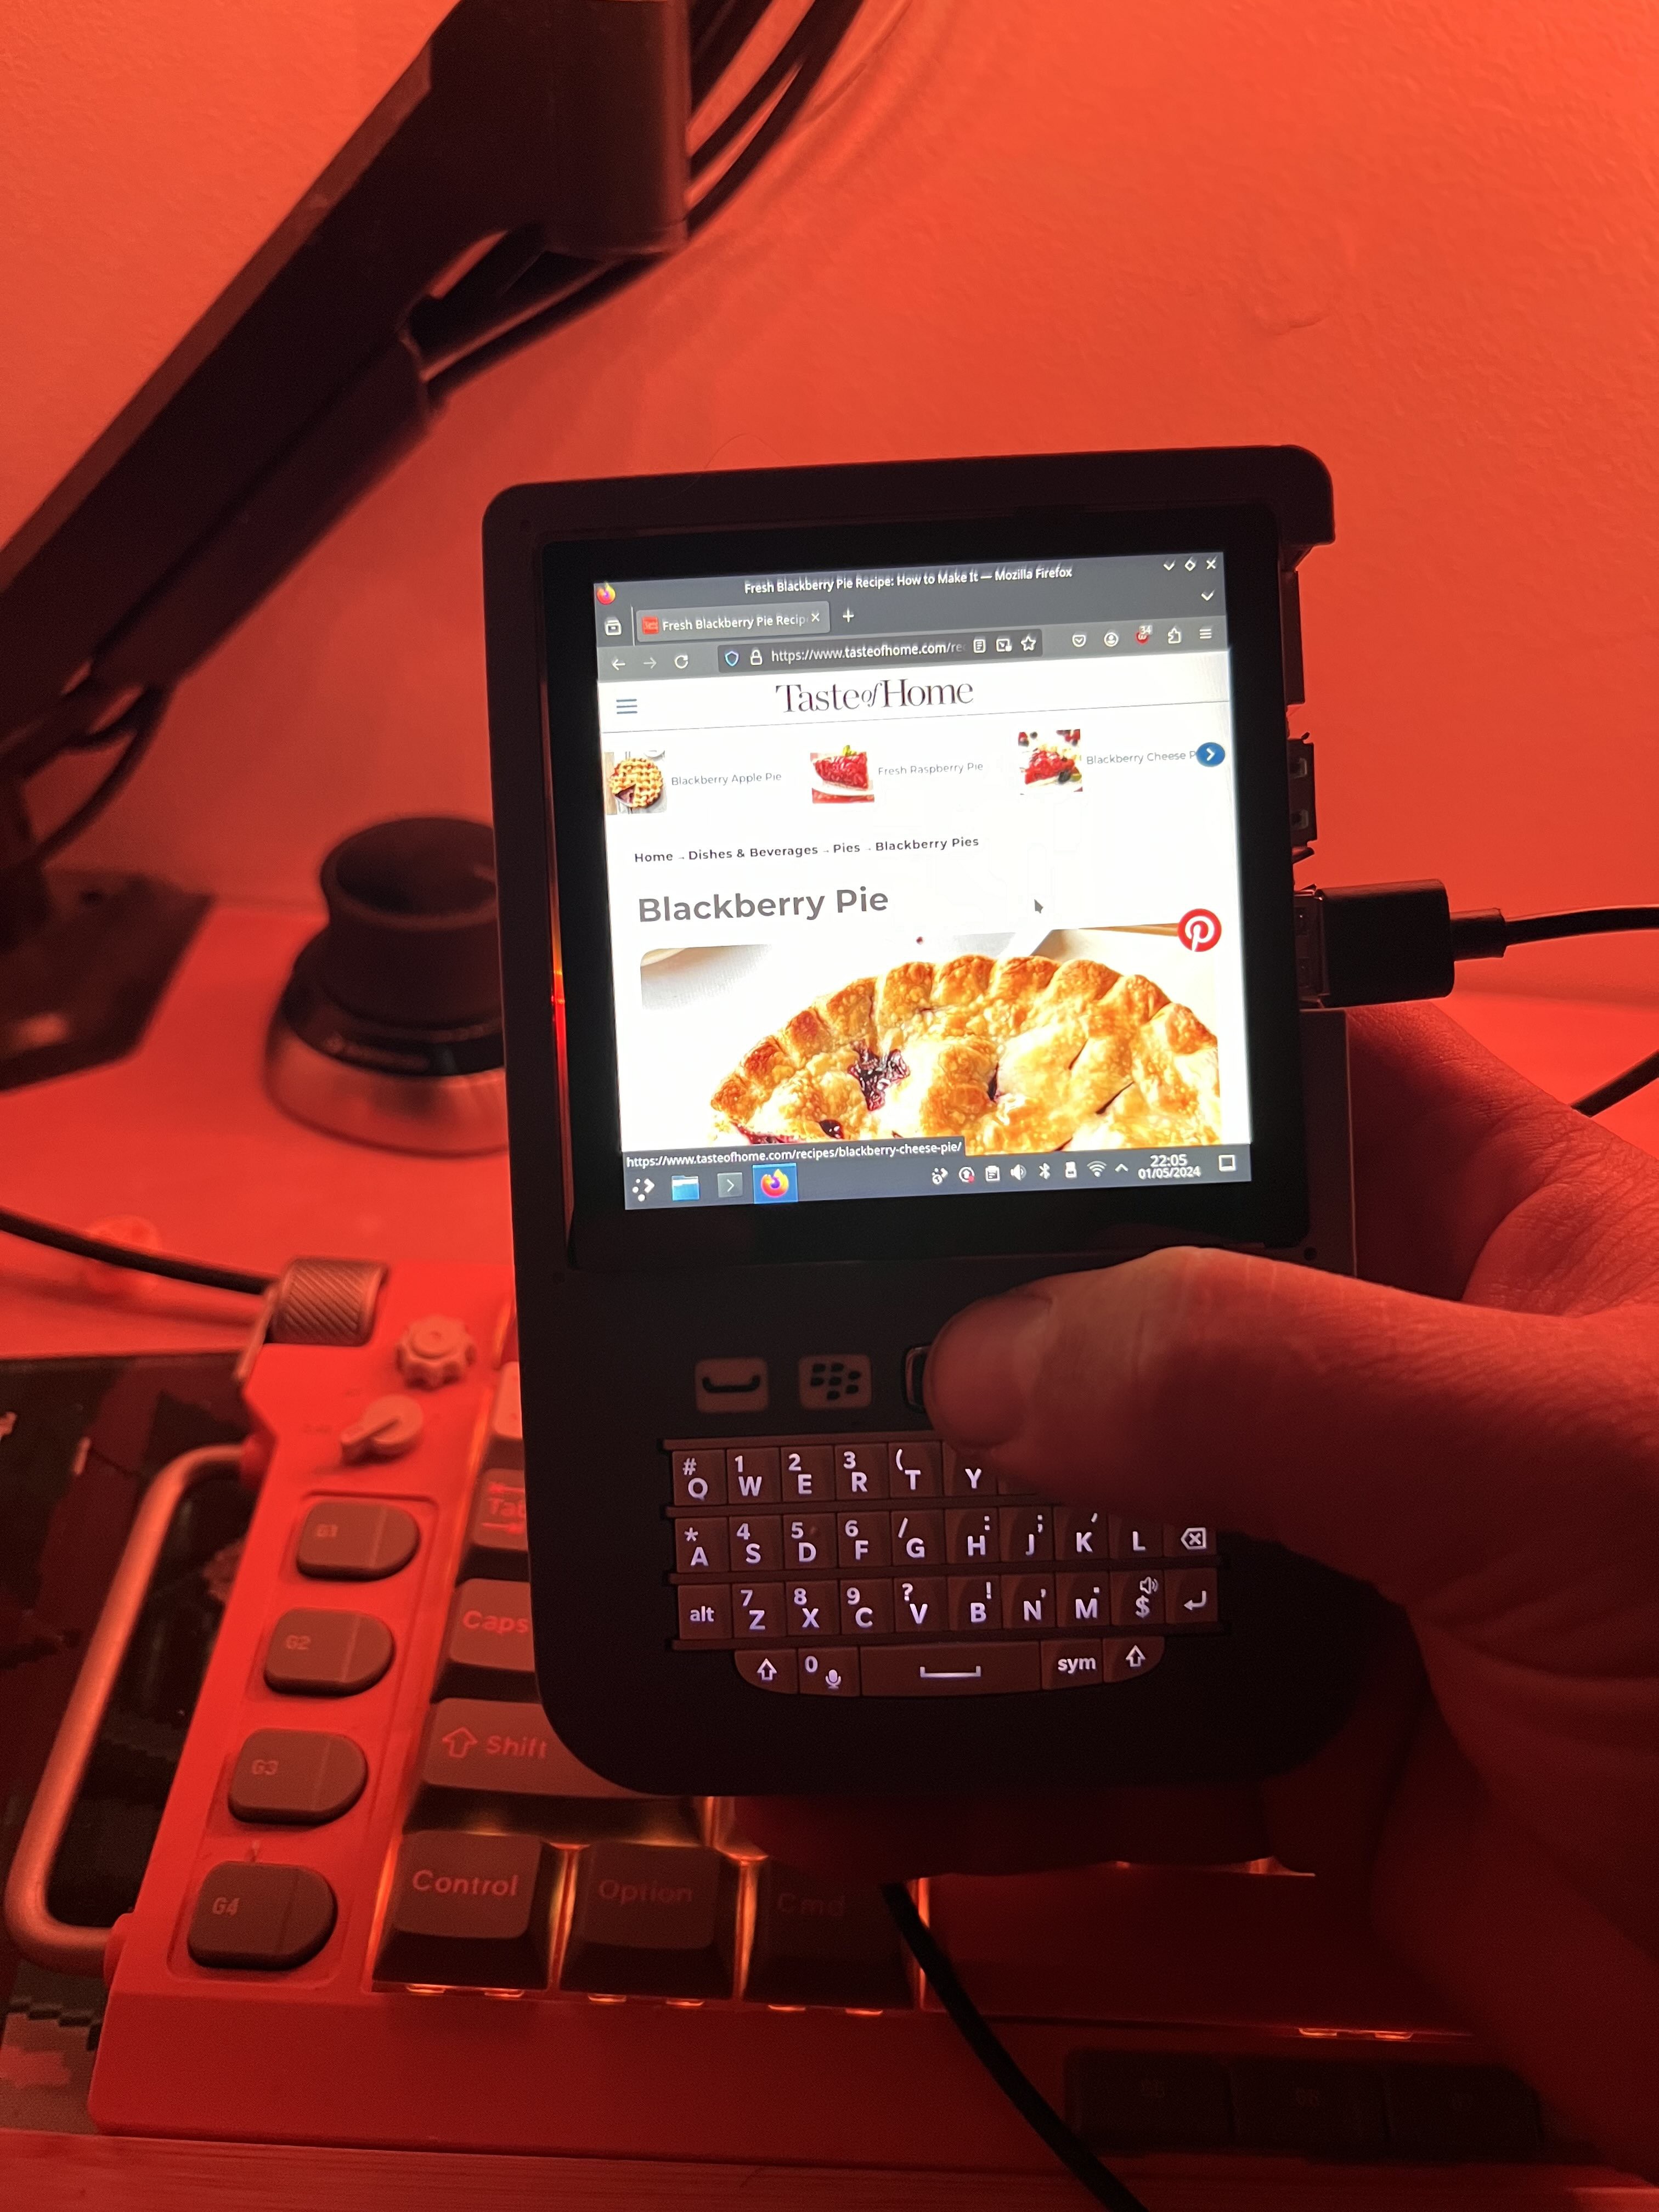
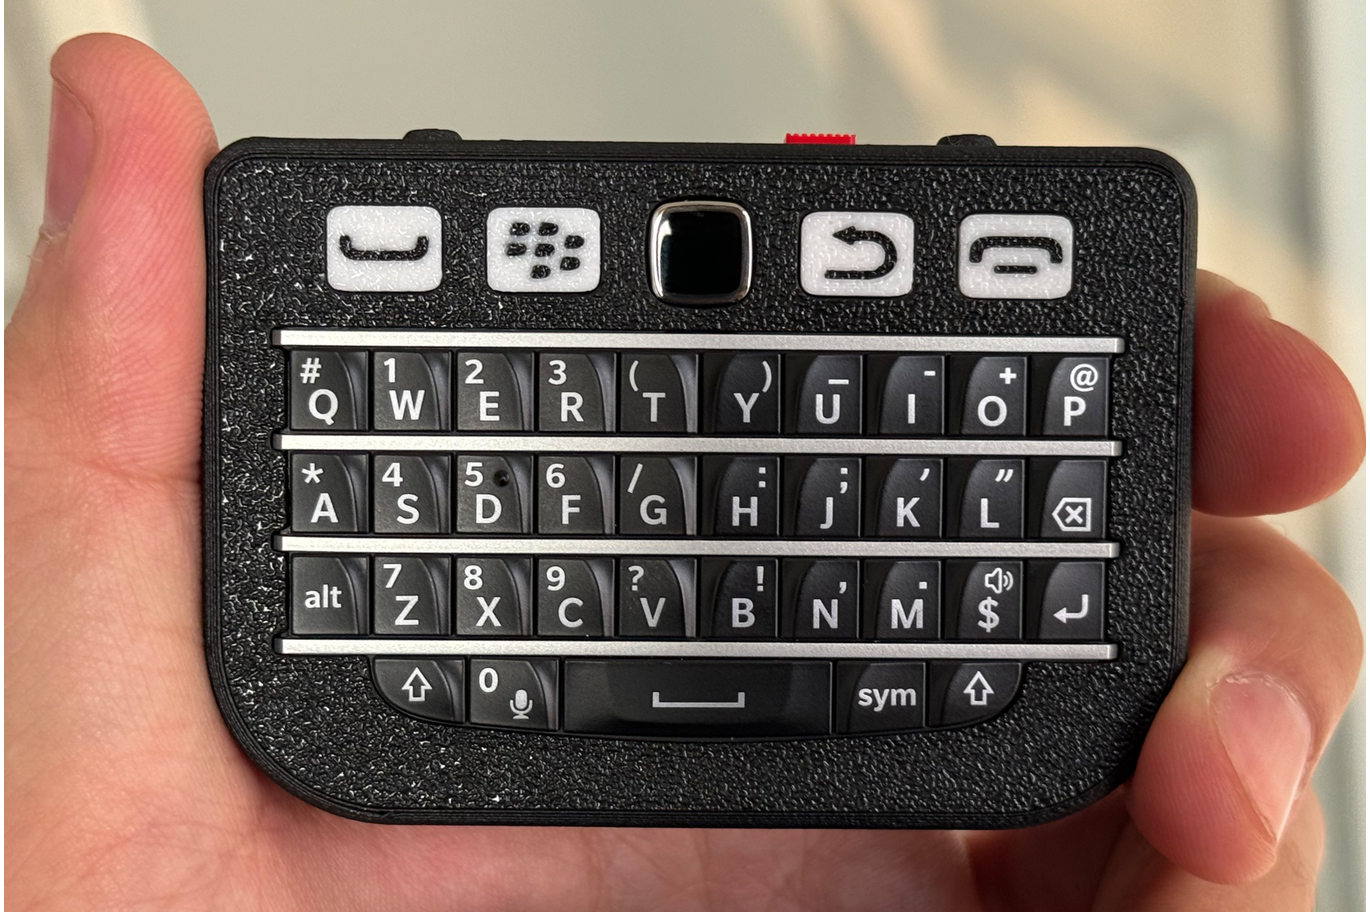
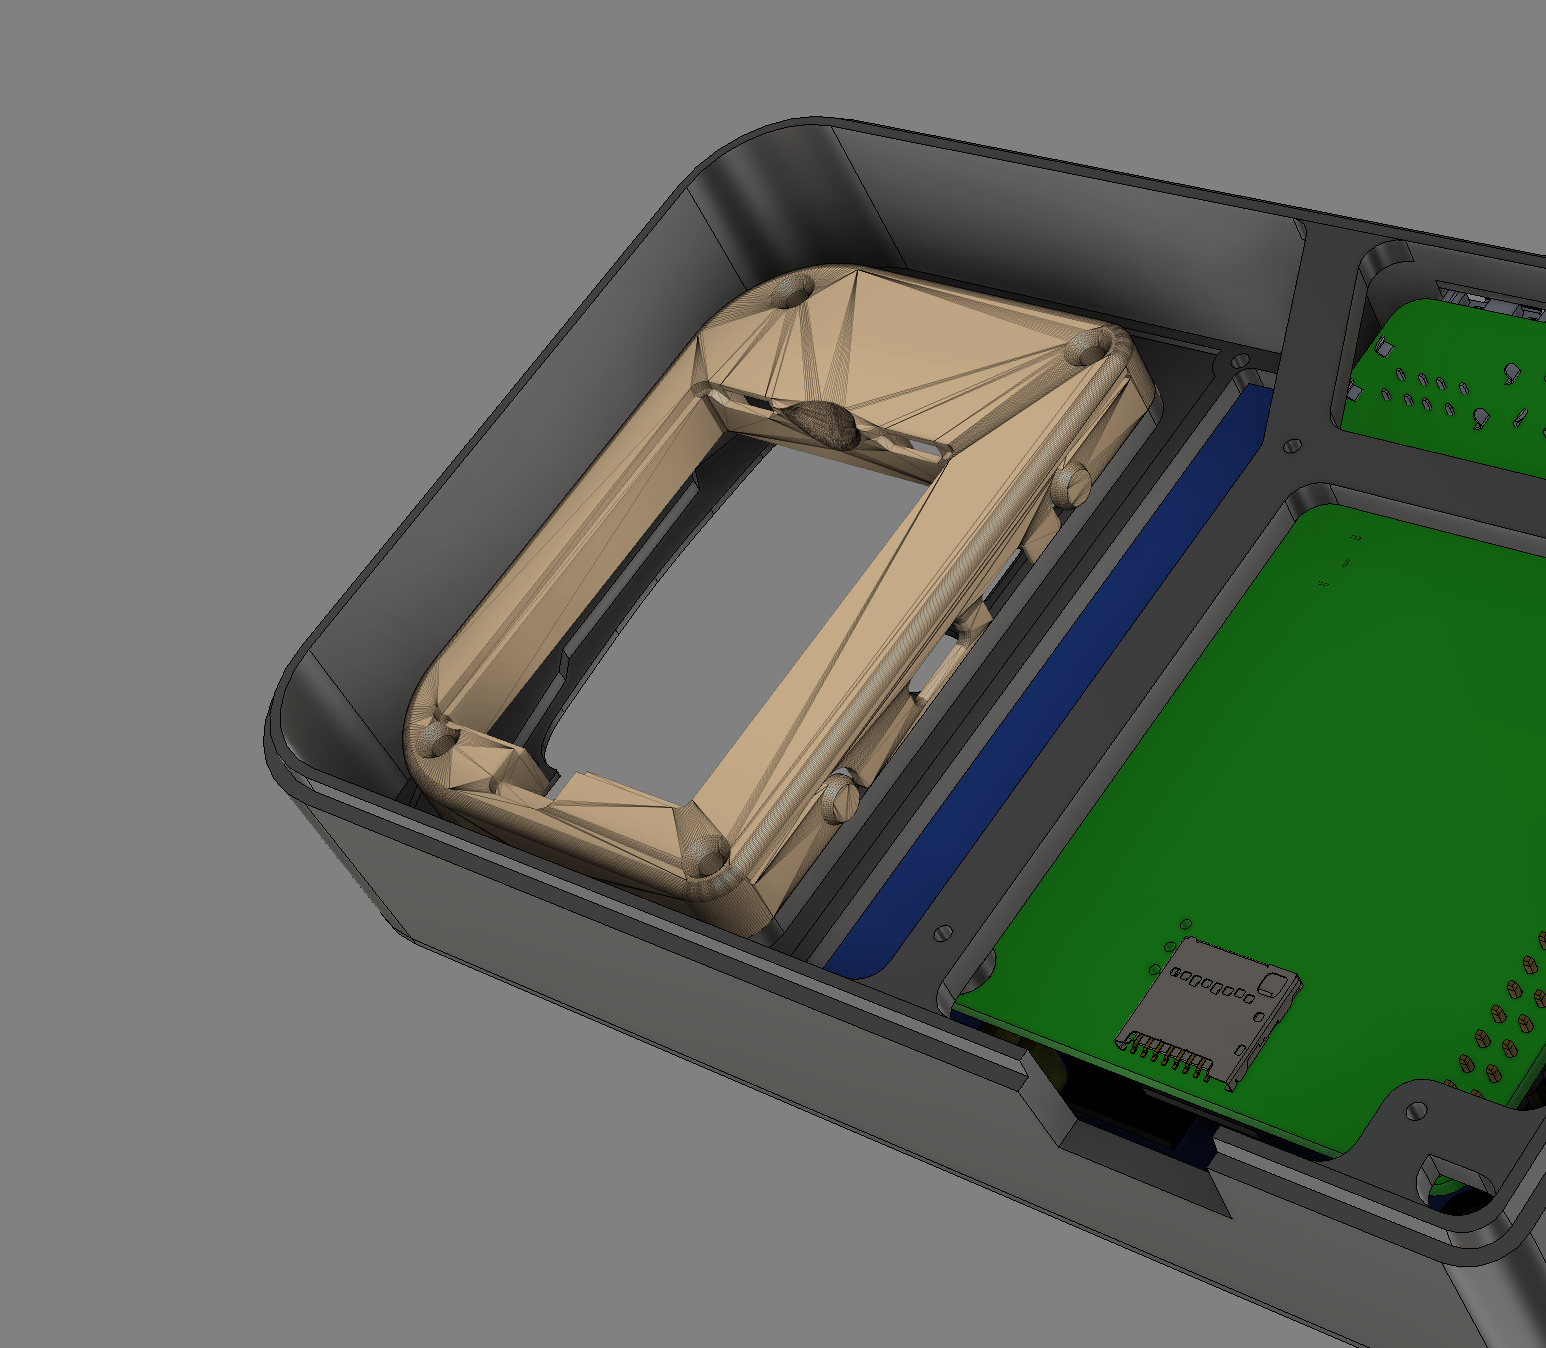
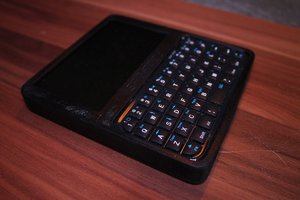
Taylor Hay's article provides a very interesting and detailed project on building a custom handheld PC using a Raspberry Pi, inspired by the cyberpunk aesthetic and practicality of Linux. Taylor's passion for portable devices and open source platforms is evident as he embarks on a complicated project to create a functional and easy-to-use handheld PC. The project takes advantage of the BlackBerry Q10 keyboard and square HyperPixel 4.0 touchscreen, combining them with a Raspberry Pi 4 and a 10,000mAh battery to ensure long-lasting usability.
Taylor's idea is very attractive and useful for technology enthusiasts, detailing both the successes and challenges faced during the construction process. The troubleshooting aspect, such as dealing with faulty USB cables and the complexities of integrating the power bank with the Pi, adds a realistic and relatable dimension to the project. Additionally, Taylor provides us with practical tips and solutions, including specific commands for making the HyperPixel display work with Kali Linux, which is a valuable resource for others attempting similar projects.
The documentation Taylor presents is very comprehensive, with clear project records and a step-by-step breakdown of components and their assembly. This transparency not only shows Taylor's experience, but also encourages and helps other enthusiasts to replicate the project.
In conclusion I would say that Taylor Hay's article is an example of the creativity and technical skill that can be applied to different projects, offering a combination of inspiration and practical guidance for technology enthusiasts who want to carry out similar projects, without a doubt a sample of the quality applied in a very ingenious project.
As a special mention I can only add the Dromey quality model Guide Document that is presented through the following URL:
https://drive.google.com/file/d/11yiAXpsPKpS42Du4ofpHOy0wYUP0Noql/view?usp=sharing
It is important to mention that this document is in the Spanish language.