 Trevor Flowers
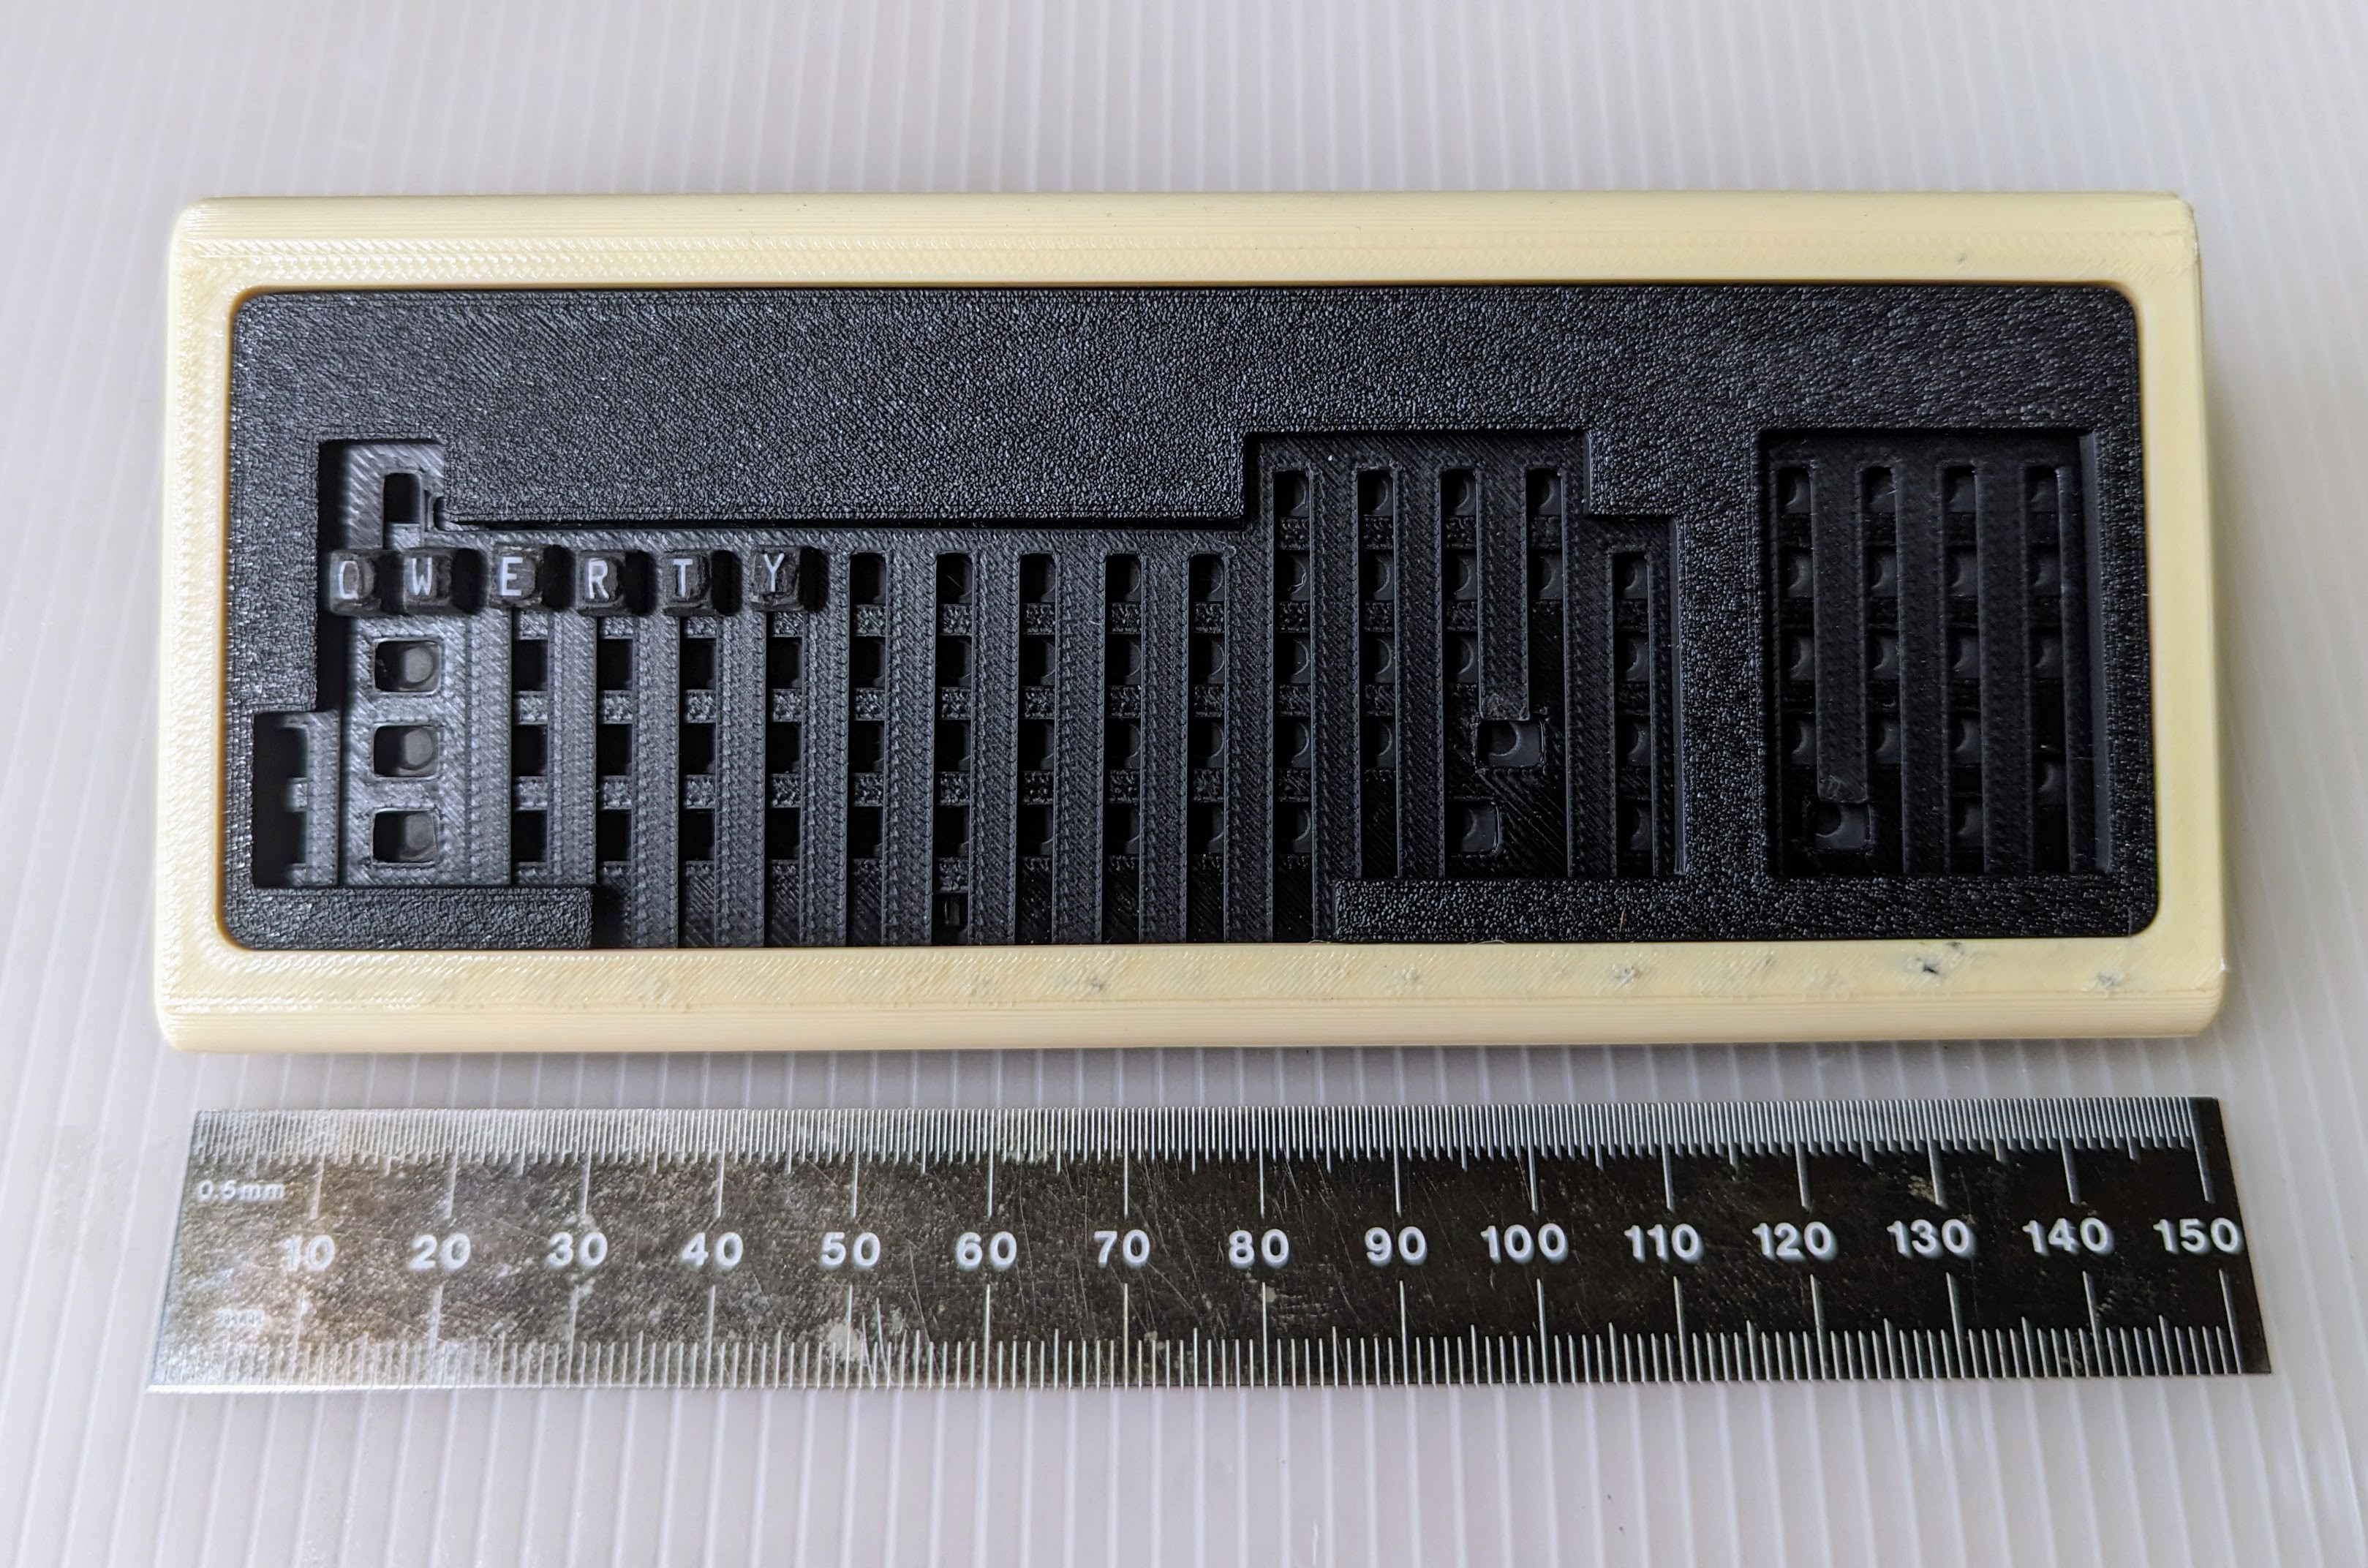
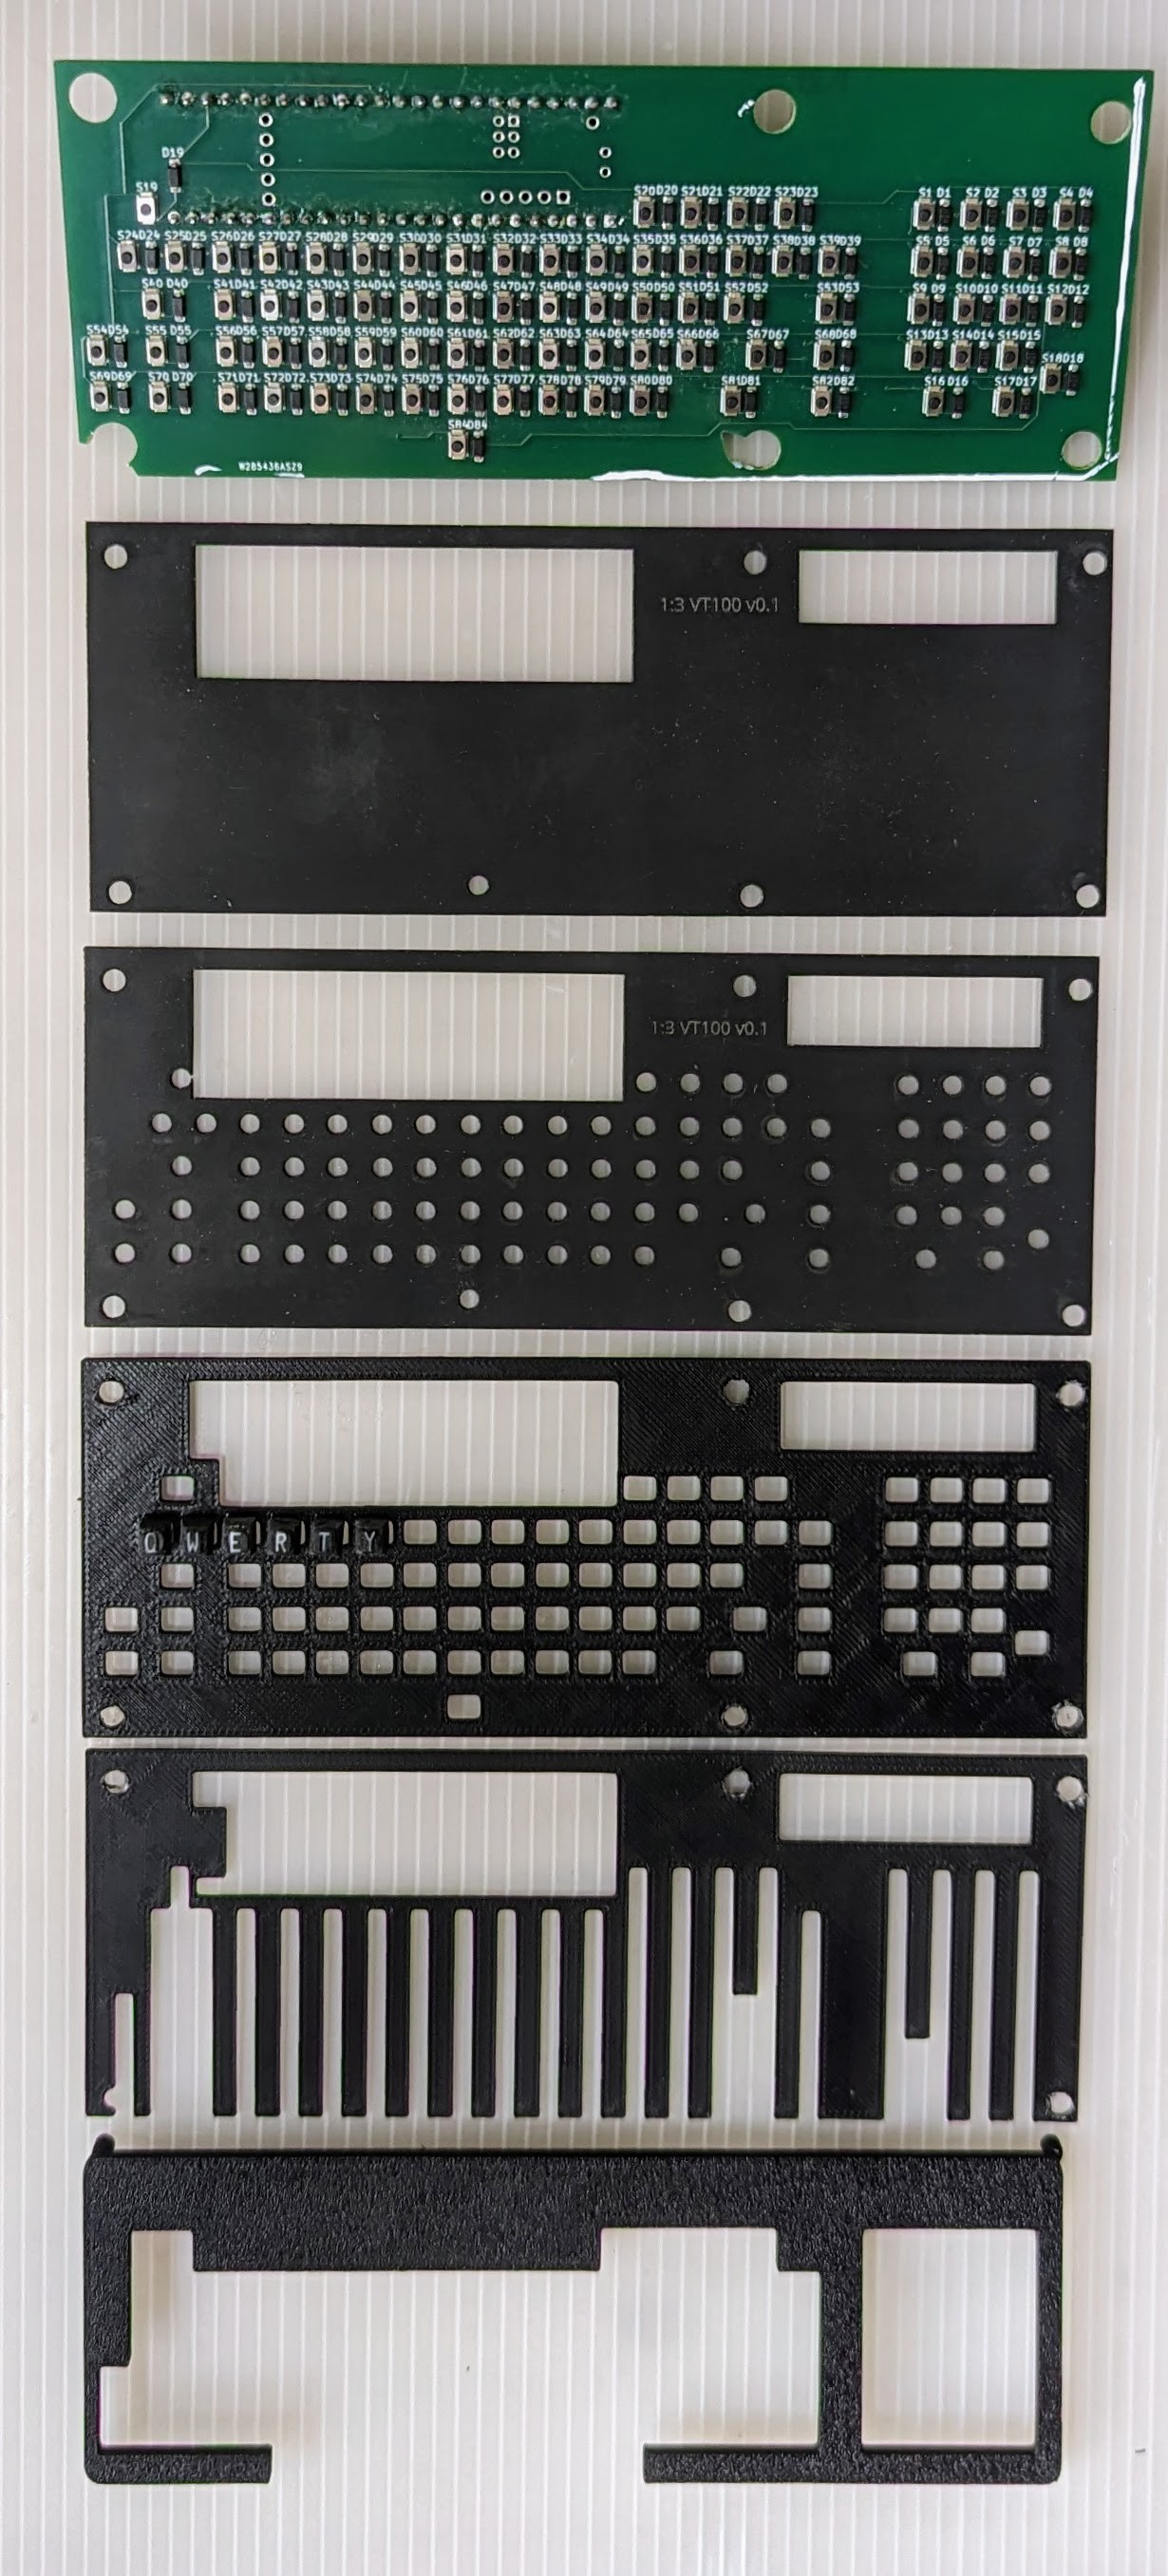
I'm using FreeCAD to model the case parts and then 3D print them in Polylite PLA or PLA+.
I'm using KiCAD to make the custom circuit board for the small keyboard. I wish I had a LumenPNP to fab the boards but until I get one I'm using a Chinese fab house.
The case is sized to fit a single board computer like the RPi 4 or similar.
I've ordered but not yet tested a 3.5" diagonal TFT display that is 640x480 pixels and takes HDMI input. That would give it enough resolution to display the orginals' 80x24 character mode.
There are a few good emulators for the VT100 so I'm hoping that with the working keyboard and a serial port on the back it can be a handy portable terminal to use with old big iron like an IBM System/360 or the excellent PiDP/11.


 mkdxdx
 David H. Bronke
 deʃhipu
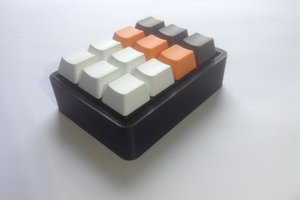
 Robin Hartley
I'm a huge fan of mini versions of working keyboards. Would love to see more about your VT100 variant.