Close
0%
0%

Laser Harp I

Affordable and pretty simple to build framed laser harp using cheap laser pointer modules and a Teensy 3.2

Similar projects worth following
Framed laser harp with up to 16 beams, MIDI over both USB and 5-pin DIN, adjustable octave and transposition, plus a whole bunch of selectable scales. Estimated cost less than €50.

Objective was to build a simple and cheap, but useable, laser harp. I consider it a prototype/base for future builds, so I'm calling it the Laser Harp I. At the same time it probably is a good start for anyone else wanting to build a laser harp, so just go ahead and build one if you feel like it.

The harp is based on cheap laser modules (up to 16 red laser diode modules, <5mW). Makes it pretty safe, but you still should not look directly into the beams, of course. I take no responsibility here. Don't be stupid. Don't let kids play with it unattended and so on.

To control settings like sensitivity (adjust to ambient lighting), scale, octave and transposition (start note), there are four potentiometers, plus a switch to divide the scale settings in two banks. For testing or a more simple build, these can be left out if you just comment out some code accordingly. Default settings are set in the variable definitions.

The start note (leftmost beam) is set to midi note number 60 (middle C). From there you can adjust start octave from -4 to +3. As the transposition setting goes from -12 to +12 semitones, you will in total get a very wide range. In some cases it will even go outside the midi range. Those notes will then be silent.

Scale settings available are:

Upper bank

chromatic
major/ionian
dorian
phrygian
lydian
mixolydian
natural minor/aeolian
locrian
reygish
melodic minor
harmonic minor
major blues
minor blues
major pentatonic
minor pentatonic
diminish

Lower bank

combi diminish
raga bhairav
raga gamansrama
raga todi
spanish
gypsy
arabian
egyptian
hawaiian
bali pelog
japan
ryukyu
wholetone
augmented
prometheus
tritone

Laser-Harp-I-universal.png

Schematic for [universal] version for both keyboard and selectable scale play

Portable Network Graphics (PNG) - 133.70 kB - 03/30/2017 at 08:48

Preview

Laser-Harp-I-chord-version.png

Schematic for [chord version] with keyboard

Portable Network Graphics (PNG) - 138.97 kB - 03/28/2017 at 08:42

Preview

Laser-Harp-I-schematic.png

Schematic

Portable Network Graphics (PNG) - 184.73 kB - 03/14/2017 at 15:05

Preview

View all 12 components

  • Universal firmware

    Johan Berglund03/30/2017 at 08:46 0 comments

    I put together a merged version of the firmware the other day, where the switch on pin 2 lets you select either scale (pot selectable) or chords (keyboard) mode. Also added a separate transpose function for the keyboard, stepping in fifths.

    Also ditched the legacy DIN MIDI. Thinking of using pin 1 for transposition indication LEDs above the keyboard.

    And there are new videos on my Instagram :)

    Edit: New videos on YouTube too.

  • Keyboard issues solved

    Johan Berglund03/27/2017 at 20:34 0 comments

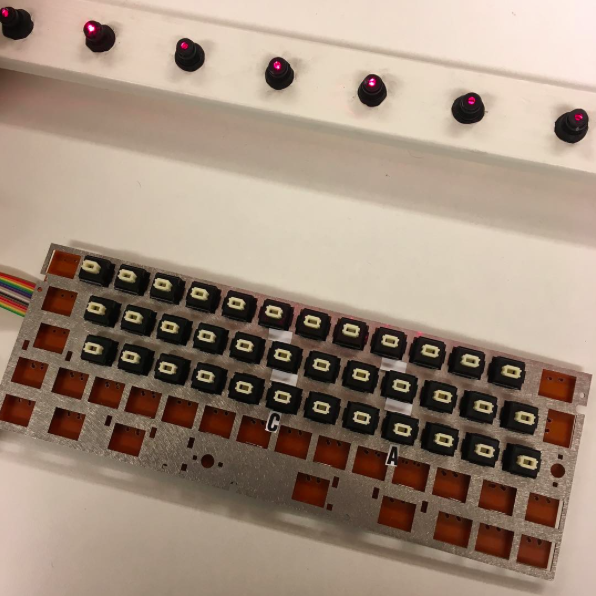
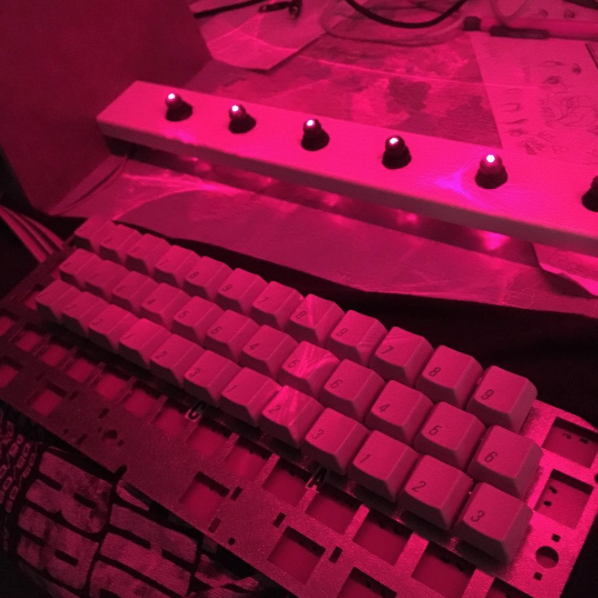
    A combination of errors confusing me, but I finally got it right! The prototype keyboard isn't very pretty, but it works :)

  • Laser Autoharp testing

    Johan Berglund03/26/2017 at 10:40 0 comments

    Well, there are issues I need to address, but I've managed to get limited functionality at least. I will have to take another look at the keyboard matrix hardware, and also check my row scanning. Could be just too long wires between keyboard and Teensy, because the functionality of individual keys is erratic. Also I can't get the chord selection to work properly, but that might be a related issue. Maybe I'll just put together another keyboard. The one I'm using now is based on a discarded mechanical keyboard prototype I made. I don't trust it. Anyway, I made a teaser video for you.

  • Laser Autoharp, aka Laser Harp I [chord version]

    Johan Berglund03/23/2017 at 21:41 0 comments

    When I was messing around switching scales while playing the harp, I realized that if I instead used keys or buttons to select scales, and replaced the scales with chords that could be strummed, I would have a laser autoharp or omnichord. It just had to be done.

    Today I got a first sketch done, and now I just need to build a keyboard for it so I can try it out. Hopefully I'll get time on my hands to do that this weekend.

    If you are curious, you can check out the code in its current state on Github.

  • Yes, it works!

    Johan Berglund03/12/2017 at 09:37 0 comments

View all 5 project logs

  • 1
    Step 1

    Prepare your frame of choice. A non conductive frame material like wood or plastic is required. Wood is probably the best choice (no risk for melting when we solder). Holes for lasers and photoresistors should be measured and aligned with care to get nice and even parallel beams. Make the holes for the photoresistors small enough to keep the component body from going through, and wide enough to allow the legs through, even with some shrink tubing on to prevent shorting. I believe I used a 3.5mm drill. Holes for lasers should be wide enough to allow for some adjustment.

  • 2
    Step 2

    On both sides of the row of holes, stick 5mm copper tape strips along the entire length of the bar. Do this on the top side of the LDR sensor bar (top) and the bottom side of the laser bar (bottom). This will be the power bus for each bar.

  • 3
    Step 3

    Put laser modules in place and solder all positive leads to one copper tape strip via a current limiting resistor, and all the negative leads directly to the other copper tape strip. For the laser modules used, the voltage and current needs to be right. With a 5V power supply and 4.5V 20mA lasers, a 27 ohm resistor in series with each laser will do the trick. Make sure your power supply can manage the total current draw. In this case, the lasers will draw 320mA combined. [edit: reality check. current draw is actually more like twice that. just use a 1A or higher rated power supply and you'll be fine} For other laser modules, just do the math for what resistors to use, or use an online calculator.

View all 10 instructions

Enjoy this project?

Share

Discussions

calhjh wrote 11/25/2022 at 04:37 point

I was wondering where you found the information about all of the scales. Is there a single source with all of the scale intervals listed?

  Are you sure? yes | no

Johan Berglund wrote 11/25/2022 at 06:50 point

It was a long time ago, so I don't quite remember. I think I compiled it from a couple of sources. One might have been a manual for a sequencer or something like that. In any case the intervals are in my source code on Github now if you need them.

  Are you sure? yes | no

Robert Swanson wrote 05/26/2019 at 20:38 point

Great project. Looked at many on the web and yours is the most informative that I've found. Think I can build one with what you've posted. I think the moving mirror designs are two complicated. "KISS"  I want to up size it. Thinking of an aluminum U channel 2" x 2" x 60" on the top to both support the lasers mounted in heat sinks and contain chips of dry ice. For cooling of the lasers so they won't overheat and add vapour to make laser beams visible.

  Are you sure? yes | no

gareth wrote 03/23/2017 at 22:53 point

Hej Johan

Nice project - I've wanted a laser harp since Jarre played Rendezvous Houston..!

My Teensy arrived yesterday so just getting my toolchain sorted.

Looking forward to the update for chords/keyboard update as I think this will make it easier to play. Please post a schematic update when you have one ready.

Could you also recommend a (simple!) PC-based synth to use for testing?

Tackar

  Are you sure? yes | no

Johan Berglund wrote 03/24/2017 at 09:50 point

Hej Gareth,

Thanks! Jarre has been a big inspiration for me too in this. I've watched him play his laser harp live in concert a number of times. It never fails to impress :)

I've made a preliminary schematic for the keyboard version and fixed some errors in the code. Will upload to Github when I get home in a couple of hours.

I'm an Apple person myself, so I don't really have much knowledge in PC synthesizers. For my testing, I've been using Thor on the iPad and nLog midi synthesizer on the iPhone. Also some kind of midi monitor software can be helpful if you want to troubleshoot, experiment or develop further.

Cheers

  Are you sure? yes | no

Johan Berglund wrote 03/28/2017 at 16:22 point

Hi Gareth,

I've uploaded schematic and code for the chord version update now. I built it with a full omnichord keyboard, 12x3 matrix, but by leaving out columns (leftmost and/or rightmost) it can be reduced to a smaller one, for example 9x3 going from Eb to B, just by not connecting switches on those column pins. Using the +/- 12 halftone transpose pot, you can easily work around the issues of using a more limited keyboard. You could even go down to a 7x3 matrix from F to B, possibly 6x3 from F to E, but less size than that, you will lose important chords. Then you just spin the circle of fifth "chord wheel" using the transpose function (well, right now it transposes in halftone steps, but virtually moving the keyboard mapping could be a thing for coming versions). Link to chord wheel image for reference: http://www.appscrawler.com/application/ScreenShotImageAction.do?appId=131631&imageId=0

  Are you sure? yes | no

jeffw wrote 03/22/2017 at 19:48 point

Great project.  Were there any libraries/#includes needed to run for example MIDI suite of functions on Teensy? Any chance to add velocity, aftertouch parameters?

  Are you sure? yes | no

Johan Berglund wrote 03/23/2017 at 08:22 point

Thank you! I did choose the Teensy for the no frills usb midi. No #includes needed, as teensyduino takes care of everything. You just select Teensy 3.2 and USB Type "MIDI" in the Tools menu of the Arduino IDE. Also, I used no libraries for the DIN MIDI either. 

If you want velocity, you could monitor the rate of value changes from each sensor. I didn't see much benefit for my intended use, so I kept it simple. Also aftertouch using sensors for distance or other stuff should not be too hard to implement.
You could even add built in audio output using the teensy audio library with not too much hassle. I left the A14/DAC pin unused for this. Myself, I prefer using external synths, so I didn't bother about that. For now at least.

  Are you sure? yes | no

Similar Projects

Does this project spark your interest?

Become a member to follow this project and never miss any updates