 Andy Castille
HomeAssistant Integration
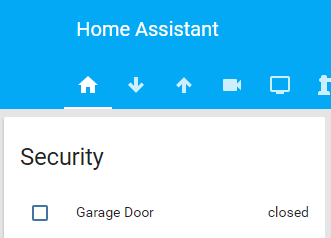
This is another one of my additions to HomeAssistant, the amazing Smart Home/Home Automation software.
In order to track MQTT messages from this project, I added the following to my HomeAssistant configuration:
binary_sensor:
  - platform: mqtt
    name: "Garage Door"
    state_topic: "hass/garagedoor"
    device_class: opening
    payload_on: "1"
    payload_off: "0"

 Pete Hoffswell
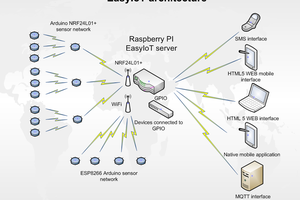
 EasyIoT
 Harri Ohra-aho
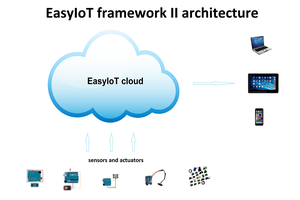
I want to do a door sensor check like you, but with magnet and magnetic sensor. And ultrasonic sensor to check if car is inside or not, and maybe if it will work, check the sens of open/close during movement of my 2 doors.
All if possible with an ESP32 based board.