 facelessloser
Hardware

- Arduino pro micro
- HX711
- 5kg load cell
- 12 ws2812 ring LED’s
- 2 buttons
- 2 latch button
- Enclosure
As with most of my projects it’s based around a arduino pro micro.
HX711
To read the load cell I needed a HX711 load cell amplifier, I wire up my 4 wire load cell like so Red – E+ Black – E- Green – A+ White – A-
Loaded up the HX711 library and it read the load cell just perfectly, Bare in mind I haven’t calibrated the load cell so I’m just reading off the values it spits out. There is a way to calibrate the load cell in the library but I didnt need it.
Buttons
I was just going to use hard-coded values for the a full glass and empty glasses but then I seen this project where he stored values in the arduinos eeprom and thought I could do the same with my project. I just needed a way to enter a mode where I could change these values. I settled on using a latching button as a switch to switch in and out of “calibration” mode, Then I had 2 push buttons one to set empty glass (red) and one to set the full glass (green) weights. Then when they are set you just switch back to normal mode.
I took advantage of the calibration buttons by making them dual purpose. While the latch button is unlatched the buttons can be used to change the LED ring to different modes one being a few solid colours and the other being different colours but pulsing/breathing so it will just light up your glass if you want.
The hunt for the perfect enclosure
This is the part of the project that drives me nuts. I wanted a metal enclosure because I had been using a metal plug socket box to hold and prototype the load cell side of the project. The problem with the metal enclosures is they are a lot more expensive then the plastic ones and all the ones I found came from china and I needed to get cracking. I finally settled on one that was big enough but it was little thick for my liking.
After I had secured the load cell into the new enclosure I found it to be a little flimsy with the weight of a full pint glass. To remedy this I had to glue another layer of plastic in the top and add some screws so it would support the load cell from the bottom too

I had the idea that if you were crazy you could build this into a table, So you would just have a floating coaster that would look like magic. Also you could do away with the load cell and just have an arduion and a WS2812 ring to make it thinner.
The over engineered top

To make the top I needed to sandwich the 12 ring ws2812 LEDs between a sheet of 75mm x 75mm x 3mm aluminium and a 75mm x 75mm x 2mm sheet of clear acrylic. To hold all 3 together I did a bit of brain storming and came to the idea of using clear silicon, Not only would this stick them all together but would also make the top plate waterproof because we all know that condensation drips off your cold drinks. So I got a tube of clear silicone and gave the aluminium bottom layer with the LED ring and good layer of silicone, Next I placed the clear acrylic on top so there was no air bubbles and there was plenty of silicone splurging out of the side

The edges didn’t quite come out as neat as I wanted. I did cut off the silicone before it set because it would be harder to cut once cured.

I thought that I would sand the clear acrylic to make it opaque and that the clear silicon would also add some opaqueness to it but I was wrong. This wasn’t really A problem because I wanted to LED’s to light up the drink. I normally defuse the WS2812 LED’s with a few layers of white nail polish but I didn’t need to.
Fight the power
So I needed to power the project somehow. I normally use a lipo charger and 3v to 5v dc-dc boaster boards but I thought I would just use a power bank from pound land. The only down side to this is that you have 2 mirco USB ports, one for charging and one for the arduino to upload new code. While I was soldering all the components to the PCB I managed to let the magic smoke out of the power bank board so I had to...
Read more »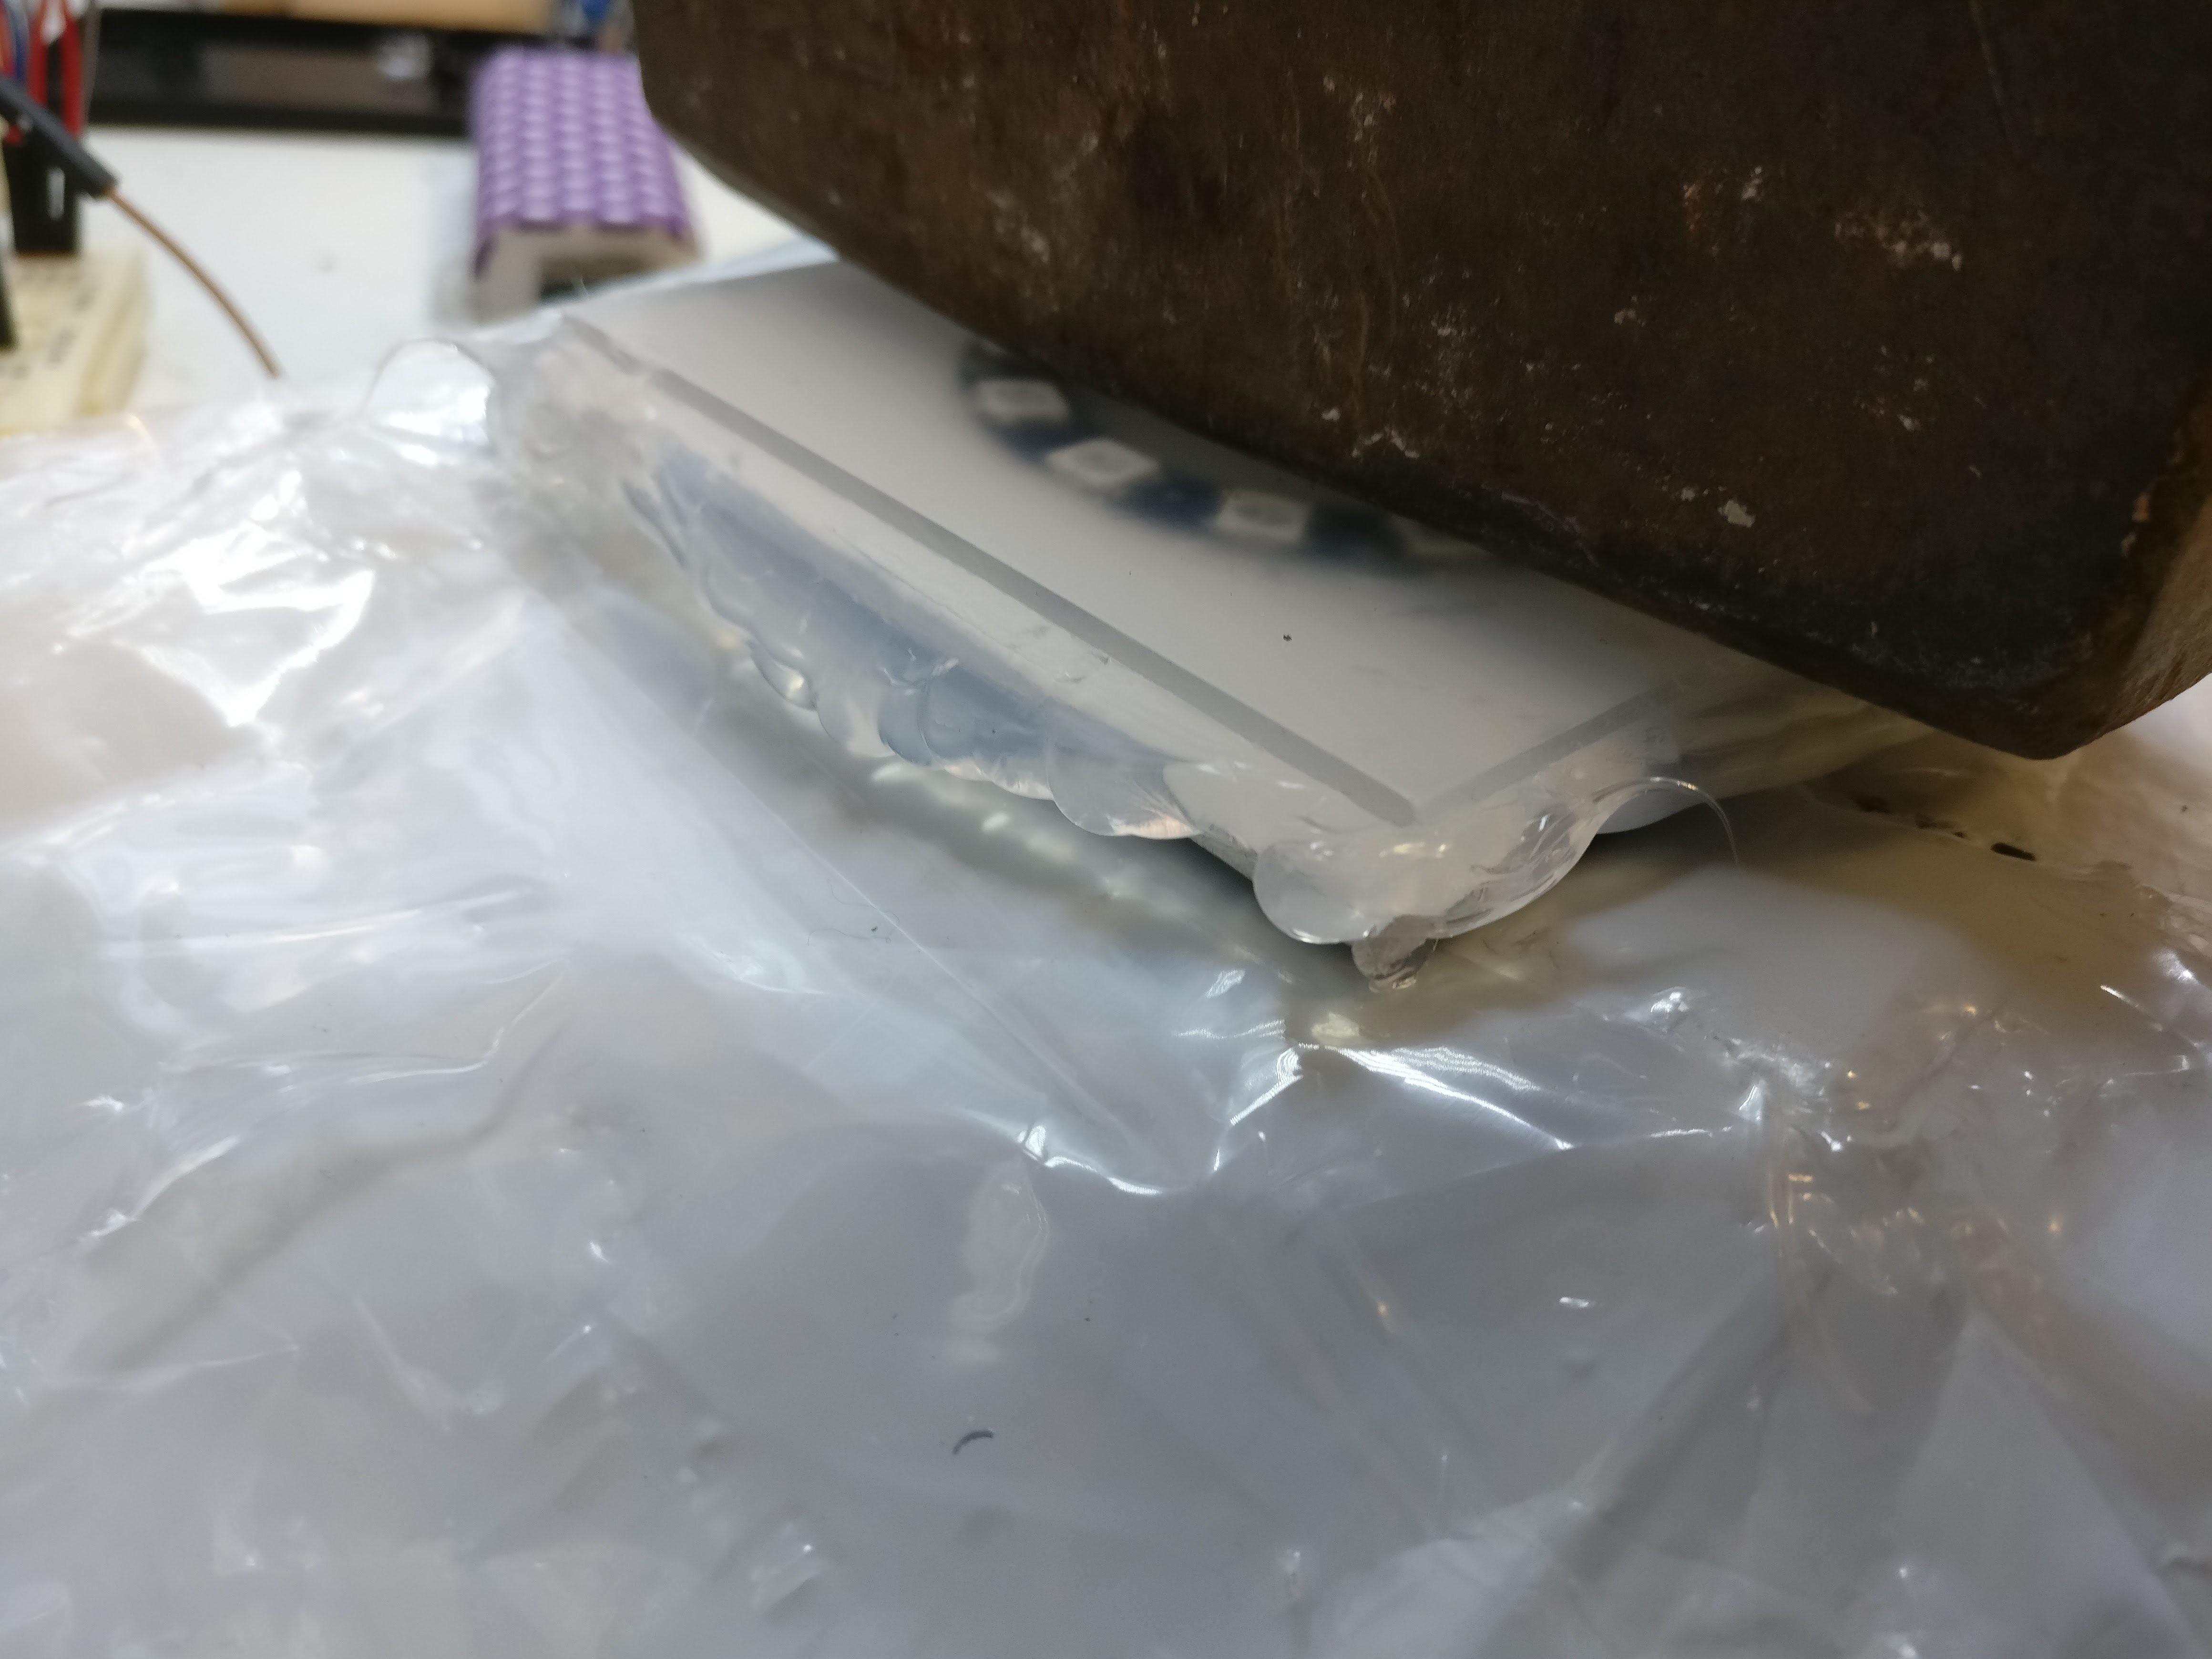
 sjm4306
 Emmanuel Lecomte
 boekenwuurm