JVC to Clio
I want to use a JVC car radio with Renault Clio's built-in steering wheel remote
I want to use a JVC car radio with Renault Clio's built-in steering wheel remote
To make the experience fit your profile, pick a username and tell us what interests you.
We found and based on your interests.
Version 2.0 with new hardware will be docuemted here: https://hackaday.io/project/163553-jvc-to-clio-20
- I think it have to replace SimpleTimer to e.g. CounTimer for the display control because I will re-use the timers and seems to me that SimpleTimer does not support it: "After f has been called, the interval is deleted, therefore the value timerId is no longer valid."
- I did not found JVC commands for the short press phone button and volume knob press. It means I cannot initiate any calls and I cannot terminate them. I found command for long press of phone button but it reject the call. JVC supports voice control but I am afraid it would be very unreliable (in Hungarian language) and very unconfortable and dangerous during driving if it recognizes wrong names and/or commands. Therefore I think I will use bluetooth. If anyone has knowledge or hints on it please share with me. My plan is that arduino will connect to my phone (Honor 9) via Bluetooth, read the contact list (send it to Clio's display) one by one. Then I will be able to initiate and terminate calls with a remote control button. At this point I do not know how should I start. Which bluetooth shield/module do I need or is it even possible. But I hope so ;)
Unfortunately I did not find any similar project yet.
The first version of the working code.
Let me mention here that this is my first project with Arduino and I never used c++ before. But I was intent and did not give up.
I will clean the code but at least it works well. There are still some unused function what I found in other's similar projects. I left them in the code because I will use them later.
Big thanks for @Manu. His code was very useful for my project: https://hackaday.io/project/27439-smart-car-radio
/*
  ############################################################################################################
  #  This code is meant to interface a 6-wire Renault Twingo / Clio steering wheel remote control with       #
  #  a JVC car radio equipped with a 'steering wheel remote input'. Hardware used is an Arduino Nano-clone.  #
  ############################################################################################################

  The steering wheel remote connection on the radio (blue/yellow wire or Tip in case of a TS connector)
  is connected to a pull-up resistor in the radio circuitry.
  Data is sent in the form of pulse interval modulation, meaning the interval following a pulse determines if we're sending a 0 or a 1.
  Pulses are sent by pulling the radio's input to ground.
  I'm driving an optocoupler to pull the radio's input to ground, so a HIGH Arduino output makes for a LOW radio input (= a pulse).
  Whenever I refer to HIGH or LOW, I'm talking about the Arduino output.

  ############
  # JVC part #
  ############
             _____________
  +---------|_____________|---------+
  | .1  ·2  ·3  ·4  ·5  ·6  ·7  ·8  |
  |                                 |
  | ˙9  ·10 ·11 ·12 ·13 ·14 ·15 ·16 |
  +---------------------------------+

  1 Ground             (black)
  2 +12v ignition      (red)
  3 Power Antenna      (blue/white)        ***  Arduino INPUT (Is powered on?)
  4 Not connected      (not connected)
  5 Right rear +       (grey)
  6 Right rear -       (grey/black)
  7 Left rear -        (white/black)
  8 Left rear +        (white)
  9 +12v battery       (yellow)
  10 +12v illumination (orange/white)
  11 Not connected     (not connected)
  12 Remote control    (blue/yellow)       ***  Arduino OUTPUT
  13 Right front +     (purple)
  14 Right front -     (purple/black)
  15 Left front -      (green/black)
  16 Left front +      (green)

  Protocol specifications for pin12:
  Pulse width                    527.5 µs
  Pulse interval for sending 0  1055.0 µs (HIGH for 1 pulse width, LOW for 1 pulse width)
  Pulse interval for sending 1  2110.0 µs (HIGH for 1 pulse width, LOW for 3 pulse widths)
  Note: since the delayMicroseconds() function accepts only unsigned integers, we're using a pulse width of 527 µs
  Data packets are constructed as follows:
  HEADER     always LOW (1 pulse width), HIGH (16 pulse widths), LOW (8 pulse widths)
  START BIT  always 1
  ADDRESS    7-bits (0x00 to 0x7F), send LSB first, always 0x47 for JVC KD-R531, probably the same for all JVC car radio's
  COMMAND    7-bits (0x00 to 0x7F), send LSB first, see next section for list of known commands for JVC KD-R531
  STOP BITS  always 1, 1
  Note: the ADDRESS, COMMAND and STOP BITS are repeated 3 times to ensure the radio properly receives them.
  Known commands for JVC KD-R531:
  HEX   DEC  BIN(7b)  FUNCTION
  0x04    4  0000100  Volume +
  0x05    5  0000101  Volume -
  0x08    8  0001000  Source cycle
  0x0D   13  0001101  Equalizer preset cycle
  0x0E   14  0001110  Mute toggle / Play/pause toggle
  0x12   18  0010010  Tuner Search + / Track + (and Manual Tune + / Fast Forward with press & hold)
  0x13   19  0010011  Tuner Search - / Track - (and Manual Tune - / Fast Rewind with press & hold)
  0x14   20  0010100  Tuner Preset + / USB Folder +
  0x15   21  0010101  Tuner Preset - / USB Folder -
  0x37   55  0110111  UNKNOWN, appears to be a sort of reset as well as a display test
  0x58   88  1011000  UNKNOWN, displays 'SN WRITING' where WRITING is blinking

  Special thanks to: https://www.avforums.com/threads/jvc-stalk-adapter-diy.248455/page-3

  #############
  # Clio part #
  #############
 ISO 10487 defines a standard for connectors for the head unit...
Read more »
I have tried some version of JVC controller program I found on the Internet but only this one worked well.
Unfortunately I don't remember where I found it, but I will try to get the source URL and share it.
/*
#############
# Clio part #
#############
ISO 10487 defines a standard for connectors for the head unit to the car's electrical system, consisting of a system of four different connectors typically used in head units for car audio.
   Power (A)
     +-----------------+
     | |1  |3  |5  |7  |
    _|                 |
   |_  |2  |4  |6  |8  |
     +-----------------+

   A1 Speed signal  (pink)              *** Arduino INPUT
   A2 Phone mute    (not connected)     ---                      ---
   A3 Not connected (not connected)     ---                      ---
   A4 +12v battery  (red/pink)          ---                      *** JVC
   A5 Antenna motor (grey)                  Arduino ***          *** JVC
   A6 Illumination  (blue)              ---                      *** JVC
   A7 +12v switched (yellow/pink)       *** Arduino              *** JVC
   A8 Ground        (black)             *** Arduino              *** JVC


################
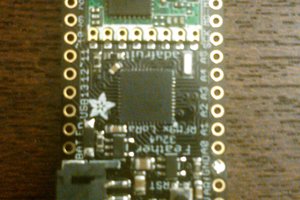
# Arduino part #
################

             +---+
      +------|USB|------+
      |[ ]J1 +---+      |
      |( )TX0     RAW( )|  RAW
      |( )RXI     GND( )|  GND
 GND  |( )GND     RST( )|  RESET
 GND  |( )GND     VCC( )|  VCC
      |( )2        A3( )|
INT0  |( )3   /\   A2( )|
      |(O)4  /  \  A1( )|
      |(O)5  \  /  A0( )|
      |(I)6   \/   15( )|  SCK
      |( )7        14( )|  MISO
      |( )8        16( )|  MOSI
      |(I)9        10( )|
      +-----------------+
           ProMicro
4 JVC_REMOTE_PIN
5 CLIO_DISPLAY_PIN
6 JVC_ANTENNA_PIN
9 CLIO_SPEEDSIGNAL_PIN

*/

// Define commands
#define VOLUP       0x04
#define VOLDOWN     0x05
#define SOURCE      0x08
#define EQUALIZER   0x0D
#define MUTE        0x0E
#define TRACKFORW   0x12
#define TRACKBACK   0x13
#define FOLDERFORW  0x14
#define FOLDERBACK  0x15
#define UNKNOWN1    0x37
#define UNKNOWN2    0x58

// Connect optocoupler input through a 1k resistor to this pin
#define JVC_REMOTE_PIN   4 // D8

// Pulse width in µs
#define PULSEWIDTH 527

// Address that the radio responds to
#define ADDRESS 0x47

int IncomingByte = 0; // Initialize Serial Buffer

void setup() {
  pinMode(JVC_REMOTE_PIN, OUTPUT); // Set pin to output
  digitalWrite(JVC_REMOTE_PIN, LOW);  // Output LOW to make sure optocoupler is off
  Serial.begin(9600);
  Serial.println("1 - Volume Up");
  Serial.println("2 - Volume Down");
  Serial.println("3 - Source");
  Serial.println("4 - Sound");
  Serial.println("5 - Mute");
  Serial.println("6 - Skip Fwd");
  Serial.println("7 - Skip Back");
  Serial.println("8 - Skip Fwd Hold");
  Serial.println("9 - Skip Back Hold");
}

void loop() {
  if (Serial.available() > 0) {
    IncomingByte = Serial.read();

    switch (IncomingByte) {
      case '1':
        SendCommand(VOLUP);
        break;
      case '2':
        SendCommand(VOLDOWN);
        break;
      case '3':
        SendCommand(SOURCE);
        break;
      case '4':
        SendCommand(EQUALIZER);
        break;
      case '5':
        SendCommand(MUTE);
        break;
      case '6':
        SendCommand(TRACKFORW);
        break;
      case '7':
        SendCommand(TRACKBACK);
        break;
      case '8':
        SendCommand(FOLDERFORW);
        break;
      case '9':
        SendCommand(FOLDERBACK);
        break;

      default:;
    }
  }
}

// Send a value (7 bits, LSB is sent first, value can be an address or command)
void SendValue(unsigned char value) {
  unsigned char i, tmp = 1;
  for (i = 0; i < sizeof(value) * 8 - 1; i++) {
    if (value & tmp)  // Do a bitwise AND on the value and tmp
      SendOne();
    else
      SendZero();
    tmp = tmp << 1; // Bitshift left by 1
  }
}

// Send a command to the radio, including the header, start bit, address and stop bits
void SendCommand(unsigned char value) {
      Serial.println("Sending");
  unsigned char i;
  Preamble();                         // Send signals to precede a command to the radio
  for (i = 0; i < 3; i++) {           // Repeat address, command and stop bits three times so radio will pick them up properly
    SendValue(ADDRESS);               // Send the address
    SendValue((unsigned char)value);  // Send the command
    Postamble();                      // Send signals to follow a command to the radio
  }
}

// Signals to transmit a '0' bit
void SendZero() {
//      Serial.println("zero");
  digitalWrite(JVC_REMOTE_PIN, HIGH);      // Output HIGH for 1 pulse width
  delayMicroseconds(PULSEWIDTH);
  digitalWrite(JVC_REMOTE_PIN, LOW);       // Output LOW for 1 pulse width
  delayMicroseconds(PULSEWIDTH);
}

// Signals to...
Read more »
I measured values on pin A1 of the ISO 10487 connector.
Here you are the measured values:
| Speed (km/h) | Pulse duration (μs) |
| 30 | ~13000 |
| 40 | ~10000 |
| 50 | ~7700 |
| 70 | ~5400 |
| 90 | ~4200 |
| 100 | ~3750 |
| 100 | ~3400 |
| 120 | ~3200 |
It can be calculated more accurate values with "distance = speed x time" formula. It seems the distance is around 0,105m. I this case the duration are the followings:
| Speed (km/h) | Pulse duration (μs) |
| 30 | 12600 |
| 40 | 9450 |
| 50 | 7560 |
| 70 | 5400 |
| 90 | 4200 |
| 100 | 3780 |
| 110 | 3436 |
| 120 | 3150 |
| 140 | 2700 |
| 150 | 2520 |
The arduino program for the measuring was the following:
/*
ISO 10487 defines a standard for connectors for the head unit to the car's electrical system, consisting of a system of four different connectors typically used in head units for car audio.
   Power (A)
     +-----------------+
     | |1  |3  |5  |7  |
    _|                 |
   |_  |2  |4  |6  |8  |
     +-----------------+

   A1 Speed signal
   A2 Phone mute
   A3 Not connected
   A4 +12v battery
   A5 Antenna motor
   A6 Illumination
   A7 +12v switched
   A8 Ground

***

             +---+
      +------|USB|------+
      |[ ]J1 +---+      |
      |( )TX0     RAW( )|  RAW
      |( )RXI     GND( )|  GND
 GND  |( )GND     RST( )|  RESET
 GND  |( )GND     VCC( )|  VCC
      |( )2        A3( )|
INT0  |( )3   /\   A2( )|
      |( )4  /  \  A1( )|
      |( )5  \  /  A0( )|
      |( )6   \/   15( )|  SCK
      |(X)7        14( )|  MISO
      |( )8        16( )|  MOSI
      |( )9        10( )|
      +-----------------+
           ProMicro
*/

int SignalPin = 7;
unsigned long duration;

void setup()
{
  Serial.begin(9600);
  pinMode(SignalPin, INPUT_PULLUP);
}

void loop()
{
  duration = pulseIn(SignalPin, LOW);
  Serial.println(duration);
  delay(1000);
}
I forgot to mention that there was a 4N25 optocoupler on pin7. I will attach some pictures about my prototype board soon...
Create an account to leave a comment. Already have an account? Log In.
Become a member to follow this project and never miss any updates

 jlbrian7
 davedarko
 Hari Wiguna
 electronicsworkshops
Hey Nemeth,
Great job, I really appreciate the fact it works! I'm struggling with similar thing - JVC radio in a Renault Clio. Therefore, I would like to replicate your project. Could you share the schematics, please?