
Functions
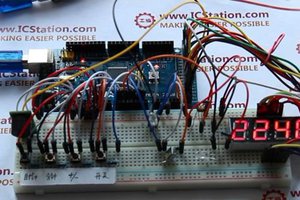
1) When start up, the hardware initialized and the LED will flash. The 4-bit digital tube display the initialized time 23:59.
2)When nobody appears in the infrared induction area, the LED will not light.
3)When the intensity of environmental light is weak and somebody is appearing in the infrared induction area, the LED will light till the person leaves the infrared induction area.
4) On 24 o'clock at midnight, the buzzer will alarm and the LED will switch to the manual control till 8 o'clock in the morning.
5)You can set the time by the switches.
Code for your reference:
http://www.icstation.com/newsletter/eMarketing/Photosensitive_Timing_Code.txt
Step 1: Components list

1)ICStation ATMEGA2560 Mega2560 R3 Board Compatible Arduino
2)830 Point Solderless PCB Bread Board MB-102 Test DIY
3)Round White Green Superbright Bulb Light
5)TL1838 VS1838B VS1838 Universal Receiving Head
6)Active Buzzer Module for Arduino
7)Breadboard Plug Wire Cable Tire
8)12X12X5mm Tact Switches 4 Legs
9)1K ohm 1/4W 1% Accuracy Metal Film Resistor
10)Common Cathode 4bit Digital Tube
11)+5V DC power supply
Step 2: Schematic diagram


Step 3: Lead to the power supply line and GND

Plug the +5V power supply line and GND from ICStation Mega into the bread board.The red bread wire is the power supply line and the black bread wire is the GND
Step 4: Connection of 4-bit digital tube

 According to the schematic diagram, connect the 4-bit digital tube with ICStation mega.
Step 5: The connection of the buzzer


1.Put the buzzer on the bread board
2.Connect the pin 1 of the buzzer to the anode, and pin 3 of the buzzer to the cathode, the pin 2 of the buzzer to the pin 47 of ICStation Mega board.
Step 6: The connection of the infrared receiving tube


1.Place the infrared receiving tube on the bread board
2.Connect the pin 1 of the infrared receiving tube to the 220K current-limiting resistance and A3 pin fo the ICStation Mega. Connect the pin 2 of the infrared receiving tube to the cathode and pin 3 of the infrared receiving tube to the pin 51 of ICStation Mega
Step 7: The connection of photoresistance


1.Place the photoresistance on the bread board
2.Connect the pin 1 of the photoresistance to the GND, and pin 2 of the photoresistance to the A2 pin of the ICStation Mega, and connect a 220K resistance in series.
Step 8: The connection of LED

Connect the pin 1 of LED to the A5 and pin 46 of the ICStation Mega , and connect the pin 2 of LED to the cathode.
Step 9: The connection of switches and 1K current-limiting resistance


1.Place four switches and 1K current-limiting resistance on the bread board.
2.Connect the pin 1 of all four switches to the +5V, and pin 3 to the GND. Connect pin 2 of the hour switch to the A4, and connect pin2 of minute switch to A1;connect the pin2 of +/- switch to A0; Connect the pin2 of on/off switch to A6
Step 10: The experimental effect

 icstation

 endevor100
 Canine Defense Technologi
 tuenhi.n2012