 Mateo Miličević
I changed my mk8 hotend and mk8 feeder into a e3D v6 hotend and mk9 material feeder. You can buy e3D v6 hotend on eBay, Amazon, Gearbest... from $ 10 to $20. You can download for free the mk9 material feeder and print it. The 3D printer is avelible for $154 on eBay. It is a Chinese CTC Prusa i3 Pro B 3D printer kit. I buyed it from my money I earned in school practice.
Original CTC i3 Pro B 3D printer kit:
Material:
- 1x e3D v6 hotend (https://m.gearbest.com/3d-printer-parts/pp_613785.html?wid=21)
- 1x 3D printed mk9 material feeder (light green 3D printed part)
- 1x radial cooling fan (https://www.ebay.com/itm/DC-50mm-12V-24V-Cooling-Fan-Blow-Radial-Hot-End-Extruder-For-3D-Printer-Parts/192192426968?hash=item2cbf8fb3d8:m:m-Wd27iXrwhjvyQ8sc0OsHg)
- 1x 3D printed e3D v6 mount (white 3D printed part)
- 1x 3D printed fan duct (dark green 3D printed part)
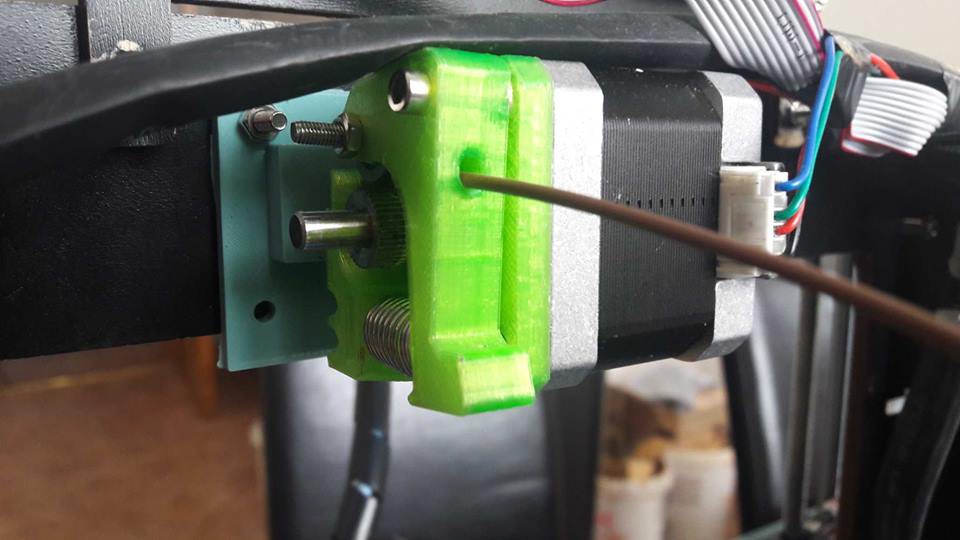
- 1x 3D printed material feeder motor holder (blue 3D printed part)
- 1x M4 nut
- 8x M3 nut
- 8x M3 bolt
- 2x self-tapping screw
- 1x spring (thickness 0.8mm, inner diameter 6mm, outside diameter 8mm, height 18mm)
PRINTING PARTS
All 3D printed parts are printed on Ultimaker 2+ 3D printer. You load the 3D models into your slicer for 3D printing and chose printing parameters All 3D printed parts are printed with PLA on 0.1 mm layer high, 0.4 mm nozzle, 210C on hetend, 60C on heatbed, 30% - 50% infill and with supports. The material feeder motor holder (blue part) is printed with 100% infill and no supports.
You can download all 3D models for free here:
https://www.thingiverse.com/thing:2781938
STEP 1
Instal the e3D v6 hotend on the printer with the white 3D printed part (e3D v6 mount) using 4x M3 nuts, 4x M3 bolts. Use 2x M3 nuts and bolts to mount the e3D v6 mount to the X carrige and 2x M3 nuts and bolts to mount the hotend.
Then instal the filament cooling fan with 1x M3 bolt and 1x M3 nut on the white 3D prined part and then instal the dark green 3D printed fan duct with 2x self-tapping bolts.
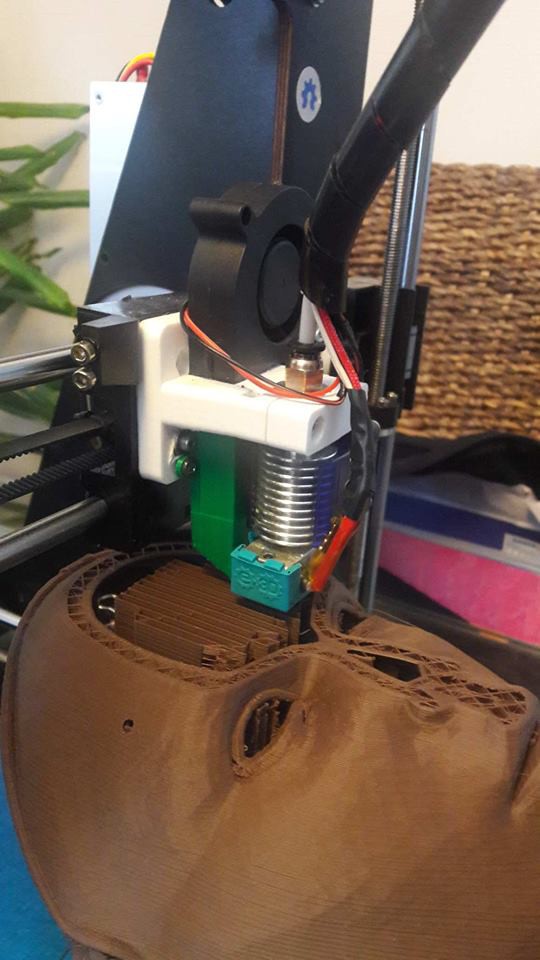
The brown mask is printed with 0.3mm layer high with 20% infill and with wood PLA.
2. STEP
Drill 2x 4mm holes for the motor feeder mount, and 1x 8mm hole for the bowden tube on the printer frame.
3. STEP
Mount the material feeder on the motor with 2x M3 bolts, 1x spring, 1x bearing from the old material feeder and 1x M3 nut and bolts for bearing.
STEP 4
Mount the motor feeder mount on the printer frame with 2x M3 nuts and bolts.
STEP 5
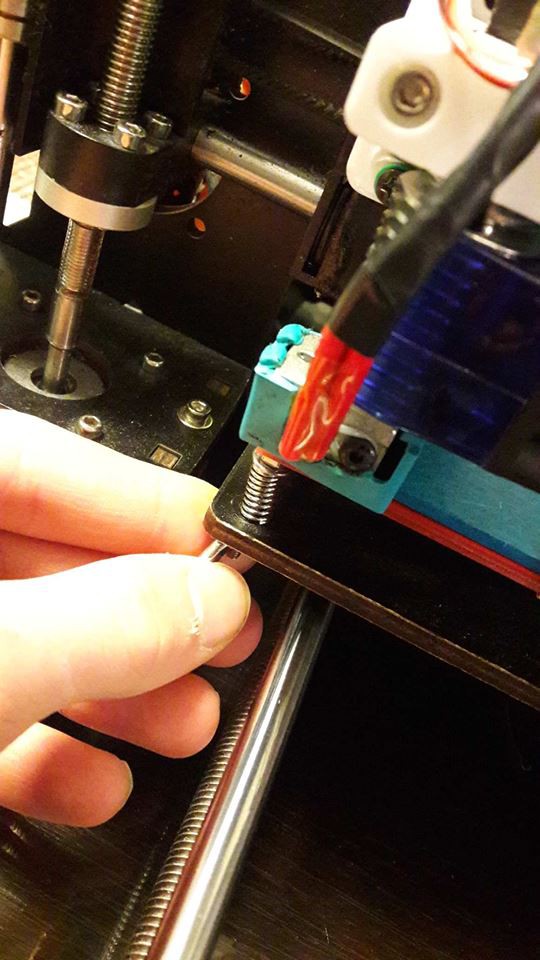
Use a thin sheat of paper to calibrate the heatbed on you 3D printer by screwing or unscrewing the nut on your heatbed. Move the paper and twist the nut untill you feel a bit of resistance. Repeat for all 4 cornes.

CURA TURTORIAL
STEP 1
Download Cura for free on: https://ultimaker.com/en/products/ultimaker-cura-software
Help for downloading Cura: https://ultimaker.com/en/resources/51943-installation-ultimaker-cura
STEP 2
Open Cura on your compunter.
STEP 3
Chose your 3D printer model or chose a custom FDM 3D printer if you cant finde your printer model.

STEP 4
Enter your printer name (you can chose your own printer name) and confirm.

STEP 5
Chose printing parameters. We will walk over all important parameters. First switch to custom settings.
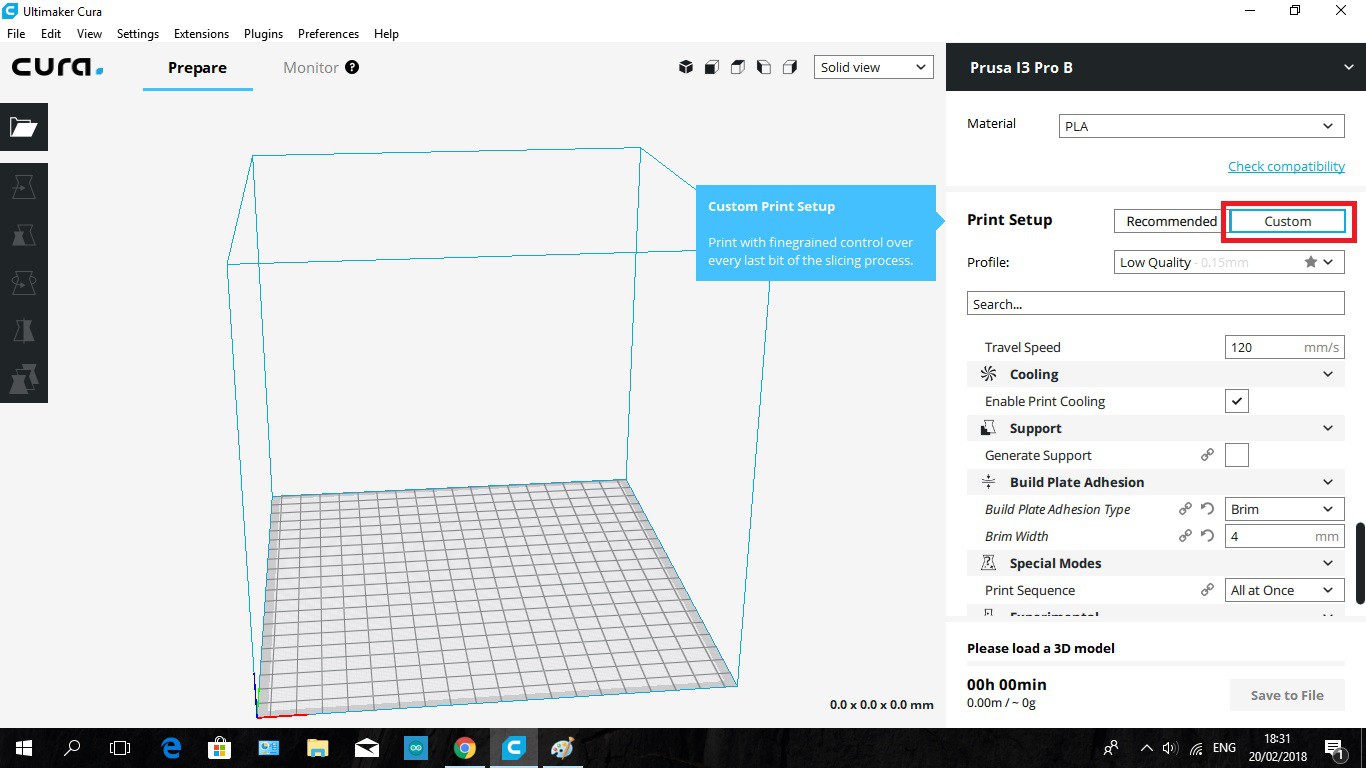
STEP 6
Chose your filament material (PLA, ABS, PETG,...)
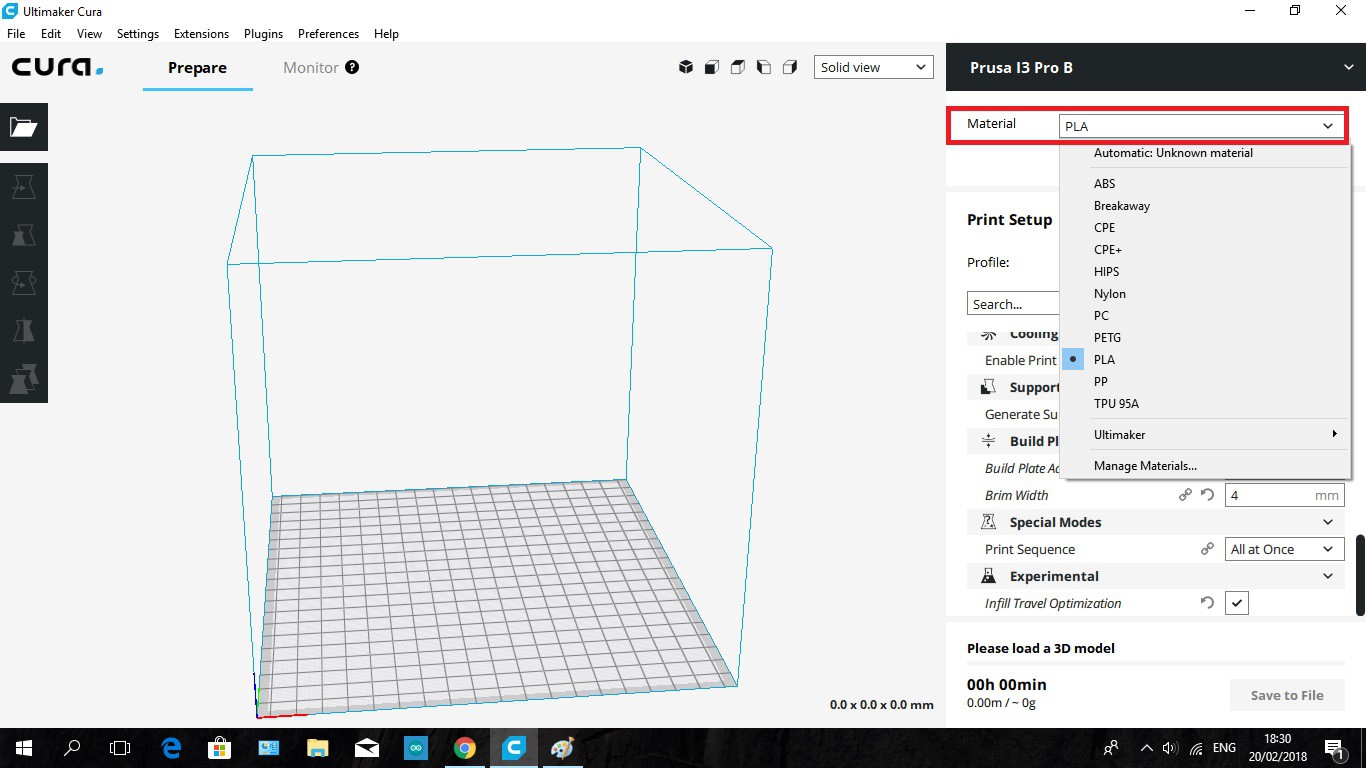
STEP 7
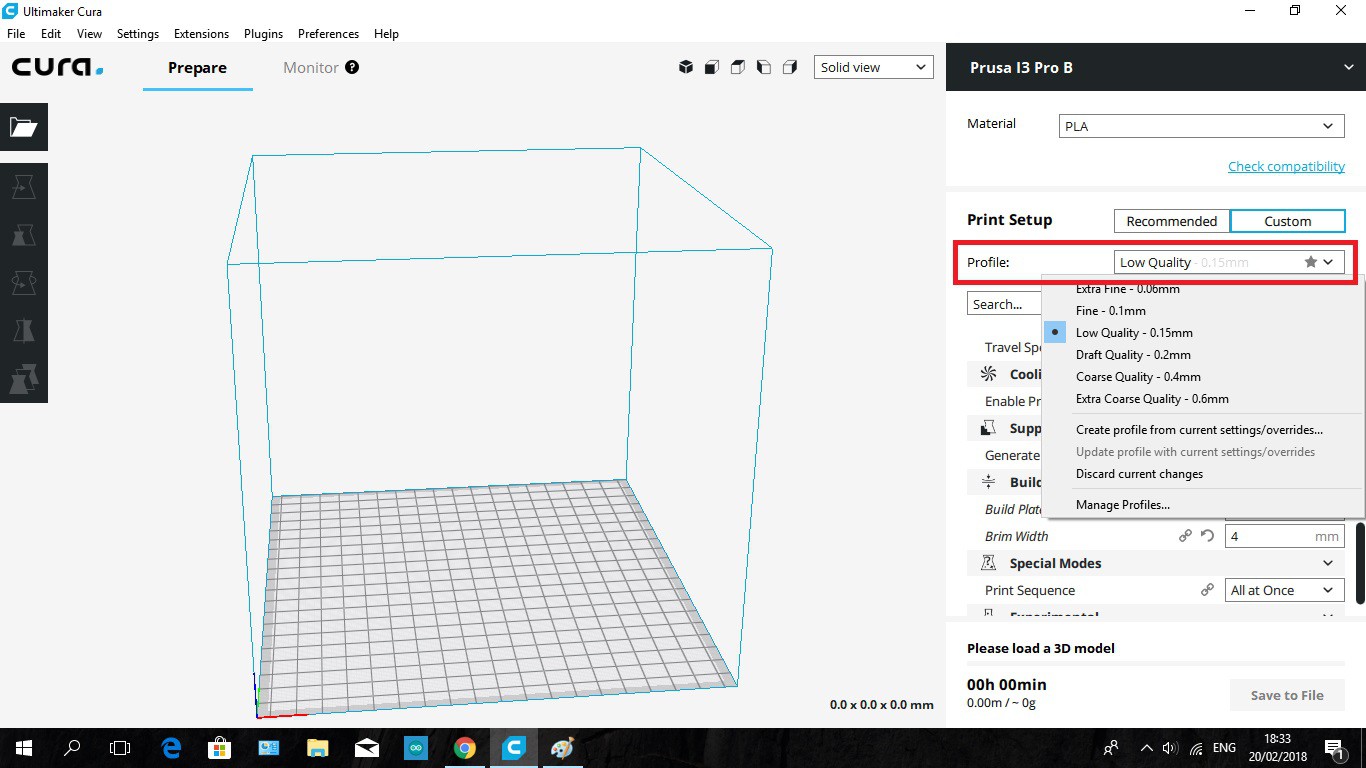
Chose print profile. 0.06mm extra fine print, 0.1mm fine print, 0.15mm low quality print, 0.2mm draft,... For best and fast results chose 0.1 or 0.15mm profile.
STEP 8
Chose print quality. 0.1 or 0.15mm for best results.
STEP 9
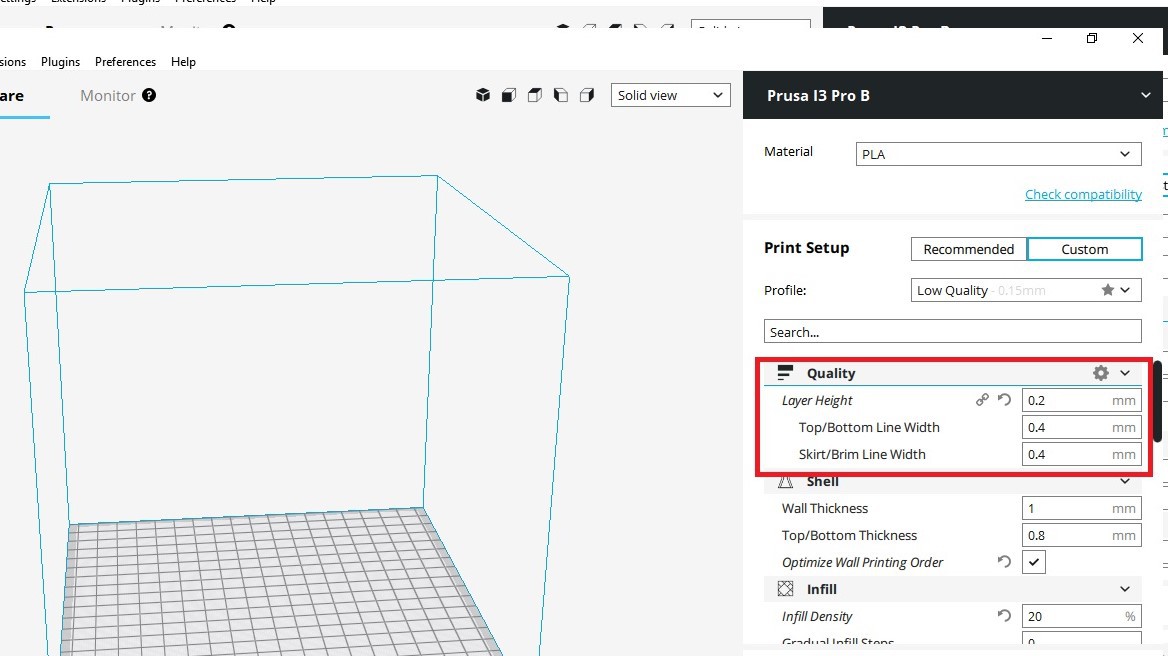
Chose wall thickness. Thicker the wall - more strong object.
1mm...
Read more »


 robert
 saarbastler
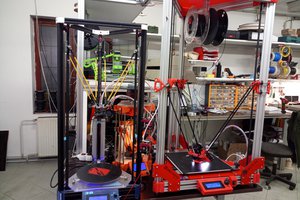
 BlueFlower
I also use an e3d v6 hotend with aluminum feeder on the top plate from https://www.thingiverse.com/thing:2719853
It works fine with Marlin Firmware, but now I use Klipper firmware with octoprint and octoklipper on an BananaPi M1, the results are better, at higher speed.
https://github.com/KevinOConnor/klipper