 Matt
MattWelcome to my little project. This is the first real electronics project that I have undertaken. My main goal is to learn more about electronics and product design. Hopefully the information I have written up in my project logs is helpful to you!
The Problem
There are plenty of ‘smart’ light fixtures on the market these days, but very few options for controlling an existing light. Those that do exist are either insanely expensive, or require integration with a much larger system, such as Clipsal C-Bus, or require an electrician to install (at least in a country like mine, Australia).
I have a number of low voltage lights on the outside of my house that I am constantly forgetting to turn off, and a few other lights that only have light switches inside, which isn’t very helpful when you need to see the lock to get in the door!
In Australia, there are laws around working with mains voltage. You aren’t allowed to play around with anything behind a GPO or mains light fitting unless you are an electrician. You are, however, allowed to work with low voltages. This brings us to my solution!
The Solution
Every man and his dog is playing around with these ESP8266 boards. I thought that I would get my hands on a couple to try as well. I figured that they would be the perfect platform to build my solution on.
Most low voltage lights work between 12v and 24v from what I have seen, with the exception of a few high end LED lights I have found. I didn’t want to have to put another power supply in the roof, and there is a perfectly good power supply sitting up there, why not use it! This would mean that I need a regulator to drop this voltage down to a logic friendly 3.3v.
We also need a way of switching the light on and off. Initially I was looking at using a triac for switching, considering most downlight transformers are 12VAC. I then figured LEDs like DC much better than AC, so ideally I should rectify the AC input into a PWM’d DC out. This also means you can throw a DC input on with no issues. Also, I believe that using PWM to dim an LED is a better idea than chopping an AC signal with a triac. I don’t really know, let me know if I am wrong! This means I need two additional components; a full wave bridge rectifier and a MOSFET.
Alone, one of these units is pretty useless. It really needs to be integrated within a larger system. At this point in time, I am looking at using OpenHAB. It looks neat, and integrates with a bunch of other stuff I have floating around the house. This will allow me to set up geofencing, or turning the lights on and off based on other triggers.
The Requirements and Features
In the first instance, my plan is to limit the unit to about 30 watts. This copes with most LED’s that I have found, but rules out using most incandescent globes. I’m sure I can increase this in a future version, but as a first pass, I think this is quite reasonable.
I want the ability to be able to switch the light on from the light switch. This will help increase the acceptance factor for visitors and other family members, not to mention having easy access to light in case of an emergency or loss of wireless.
The unit should be powered off the transformer that already exists in the system. You don’t want to have to have an additional power supply just to have an ESPLux connected to your light. That’d just be silly.
There should be locator lights on the unit itself. I’m not sure about you, but I’m not a huge fan of crawling through roof cavities. Anything that helps get me out of there quicker is a good thing as far as I’m concerned. Using these lights to find the unit in a dark crawl space will be a beneficial thing hopefully!
Licensing
This project stands on the shoulders of giants. Without the amazing work of some of the greats in the industry, this project wouldn't exist. I have detailed all the license information for each component of ESPLux in a directory on GitHub.
The Use Cases
I’m sure I am only scraping the surface, but a few things that...
Read more »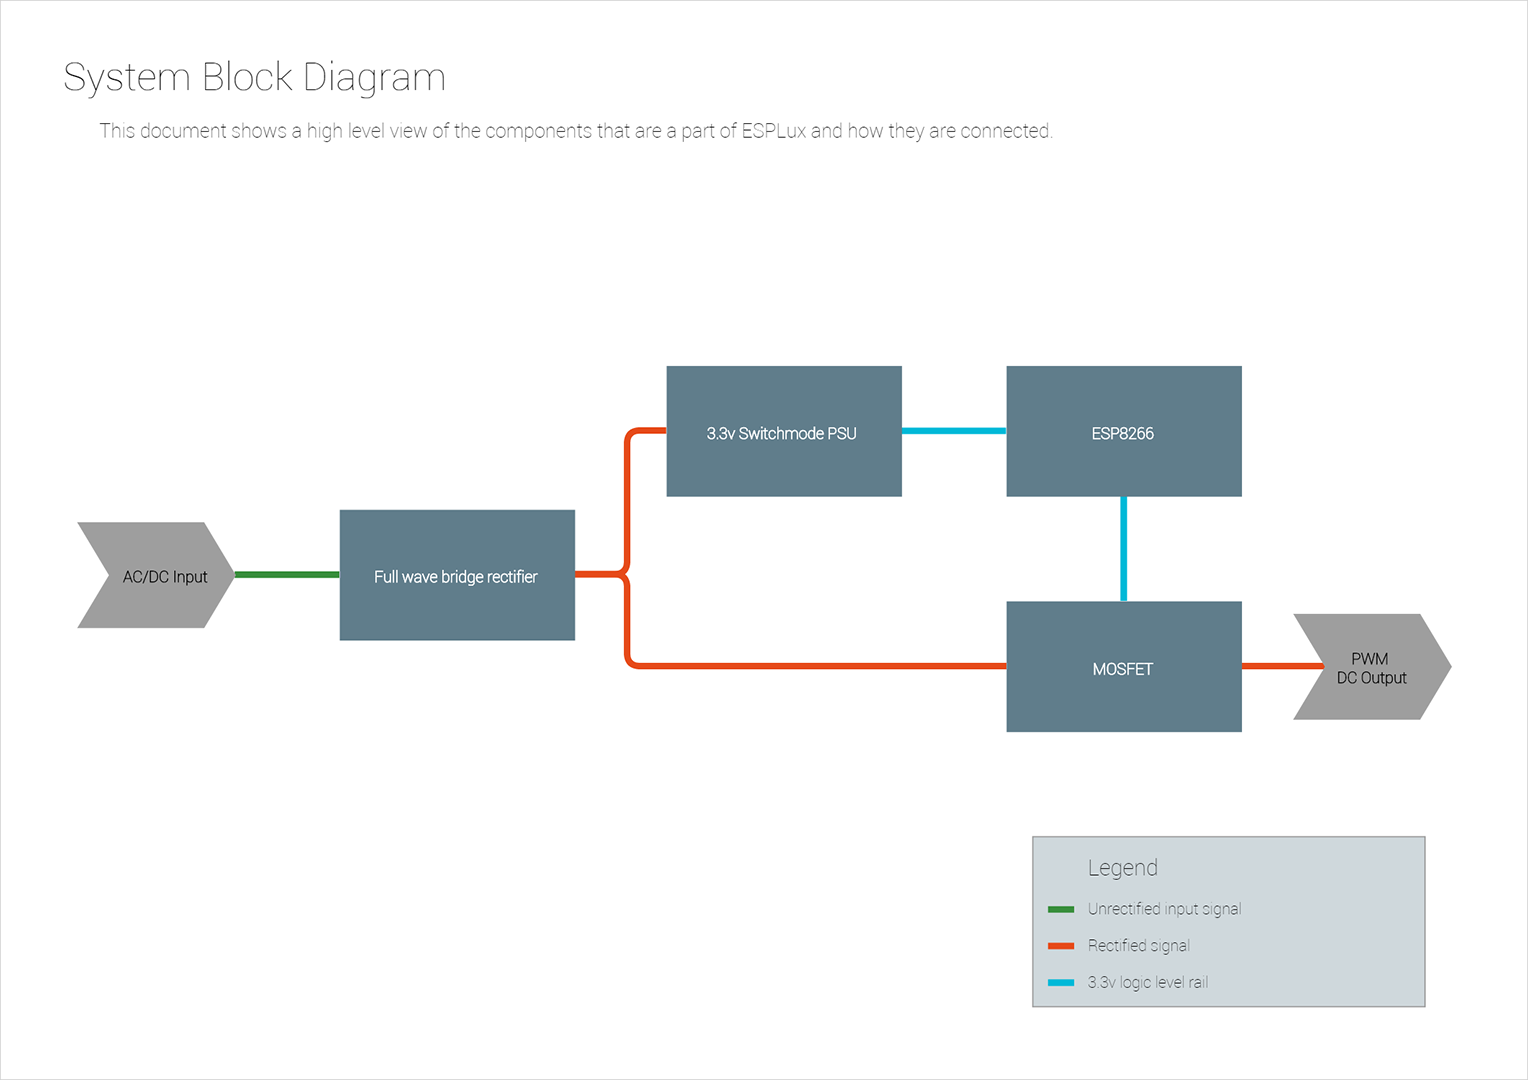 I drew this on
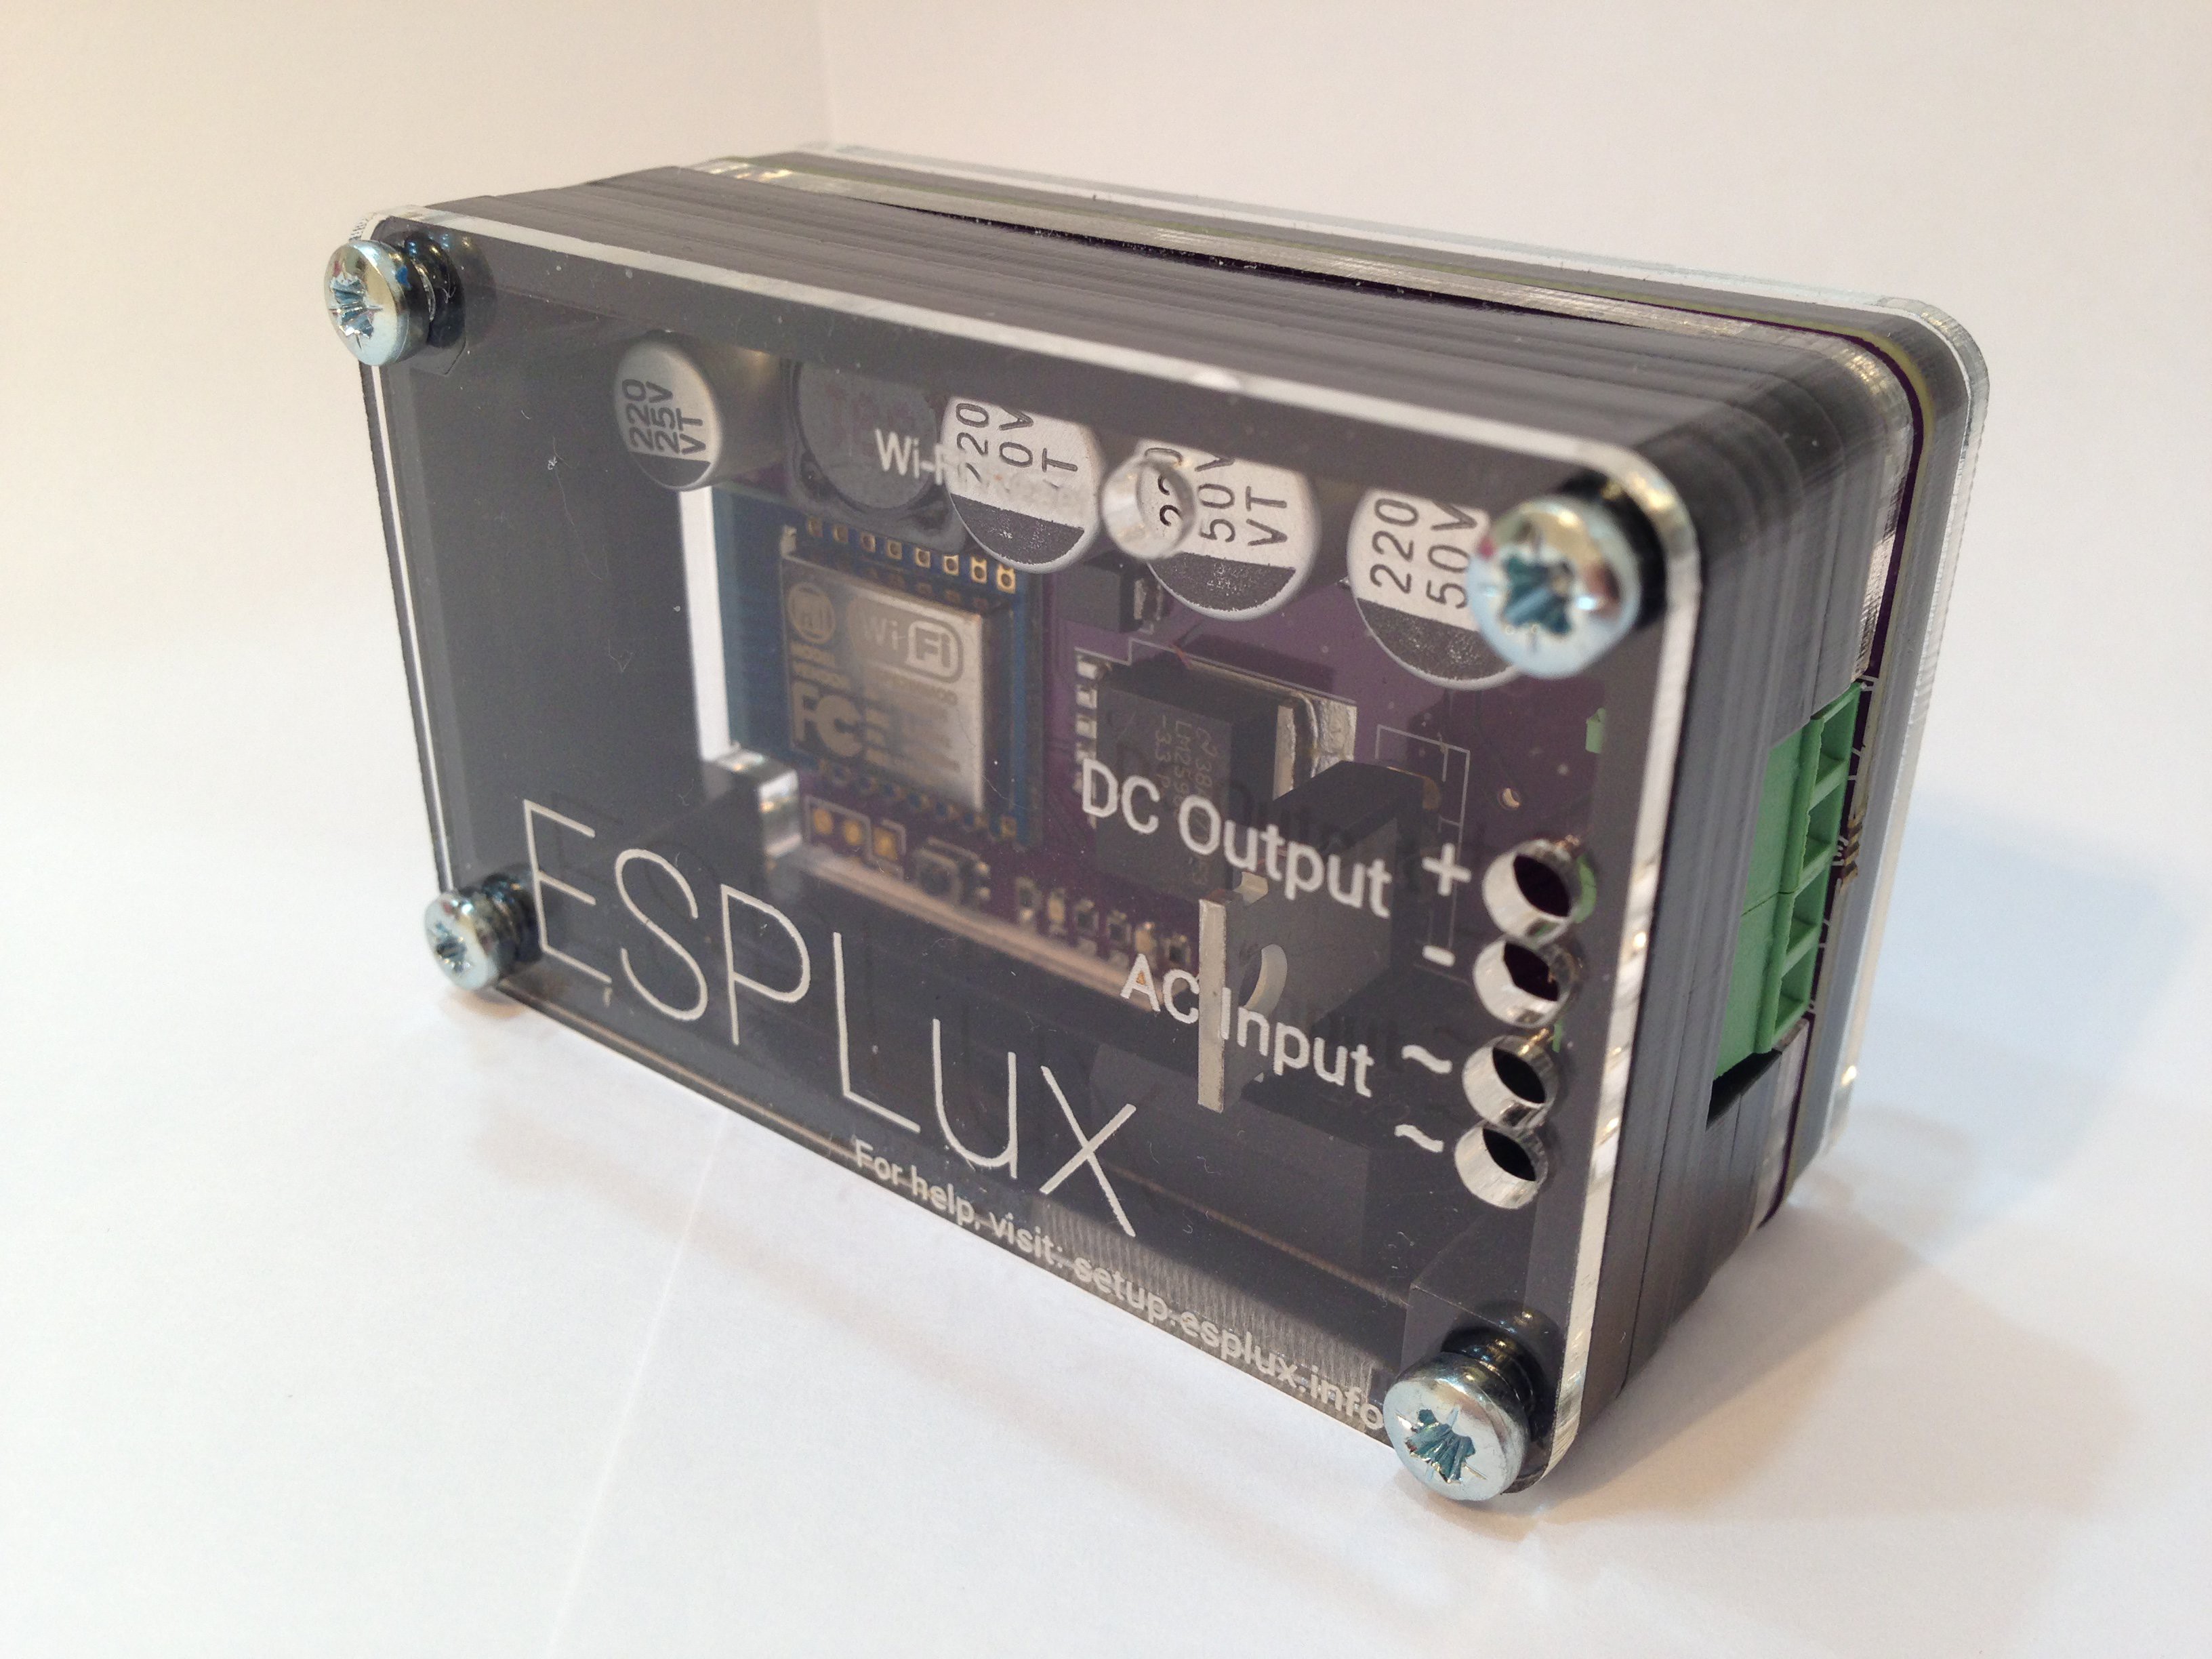


 Jon Kunkee
 Mangus Tiranus
 core weaver
 2bluesc
Cool, I like the name. Translating into Latin really never fails to produce an attractive-sounding name.