Close
0%
0%

Cinebike Human Powered Cinema

Bicycle Cinema is all about putting the power of media distribution into the hands of the people through portable power generation.

Similar projects worth following
We've probably all seen bicycle generators, but in the last few years a few other technologies have come along that expand on the possibilities of such setups. Namely, low power LED-based projectors that can provide a BRIGHT image and pull only ~60 watts, and lithium battery chemistry that allows for lightweight, portable storage for captured energy. Using the latest technologies available we have updated the old concept for a modern era.

Why Human Powered Media?

First and foremost, to serve the needs of under-represented communities. Not everyone in the world has access to cinema, television, the internet, or even a stable power supply. From protestors living behind the barricades in Kiev to remote villages of Mexico, our bicycle powered cinema is bringing news, entertainment, and social action to places that demand off-the-grid solutions.

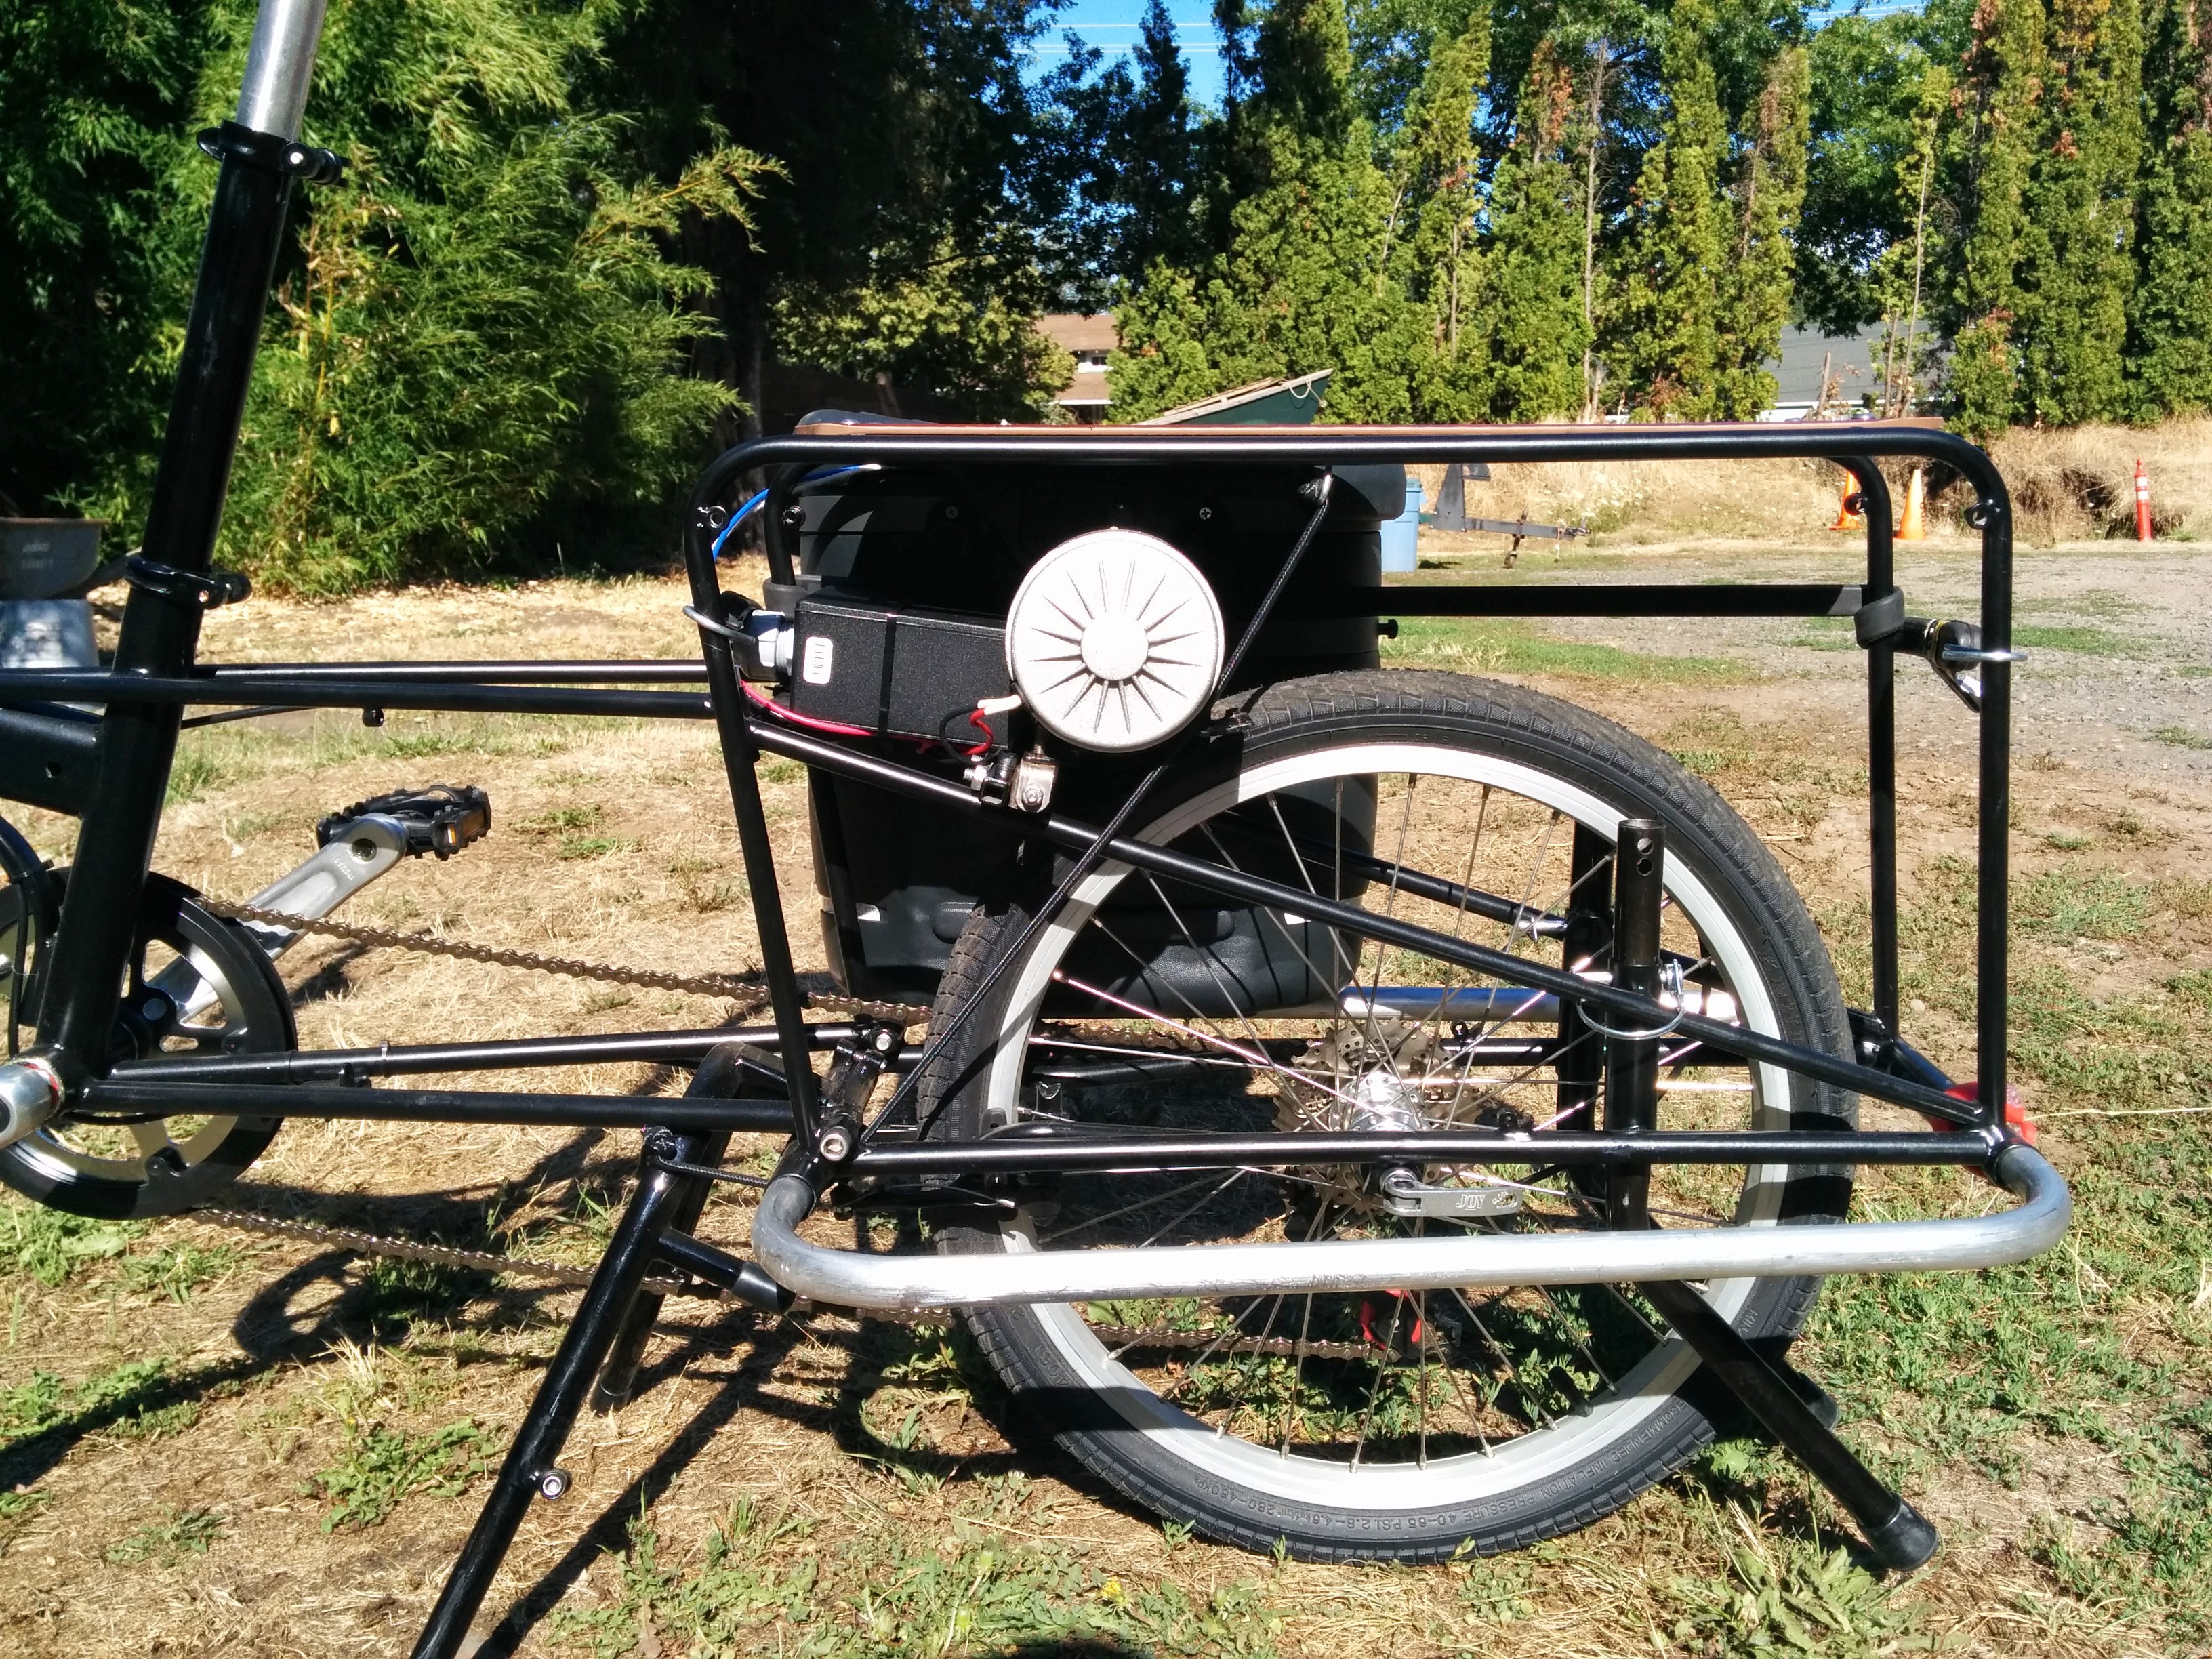
Everything to power a "media campfire" fits on the bike, which then becomes a stationary generator to power an event.

The bike can also serve many other purpose:

  • Providing a phone charging station
  • Power generation in an emergency, disaster, or power outage
  • Providing off-grid power to remote outposts (the forest service uses bicycle generators)
  • Educational opportunities (see what it feels like to power an incandescent vs. an LED, etc.)
  • Promotional efforts, trade-shows, etc.
  • Pretty much anything that involves children (kids love bicycle cinema!)
  • etc.

What makes this system any different?

True there are a lot of bicycle generators out there. What makes this design unique is the addition of the latest projection and energy storage technology. We have a truly portable single-operator movie theater on a bike. It can fold down and go on an airplane, attach to a standard bike rack, it fits children and adults alike, and it is powered by the audience themselves. This changes the old passive media consumption into an interactive, educational, and fun event. It truly changes the nature of watching a film to have it 100% human powered.

  • 1 × Bicycle After much trial and error, we settled on the Bike Friday Haul-A-Day because A. It fits any rider, B. It has a cargo area for all equipment, C. It breaks down easily for travel, and D. it has a built in solution for raising the back tire.
  • 1 × 24V 200W Scooter Motor We're going to use a scooter motor for the generator.
  • 1 × Friction Spindle This is the piece that attaches to the motor and makes contact with the wheel.
  • 1 × Voltage Regulator The key to making this whole thing work.
  • 2 × Goal Zero Sherpa 100 Batteries

View all 9 components

  • Next: A Rider Feedback Mechanism

    stopsendingmejunk05/08/2015 at 04:03 0 comments

    The next phase of this project is to build some kind of feedback display. We've found that even just a light that goes on when energy is being generated provides a reward for the rider. I have prototyped a string of individually addressable RGB LEDs doing different animations depending on how much electricity is being generated. Now it's time to build a final version and (ahemm...) a teensy would be a perfect lightweight controller.

    The problem is I'm not sure where to put it or what to display. The original idea was to wire LEDs around the whole bike, but the massive range of adjustability to the bike just made it unfeasible. I also considered doing lights on a rear flag, then deploying it somehow in front of the rider. The flag pole could act as a big energy meter. Another idea is simply some kind of display attached to the handlebars. I would love to hear some other ideas!

    In addition to the display, some simple games would be fun and add a competitive component. "How long will it take you to generate 1Wh of stored energy?," Who can make the most electricity in 30 seconds," etc.

View project log

  • 1
    Step 1

    First, you need a bike that can be made stationary. You need some way to get the back wheel off the ground so it can spin and run the generator. Our first idea was to use a trainer stand like this one with the generator in place of the resistance wheel. Our field testers reported that this was not fun to pack while riding to a village at the top of a mountain, so we had to think more portably.

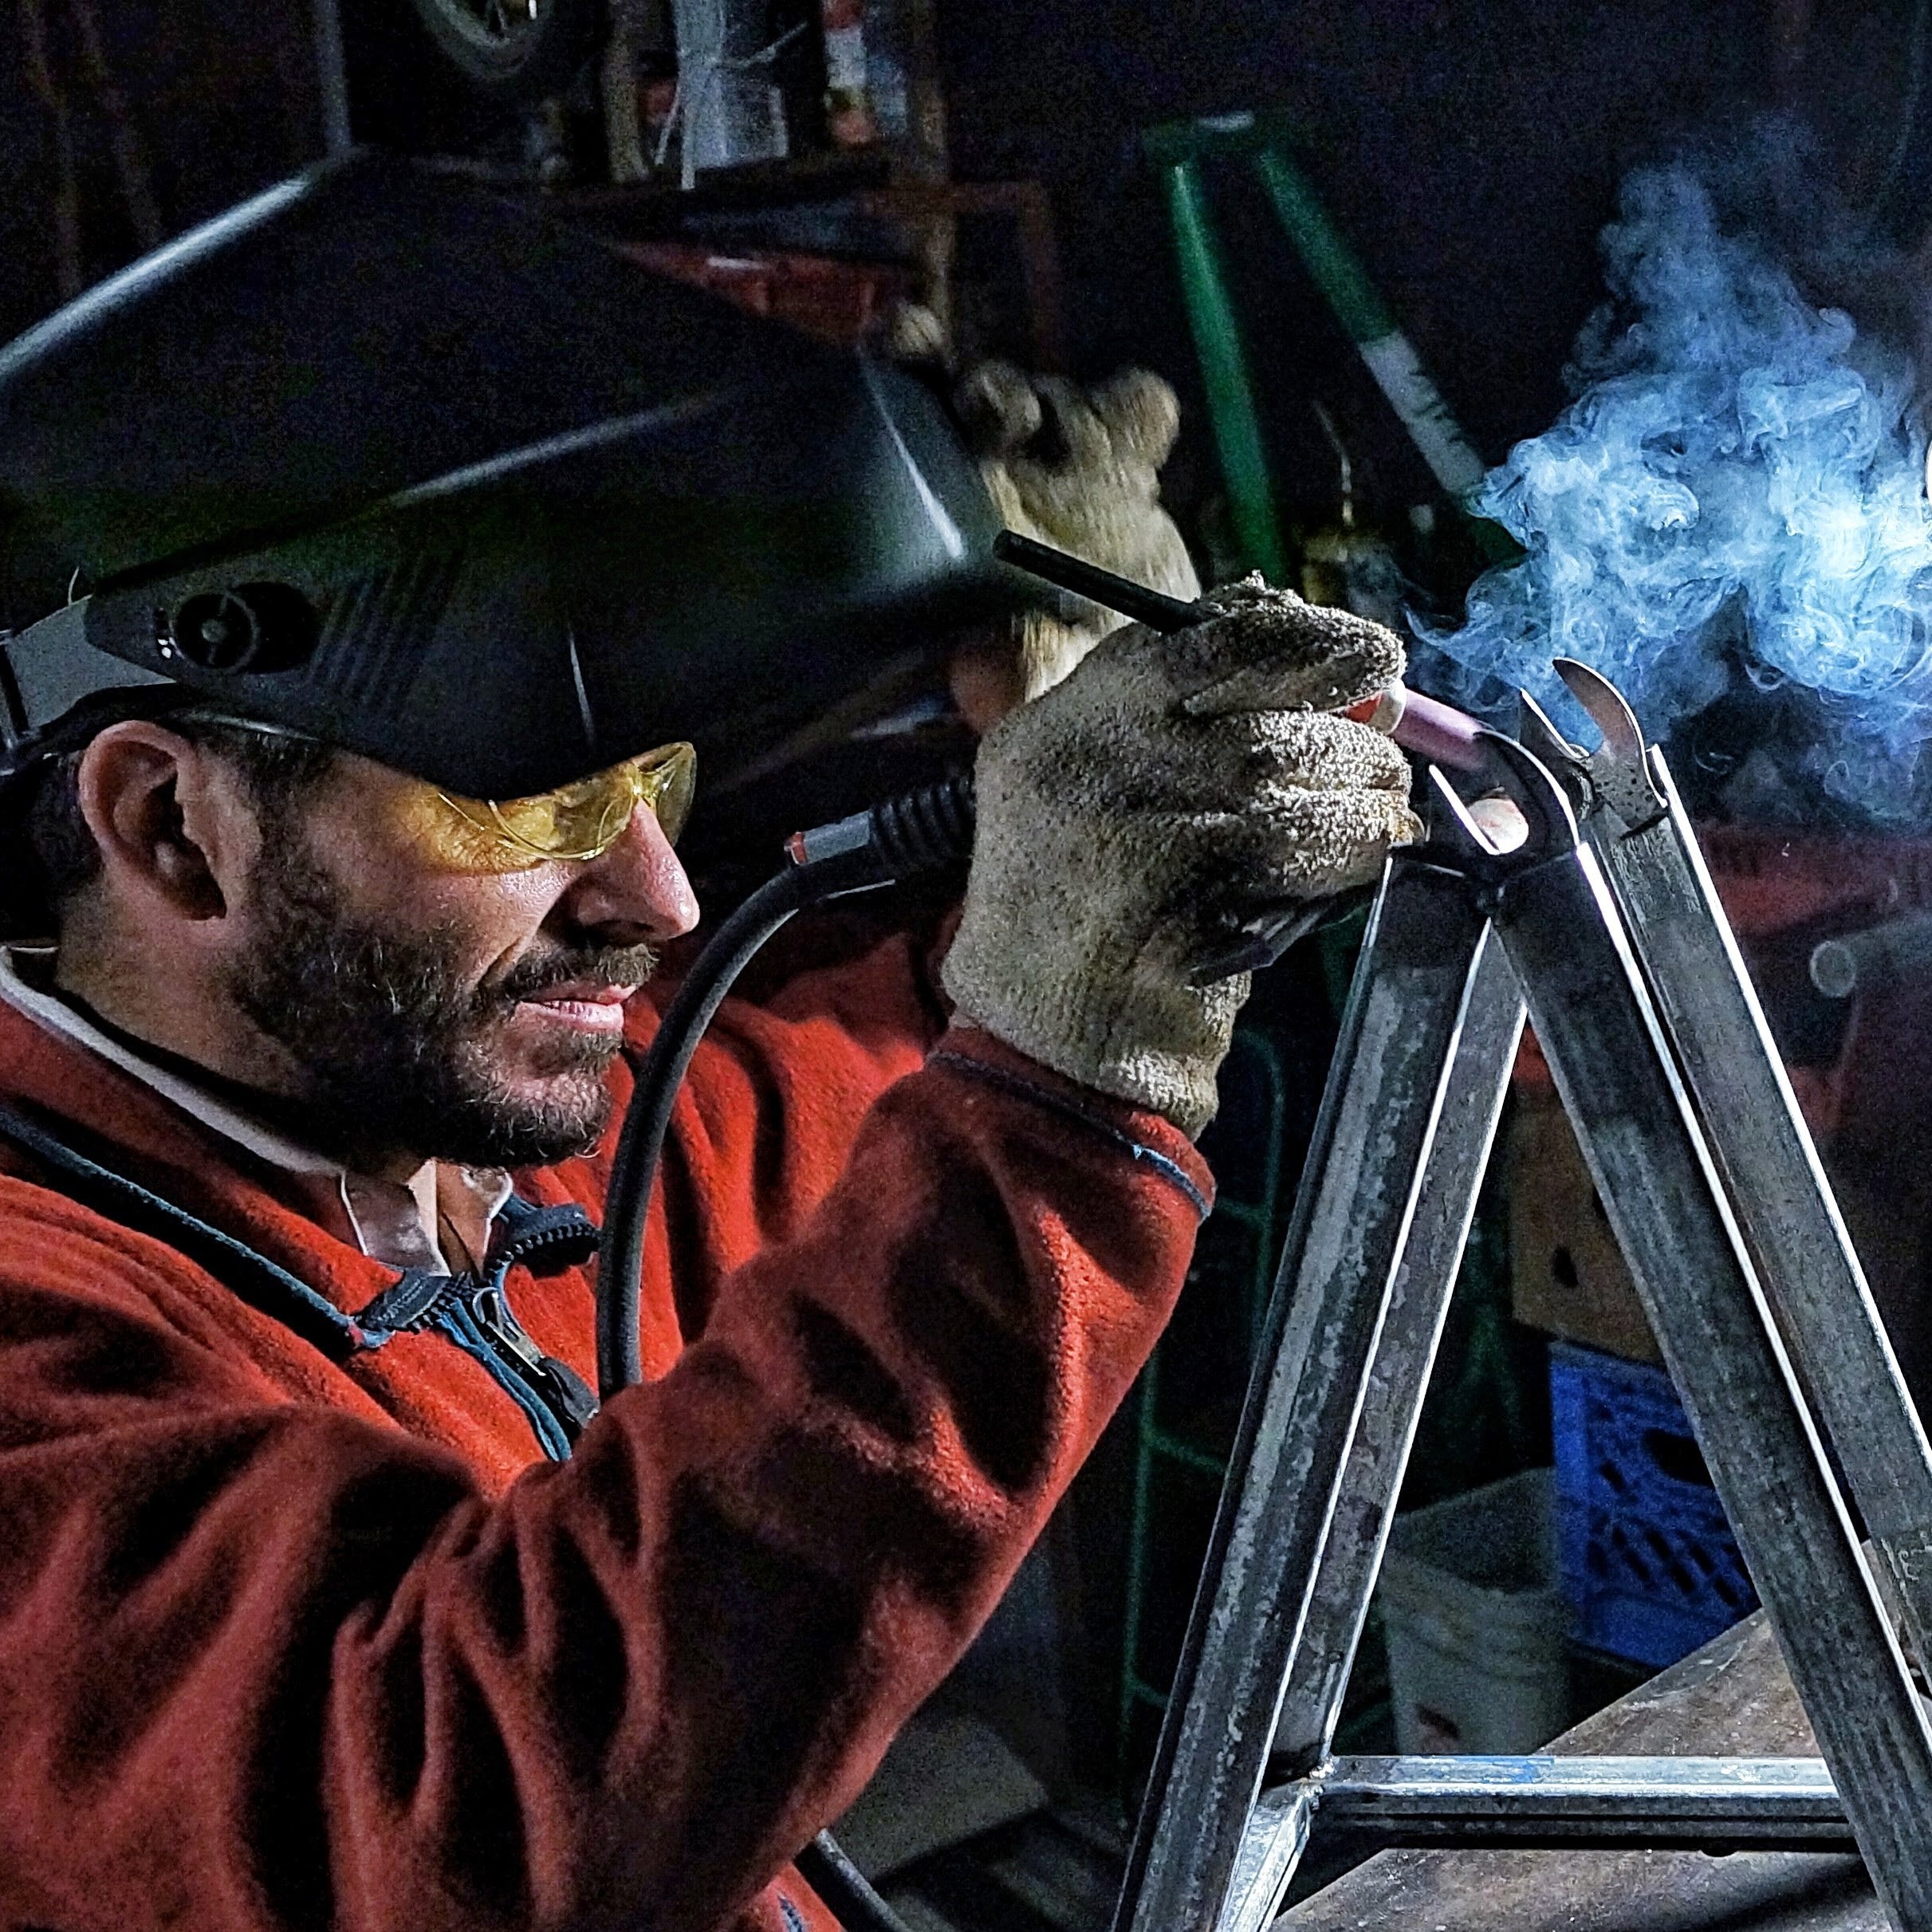
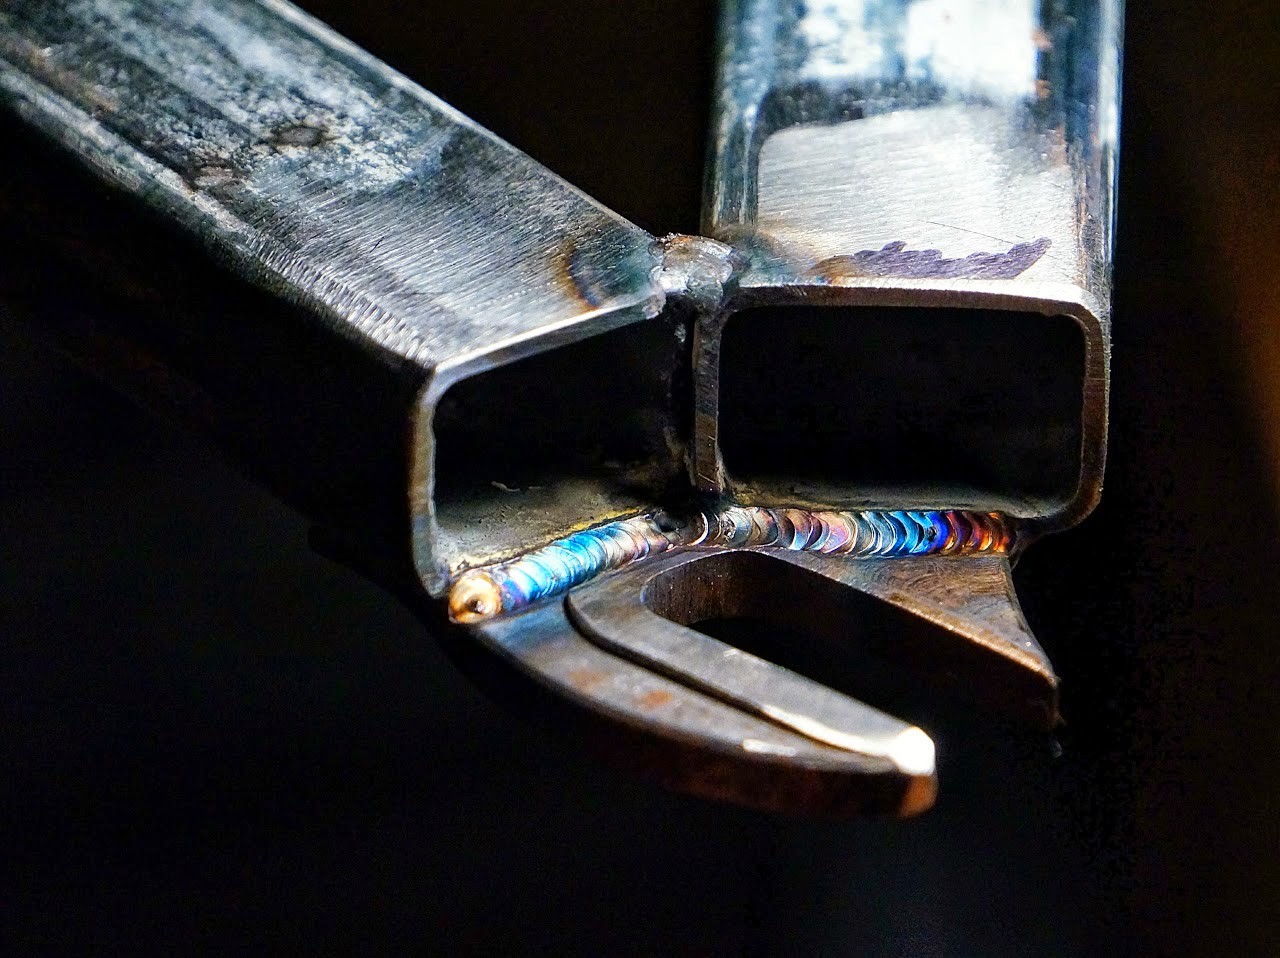
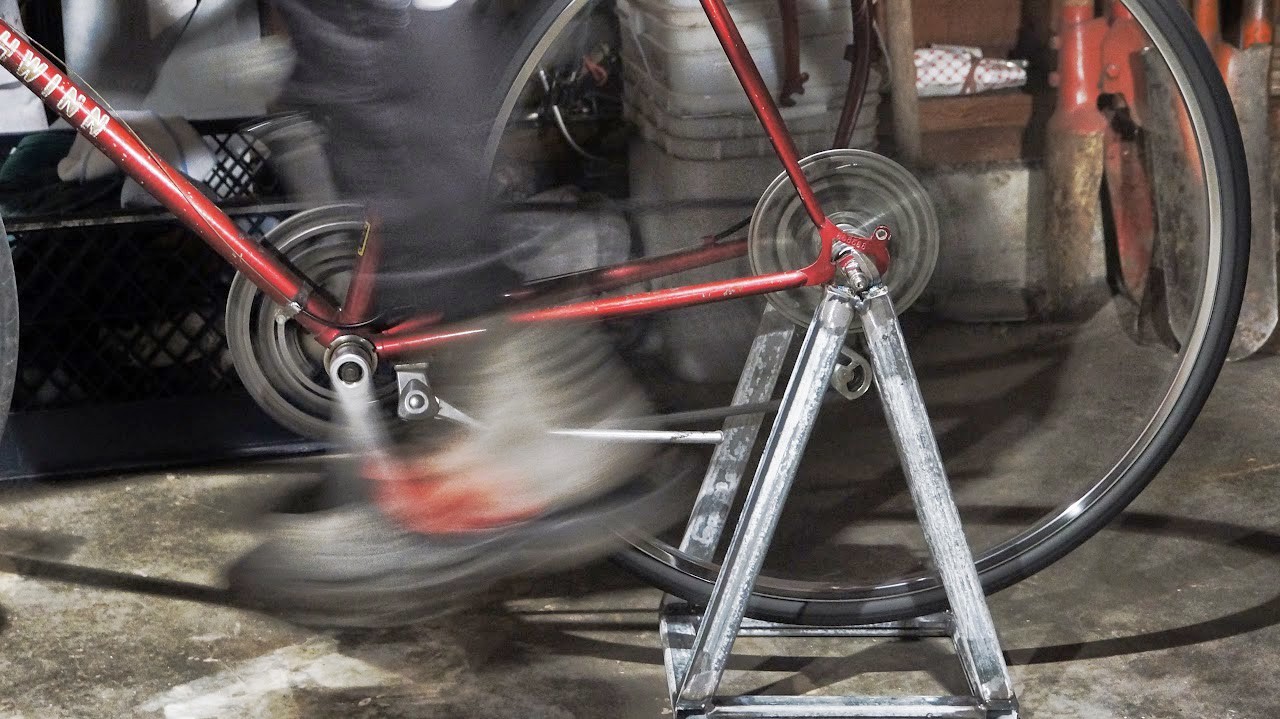
    This was an early stand design built from recycled bike parts. The legs are built with quick-releases so they can be stowed. It was built for us by an extremely cool bike artist in Portland named Johnny who makes all sorts of cool bike-related stuff. Ultimately we abandoned this design because it was bulky, a bit dangerous, and we needed something we could make a lot of.

    Drawings of our first portable stand attempt.

    Next we teamed up with the wonderful and talented Mike Cobb from Framebuilder Supply in also located in Portland. Mike helped us design and fabricate a rear-rack that attaches to your axle and can be rotated down to become a stand. This is an ingenious solution to the "portable and produceable" stand dilemma we faced and remains the best solution for adapting any old regular bike with a portable stand.

    Mike drew the blueprints for his design on the bottom of a pizza box. A full stomach is necessary for adequate inspiration.

    Mike Cobb, master welder and all around cool dude.

    The attachment point will fit a standard pair of "bob nutz" which are used to attach bob trailers. You can get them at REI.

    Here is the rack-stand deployed and being tested for the first time. It worked great and was extremely stable. Optionally you could nest tubes into the bottom that extend out for additional side-to-side stability.

    Ultimately we arrived at a slightly different solution for a few reasons. We use the Bike Friday Haul-A-Day which actually has stands built in for this purpose.

    Alan at Bike Friday integrated a stand design directly into our Haul-A-Day. You can see the two legs toward the rear end of the bike and the clip that holds them in stowed position. If you're wondering, yes - the legs ended up hitting things on the ground so a later design revision allowed them legs to be stored sticking up instead of down.
  • 2
    Step 2

    Next up if you want to build a generator you will need a generator motor. I settled on this one - a 24V 200W motor. Voltage doesn't matter for our purposes - the output voltage will be directly correlated to the RPMs you spin the motor at.

    On the motor you will need to attach a friction spindle of some sort to the motor - this is the part that rests on the wheel. We manufacture a part specifically for this that we unfortunately don't sell, but there are other options. The guys at Magnificent Revolution have a few designs here, or here. It turns out this is a tricky problem because the motor shaft is threaded the opposite of a standard nut. You can't use just any bolt, only the bolt it comes with will work for attaching anything.

    We use a 20mm spindle so a drilled out skateboard wheel will fit on it snuggly. The skateboard wheel will deaden the sound of the friction contact, but decrease its efficiency the larger it is.

    If you want to make your own and lack fabrication abilities, I played around with one solution that you may have luck with. I found all the parts to make a friction spindle at the local hardware store. I did not test this design thoroughly enough to be confident of its long-term durability, but it did work for a long time and never failed. YMMV. With that caveat, here is how to do it.

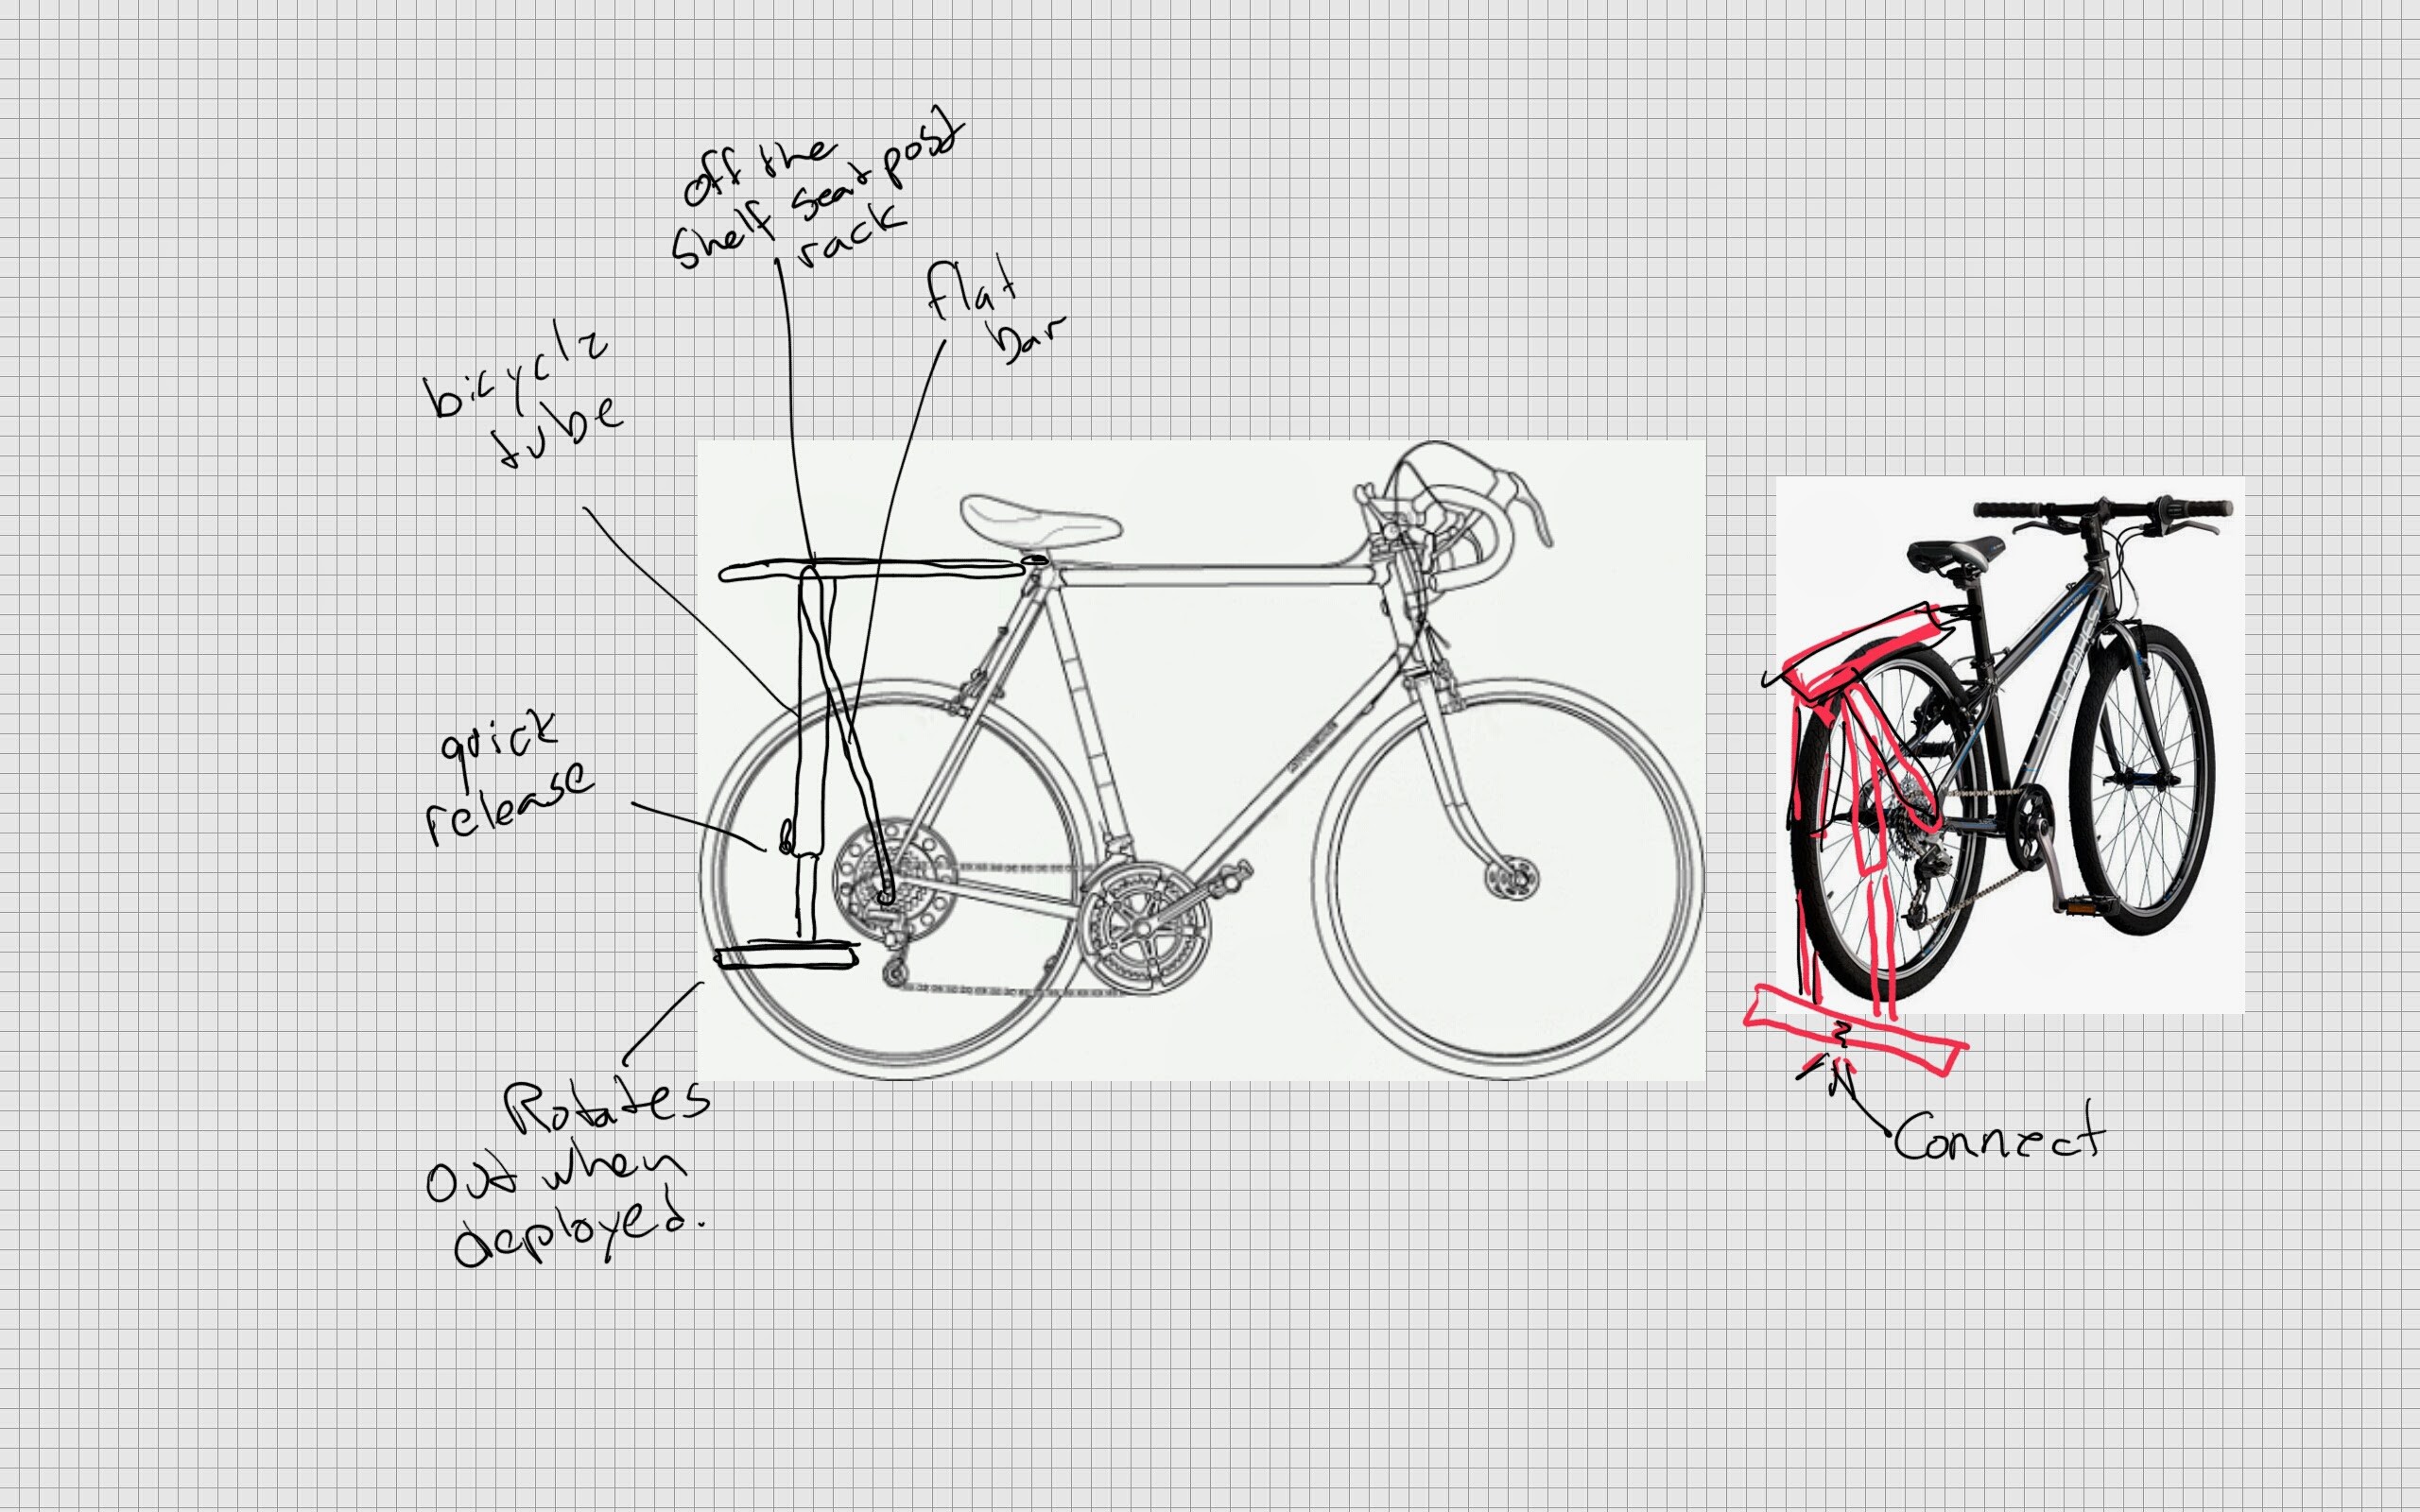
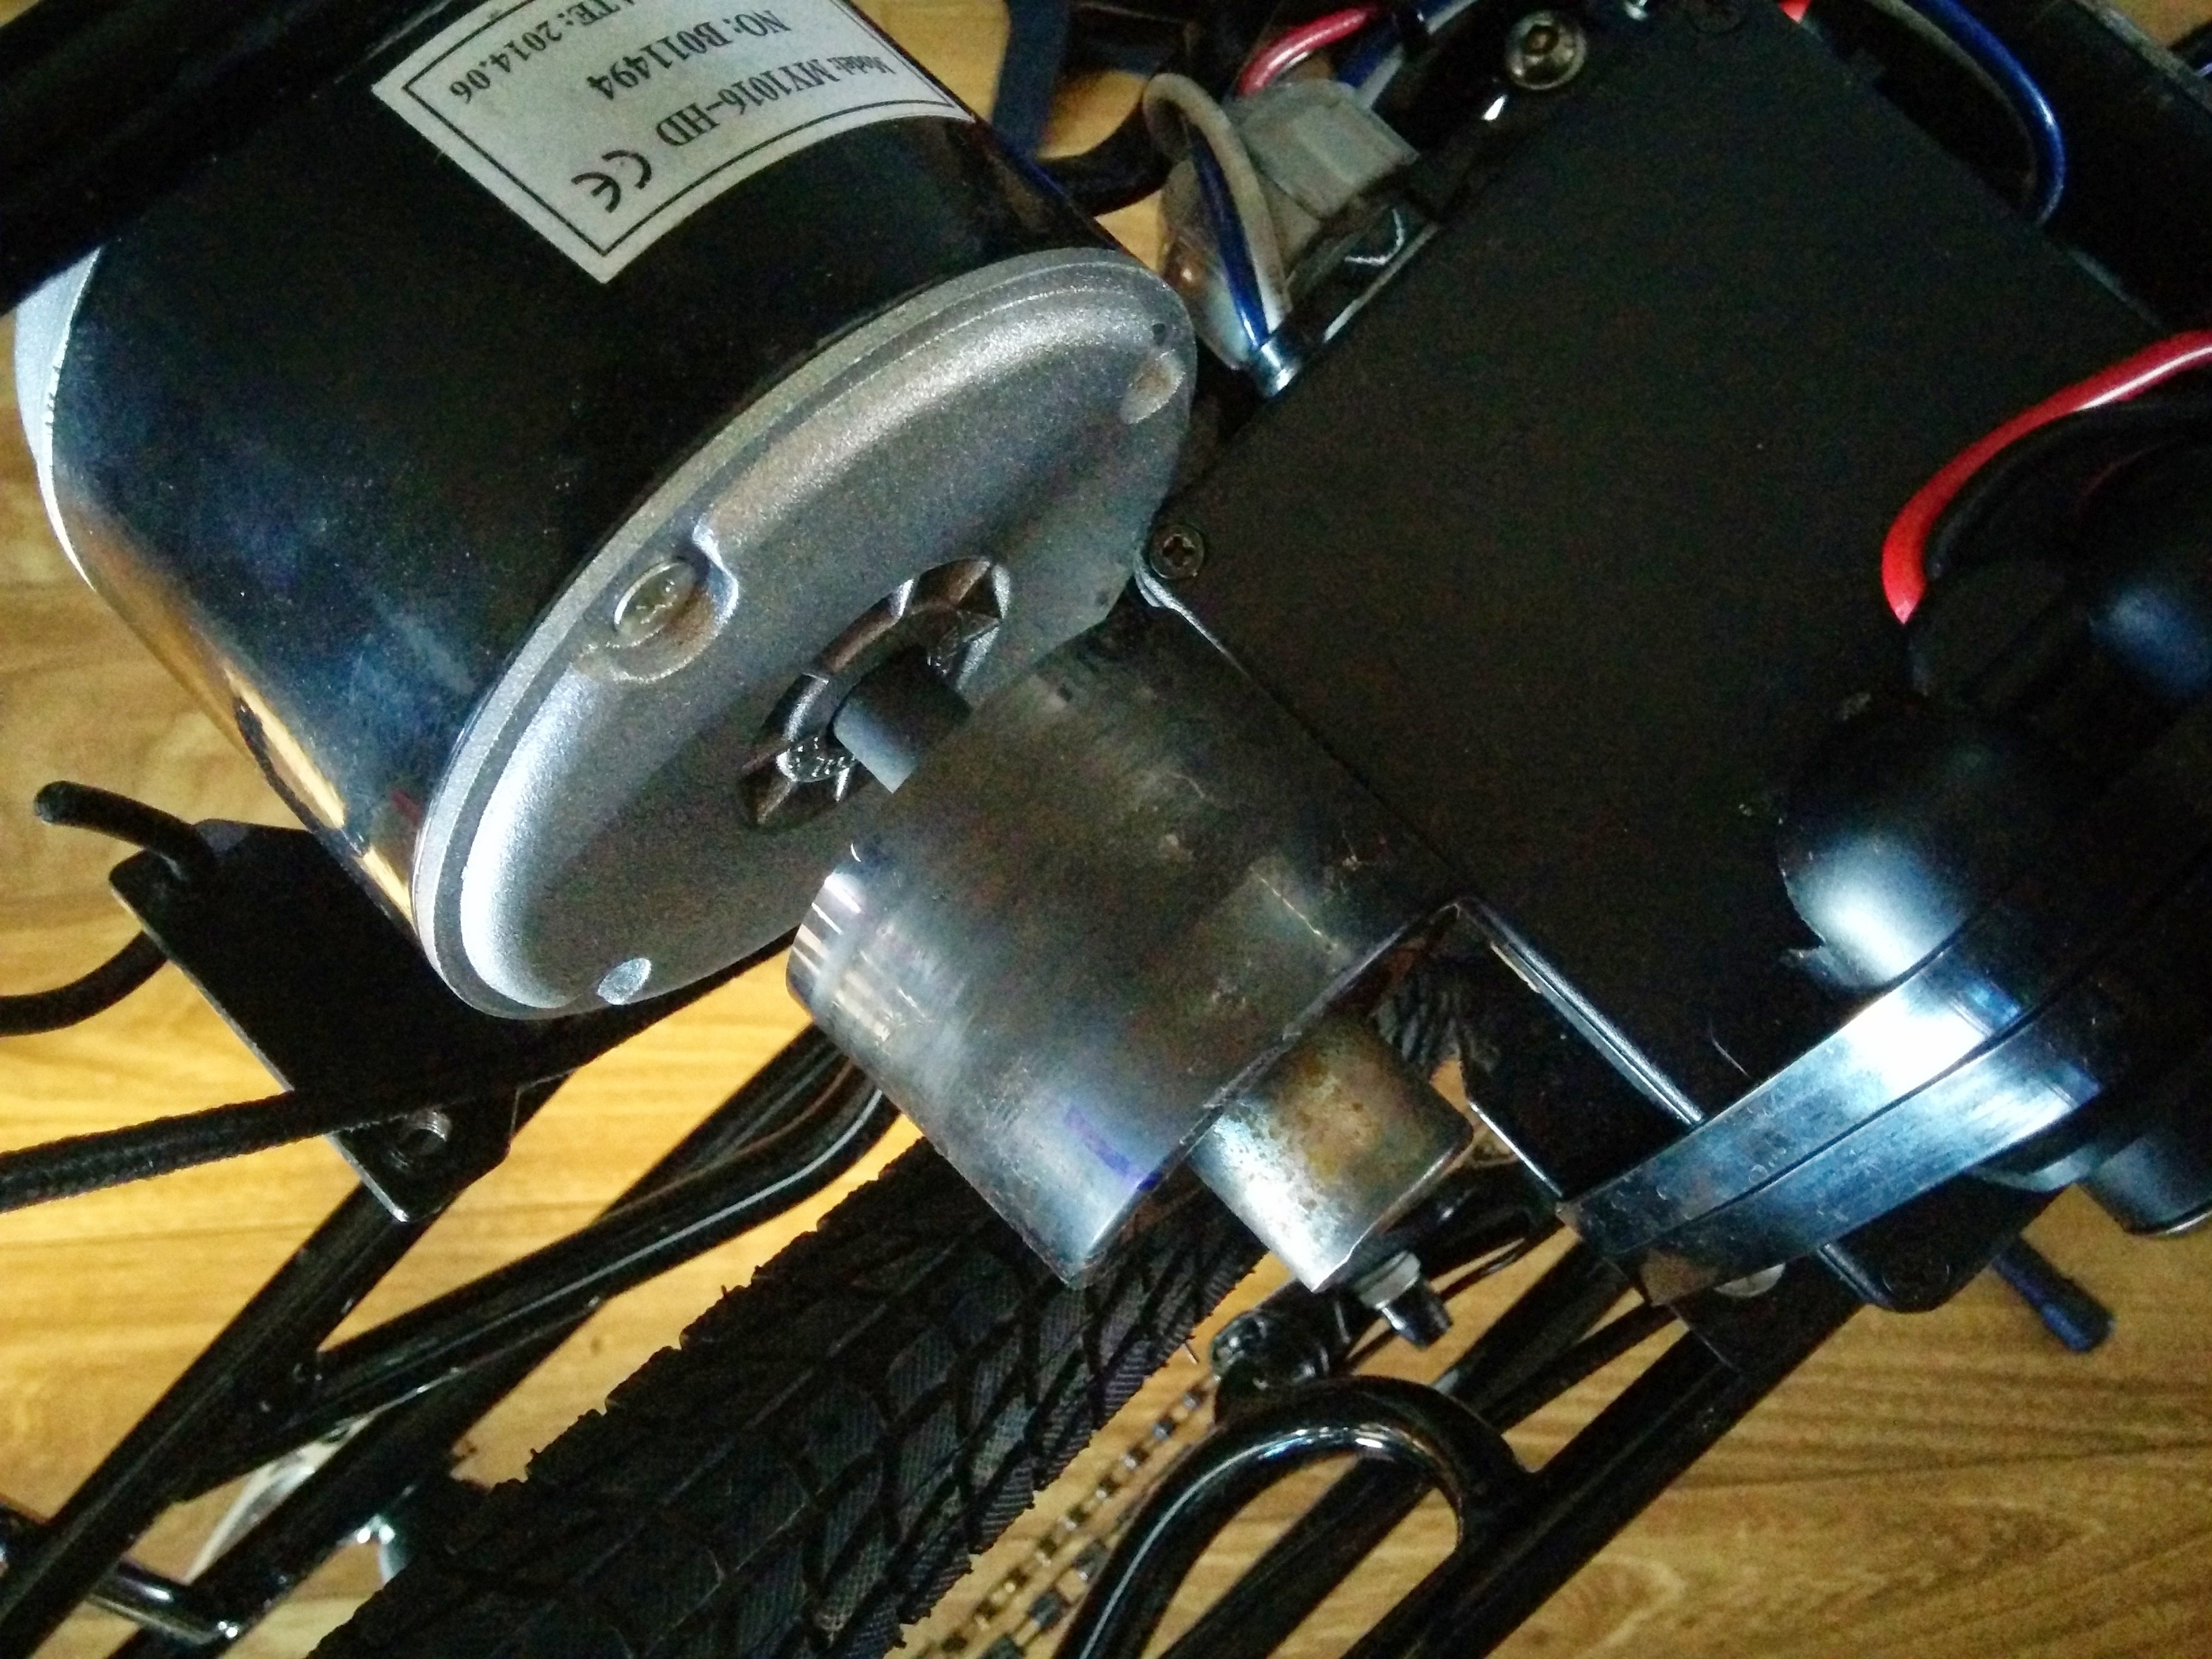
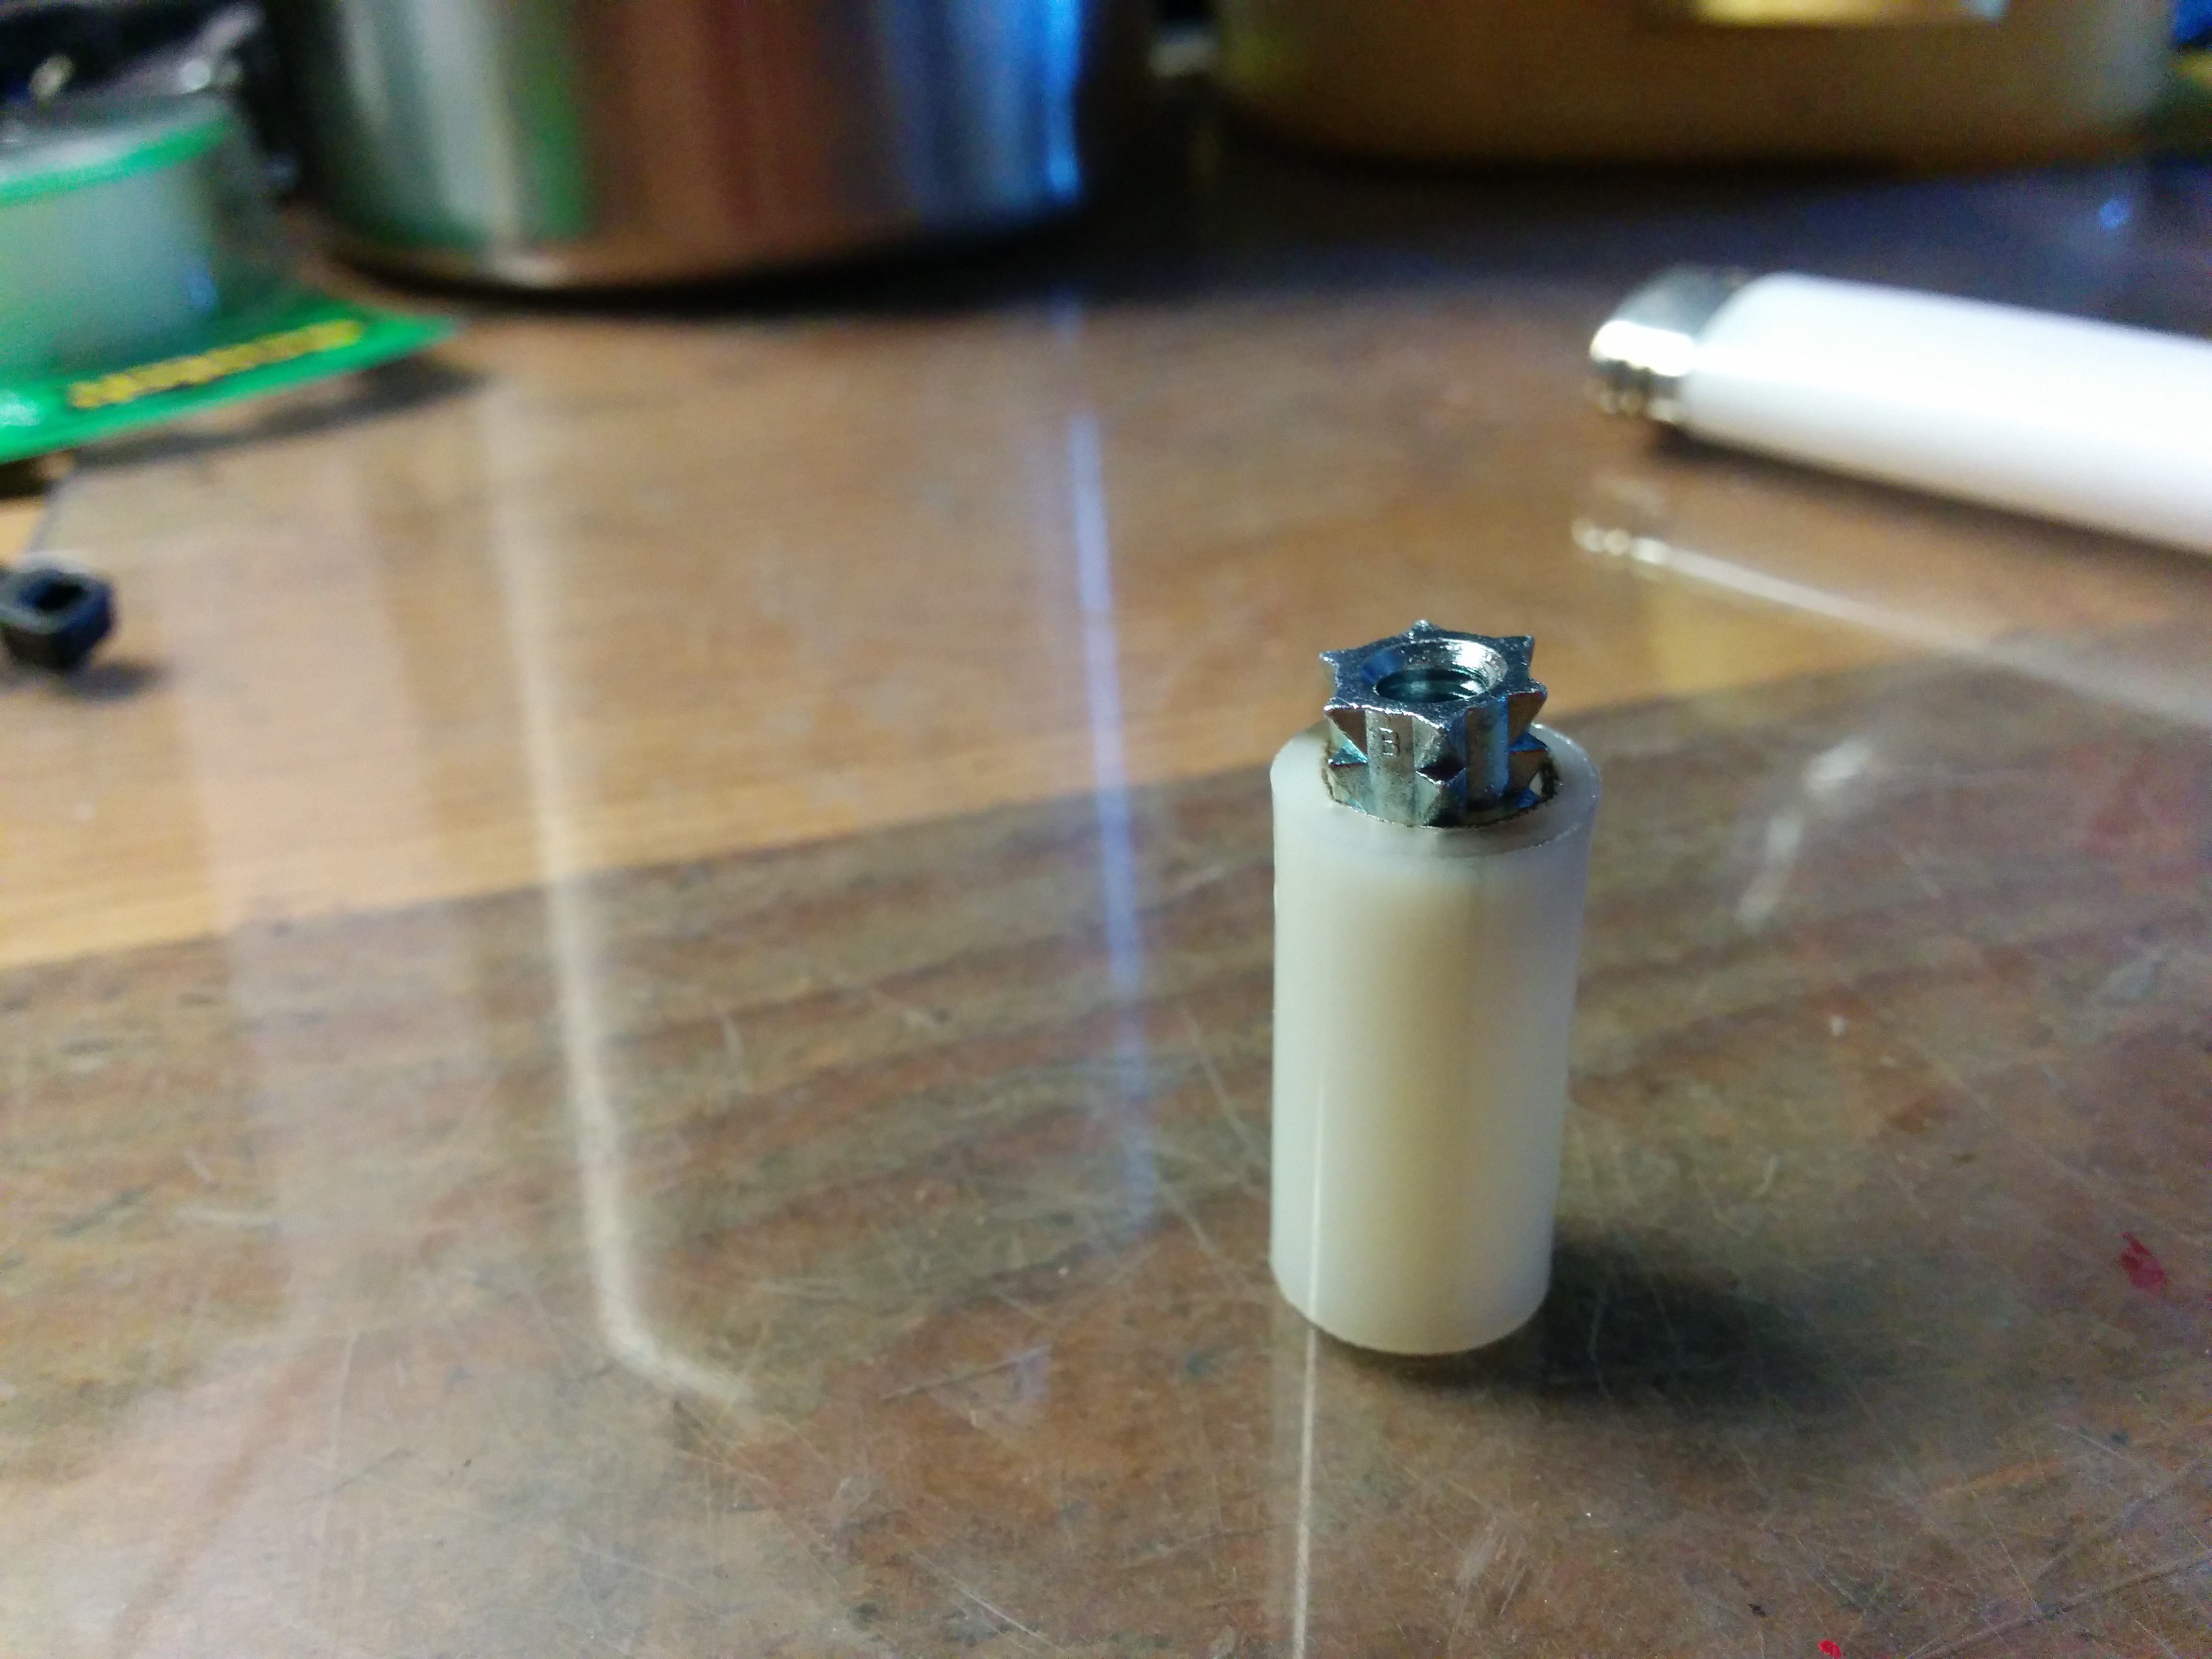
    A screw wall anchor is essentially forced into a long vinyl bushing. You need to find an anchor that can't quite fit and then use a lighter to heat up the plastic. Finally, a c-clamp or vice is the best way to force the anchor into the tube.

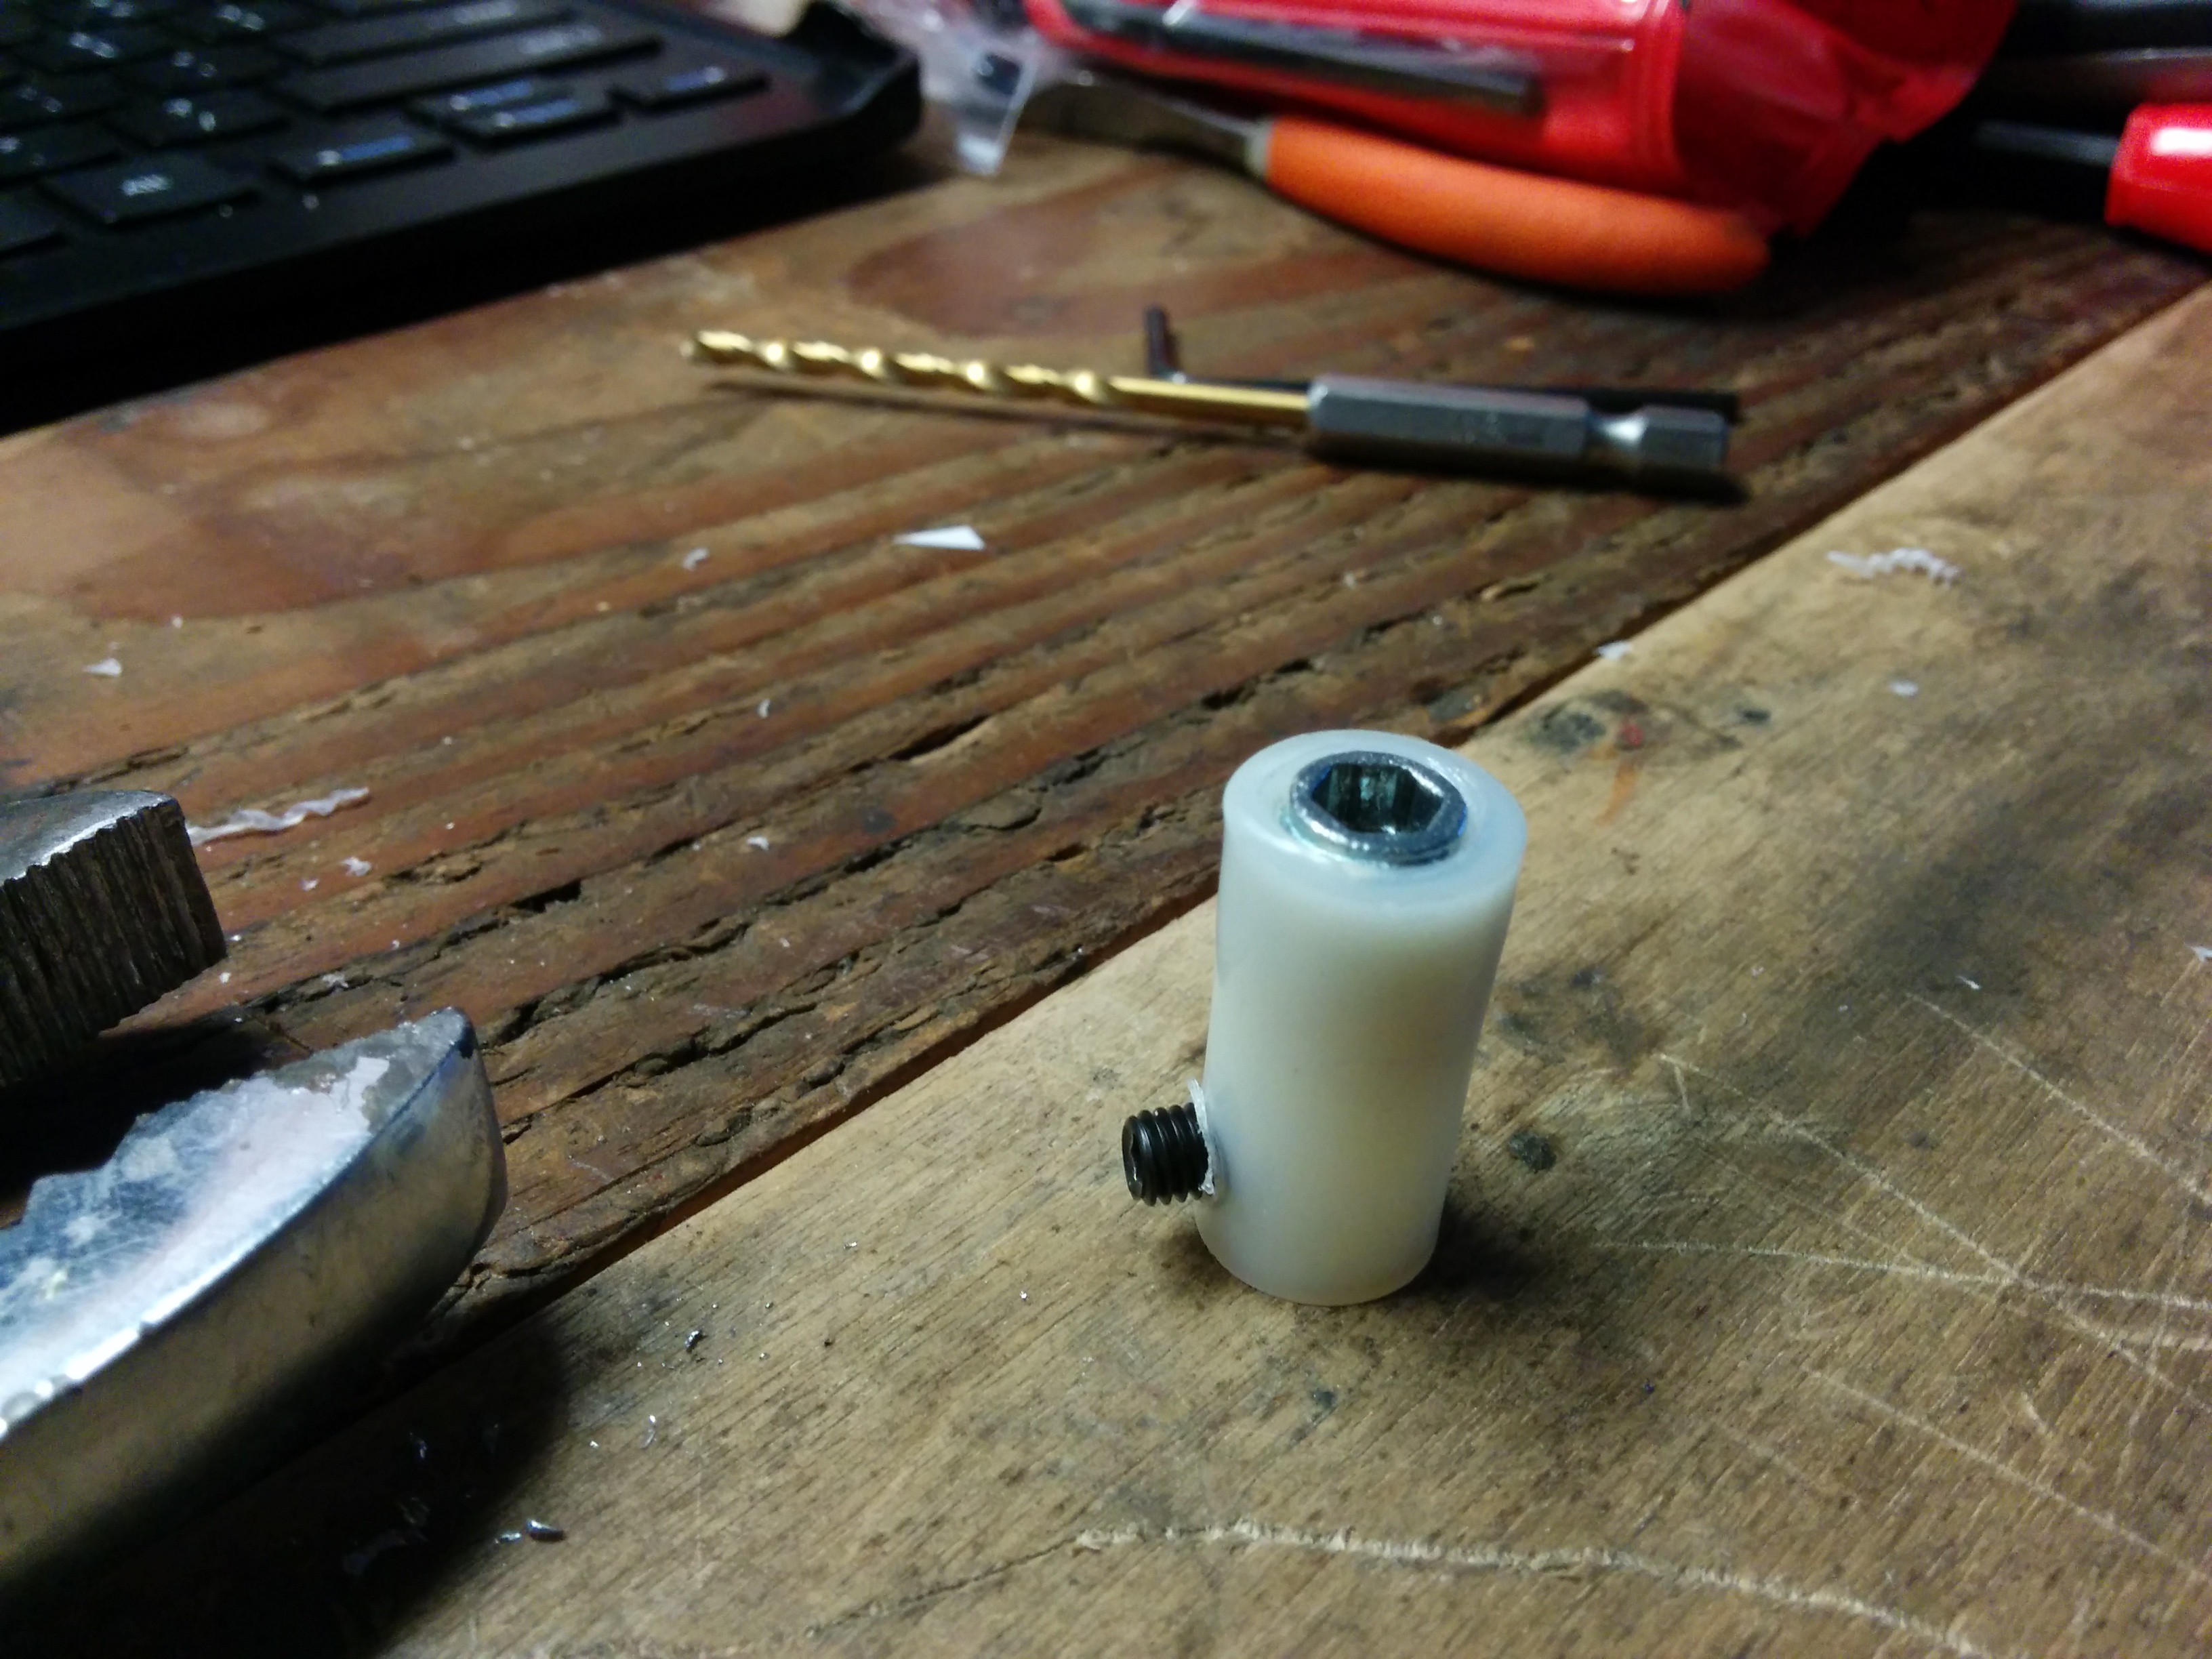
    Next drill a hole in the bottom and put a grub screw into it. Drill the hole slightly small that the grub screw so that it threads itself in nicely.

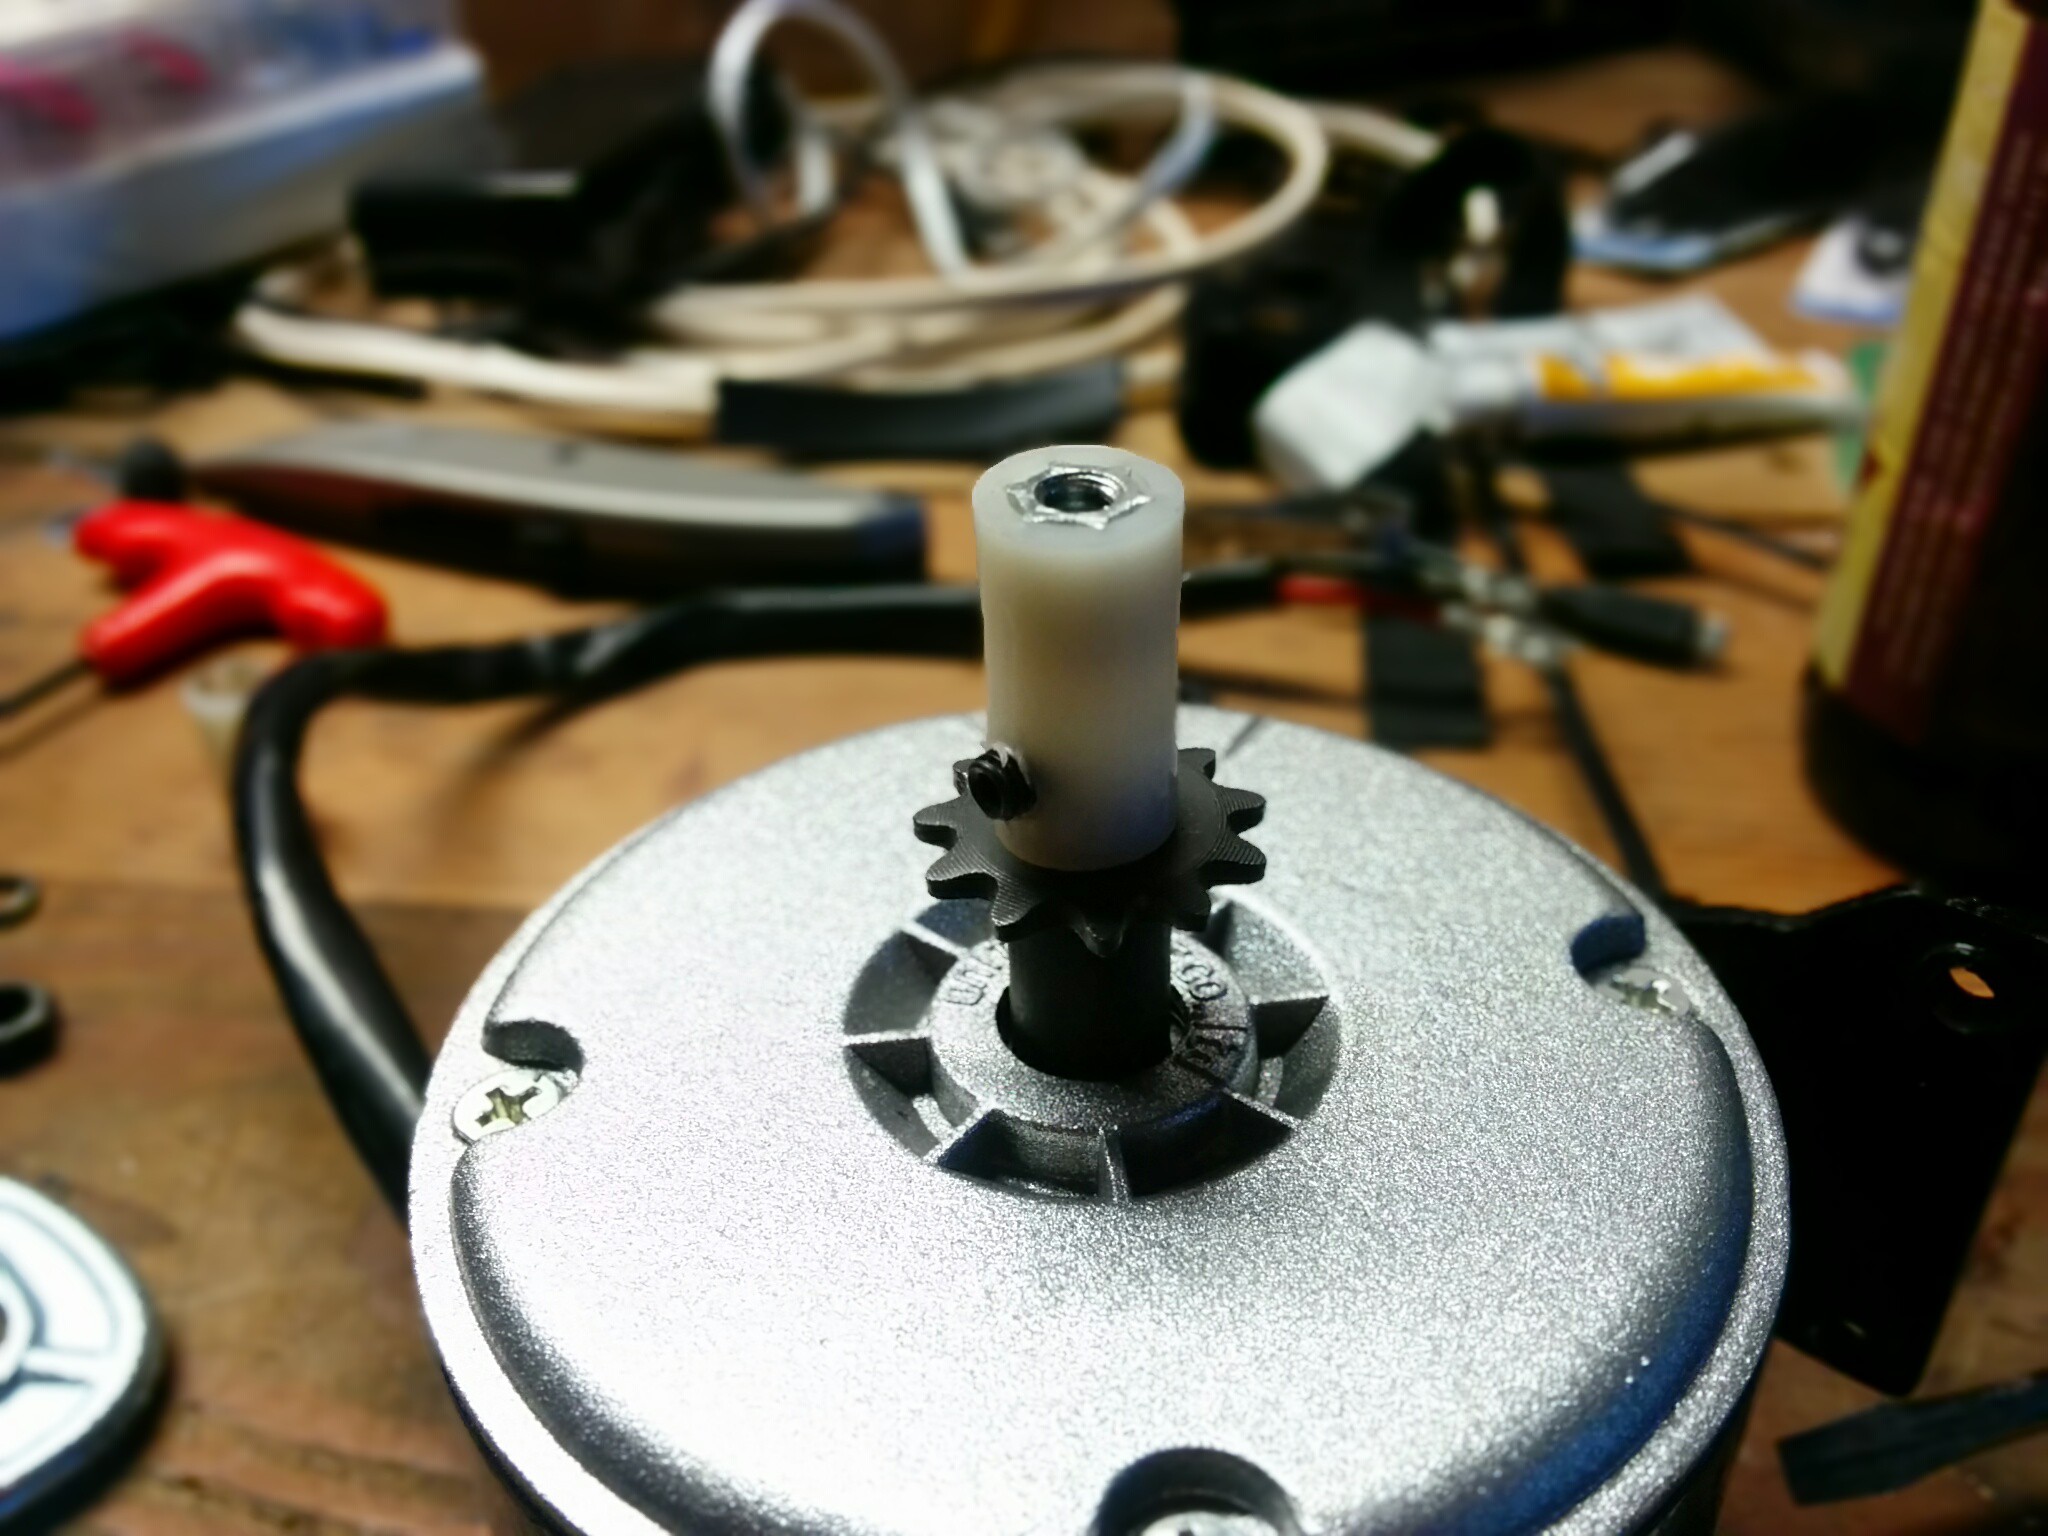
    Now you can screw your adapter onto the flat side of the motor shaft using the grub screw to hold it on. Be careful not to over tighten and strip your new threads in the vinyl.

    Using a long screw and some varying sizes of washers, you can now screw a skateboard wheel onto the generator motor. Be careful to get the wheel exactly centered or it will bounce when being used.

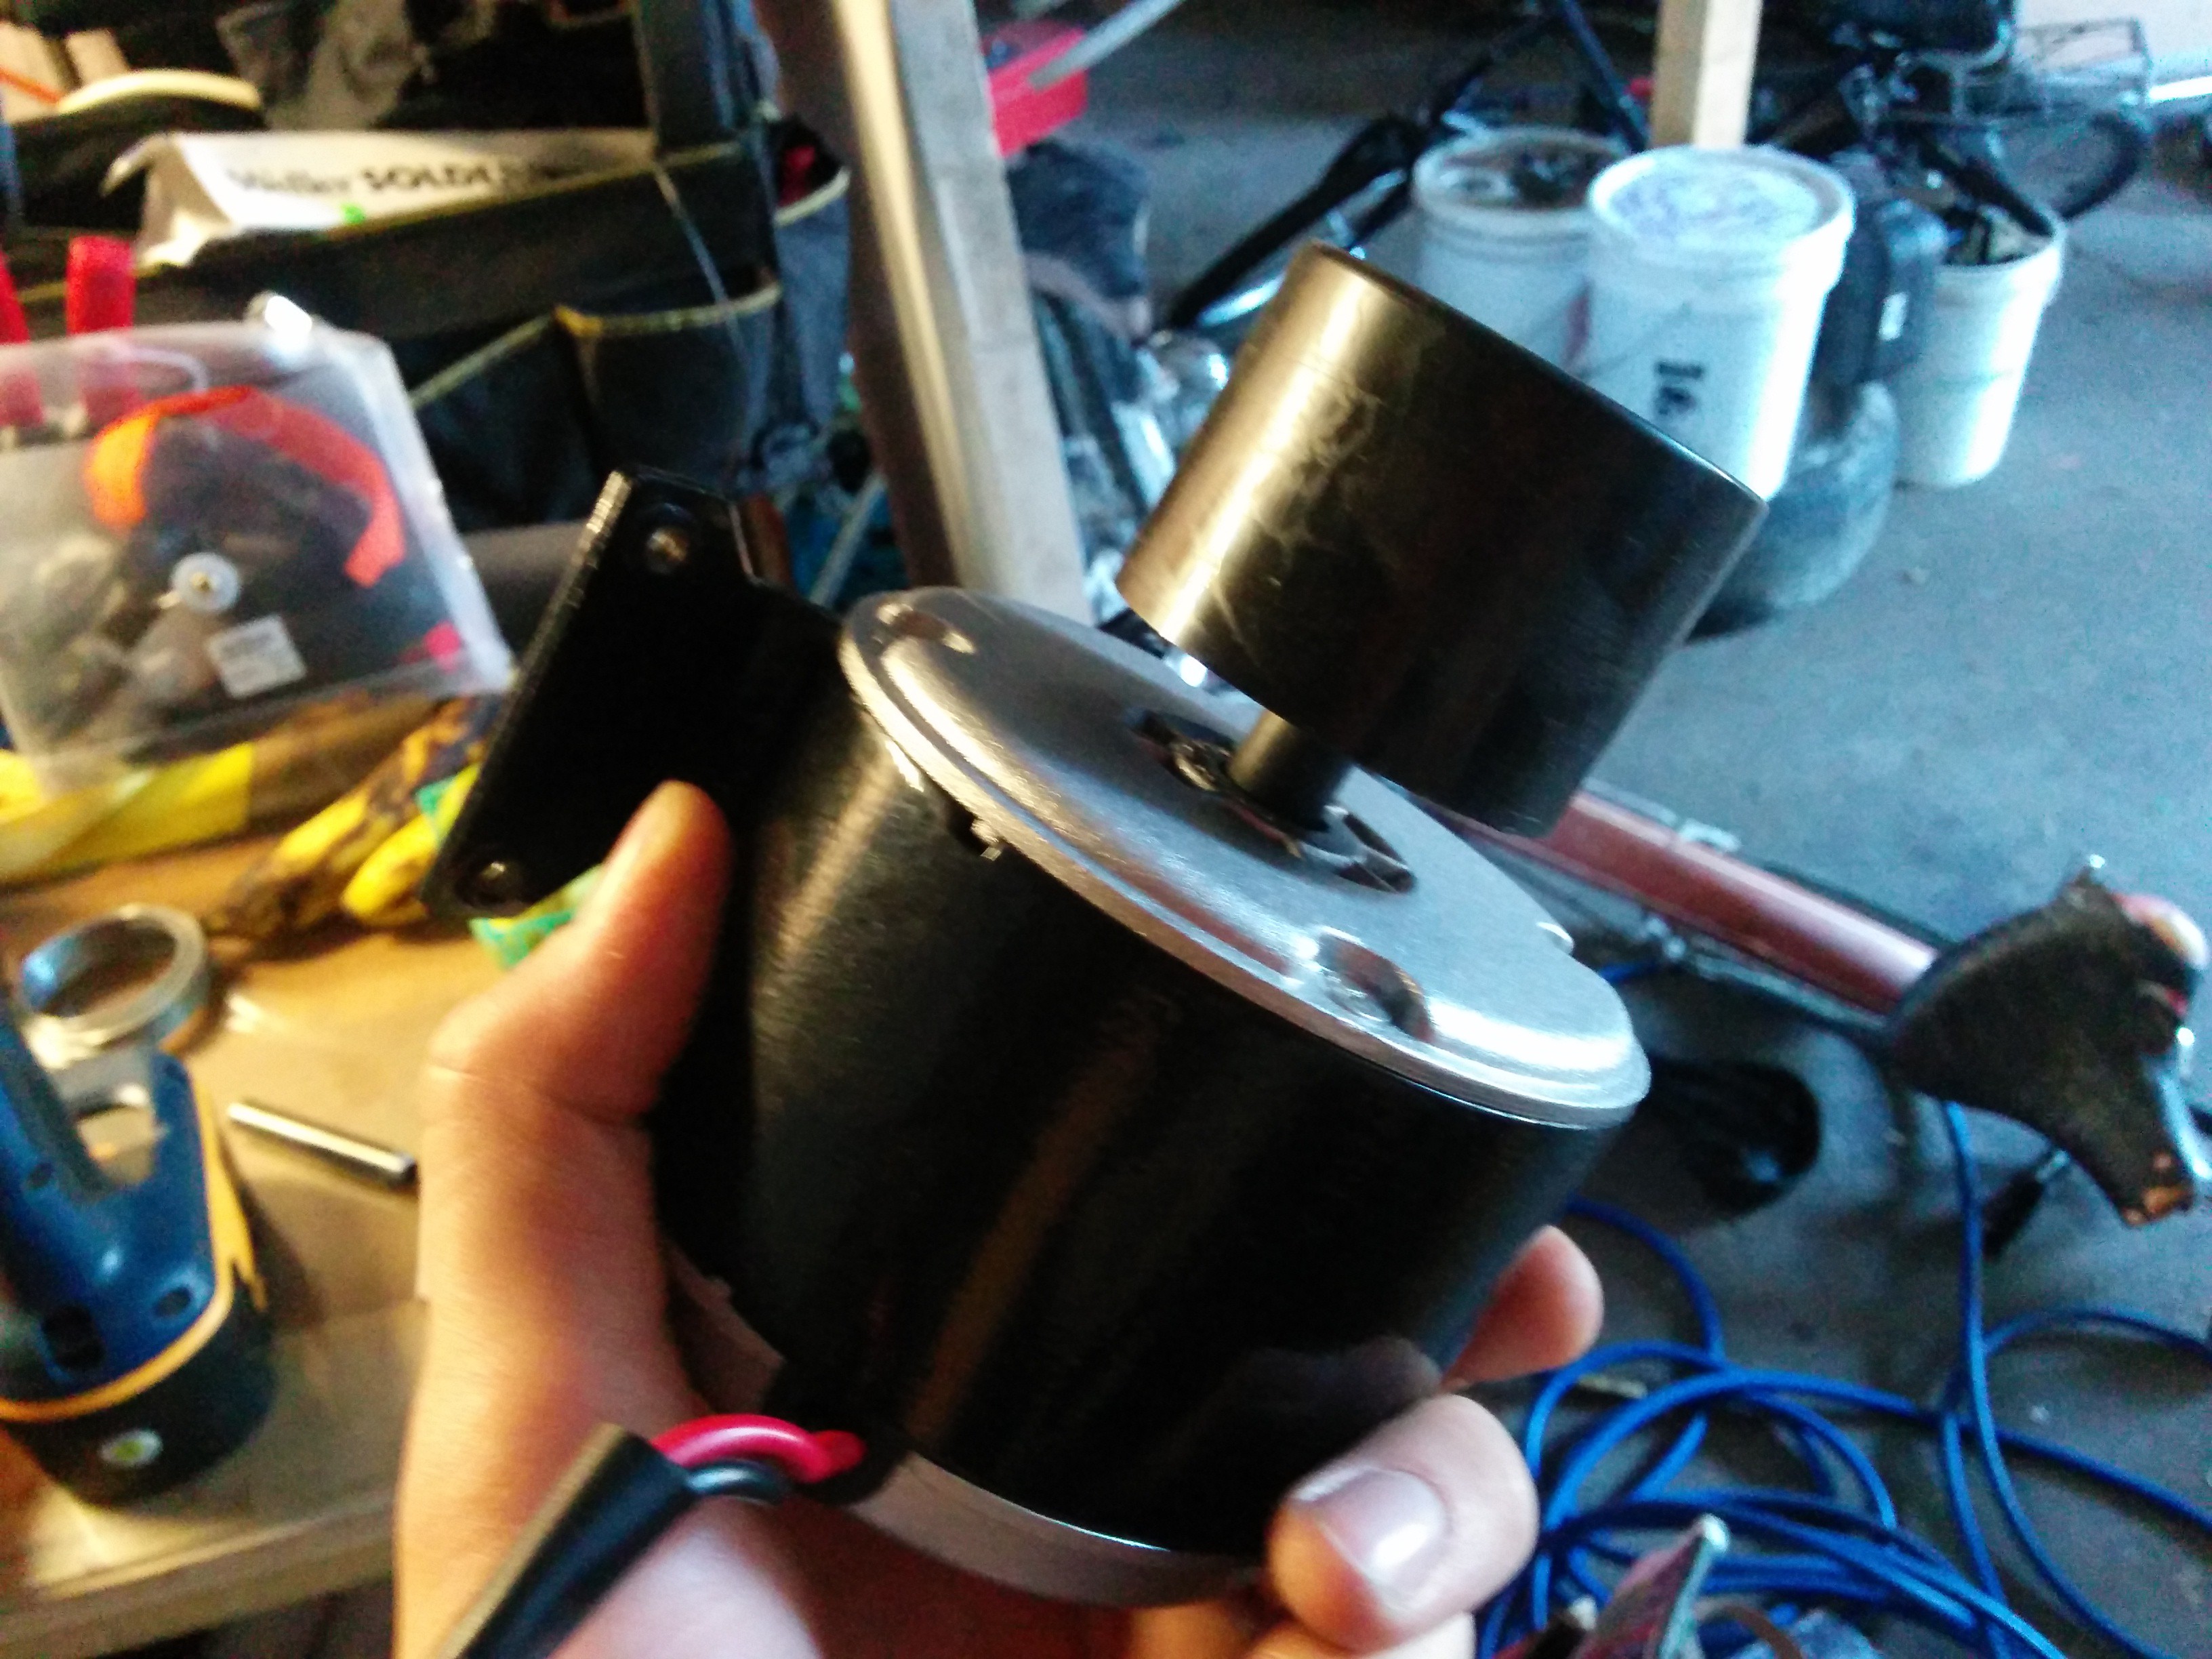
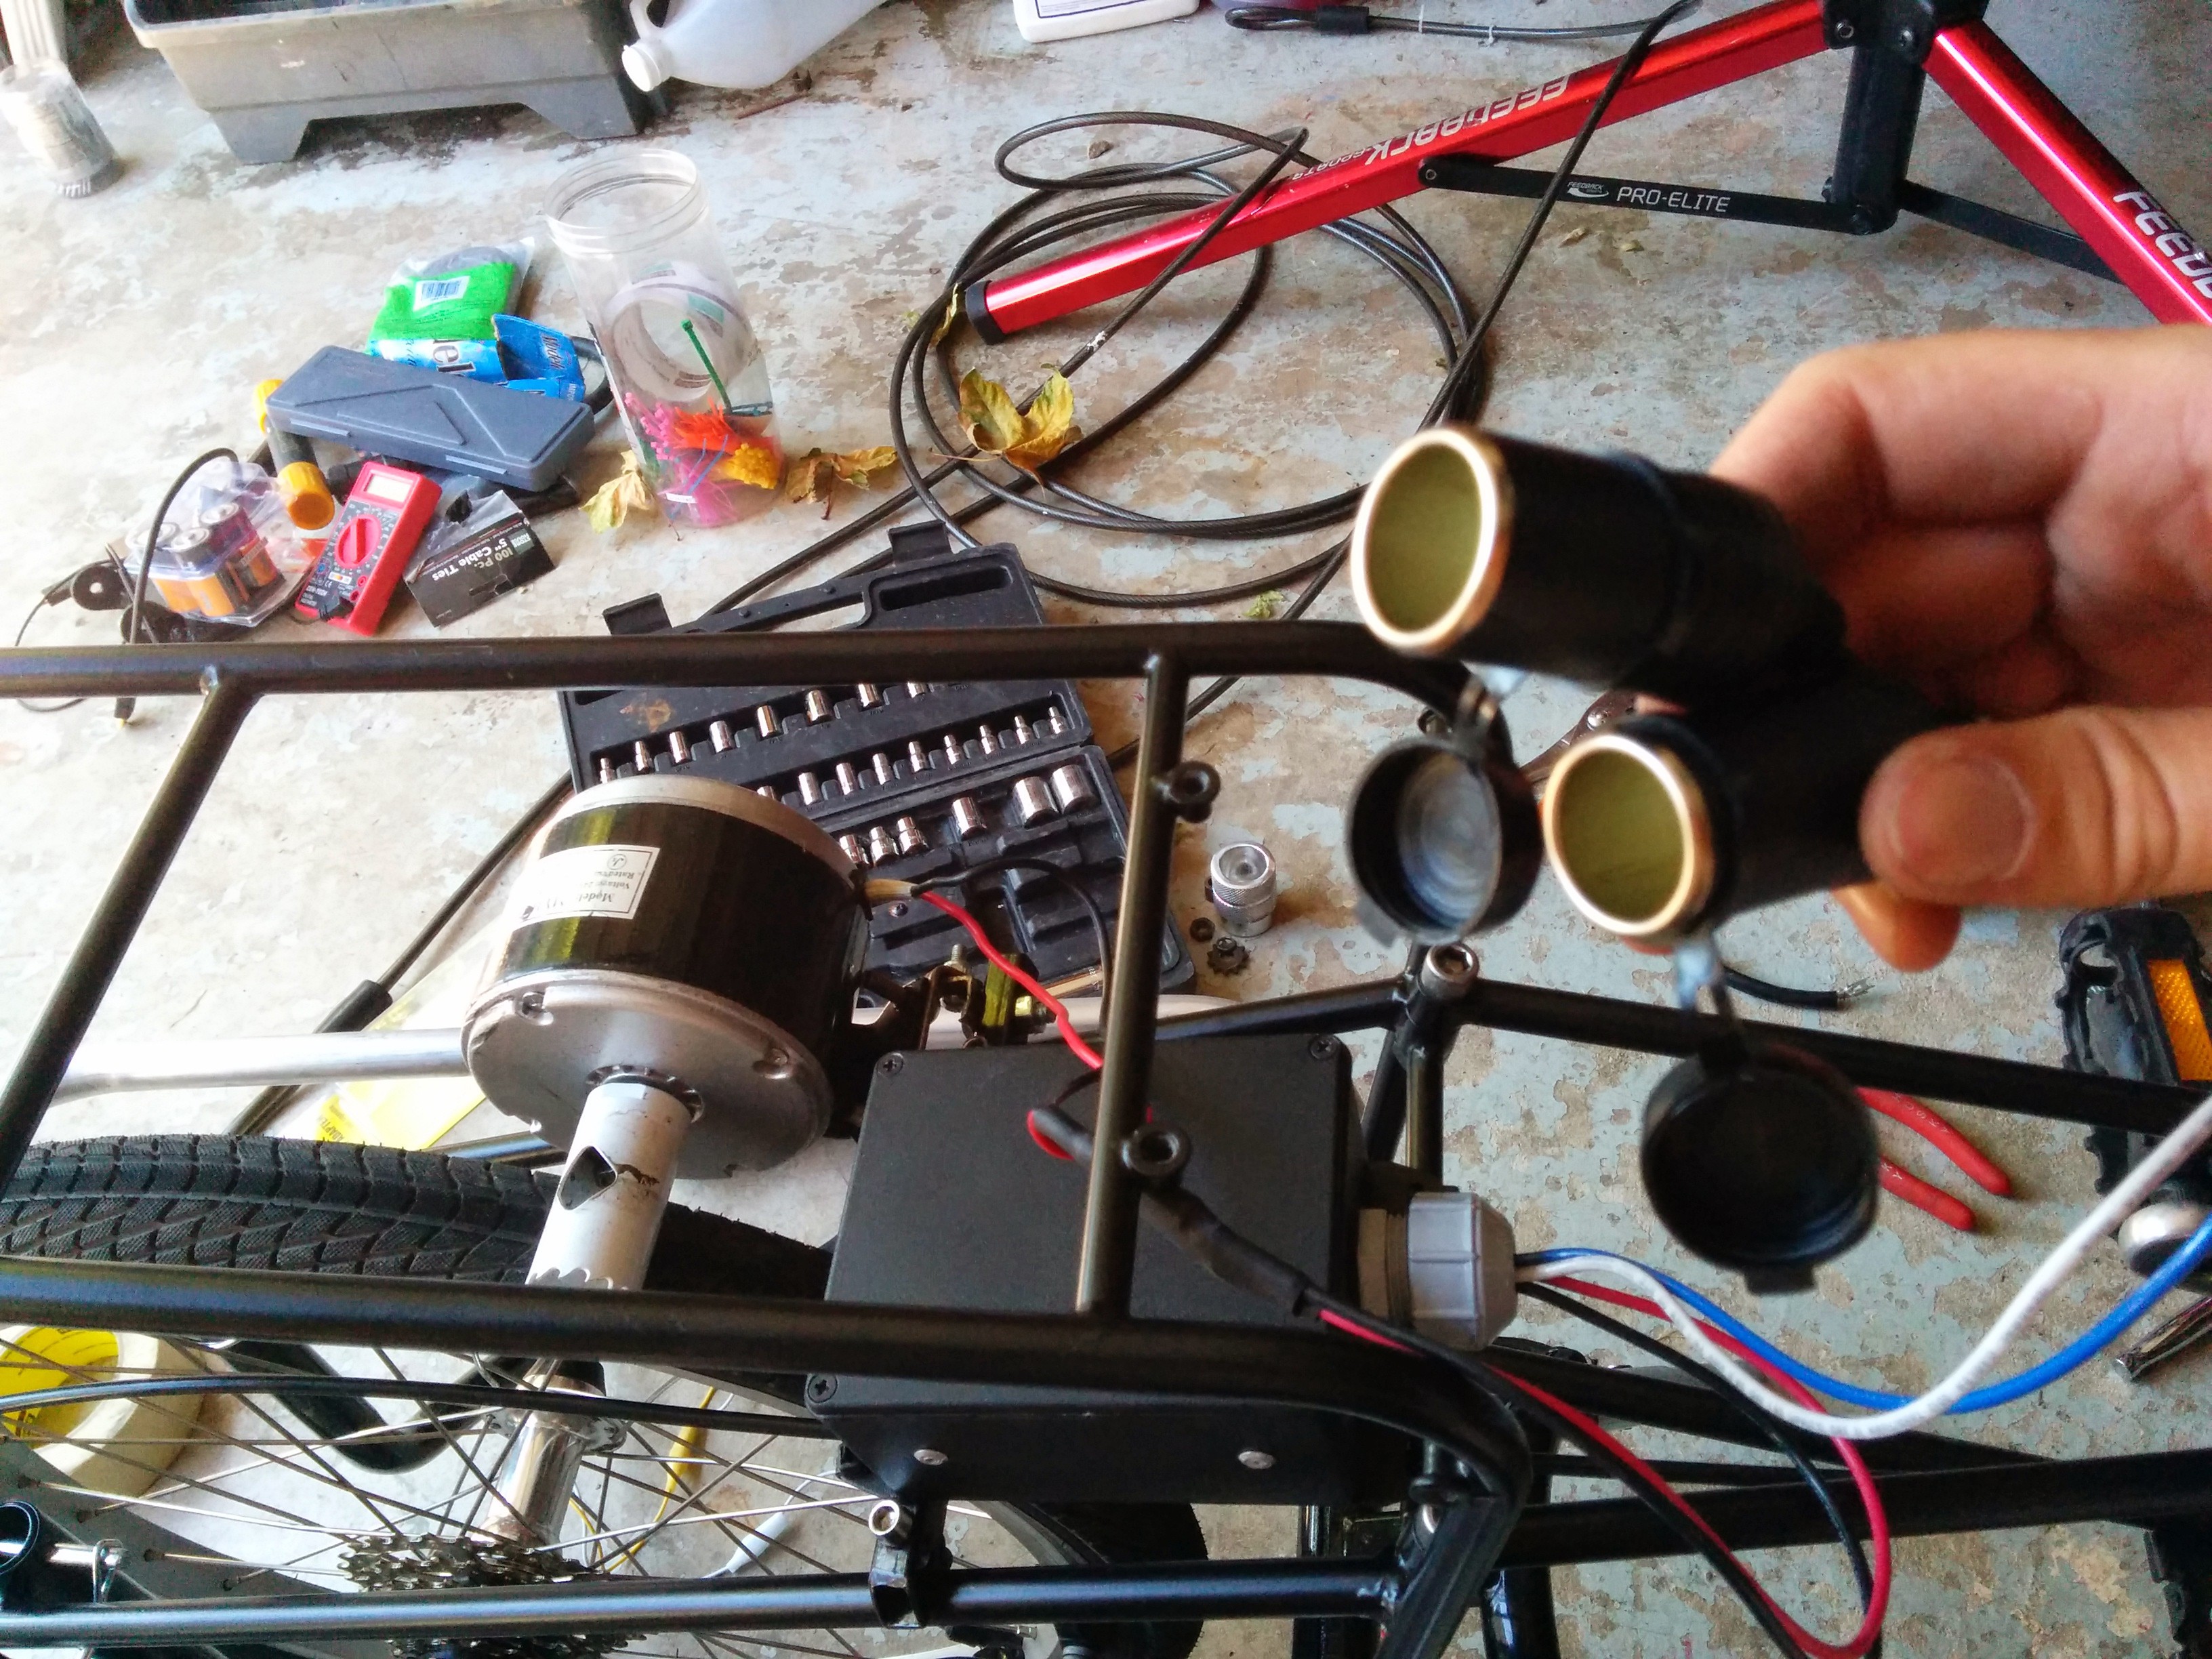
    Here it is in action. You can see the multiple washers I had to use to get it to work.

  • 3
    Step 3

    A strong rider can put out 60v or more from the motor, and you're going to have to drop that down before you can charge a buffer battery. This means a voltage regulator - and since the A. the potential voltage is so high, B. The potential voltage is so low, and C. lithium batteries require precise input voltage, it's going to require an extra special voltage regulator.

    We have just such an amazing regulator that unfortunately we don't sell separately from our bike A similar regulator is sold here here. It is the absolute best solution but it's going to cost you.

    This regulator also does the job, but in testing it doesn't work quite as well. It doesn't seem to make the generator "grab" as strongly, so you have to get unrealistically high RPMs to generate the energy you need. There may be a way to fix that, but we just went with the better regulators. If anyone can explain why these regulators work differently, I would love to hear it.

    Here you can see the motor mounted on the left side of the rear wheel. That means we're running the motor in reverse and need to reverse the polarity. If you look closely black is wired to red and red to black on the voltage regulator to compensate.

    The regulator is then going to feed into the batteries via to 12v female cigarette ports. The batteries will then run the equipment.

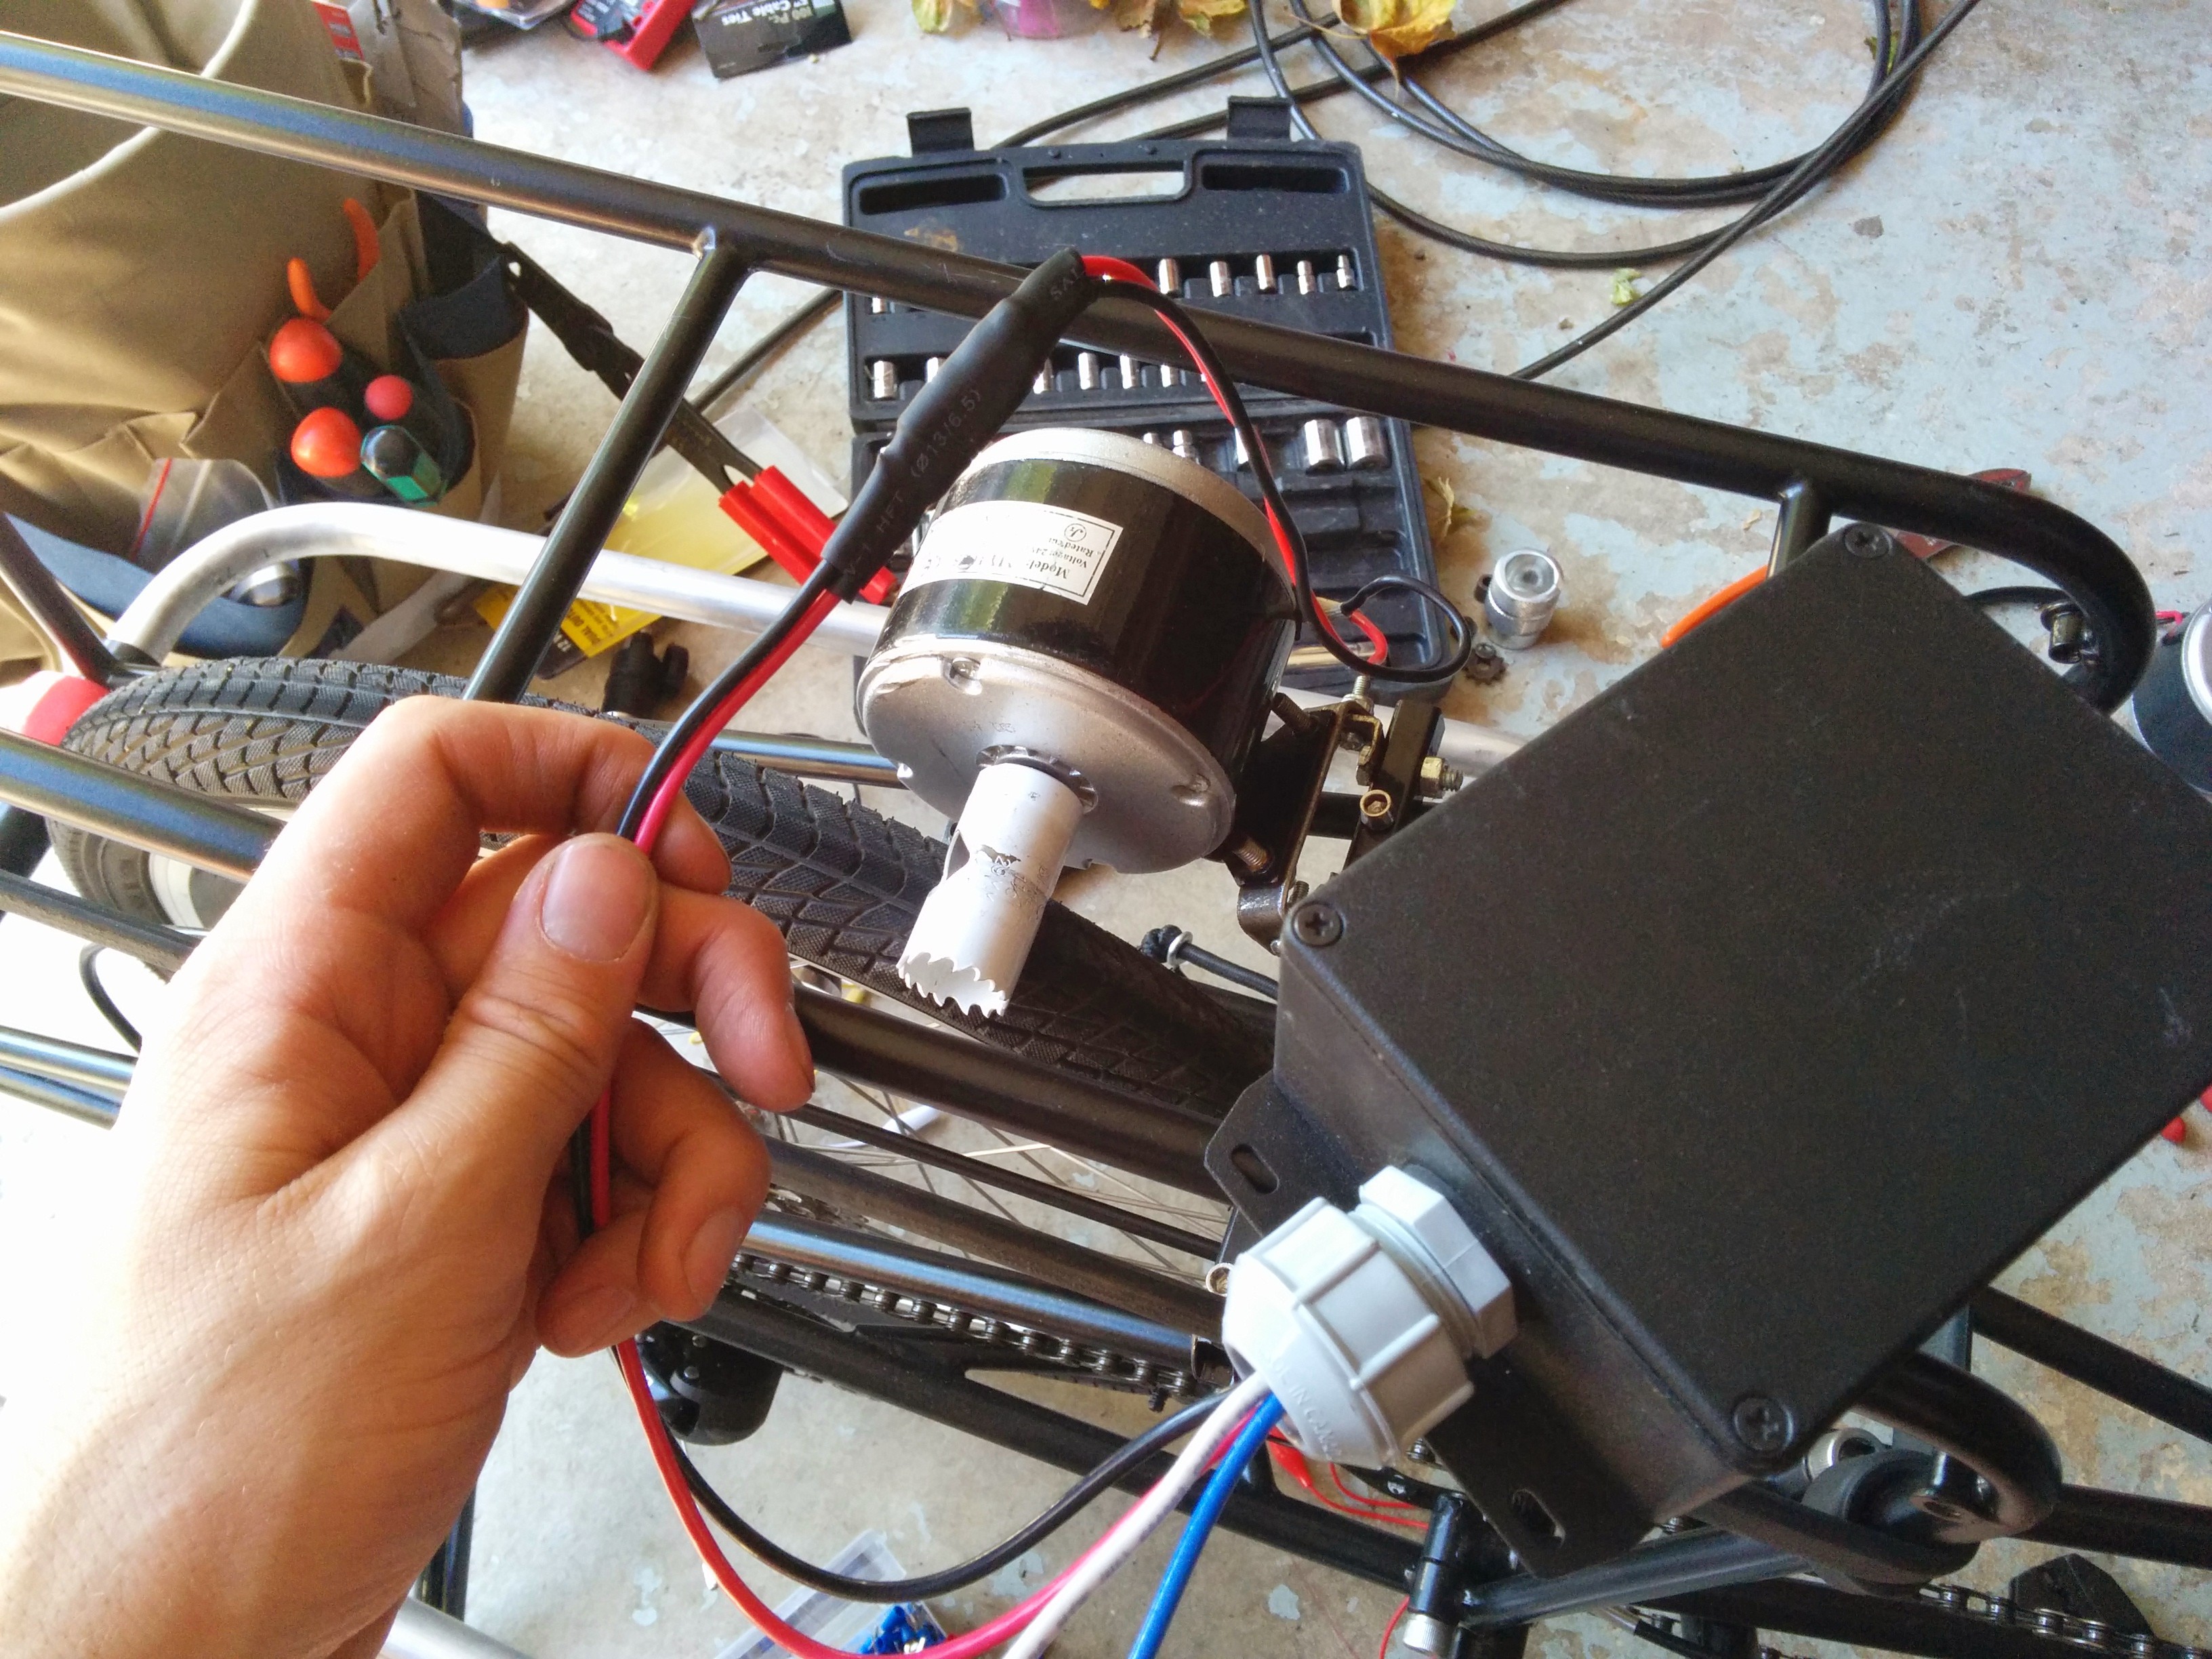
    Two 12V ports here coming out of the regulator. They will actually be putting out 14.1V, just above the minimum charge voltage of the Sherpas (14V).
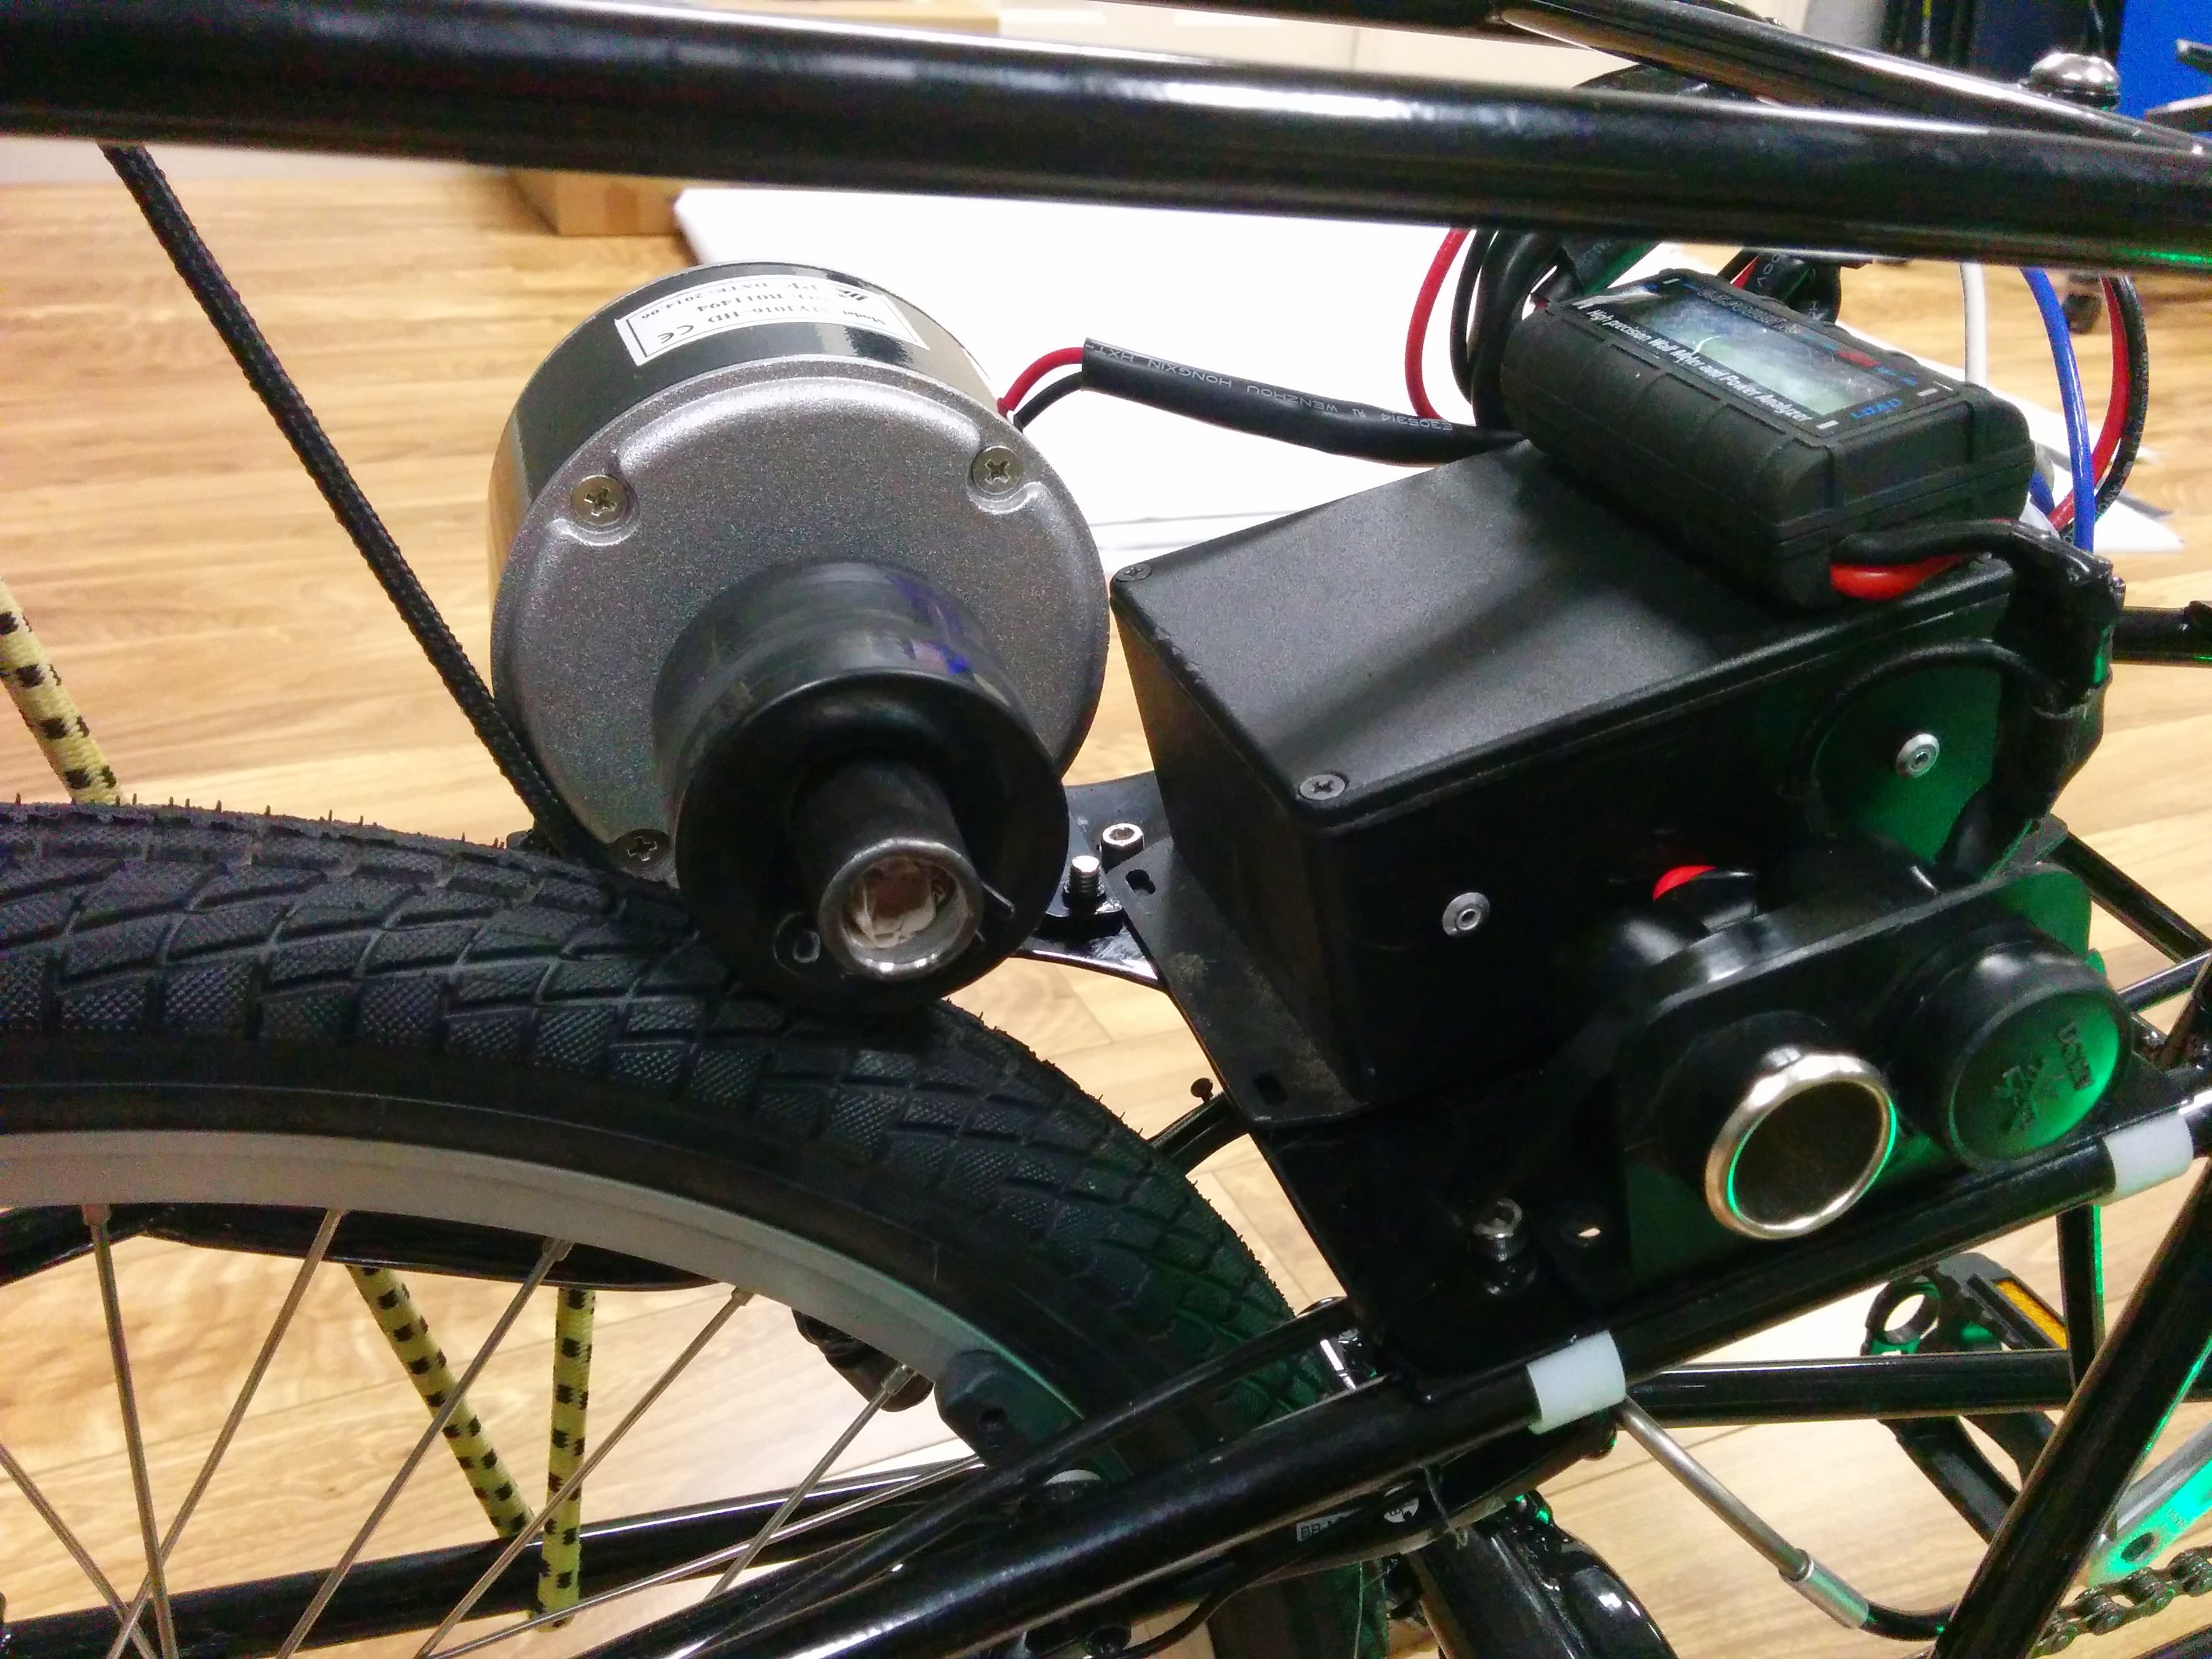
    The reason for having a battery is to provide a buffer so when someone stops pedaling the electricity doesn't suddenly cut out. We do events for cities and whatnot so it's mission critical that the "show must go on" - therefore we bring enough battery power for the entire event, and hope to leave again with full batteries.

    Others may prefer to have the event stop if the audience isn't generating the electricity, to further drive home the concept.

    We use two Goal Zero Sherpa 100 lithium batteries. Why lithium? Because it's lightweight and energy dense. Other bicycle generator designs online use lead acid, which is simpler to charge but weighs a ton and wears out fast. That might be an option for you, but for us it's important that the system be as light as possible so we can actually ride with it.

    Additionally, the Sherpa 100's offer 2 USB ports, as well as 19v and 12v outputs built right in. You can charge everybody's phone (10 watts each!), run a mini-fridge (okay, you might need two bikes), or whatever you can think of. Our projector requires 19v so... bingo.

    The Sherpa 100 batteries will take an input charge of 45 watts each, while our projector pulls over 60 watts. This leaves us at a deficit and it is impossible to charge faster than the battery is being depleted To solve this we use two batteries chained together in order to input 90 watts total into the system. This allows us the rider to stay ahead of the projector. At good events with adult riders, we have arrived with the batteries at 50% and left with them fully charged!

    Here is everything put together and on the bike. The generator sits on a hinge so you can pull it off while riding around (unless you want to keep generating electricity, in which case - leave it down by all means!). You can see I upgraded here to a mountable dual 12V port and also added a watt-meter inline.

    Here is an early design that we mounted on the rear-rack of a regular bicycle. I showed it here so you can get an idea of different options. It worked quite well and if we had the R&D budget I would build a version of this combined with the rotating rack-stand and make it a stand-alone package that can work on nearly any bike. But, priorities!

View all 6 instructions

Enjoy this project?

Share

Discussions

herilroast wrote 06/01/2022 at 09:55 point

This is looking very amazing you can click on the link mexon cinema 4D studio where you will get the best guide about it.

  Are you sure? yes | no

Rob Vincent wrote 05/15/2015 at 03:44 point

This is a truly beaautiful project!  Thank you for sharing it,

  Are you sure? yes | no

rickosgood wrote 05/09/2015 at 17:50 point

Hello! I'm one of the organizers for Eugene Mini Makerfaire in Eugene, Oregon. Our event is coming up on Saturday, June 13. I saw your cinema bike come through the tips line and noticed that you were based in Portland. I just wanted to invite you to bring this awesome contraption to the faire. If you're interested, let me know and I'll send you some more details.

  Are you sure? yes | no

stopsendingmejunk wrote 05/10/2015 at 19:21 point

Hey thanks for the invite! We are actually based out of Salt Lake City, so can't make it. I absolutely love Eugene, though and I'm sure it will be awesome! 

  Are you sure? yes | no

Similar Projects

Does this project spark your interest?

Become a member to follow this project and never miss any updates