Close
0%
0%

The High-Voltage Spirit of Christmas

Freeform Arduino-controller Christmas Tree with the traditional ball of plasma top

Similar projects worth following
This is my take on the Circuit Sculpture contest. It is a freeform Christmas tree made of copper wire, decorated by Arduino-controlled LEDs. On top of that, (the tree, I mean) is a homemade plasma tube functioning as a tree-top ornament.

Ah, Christmas. The blinking lights, the cookies, the smell of ozone, the presents... Wonderful.

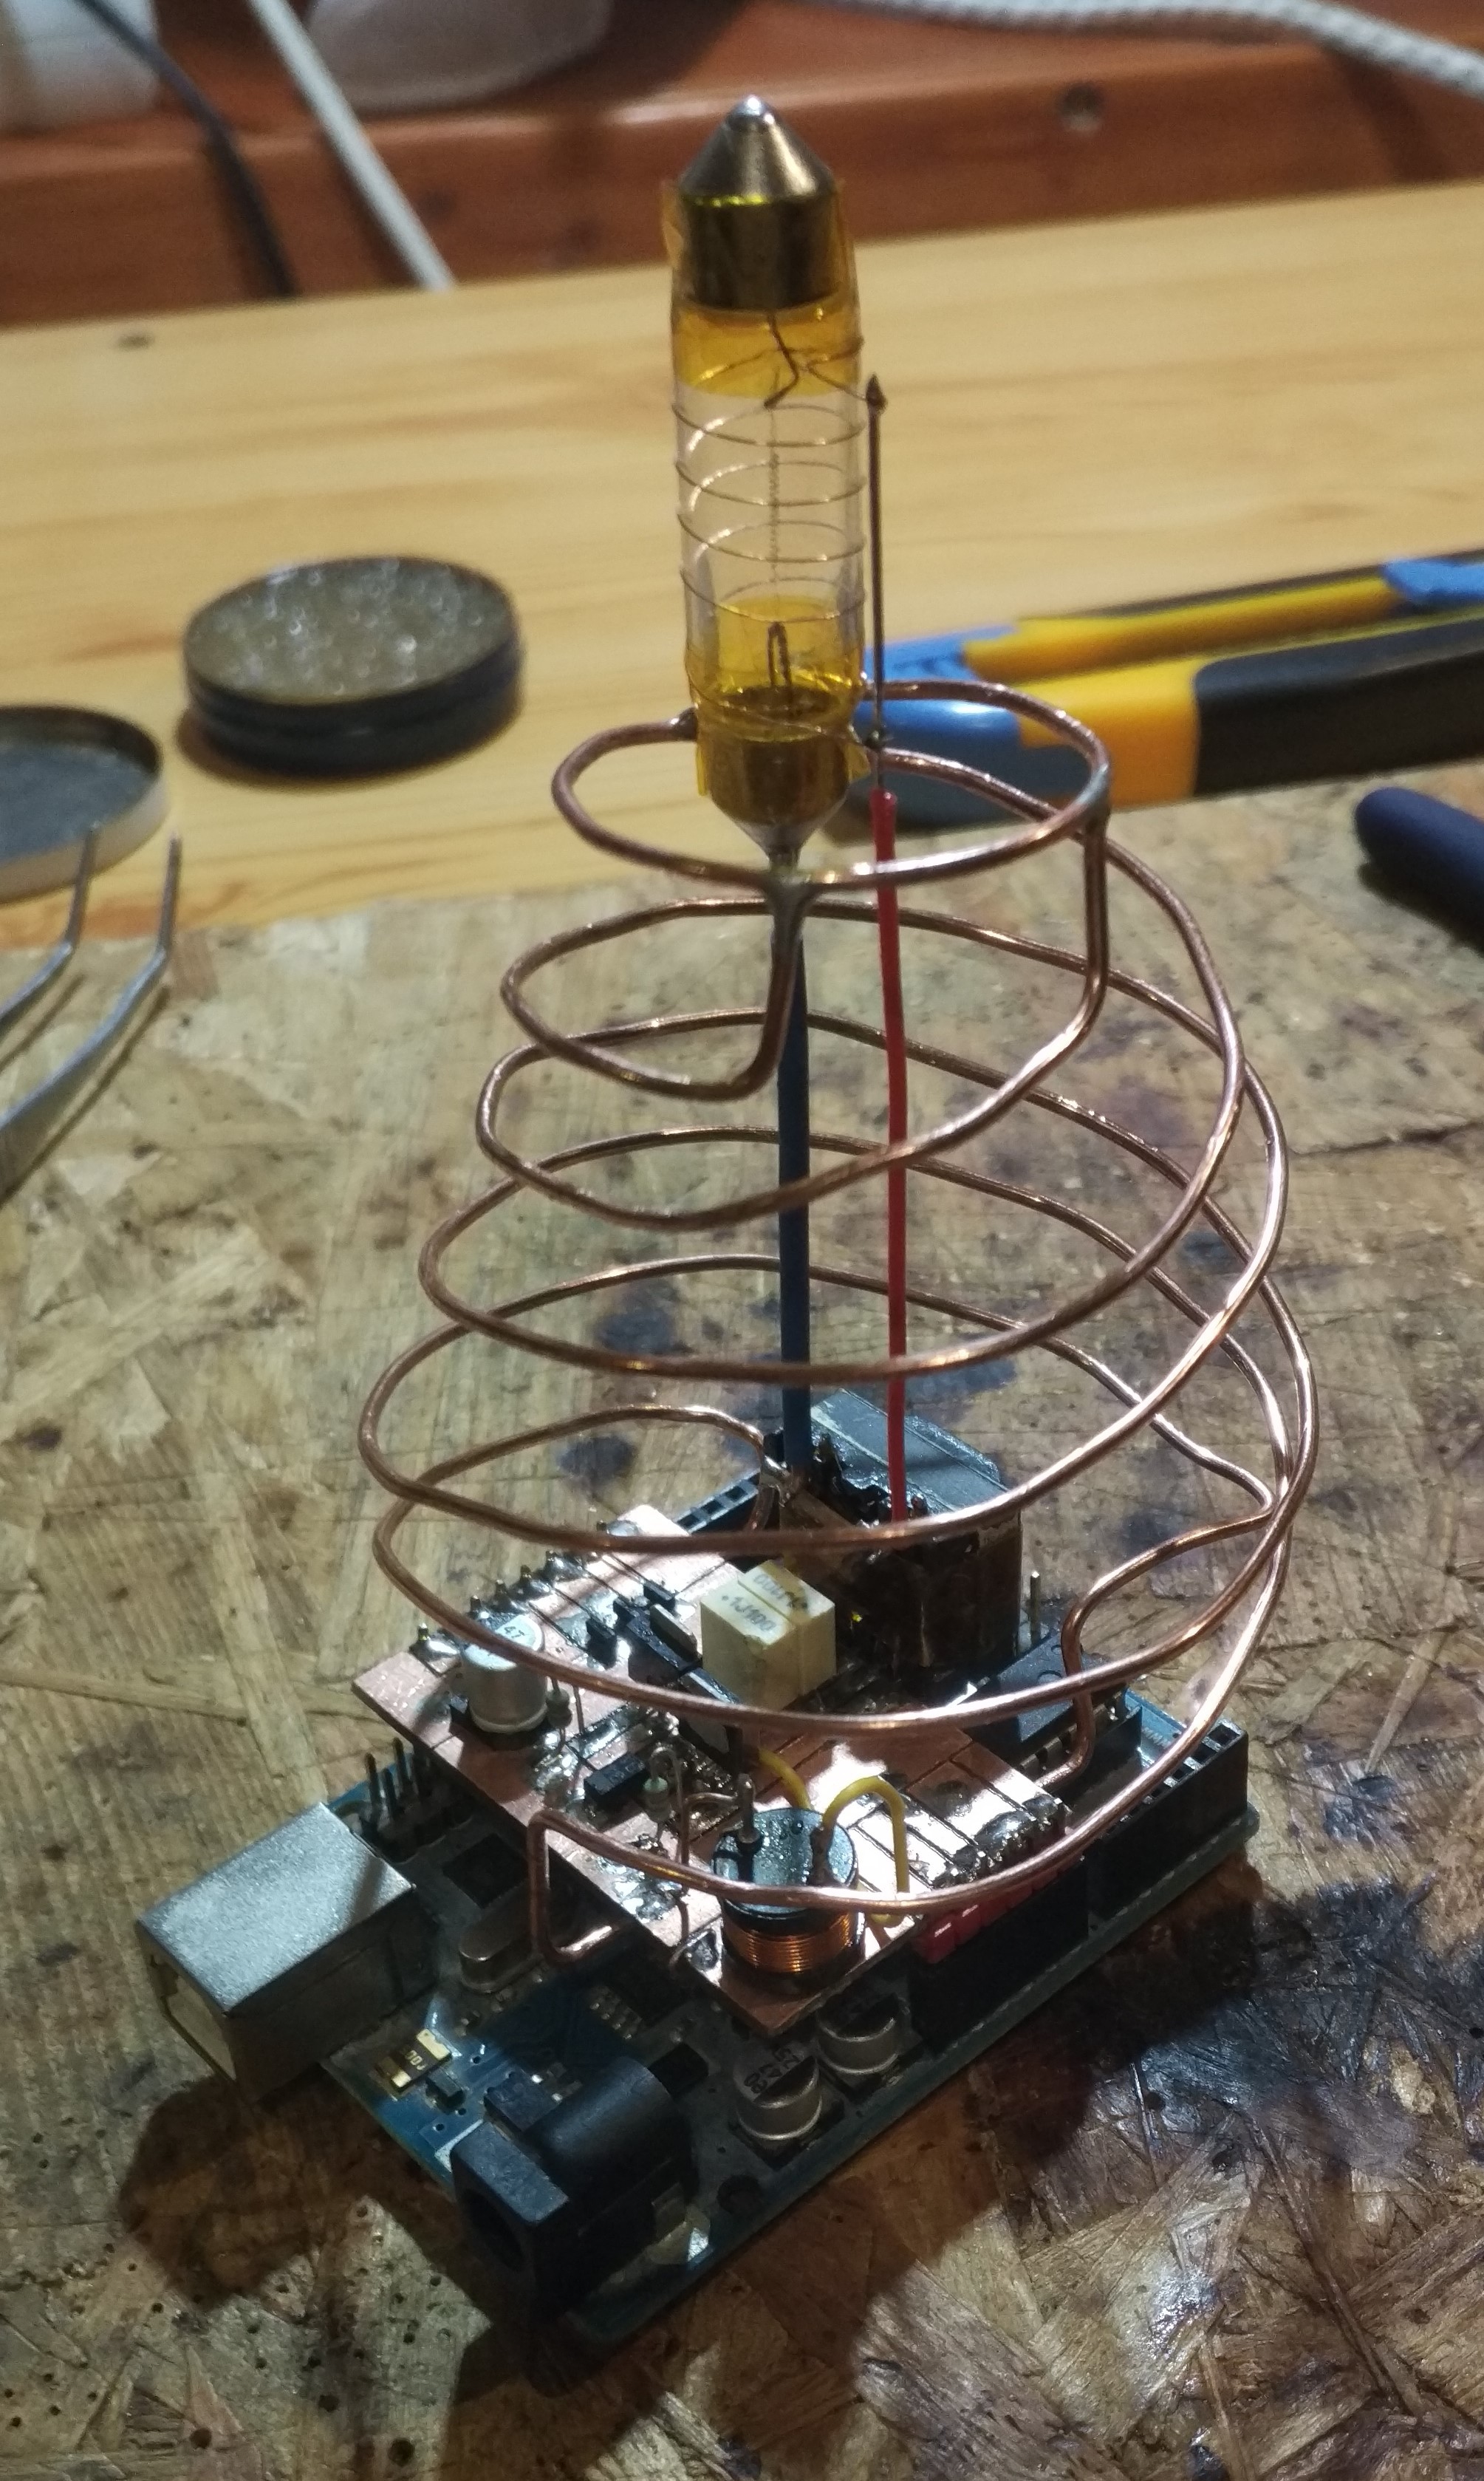
The tree is made of three spirals of copper wire. It is decorated by SMD LEDs: red, green, and yellow, 10 of each; and colorful wires. The three group of LEDs are controlled by the Arduino.

Since americans like to put stars on top of their trees, I thought I would do the same. But instead of using chinese made 5 spikes of plastic coated with glitter, I opted for something more realistic. So I got a lightbulb, coiled some wire on it, and gave it a (relatively) high voltage, thus creating a 'plasma tube'. After all, stars are just big balls of plasma (except for, you know, the fusion thing, but whatever).

For now, the light do nothing special, just blink. But since it's based on Arduino, it'd be a easy to use PWM for dimming, or to setup a serial connection to remotely control them. Even over the internet, since IoT Christmas trees are a thing now, apparently. Well, maybe next year.

main.c

Source code

plain - 353.00 bytes - 12/30/2018 at 15:50

Download

Makefile

Makefile for the source code

makefile - 622.00 bytes - 12/30/2018 at 15:50

Download

  • It's alive!

    Szabolcs Lőrincz12/31/2018 at 17:36 0 comments

    And so, my Christmas tree has came to life. It's not the neatest work (it's called 'ugly soldering' for a reason), but I did it, and learned some things about high voltage, which is great. Here's a short video showing off how it works.

    I could watch this for hours.

  • Putting the tree on the ornament

    Szabolcs Lőrincz12/31/2018 at 17:31 0 comments

    Now for the last step: the tree. The obvious choice was to make it from copper. I used standard 1.5 mm^2 MCU wire, which I stripped from its insulation. I soldered it to the underside of the board, so that it will also serve as the ground connection for the LEDs.

    Read more »

  • Assemble

    Szabolcs Lőrincz12/30/2018 at 16:53 0 comments

    Now that all is working, it is time to assemble the thing into a whole. It will take the form of an Arduino shield. So I took a piece of PCB board, cut it to size, and used it as a foundation for my project. So basically, this is a circuit assembled on a sheet of FR4 with copper conductors, but it's just a part of it, so I hope it would still count as freeform.

    Anyway, here's the pictures from the process. The shield connects to the upper part of the 'duino, since we don't need analog inputs and have enough digital GPIOs. I didn't want to drill holes for the pin headers, so I fitted the board between the headers and filed a little cut for them to fit better.

    Read more »

  • Sparks of imagination

    Szabolcs Lőrincz12/28/2018 at 22:05 0 comments

    The next problem was to utilize the voltage. Since it didn't produce any corona effect, I came up with the idea to build a plasma ball. For that, I needed a glass thing containing low pressure gas and a metal electrode. Luckily, light bulbs fit this description perfectly. A neon bulb would be ideal for gas discharge, but that's what neon bulbs do anyway, so it wouldn't be so spectacular. Instead, I tried to glow some filament light bulbs on fire. The filament alone didn't produce any plasma sparks, so an outer electrode was necessary to increase the electric field. And thus, these monster creatures were born:

    "Kill us, please."

    Not only do they look disgustingly hideous, they do not work either. (Not so much of a loss.)

    Read more »

  • Getting high... voltage

    Szabolcs Lőrincz12/28/2018 at 20:54 0 comments

    My main goal was to create some awesomeness, that is simple enough to implement in free form circuitry. A high voltage resonator seemed like a good choice. My first idea was to create something like a "tesla coil". I soon had to realize that these are not as simple as they seem to be, so I turned to using traditional transformers.

    I had these little trafos lying around. They're from compact fluorescent lamps, which have an inverter inside their base to provide voltage to the tube. I also had some neon lamp bulbs, so the solution was obvious. Using a MOSFET and an Arduino, I managed to drive this with a 100 kHz square wave, and there was light. Funny thing is, since my square wave was asymmetric, only one electrode of the lamp was glowing.

    Neon bulb driver

    It was nice, but I though I could do one better.

    Read more »

View all 5 project logs

Enjoy this project?

Share

Discussions

Does this project spark your interest?

Become a member to follow this project and never miss any updates