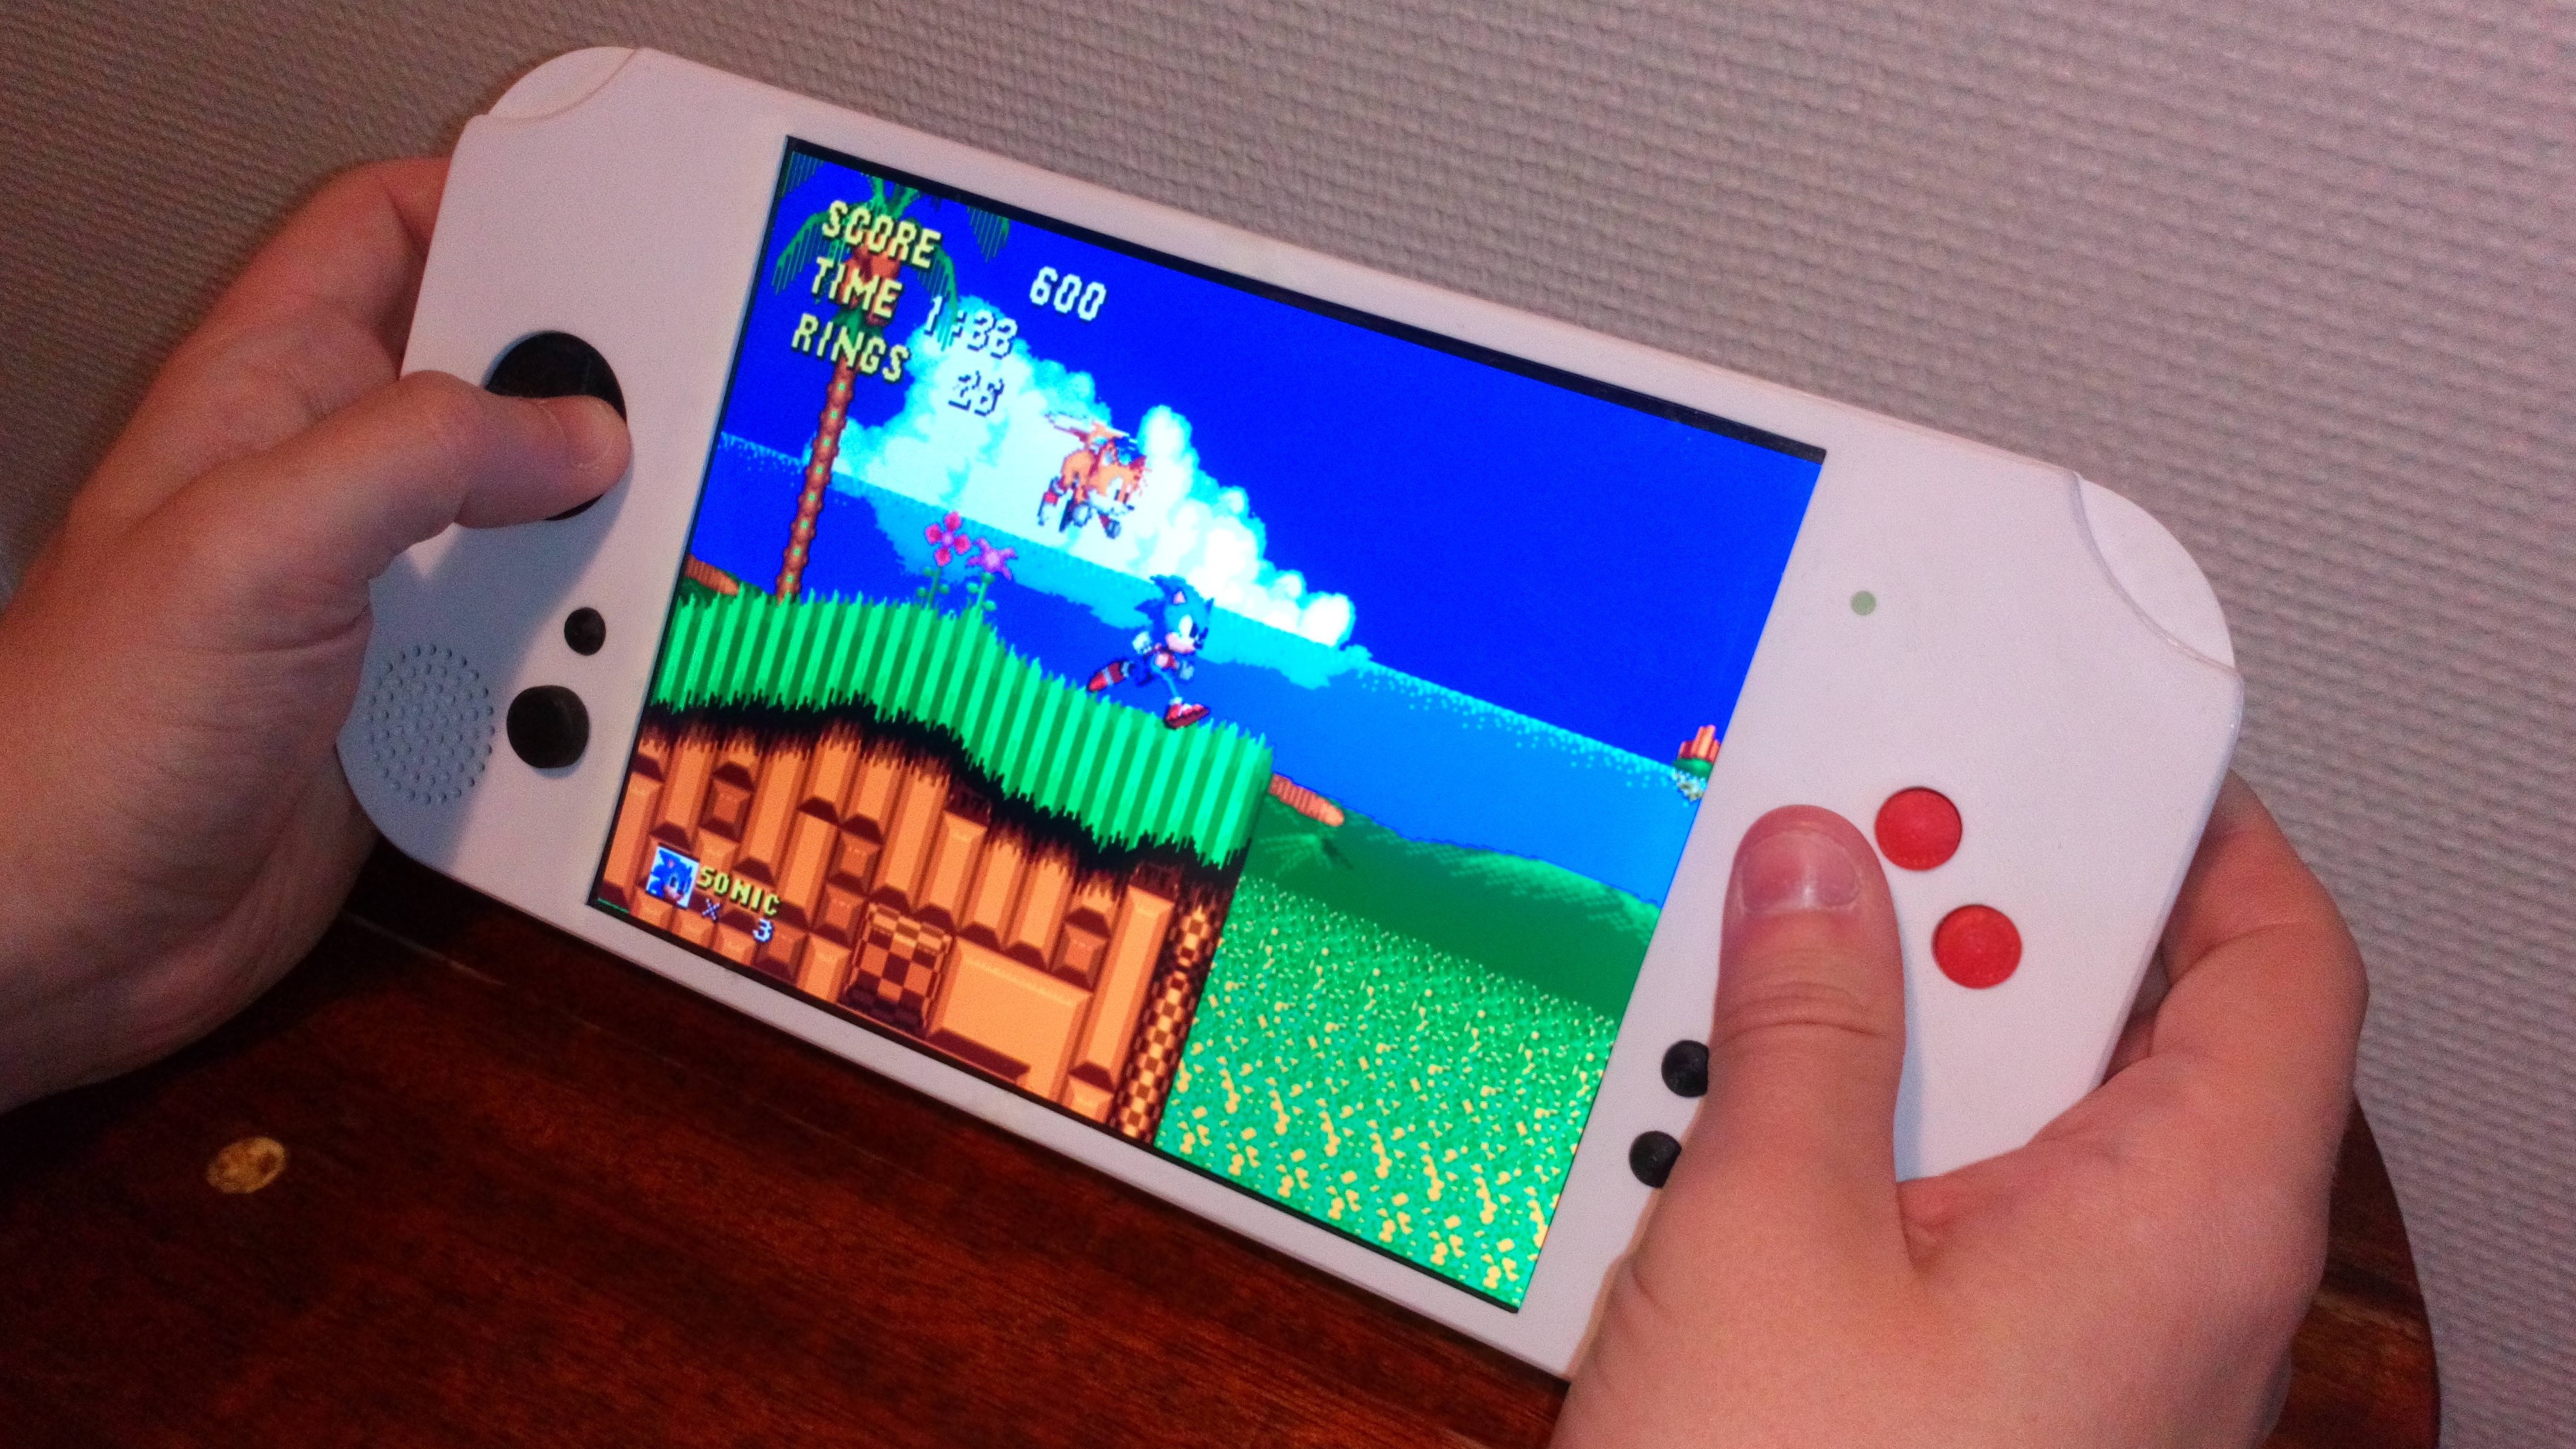
I'm a designer, engineer and game enthusiast from Sweden. Video gaming has always been a huge passion of mine, ever since I first played on the Sega Megadrive as a child. And I have been interested in the gaming hardware almost as long, especially the portable consoles.
When I bought a PSP in 2008, I could for the first time add some emulators to a portable console. So now I could play all the classic games again, that I haven't played for a long time. The only small issue I had with playing emulated games on the PSP, was with the screen. It was quite small and in wrong aspect ratio, which resulted in black borders. Since then I allways wanted to build my own portable console, and take care of those issues myself. So finally, in the late 2018 I had the knowledge and an idea on how to begin with that project.
Hardware
With a 3D-printer, Raspberry Pi, iPad mini 3 display and some other parts and circuit boards, I was able to build this prototype of the portable retro game console that I wanted. The goal was to create a portable console with a big display, that was both functional and aesthetically pleasing.
I chose the Raspberry Pi because of several reasons. It has great software support and it's compatible with many different emulators. It's small and thin. Priceworthy. And has low power consumption, but still powerful enough to emulate most systems.
I use a 7.9-inch LG display, the same model you find in an iPad mini 3. I found many other displays with the size and aspect ratio I wanted. But I chose the LG, even though it was more expensive, because it was brighter and had much better colour rendition than the other displays.
To improve the audio quality on the Raspberry Pi, I included an USB DAC(16 Bit, 48 kHz). I also had to include an amplifier board to power the speakers. For the buttons and the d-pad I use soft tactile switches, in order to get the same feel most game controllers have.
Design
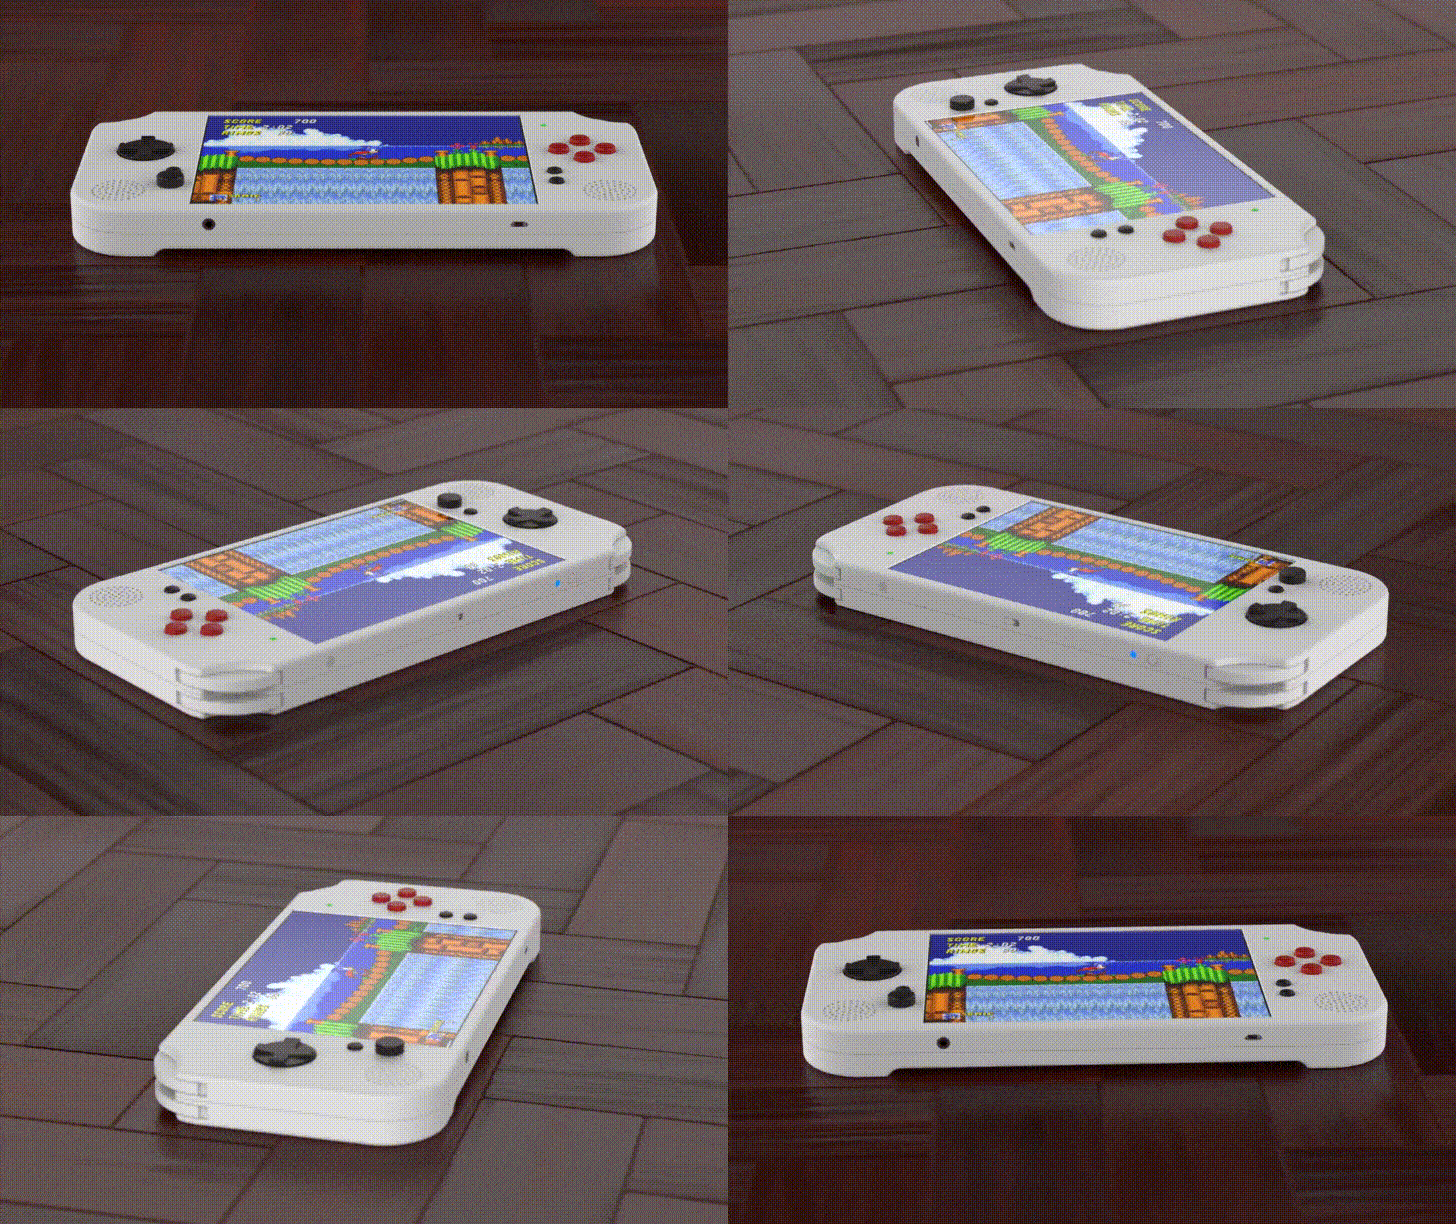
My design inspirations I got from many different sources, not only gaming hardware. I tried to make it as small and thin as I could, but still keep it comfortable to hold for many hours of gaming.
On the top there are two buttons, one is for adjusting the screen brightness, and the other is for shuting down the system. There is also a power switch, to completely power off the console. The 3.5 mm headphone jack and the micro-USB port for charging the battery, is located on the bottom. The power LED on the front indicates low, charging and charged battery. There is also the rest of the buttons, the d-pad and the volume knob. Above the volume knob there is a hotkey button. You use that, with different combinations with other buttons, to do things like save, load, reset, and quit to main menu. In order to avoid high temperatures in the console, I have installed a small, silent fan on the back. It brings air through the intake, then past the heat sink on the Raspberry Pi and out again.
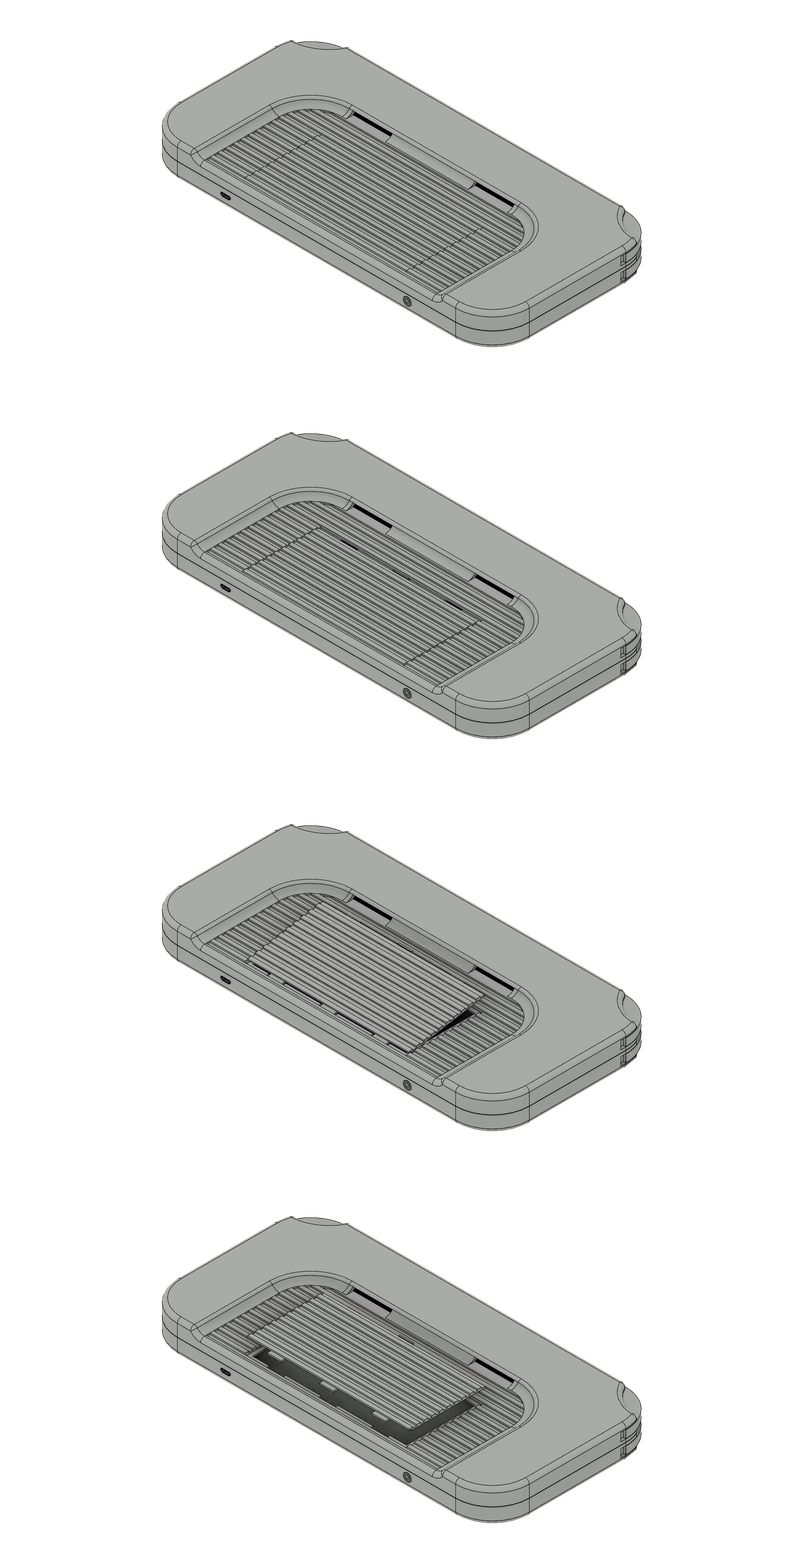
To get access to the replaceable Li-Po battery and microSD card, you only have to remove the back cover. There's no screws, you just slide it downward to open it. And I designed the cover and the area around it in a way, to better conceal the joints.
Specifications:
- Dimensions: Width: 277 mm, Height: 134 mm, Depth: 21 mm - 25 mm
- Compatible SBCs: Raspberry Pi 2, 3 and 4
- Display: 7.9-inch in 4:3 aspect ratio, 60 Hz 2048 × 1536 IPS LCD
- Audio: Two 3 W speakers Ø28.5 mm and 3.5 mm headphone jack
- Battery: Li-Po battery, 10,000 mAh (approximately 5 to 7 hours of game playing)
- Storage: 64 GB microSD card (capacity for over 20,000 games)
Dimension comparison:
Portable Retro Game Console:
- Width: 277 mm, Height: 134 mm, Depth: 21 mm - 25 mm
- Display: 7.9-inch in 4:3 aspect ratio, 2048 × 1536
Wii U GamePad:
- Width: 259 mm, Height: 135 mm, Depth: 23 mm
- Display: 6.2-inch in 16:9 aspect ratio, 854 × 480

 c
c





 jefmer
 Salim Benbouziyane
I am looking for a handheld console (3D Printed) for one of my next projects. There are a lot with a 5" screen or less but I have had those before and the screen is too small. This looks ideal was the project and build instructions ever released so we can build our own ?