Close
0%
0%

On Air

Keyword activated status display

Similar projects worth following
Voice controlled display to let others know your availability.

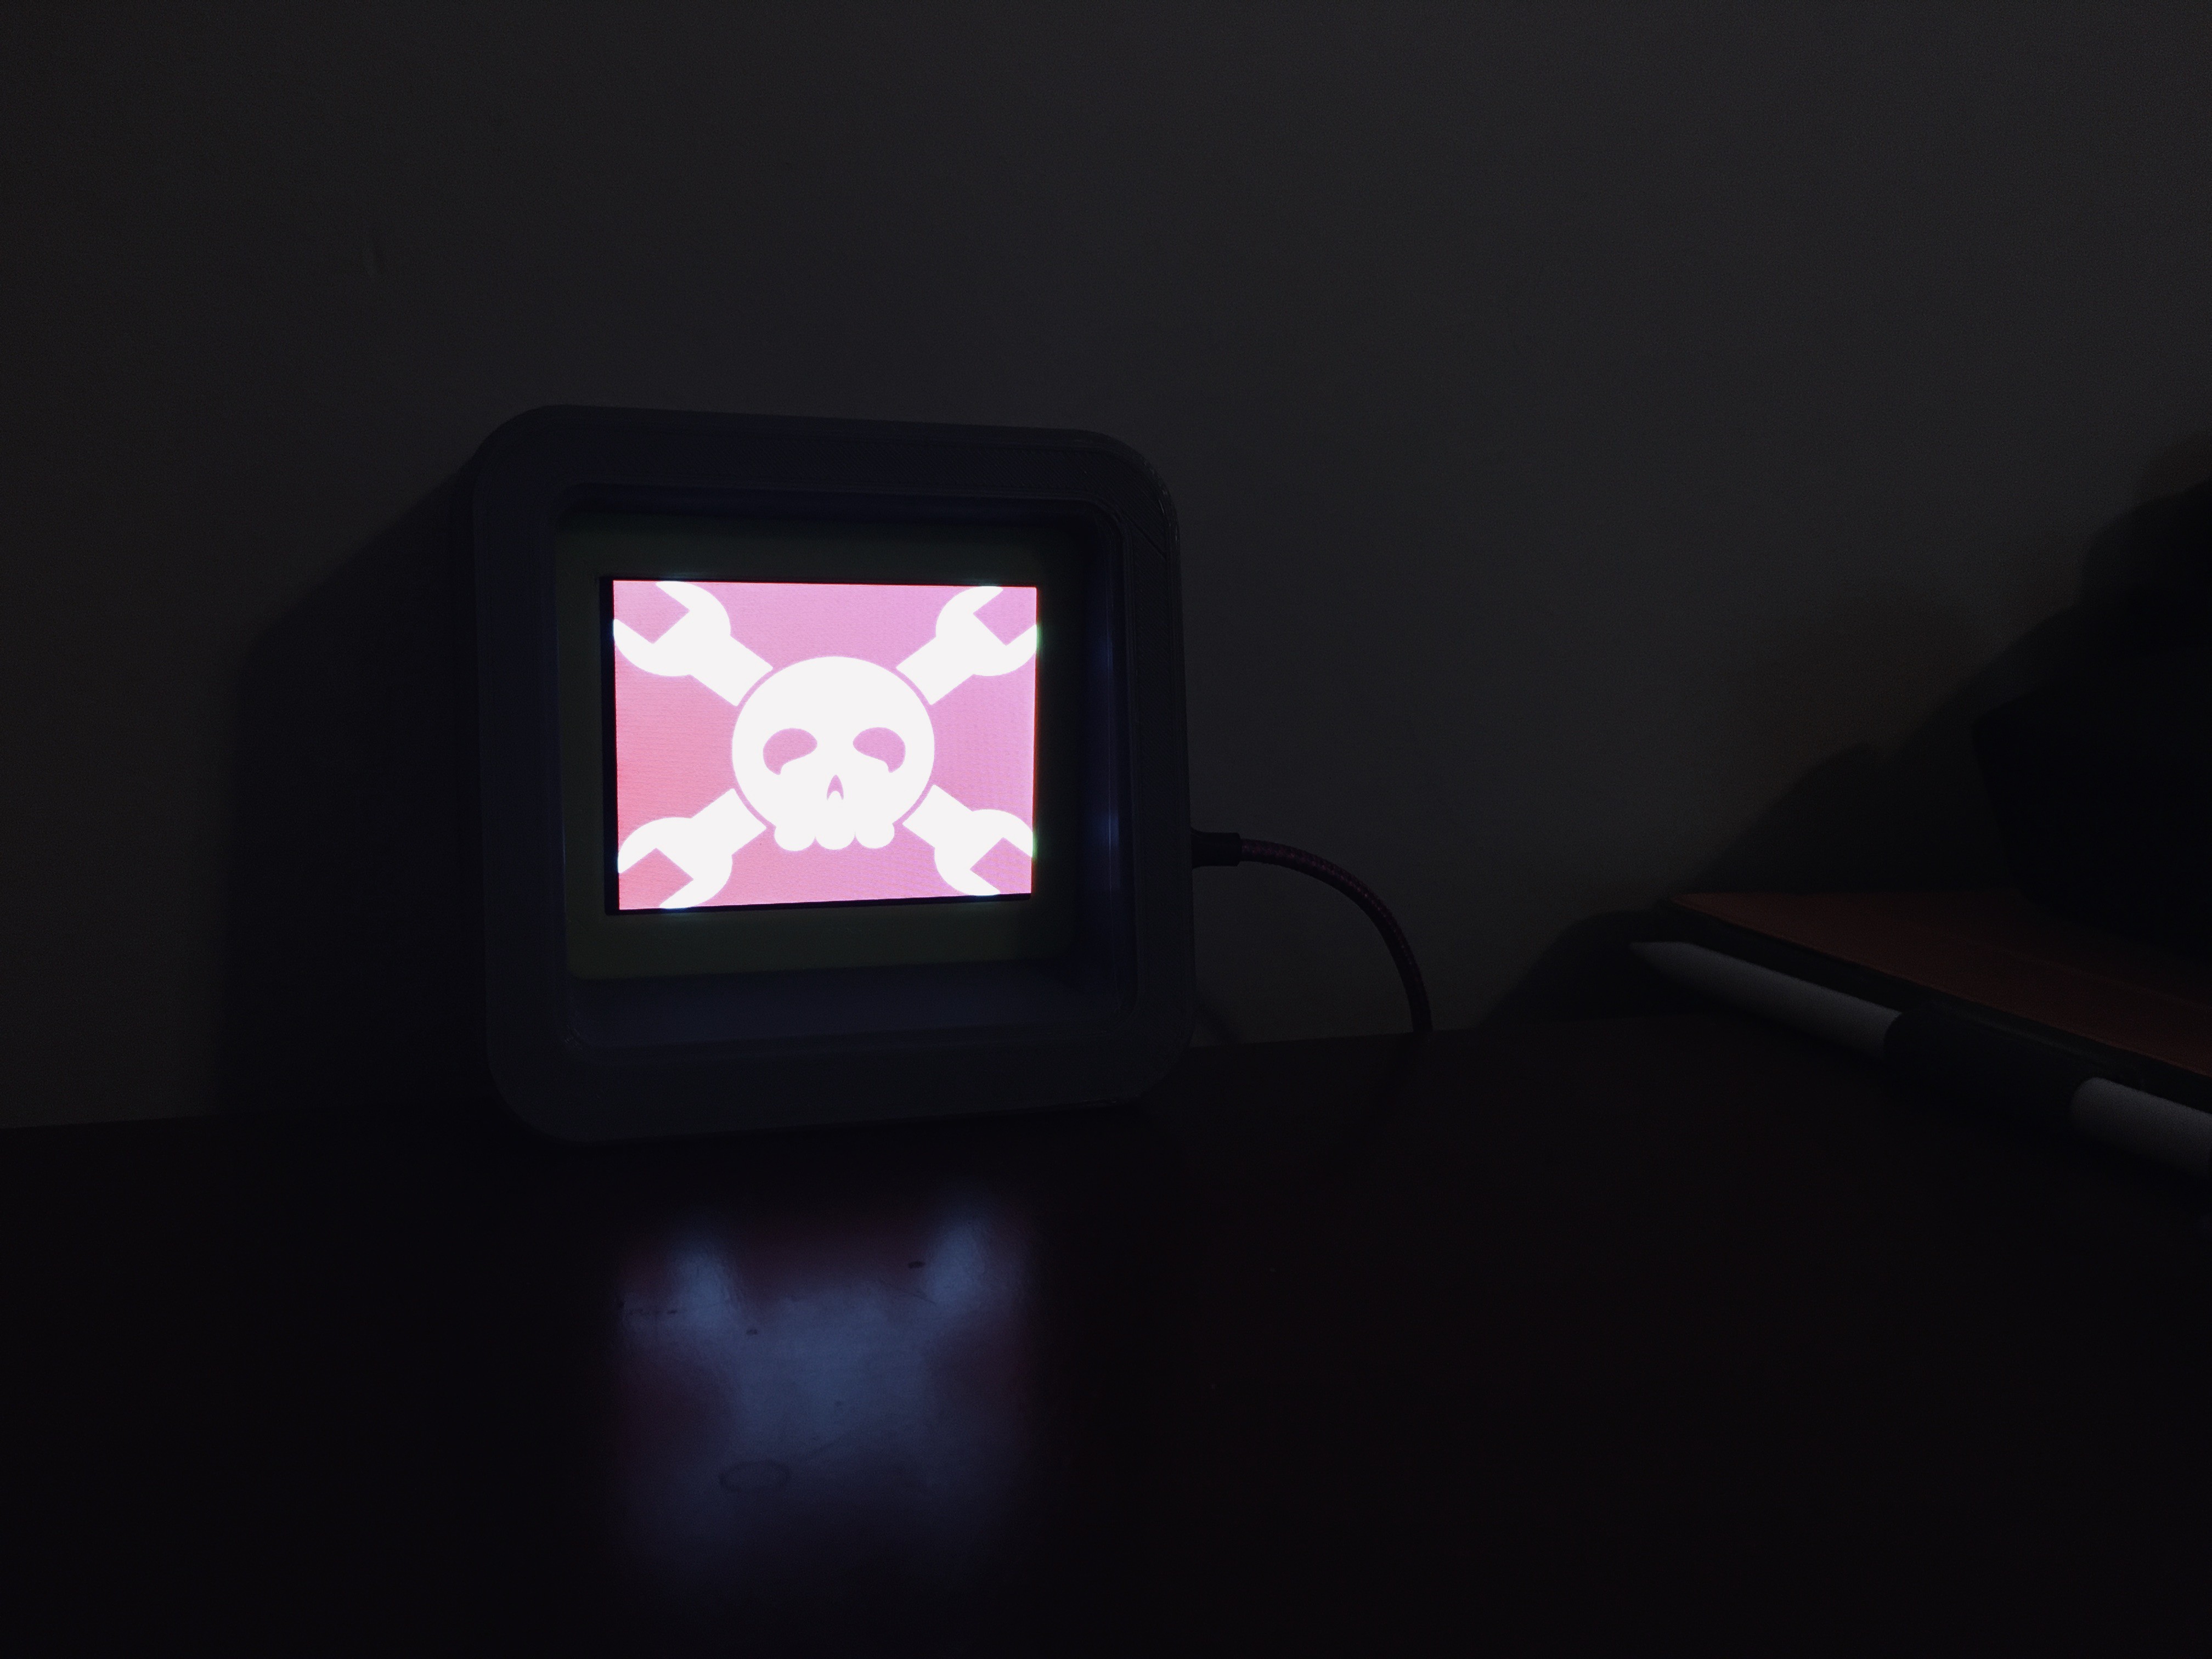
Many of us work in environments where it's useful to let others know that we are head down busy on a project or collaborating with somebody else. To help with this I setup a display that shows the Jolly Wrencher on a green or red background indicating whether I am busy or free.

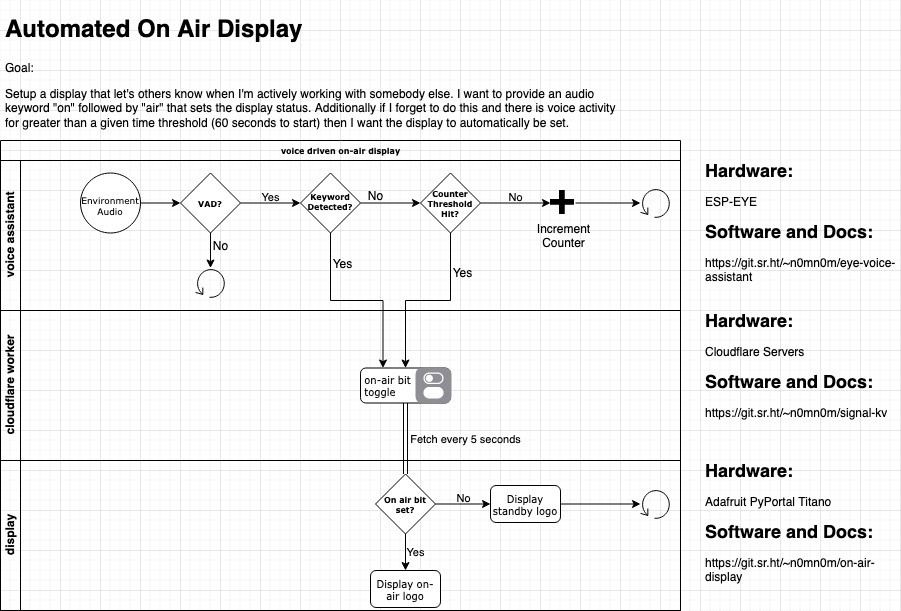
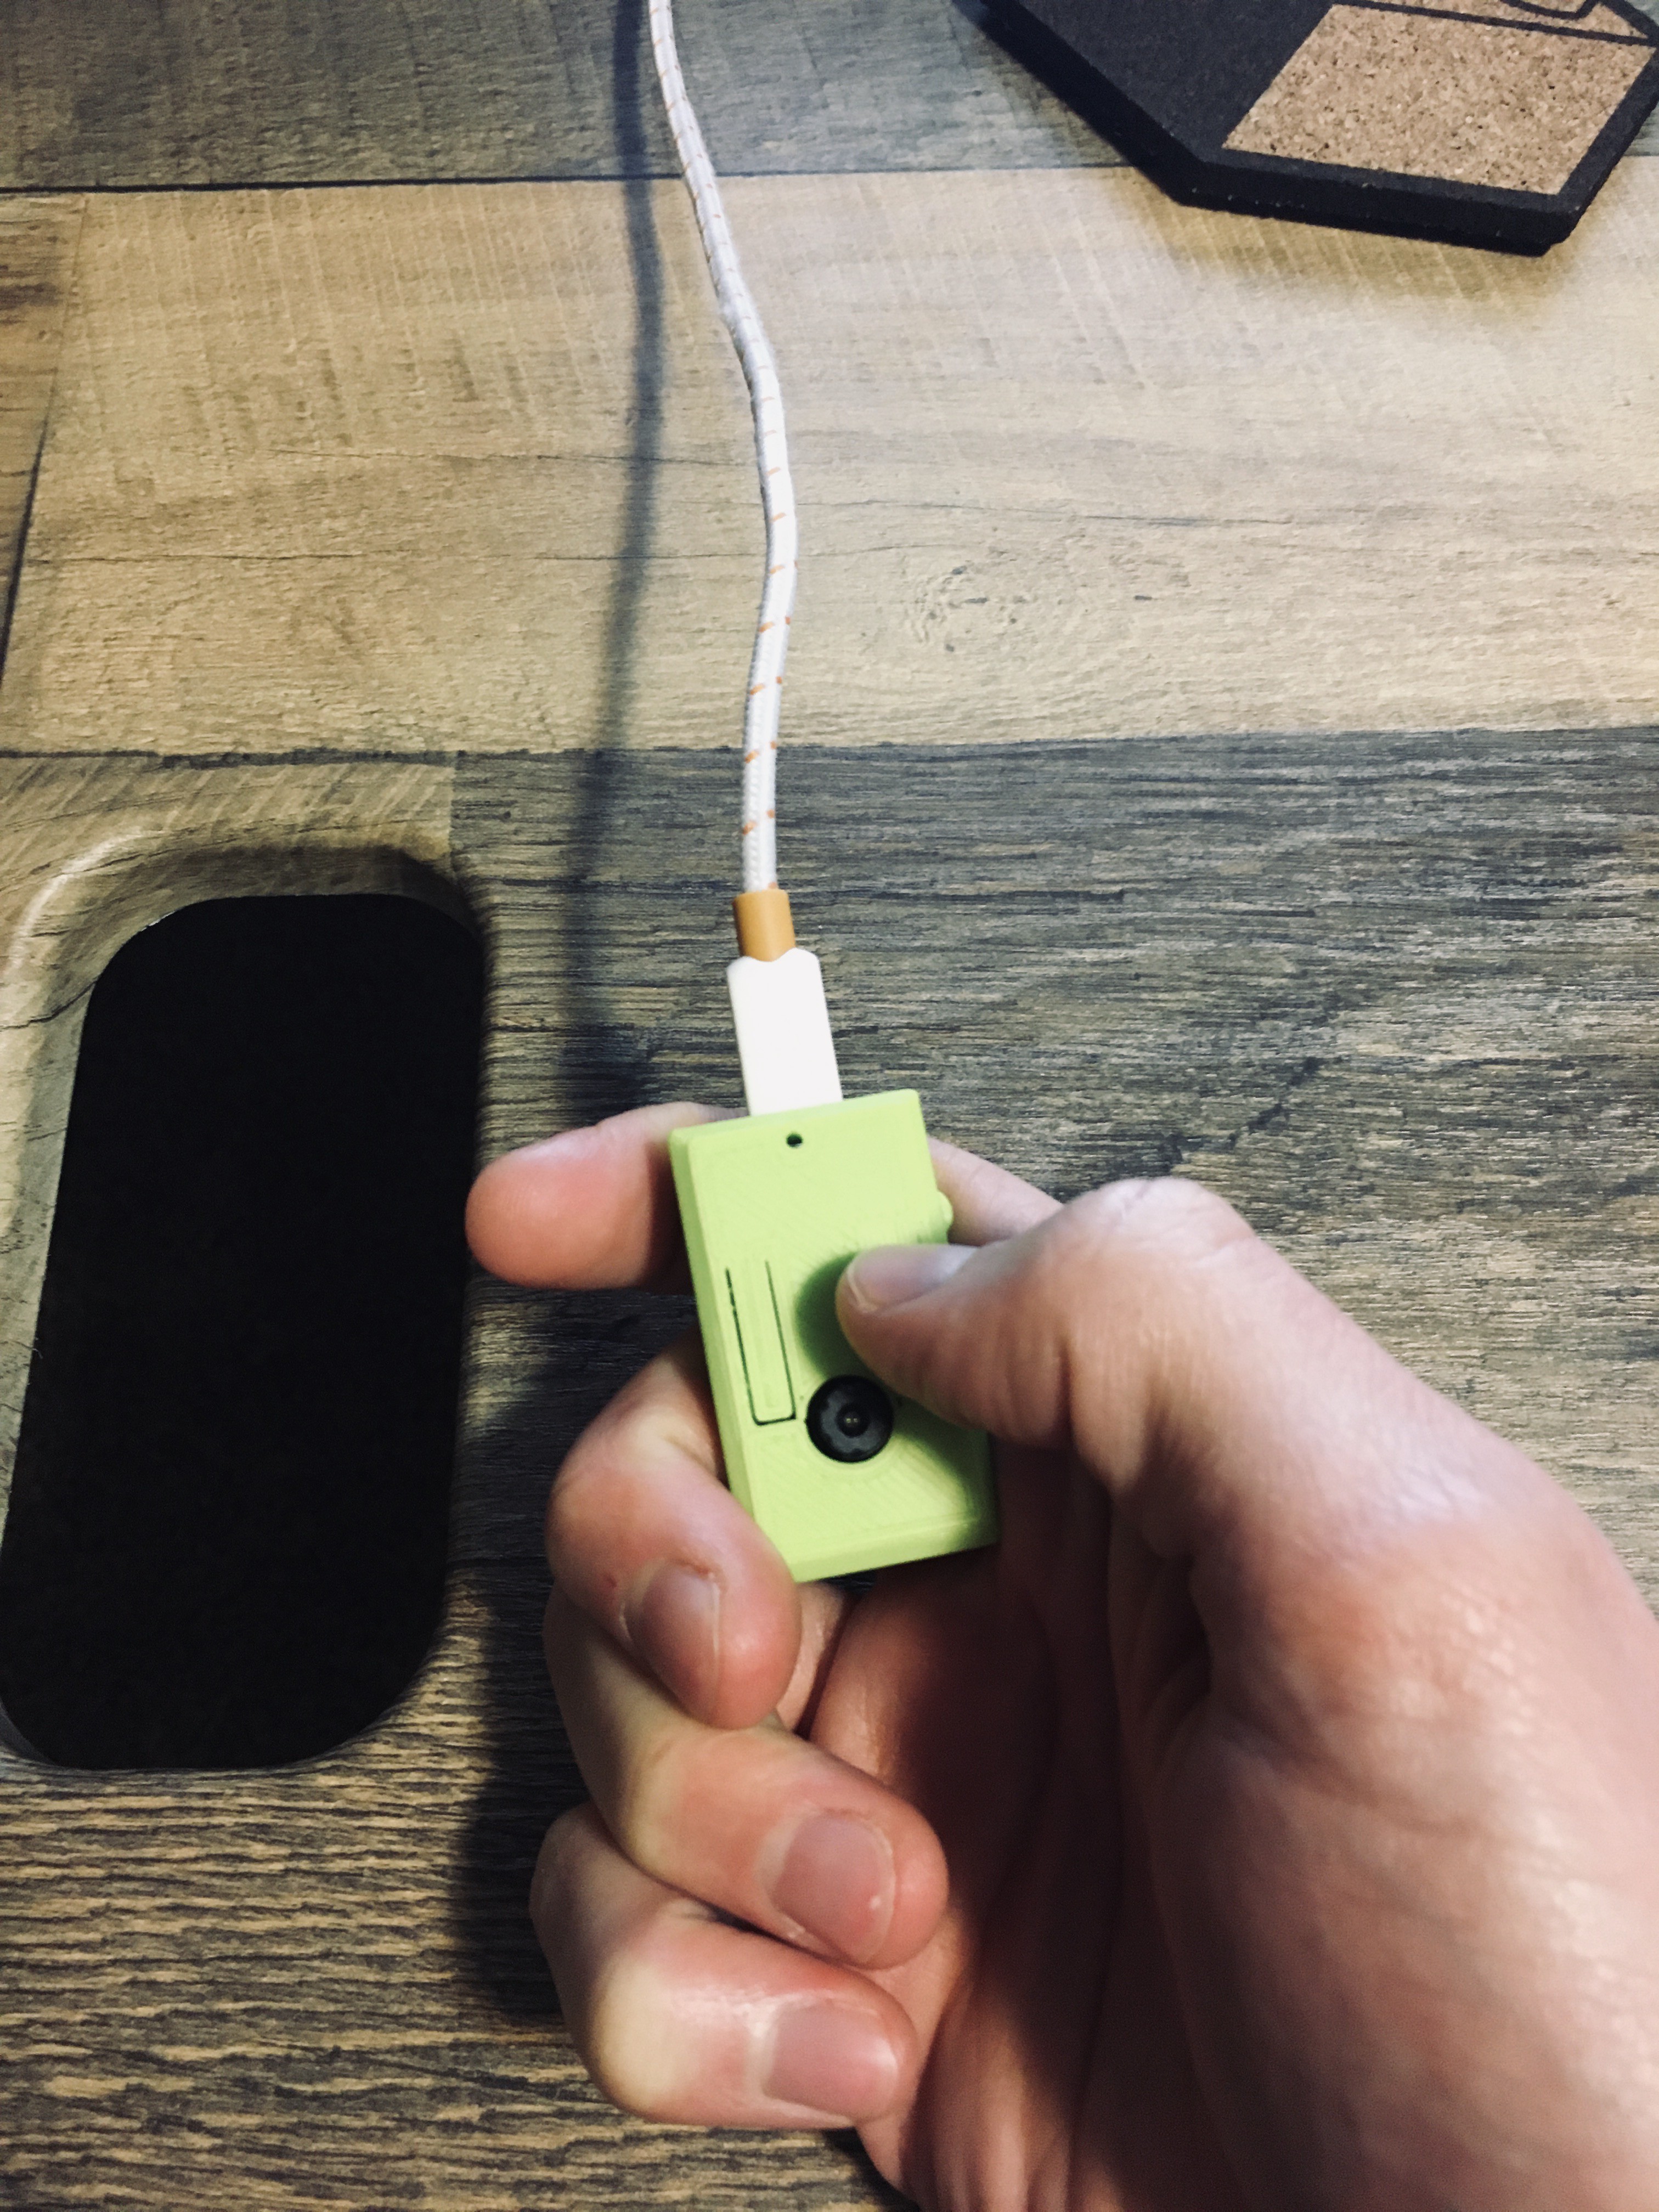
For this project I trained and deployed a Tensorflow Lite model on ESP-EYE that listens for a wake word (visual) followed by a command (on/off) to set that signal bit managed by a Cloudflare Worker that is then read from by the display (PyPortal) setting the appropriate screen.

Blog Series

Repo

Graphics Interchange Format - 4.85 MB - 03/31/2020 at 01:09

Preview
Download

generate.sh

Use espeak and nox to generate synthetic word datasets

x-sh - 918.00 bytes - 03/19/2020 at 00:57

Download

on-air-grid.png

Initial plan (of course it's already changed a bit)

Portable Network Graphics (PNG) - 96.74 kB - 03/06/2020 at 02:08

Preview
Download

display_mounted.jpg

Display new case and hanging

JPEG Image - 1.64 MB - 03/31/2020 at 12:32

Preview
Download

stairwell_display.jpg

Display Stairwell

JPEG Image - 1.87 MB - 03/31/2020 at 12:32

Preview
Download

View all 11 files

  • v0.1 complete

    Alexander Hagerman03/31/2020 at 12:45 1 comment

    My first commit to on-air shows March 3, 2020. My first blog post was at the beginning of February. I know that the weeks leading up to that commit I spent some time reading through the TF Lite documentation, playing with Cloudflare Workers K/V and getting my first setup of esp-idf squared away. After that it was off to the races. I outlined my original goal in the planning post. I didn't quite get to that goal. The project currently doesn't have a VAD to handle the scenario where I forget to activate the display before starting a call or hangout. Additionally I wasn't able to train a custom keyword as highlighted in the custom model post. I was however able to get a functional implementation of the concept. I am able to hang the display up, and then in my lab with the ESP-EYE plugged in I can use the wake word visual followed by on/off to toggle the display status.

  • Getting there

    Alexander Hagerman03/30/2020 at 00:14 0 comments

    After spending some time orchestrating training and data generation to make the process flow as fast as possible I spent this week working on integrating the model, the control flow and the final network call when the right sequence of words is detected. I ran into a few different issues with the network call. Earlier in the project I verified the HTTPS PUT behavior using the examples in the esp-idf project repo. Since then `tcp_adapter_init` has been replaced with netif_adapter_init. Additionally I haven't spent much time using a modern compiler with C++ calling C code. Because of that I spent some time chasing down struct init errors going from the pure C example to calling `esp_wifi` and `esp_netif` from C++ code with the TF Lite template. Outside of working through those errors I spent some time looking at the difference between the models score on words and when the model sets `new_command` to `true`. Outside of one last http bug I think the project is ready for a `0.1` version status. After that I'm going to take stock of what all I've learned, the gaps I identified in my knowledge and figure out what to hack on next.

    Project code continues to be updated and made available in this repo.

    I'll also have new post up on my blog in the next few days detailing a couple other topics wrapping up this learning adventure.

  • End of the week progress update

    Alexander Hagerman03/22/2020 at 22:18 0 comments

    Last week I was able to get some work done on the ESP-EYE and to start generating synthetic voice data. This week I focused in on the voice model itself, and that's been an adventure. Tensorflow has an example micro_speech project that I figured I would be able to use as a starting point. Working through the demo exposed some quirks such as the code relying on TF 1.x modules while the micro libraries are in TF 2.x. Also the first time through the micro_speech demo it didn't pick up audio on the eye. That lead me to consider alternatives where I found the ESP Skainet project. Eventually I made my way back to the ESP WHO application which the EYE comes flashed with. I spent some time with esp-idf and who to get that back to working on the board, partially to confirm the microphone was picking up good since TF didn't get any audio input when I flashed that. Along with that adventure I dug into esp-adf and esp-sr a bit to see if those might be better options. While both are interesting the sr component lacks a training step (which is great for projects, but not one where I'm working to learn more about training :D ) and they add new complexities. They're starred and marked for revisit another day.

    Eventually I came back to Tensorflow, blew away the local repo, did a fresh clone, new python venv and went back through micro_speech. This time the audio was picked up and this gave me a good starting point. I started to work on modifying the code to load my custom model, but started to run into some issues. Instead of digging in I thought it was a good time to back track through the week. I have made a lot of notes that will turn into future post. I've created some shell alias commands to assist in my esp workflow, and I turned a lot of separate data generation, transformation and training steps into a series of shell scripts.

    I also decided to train a new model taking "hi" as my synthetic word, and "on" from the Tensorflow prelabeled keywords. This gives me the same dimensions as the micro_speech demo so I can easily load this model onto the eye and see what kind of performance I get with the synthetic word recognition. If that goes well then the next step will be training the model with both synthetic words then working back through the TF Micro docs to setup loading of the model on the EYE at which point the last thing to do will be wiring the HTTP POST (found in /sig) on the right series of words. If the synthetic words don't perform well then I'll debate recording words modifying this project to run locally, or using the commands available to train a new model and change the word detection.

    The code updates for training, the esp-eye projects and portal updates are available here.

  • Creating words

    Alexander Hagerman03/19/2020 at 01:00 0 comments

    After getting the display and worker up and running I started down the path of training my model for keyword recognition. Right now I've settled on the wake words `Hi Smalltalk`. After the wake word is detected the model will then detect `silence`, `on`, `off`, or `unknown`.

    My starting point for training the model was the [`micro_speech`](https://github.com/tensorflow/tensorflow/tree/master/tensorflow/lite/micro/examples/micro_speech) and [`speech_commands`](https://github.com/tensorflow/docs/blob/master/site/en/r1/tutorials/sequences/audio_recognition.md) tutorials that are part of the Tensorflow project. One of the first things I noticed while planning out this step was the lack of good wake words in the speech command dataset. There are [many](https://github.com/jim-schwoebel/voice_datasets) voice datasets available online, but many are unlabeled or conversational. Since digging didn't turn up much in the way of open labeled word datasets I decided to use `on` and `off` from the speech commands [dataset](https://ai.googleblog.com/2017/08/launching-speech-commands-dataset.html) since that gave me a baseline for comparison with my custom words. After recording myself saying `hi` and `smalltalk` less then ten times I knew I did not want to generate my own samples at the scale of the other labeled keywords.

    Instead of giving up on my wake word combination I started digging around for options and found an interesting [project](https://github.com/JohannesBuchner/spoken-command-recognition) where somebody had started down the path of generating labeled words with text to speech. After reading through the repo I ended up using [espeak](http://espeak.sourceforge.net/) and [sox](http://sox.sourceforge.net/) to generate my labeled dataset.
    The first step was to generate the [phonemes](https://en.wikipedia.org/wiki/Phoneme) for the wake words:

    $ espeak -v en -X smalltalk
     sm'O:ltO:k


    I then stored the phoneme in a word file that will be used by `generate.sh`.

    $ cat words
    hi 001 [[h'aI]]
    busy 002 [[b'Izi]]
    free 003 [[fr'i:]]
    smalltalk 004 [[sm'O:ltO:k]]

    After modifying `generate.sh` from the spoken command repo (eliminating some extra commands and extending the loop to generating more samples) I had everything I needed to synthetically generate a new labeled word dataset.

    #!/bin/bash
    # For the various loops the variable stored in the index variable
    # is used to attenuate the voices being created from espeak.
    
    lastwordid=""
    
    cat words | while read word wordid phoneme
    
    do
        echo $word
        mkdir -p db/$word
    
        if [[ $word != $lastword ]]; then
            versionid=0
        fi
    
        lastword=$word
    
        # Generate voices with various dialects
        for i in english english-north en-scottish english_rp english_wmids english-us en-westindies
        do         # Loop changing the pitch in each iteration
            for k in $(seq 1 99)
            do
                # Change the speed of words per minute
                for j in 80 100 120 140 160; do                 
                    echo $versionid "$phoneme" $i $j $k
                    echo "$phoneme" | espeak -p $k -s $j -v $i -w db/$word/$versionid.wav
                    # Set sox options for Tensorflow
                    sox db/$word/$versionid.wav -b 16 --endian little db/$word/tf_$versionid.wav rate 16k
                    ((versionid++))
                done
            done
        done
    done

    After the run I have samples and labels with a volume comparable to the other words provided by Google. The pitch, speed and tone of voice changes with each loop which will hopefully provide enough variety to make this dataset useful in training. Even if this doesn't work out learning about `espeak` and `sox` was interesting. I've already got some future ideas on how to use those. If it does work the ability to generate training data on demand seems incredibly useful.

    Next up, training the model and loading to the ESP-EYE. The code, docs, images etc for the project can be found [here](https://git.sr.ht/~n0mn0m/on-air) and I'll be posting updates as I continue along to [HackadayIO](https://hackaday.io/project/170228-on-air) and this blog. If you have any questions or ideas reach [out](mailto:alexander@unexpextedeof.net...

    Read more »

  • Weekend update

    Alexander Hagerman03/09/2020 at 20:16 0 comments

    Over the weekend I had some time to work with the ESP-EYE and start talking with my signal endpoint. For now it's not "smart" but I have a button that will let me set the signal status manually, and the PyPortal updates accordingly. This at least proves out the MVP of the data flow between systems, and got me more comfortable with the ESP-IDF tools and libraries.

    One bump I ran into was a `RunTimeError` from the ESP32 on the PyPortal. For now I'm using the circuitpython supervisor module to reload when this happens. Since it's a read only operation the only idiosyncrasy is that the screen loads green for the default background, then switches on the status fetch if the endpoint indicates busy. I may remove loading a default background to prevent this, and longer term look into what's happening with the ESP32 on the PyPortal.

    Next up is training my own custom speech model and running the keyword detection model on the ESP-EYE.

    Source available.

  • The fun begins

    Alexander Hagerman03/06/2020 at 02:17 0 comments

    So far on my blog I have documented the initial work for my Train all the Things project. With the initial research and setup done I'm off into the unknown. I got my ESP-EYE last week and I've been able to setup the esp-idf tool chain. So far I'm liking it. I don't feel locked in to certain editors and tools like I have with other boards. I was able to get it to work as a station and doing some basic http calls. This weekend/next week I plan to have it sending status signals to my endpoint and figure out any TLS road bumps that may be hiding. After that I should be able to solely focus on Tensorflow. I've done a little bit of early model training and testing. So far things are promising, and it helps that this is just for me, so if it over trains to my voice that's not a problem like it would be in many real world applications (although I will try to avoid that). I am curious if I'll have the HTTP POST being sent inside of my model code in the FreeRTOS task, or if I'll be able to setup a different TaskHandler in FreeRTOS and message pass. That seems to be one of the bigger unknowns to me so far, and while FreeRTOS is really interesting it's a whole new thing, with a lot to learn.

    So far so good, stay tuned and feel free to reach out.

View all 6 project logs

  • 1
    DIY

    Required Hardware:

    1. ESP-EYE

            a. Optional ESP-EYE case

    2. PyPortal

            a. Optional PyPortal case

    3. Two 3.3v usb to outler adapters and two usb to usb mini cables

    OR

    4. Two 3.3v micro usb wall outlet chargers

    Build Steps:

    1. Clone the on-air repo.

    Cloudflare Worker:

    1. Setup Cloudflare DNS records for your domain and endpoint, or setup a new domain with Cloudflare if you don’t have one to resolve the endpoint.

    2. Setup a Cloudflare workers account with worker K/V.

    3. Setup the Wrangler CLI tool.

    4. `cd` into the `on-air/sighandler` directory.

    5. Update `wrangler.toml`

    6. Run `wrangler preview`

    7. `wrangler publish`

    8. Update `Makefile` with your domain and test calling.

    PyPortal:

    1. Setup CircuitPython 5.x on the PyPortal.
      1. If you’re new to CircuitPython you should read this first.
    2. Go to the directory where you cloned on-air.

    3. `cd` into display.

    4. Update `secrets.py` with your wifi information and status URL endpoint.

      1. You may also want to adjust the timeframe when the display is asleep (9PM - 6AM EST/ -5 UTC)

    5. Copy `code.py`, `secrets.py` and the bitmap files in `screens/` to the root of the PyPortal.

    6. The display is now good to go.

    ESP-EYE:

    1. Setup `esp-idf` using the 4.1 release branch.
    2. Install espeak and sox.
    3. Setup a Python 3.7 virtual environment and install Tensorflow 1.15.
    4. `cd` into `on-air/voice-assistant/train`
    5. `chmod +x orchestrate.sh` and `./orchestrate.sh`
    6. Once training completes `cd ../smalltalk`
    7. Activate the `esp-idf` tooling so that `$IDF_PATH` is set correctly and all requirements are met.
    8. `idf.py menuconfig` and set your wifi settings.
    9. Update the URL in `toggle_status.cc`
      1. This should match the host and endpoint you deployed the Cloudflare worker to above
    10. `idf.py build`
    11. `idf.py --port <device port> flash monitor`
    12. You should see the device start, attach to WiFi and begin listening for the wake word “visual” followed by “on” or “off”.

View all instructions

Enjoy this project?

Share

Discussions

Similar Projects

Does this project spark your interest?

Become a member to follow this project and never miss any updates