zst123
-
AWS DynamoDB interfaced with IoT Core
06/27/2020 at 13:17 • 0 commentsBefore we start, I did some research on Amazon FreeRTOS and how Amazon IoT/MQTT works
- https://www.embedded.com/a-peek-inside-amazon-freertos-publishing-messages-to-the-cloud/
- https://www.hivemq.com/blog/mqtt-essentials-part-1-introducing-mqtt/
- https://s3.amazonaws.com/awsdfwmeetup/AWS+IoT+Meetup_final.pdf
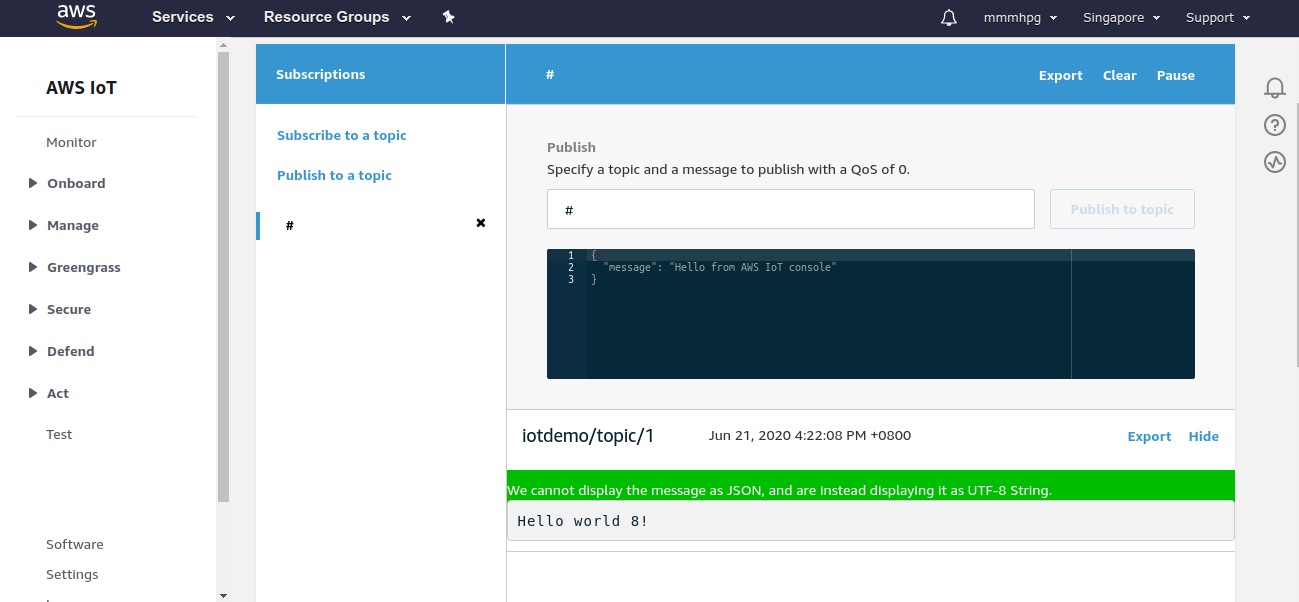
I previously confirmed that MQTT messages are sent successfully with the demo code. From the AWS website, we can monitor it too:
![]()
Since my application is to do inventory tracking, I will need to use my IoT device to update a database.In AWS, I see that I can do this from IoT core -> Lambda -> DynamoDB. I followed this guide.
Connect IoT core to Lambda using IoT Rules.
- https://docs.aws.amazon.com/iot/latest/developerguide/iot-lambda-rule.html
- https://docs.aws.amazon.com/iot/latest/developerguide/iot-rule-actions.html#lambda-rule
- https://docs.aws.amazon.com/lambda/latest/dg/services-iot.html
Go to Act > Rule > Create a rule.
I used this query string SELECT * FROM '#'
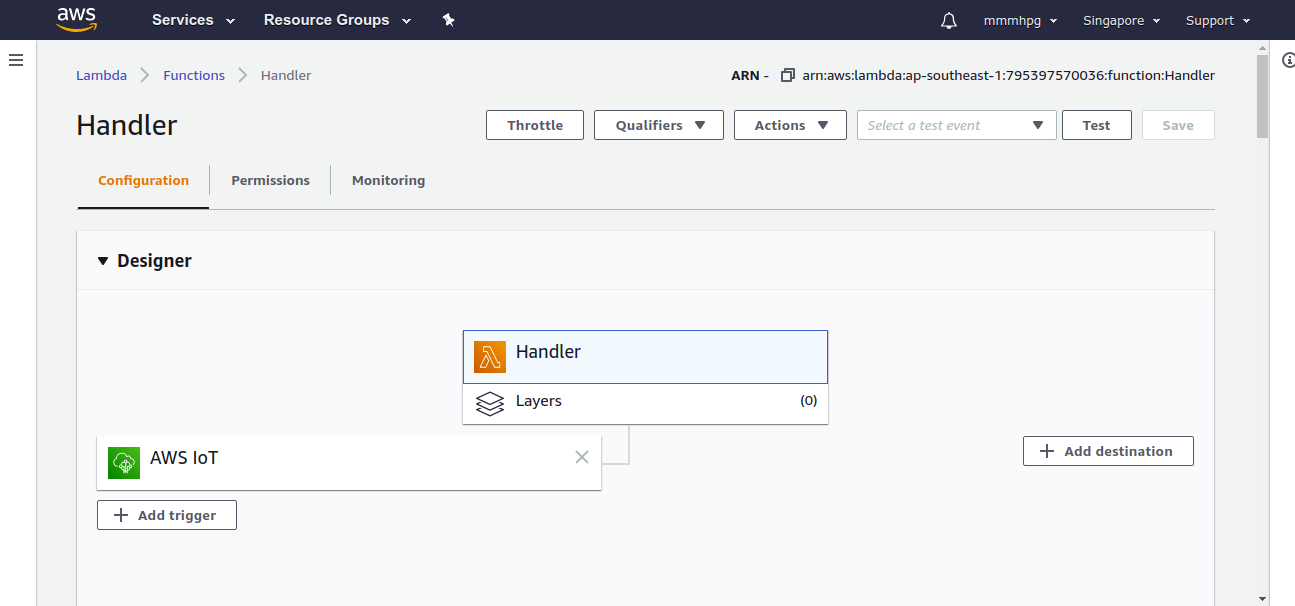
Go to Add Action > Send a message to a Lambda function > Create a new Lambda function > Select your function > Create rule.
![]()
In order for AWS IoT to call a Lambda function, you must configure a policy granting the lambda:InvokeFunction permission to AWS IoT.
- aws lambda add-permission --function-name my-function --statement-id iot-events --action "lambda:InvokeFunction" --principal iotevents.amazonaws.com
But when I run this command I get an error
- An error occurred (AccessDeniedException) when calling the AddPermission operation: User: cypress-psoc is not authorized to perform: lambda:AddPermission on resource:
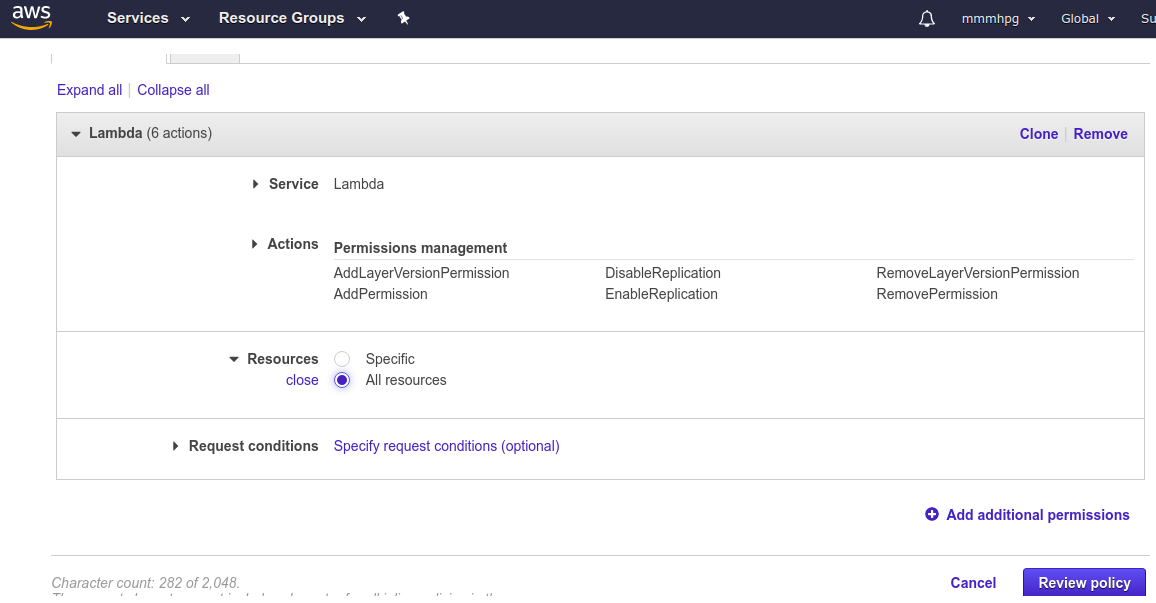
To solve this, find your user in the IAM management console > Permissions > Add inline policies. Use these settings:
- Service: Lambda
- Actions: Permission management
- Resource: all resources
Now when I run the command again, it works.
![]()
From lambda, when I used the “Test” button in Lambda, I got another “AccessDeniedException”.
From lambda to dynamodb, we also need to add permissions. I solved this by adding “AmazonDynamoDBFullAccess” permission.
- Attach the IAM policy to an IAM role
- https://aws.amazon.com/blogs/security/how-to-create-an-aws-iam-policy-to-grant-aws-lambda-access-to-an-amazon-dynamodb-table/
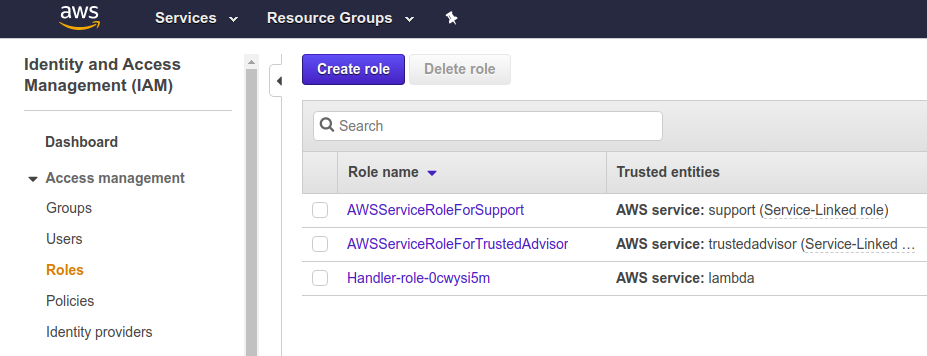
Go to your IAM console > Access management > Roles
Find the role for your lambda. When I created mine, I left it as the the default name so it is Handler-role-0cwysi5m.
![]()
Go to Permissions > Attach policies, and find “AmazonDynamoDBFullAccess”.
After this, I can successfully write to DynamoDB
-
Application Code, TFT display, CapSense
06/21/2020 at 03:35 • 0 comments(1) Finding out how Cypress FreeRTOS Demo Code runs
I wanted to modify as little of the original files as possible. So I put my code around the demo code. This is how the code runs from the main.c until it reaches the demo code.
In main.c (aws_demos/application_code/main.c)
- Startup task is vApplicationDaemonTaskStartupHook()
- It calls DEMO_RUNNER_RunDemos().
In iot_demo_runner.c,
- DEMO_RUNNER_RunDemos() will call DEMO_entryFUNCTION().
In iot_demo_runner.h
- DEMO_entryFUNCTION is defined as RunMqttDemo if CONFIG_MQTT_DEMO_ENABLED is defined.
In aws_demo_config.h,
- CONFIG_MQTT_DEMO_ENABLED is defined here.
(2) Modify to run my own code
I created my own app.c and app.h files with the startup function called RunMyApplication().
In aws_demo_config.h,
- I removed #define CONFIG_MQTT_DEMO_ENABLED
- And I added #define CONFIG_MY_APPLICATION
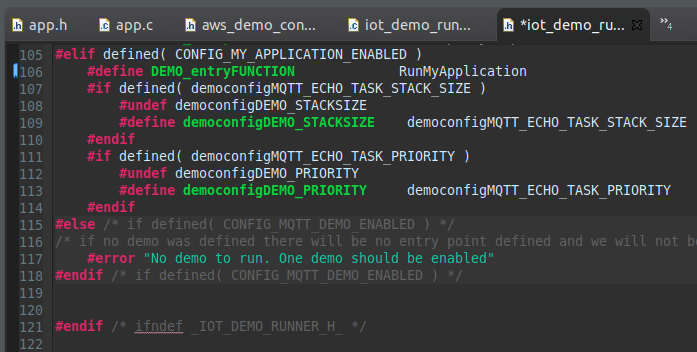
In iot_demo_runner.h,
- I pointed to my own function RunMyApplication() by creating a new definition as follows...
![]()
(3) How to add TFT display library
I used reference from this blog post:
Right click on the project inside Project Explorer > ModusToolbox > Library Manager
Turn on these Libraries
- Board Utils > CY8CKIT-028-TFT
- PSoC 6 Middleware > emwin
In the Makefile, add this to COMPONENTS. To indicate we are using an OS and it is Non-TouchScreen.
- COMPONENTS=EMWIN_OSNTS
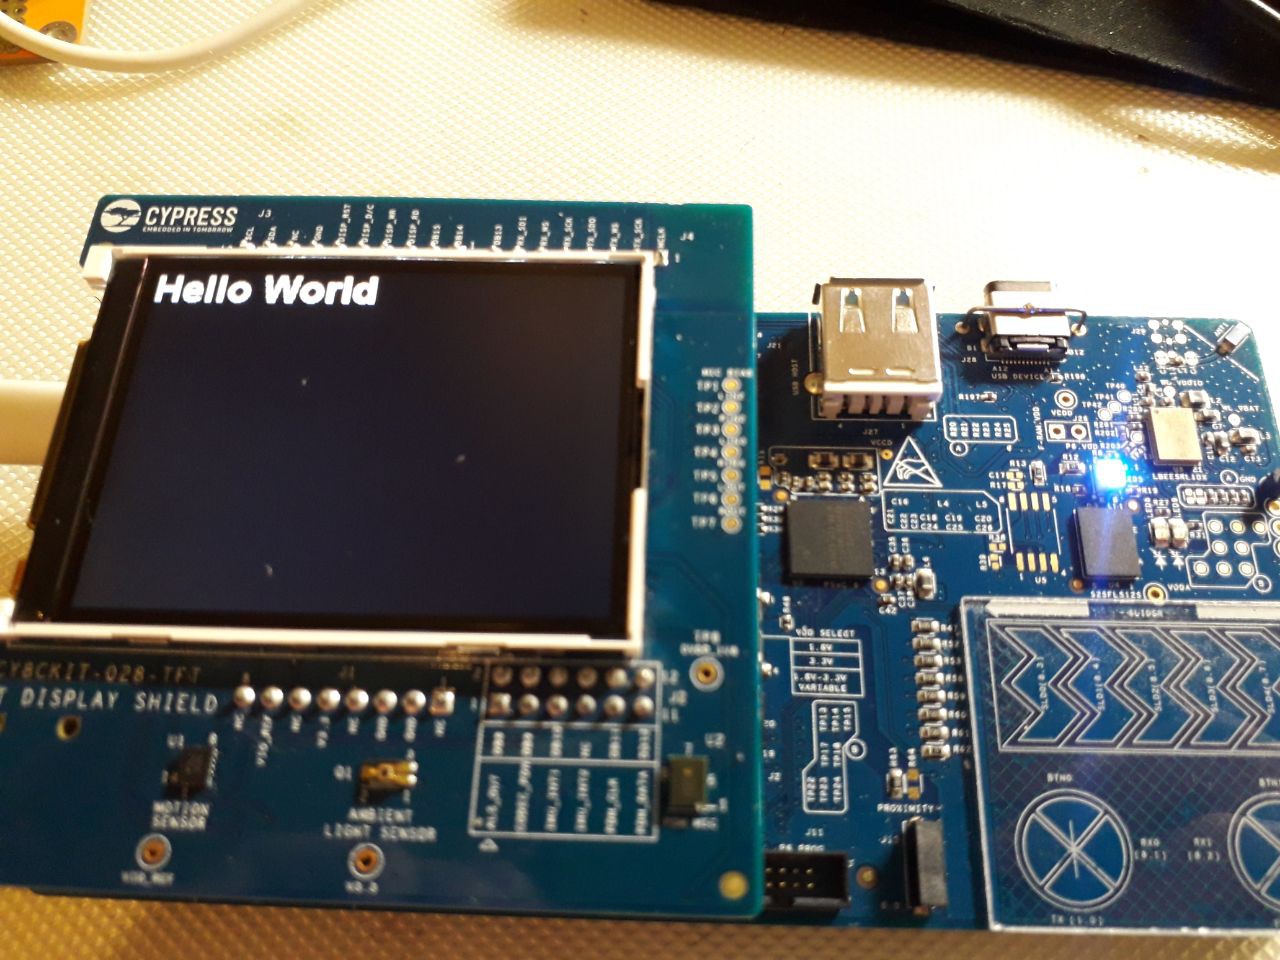
In my RunMyApplication() function, I added these lines. To test the LED and the TFT display.
cyhal_gpio_init(CYBSP_USER_LED5, CYHAL_GPIO_DIR_OUTPUT, CYHAL_GPIO_DRIVE_STRONG, CYBSP_LED_STATE_ON);
GUI_Init();
GUI_SetFont(GUI_FONT_32B_1);
GUI_DispString("Hello World");
And now it looks like this
![]()
(4) How to add CapSense library
Do not add CapSense library. Leave capsense unchecked in the Library Manager. Because Cypress FreeRTOS already includes the CapSense library.
I created a new RTOS task and then initialised the CapSense using code from these examples.
- https://github.com/cypresssemiconductorco/mtb-example-psoc6-capsense-buttons-slider
- https://www.cypress.com/documentation/code-examples/ce218136-psoc-6-mcu-e-ink-display-capsense-rtos
One problem I faced is I cannot get the slider gesture to work (flick left / flick right). But I can get the slider position (value of 0 to 300) working perfectly.
This is a video of my progress for today. It shows the testing of CapSense, TFT display and WiFi working.
-
Testing Amazon FreeRTOS
06/20/2020 at 12:53 • 0 commentsAfter doing some research, I think the best experience will be to use Cypress’ Amazon FreeRTOS. I tried looking into mbed OS but the documentation for this board is not clear and it seems it doesn’t have an easy way to import into ModusToolbox.
As a start, I read the Cypress Official Start Guide Getting Started with Amazon FreeRTOS and PSoC62 + 43xxx.
(1) AWS IAM Account
Firstly, I created an AWS account and then logged in as root.
After this, we need to create an IAM user account which is used to assign permissions for our IoT device to access later.
I followed this blog post where he shows step by step photos on how to setup
After that, followed this guide to add FreeRTOS permissions.
From the guide above, make sure you download all the account files. We will use them in the next part. I ended up with these files:
- cypress-psoc_accessKeys.csv
- cypress-psoc_certificate.pem
- cypress-psoc_codecommit_credentials.csv
- cypress-psoc_privatekey.pem
(2) AWS IoT Core
To configure later, need to install AWC CLI tool. Follow this guide.
mkdir aws_cli
cd aws_cli
curl "https://awscli.amazonaws.com/awscli-exe-linux-x86_64.zip" -o "awscliv2.zip"
unzip awscliv2.zip
sudo ./aws/install
Then we need to configure AWS
Now, from the account files, use cypress-psoc_accessKeys.csv here.
$ aws configure
AWS Access Key ID [None]:     <<Use cypress-psoc_accessKeys.csv>>
AWS Secret Access Key [None]: <<Use cypress-psoc_accessKeys.csv>>
Default region name [None]: ap-southeast-1 <<Choose the server closest to me>>
Default output format [None]:  <<I left this blank>>
And after configuring check the endpoint.
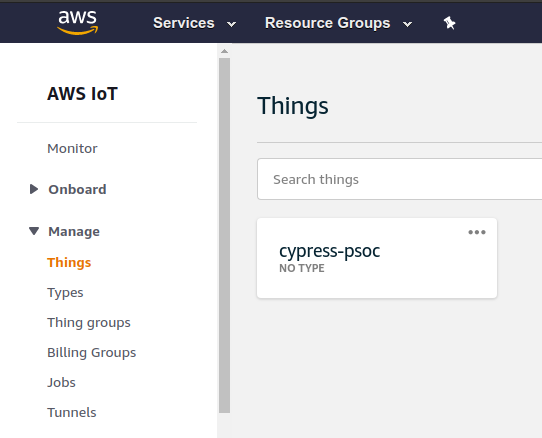
$ aws iot describe-endpoint
{
    "endpointAddress": "a2cgpzvh8vmm38.iot.ap-southeast-1.amazonaws.com"
}
Next, we need to register the board
After done, we can finally see the board in the console (Manage > Things)
![]()
(3) Cypress AWS FreeRTOS
Clone the Cypress AWS FreeRTOS repo into your workspace
- git clone --recurse-submodules https://github.com/cypresssemiconductorco/amazon-freertos.git --branch 201910-MTBAFR1951
In ModusToolbox IDE.
- Import the demo projects: File > Import > General > Existing Projects into Workspace
- Choose the demo for your board: ~/ModusToolbox/workspace_rtos/amazon-freertos/projects/cypress/CY8CKIT_062_WIFI_BT/mtb/aws_demos
- Build and check no errors: Project > Build All
Configure MQTT and your WiFi settings:
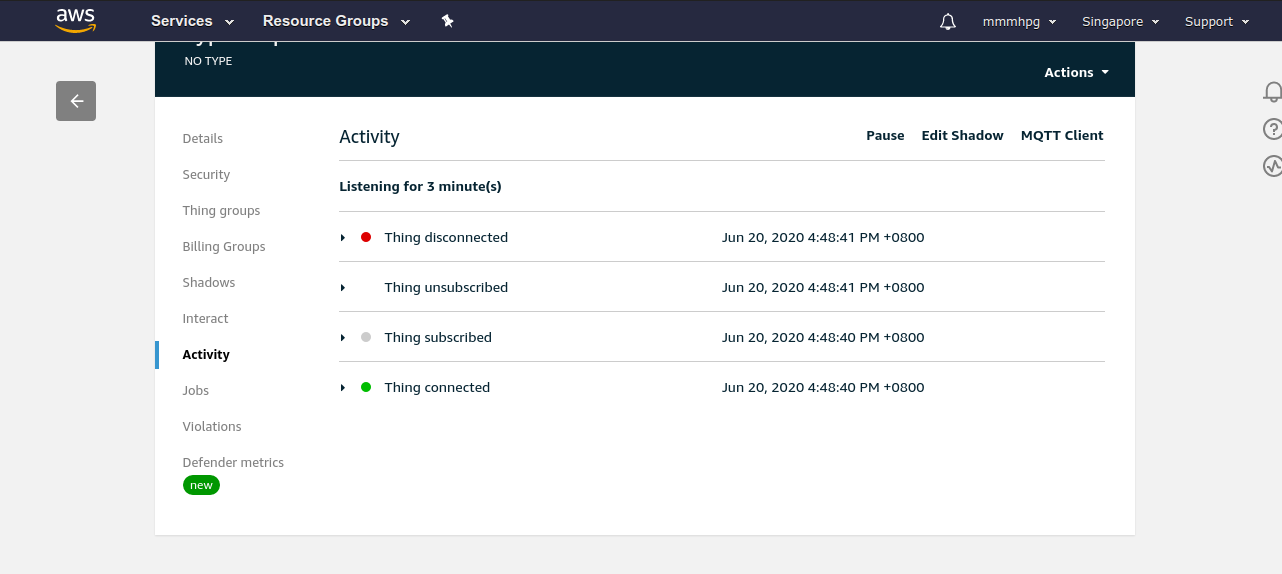
Program the board and the connection should be shown on the activity page.
![]()
I faced a problem where a lot of sematic problems appear but it compiles successfully.
We actually need to disable some settings in Code Analysis (according to ModusToolbox user guide):
Note
While debugging, you may see various errors in your code (main.cpp file), such as "function ‘printf’ could not be resolved." These are likely not real errors. They are caused by the import of the make file into Eclipse.

To turn these errors off, go to Project > Properties > C/C++ > Code Analysis, and disable "Potential Programming Problems" and "Syntax and Semantic Errors.
In my next post, I will modify the demo program to do my own application.
-
Hello, PSoC 6 WiFi-BT Pioneer Kit
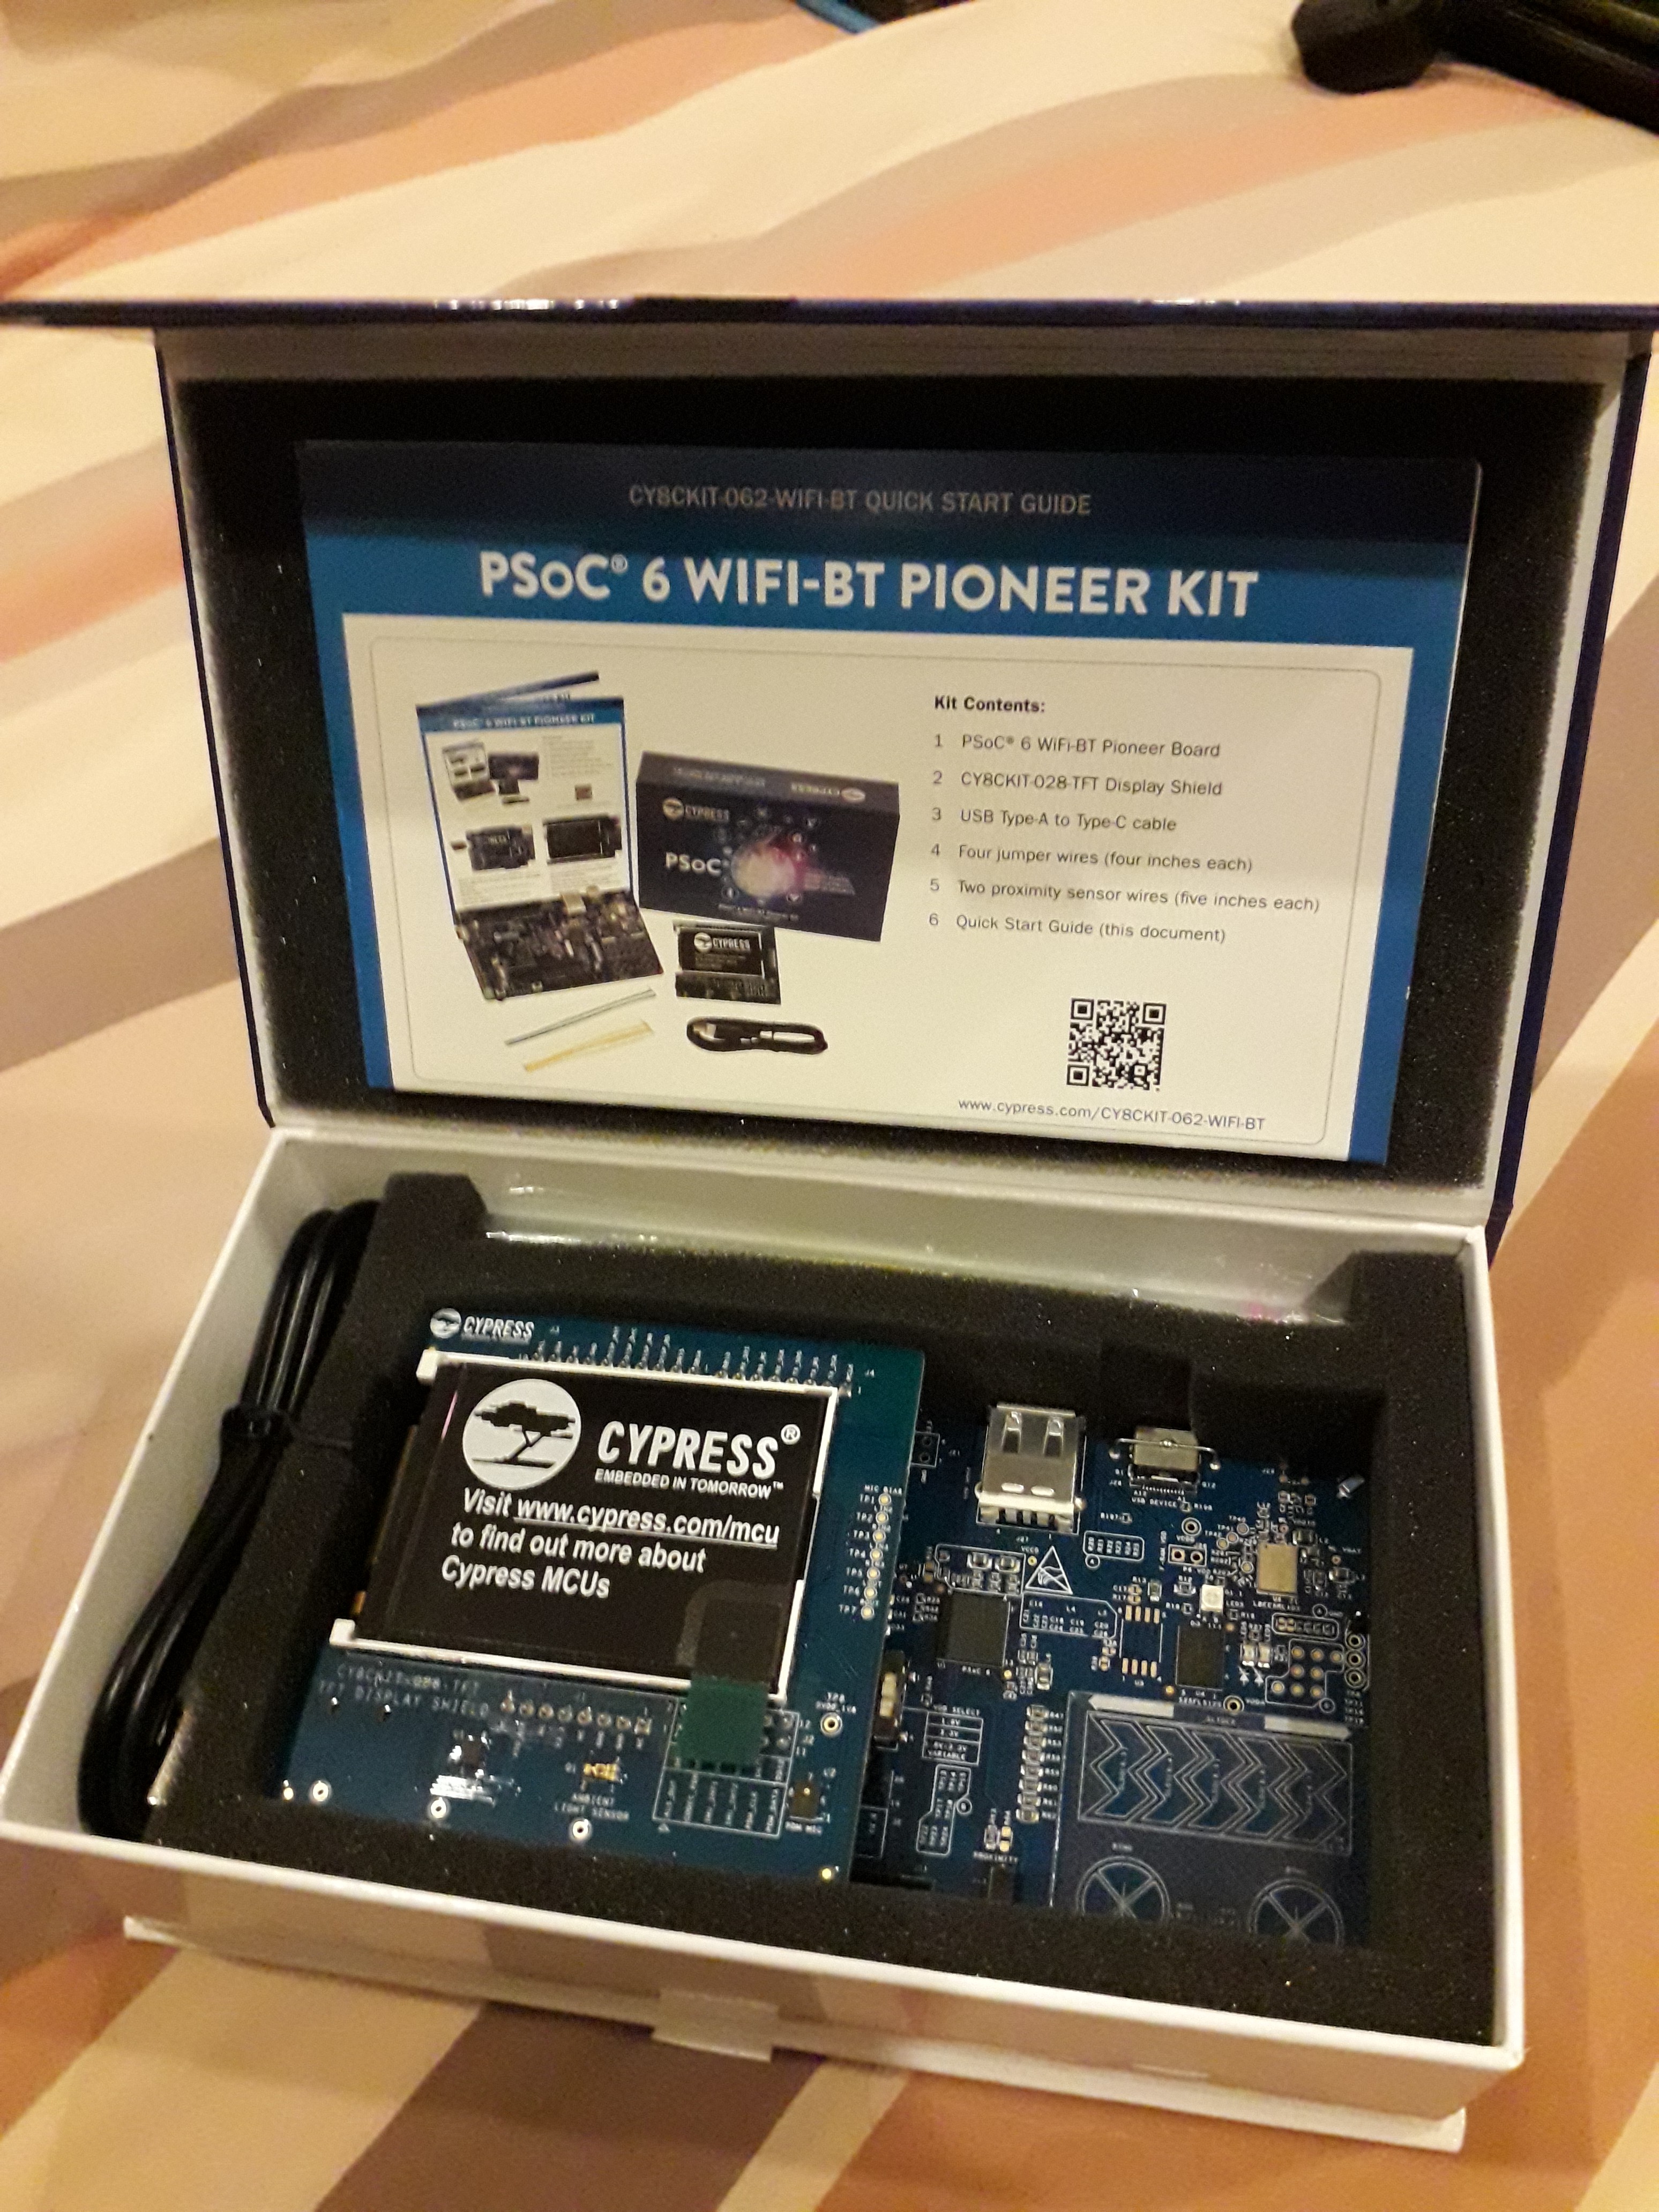
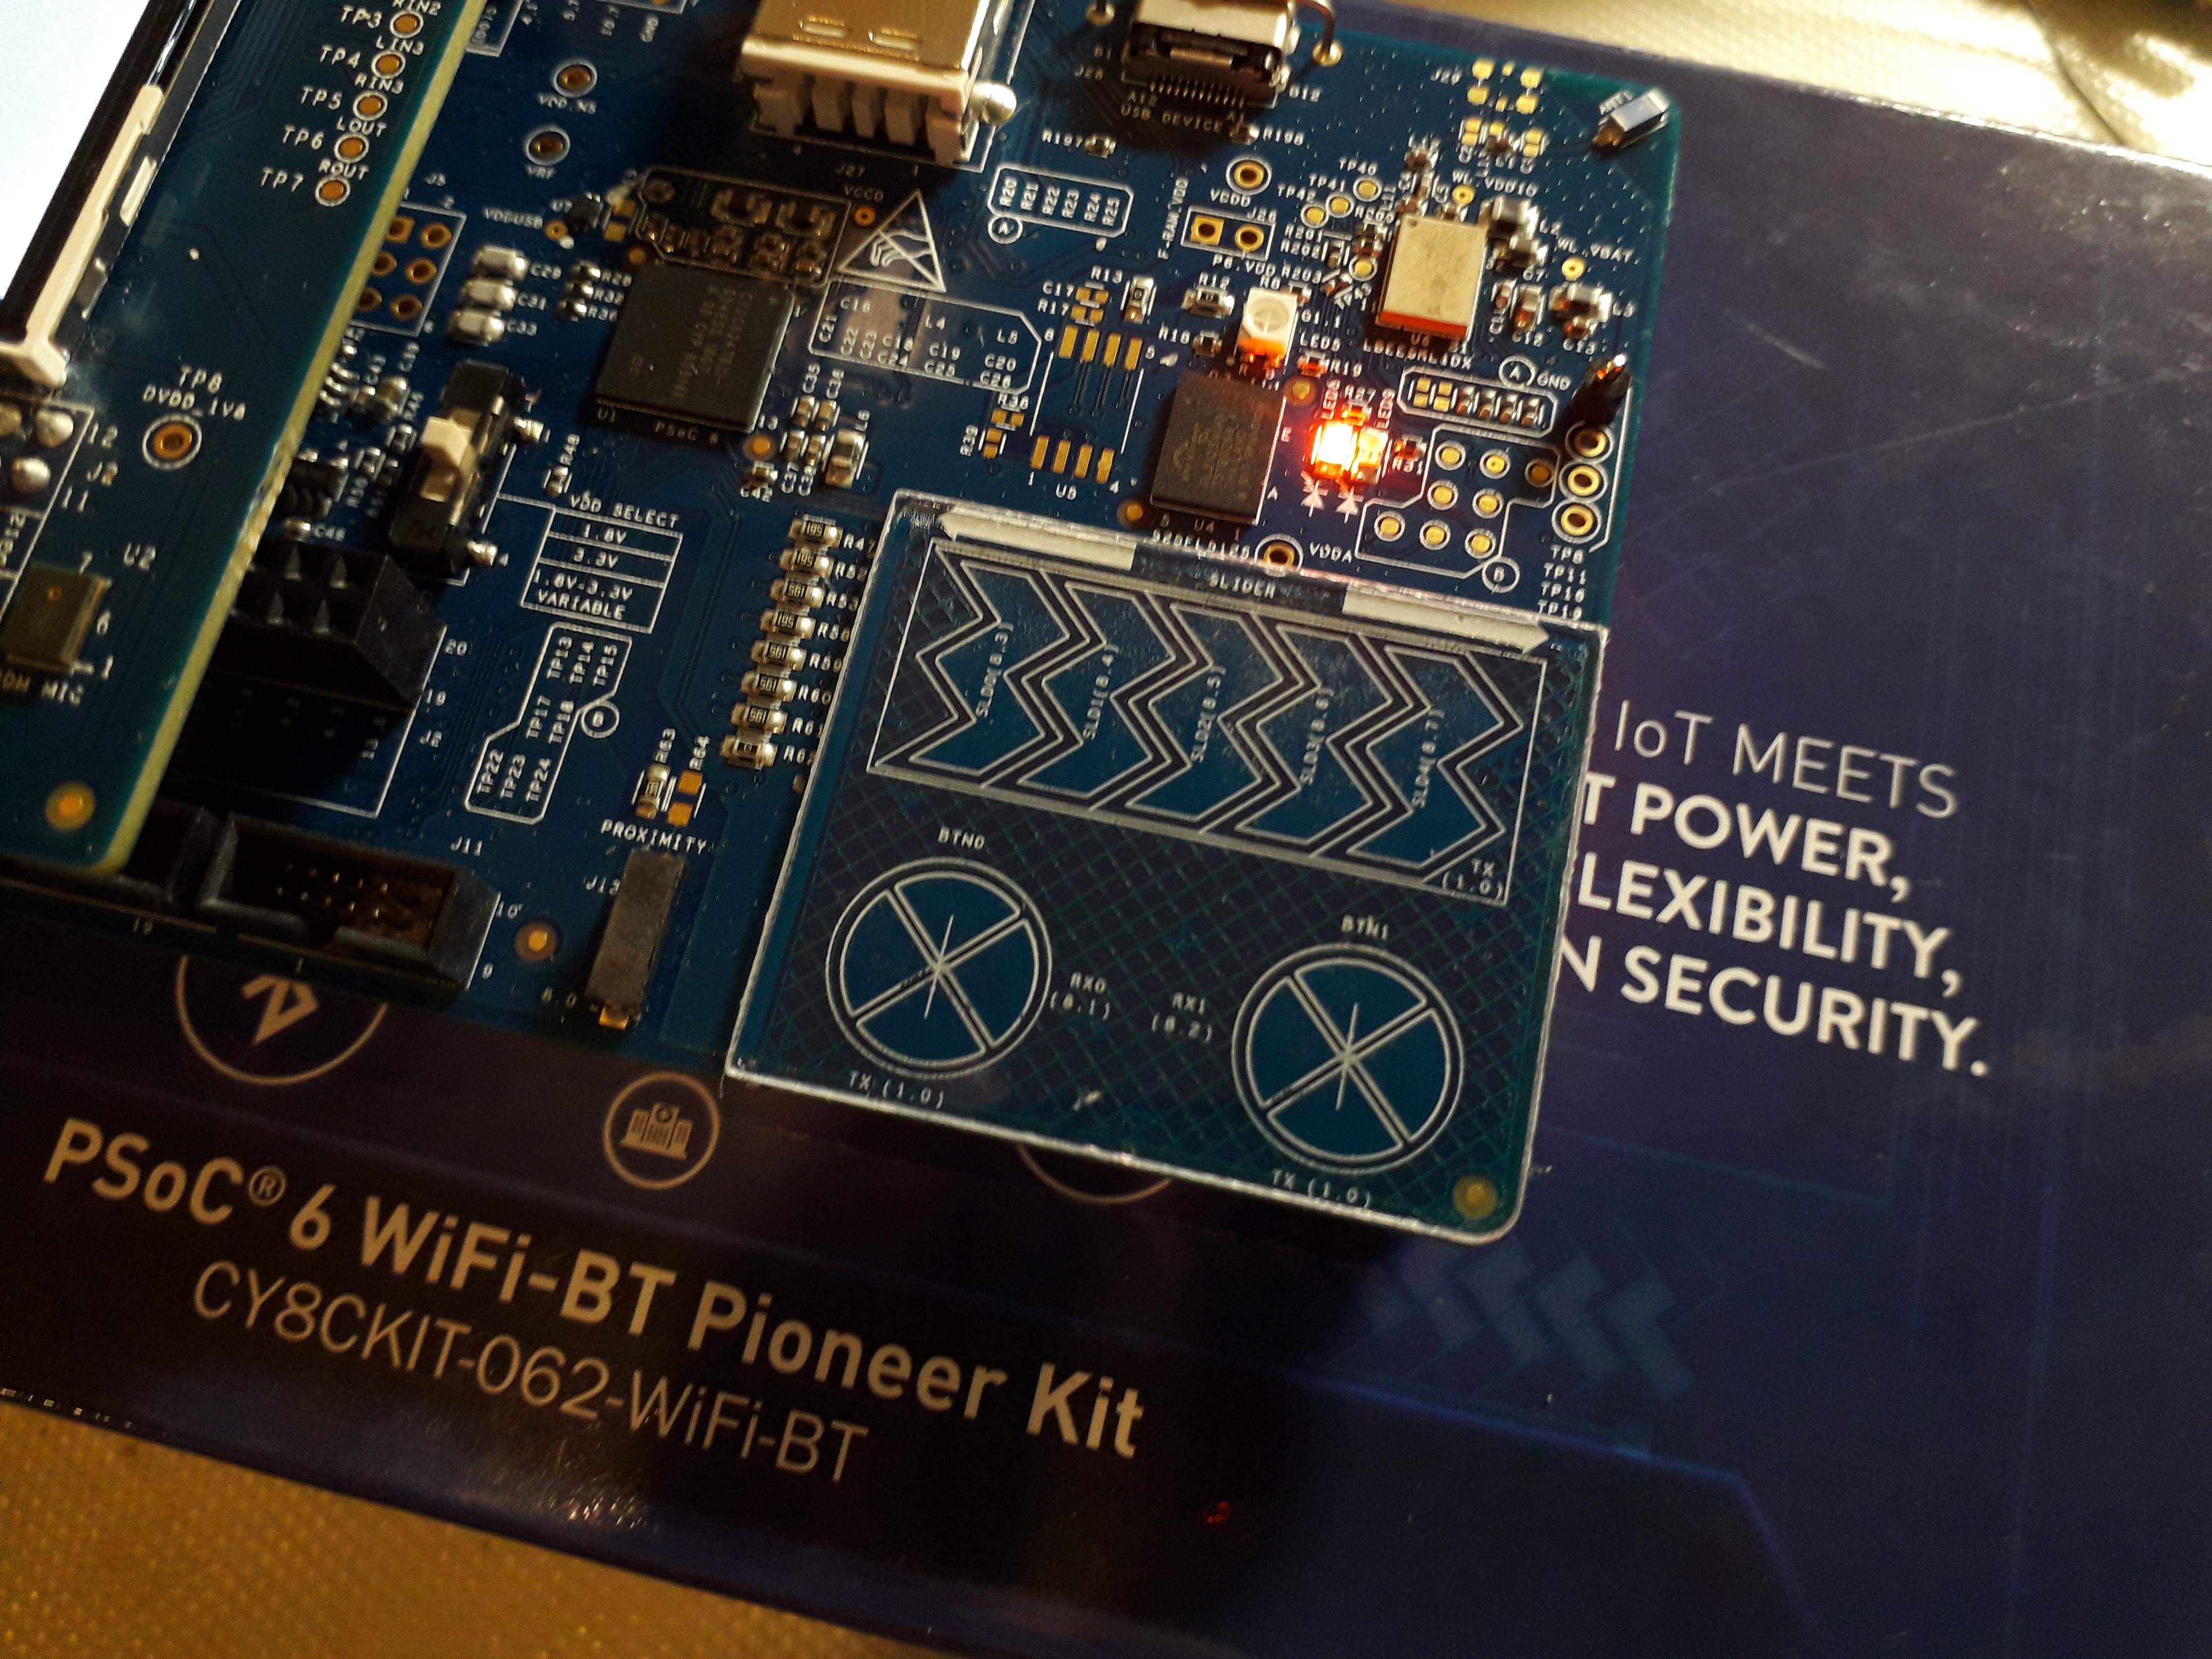
06/19/2020 at 17:02 • 0 commentsI just received my Cypress PSoC 6 WiFi-BT Pioneer Kit (CY8CKIT-062-WiFi-BT) in the mail. Thank you Hackaday, Cypress and Digikey for choosing my project.
![]()
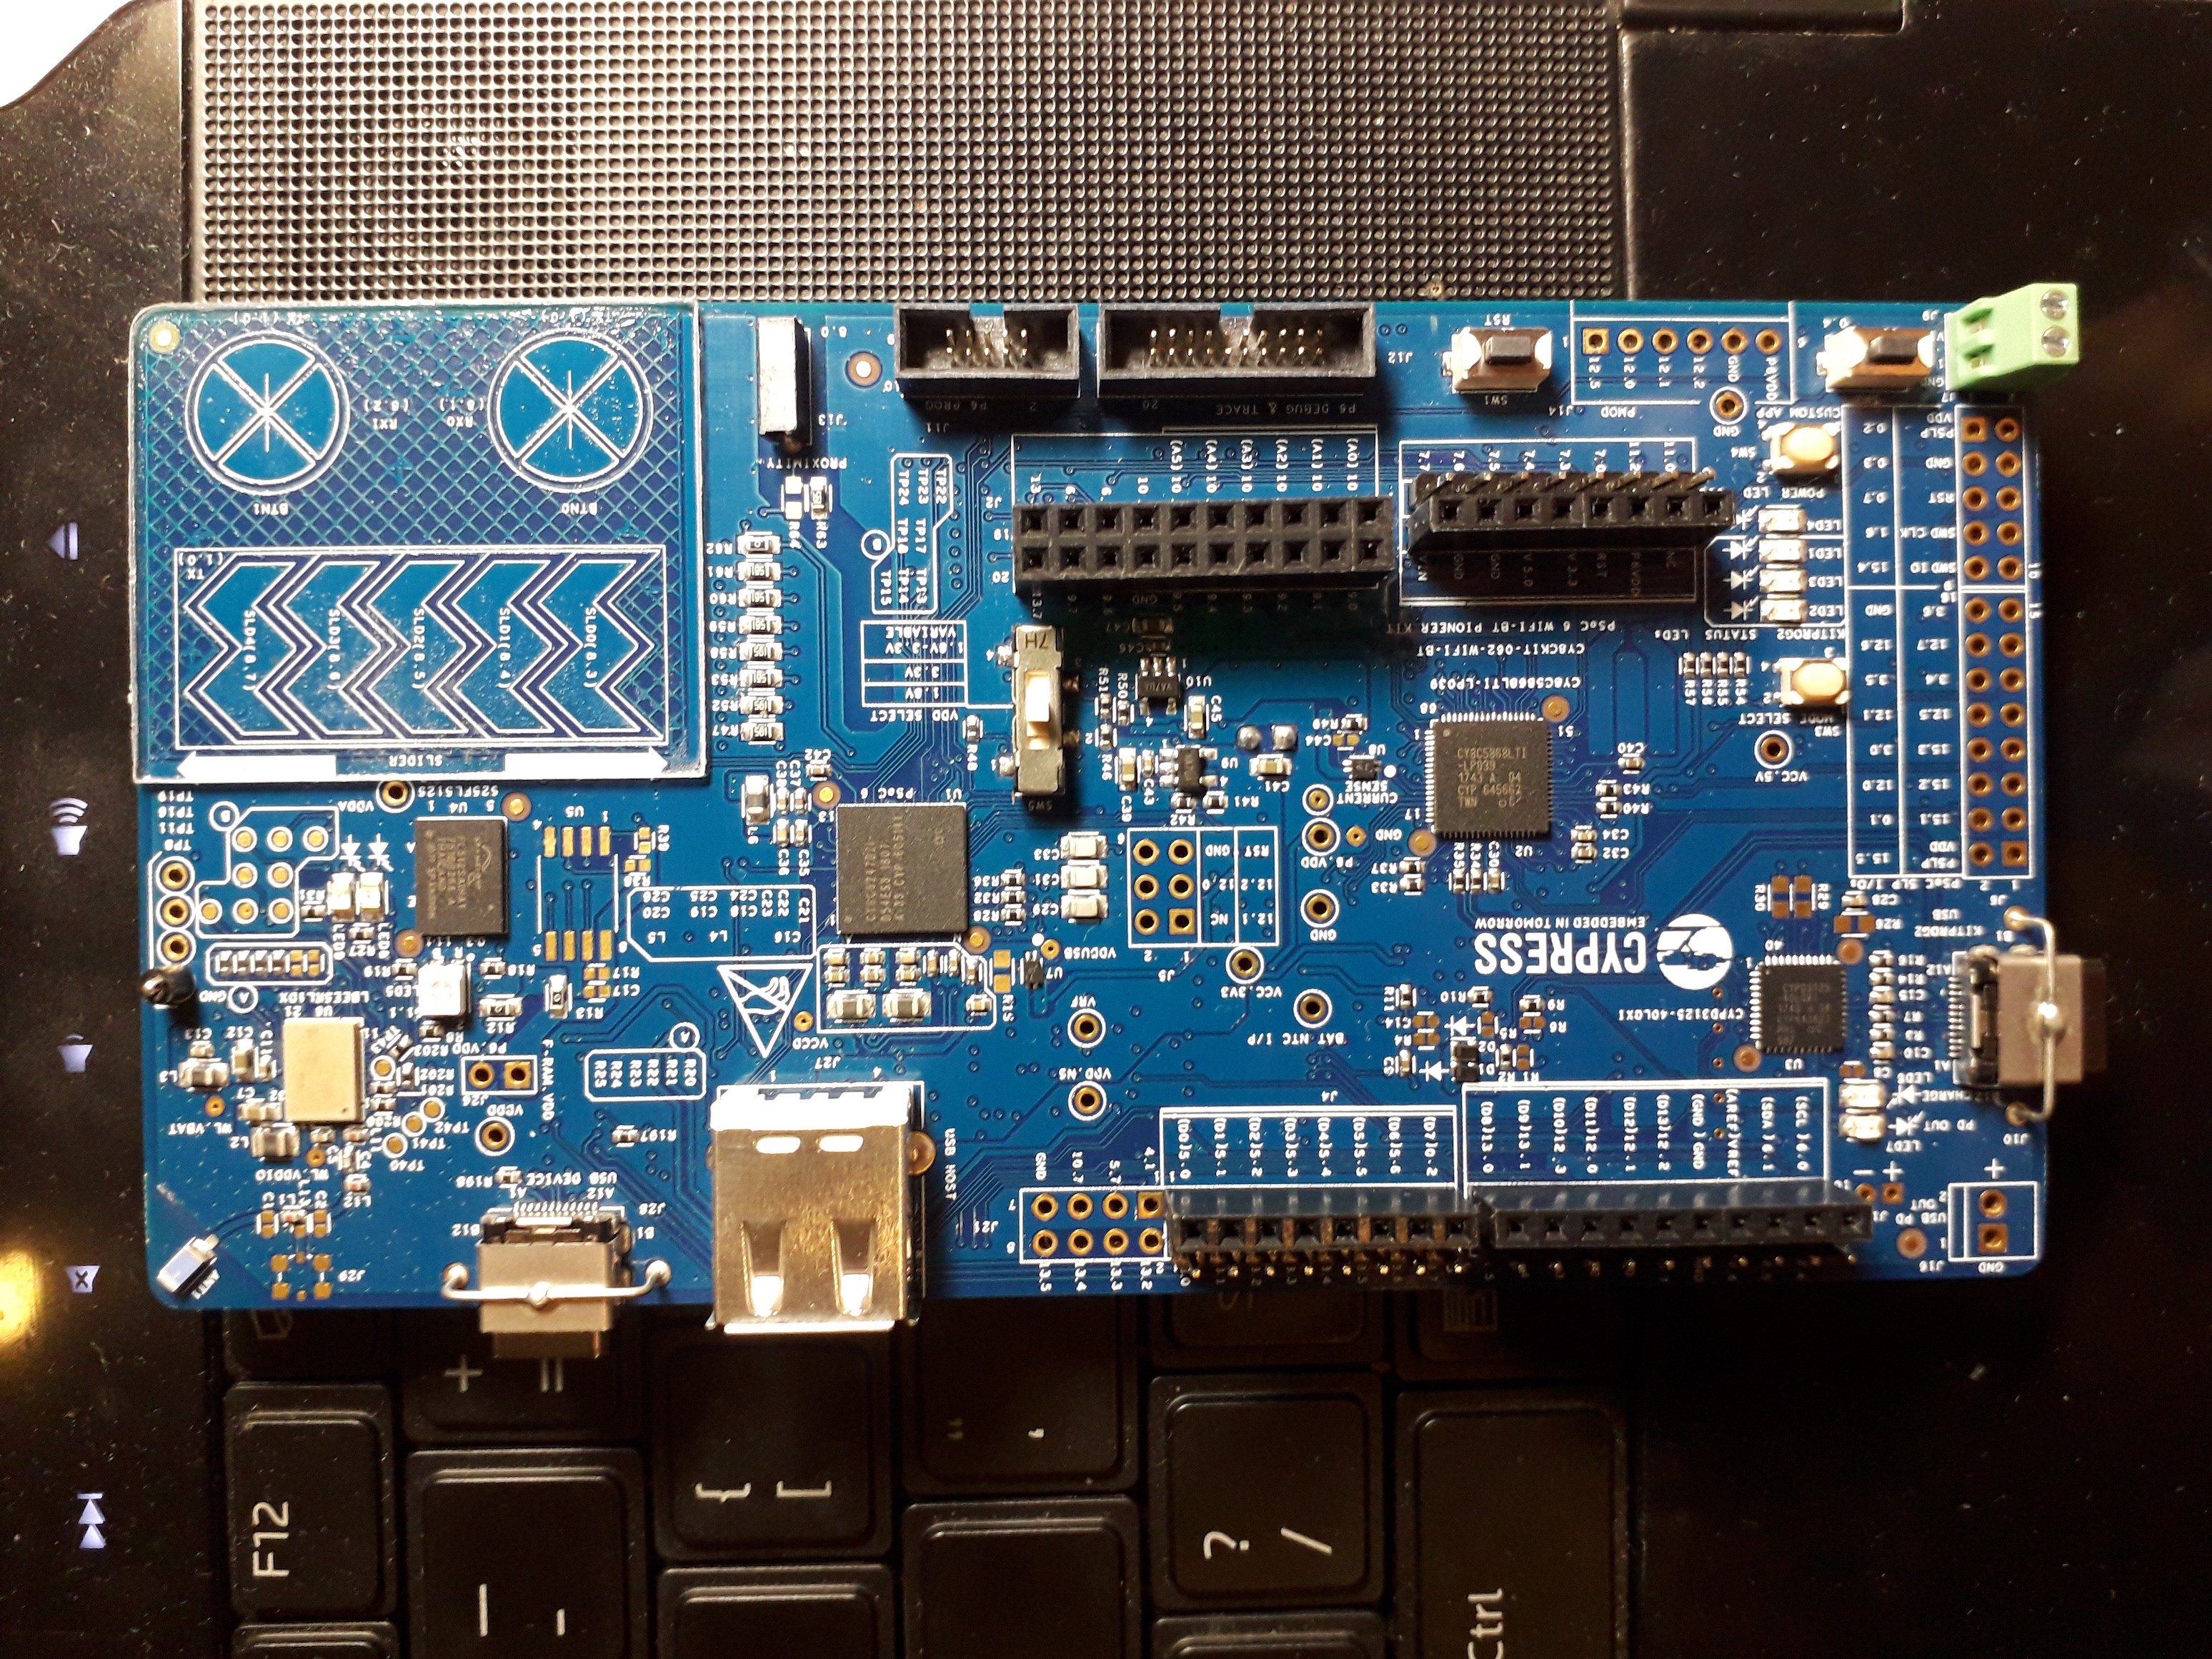
The main board is called the PSoC 6 WiFi-BT Pioneer Kit (CY8CKIT-062-WiFi-BT). The microcontroller on it is the CY8C6247BZI-D54 MCU.
![]()
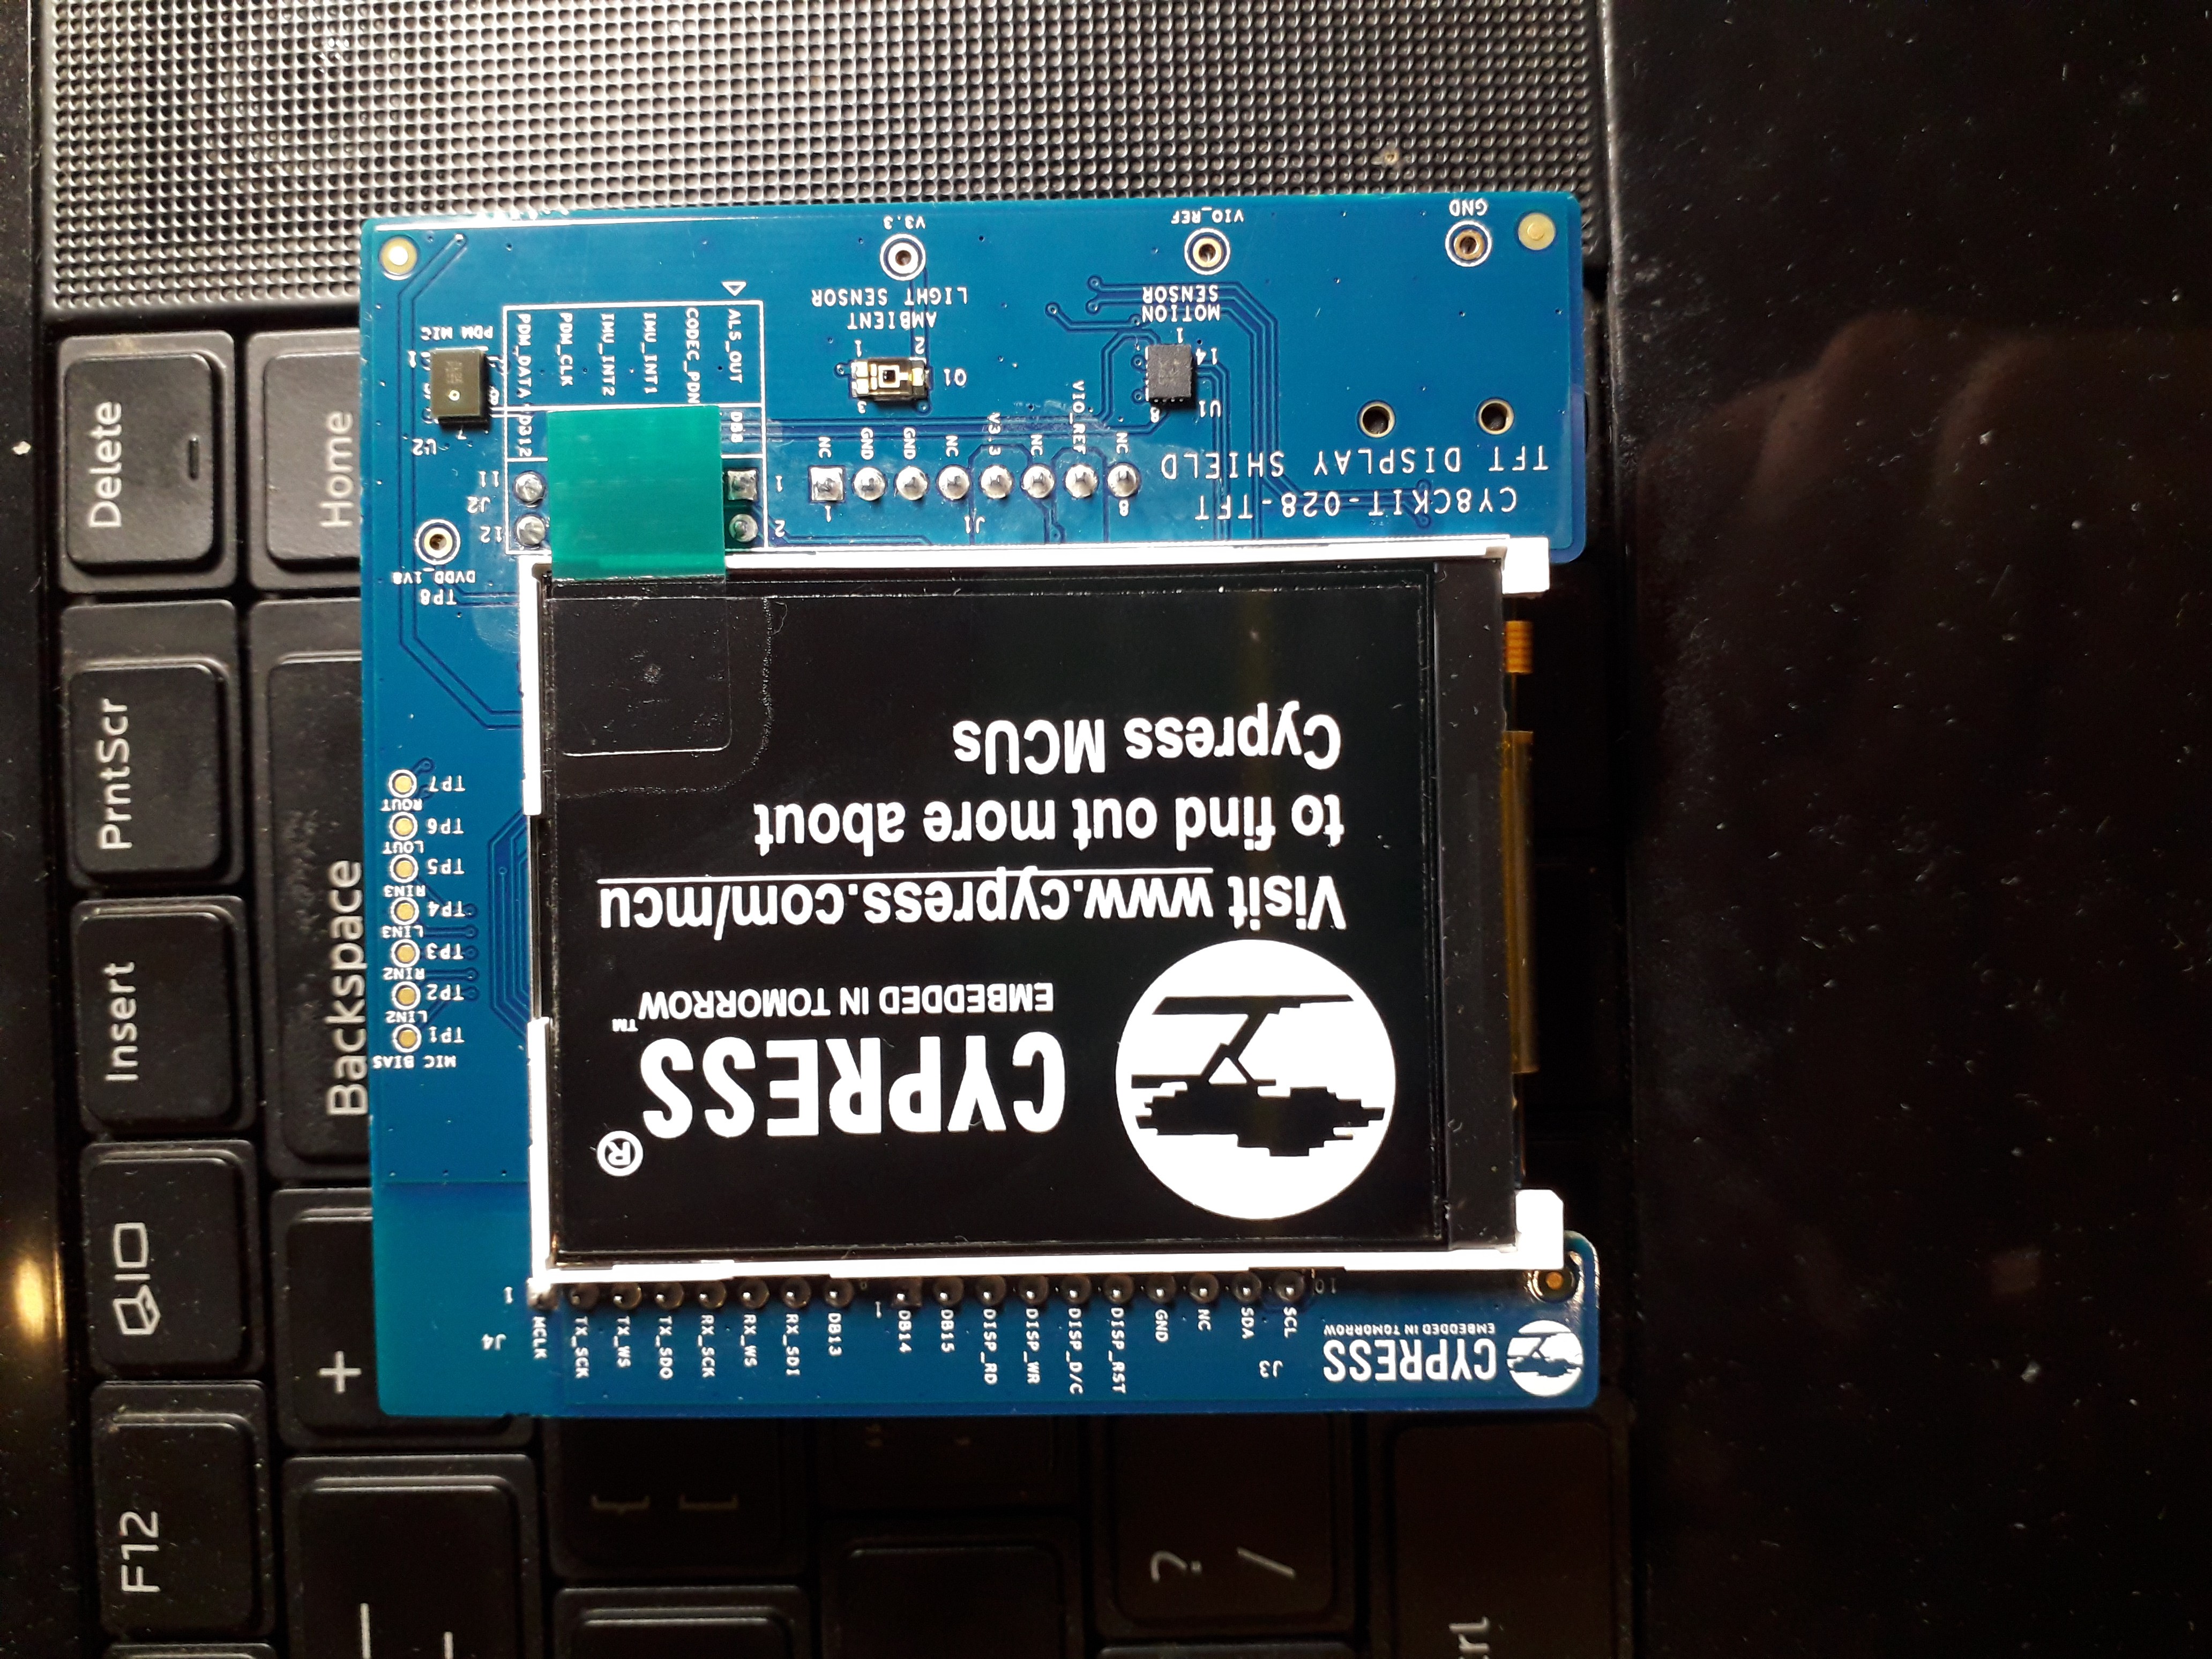
It comes with a shield called the CY8CKIT-028-TFT Display Shield.
![]()
This is my first time working with Cypress microcontrollers.
First I downloaded the IDE from the official website. I will be using it on Ubuntu 20.04 LTS.
I extracted the folder ModusToolbox from the zip file into my home folder ~/
According to the readme file, I ran the installation commands as follows
~/ModusToolbox/tools_2.1/openocd/udev_rules/install_rules.sh
~/ModusToolbox/tools_2.1/driver_media/install_rules.sh
~/ModusToolbox/tools_2.1/fw-loader/udev_rules/install_rules.sh
~/ModusToolbox/tools_2.1/modus-shell/postinstall
sudo apt-get install libusb-0.1-4
And then I started ModusToolbox by double clicking on this file
~/ModusToolbox/ide_2.1/eclipse/ModusToolbox
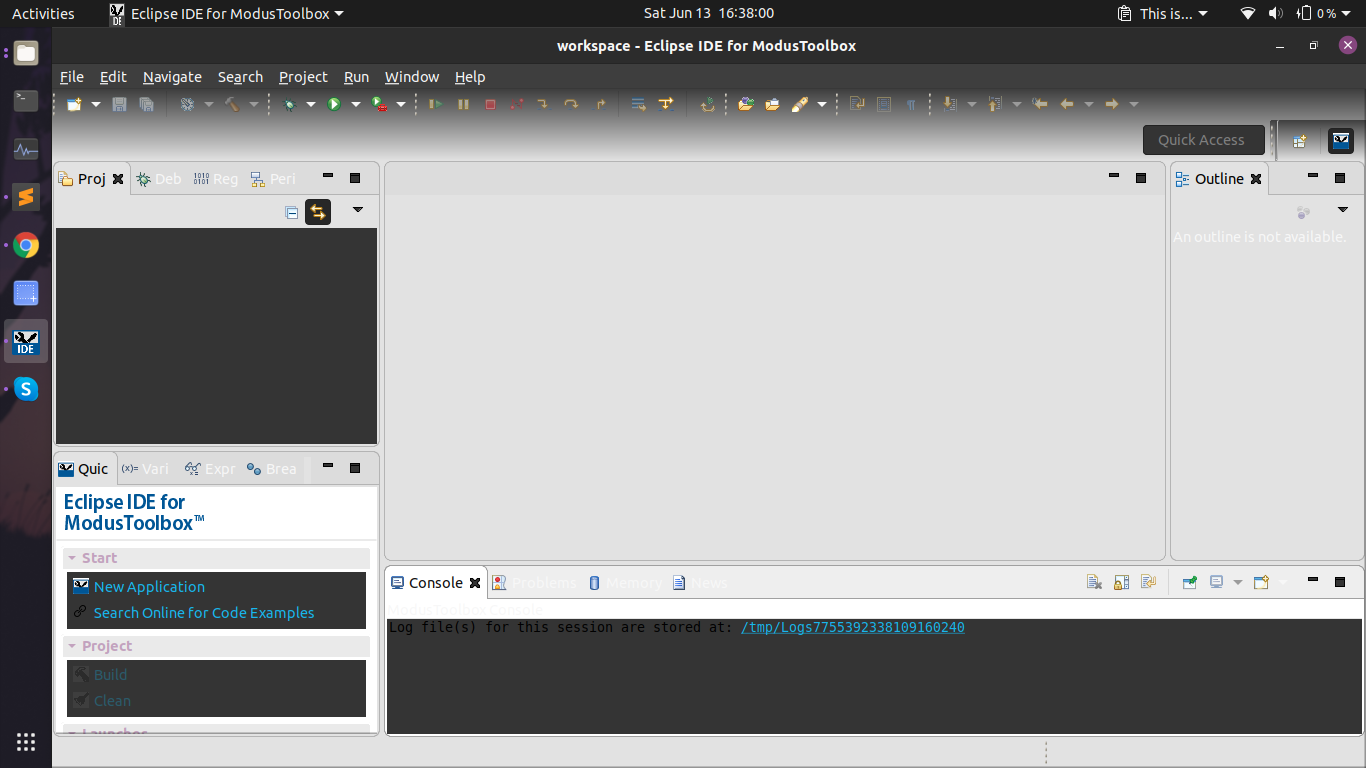
![]()
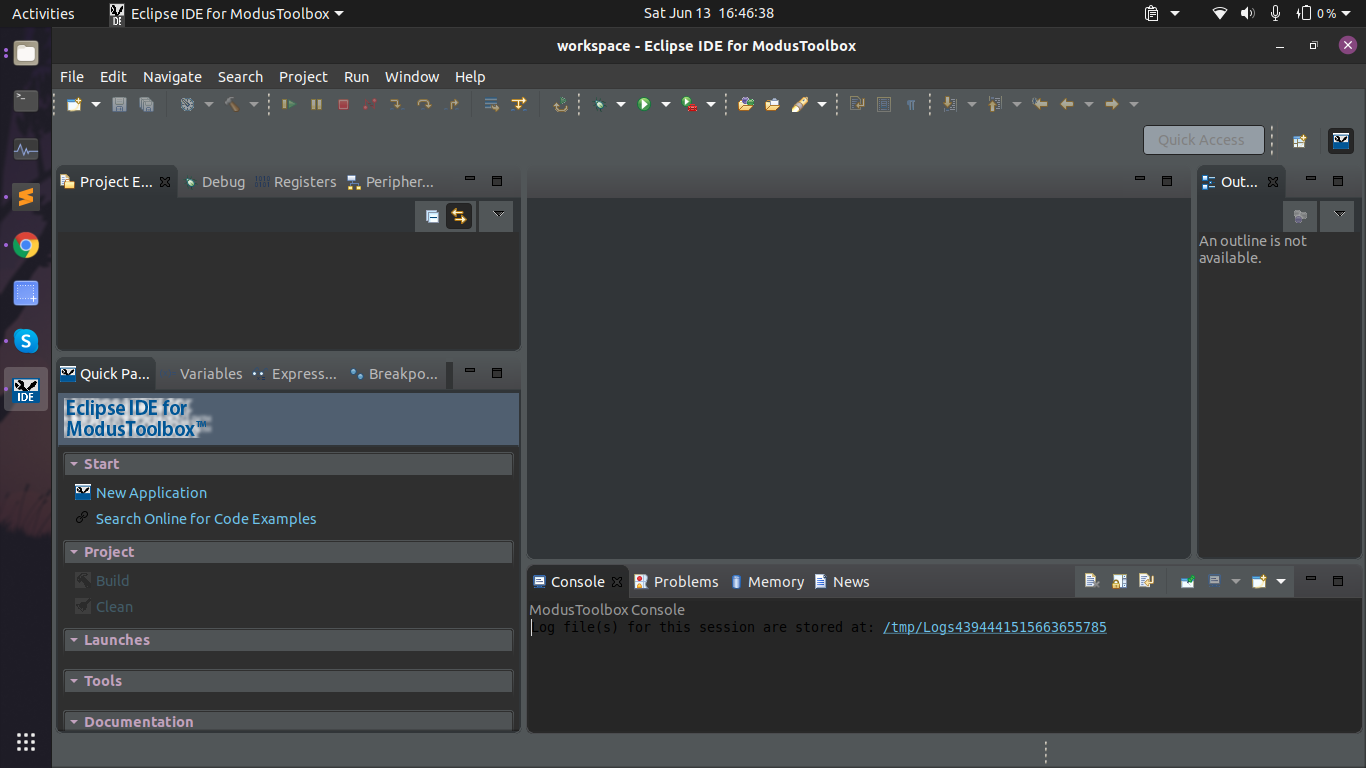
This is the screen I see. Oops, right now I’m using the default ubuntu dark theme. But the light theme of the IDE is not usable.
Go to Window > Preferences > Appearances > Theme and change to Dark theme.
Restart the IDE and it looks much better.
![]()
From Quick Panel, choose New Application.
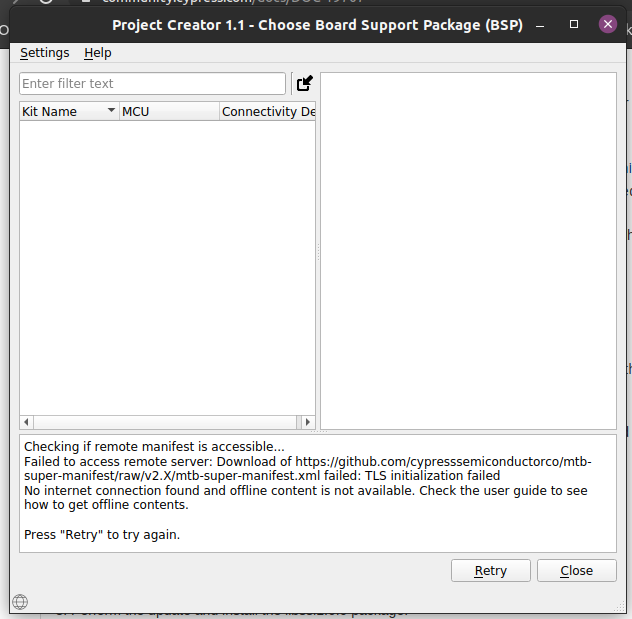
In Project Creator, I faced an issue with retrieving the devices -- Failed to access remote server.
![]()
The problem occurs because Ubuntu 20.04 does not include the libssl1.0.0 package. I must download it from the ubuntu 18.04 repo.
Install the deb from the ubuntu repo.
wget http://security.ubuntu.com/ubuntu/pool/main/o/openssl1.0/libssl1.0.0_1.0.2n-1ubuntu5.3_amd64.deb
sudo apt install ./libssl1.0.0_1.0.2n-1ubuntu5.3_amd64.deb
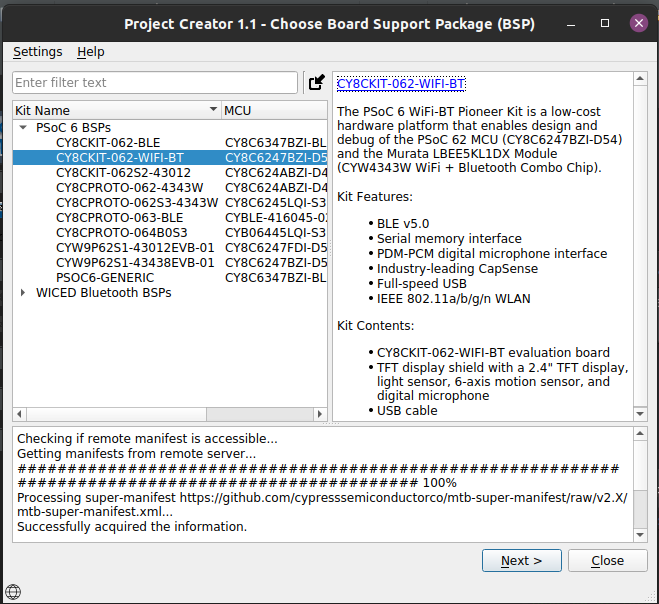
Click on Retry and everything works.
I got the PSoC® 6 WiFi-BT Pioneer Kit so I chose CY8CKIT-062-WiFi-BT.
![]()
And then I created a project from the hello world template.
The board comes with a debugger, and the firmware is KitProg2.
$ lsusb
Bus 006 Device 006: ID 04b4:f148 Cypress Semiconductor Corp. Cypress KitProg2 (CMSIS-DAP, Mass Storage)
The ModusToolbox IDE needs us to upgrade it to KitProg3.
Press and hold down SW3 to set it into bootloader mode and connect the board. LED2 should flash.
Then go to terminal run the command
$ cd ~/ModusToolbox/tools_2.1/fw-loader/bin
$ ./fw-loader --update-kp3
Now check the device again
$ lsusb
Bus 006 Device 011: ID 04b4:f154 Cypress Semiconductor Corp. KitProg3 CMSIS-DAP
Finally, go back to ModusToolbox. Build the project and program the board.
Flashing LED successful.![]()
FIMble
Concept of a plug-and-play IoT food monitoring system. It aims to reduce food wastage at consumer and distributor level