Close
0%
0%

Vintage sewing machines

Fixing up vintage sewing machines for hobby use.

Public Chat
Similar projects worth following
My (adult) children gave me a vintage Adler sewing machine for my birthday. The idea was to use it for hobby work - I occassionally make things like phone cases from leather.

I love the machine. It is a beautiful little thing, and a mechanical marvel.

The Adler seems to have infected me with a strange virus - I have developed an almost irresistable urge to buy up old machines and rescue them from the junkyard (or worse.)

The recent Hackaday articles on using industrial sewing machines for hobby work convinced me that the old machines are a valid hacking subject.

This project page will be a collection of posts about my adventures in cleaning, restoring, and using my Adler and any other sewing machines the infection may force me to pick up.

"Vintage" as applied to sewing machines has a somewhat specific meaning.  Antique sewing machines are ones made before 1900.  Vintage machines were made between 1900 and about 1970. Modern machines are anything after about 1980.

Vintage machines were made after all the early wrinkles were worked out and before the manufacturers switched from all metal construction to using plastic in the housings and mechanisms.

The all metal machines are nearly indestructable.  About all that can kill a vintage sewing machine is rust or being dropped on a hard floor - cast iron tends to be brittle.

Supplies (needles, bobbin cases, replacement parts, etc.) are often still available for popular vintage machines.  Sometimes because there's a lot of new-old-stock still around, sometimes because modern machines still use parts originally designed for older machines, and sometimes because there's enough of a market that somebody, somewhere, fired up a production line to make new parts for the old machines.

  • The Pfaff model K - Surprisingly modern for its age

    Joseph Eoff12/23/2022 at 17:49 0 comments

    I was given a Pfaff model K a few months ago.  I've fixed it up a bit and passed it on to a new home.

    You can read the full story here.

    All done 1

    This particular Pfaff  model K was manufactured in 1897, making it 125 years old.

    Despite its age, it is in fact easier to get materials it for than my Adler class 8 that is only 96 years old.

    The Pfaff model K is a copy of the immensely popular and long lived Singer 28.

    They are so similar that shuttles and bobbins made for the Singer 28 can be used in the Pfaff K.  Surprisingly, you can buy brand new shuttles and bobbins made for the Singer 28.  I bought a set of 10 bobbins with a shuttle (from Amazon) that was sold for the Singer 28 and used them with this Pfaff K

    The needles used with the Pfaff K and the Singer 28 are the same needles as on any modern domestic sewing machine - you can walk into any store and buy a pack of needles without concern.

    The presser feet are the same low shank models used on modern machines.  Again, pretty much anything that will fit a modern machine can be used on the Pfaff K.

    Since someone had removed the Pfaff from the treadle table it belonged in, I had to build a new base for it and convert it to electric drive.

    With its new base, an electric motor, and a thorough cleaning, polishing, and oiling, the old Pfaff runs very well:


    If you get hold of a vibrating shuttle sewing machine, keep in mind that even if you buy a shuttle specifically for that model you will still have to fit the shuttle to the machine.  The shuttle swings in an arc.  It touches an arc in the base of the machine along the entire sweep.  The arc in the base of the machine will not be exactly the same on every machine.  You have to grind the side of the shuttle that touches the arc to fit it properly.  I ground mine on a couple of sharpening stones (normally used for knives) then polished the ground side with some jeweler's rouge on a scrap of leather.

    If you listen to this video and compare it with the first one, you'll notice that it was a lot quieter when my wife was using it.  That's because I had fitted the shuttle.    In this second video, I had not yet done anything with the shuttle - the thread had a hard time passing between the shuttle and the shuttle carrier, resulting in a lot of clanking as the shuttle jumped around.


    Grinding the shuttle is not something I thought up on my own.  I have a copy of an old sewing machine technician training book (Wilhelm Renters Der Nähmaschinen Fachmann) that mentions it - though it doesn't go into details.

    All the information I've gathered here and on my blog applies to the Pfaff model K (3/4 size machine,) and its "big sister" the Pfaff model L (full size machine.)  The Pfaff K was later renamed to Pfaff 11 and the L was renamed to the Pfaff 12.  It also all applies to the Singer 27 and the 127 (both 3/4 sized machines) as well as the 28 and the 128 (full sized machines.)  Much of it may apply to other vibrating shuttle machines as well.

  • Just the way you want it - A Pfaff 30 (and a historical footnote)

    Joseph Eoff07/13/2022 at 18:21 0 comments

    I had a chance a few weeks ago to clean up a Pfaff 30.

    Polished machine 1

    The Pfaff 30 is pretty much the ideal vintage machine.  It (and the Pfaff 31) are related to the massively popular and long lived Singer 15.  Their similarity with the more common Singer means that it is relatively easy to find bobbins, bobbin cases, and needles for the two machines. Old Pfaff sewing machines have a (well deserved) reputation for good manufacturing and reliability.

    This particular Pfaff 30 is an example of what you want to find when you are looking for a vintage sewing machine.  Besides being a common machine (there were literally millions of them made,) this one was in good shape and had many of the original accessories still with it in the drawers of the cabinet.

    A quick test the day I picked it up using a spool of thread and a threaded bobbin that were already on the machine (and who knows how many decades old) showed that the machine was mechanically OK.

    First seam
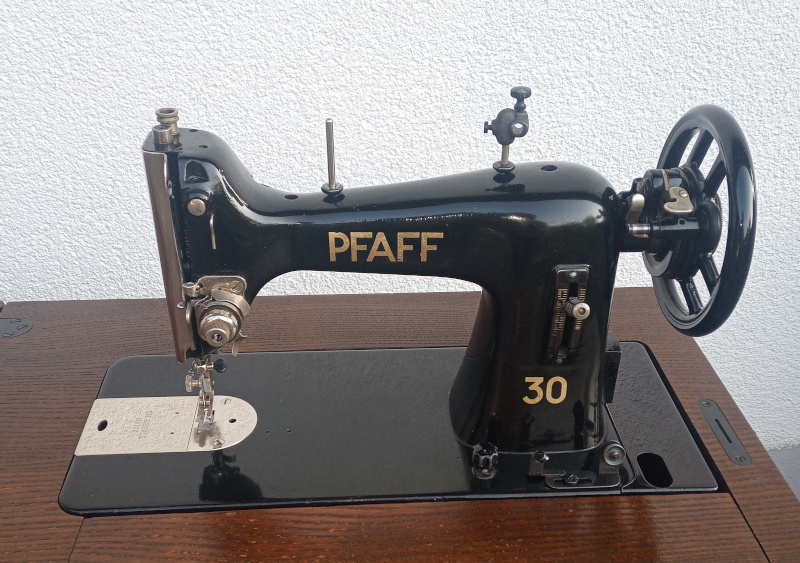
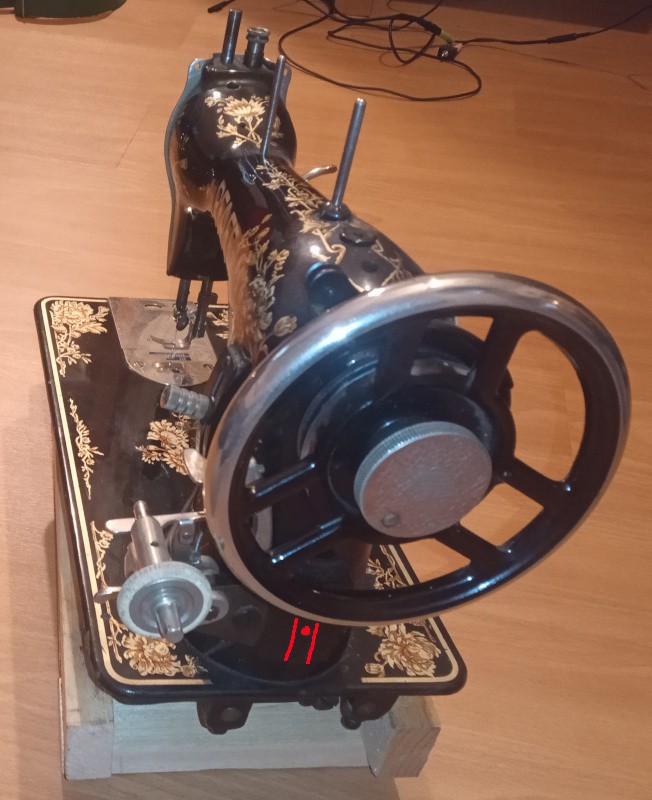
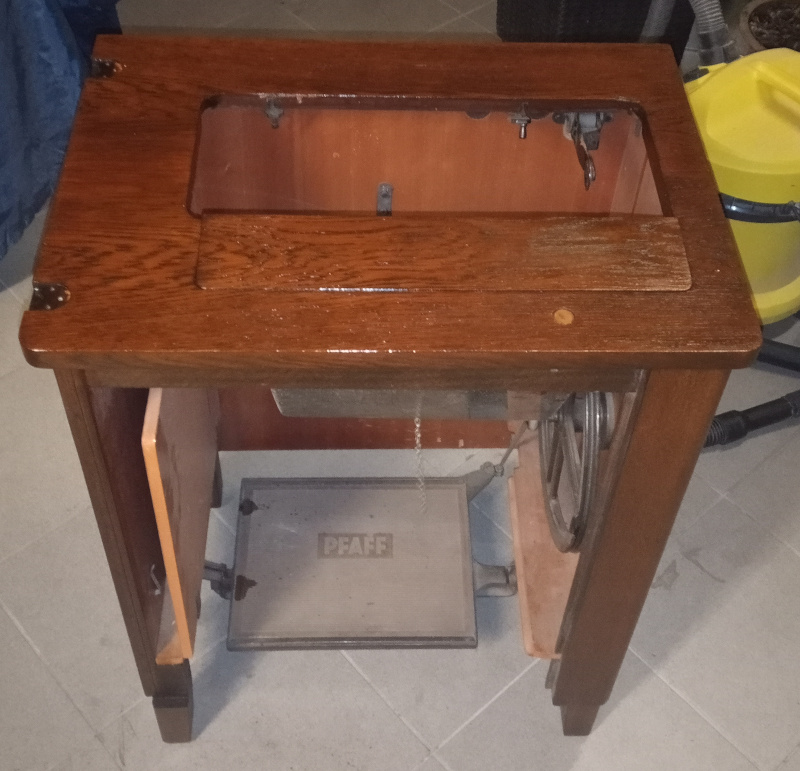
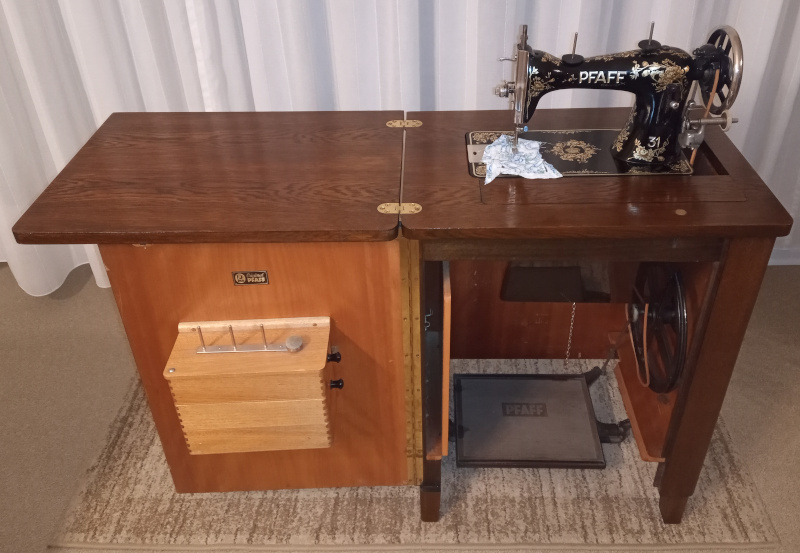
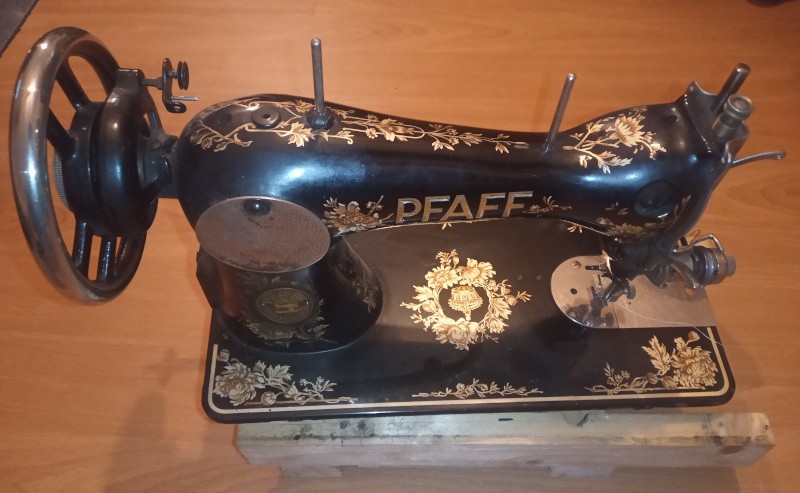
Despite the generally good condition of the Pfaff 30, it did need a few things done.

    1. Cleanup - It had been collecting dust for a very long time.  Along with the dust, many generations of spiders had left their traces on the machine and the cabinet.
    2. Oiling - The oil the previous owner had used was good and hadn't dried up or gotten gummy, but you should always oil a sewing machine according to the directions in the user's guide before using it.
    3. Replace the drive belt and the winder tire - These parts tend to dry up and crack when not used.  The drive belt is made of leather.  The winder tires are made of rubber.  Both go bad over the years.

    You can count on doing those three things for any vintage sewing machine you buy.  The drive belt and the winder tire are common parts.  You can buy a length of leather drive belt for a few dollars from Amazon (or your local sewing machine store.)  The winder tires are just rubber O-rings.  If you can't find someone selling one explicitly for your machine, just measure the diameter of the winder wheel and the width of the groove and order an O-ring.  They are usually pretty cheap.

    The user's guide is important.  The original was gone from this machine, but Pfaff still makes them available for download. The scanned copy is something of a mess.  I cut and resized the pages in the PDF to make them a little easier to read.  You can get the improved copy of the Pfaff 30 instruction book here.

    The cabinet on this Pfaff had been refinished with polyurethane varnish at some point, so I used soapy water to clean the dust (and the spider poop) off.

    Since this machine was made some time after Pfaff switched from japanning and shellac to plain black paint, I simply stripped the oily surface of the machine with ethyl alcohol.

    A bit of oil based furniture polish gave the cabinet a nice shine, and a little car polish and some rubbing brought the machine itself back to its original glory.

    Older Pfaff sewing machines were in nicely made cabinets.  The 30 and the 31 that I've had here were both made of walnut stained oak.

    Finished Pfaff 30 - 4
    Finished Pfaff 30 - 2

    Polished machine 2
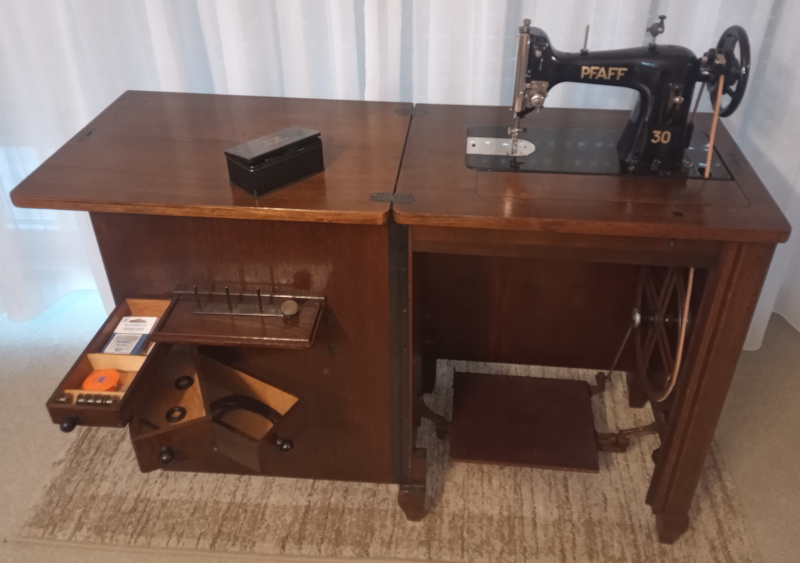
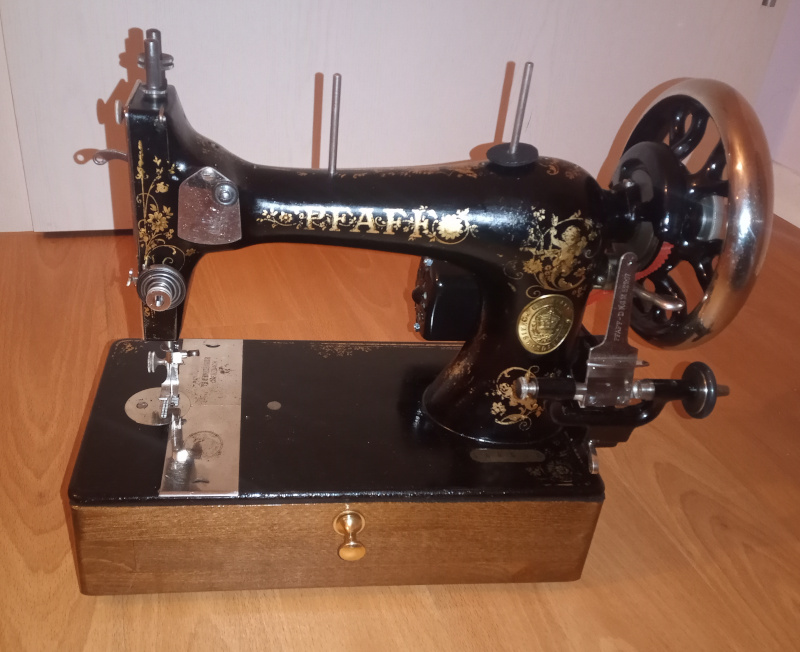
If you've been following my sewing machine adventures, you may have seen the Pfaff 31 I cleaned up for my daughter.  The 31 has a more typical sewing machine look, with lots of chrome.


    Pfaff model 31 - 3
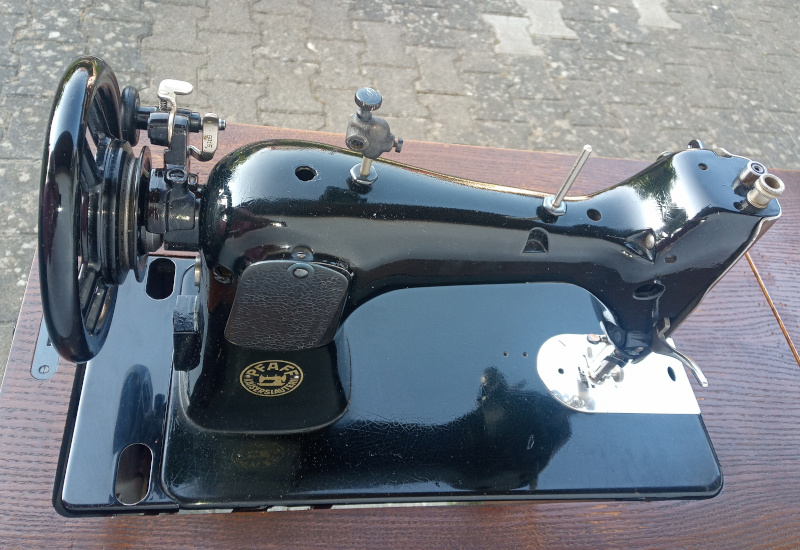
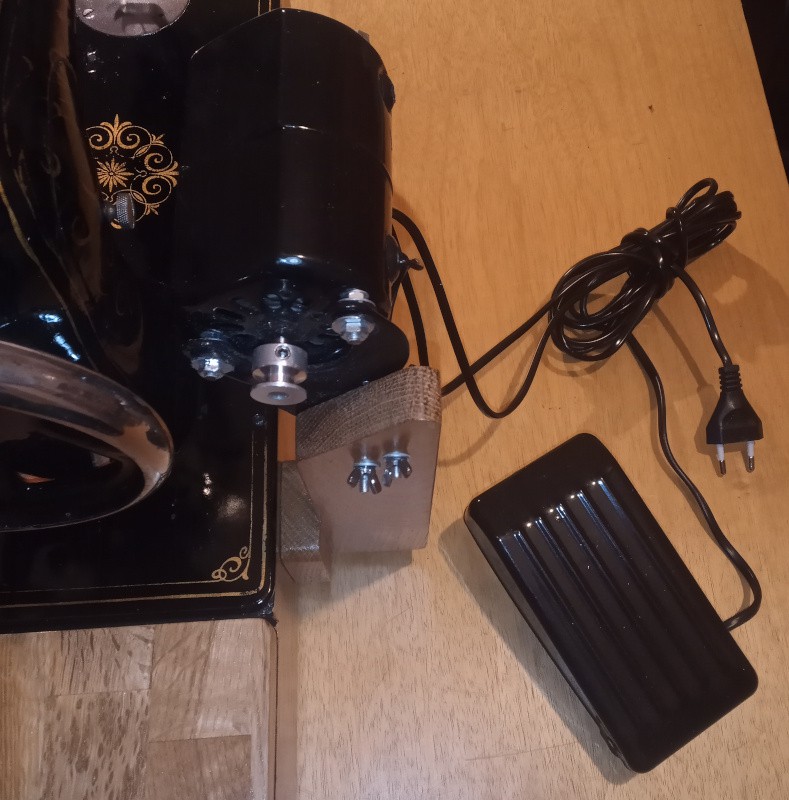
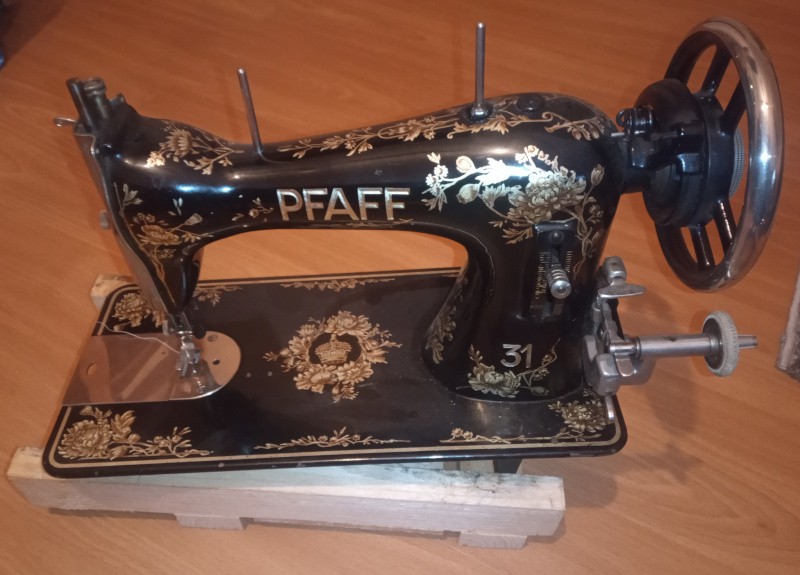
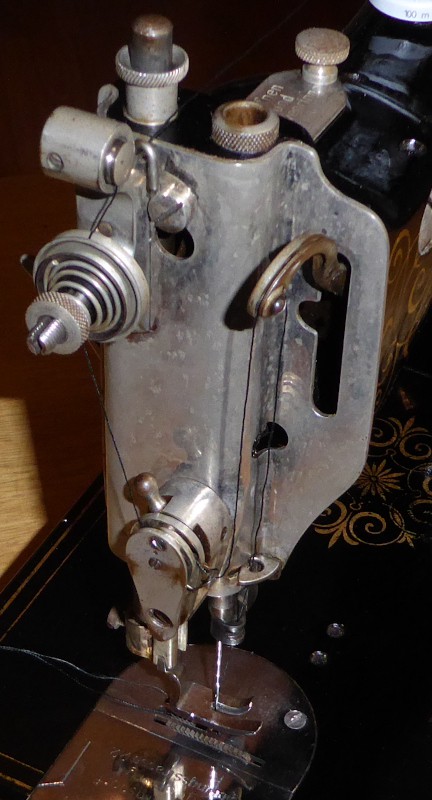
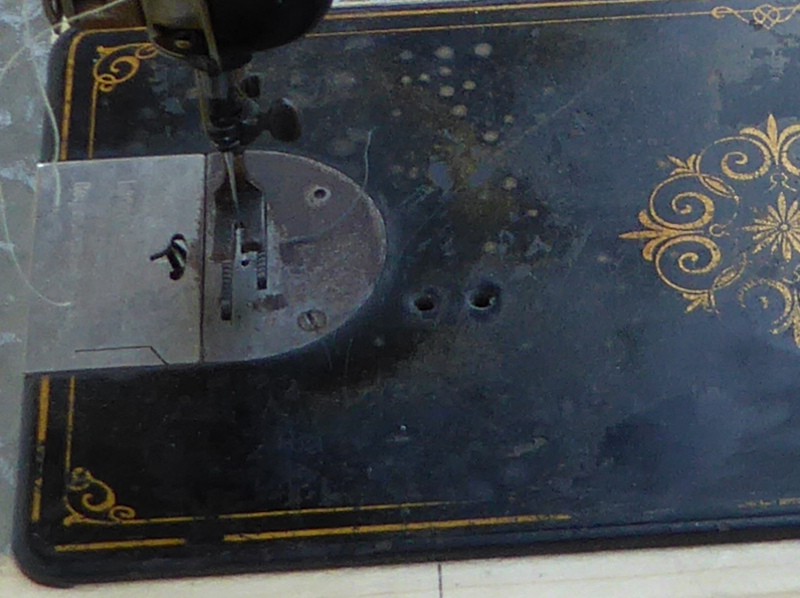
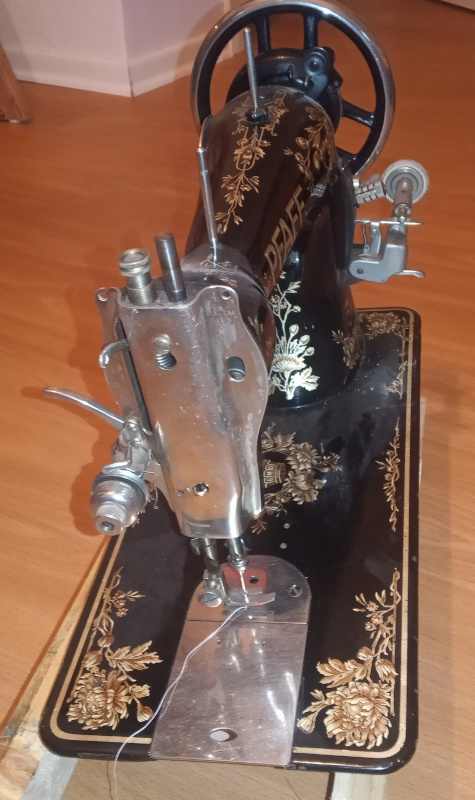
The Pfaff 30 has a lot of parts that are black rather than chromed.

    Black instead of chrome1
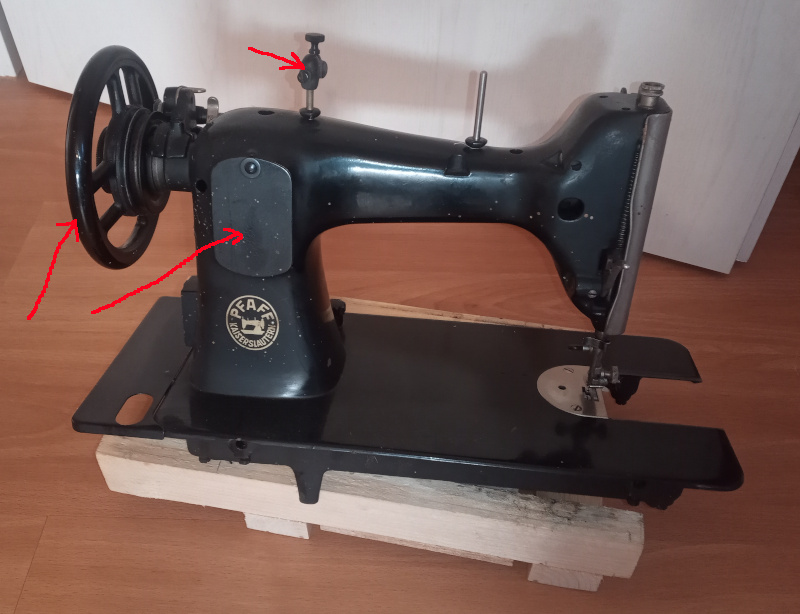
That's not a general thing - many if not most Pfaff 30 machines are chromed as well.

    This black Pfaff 30 is something of a historical footnote.


    According to  this list of serial numbers, this particular machine was manufactured some time in 1940.

    That date of manufacture explains the unusual appearance of this Pfaff 30.  Germany was heavily involved in World War II at that time, and experiencing a shortage of non-ferrous metals - chrome and brass were in short supply since they were needed for the war effort.

    The lack of chrome and brass is reflected in the blued steel trim in place...

    Read more »

  • Watch your step

    Joseph Eoff07/10/2022 at 11:18 0 comments

    Often times the only sources of parts and accessories for vintage (or antique) sewing machines are rather questionable.  You'll have to resort to ordering things from eBay or other online sources based on a picture of an item that looks like the one you need.


    I got lucky with the accessories I needed for my Adler class 8.  I found someone selling a box of bits and pieces for the Phoenix class 8.  The Phoenix is a similar machine manufactured about the same time as my Adler.  Both machines are derived from the Wheeler and Wilson 9.  Though the machines have their differences (especially in appearance,) they do have some interchangeable parts.

    The box of unobtanium I bought contained eleven bobbins that would fit my Adler, as well as a selection of presser feet that had the right (oddball) neck to fit the Adler.

    The bobbins and the presser feet were (naturally) somewhat rusty, requiring an afternoon's work to make them usable.

    The bobbins all fit, and I thought the presser feet would all be OK, as well.

    While the feet fit the Adler, they turned out to not all be usable - it is one thing to fit the foot holder, and quite another to actually work with the machine.

    I wanted to use a rolled hem presser foot to fix a hole in my pants pocket the other day, and discovered that some of the feet from my box of unobtanium were made for a slightly different machine.

    Here are two of the rolled hem feet I have:

    Except for the slit in the left foot (to make threading easier,) they look pretty much identical.

    I wanted to use the one on the right because it is in better shape.  The one on the left has a rough surface from the rust that I removed.

    When I put it in the machine, I found this:

    The hole for the needle is a couple of millimeters off.  It was made for a machine where the distance between the needle bar and the presser bar is just a little shorter than on the Adler.

    Check such things carefully before you use such reclaimed accessories for the first time.  A decades old part may be an almost fit for your machine, or it may be bent or worn.  Make sure the needle can pass through the hole without dragging - and without dragging the thread on the foot.

    While you are checking,  make sure that the presser bar is properly aligned.  The distance between the needle bar and the presser bar is fixed, but the presser foot holder can often be rotated.  You loosen a screw on the presser foot holder, then turn the foot a bit to the left or right to center the needle in the hole.  Tighten the screw afterwards, of course.

    The red arrow in the picture above points to the screw you loosen to align the presser foot holder.
    The blue arrow points to a screw I had to replace.  The original had been broken at some point in the last century.  It was just a smidge too short to hold the presser foot tight.  That didn't matter to the previous owner - he only had one presser foot, and it was "glued" into place by decades of dried on oil.

    Old machines often have odd sized screws with oddball thread pitches.  This one turned out to be a 1/8 inch British standard Whitworth screw with 40 thread per inch.  It is almost (but not quite) the same as a UNC 1/8 inch screw.  The difference lies in the angle of the thread rather than in the size or pitch.

    How a British screw ended up in a German made sewing machine is a puzzle I'll likely never solve.

    Proper alignment of the presser foot is very critical with straight stitch machines because the hole in the throat plate is much smaller than on zig-zag machines.  On the other hand, zig-zag machines can fool you - they'll work just fine on a narrow zig-zag or straight stitch, but then slam the needle into the throat plate when you use a wider zig-zag.  Check zig-zag machines for alignment using the widest zig-zag setting your machine has.

    Keep your eyes open and watch your step when using old machines with scavenged accessories.

    As for fixing my...

    Read more »

  • Electrical power for a vintage sewing machine

    Joseph Eoff03/05/2022 at 12:56 0 comments

    Many of the older sewing machines were originally made to be "people powered." 

    While most folks don't know what to call it, most everyone has at some time seen a foot operated, treadle powered sewing machine:

    That's my daughter's Pfaff 31 treadle operated sewing machine.

    There were also machines made to be hand powered.  They had  a hand crank on the balance wheel.  The operator had to crank the wheel with one hand while guiding the material with the other.

    The hand cranks were attached to the machine using a boss.

    This picture shows the boss on my daughter's Pfaff 31:

    It's a bit hard to see, so I've marked it in red:

    The boss on nearly all sewing machines is about the same size and in the same location.  Because of this commonality, there are commercially available sewing machine motor sets.  You can buy them on Amazon or from other online sources.

    This is the motor from my Adler 8:

    It was probably not a good choice, but it came with the machine when my kids bought it.  It is rated for 10000 RPM maximum.  Given how smoothly the Adler 8 runs, it can probably reach a large portion of that 10000 RPM - which translates to about 1600 stitches per minute given the 9mm to 54mm pulley ratio of the motor and the machine.  An 8000 RPM (or lower) motor would be a better choice for the Adler.  In general, too slow is probably a better choice than too fast.

    The long slot on the right would normally be screwed to the boss on the sewing machine.

    My Adler 8 doesn't have a boss.  It was built before motors were a common idea, and it was built for speeds you couldn't reach with a hand crank.  It was intended for use purely in its treadle table.

    I don't have a table for my Adler 8, so I built a wooden base for it to sit on.  The base has a wooden arm as a motor mount:

    It is often possible to convert a treadle powered machine to electrical power by simply buying a sewing machine motor kit and screwing it to the existing boss on the machine.  The opening in the table won't have been designed with the motor in mind so you may no longer be able to fold the machine down into the table with a motor attached.

    If you've got the table, though, I do suggest you try sewing with the treadle before going electric.  It takes a little practice, but it isn't that difficult to do:

    That's me trying out the treadle on the Pfaff 31.  Up to that point I had never operated a treadle machine.  I didn't quite manage a steady rhythm, but then I was operating a camera while guiding the material and working the treadle.

    The treadle belts are almost always dried and cracked on old machines.  They are simple leather belts, though, and are still available.  You can buy them online for just a few dollars.

  • Choosing a vintage sewing machine for hobby use

    Joseph Eoff02/22/2022 at 13:26 0 comments

    In my limited experience, vintage sewing machines are rather like cats - they choose their owners rather than the nominal owner having much say in the decision.

    My wife was given her Pfaff 262 by a friend.  My wife wouldn't trade or sell the 262 for any newer machine - it suits her very well.  The 262 is a stodgy grey machine - its beauty lies in its abilities, not its appearance.  The 262 is a zig-zag machine, with some fancy stitches to go with the plain ones.  It is also fast, powerful, and damn near silent.  I wouldn't use it to sew leather like I do with my Adler, but mostly because my wife would not be amused by the changed thread tension settings it would take to do leather.

    My daughter mentioned handsewing a blouse (despite owning a modern sewing machine,) so I sent her a picture of her greatgrandmother's Pfaff 31 and asked if she'd like to use it - love at first sight.  Her modern machine is a typical beginner's machine - zig-zag, inexpensive, plastic, noisy, slow.  The Pfaff 31 is straight stitch only, treadle powered, quiet - and beautiful.  She's going to use it to make a stuffed (plush) animal for a friend's infant child - as soon as her university exams for the semester are completed.

    My Adler was a gift from my kids - they bought it because it was inexpensive and the seller said he used it on leather.  It was filthy and sad looking - and I found it irresistible from first sight. I've spent considerable time cleaning it and getting it back into a state where its beauty really shines.

    Between them, those three machines represent a good selection of the reasons to own and use a vintage sewing machine.

    The Pfaff machines are common here - we live relatively close to where the Pfaff factory stood before the company was sold off and production moved to where ever it is that things are made these days.  I can get on the eBay "Kleinanzeigen" (classified ads) on pretty much any day and find Pfaff machines in my area that I could buy complete (head and table with motor or treadle)  for a pittance - or just for the effort of driving over and taking it off the hands of someone cleaning out a basement or attic.

    The Pfaff 262 is "modern" enough that I can buy spare parts on Amazon.  The Pfaff 31 is common enough that I could easily get spare parts on eBay.  Both machines are closely enough related to more modern machines that consumables (needles, bobbins, bobbin holders) are available on Amazon.  User's guides and other information is available at various places on the internet - Pfaff still provides downloadable guides for many of of its older machines.

    The 262 was a professional machine for its day - made for daily use by tailors and seamstresses.  It is fast (but not too fast,) solid, flexible.

    The 31 was a home machine (a domestic, as sewing machine enthusiasts refer to them.)  It is not especially fast, but it is reliable and solid - and simple to use.

    The Pfaffs are the ideal case - good solid machines, common, well documented, have easily obtainable spare parts and consumables. They are what you want to look for in a vintage machine.

    My Adler class 8 is pretty much the opposite of the Pfaffs.  While it is a good, solid, reliable machine, it is less than ideal in that it isn't a common machine.  

    User's guides are hard to come by. 

    Compatible needles are still made today for industrial machines - which the Adler 8 was in its day. It was made for factory style use - it was made to be fast, even when operated by a treadle. 1200 stitches per minute may not sound all that fast compared to a modern industrial machine, but it was doing it with nothing more than foot power.

    Spare parts are a matter of poring through eBay, looking for bits and pieces and buying things because they were made for a similar machine and might fit the Adler 8 - or not, you take your chances and sometimes guess wrong.  I've...

    Read more »

  • A quick look at our zoo

    Joseph Eoff02/16/2022 at 20:18 0 comments

    Between my wife and I, we have three sewing machines.  We had four for a while because I was refinishing one for my daughter.

    Let's have a look:

    Pfaff 262

    This one belongs to my wife.  It is her main machine - she uses it for just about everything.  It was given to her by a friend who didn't have room for it anymore.  We've had it for probably 15 years or so.

    The Pfaff 262 was built in around 1962.  It does simple zig-zag as well as some fancy zig-zag patterns.  Besides sewing really well, it is very quiet.

    AEG 376

    My wife uses the AEG pretty much just when she needs a free arm - that's why she bought it.

    The AEG squeaks and groans and makes a lot of racket - you'd think it was hammering its way through a wall instead of sewing a couple of pieces of light cotton cloth.  It is a new machine, made some time in the last 5 years or so.


    Pfaff 31

    This is the machine I recently cleaned up for my daughter.  It isn't as quiet as the Pfaff 262, and it only sews a straight seam.

    It is a pretty machine, though, and while it may only do straight stitches, it does it very well.

    The Pfaff 31 belonged to my daughter's great grandmother.  The machine was manufactured in 1939.

    The Pfaff 31 doesn't have a motor - it is driven by a treadle in the cabinet.

    Adler class 8

    This one is mine.  It was made in about 1926.  It is a straight stitch machine, and was (according to Adler) one of the fastest sewing machines of its time.  It could do 1200 stitches per minute when driven with a treadle - no motor, just wiggling your feet on a board.  I don't have the original table with treadle that it would have been in when new.  It has to make do with an anemic 100 watt electric motor.


    It doesn't manage 1200 stitches per minute when sewing two pieces of 2.5 millimeter thick leather, but it does get on down the road.  It is frighteningly fast when sewing lighter materials.

    Sewing leather is the reason I have the Adler.

    This is the first real project I used the Adler on:

    That's a holster for my somewhat over dimensioned phone.  I'm still learning how to use a sewing machine, so there's lots of mistakes to be found in the holster.

  • Refinishing the cabinet of the Pfaff 31

    Joseph Eoff02/14/2022 at 17:47 0 comments

    I ended up refinishing the outside of the cabinet for the Pfaff 31.

    I hand sanded it to remove the old finish, then sanded it just enough more to remove the stain.

    The cabinet itself is made of oak and oak veneer.  It was originally stained in walnut to go with the walnut veneer on the front of the cabinet.

    Many of the older cabinets were made in the same style and quality as other furniture of the times.  The machines often stood in the living room of the house where it would be seen by visitors, even when not in use.

    Later cabinets were made of cheaper materials, though I'm not sure when the change ocurred.  The Pfaff 262 (made in the mid 1960s) that my wife uses also has a good quality cabinet made of oak and oak veneer (though in a lighter color.)

    I sanded the old finish off the the Pfaff 31 cabinet by hand because I was afraid of sanding too deep if I used a power sander.  The oak veneer is less than 1/8 inch (3mm) thick - it would be easy to sand through that with the rough sand paper it took to remove the old finish.

    I left the walnut veneer alone - I didn't sand it at all.

    Sanding off the finish 2

    With the old finish and stain removed, I applied new walnut stain to all of the oak pieces.

    Stain, oil, and sandpaperInvisible patches
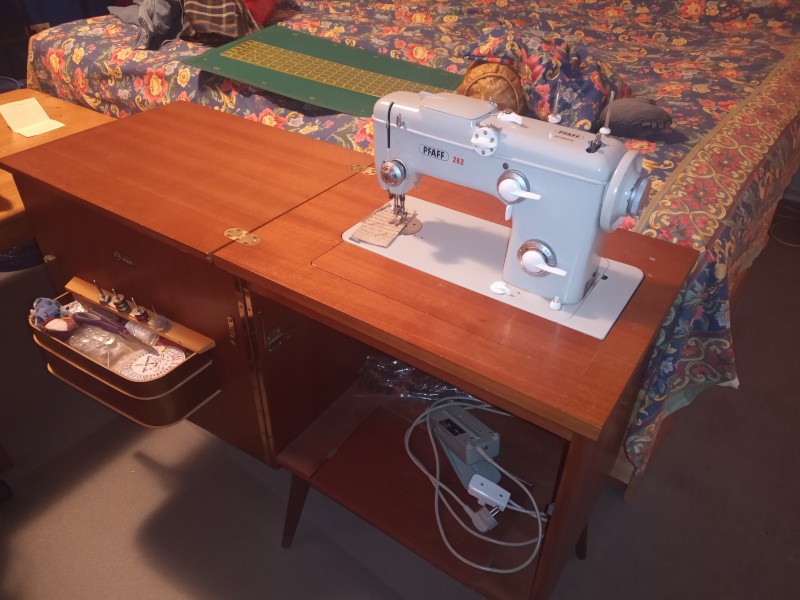
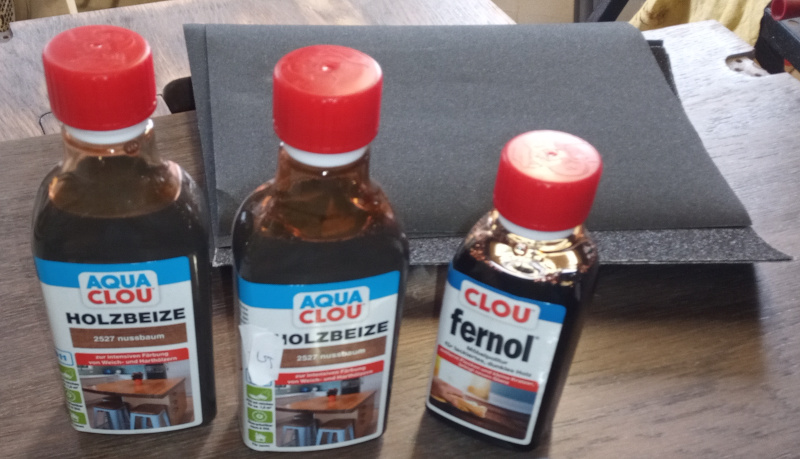
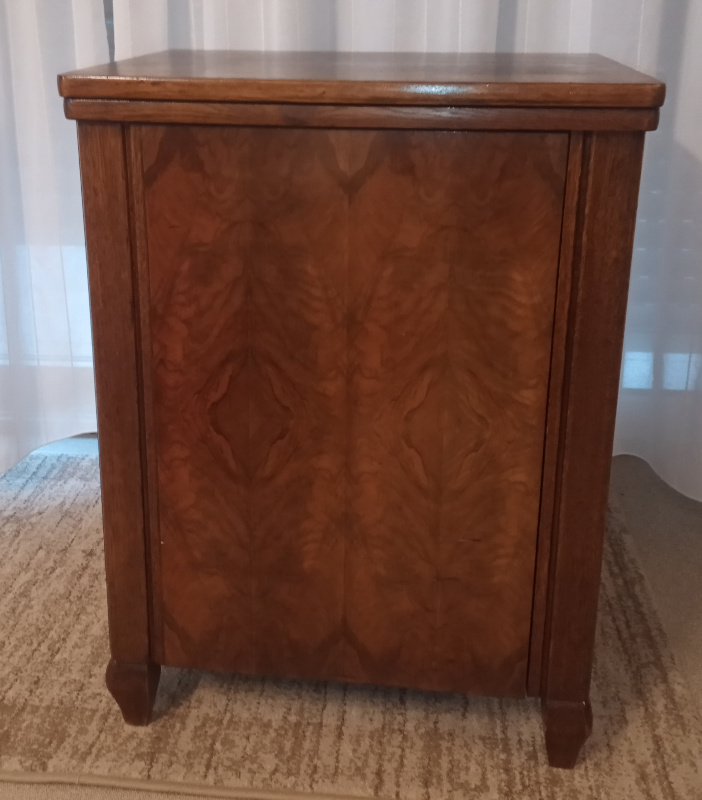
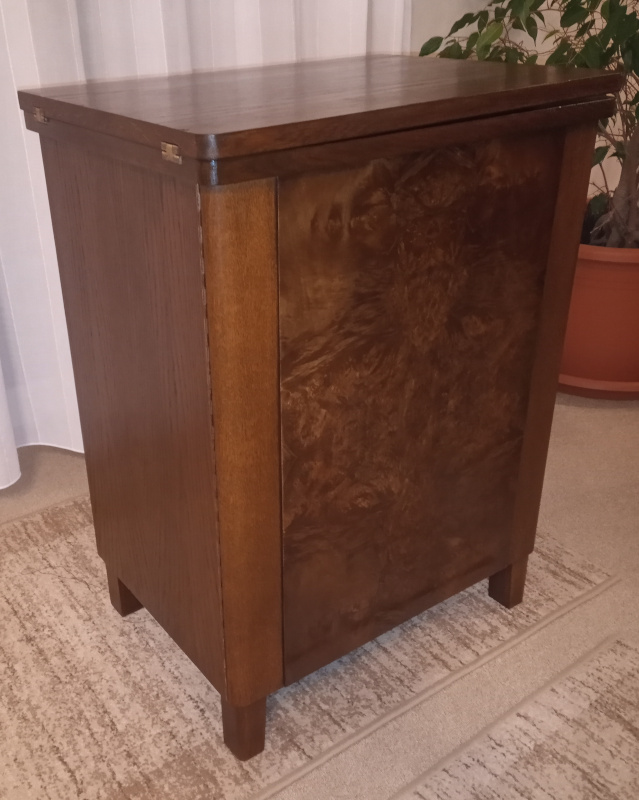
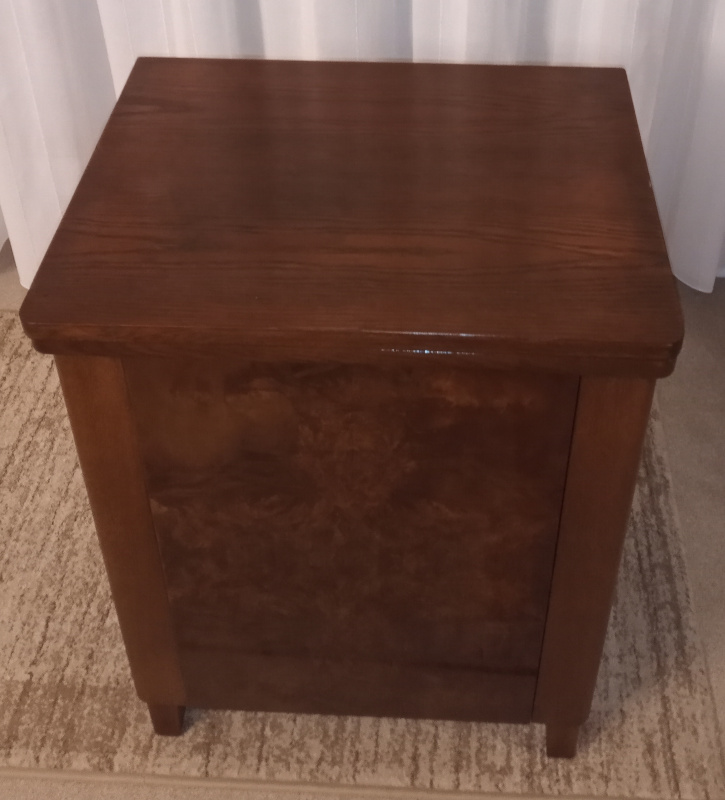
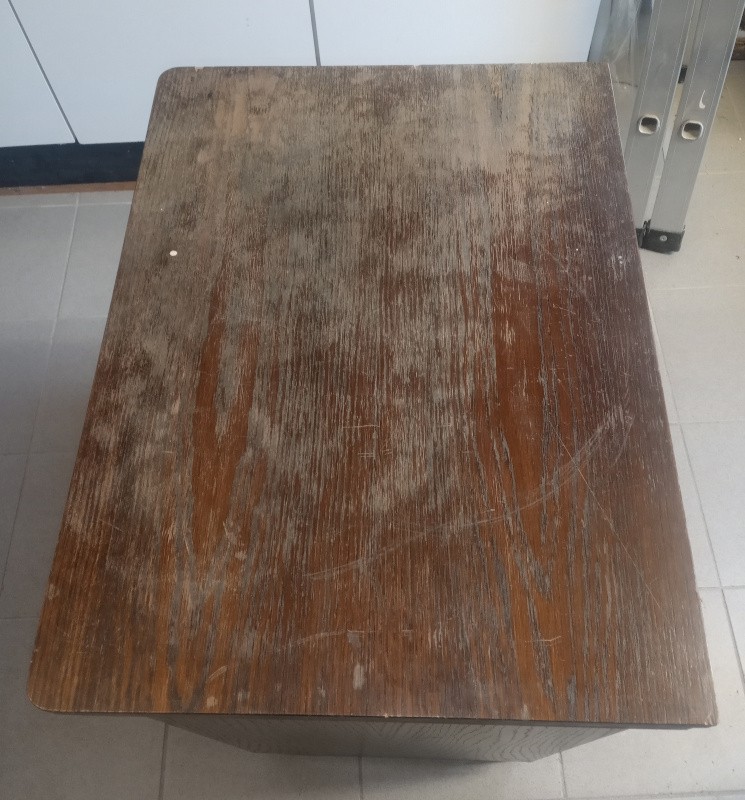
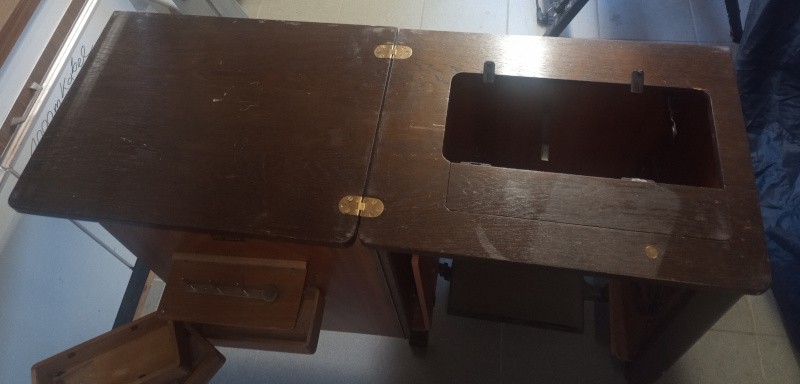
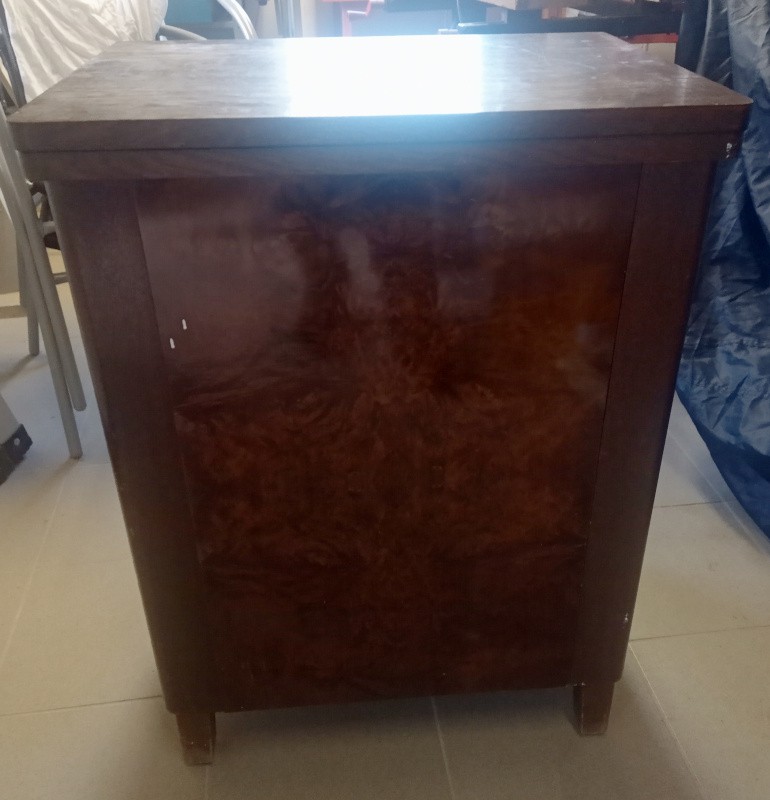
I used that bottle of "Fernol" on the walnut veneer.  Fernol is an oil based furniture polish made to clean up and restore old finishes.  It took care of the scratches and the house paint drips on the front of the cabinet.

    Shellac and ethanol

    I applied shellac over the newly stained wood.  I had a half a liter (or more) left over from when I cleaned up my Adler 8 and built its base.

    Shellac has a beautiful effect on wood.  No other finish I've seen comes close to making the wood grain stand out so beautifully.

    I use the ethanol as a thinner for the shellac.  The shellac I used was a thin "cut," but even so I found I needed to thin it some, else it would dry too fast for me to get an even coat.

    The refinished cabinet looks like this:

    Pfaff model 31 in its walnut (Nussbaum) cabinet 1
    Pfaff model 31 in its walnut (Nussbaum) cabinet 3

    After the cabinet was refinished and reassembled, I wiped the Pfaff 31 down with the Fernol and reinstalled the machine in its cabinet:

    Pfaff model 31 in its walnut (Nussbaum) cabinet 5
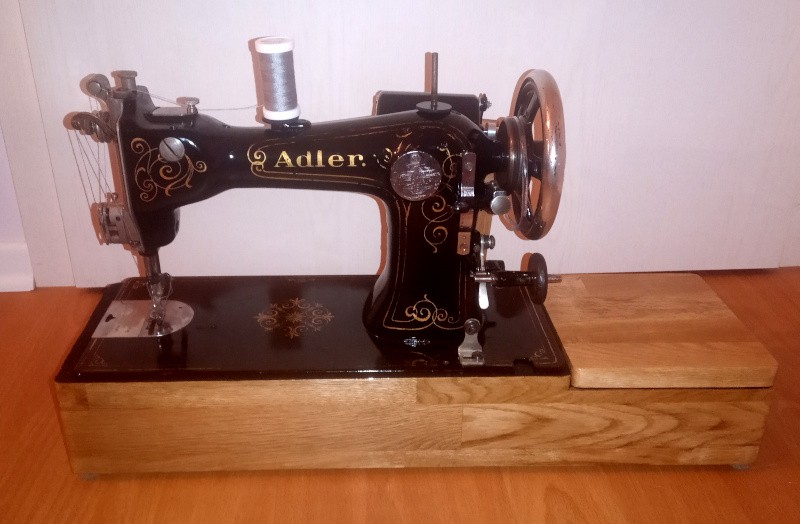
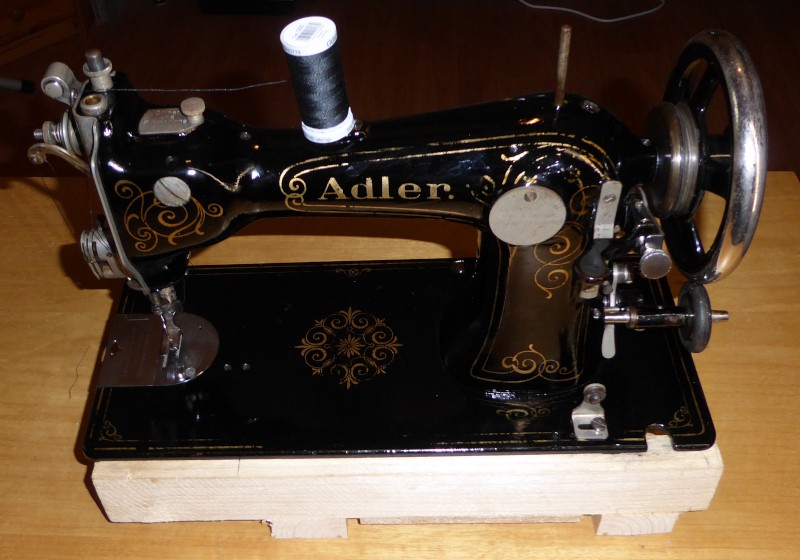
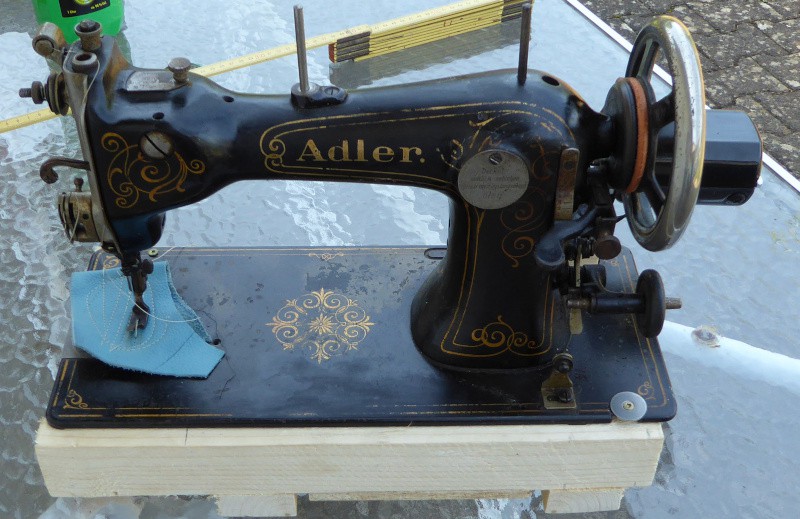
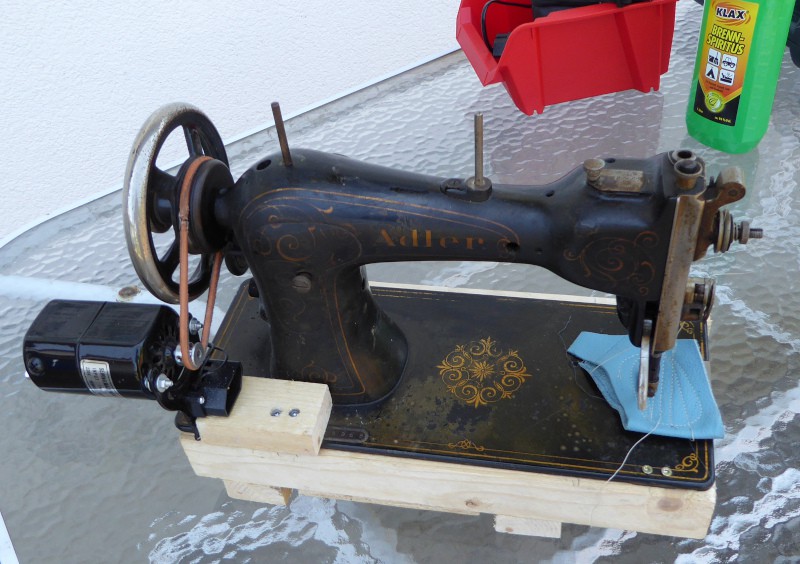
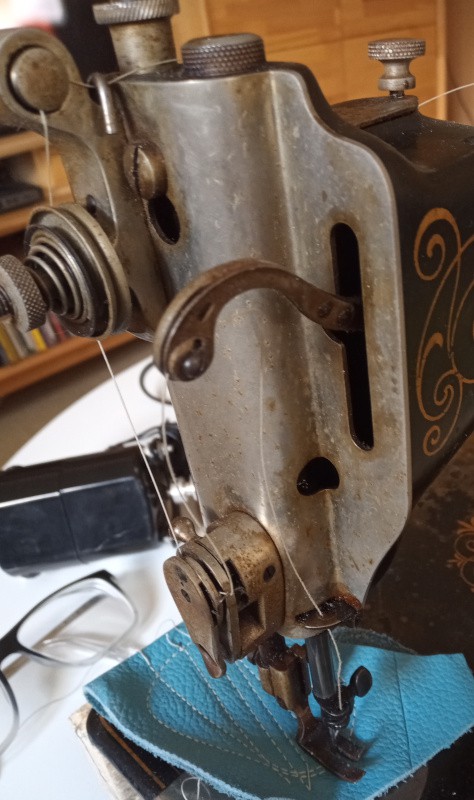
Sewing machines are traditionally cleaned with sewing machine oil.  Wipe on, wipe off.  It leaves a thin film that shines and prevents rust.  You do have to wipe off, though.  My Adler 8 appears to have only ever had oil applied to it without the excess being removed.
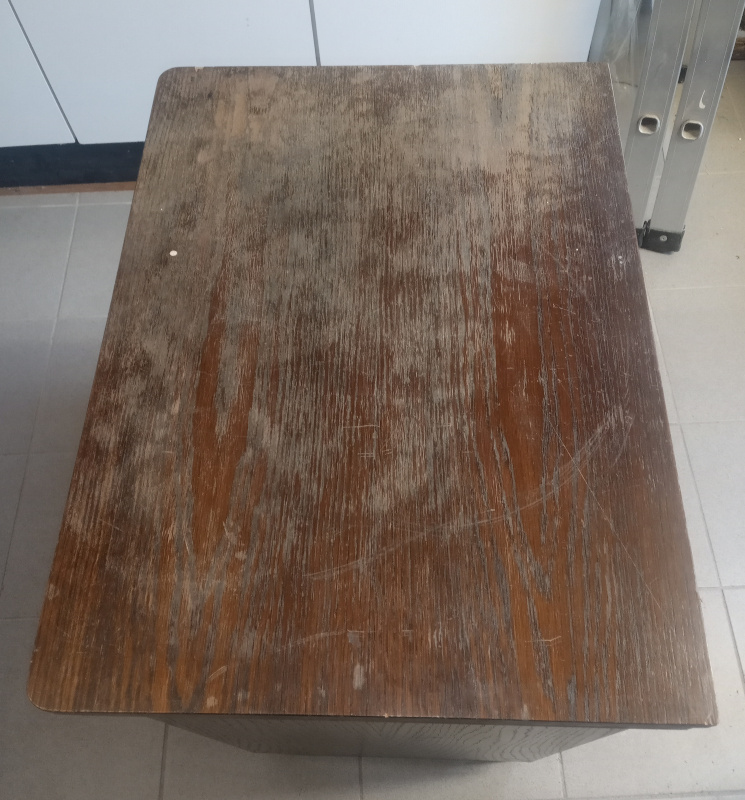
    I think the results of the refinishing (though far from perfect) were worth the time, especially as compared to this:


    Cabinet 2

    My daughter and her boyfriend visited us this weekend.  They took the Pfaff 31 home with them.

    She's promised to send pictures of the first completed project sewn on her great grandmother's sewing machine.

  • Initial state of the Pfaff 31

    Joseph Eoff02/12/2022 at 22:08 0 comments

    The Pfaff 31 I've cleaned up for my daughter had an easier life than my Adler 8.  The Pfaff 31 belonged to my father-in-law's mother - that's my daughter's great grandmother.

    Great grandmother died over thirty years ago.  My father-in-law kept her sewing machine. He took the machine out of its cabinet and used the cabinet as a work table in his workshop.

    The machine was in beautiful shape.  It had a bit of dust, but whatever oil great grandmother used on it was wonderful stuff - it sewed like she'd just used it yesterday, despite not having been used in thirty years.

    The cabinet took some damage in being used as a workbench.  There were some dings and scrapes in the surface, but nothing major.  The worst was that the finish on the sewing table and the cover was ruined.

    The walnut burl veneer front was undamaged, though it was grungy and had a couple of drops of white house paint on it.

    The only real work to getting the Pfaff 31 ready for use was in restoring the cabinet.

  • Cleaning up the Adler 8

    Joseph Eoff02/12/2022 at 11:52 0 comments

    The Adler class 8, like many older machines, is finished in black japanning.  The golden decorations may be water transfer decals or gold leaf - I don't know how the designs were applied to the Adler 8.  To protect the decoration, there was a coat of shellac applied over the entire surface of the machine.

    The shellac coat on my Adler was worn off in places - everywhere the gold decorations are damaged there was missing shellac.

    Additionally, the shellac was soaked through with sewing machine oil.

    Given the damage to the finish, I decided to strip off all the shellac and refinish the machine.

    I felt bad about that for a while because of the (inevitable) damage that stripping the shellac does to the gold decorations.  When I found that many people simply strip the machines to bare metal and repaint them with modern paint, I felt much better about how I cleaned up my machine.

    Shellac disolves in alcohol.  I used 99% pure ethanol to remove the shellac from my Adler. I buy what is known as "bio fire starter fluid" here in Germany.  It's 99% ethanol, and it is fairly cheap (a couple of Euros for a  one liter bottle.)

    I used paper towels soaked in ethanol to wipe off the oil soaked shellac, then cotton pads (made for removing makeup) to do the final cleanup.  The paper towels tend to leave scratches in the surface and to remove more bits of the decorations.  The cotton pads do less damage, but soak up less shellac.  Paper towels to remove the bulk of the shellac, cotton pads to carefully remove the last thin layer over the decals.

    After removing the old shellac, I applied a coat of fresh shellac over all the japanned areas.

    I removed most of the external metal parts to clean and polish them separately.

    This is what the Adler looked like after clean up and refinishing:


    I later polished some of the metal parts that I only cleaned the first time around.

    Cleaned up like that, I'm not worried about it getting filth on the leather (or cloth) or the thread while sewing.

    I wasn't going for some museum exhibition level restoration.  The Adler is meant to be a working tool, not a decoration.  All I wanted was clean enough to use and that it looks taken care of.

    The mechanical parts were adequately clean and (overly) well oiled.

    There was only one real mechanical problem, and it took me a long while to realize that it even existed.

    I only discovered it when I tried to properly adjust the thread tension to sew cloth instead of leather.

    That's a story for another day.

  • Original condition of the Adler

    Joseph Eoff02/11/2022 at 20:23 0 comments

    When I got the Adler, it would sew but it needed to be cleaned up.  It also had a small problem, though I didn't know it at the time.

    Here are a few pictures of the Adler taken shortly after I got it:

    As you can see, it looked really grotty.

    The last picture shows that it could sew despite the grunge.

    The machine was too pretty to leave in that condition.  Besides which, while I'm no neat freak it was simply too grungy to use.  It needed a clean up, soonest.

View all 11 project logs

Enjoy this project?

Share

Discussions

cyplesma wrote 07/13/2022 at 19:29 point

Remember it's not a sewing machine, it's a power thread injector.   8 )

  Are you sure? yes | no

Similar Projects

Does this project spark your interest?

Become a member to follow this project and never miss any updates