Close
0%
0%

Free Standing VR Support Rig

This rig doesn't require bolting to the ceiling or wall. Works with my VR shoes to keep the user in the same spot as they walk in VR.

Similar projects worth following

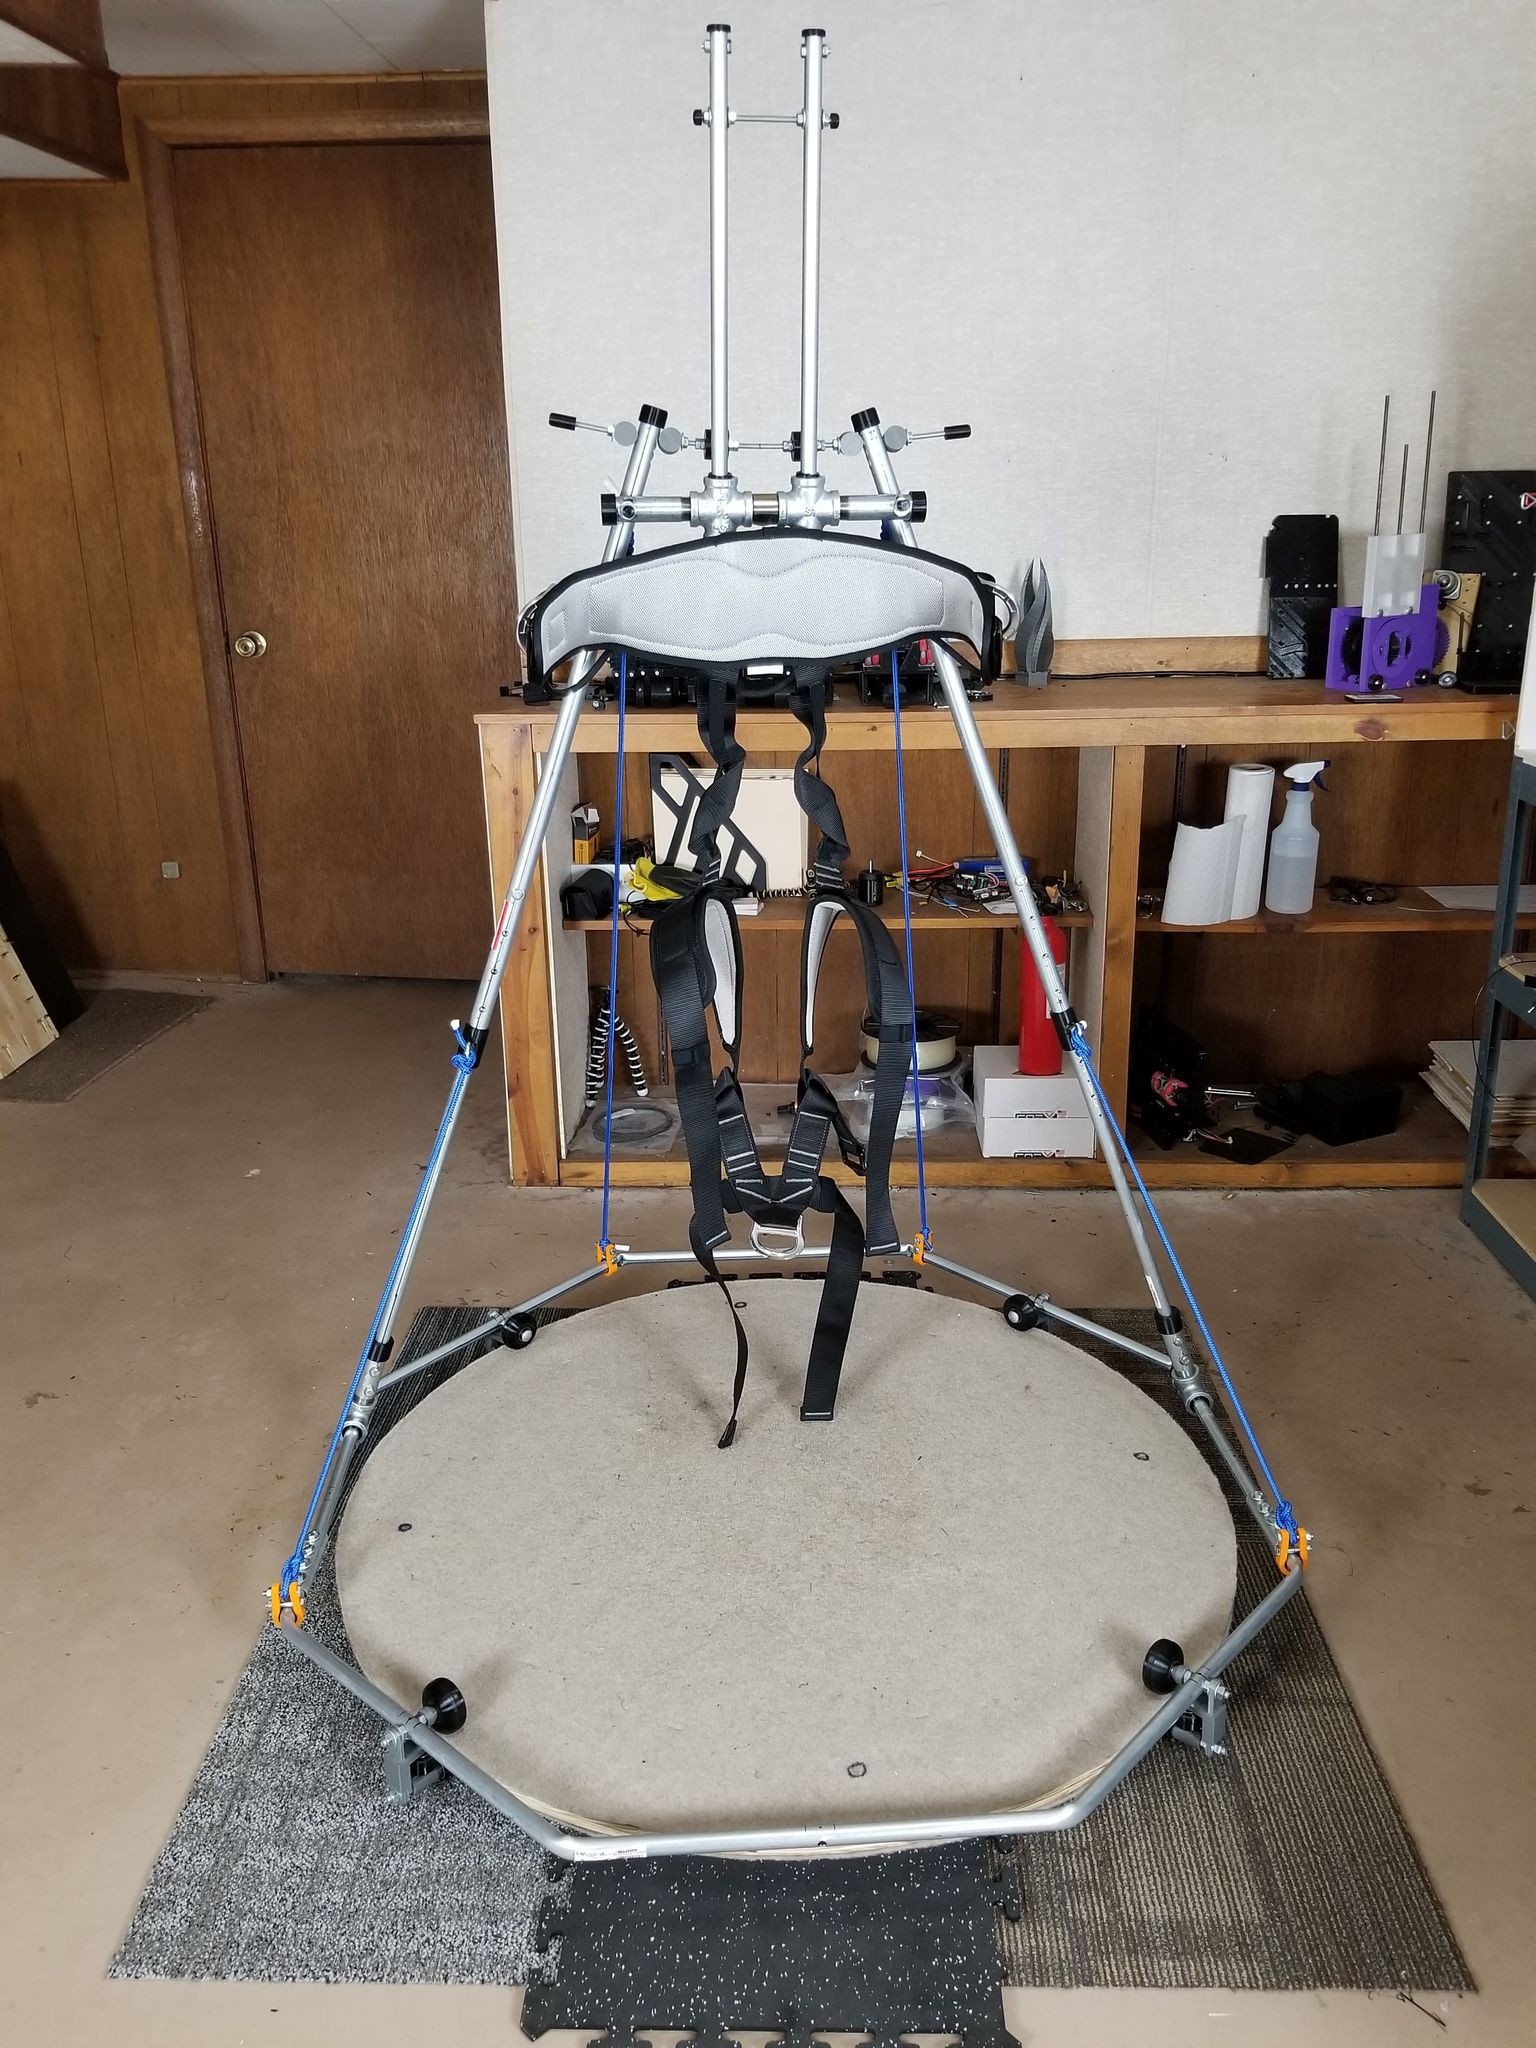
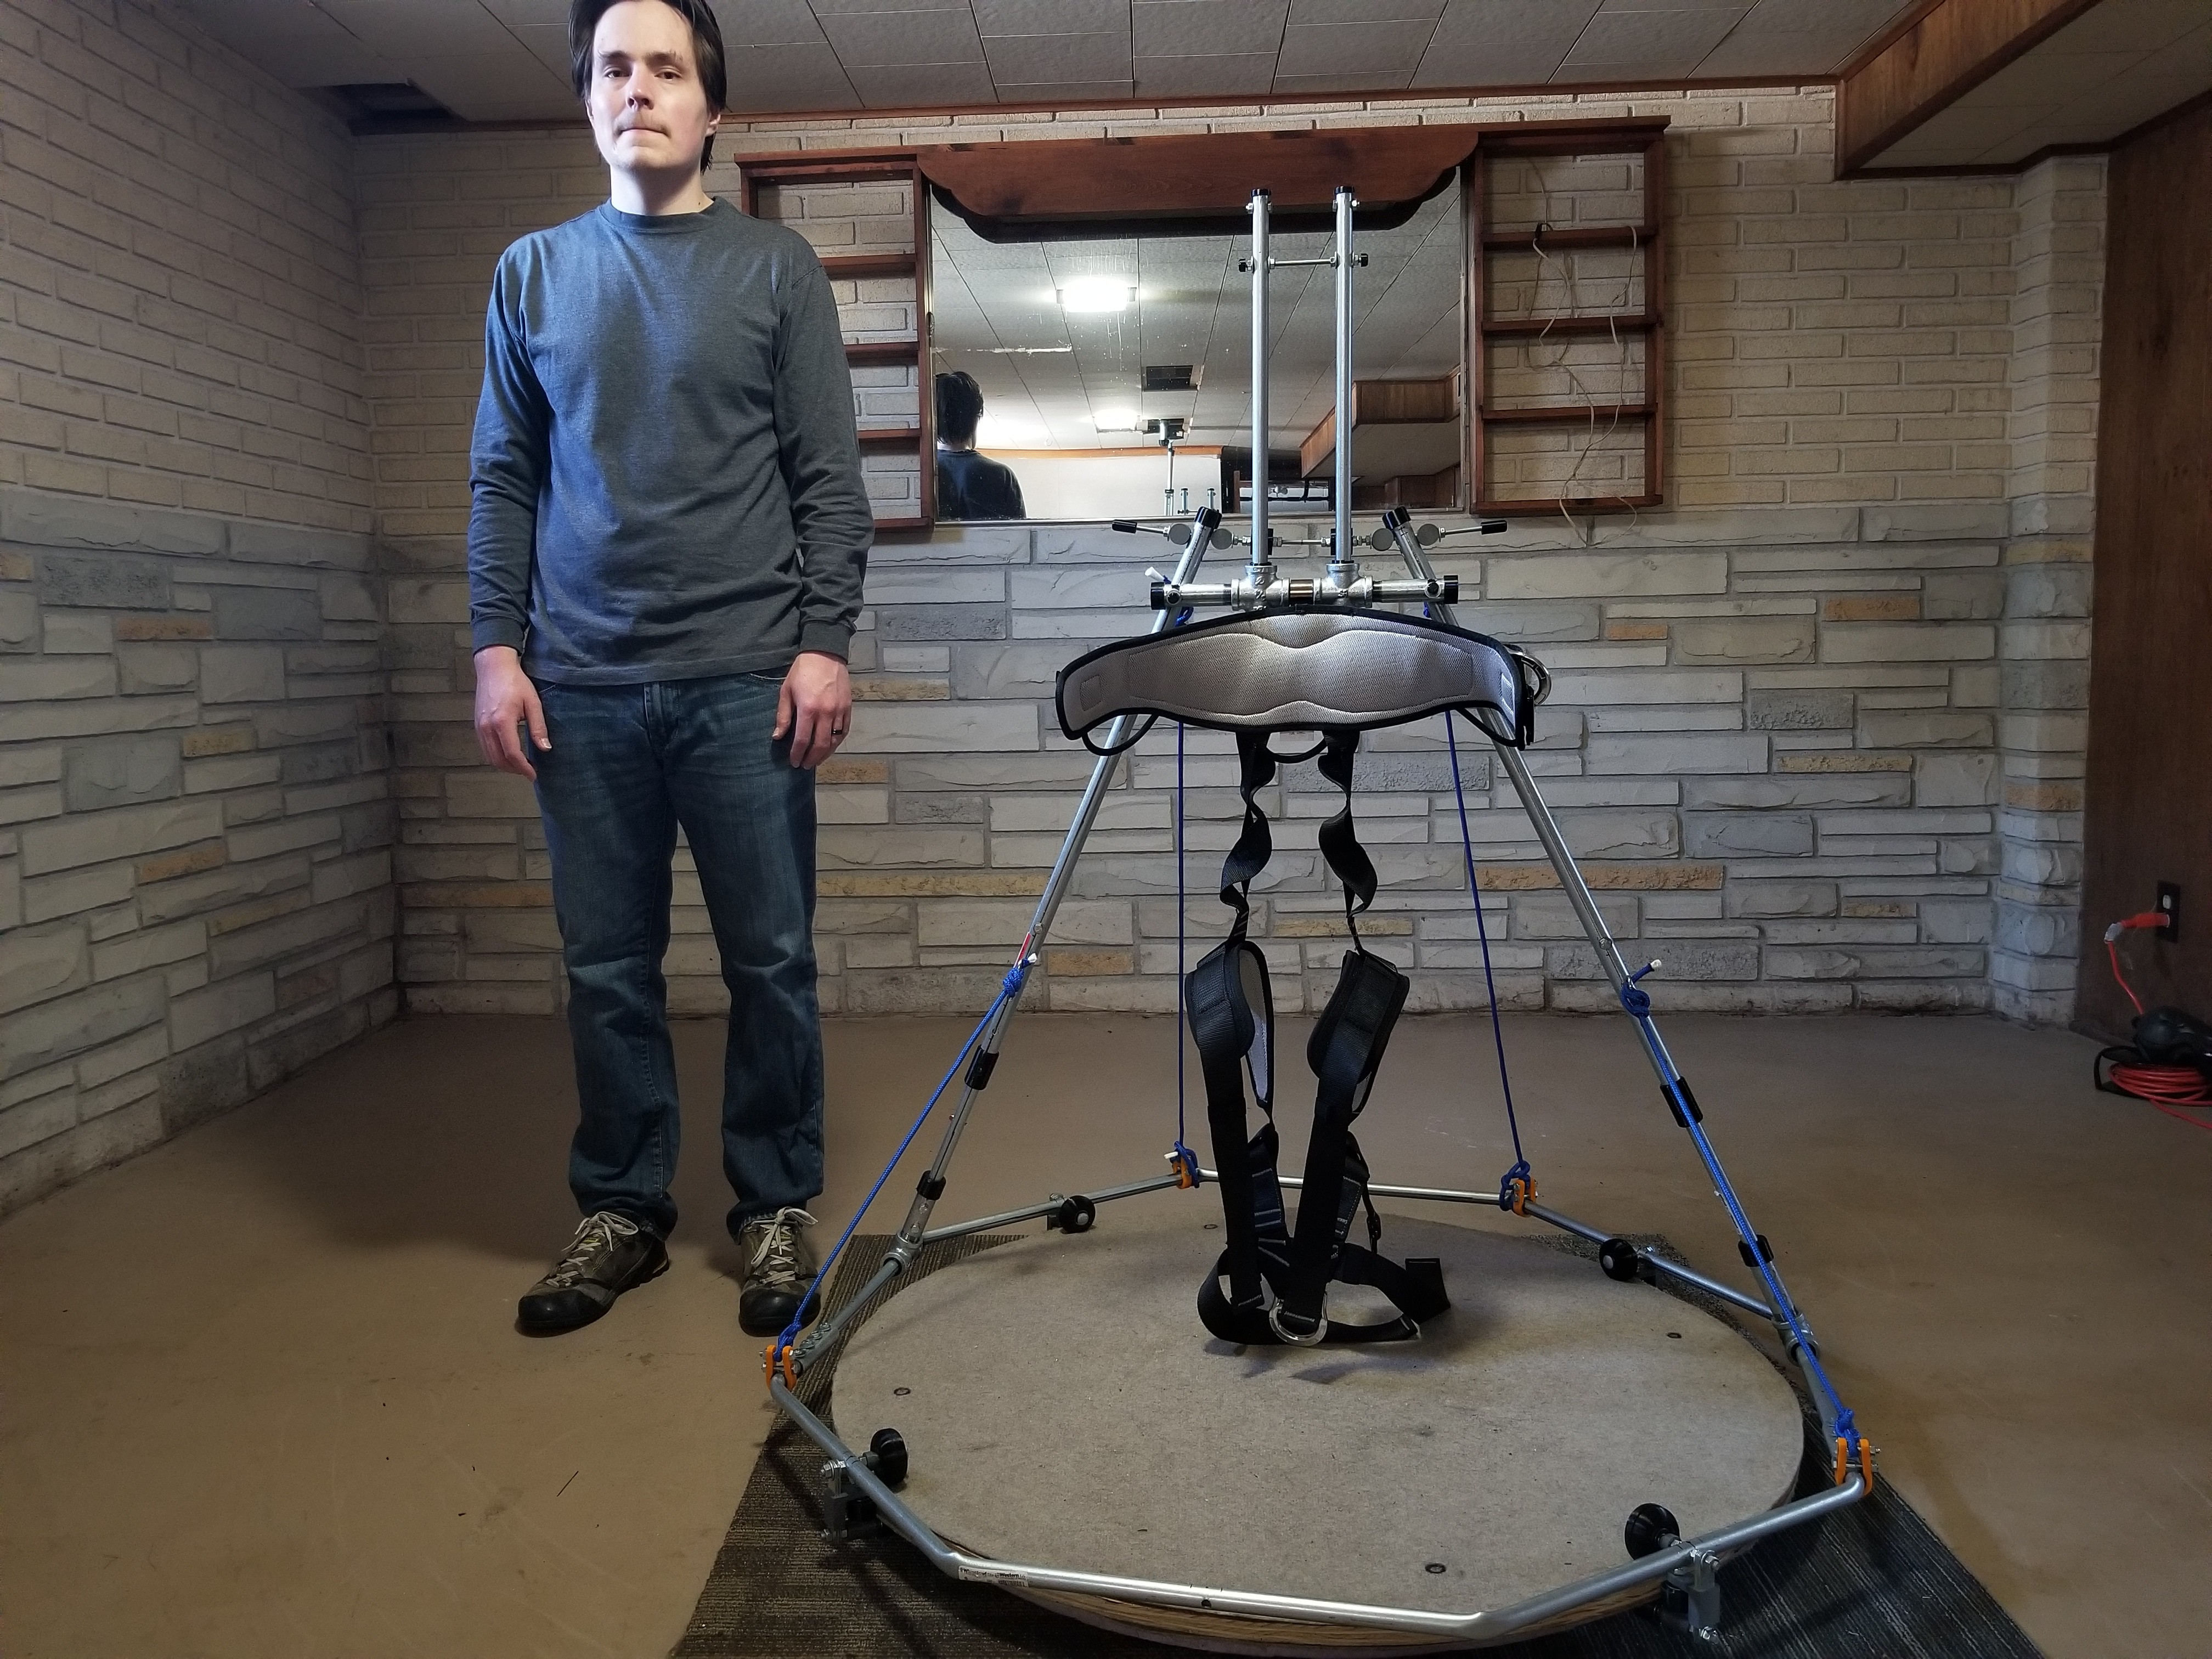
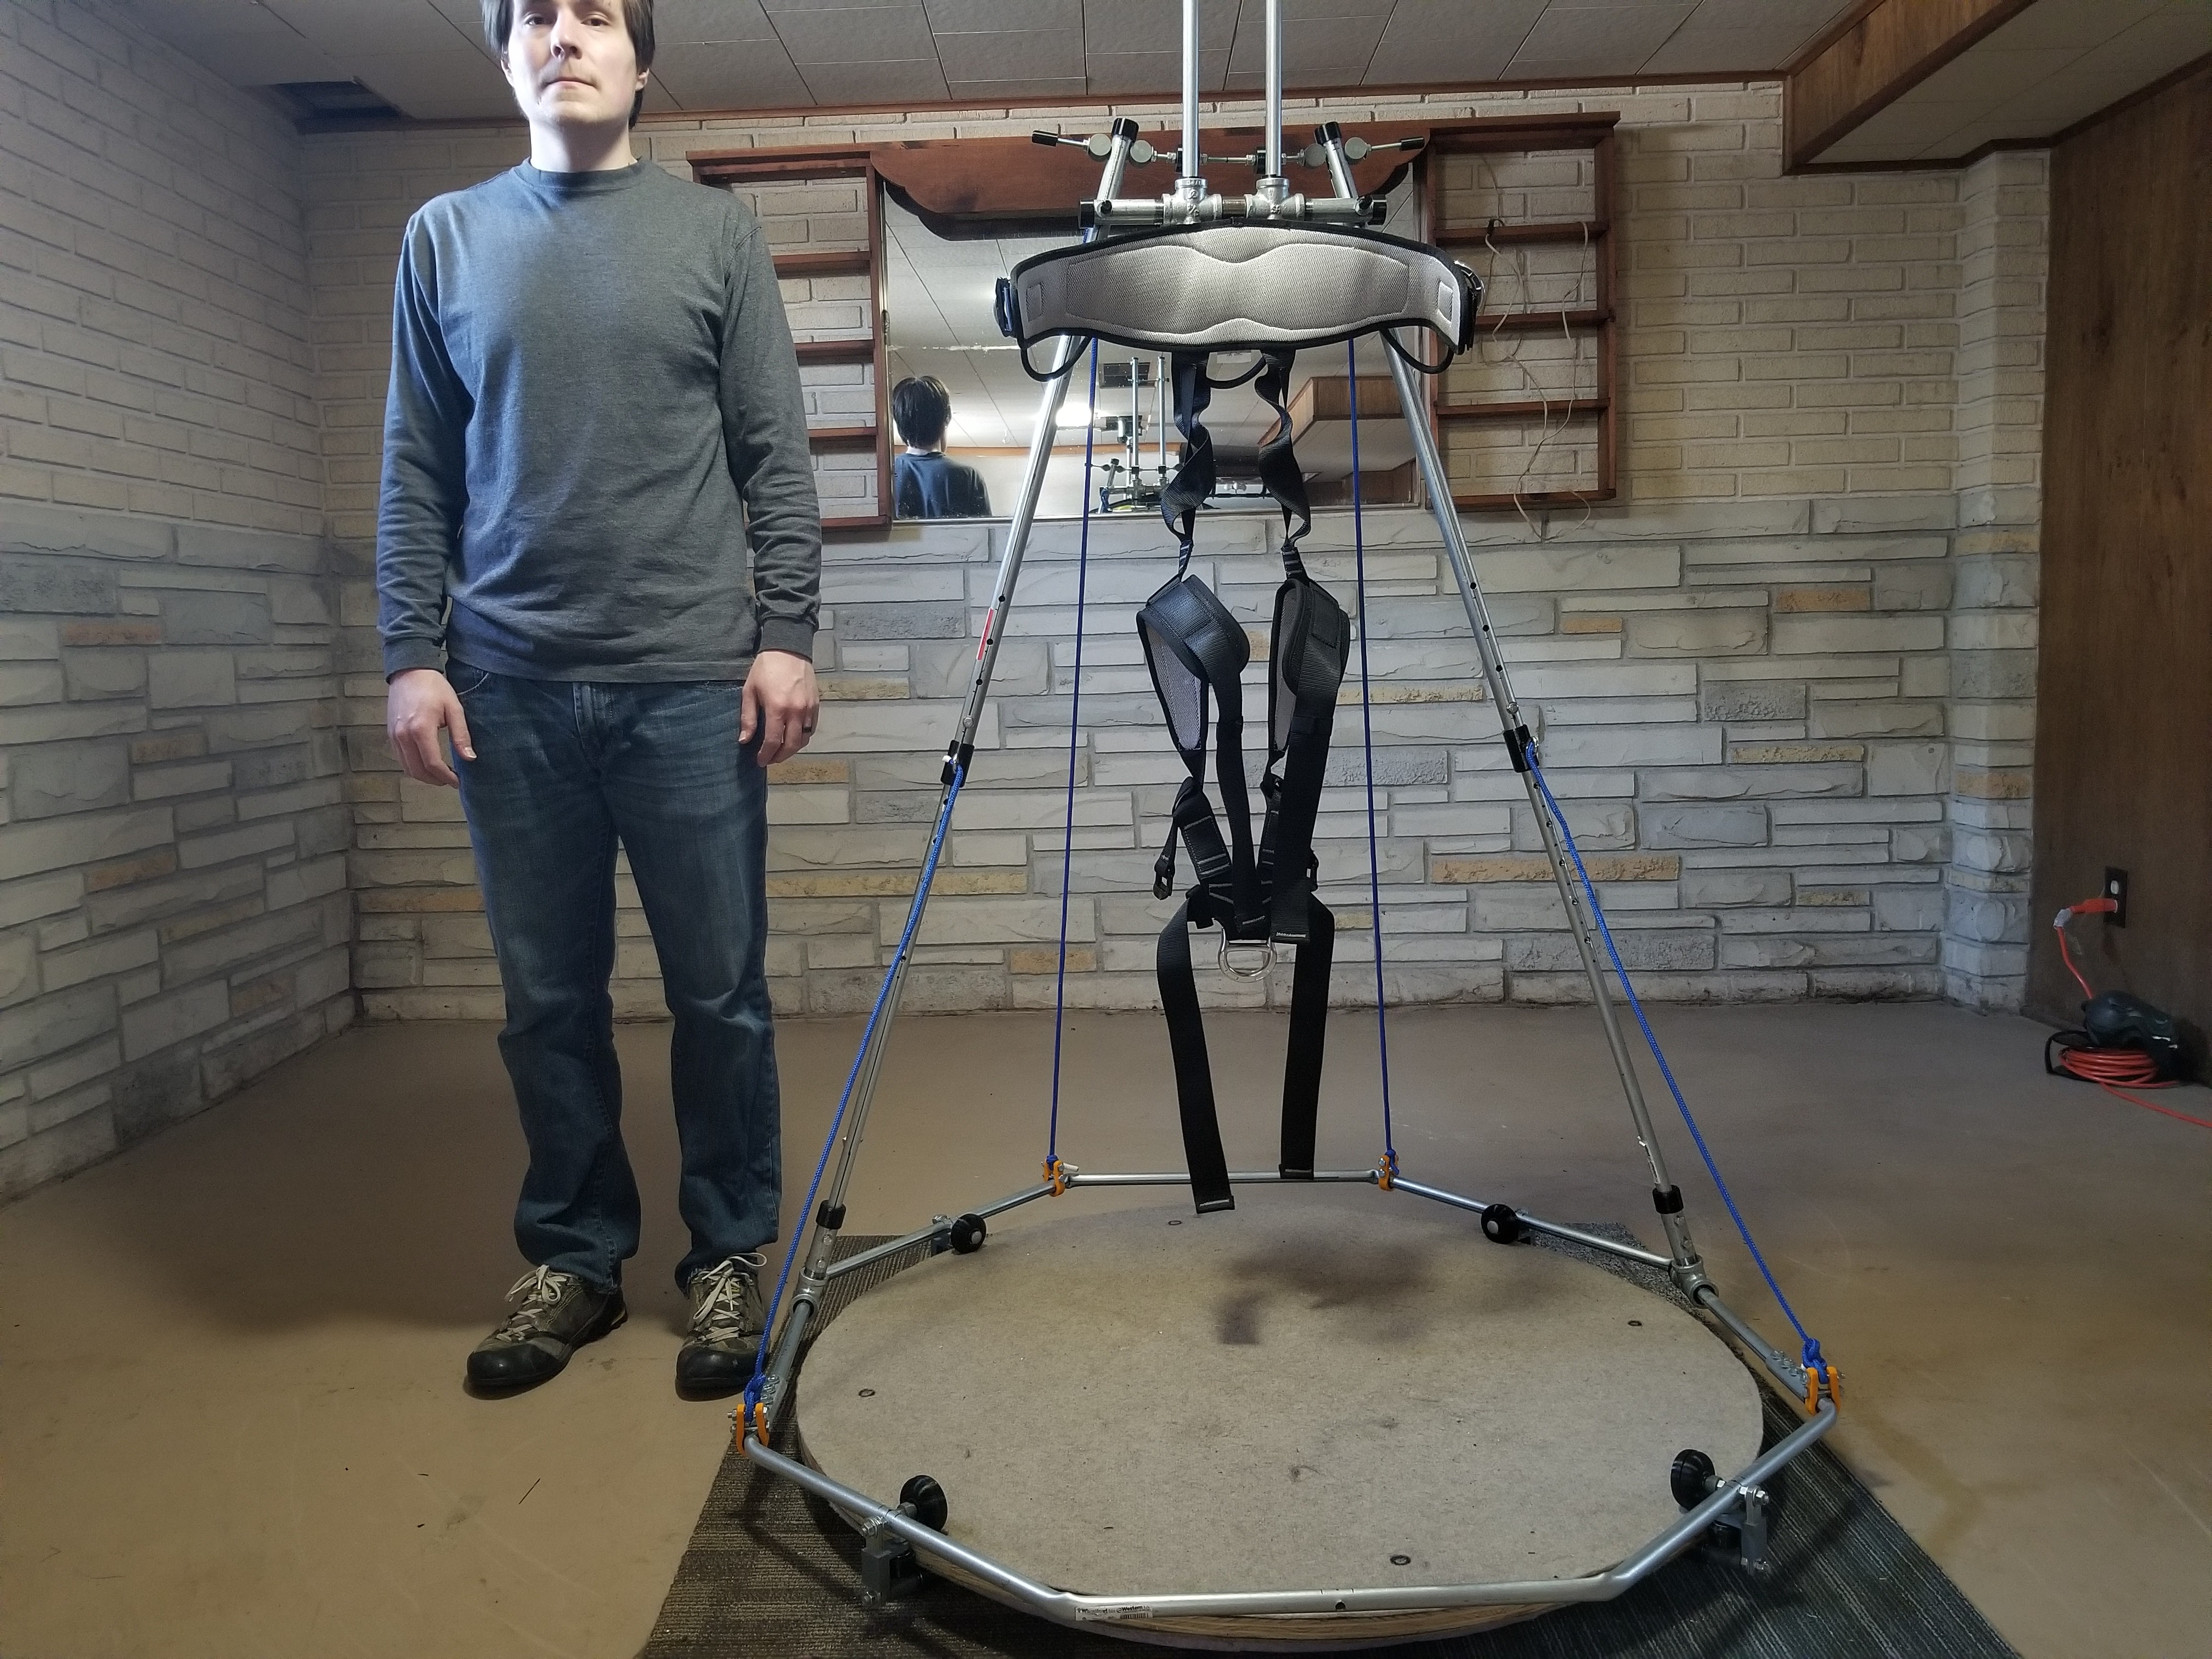
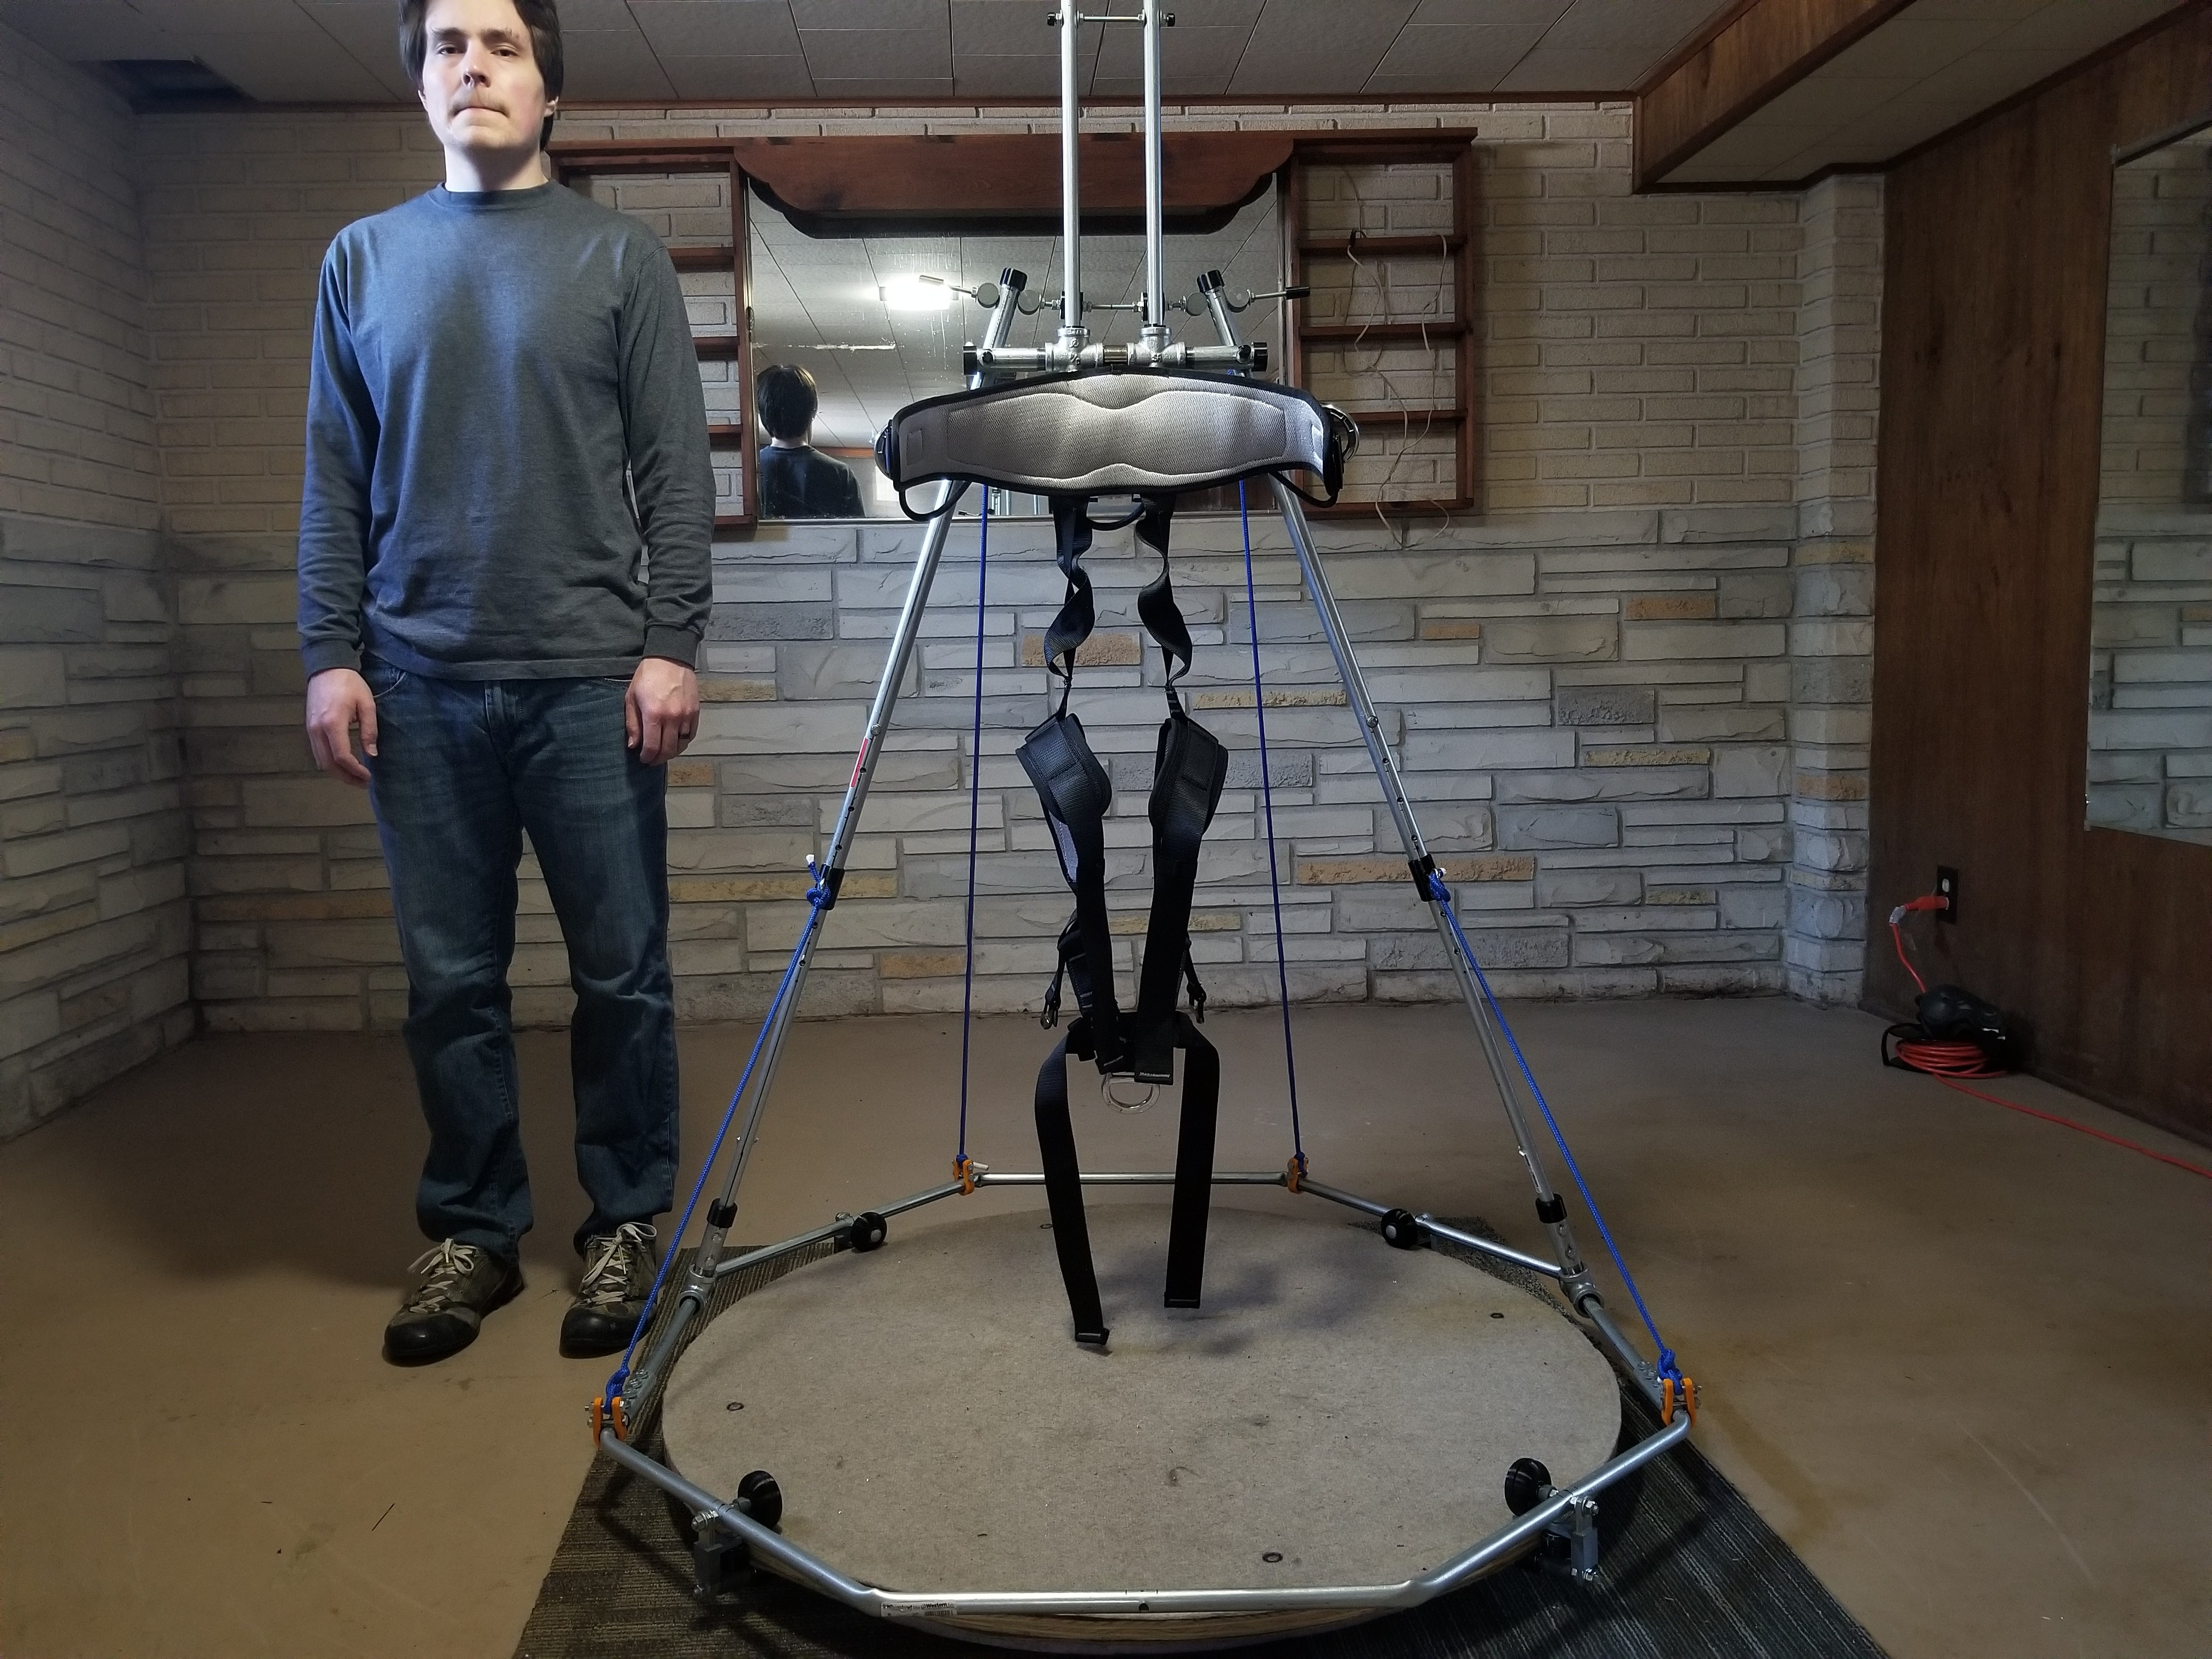
This is a free-standing (no bolting to a wall, floor, or ceiling required) VR support rig. It's for keeping the user in the same spot as they walk in VR, while the user is also wearing my passive VR shoes.

Features

  • Full 360 continuous turning
  • Adjustable height
  • Leaning forward (rig can tilt forward)
  • Crouching (distance is adjustable)
  • Sitting (distance is adjustable)
  • Easy to turn while walking
  • Relatively quiet when walking
  • No welding required to build it
  • 50 pounds (about 27 from the platform and 23 from the rig)

Not sure if you should build this rig or my ceiling mounted one? You can read my comparison between them here.

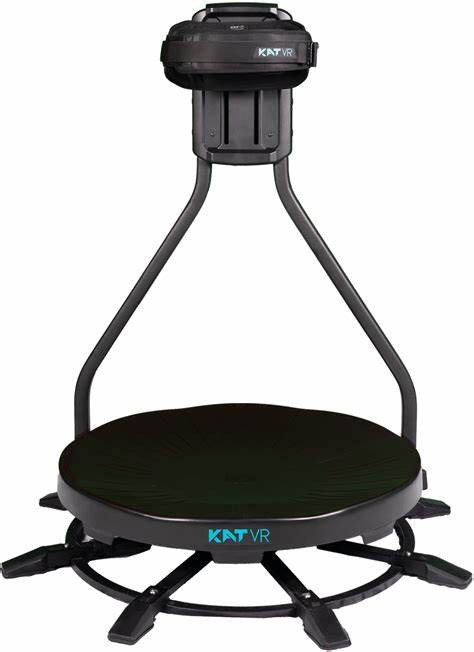
What is the difference between this and VR treadmills like the Kat Walk C? You can find info about that here.

  • Ceiling Mounted vs. Free Standing VR Support Rig

    finallyfunctional03/26/2022 at 14:13 0 comments

    I currently have two VR support rigs that are meant to be used with my passive VR shoes.

    Similarities

    Both rigs support

    • Crouching (crouching height is adjustable)
    • Sitting
    • Walking while turning.
    • The platforms are the same, so they have the same noise reducing materials.
    • The platform can be leaned flat up against a wall for storage.
    • No welding required to build either rig.

    Ceiling Mounted Rig Pros and Cons

    • Pros
      • Less time to assemble since there are less parts.
      • There is no resistance to turning. It's like butter. It's also completely silent.
      • Smaller size. Rig can be stored up on the ceiling, or the majority of it can be stored in a small closet. 
      • It's easier to make the platform as large as you want. The platform is also not required to be elevated.
    • Cons
      • Requires bolting into the ceiling.
      • It's bolted to one spot, so it can't be moved around.
      • Requires a lower ceiling. My ceiling is 7 feet tall in the basement where I have it set up.
      • Height is not as adjustable as with the other rig.

    Free Standing Rig Pros and Cons

    • Pros
      • Bolting into the ceiling is not required.
      • Can be moved around. It weighs about 50 pounds. I can easily drag or push it around my basement.
      • Height is more adjustable than the other rig.
    • Cons
      • More parts, so takes more time to build.
      • Turning as some resistance. I find the resistance comfortable and am not bothered by it, but it is noticeable, especially when switching between the two rigs.
      • While playing, I don't notice it, but turning has some noise.
      • More time to partially disassemble to store away.
      • I've designed the platform to be 42in in diameter. It could be made bigger, but would require designing and building a bigger octagon. The platform's edge must be elevated, which I use layers of polystyrene to do.

    My Preference

    After using both rigs for extended periods of time, I prefer the ceiling mounted rig. I realize this rig is not an option for many people. I prefer it mainly because turning while walking has no resistance. It also has the advantages of less parts and a simpler platform design.

    In the Future

    In the future I may design and build a 3rd support rig. This rig will take my ceiling mounted design and instead of bolting it to the ceiling, couple it to something like the frame of a swing set.

  • Differences Between This Support Rig and Similar Devices

    finallyfunctional03/24/2022 at 23:06 0 comments

    The most similar looking device to my DIY rig is the Kat Walk C.

    Both the devices have slanted tubes/bars of metal that extend up to a section that has a harness. In my case a climbing harness with leg straps, whereas the Kat Walk C uses a large waist strap. They also both have platforms that are circular. However, there are many non-trivial differences between my DIY device and the Kat Walk C, and other similar devices such as the Virtuix Omni.

    Extra Features

    My rig supports sitting because the climbing harness has leg straps. If the kat walk C had a strap that had leg straps, and the crouching distance was expanded, it could too, but it currently doesn't.

     My rig has a larger range for crouching than the Kat Walk C. It supports tilting forward as well. Lastly, the height of the rig is adjustable.

    Reduced Weight

    My rig all together weighs 51 pounds (27.4 pounds from the platform, 23.6 pounds from the rig). The Kat Walk C weighs 128 pounds.

    Noise Reduction

    From the picture above, you can see that underneath the Kat Walk C's platform are a series of legs that extend out from the center. I build a similar design, which I went over in this build log, but one of the reasons I decided against it was because it was louder than just having the platform rest on the ground. 

    I decided to go with a design that maximizes the surface area in contact with the ground, as this reduced the noise more. The platform consists of 1.5in of polystyrene, a layer of thin carpet, a 0.75in thick piece of plywood, and another layer of thin carpet. The carpet, polystyrene, and large surface area with the ground reduces noise more. You can watch some of my demos here where I also recorded the sound the rig makes. The noise made while walking is relatively quiet. Unfortunately running is still loud.

    Platform Differences

    The Kat Walk C and other slidemills use a curved, bowl shaped surface. My platform is completely flat to make it easier to build. It's covered with a thin layer of carpet to reduce noise and also to increase friction with the VR shoes a little bit. Obviously, instead of sliding on the surface, I use overshoes with wheels.

    Easier Construction

    I designed the rig so it would be relatively easy to put together. 

    • It doesn't require any welding. 
    • Most of the metal is conduit which is easy to cut and drill holes in.  It's also light-weight.
    • It uses an octagon with rollers that grip the edge of the platform. This made the platform design easier, as I didn't need a large strong bearing underneath the platform in the center, and didn't need legs holding up the platform. It's also an octagon instead of a perfect circle because an octagon is much easier to make than a perfect ring.

  • Adjustable Height

    finallyfunctional03/24/2022 at 22:46 0 comments

    This support rig allows for height adjustment. The long two slanted tubes that connect the octagon to the top part the user straps into are telescoping tubes. These are photos of the different heights with me in the background as a reference. I'm 5ft 11in tall.

    Above is the lowest setting I set up. More holes on the telescoping rods could be drilled to go lower by a maximum of about 5in.

    Above is the highest setting. More holes cannot be drilled to increase the height.

    This is the height that I personally use.

View all 3 project logs

  • 1
    Before You Build

    Prerequisite reading

    Before you buy the parts and tools to build this rig, please carefully read through the following.

    • By reading these instructions and/or building this VR support rig, you agree to my liability disclaimer.
    • Please read this log on if you should even build this rig and VR shoes.
    • This rig is meant to be used with my passive VR shoes. You'll need to build those too. You can read about those here.
    • This rig has a feature list on its project page, in the description.
    • I also have a ceiling mounted rig. You can read my comparison of the two here. The other rig might be better suited to your needs.
    • I used a specific half-body safety harness for my build. It couples to the rest of the rig in a specific way. If you use a different climbing harness with a different design, you may need to figure out a different way of coupling it to the rest of the rig.

    Again, please read everything above before you spend the money on the parts for this rig and the time building this rig. My setup is niche and not for everyone.

  • 2
    TODO

View all instructions

Enjoy this project?

Share

Discussions

Similar Projects

Does this project spark your interest?

Become a member to follow this project and never miss any updates