 Timo Birnschein
I use Inkscape to make this work.
Inkscape really has evolved into my favorite vector graphics tool. For laser cutting projects it has all the features I could wish for and appears to export clean and compatible (with some exceptions) svg files to work with VisiCut.
In Inkscape, I generated a few calibration blobs.

This is the second attempt in making this work (the first blobs were too large) and the second from the left is already the winner. They may look all the same but some of the feathering color settings change.
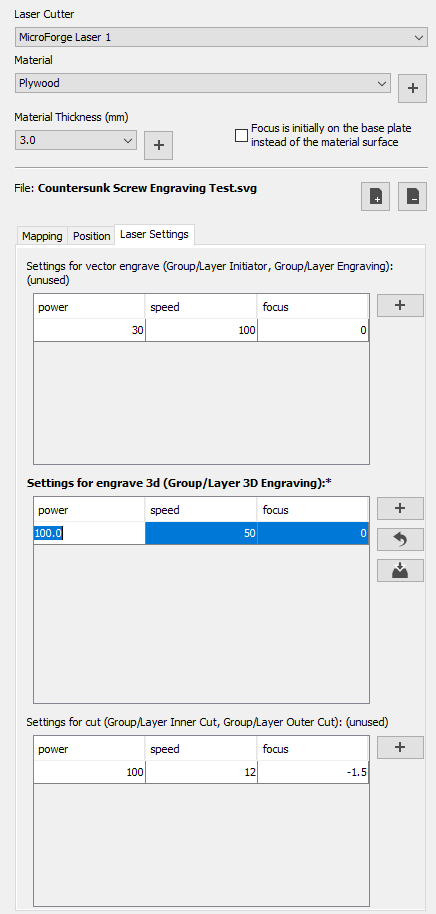
For a 3mm countersunk screw, this is a 7mm circle with color fading. The outside color starts at 30 and the inside is 220 black level (out of 0-255). The actual screw is only 5.5mm outer diameter which sinks its head into the material a bit. I guess I could have just made the entire thing deeper or engrave slower to make the engraving deeper but this is what works.

Then, I move the color faded circle onto my 3D Engraving layer and add another circle for the M3 cutout. Technically, that's not really needed as 220 already burns a hole into the material due to non-linearities of the laser power but it makes the hole more reliable and round. That circles moves onto the layer Inner Cut.
Then I export the file as svg and import it into VisiCut. There, I have a template that uses all my layers and assigns the proper profiles to them as described in here.
I need to change the engraving power for this test to be able to engrave deep enough.
Then, I just export the laser gcode and load it up into LaserGRBL:
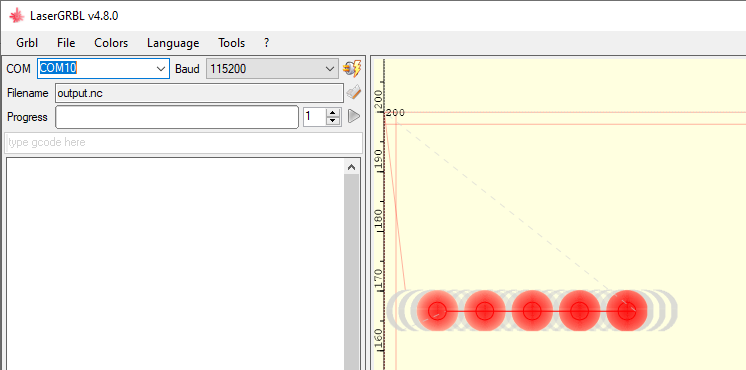
Here, I just need to click play and watch the work be done.
The output is a really well machined countersunk hole that is a liiiiittle bit too shallow for the screw to fit without tension but once tightened slightly, the countersunk M3 screw sits perfectly flush with the surface! That means no more extra drilling and not more vacuum cleaning after the rather messy counter-sinking!
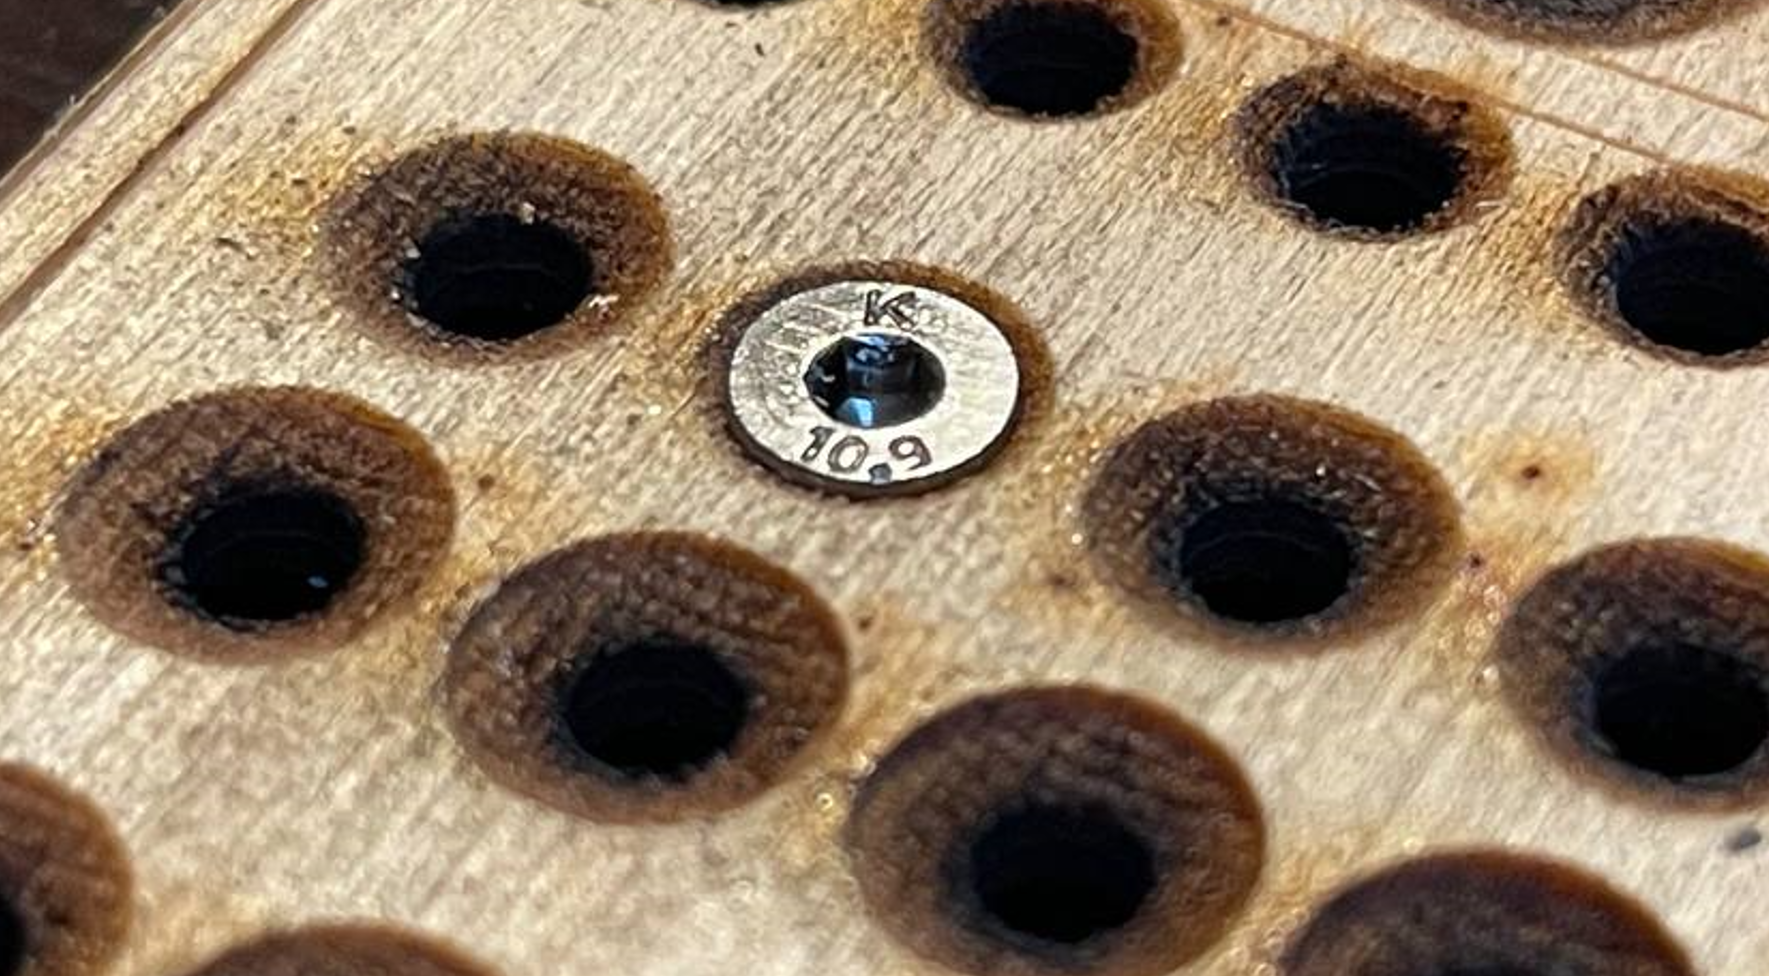
This was just a 30 minute experiment but it will absolutely go into my bag of tricks for future projects!

 Mark Langford
 David Tucker
Awesome - thanks for sharing this.