 Johann Elias Stoetzer
Actually, cutting hedges and lawns is forbidden during the breeding season to protect birds and other animals, but many do not comply with this.
Especially companies that carry out this work seem to have to show that they work for their money - so rather cut everything short?
But there are ways to protect small animals in the garden. Stricter rules alone won't help - besides, banning more and more is surely not "sustainable" either?
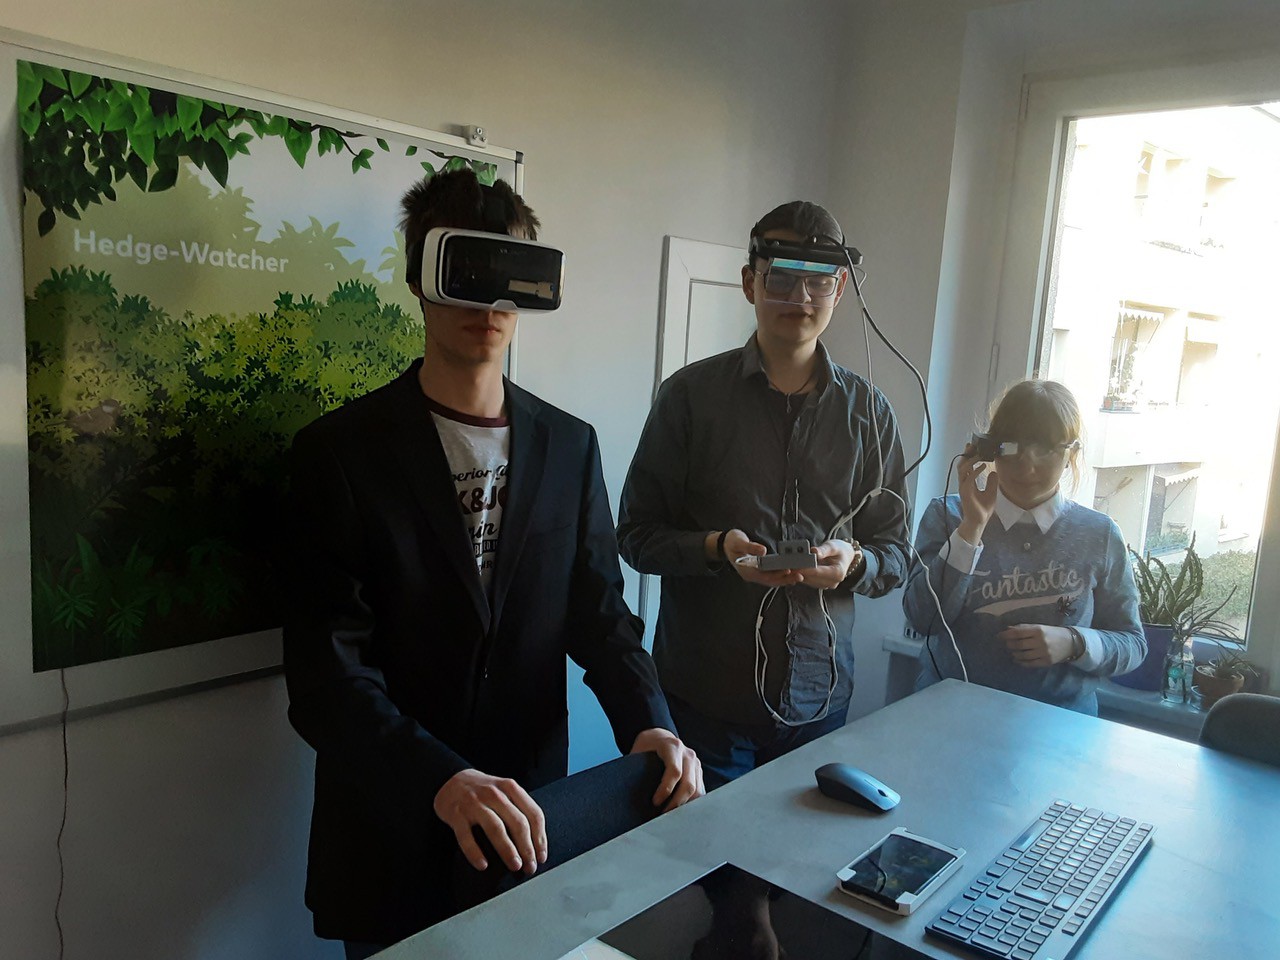
Problems can arise even within the periods when hedge trimming is allowed. Birds that live in the hedges are particularly affected by this. Often the birds are simply not seen - after all, good camouflage is (was?) an evolutionary advantage for them:

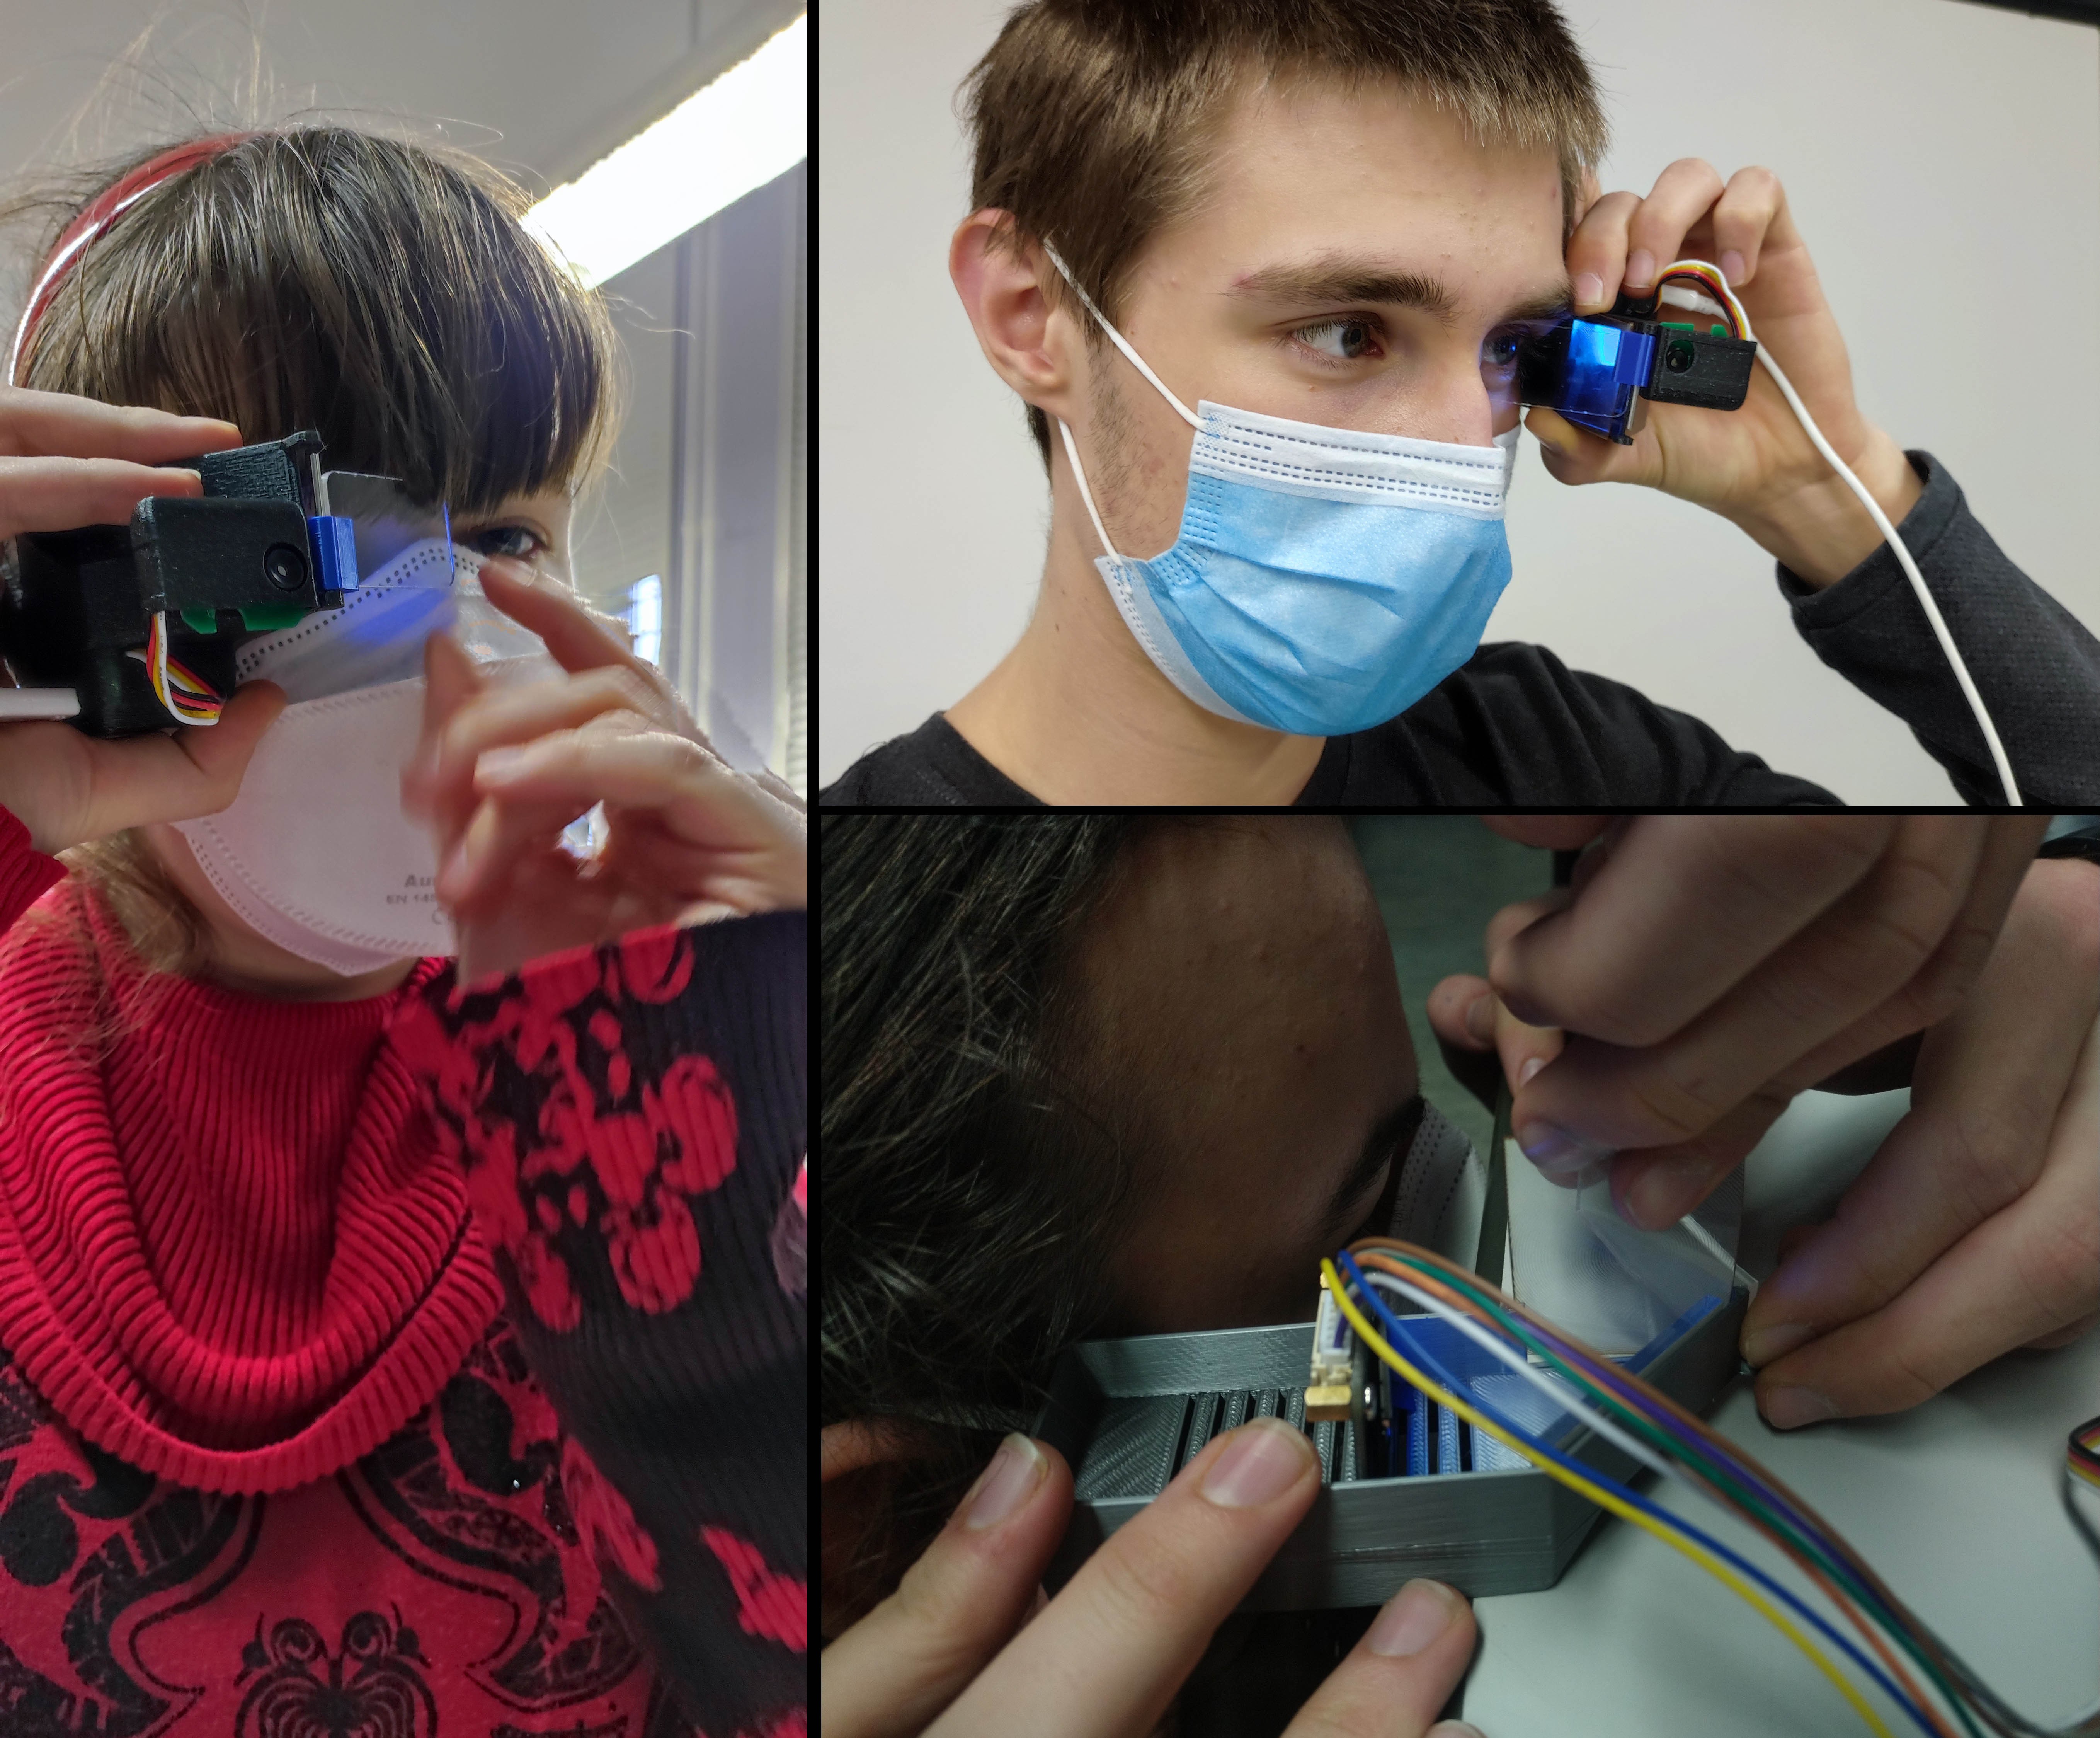
(can you spot the bird in the left picture?)
Being considerate of and protecting birds when gardening is extremely important, as the animals make a significant contribution to the ecosystem (natural enemies of pests, pollinators of fruits, and seed transporters).
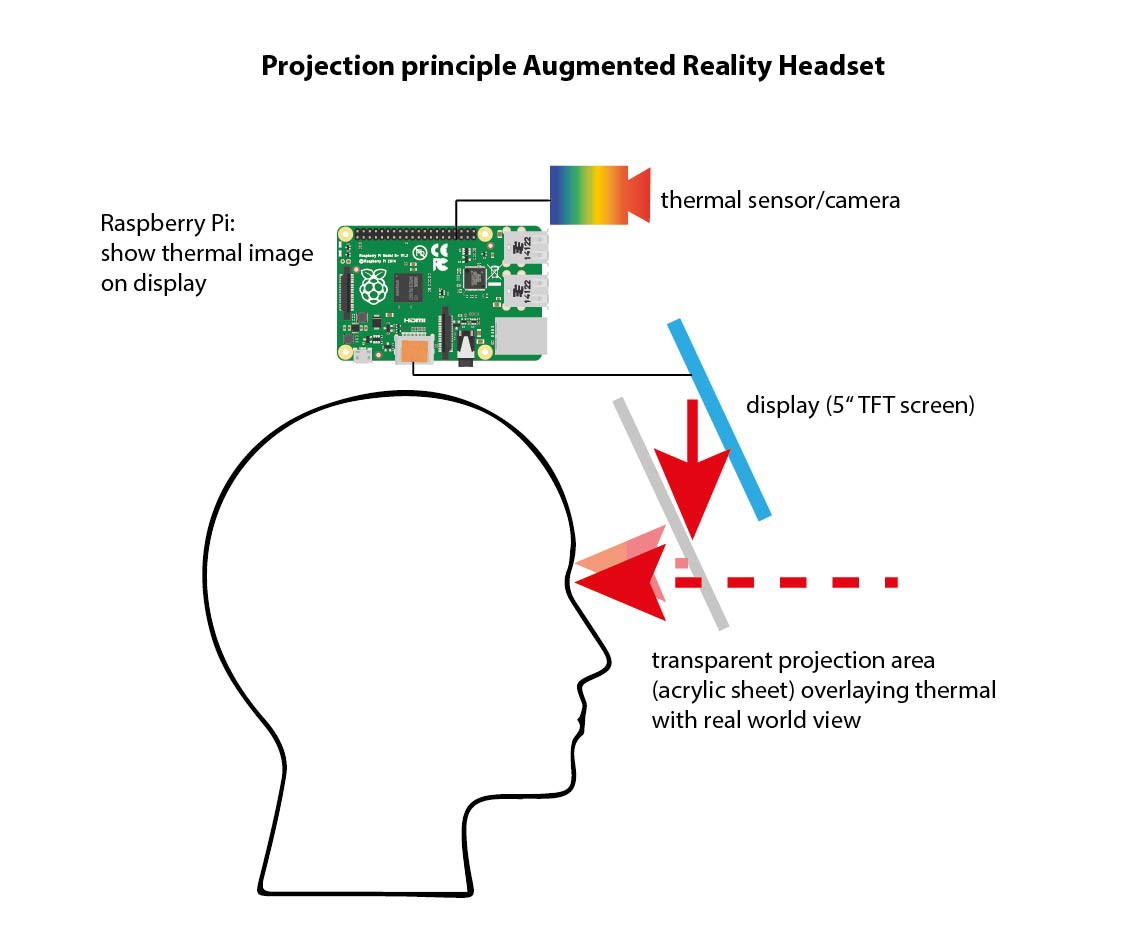
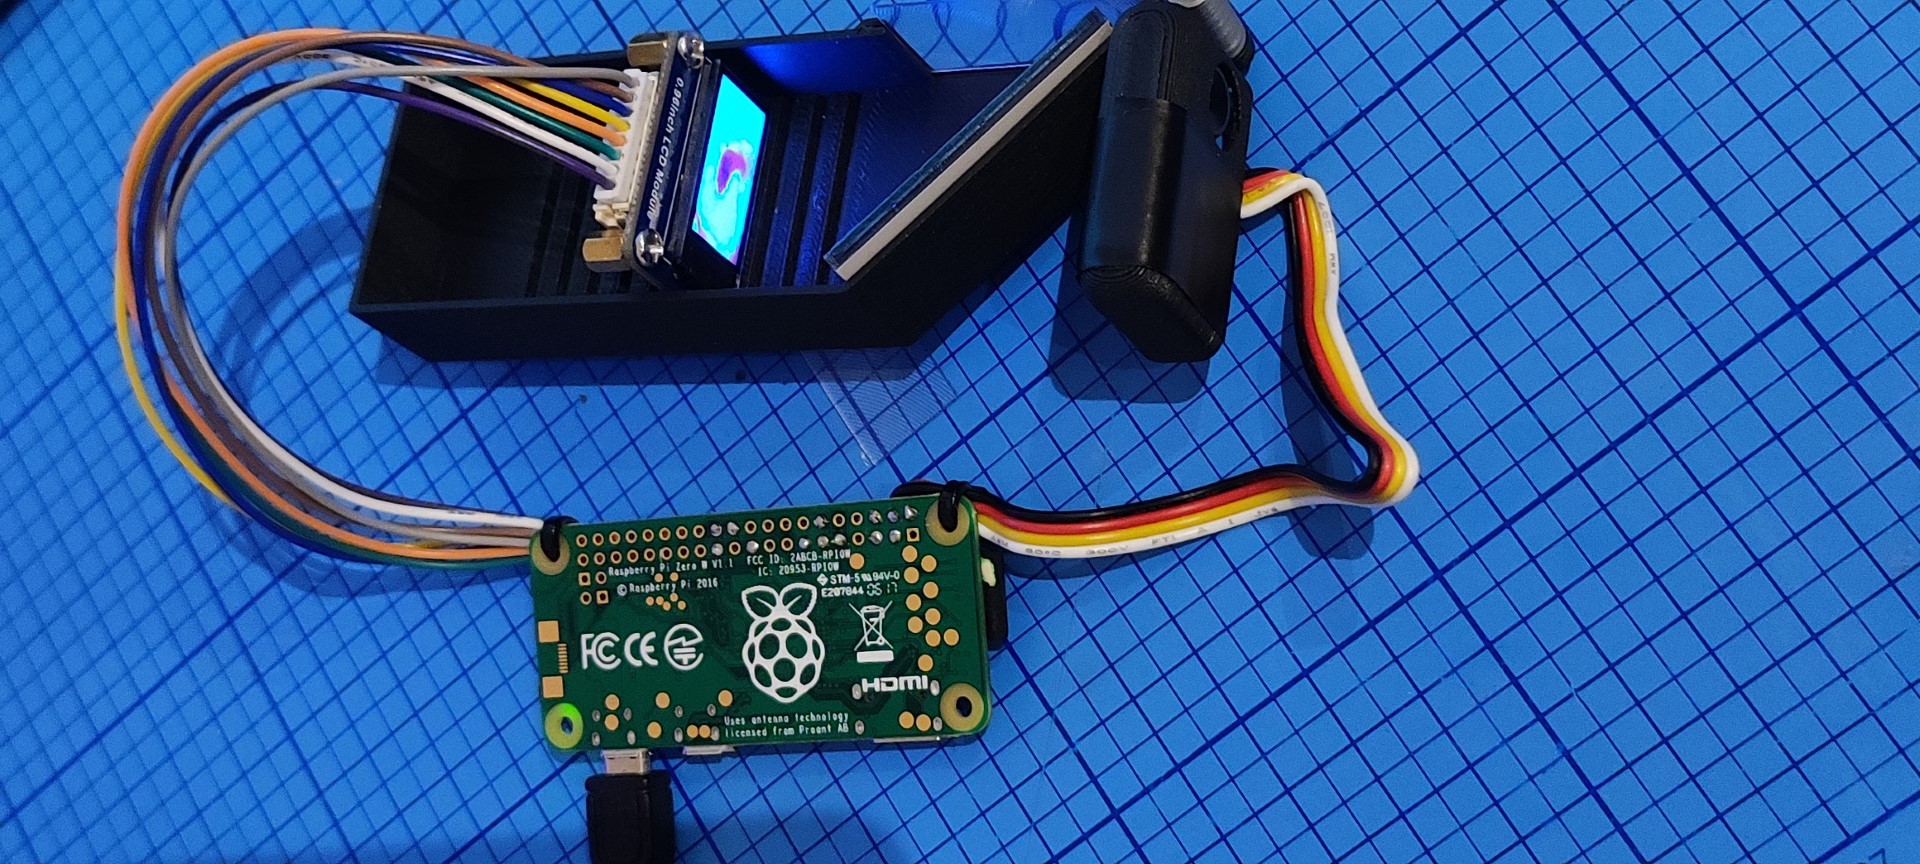
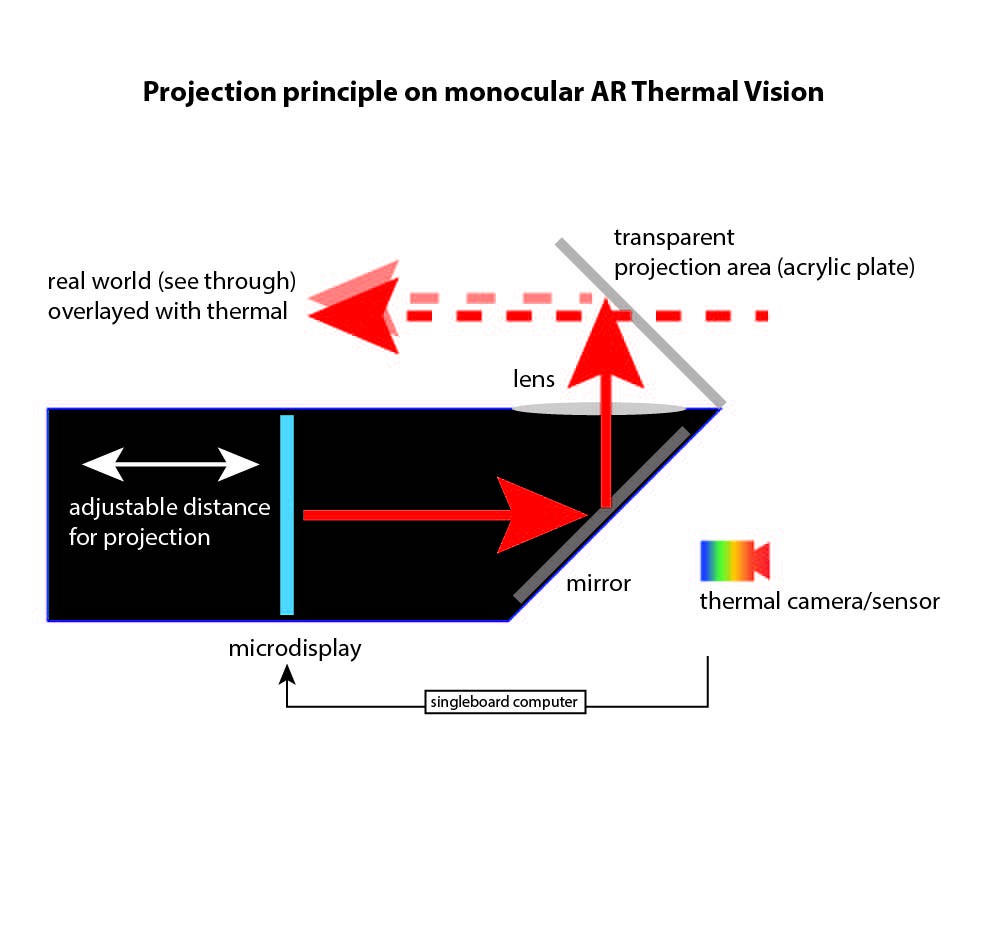
In order to expand our visual perception and make the birds visible during cutting jobs, we therefore, have to find a way to expand our vision with the help of a technical solution: Birds are usually well camouflaged in the light visible to us, so it seems sensible to locate the birds in the hedges via their body heat - also known as thermal imaging ;-)
One possibility would be to attach a thermal imaging camera to the hedge trimmer in order to visualize the birds in the hedge. However, this did not seem to us to be effective for three reasons:
- You could not constantly see the required thermal image. The eyes would have to constantly focus back and forth between the tool and the screen of the thermal imaging camera. This distraction of attention when using a power tool could also lead to accidents!
- The area displayed by the camera would not be on the same axis of vision and thus considerably offset from what is perceived by the human eye. Thus, one would not know where exactly the bird is in the hedge.
- When changing tools (e.g. hedge trimmer to branch cutter), the camera would have to be remounted to the new tool.
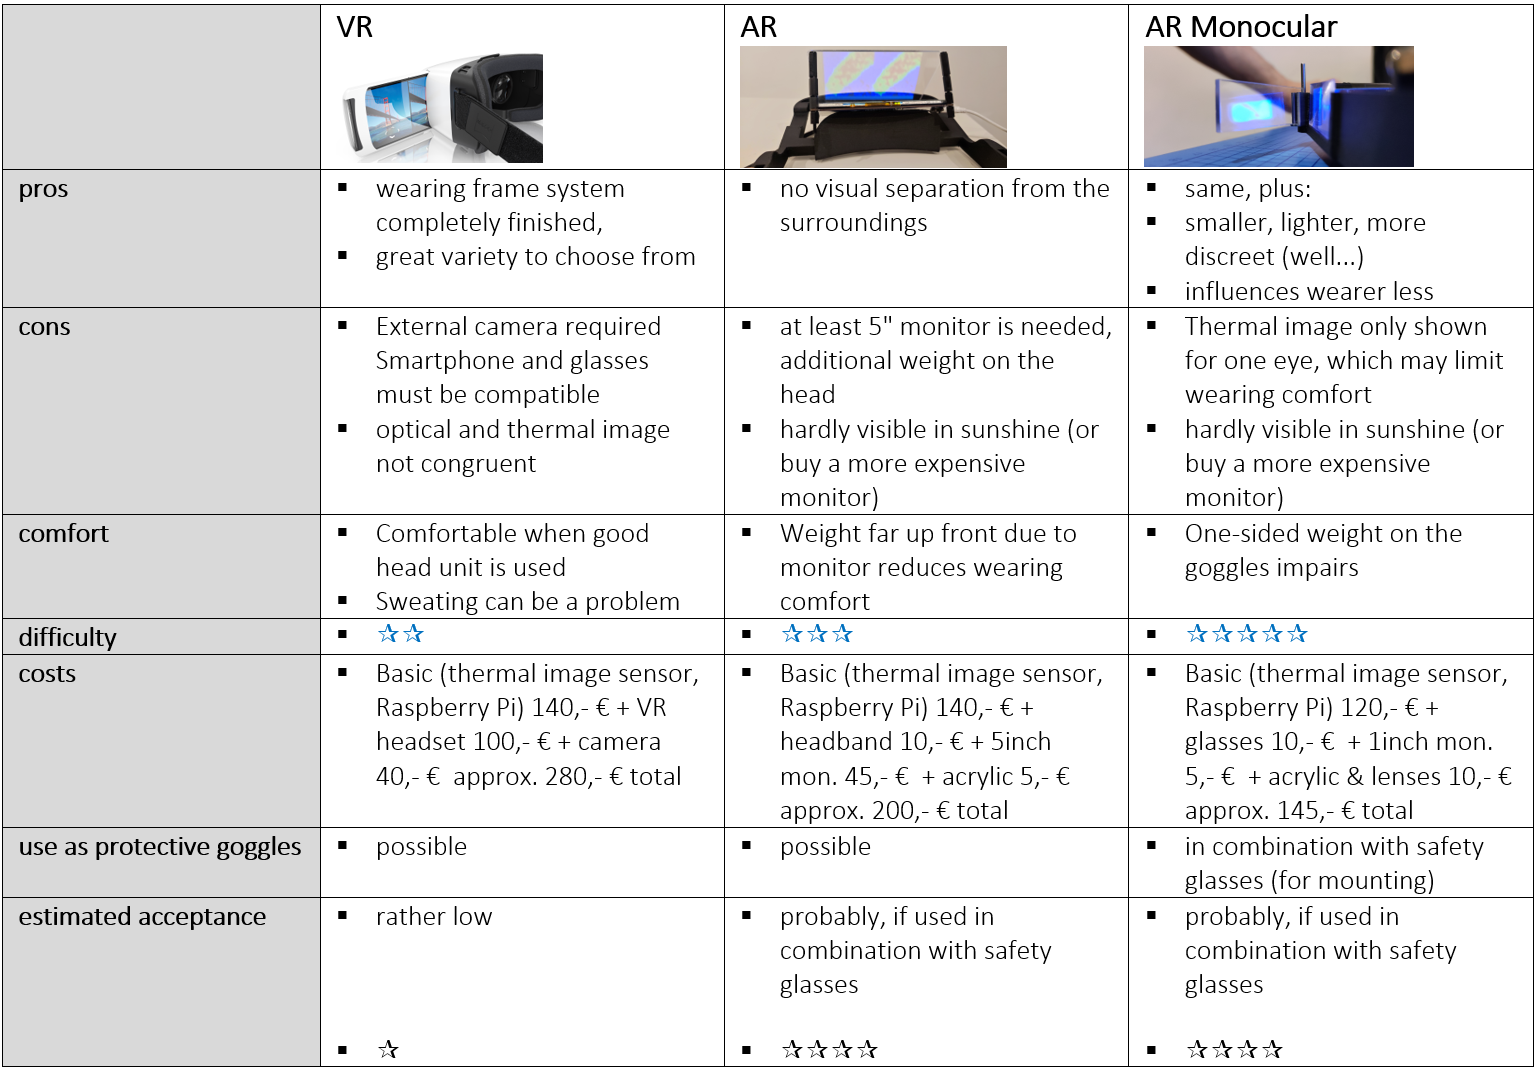
Alternatively, we want to develop three approaches to detect camouflaged animals in hedges using a thermal image sensor that do not have these disadvantages:
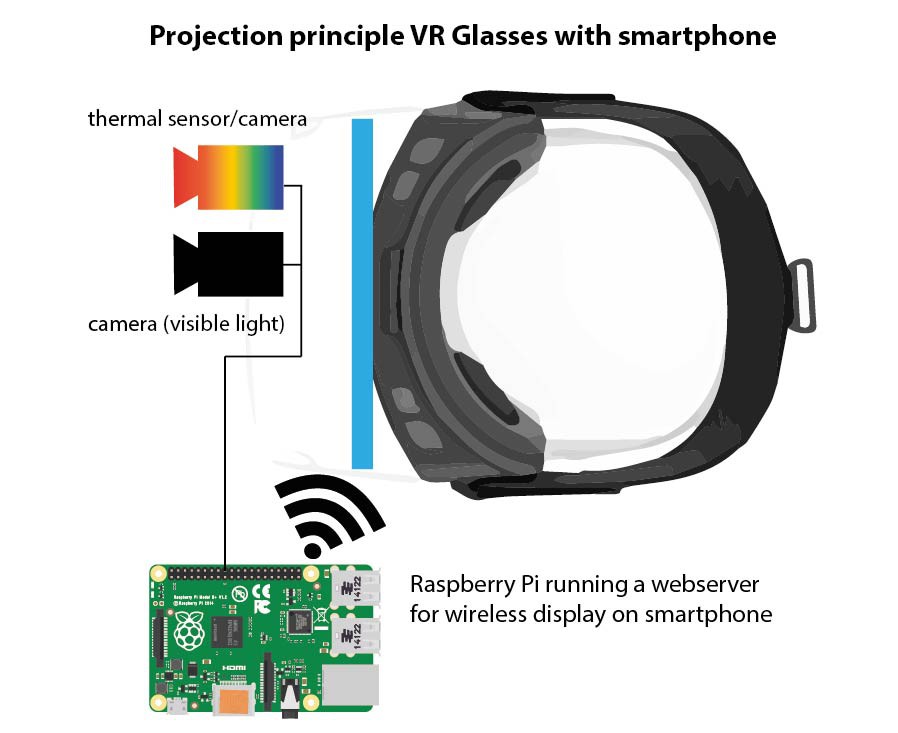
- Virtual Reality Headset ("google cardboard") with thermal vision and real world camera
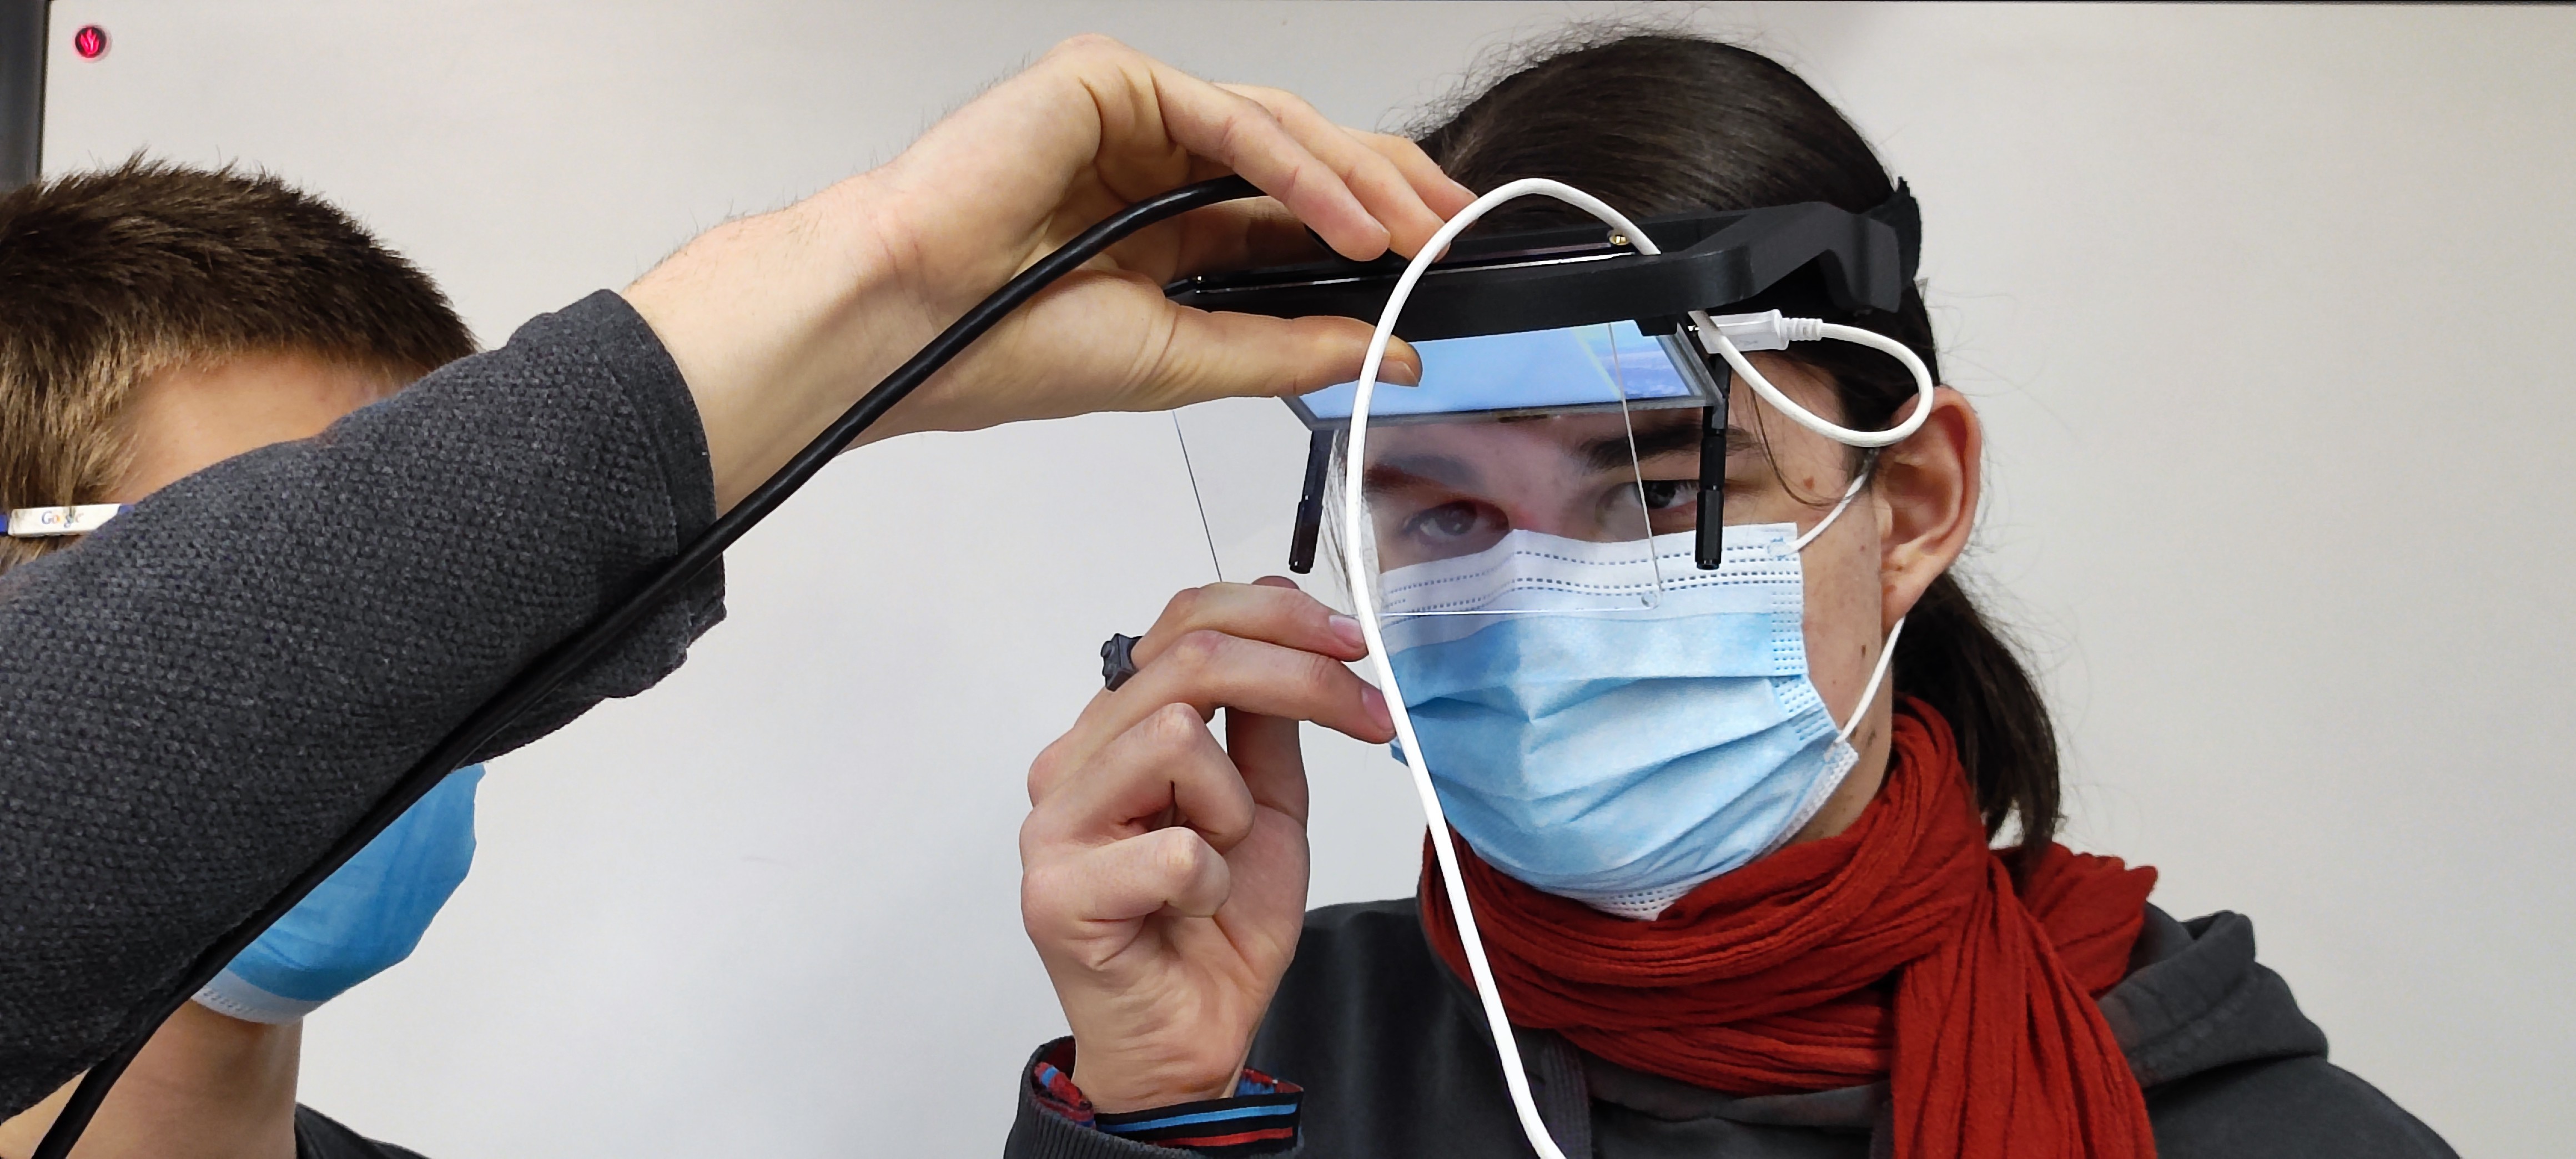
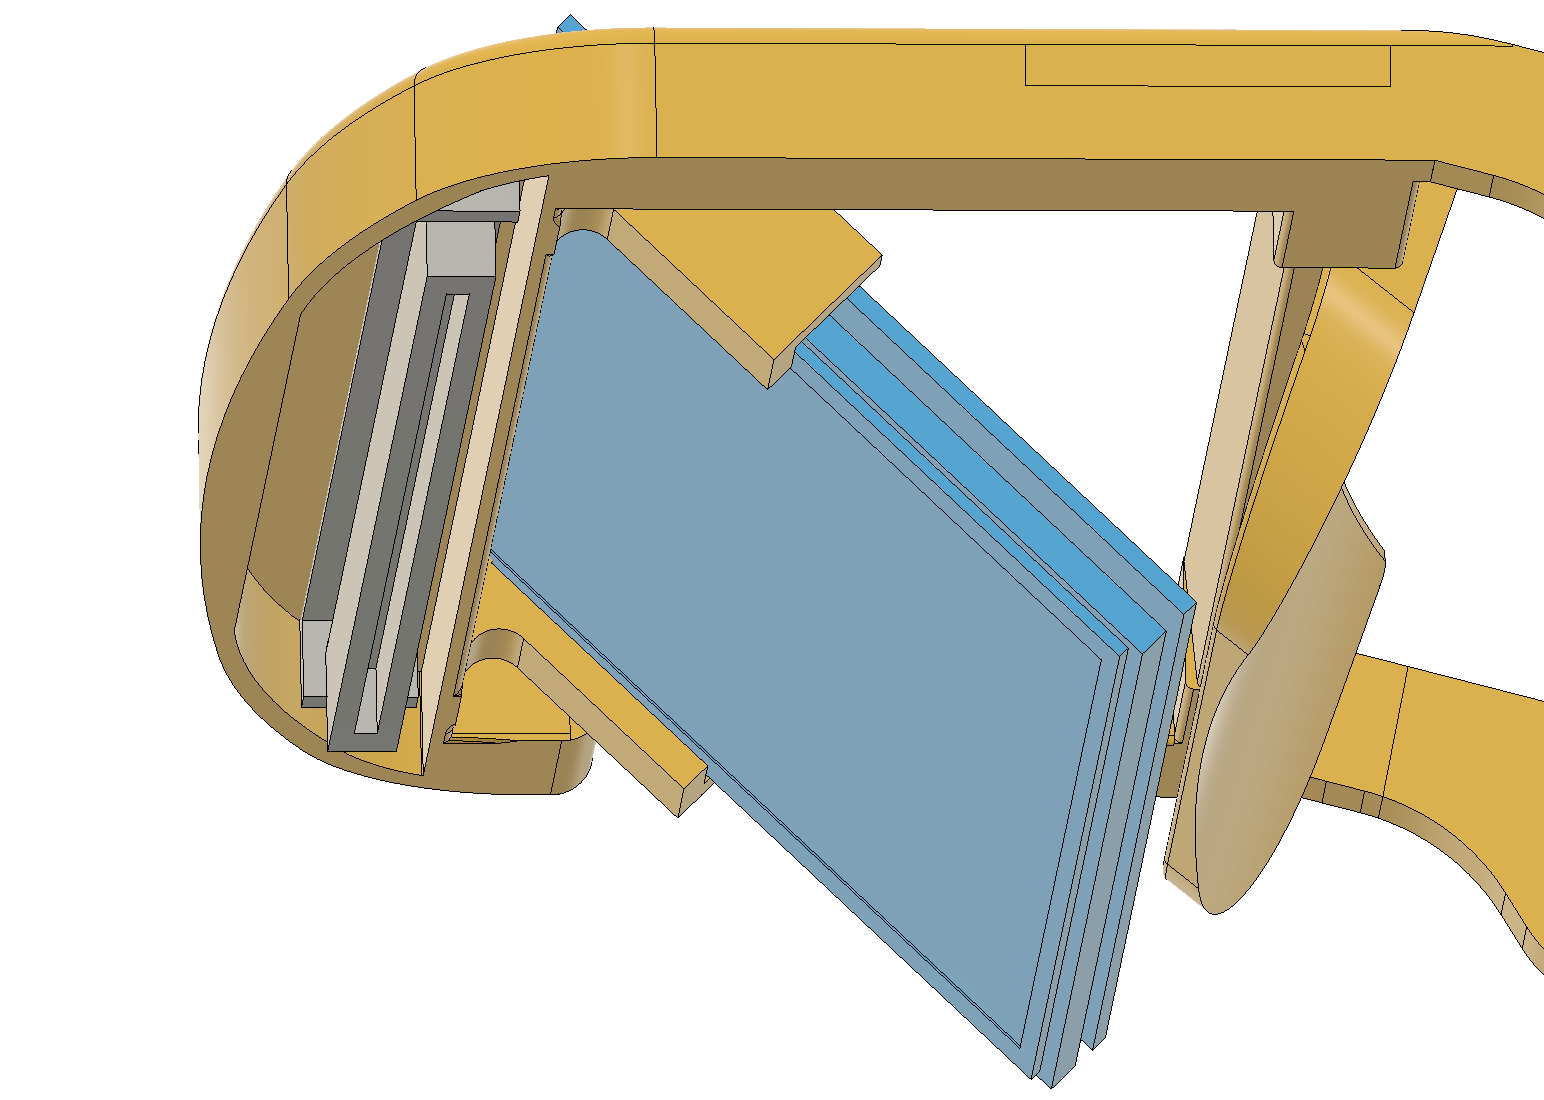
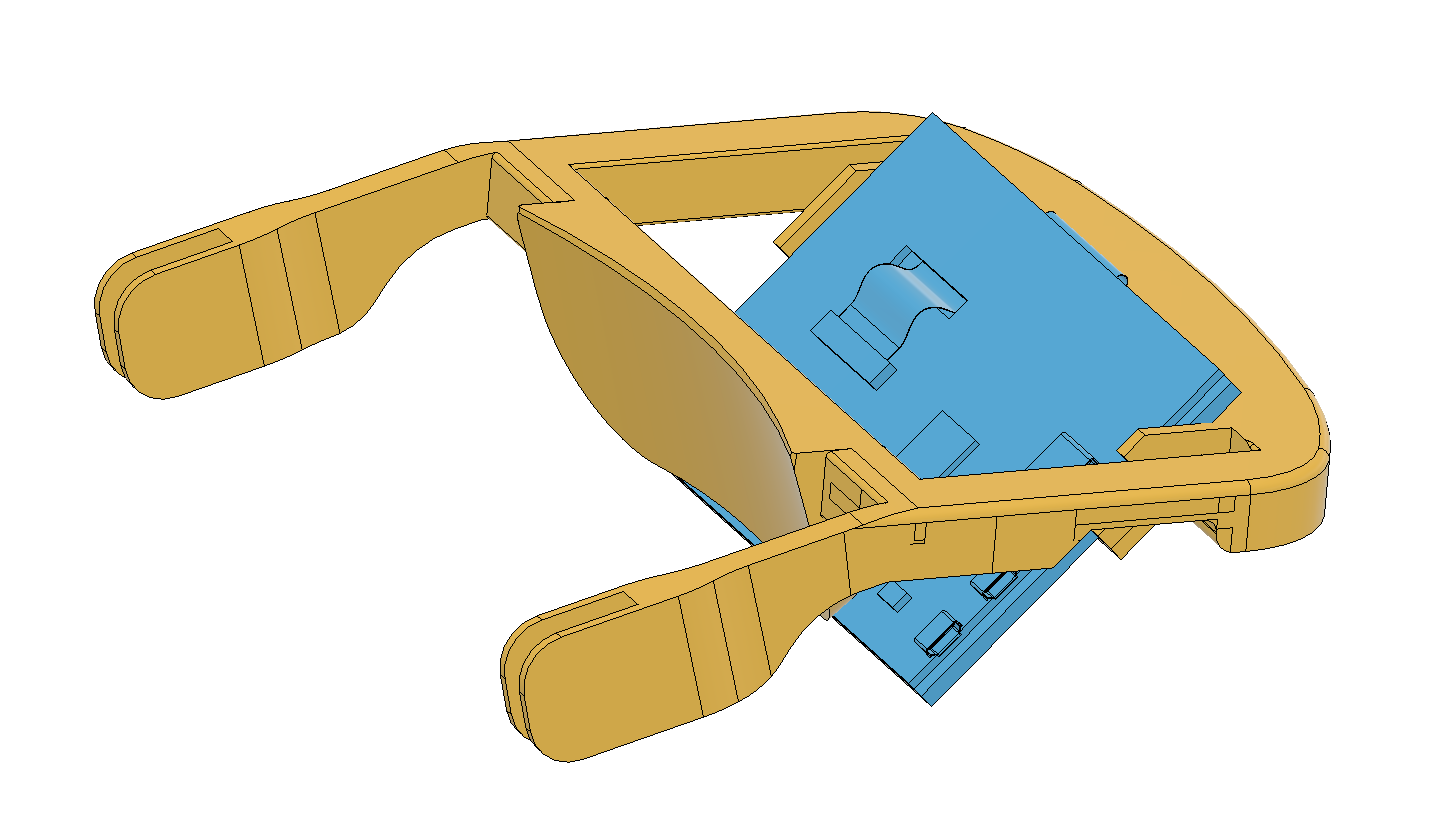
- Augmented Reality Headset (both eyes)
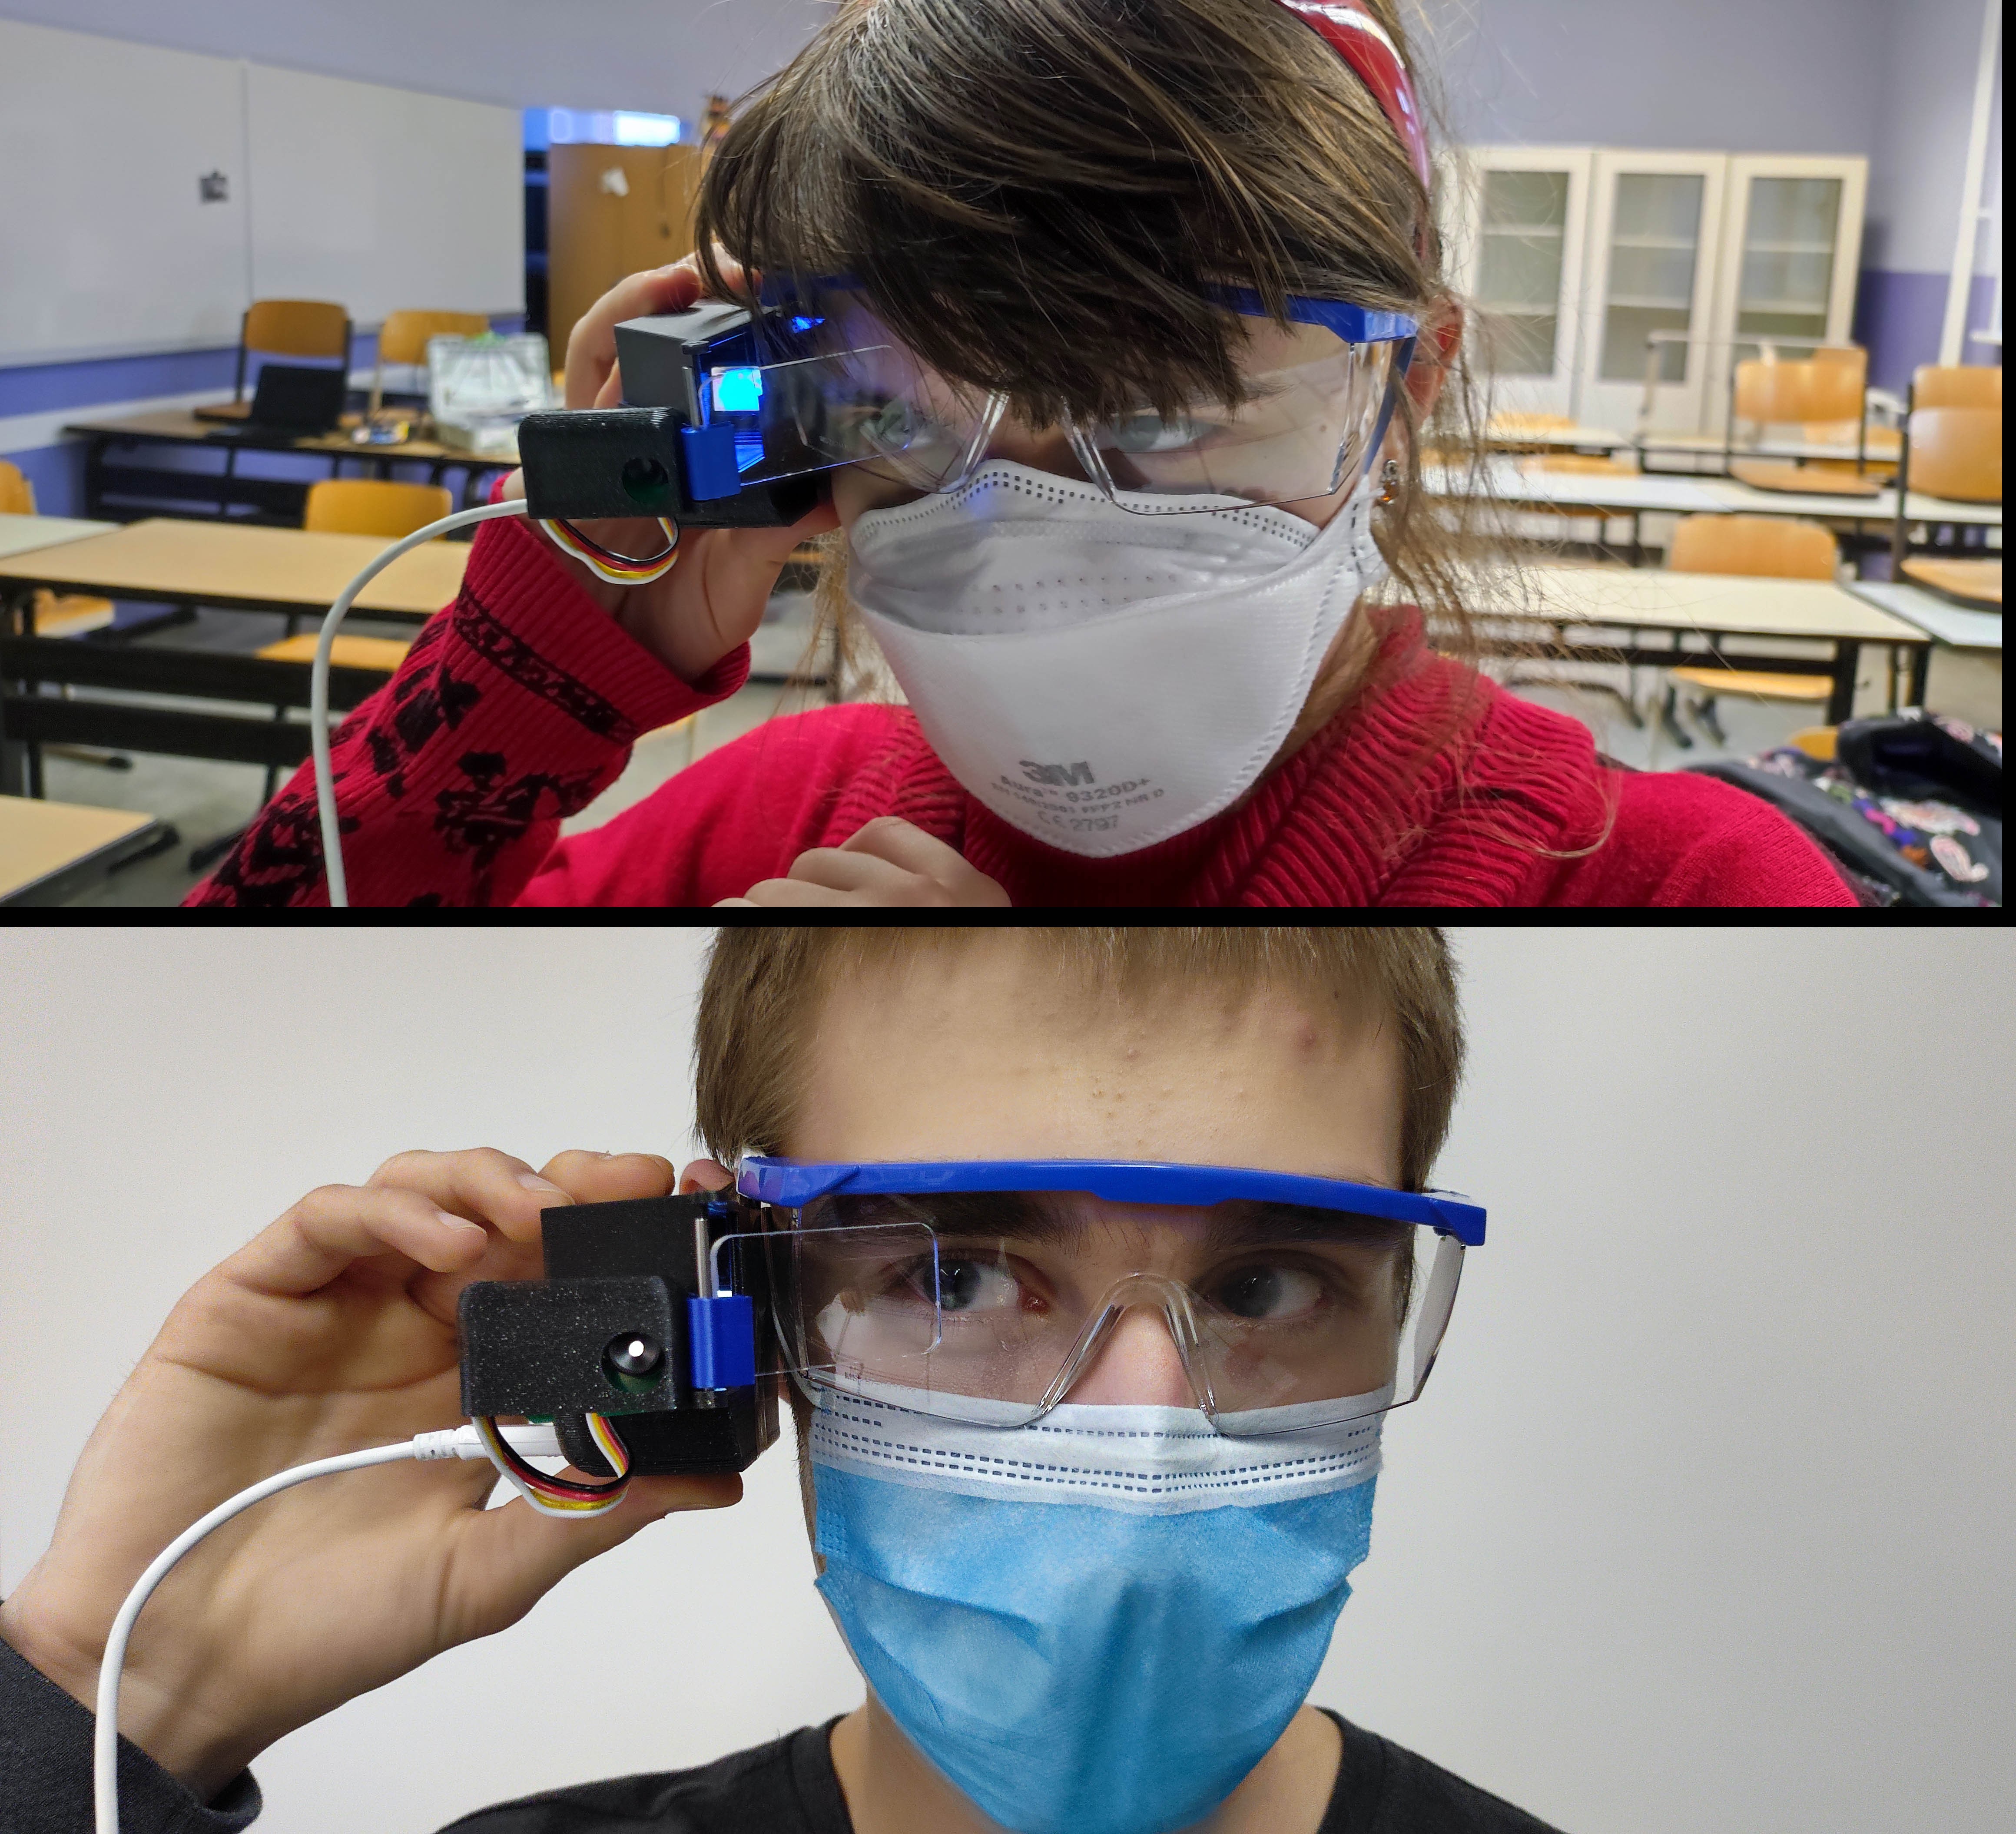
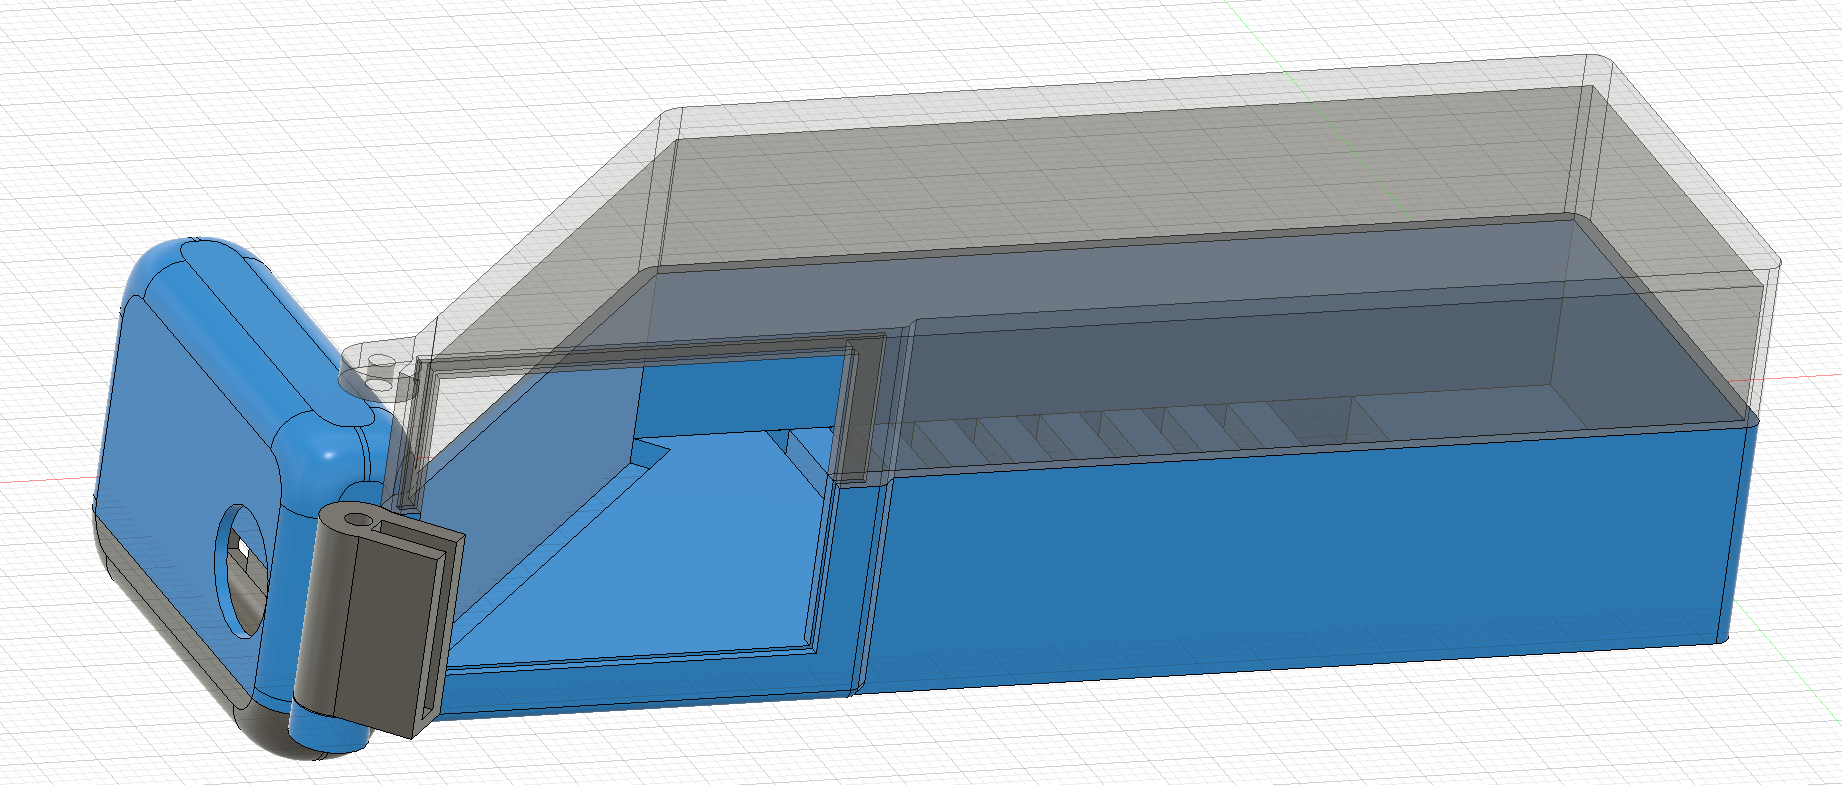
- Augmented Reality Monocular
We start with the last one, because we think, it is the coolest ... although you may look like a BORG when cutting hedges {who cares...?] ;-)


 FabLab München
 WalkerDev
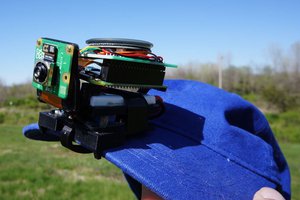
 Jacob David C Cunningham
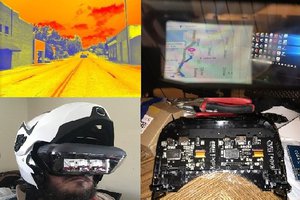
 Josh Starnes