Close
0%
0%

Desktop CNC Mill Conversion

Mill conversion with only salvaged components

Similar projects worth following
I plan on converting my mill to CNC. All of the components will be salvaged from other devices. This includes motors, belts, ICs, etc. Many of the parts are from broken x-ray imaging equipment.

In the long run I may also add a 3D print head for 3D printing.

I am trying to convert my mill without having to purchase any parts. Many of the parts I can source from work. I service and sell x-ray imaging equipment. We end up with outdated or broken stuff from time to time. So my plan is to repurpose it as best I can.

The majority of my parts are coming from a CR Reader. CR stands for computed radiography. After the imaging plate is exposed to x-rays it is placed into a CR reader where a laser is shined onto a plate. The amount of light given off by the plate is recorded by a photo multiplier tube. Afterwards the plate is erased by shining lights at it, usually florescent. There are numerous sensors, belts, motors, laser optics, power supply, rollers, shafts, gears, etc in each machine. They are really a treasure trove worth of parts. Think of 'em as an 80s photocopier with at least 3x the parts.

I will have to machine some custom parts to mount the motors and also to attach the toothed pulleys onto the lead screws. The metal for this will also be sourced from work. I've saved some steel weight blocks from x-ray tube supports that we have decommissioned. They are a nice size for making custom parts out of. I also have some pieces of rails that will work well for mounting the motor onto.

I am going to do my best to avoid making any permanent changes that I can not revert to the mill. This way if the CNC goes down I will still be able to make things until  get it going again.

System Design Documentation:
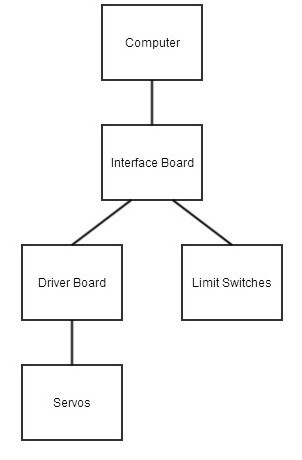
The system will be powered by a power supply salvaged from a CR reader. The drivers will be controlled by a computer's parallel port running Mach3. The drivers limit the current going into the steppers and also only require two pins for input (step and reverse). The steppers will be attached the the lead screws using toothed pulleys. 

  • 1 × Power Supply Salvaged from a CR Reader. provides 5, 12, 15, -15, 24, with multiple rails
  • 4 × Stepper Motors Salvaged from a CR Reader - Sanyo Denki Step Syn 2.5A 1.8Deg 103H7123-0642
  • 4 × Driver IC Salvaged from a CR Reader - STK672-050
  • 3 × Toothed Belts Salvaged from a CR Reader
  • 1 × Wiring Harness Salvaged from a CR Reader

View all 8 components

  • Begin Machining

    Tecratal08/21/2014 at 00:41 0 comments

    I've begun machining a part which will replace the indicator knob with a toothed pulley on the mill. I am using a piece of steel that was used as a counterbalance weight in an x-ray machine as my source material.  I could glue the toothed pulley in place of the indicator wheel, but then I would not be able to use it as a manual machine. I prefer to keep that capability in case I have computer issues or some other failure causing it to not work. Then I can still make parts on it.

  • Added some pictures and working on documentation

    Tecratal08/12/2014 at 00:37 0 comments

    I've been a bit behind on documenting stuff. I've uploaded a few pictures. Here is a quick summary with some info about a few of the pictures:

    The first picture is the mill I am going to modify. It is a Model T-981 from Central Machinery. It probably came from Harbor Freight, but I bought it used. It was made in 1988. Still runs well and just needed a few minor adjustments. I went with this over a Bridgeport due to price and because it's a nice size for hobby work.

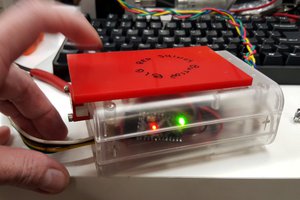
    The second picture is my test setup for the motor. The machine I salvaged most of the parts from had 10 steppers along with 10 drivers and a nice power supply. I cut the stepper chips off of the main board with a Dremel tool. I then just soldered the wires directly on the pins of the controller while it is still on the PCB. This provides me with a decent heat sink and keeps everything together nicely. All of the motors also have connectors on them so it is easy to take things apart as needed for wire routing later on. I drove it with a cheap digital signal generator. The stepper driver was very easy to work with. Just needed to hook the motor up to it, give it power, and a couple resistors to set max current of the motor.

    Other pictures show a closeup of the stepper with driver, box of motors belts and toothed pulleys from the CR reader I stripped down, and the board that I cut 4 of the driver ICs off of.

  • Determining RPM without a tachometer

    Tecratal08/06/2014 at 20:56 0 comments

    The mill uses a set of pulleys to set the speed. Normally you would look at a chart showing speeds and what setting to set the pulley to. The problem I ran into was that I did not have the owner's manual to the mill. The mill was made quite a few years ago and this version is no longer produced. I could not find an owner's manual online because of this. A tachometer would be an easy way to see what speed it is running at, but I didn't have one and didn't want to spend money on something I will only use once.

    My solution was to tape a couple magnets onto the end of a drill bit. I used two--one on each side so it would be somewhat balanced. I then wrapped electrical tape around it to make sure they would stay on. To make the sensor I wound some wire around an allen wrench. I attached the leads to an oscilloscope and measured the waveform to determine the speed it was rotating at. Then I recorded the speed and what pulley setting it was on.

  • Acquired most of the parts needed

    Tecratal08/05/2014 at 19:18 0 comments

    So far I am off to a good start. I have salvaged all the power supply, motors, drivers, belts, pulleys, and metal I will need. I still need to find some optoisolators to go in between the computer and the driver IC. 

    I don't want to make any permanent modifications to my mill. That way I can still use it to make parts. So my first step is to begin machining a new part that holds the toothed pulleys onto the shaft of the lead screws.

View all 4 project logs

Enjoy this project?

Share

Discussions

Scott wrote 11/14/2021 at 14:00 point

Did you get anywhere on this? My father just passed away and I took on the task of helping mom sell some of his stuff. He was a custom knife maker and I've already sold his belt sanders, buffers, drill press and heat treat furnace, but he has one of the same type of mill. I was thinking what you're suggesting and thus searched and your post came up. I would be curious to know if you got anywhere.  I have a project currently to add a stepper-based focuser to a telescope and started accumulating parts to build a 3 axis framework (not sure yet if I'm going to rig it for lazer or cnc - I have 3x 3d printers at the moment and have worked quite a bit with arduino/espressif and other micro controllers and have a whole farm of raspberry pis, burn my own firmwares for my printers, etc.  I also have a tentative project, possibly for that 3 axis, to try to rig something to make a stone memorial in a remote location (flatten the top of a rock and etch in the message w/names).

  Are you sure? yes | no

mats fahlberg wrote 03/26/2020 at 21:33 point

This is extraordinary! I have been working at an hospital as Med. tec. ing and have two exactly the same CR-readers scraped in to smaller parts. I have somewhat same ideas as you but for a 

lathe. Interested in where you cut apart the PCB with the stepper motor drivers.

Are you still active on Hackaday?

  Are you sure? yes | no

Robby! wrote 08/21/2014 at 23:14 point
Is this mainly a scavenge project? Or do you plan to eventually rethink it with commonly available parts for purchase?

  Are you sure? yes | no

Tecratal wrote 08/22/2014 at 01:15 point
I am trying to scavenge the parts to make it more of a challenge for me and also to save money. Regardless of this most of the parts are available for purchase from electronic component distributors. For example the stepper driver IC is available on Digi-Key for $15.

As i work on better documenting the project I will try to find equivalents or similar alternatives to what I am using for the parts which are not common. A good example would be the toothed pulleys. They do not have any markings on them but I can probably find a direct replacement on McMaster-Carr once I measure their dimensions and teeth.

Some parts will need to be machined which is unavoidable when trying to adapt a machine. I'll probably put up some CAD drawings of the parts I produce as reference in case anyone wishes to duplicate the project. If there is demand it would be easy to get a batch of parts made up for a kit.

  Are you sure? yes | no

zakqwy wrote 08/05/2014 at 20:23 point
Neat project. What kind of mill do you have?

  Are you sure? yes | no

Tecratal wrote 08/05/2014 at 21:47 point
Its one from harbor freight, its very similar to this one http://www.harborfreight.com/1-1-2-half-horsepower-heavy-duty-milling-drilling-machine-33686.html except has slight lower travel on all axis. I got it off craigslist; it came with a good amount of tooling and works well for its size. I'll post some pictures soon.

  Are you sure? yes | no

zakqwy wrote 08/05/2014 at 21:48 point
Nice. I've heard HF mills can be decent once you get 'em set up right.

  Are you sure? yes | no

Similar Projects

Does this project spark your interest?

Become a member to follow this project and never miss any updates