Close
0%
0%

Tube Train/Bus Bedside Departure Board

Want to time leaving home to perfection so you arrive just in time for next train or bus? You need a departure board in your own bedroom!

Similar projects worth following
Using the TFL API it's easy(ish!) to pull live train or bus departure information, which can then be displayed on a 16x2 LCD display connected to an Arduino ESP8266.

Build instructions as follows:

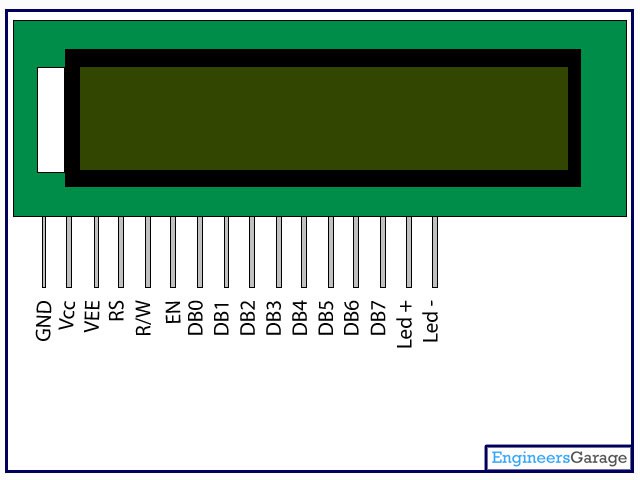
Connect your Arduino to the LCD Display using instructions and circuit at:

https://www.arduino.cc/en/Tutorial/HelloWorld

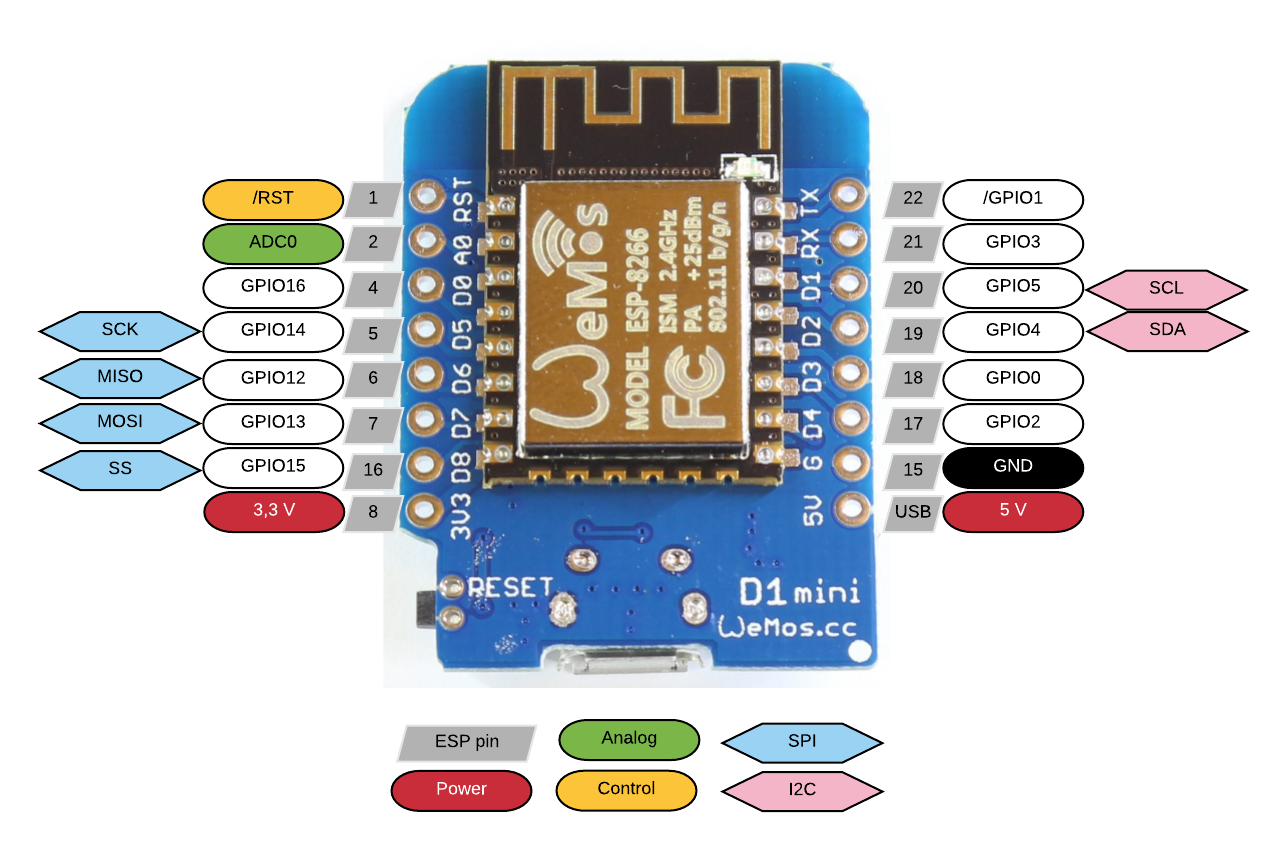
Note that I use the pins_arduino.h header to specify the GPIO pins connected the display, if you're using something other than the NodeMCU/ESP8266 you should change the LiquidCrystal initialisation pins in line 39.

Test with the hello world code to make sure you can see the text on the screen.

Next up, download the code from https://github.com/terryspitz/train/blob/master/train/train.ino 

Customise as follows:

1. Visit https://api-portal.tfl.gov.uk/admin, create an account, click the email it sends to verify your address, then copy and paste the app_id and app_key in line 19.

3.  Visit https://api.tfl.gov.uk/swagger/ui/index.html?url=/swagger/docs/v1#!/StopPoint/StopPoint_Search to find your station / stop ID, and cut and paste into a new station after line 30.

4. [Platforms choice now supported]

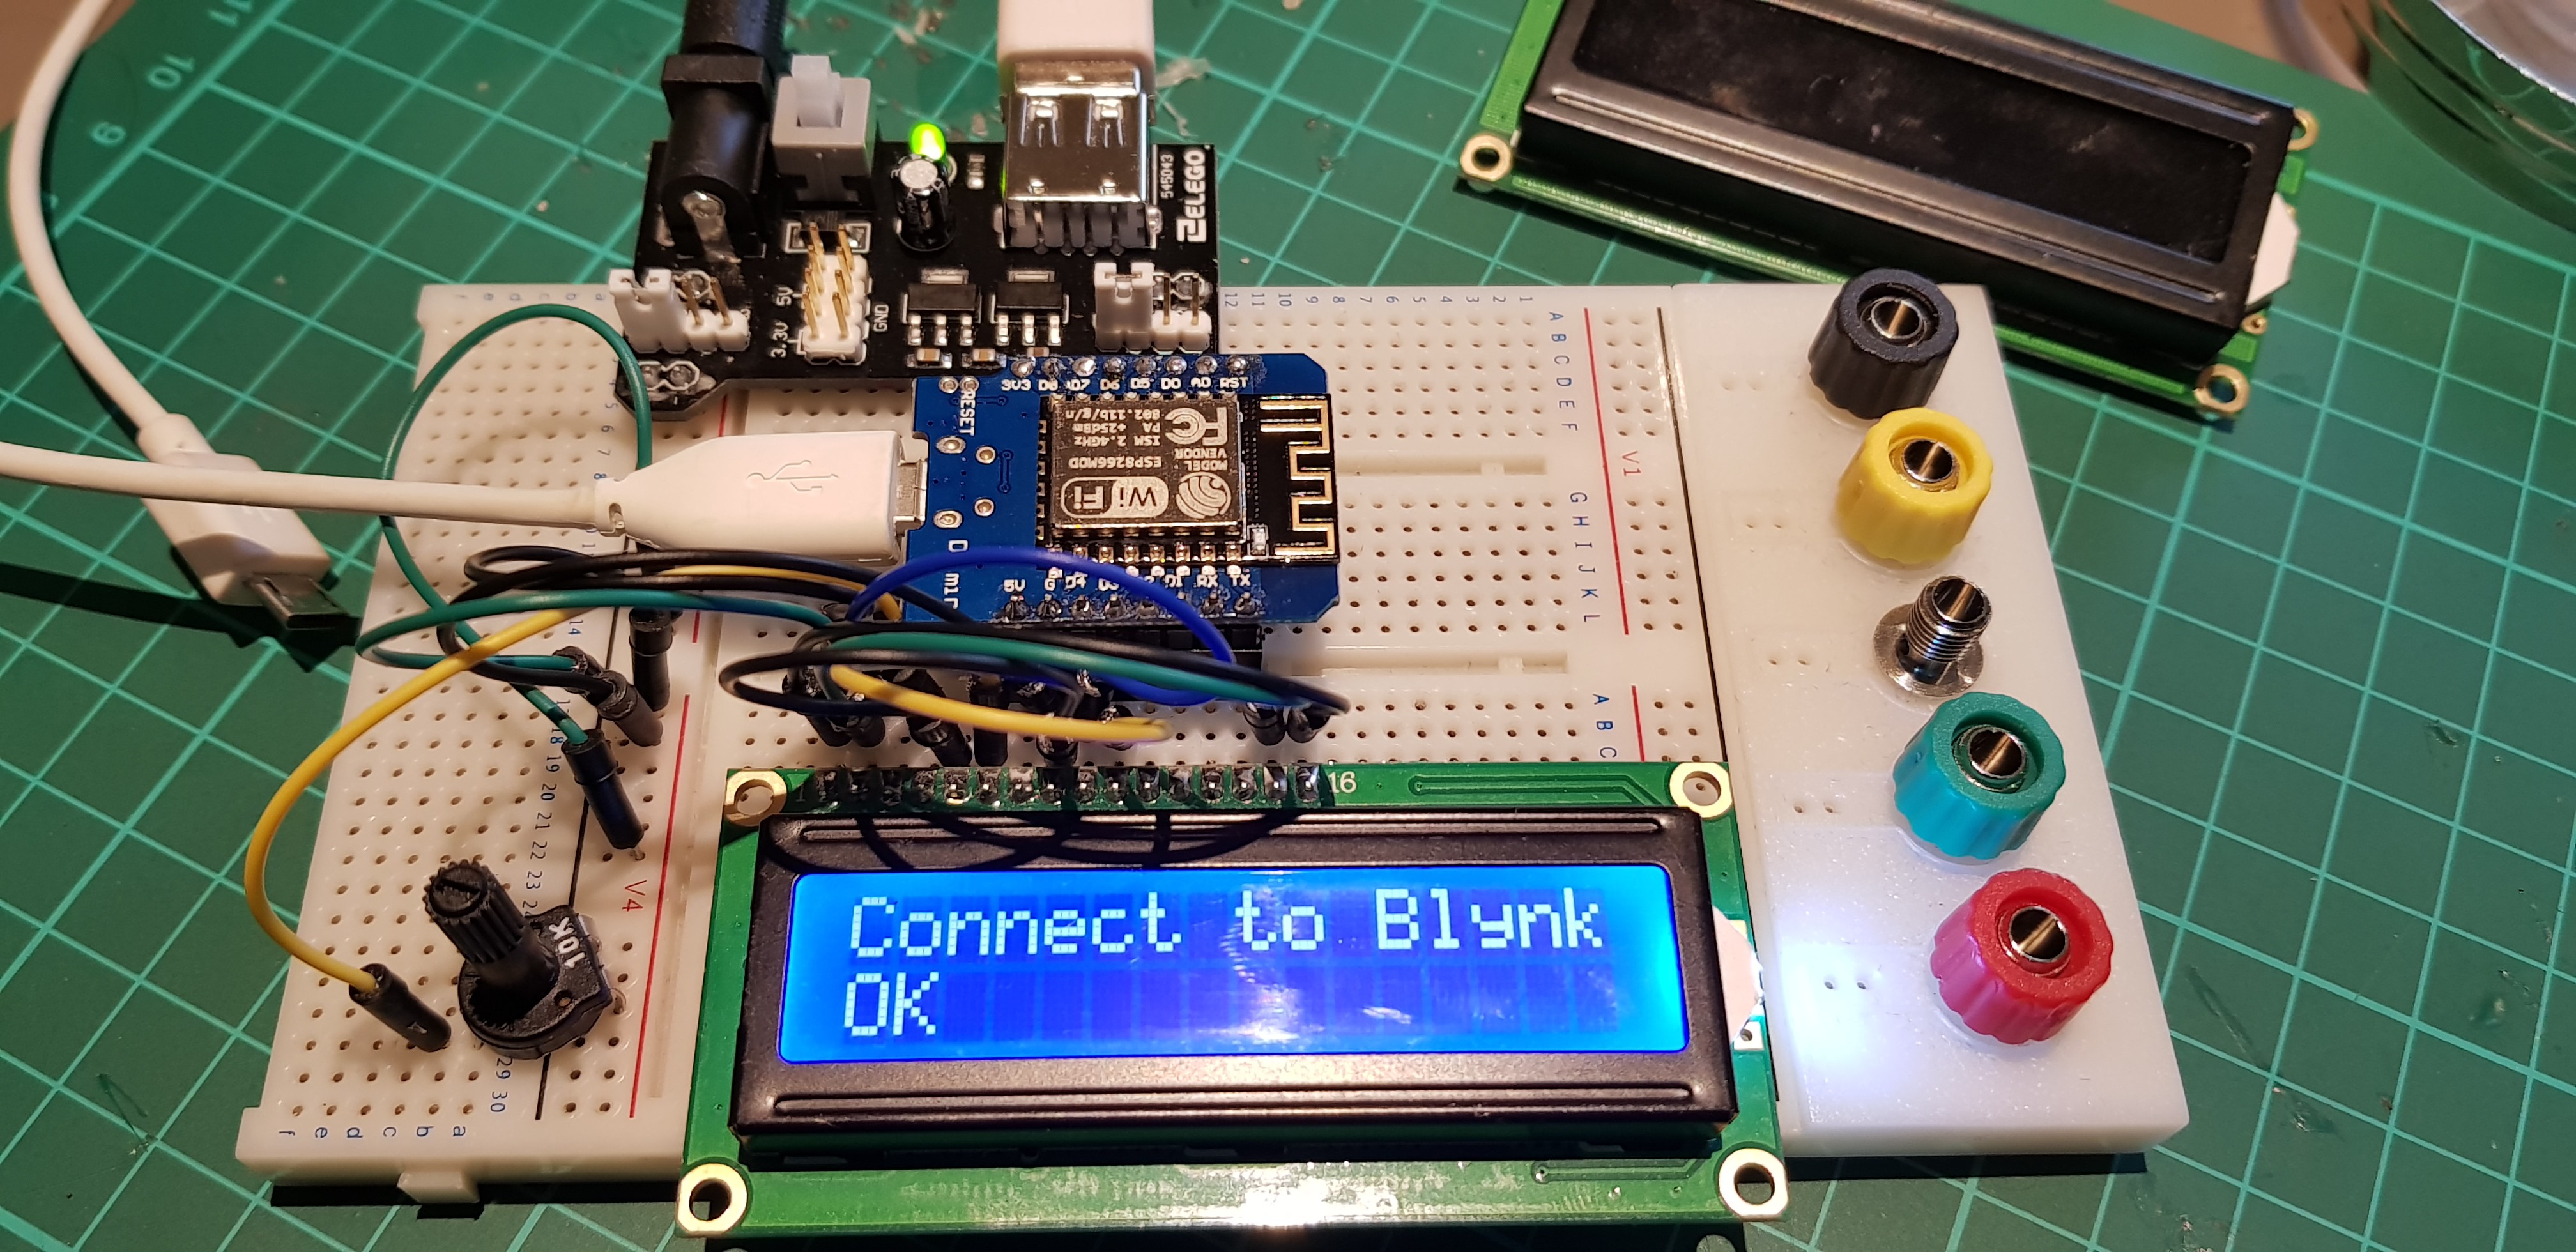
5. Compile and upload to your board.  You may need to restart a couple of times for it to startup. Follow the messages on the LCD along with the code to check progress.

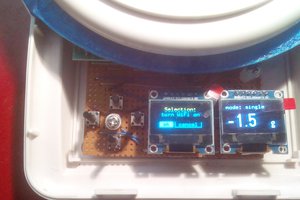
6. If it says "Connect to WiFi BedsideDepartureBoard", connect to the device WiFi "BedsideDepartureBoard" from your phone WiFi settings to get it onto your home network WiFi, see https://github.com/tzapu/WiFiManager/blob/master/README.md#how-it-works

7. That's it! Or, ... Start debugging!

  • Bedside Hackathon

    terryspitz07/05/2018 at 18:31 0 comments

    My other project  https://hackaday.io/project/19698-peace-clock got paused after I trashed the microstepper trying to squeeze it into a 3D printed case that was a bit too small! So I went back to debugging this beauty.  Progress!

    1. I learned to solder!  I read a Webpage and realised I'd been melting the solder onto the parts, but finding it didn't bond... When I should be heating the parts then the solder is melted by them and bonds properly.

    2. Added a separate power board driven by a 9V adapter which then drives the LCD display at 5V and the Arduino/node MCU via USB. This solves the issues with the MCU not booting.

    3. I switched the NodeMCU to an even smaller WeMos D1 mini which I bought a few of for almost n throwaway price .. https://rover.ebay.com/rover/0/0/0?mpre=https%3A%2F%2Fwww.ebay.co.uk%2Fulk%2Fitm%2F322536706047 £2.99/unit.

    However, weirdly, it doesn't like Serial.begin(...) Which causes it to crash. So... No serial diagnostics. Luckily it's got an LCD display so that's where to write diagnostics!!

    The 8 D1-4 & TX/RX/G/5V pins of the WeMos fit beautifully into the 8 display pins of the LCD (DB0-7 of which only DB4-7 are used) which makes the circuit easy to assemble and nice and tightly packed.

    4. Added a Blynk phone app! https://www.blynk.cc. Wow it's easy.  Echoing the LCD display from the circuit into a virtual LCD in the app was two lines of code! The app lets you change station name from a list populated by the device!  Needs a little more work to filter on underground line, and populate lines and stains from the TFL API.

    5. I got kings cross working! The TFL arrivals info for this is a JSON requiring around 100KB which was too much memory for my little WeMos D1. Actually it was working at 5am (when I was having time sleeping) but stopped at 5.30am when more reasons started arriving! Solution was found on this page: https://arduinojson.org/v5/faq/how-to-reduce-memory-usage/ under Deserialise in Chunks... Which recommends parsing each arrival object separately. Works like a dream.

    Next up: work on app and then try another circuit board. Also work out the separate components used in the power board. Finally, the orange LCD display which matches the real London underground display only works intermittently, needs some persuading (debugging). Wish me luck!

  • Help!

    terryspitz04/04/2018 at 08:51 0 comments

    Everything was going well on this project until I started trying to solder together a stripboard prototype. I must have shorted something. Now my nodemcu can boot and run fine, but only when I disconnect the display while first booting it. After that I can connect the display and it runs fine. Anyone have any ideas?

    Also I bought a few even smaller WiFi/Arduino chips, the WeMos D1 mini, but these also have problems powering the 1602 LCD display.  Time to break out the multimeter.

  • Lots to do!

    terryspitz03/11/2018 at 12:54 0 comments

    OK so v0.1 works, but I realise there's lots to do (I've starting raising these as Issues on https://github.com/terryspitz/train/issues):


    1. Check for Timetabled trains as well as Arrivals (this is important at my local station Pinner since there is often only one train into London showing in Arrivals API).
    2. Add a GUI for selecting WiFi and Password (nearly done)
    3. Add a GUI for selecting Station and Line
    4. Add support for Bus Stops
    5. Support arrival time in mins vs. actual time
    6. Add Station/Line Status check - very important!
    7. Add sleep/wake times

    I've also like to productionise the hardware: solder onto a stripboard or even learn how to design and order a PCB, add an on/off button, and build (3D print) a case.

    Anyone think I could sell these on the web???

    terry

View all 3 project logs

Enjoy this project?

Share

Discussions

dhruv wrote 11/23/2022 at 21:40 point

Hi there! I know this is from a while ago - but I'd love to try building one of these. I saw from your project logs that you played around with a few different pieces of hardware to put this together. Do you think you'd be able to outline the key hardware choices you settled on, so I could try ordering the parts and building one of these?

Thanks so much!

  Are you sure? yes | no

hairnetnic wrote 01/27/2019 at 13:09 point

Hi, really interested in making use of your design here, but the code line numbers differ significantly from the sketch on github. I've tried to use common sense to match the above instructions but lack the experience to have confidence I've got the right lines.  Could you verify or update the which lines are needed for customising the output please?

Cheers,

  Are you sure? yes | no

terryspitz wrote 06/01/2019 at 07:24 point

Sorry for the delayed response, only just saw this. I've updated the build instructions, so have another go and let me know! My knowledge of soldering and powering the Esp8266 is getting better so I'll try to revisit the instructions more fully at some point.

  Are you sure? yes | no

davidccostin wrote 12/29/2018 at 18:52 point

That's an awesome project. I've only just started playing with Audrino and got up to the LCD lesson. I would love to be able to buy a PCB and build the project. There is someone selling them on the web as completed items but they are very expensive so build your own would be fun.


https://callingallstations.co.uk/2016/08/25/departureboard/bwhich featured on Geoff Marshalls YouTube channel

  Are you sure? yes | no

idlem1nd wrote 03/04/2018 at 20:24 point

I no longer consult to TfL now Terry, but thanks for the comment on my blog article. I like what you’ve done here a lot, great job!

  Are you sure? yes | no

Similar Projects

Does this project spark your interest?

Become a member to follow this project and never miss any updates