leadacid44
-
Step 4 - Final Solution
09/14/2015 at 01:15 • 4 commentsWell, what happened in step 3 was a series of oversights on my part. Ultimately the reason my first version of the contact disks didn't work is that they weren't thick enough. The disks that I made using the craft foam ended up being a little over 2mm, or 1/8" of an inch, which apparently is not thick enough. I discovered this because I wasn't feeling anything at the end of the keystroke. There should have been *some* kind of bottom resistance when the contact disk touched the PCB, but all I got was the hard plastic-on-plastic of the key bottoming out in its spring.
So foo...what to do? Well, in a fit of desperation, I simply super-glued two disks together and put that into one the keyboard switches. That worked!
Well, kinda. I was getting a lot of duplicated or random characters. For example, if I tried to use the 'a' key, I would get a string of random characters. It was never consistent and could contain even non-text characters like CTRL. Because there was no pattern I made the assumption that it had to be the way I had assembled my experimental double-sandwich stack. I suspected that perhaps because it is a capacitance sensing keyboard, the double-sandwich method was causing some kind of capacitor effect? So I went forward and created about a half-dozen of the double stack disks by simply doubling up the foam, rather than just gluing two sandwiches together. I put version 2 of the craft foam disks into various spots on the keyboard and gave it a whirl. Annoyingly this did not help. The keys were triggering reliably (meaning the foam thickness was good) but they were producing random characters. Not exactly my definition of success. And on top of it all, I was getting very inconsistent key press requirements depending on the placement of the disk, indicating that my materials choice or disk diameter was probably wrong.
Something had to be done.
So at this point I decided to try making a set of disks out of the same foam that Compaq used originally. Based on the previous disks, I figured that they had used polyethylene foam, probably light density, and probably around 1/8". Measuring the old ones proved extremely difficult, as they didn't stay intact through the measuring process. Near as I could tell, they were a bit over 1/8".
Now, a side note about foam. Ah foam. What a pain. I knew what I wanted, but had no idea what it was called! I'm sure there's someone in the foam industry saying that the types and materials and densities are all very different and I'm an idiot for getting them confused. Well, let me tell ya this, I didn't know my polyethylene from polystyrene from polypropylene. All I knew was that I wanted that light grey squashy foam that you sometimes get at the bottom of a box of stuff from electronics vendors. It couldn't be too stiff, it couldn't be too light.
So I tore my house apart, thinking that I must have a sheet of it somewhere. It's one of those materials that you're pretty sure you have laying around but you can't be sure where you last saw it. The basement? Nope. The office? Nope. At work in that junk closet? Nope. Well, apparently I don't have anything even remotely like it, because I still have yet to see anything like this foam just laying around. Oh sure, I had thick stuff. Like 1/2" or larger, but nothing smaller. You could cut the foam thinner, but that seems like it would be a major pain. And even if I did, I certainly didn't have any that was new enough that it would be worth carving up to use in a project. It could disintegrate next year for all I know. I needed new stuff that's the exact size.
So I started digging around on the Internet thinking SOMEONE must sell this kind of stuff. McMaster-Carr? Nope. Amazon? Not as far as I can tell. ULine? Nope, nothing this small. Finally I came across a company called Foam Factory Inc. They had exactly what I needed. I actually ended up buying a few different types, but ultimately what you want is 1/8" closed-cell polyethylene foam in the 2 lb density. This stuff is exactly what we need. I paid $10 for a big roll of it. Way overkill, but they only sell in pretty big quantities. Shipping was more expensive than the material itself, go figure.
So anyway, now that I have my foam, I also learned about this contact disk is that it does actually have to move and twist and deform a little bit. The foam acts like a tiny spring so that when you press the key down on the keyboard, the contact disk doesn't need to be perfectly parallel with the surface PCB, it just has to be close enough that the non-uniform pressure from the key causes the disk to push against the PCB, and the foam then distorts enough to allow the Mylar to make sufficient contact with the PCB.
Now, speaking of Mylar. Turns out that the space blanket I had didn't work. It might be possible with certain kinds, but the one I had cut up was the culprit of the random key presses. Seems it conducts too well or something. When I took a tiny piece of it, glued it to the end of pencil, and poked the keyboard, it caused the same multiple random key press problem as demonstrated in the first version of the disks. So it was clearly the blanket material itself, not necessarily the sandwich I had constructed.
So I was back to the drawing board with the Mylar. I went back through the forum posts and found that someone had said that an anti-static bag would also work. Fair enough, and easy enough to test. So I cut up an old bag and tried it out. Worked great! An interesting thing though, only one side of the bag worked. I suspect the construction of the bag meant that only one side was semi-conductive, and therefore that side was either the one that worked, or did not. I actually never tested that. Something for the future generations to try out.
So ultimately what we need to make a successful disk are three things.
- Some kind of flexible but strong plastic, like transparency film
- Some kind of flexible lightweight foam, right around 1/8"
- Some kind of semi-conductive plastic, like an anti-static bag.
By combining these three into a sandwich just like I did with the first attempt, I should be able to make a sandwich that works perfectly!
Construction techniques are exactly the same as the first go-round. The glue goes on the transparency, the foam goes on the glue. Compress to ensure good bond. Glue goes on the anti-static bag, foam goes on the glue. Compress to ensure a good bond. The foam had such a low density that I was worried the glue would soak through and the foam would permanently compress, but amazingly enough it did not. After compressing the new sandwich, it takes a little while for the foam to expand to its full size again, but it eventually does. Overnight is fine.
So I sat down with my hammer, my punch, my block of timber, the sandwich, and a ball game. I never found a good side to work from. Sometimes punching from the transparency side yielded better results, sometimes the anti-static bag side worked better. Something else I noticed when making the disks was that they compress down because of the force of the punch. Once you have them punched out, let them rest for a day or so, the foam will re-expand and be the right height. There's no easy way to force this to happen faster. If you try to force the foam to expand, it tend to tear or the glue lets go. Adhesion on the corners and the edges of the transparency film and the anti-static bag were also kind of iffy, but that could have been because of the way I glued things, or it could have been because of the new foam. Either way, my scrap rate was much higher than when I used the craft foam.
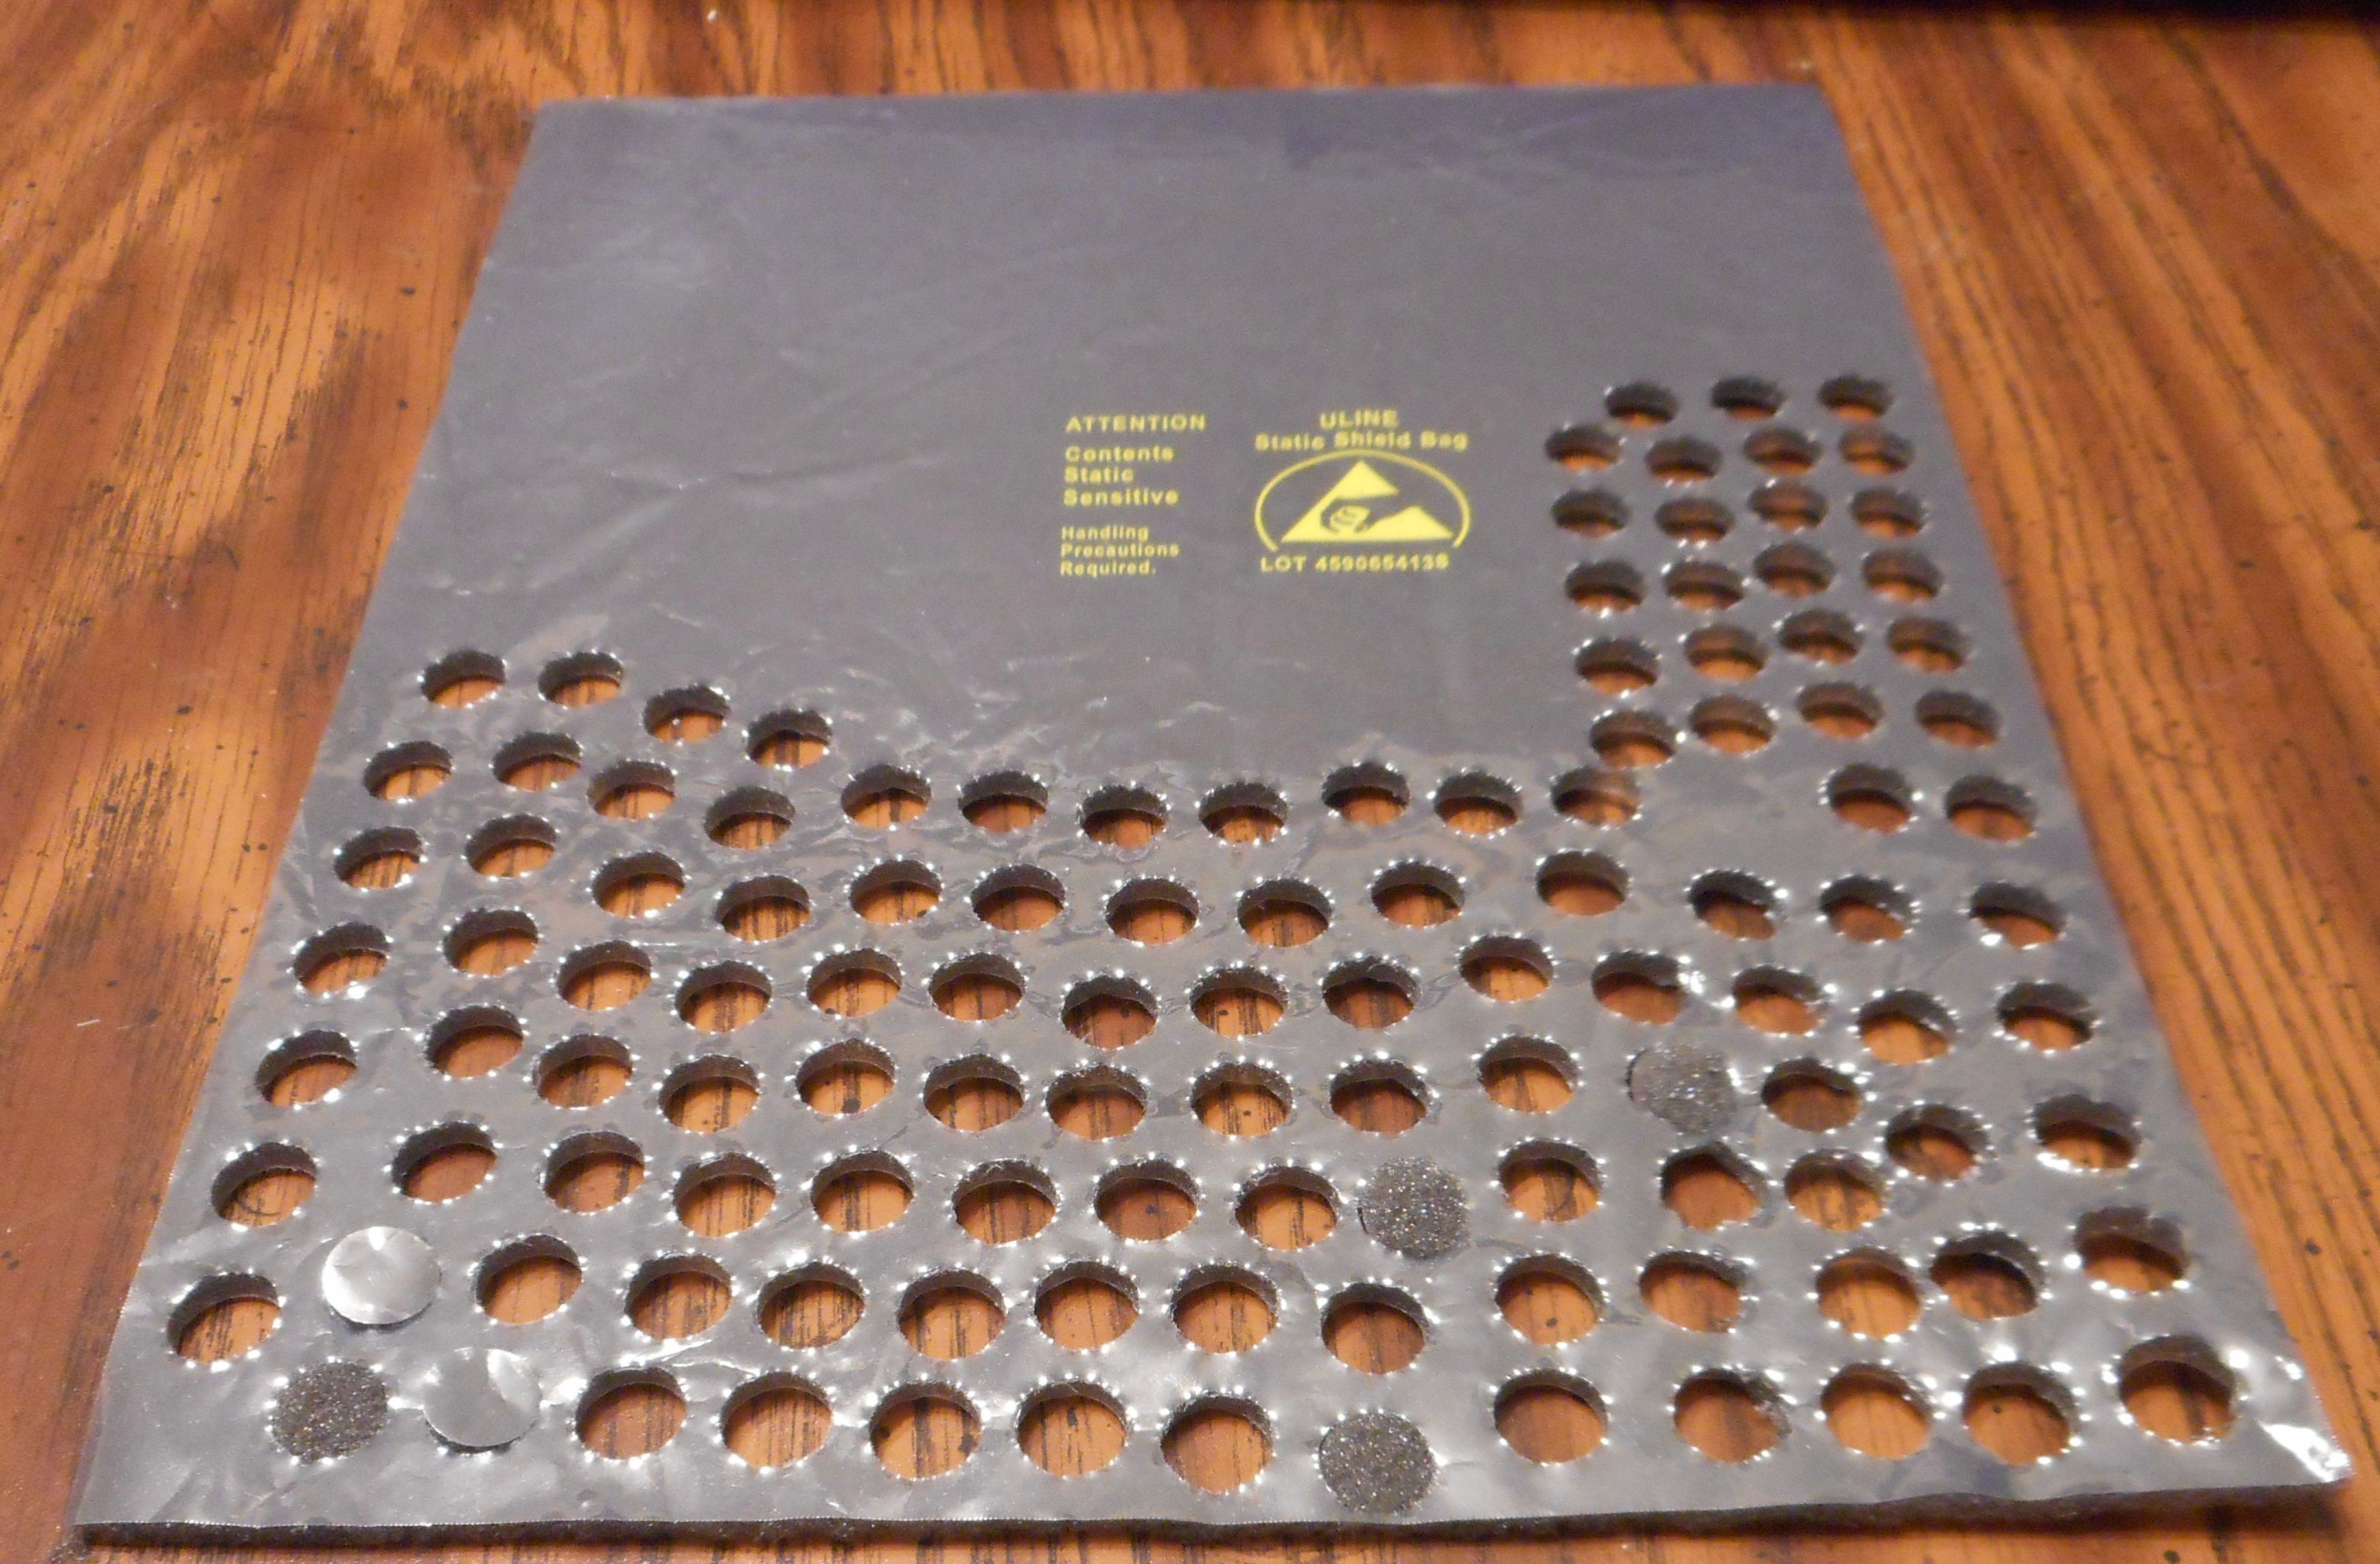
![]()
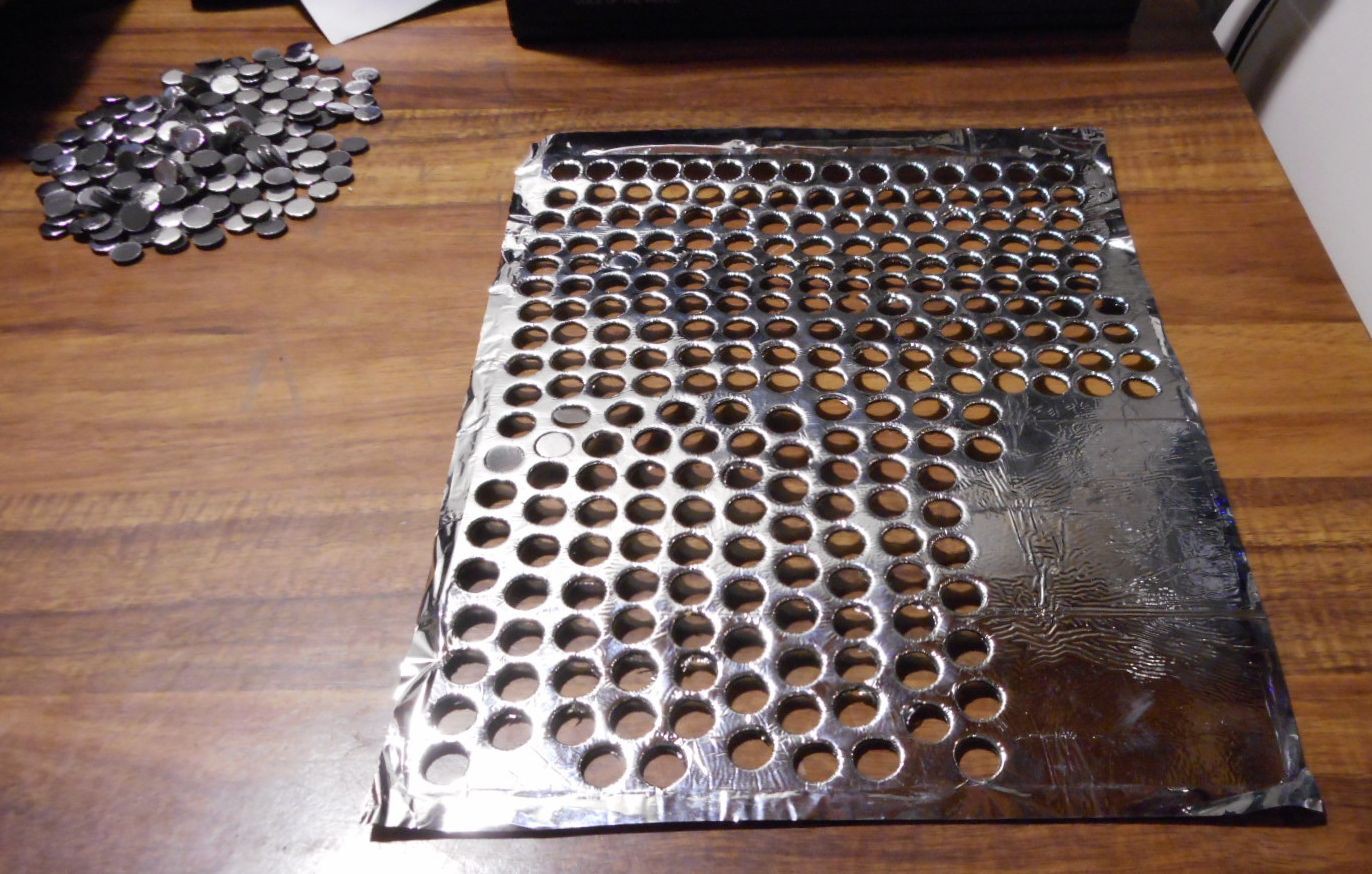
Here you can see the sandwich after I started wailing on it for a while. You can clearly see the anti-static logo as well. Also note that the edges around the holes isn't very clean, and that there are quite a few damaged ones still left in their holes. The second round of punching didn't go nearly as smoothly as the first. I attribute this to two problems. First, I don't think my punch was as sharp anymore, and secondly I think that the sandwich yielded more, allowing the plastic to tear and stretch more than simply be cut. The wrinkles in the anti-static bag don't seem to make any difference, thankfully.
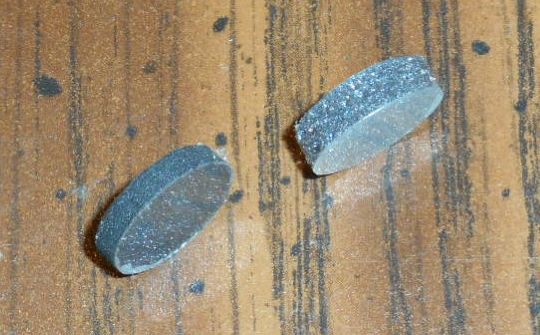
![]()
Here you can see the thickness difference between the 1/8" foam on the right and the original craft foam I used on the left.
So with my new disks, I took the time to pop them into the keyboard. A long, boring task. In this case, what I found was that the transparency film was actually slightly bigger than what the key was expecting. I kind of had to force the film to buckle a little to pop under the four plastic clips in the key. I ended up using a big needle and a piece of wire to do this. Once I got the hang of it, it went pretty fast, and it was pretty obvious when the disk wasn't seated correctly.
Finally, in the moment of truth, I fired up the Compaq, and tested it out.
Every key worked! Even on the first try!
![]()
I've been working with the system for the last two weeks now. Installing a hard drive, doing some modifications to the hardware configuration, fixing the broken floppy drive, etc. In my opinion, the keyboard behaves exactly like I would expect it to. I've noticed that there is one key, the left arrow key, that seems to not respond all the time, so I may need to replace that one, but for the most part, all of the keys function exactly as they should.
Mission accomplished! -
Step 3 - Trying to Fix the Problem
09/13/2015 at 21:09 • 0 commentsWhen I discovered that the contact disks were failing on the keyboard, I decided that I wanted to try to make a new set. I chose this instead of coming up with some different method of achieving the same goal. In my research I had heard of several people doing kooky things, like wadding up tiny balls of tinfoil and putting them inside the keyboard. There were also anecdotes of people making new disks by taking stiff plastic and gluing it to foam and then gluing a thermal blanket or some kind of foil to the opposite side of that, effectively recreating the original sandwich. I decided to go down that path.
So I dug up a thermal blanket that I had laying around, and tried poking it into the contacts on the keyboard. Letters appeared on the screen! Huzzah! That told me that the blanket would work, and probably more importantly, that the keyboard itself and its associated electronics still worked.
So I decided that would be a feasible route, so I'll just cook up a new set of disks. How hard could it be? Famous last words.
First things first, I took some measurements of the disks. Because of how flimsy and degraded they were, and the lousy ruler I had, I wasn't sure if they were metric or standard. Either 11mm or 7/16" in diameter.
The next question was how to cut the materials into little disks. I had debated whether or not to cut the disks first and then glue them together or to somehow cut them after the fact. On one hand, cutting them before would allow the use of a vinyl cutter, a hole punch or something else like that, whereas a complete sandwich may be too big to fit in the tool. But on the other hand, gluing those disks together after the fact and getting the alignment right would be darn near impossible.
I did some Google searching and came to the conclusion that there was no such thing as an 11mm OR 7/16" circular hole punch. Larger? Sure. Smaller? Sure. Goofy star-shapes? Sure. But round 11mm? Nope. And even if I DID find one that was the right size, often they had a very small (read: paper thickness) punch limit and cost a small fortune.
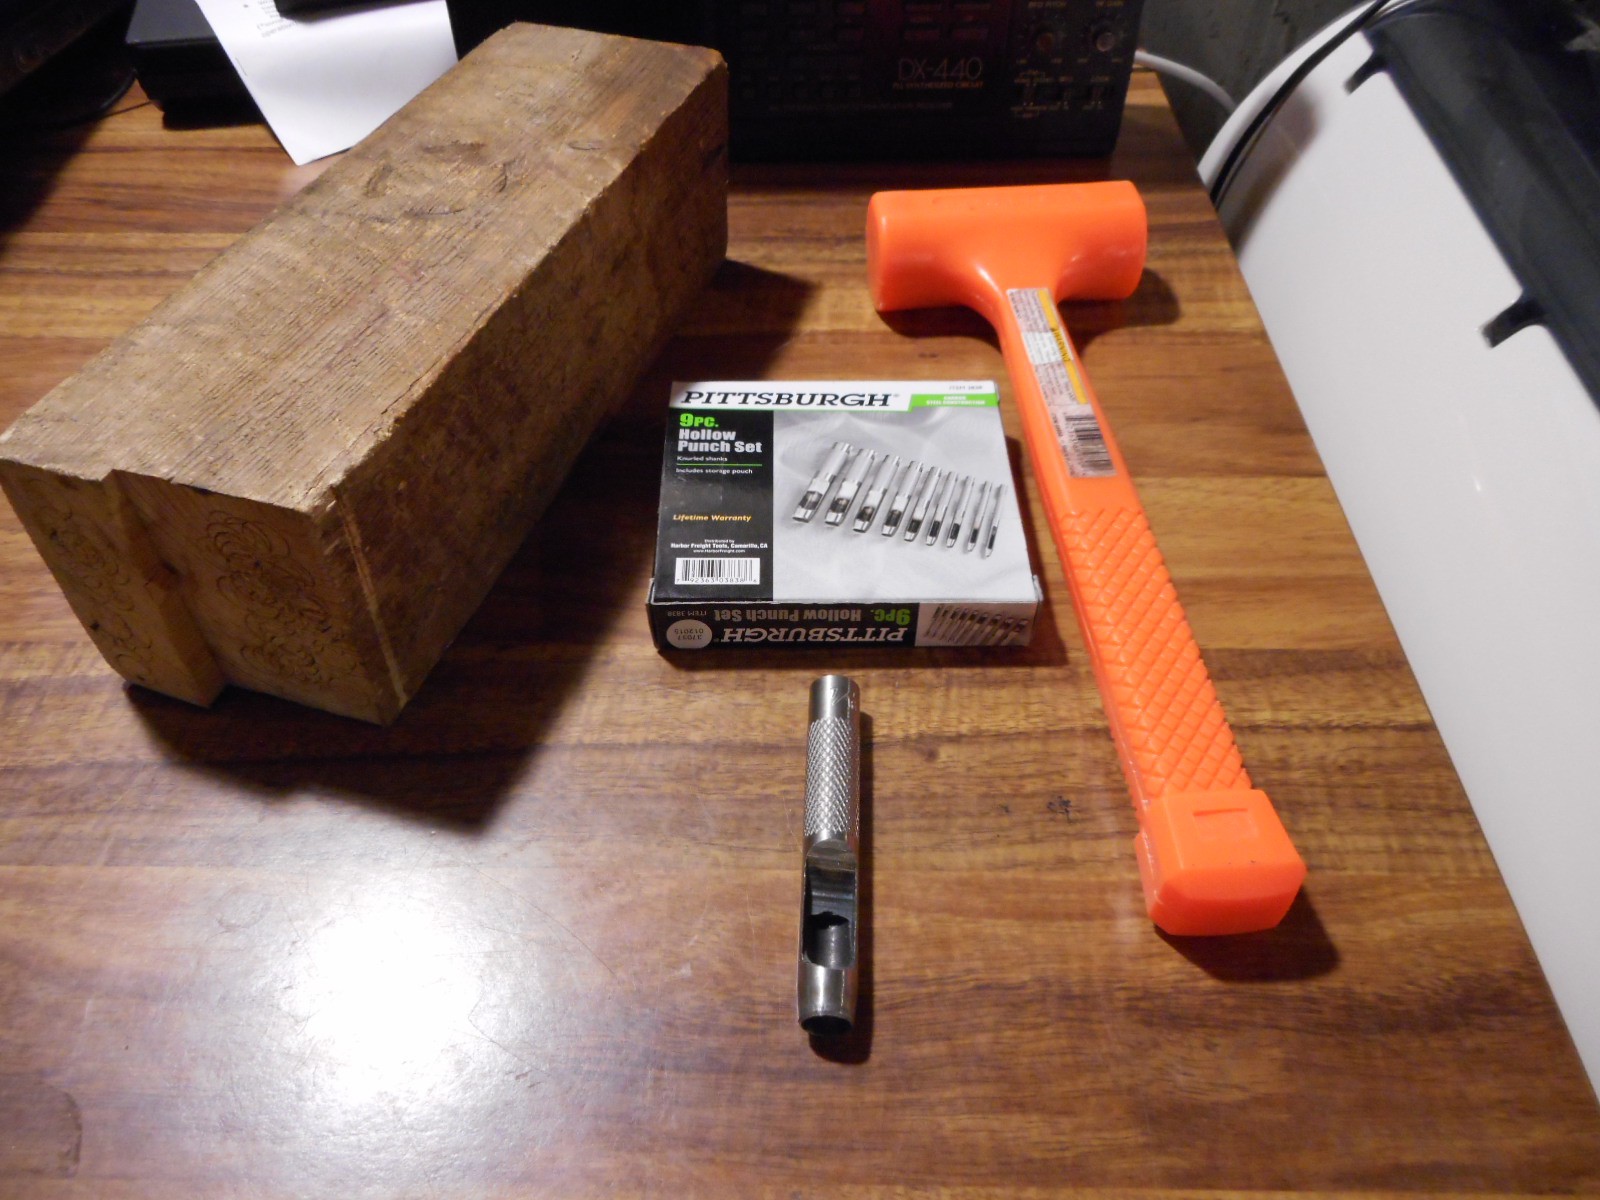
Finally (and I honestly have no idea how I even got to this idea) I thought of a leather hole punch. I did some more Googling, and found that Harbor Freight sells a set of hollow punches intended for leather crafting, and included in the set is a 7/16" punch. Huzzah!
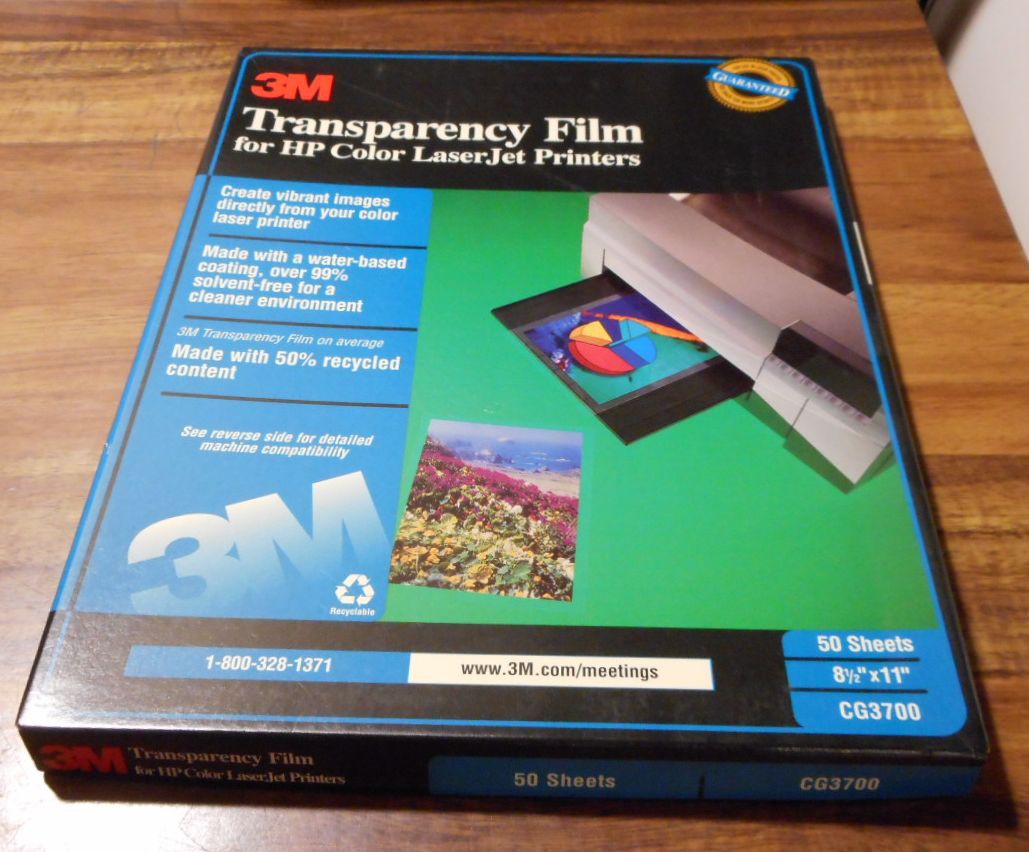
So I dug round the house, found some old 3M transparency film I had laying round, grabbed my thermal blanket, a took a trip to Hobby Lobby to get some black craft foam and some spray adhesive, and rounded out the afternoon by going over to Harbor Freight and buying the punch set.
I liked the transparency film as it was somewhat stiff, strong, but not brittle. Excellent for this project. Also, I didn't need to buy any. Always a plus. Honestly, I don't know why I have the stuff. Who uses transparencies anymore these days?
![]()
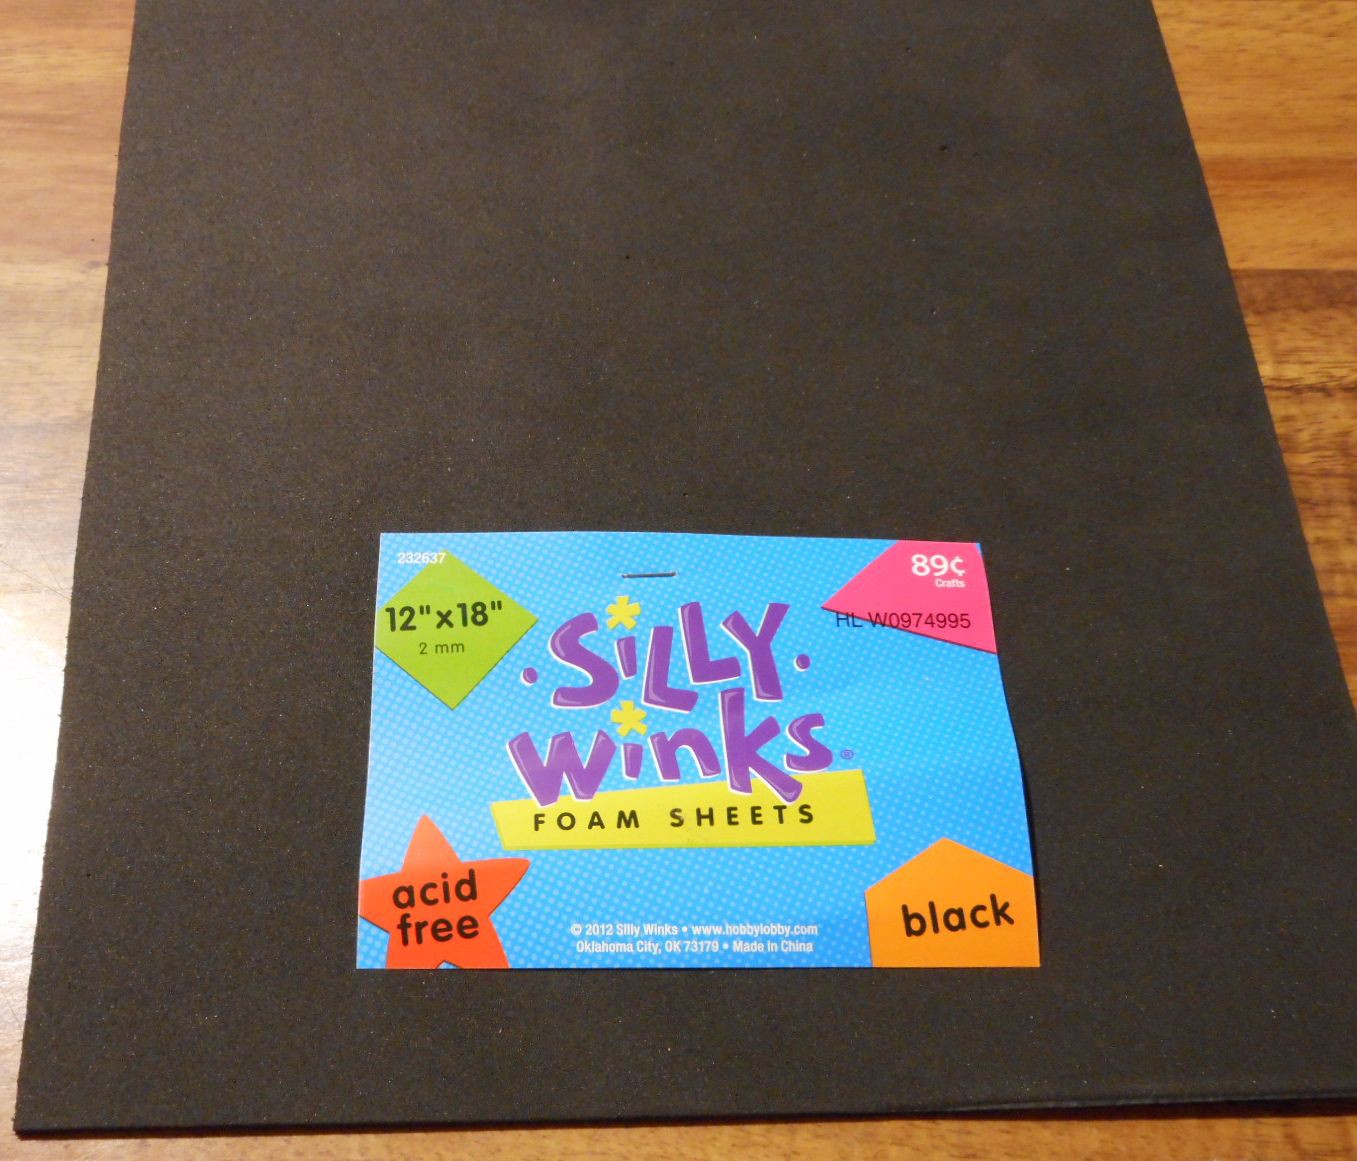
The foam I grabbed was the thickest sheet foam I could find that was still kind of dense and what I figured would hold up to the abuse. I figured if anything this would be my weakest point, but also the cheapest part to change out if it didn't work.
![]()
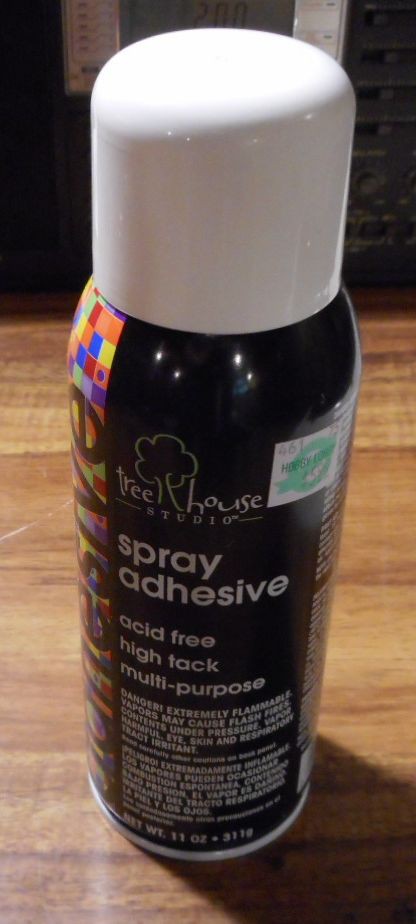
As for the glue, I went with spray adhesive. I would have gone with 3M Super 77 if I could have justified the high price of the can. So I went with TreeHouse Studio glue, which I can't seem to find anywhere online. It had the most VOC warnings compared to the others on the shelf, so I figured it had to be good.
![]()
So I glued up a sandwich, stuck it between some heavy boxes and the floor to allow it to cure completely under pressure, and called it a night. Of particular note, when you're gluing something like this, I did the spray-on-and-then wait-a-minute process, which seemed to form a very good bond between the layers. Of particular note, if you are like me and have some...shall we say...hairy arms, be sure to wear a long shirt or something to cover your arms from the glue overspray. While it wasn't bad or anything...the atomized glue has a habit of condensing on your arm hair. It is a very...annoying feeling.
Speaking of applying the glue, I found that applying the glue to the heaviest item was the only way to go. For example, don't try to spray the glue directly onto the Mylar space blanket. It will curl up and generally be a pain to work with. Instead apply the glue to the transparency and bond the foam to that. Then glue up the foam, and apply the space blanket to that. A heavy weight on the sandwich ensures a good and consistent bond between the layers.
The next day I took to the sandwich sheet with the hole punch with gusto. If you end up doing this, I recommend using the punch against a block of wood. I ended up using a combination of end-grain on a 4x4 or side-grain on a 2x4. It seems that when you use the end-grain as a blocking material you get better initial cuts while the tool is sharp, but once it starts to dull, use the side-grain. In either case, use whatever works to create perfect little disks without tear-out or odd creases in the transparency plastic. A dead-blow hammer seems to work really good as well. Your mileage may vary, so like I said, use what works best for you.
![]()
So I started wailing away on the punch while listening to a baseball game like some kind of madman and ended up with a little pile of new contact disks. Huzzah!
![]()
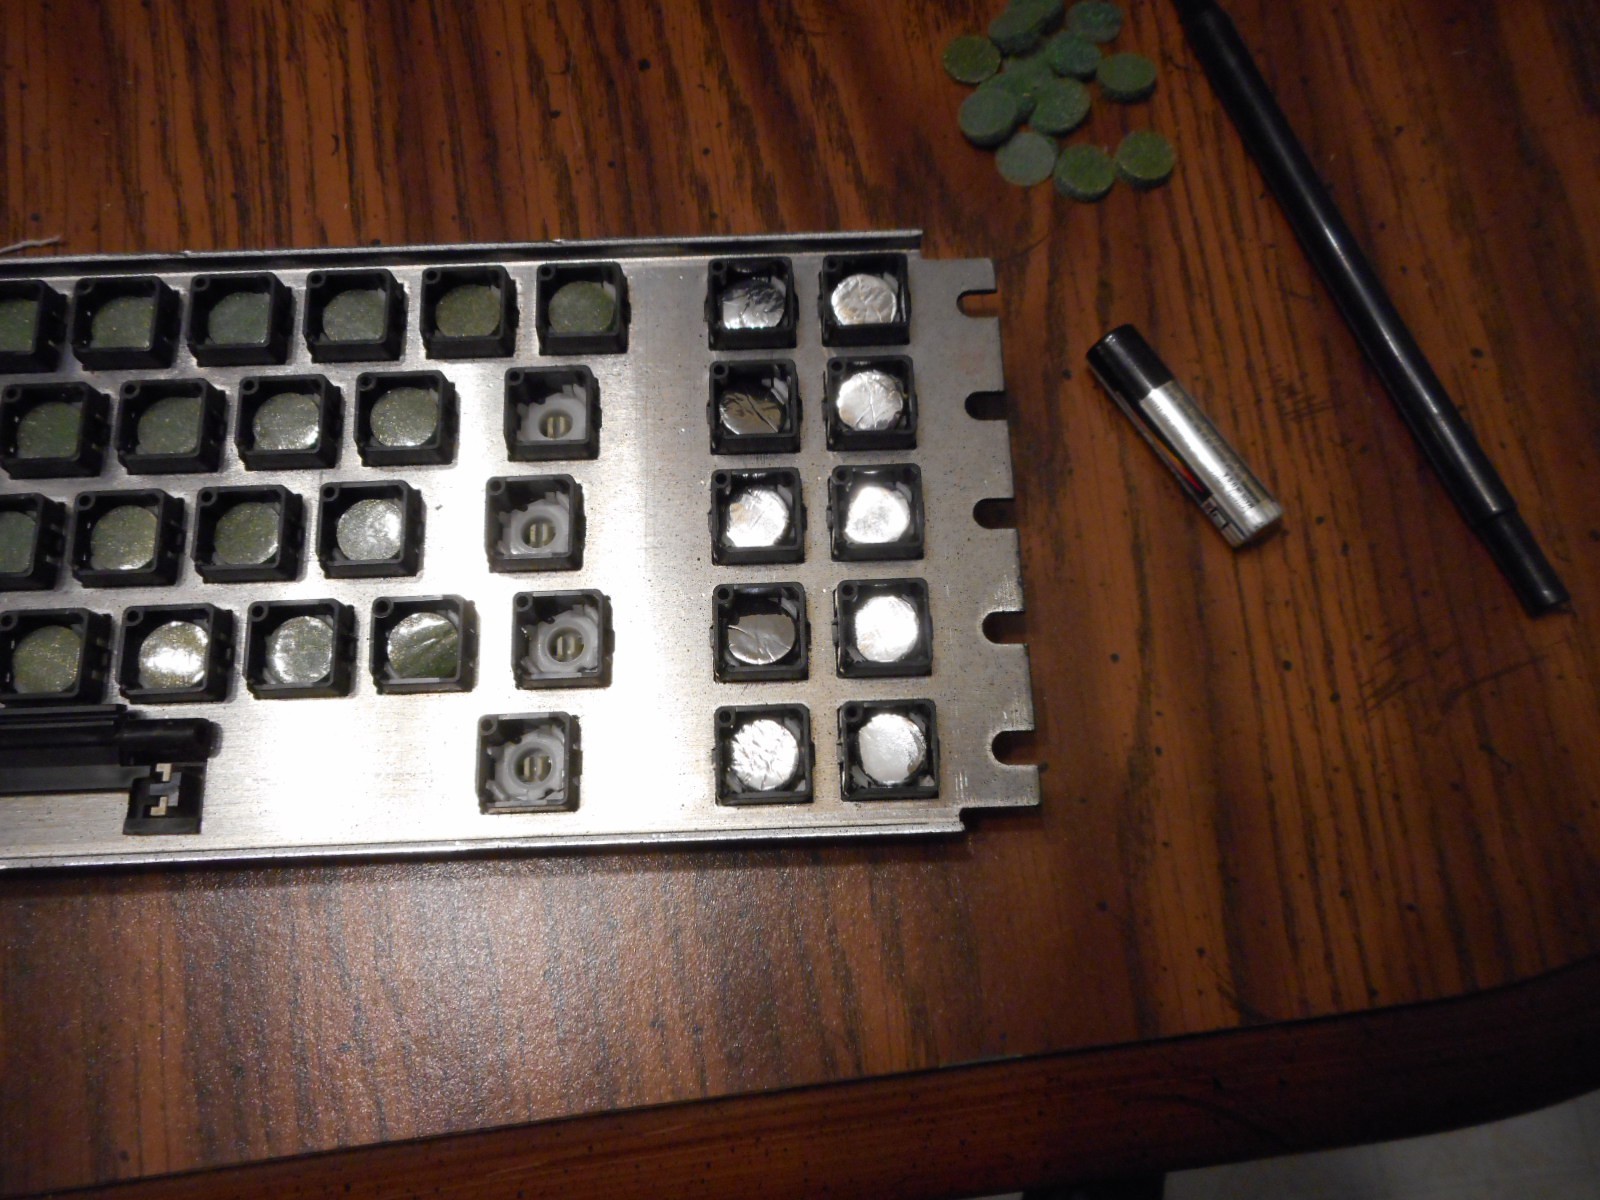
So, I spent the time popping them into the keyboard. This was a PAIN. Tedious work. It took me another evening (and another baseball game) to complete the job. The key when putting them in is to get them seated perfectly into those four plastic clips. You want the disk to sit neatly and flush in that little spot. I found that using a small bent paperclip, a AAA battery, a pen, or a small pointy screwdriver to really seat them in there was key to getting them to stay put.
![]()
So I spend the time to get them all put into the keyboard, I tidy things up, put it all together and power on the system.
And when I to go try typing I get...
Nothing.
Nada.
Zilch.
I couldn't believe it! I went through all that work! What happened? -
Step 0 - Introduction to the Compaq Portable
09/13/2015 at 16:49 • 2 commentsSo a few weeks ago I was looking around one of my favorite online auction sites, http://www.shopgoodwill.com/ and came across a Compaq Portable (the original) with bids going around $5. I watched the auction, put in a bid, and won it for $5, a hell of a deal. Well, unfortunately shipping that heavy beast cost me another $45. Whoops.
So a few days later the monster is sitting on my kitchen table and I power it up. Amazingly enough, it seemed to survive the trip without issue. I half expected a broken yolk on the CRT or something. Anyway, the first power-up test worked well. No smoke, no fire. It beeped and wanted a boot disk. Success!
Unfortunately I didn't have a 360k 5.25" bootable floppy around at the time, so I didn't get very far. I powered it off and put it aside.
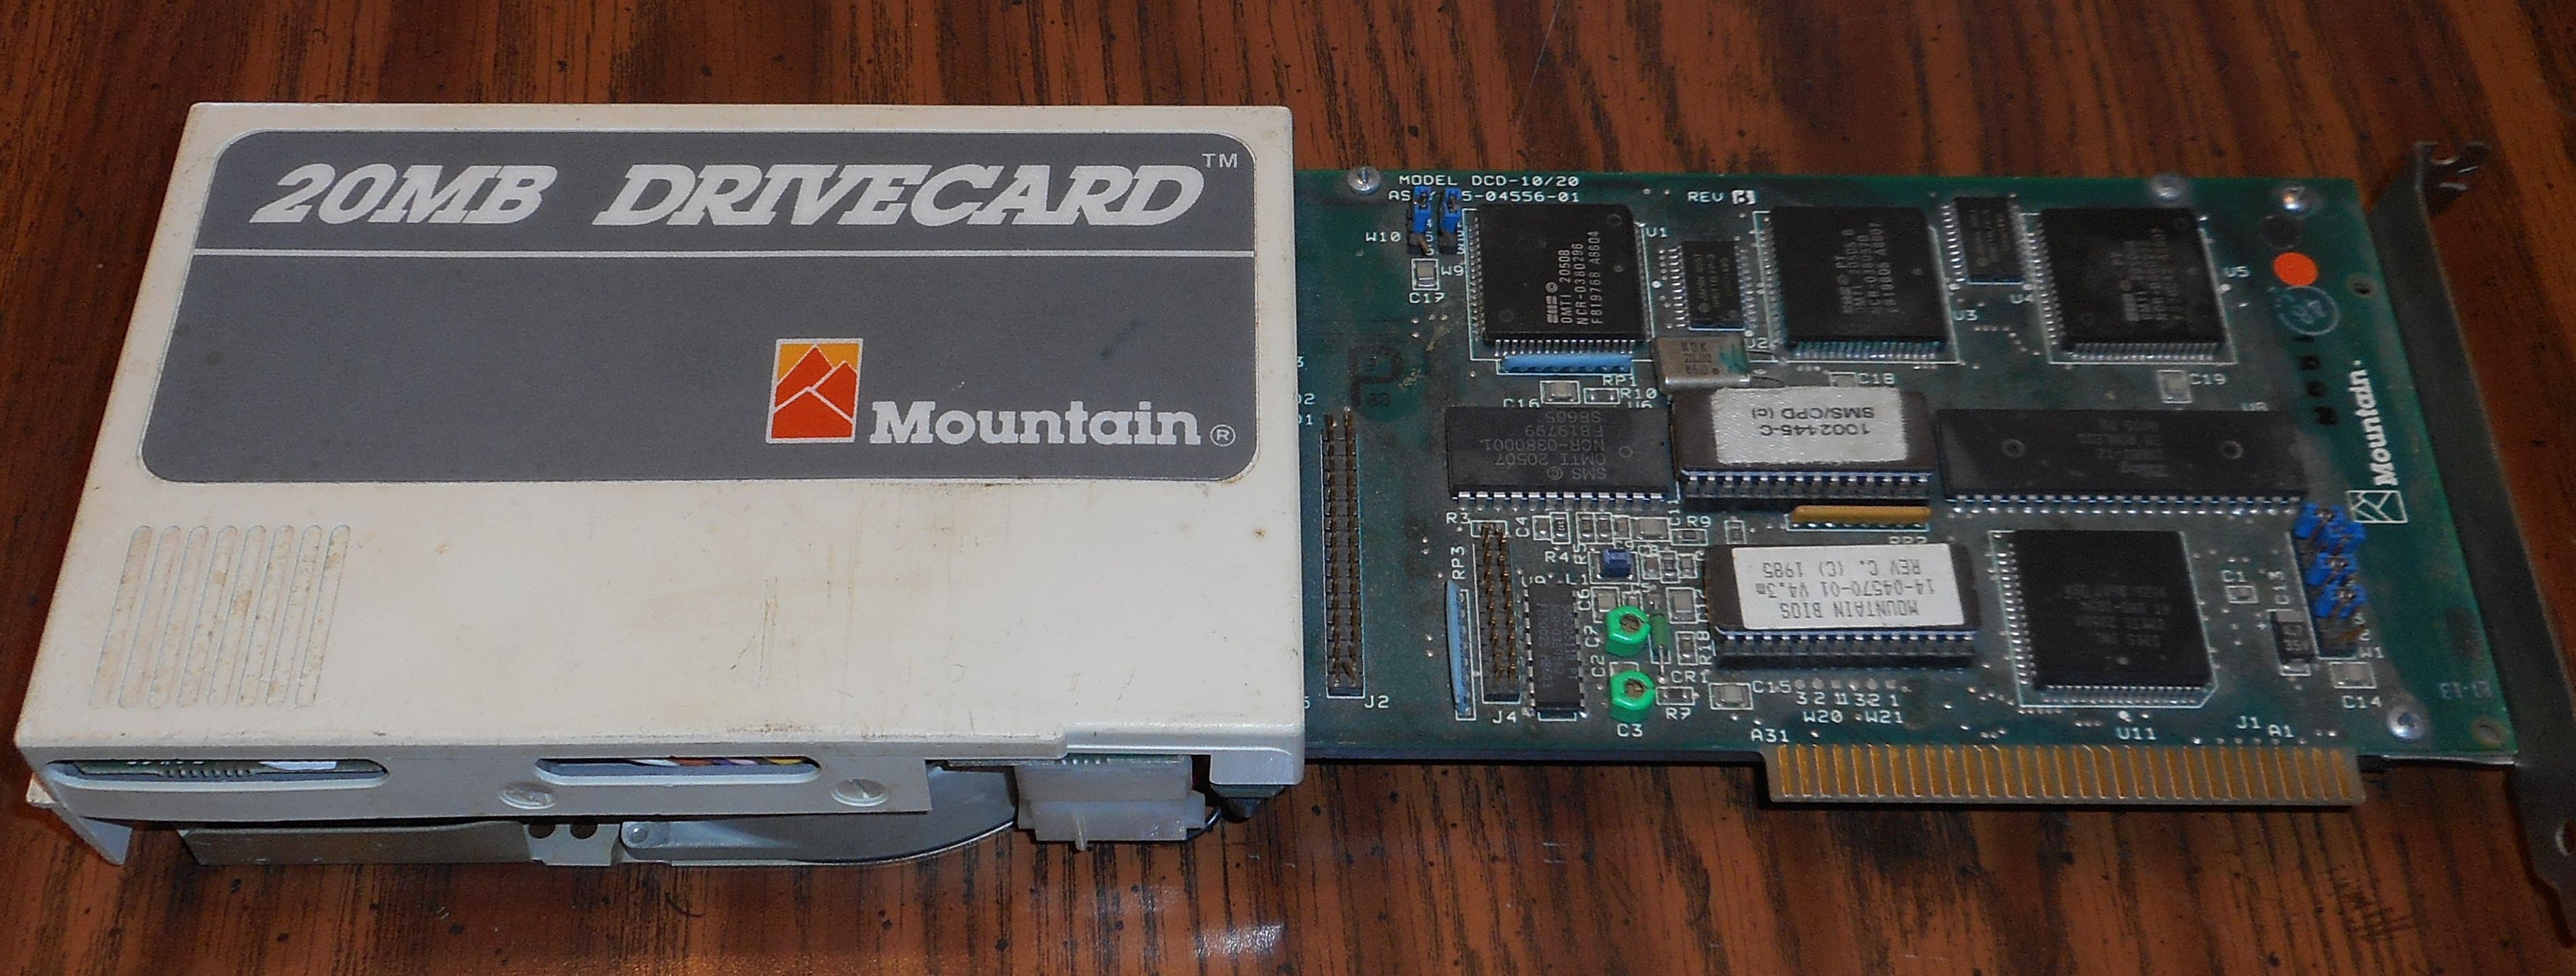
Fast forward one weekend trip to my storage unit and digging through some old boxes of stuff, I came back home armed with a bootable floppy and a old Mountain DriveCard. A kind of 20MB hard-drive-on-an-8-bit-ISA-card device, which I used to use way back in the day on my last 8088 IBM. I figured if it wouldn't boot from the floppy, the DriveCard should work.
![]()
(It's amazing to think that this hokey thing from 1986 still works, and its practically my go-to device for debugging and testing vintage computers. What's even more amazing is the price the sucker commanded back in the day - $1,195! Apparently that was a excellent deal in those days! - Google Books - PC World Review in 1986)
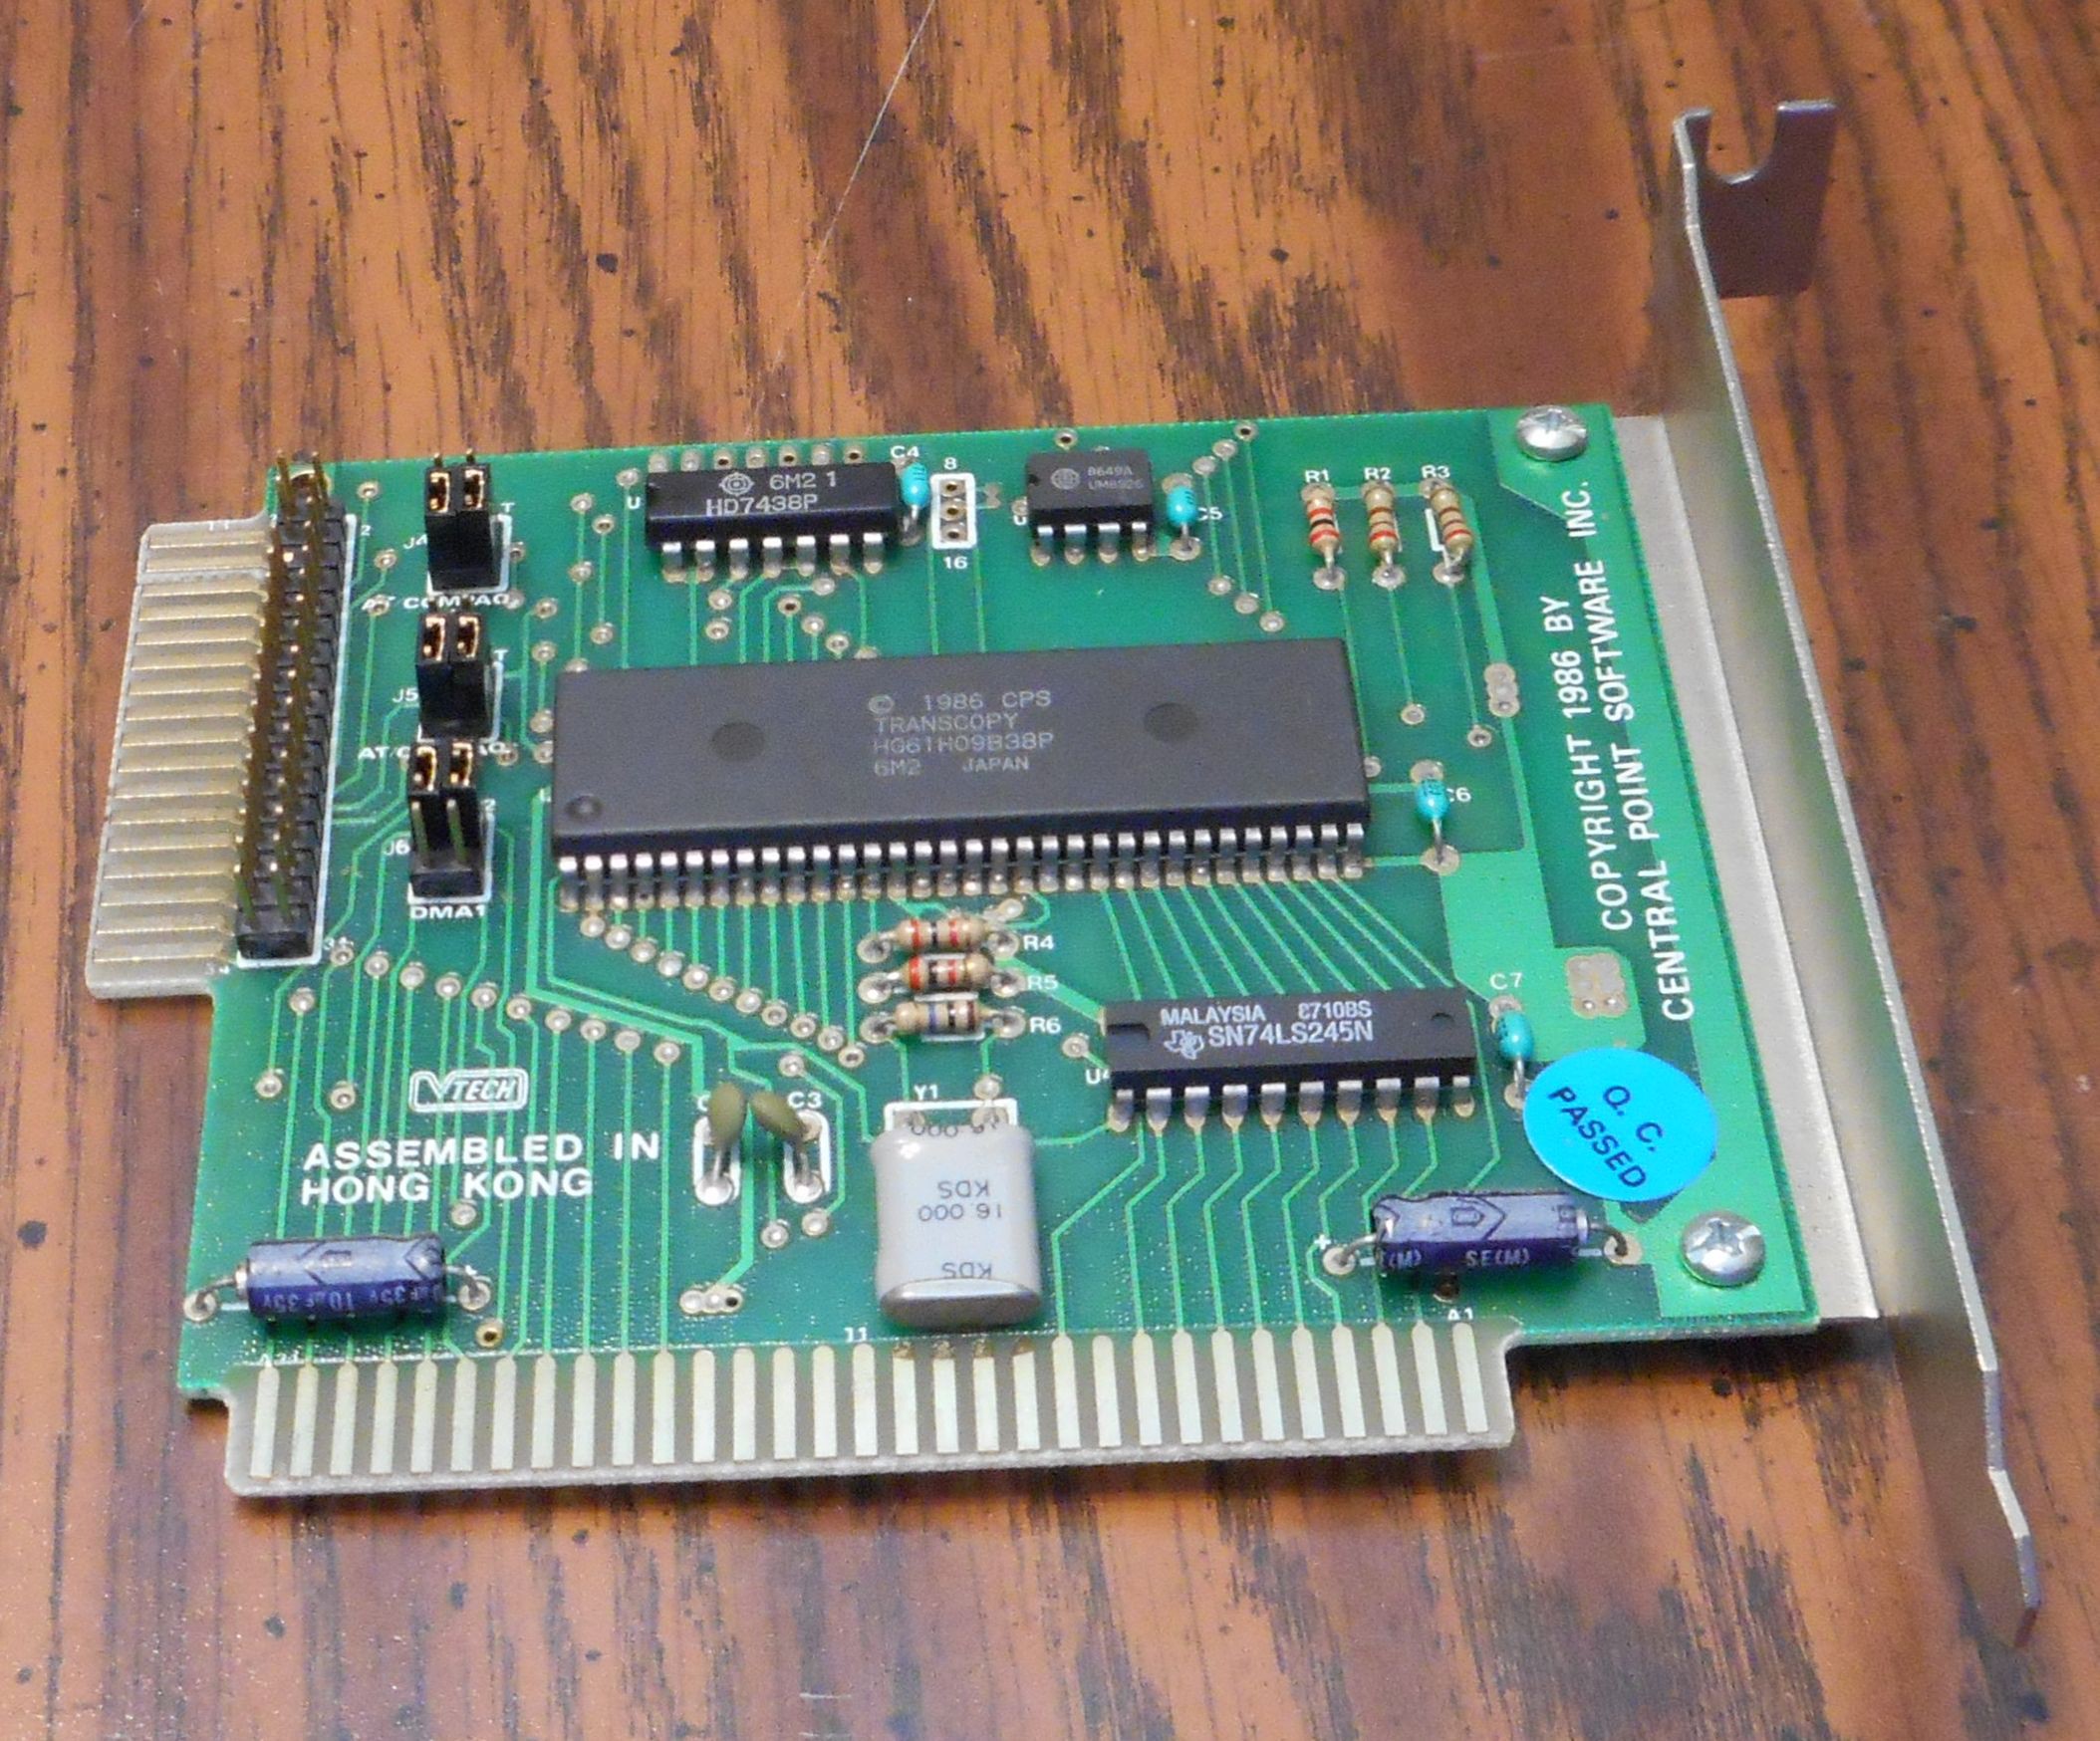
Well, surprise surprise, the floppy drive didn't work, and while I was mucking about with it, I started to suspect that there may be a problem with the keyboard, but I dismissed that thought at the time. So I pushed onward and put the DriveCard in. At the same time I poked around the system to see what other kinds of goodies were in it. Interestingly enough, not much had been changed over the years in it. Same 2x 5.25" floppies, a floppy/parallel controller, a CGA card, a old 2400 baud modem, and a Central Point TransCopy card. Interesting. I pulled out the TransCopy card, which goes in between the floppy controller and the drives themselves, thinking that might be causing it to not boot the floppy, but nope. No dice. Drat.
![]()
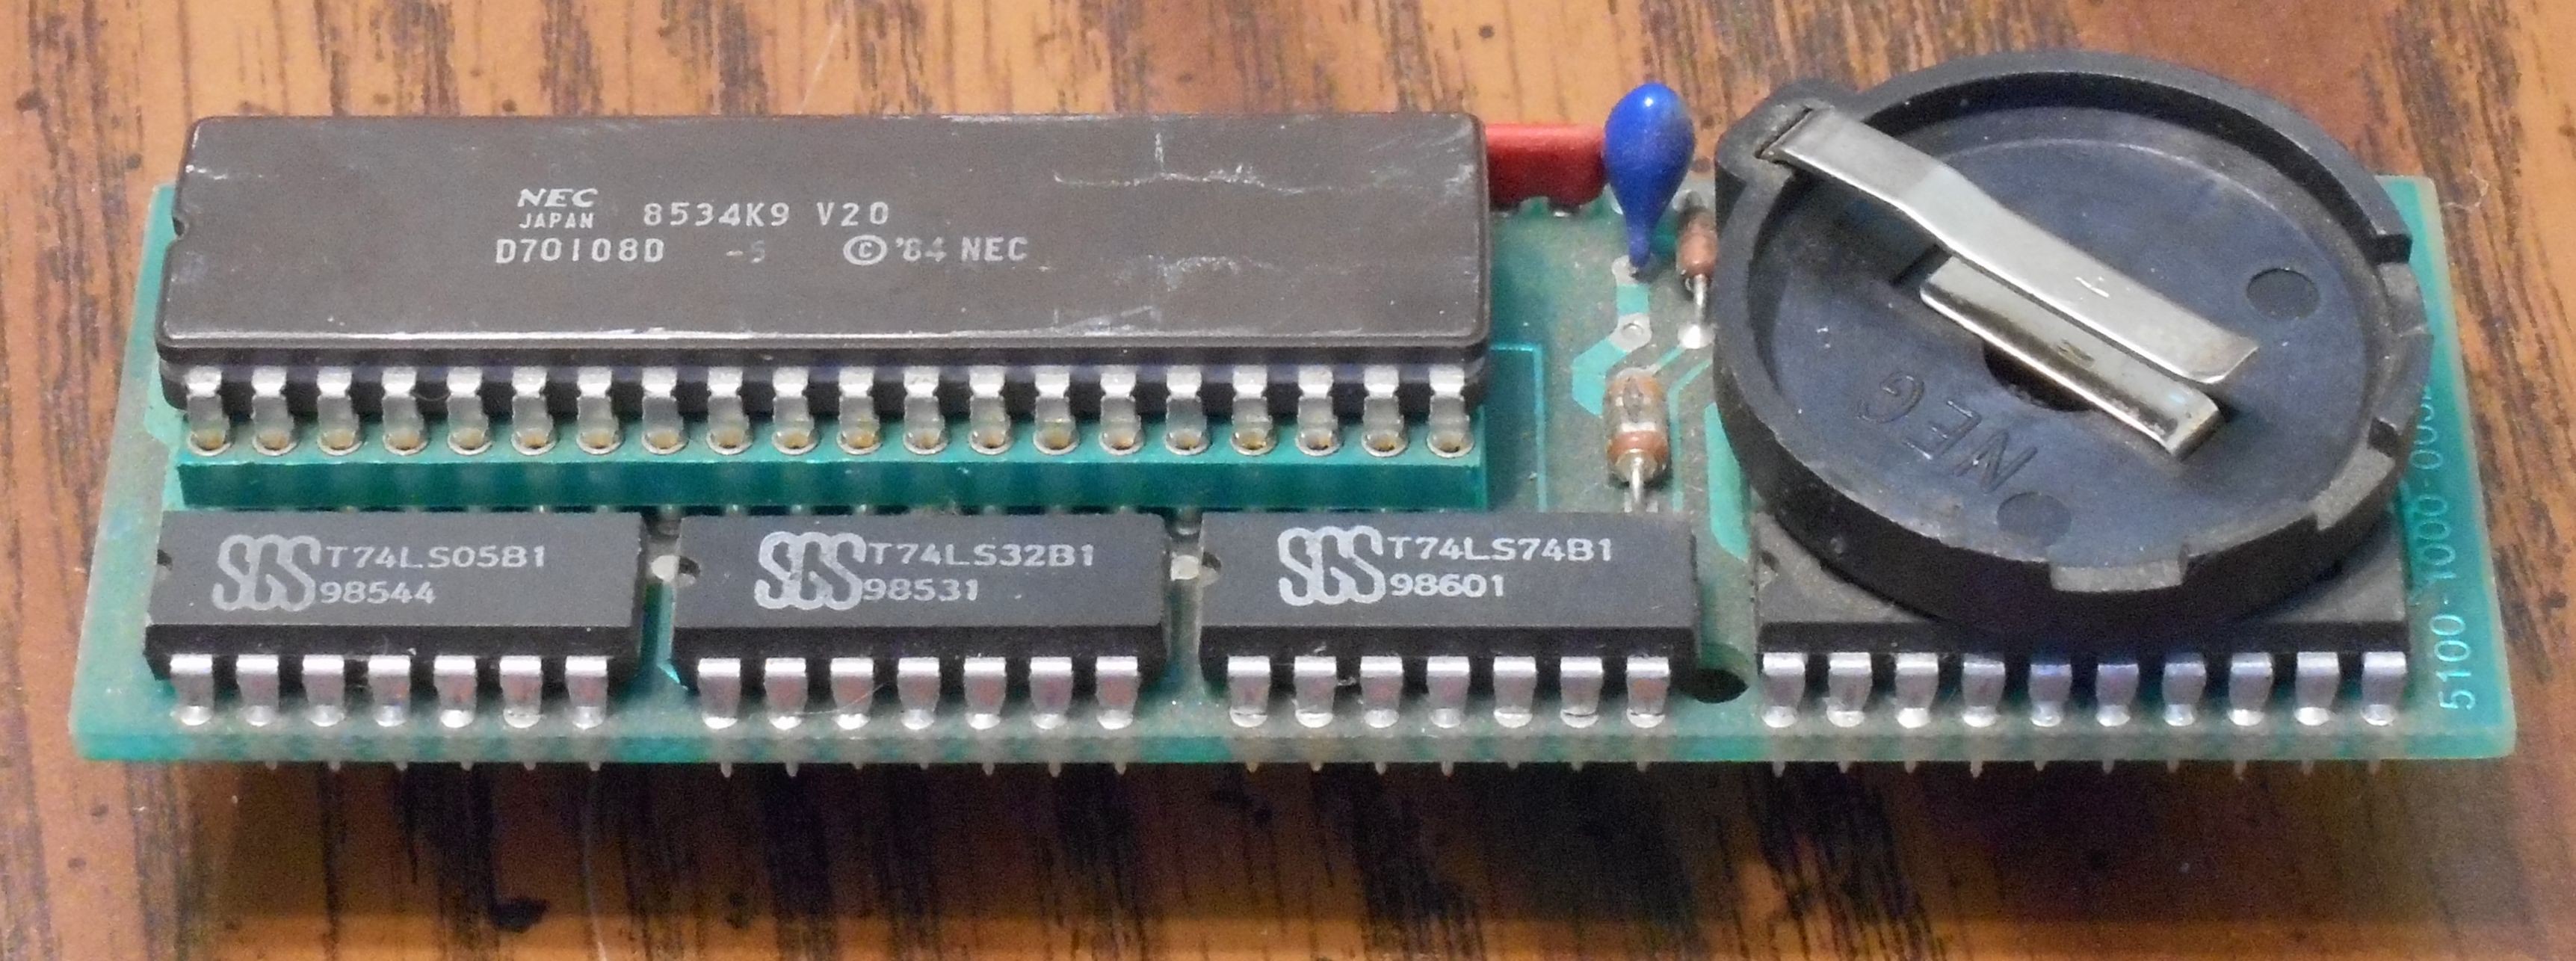
There also was a strange interposer card on the CPU.
![]()
Here it is removed from the system. Apparently this is a dClock RTC, sold by Microsync in about 1986. I have since removed the absolutely stone-dead lithium battery. Here's an ad for it from the March 1986 issue of InfoWorld. (As a side note-if anyone has any information about this device, or the software that's supposed to go with it, please contact me!)
Anyway, so I went ahead and put the DriveCard in. Lo and behold, it booted! A click, a whir, a bunch of drive head read noise, and I was looking at an MS-DOS 5 prompt! But at this point it became obvious that the keyboard was unresponsive. Odd.
I poked and prodded with the keyboard for some time, thinking there was a problem with the cable or with the controller, or with the keyboard itself. Nothing really changed, so it was time to hit the internet and find out what the problem may be.
-
Step 2 - Defining the Problem
09/13/2015 at 16:41 • 0 commentsWell, now that I had a plan of attack, it was time to take things apart. I took to the keyboard and did a little cleaning while I was in there, and was somewhat surprised (even with the fore-knowledge of how it was supposed to work) at the construction.
The Compaq Portable (and a few other Compaq systems from that era) uses an interesting arrangement for it's keyboard. The keyboard switches aren't switches in the traditional sense, like the mechanical, buckling spring, or even rubber-dome contacts like many of the other popular types available at the time or since. Instead, the keyboard behaves somewhat like the modern capacitive touchscreen, albeit on a much larger, much less transparent, scale.
The keyboard has three components: the physical plastic keycap and traveling spring, the plastic-foam-mylar contact disk, and the keyboard PCB itself. As Philip describes in his article, and as the others at the Vintage Computer Forums mention, the keyboard doesn't necessarily sense an electrical contact, but senses the capacitance of that contact disk, which than triggers the input. Interestingly, human fingertips can also be used in lieu of the plastic keyboard parts.
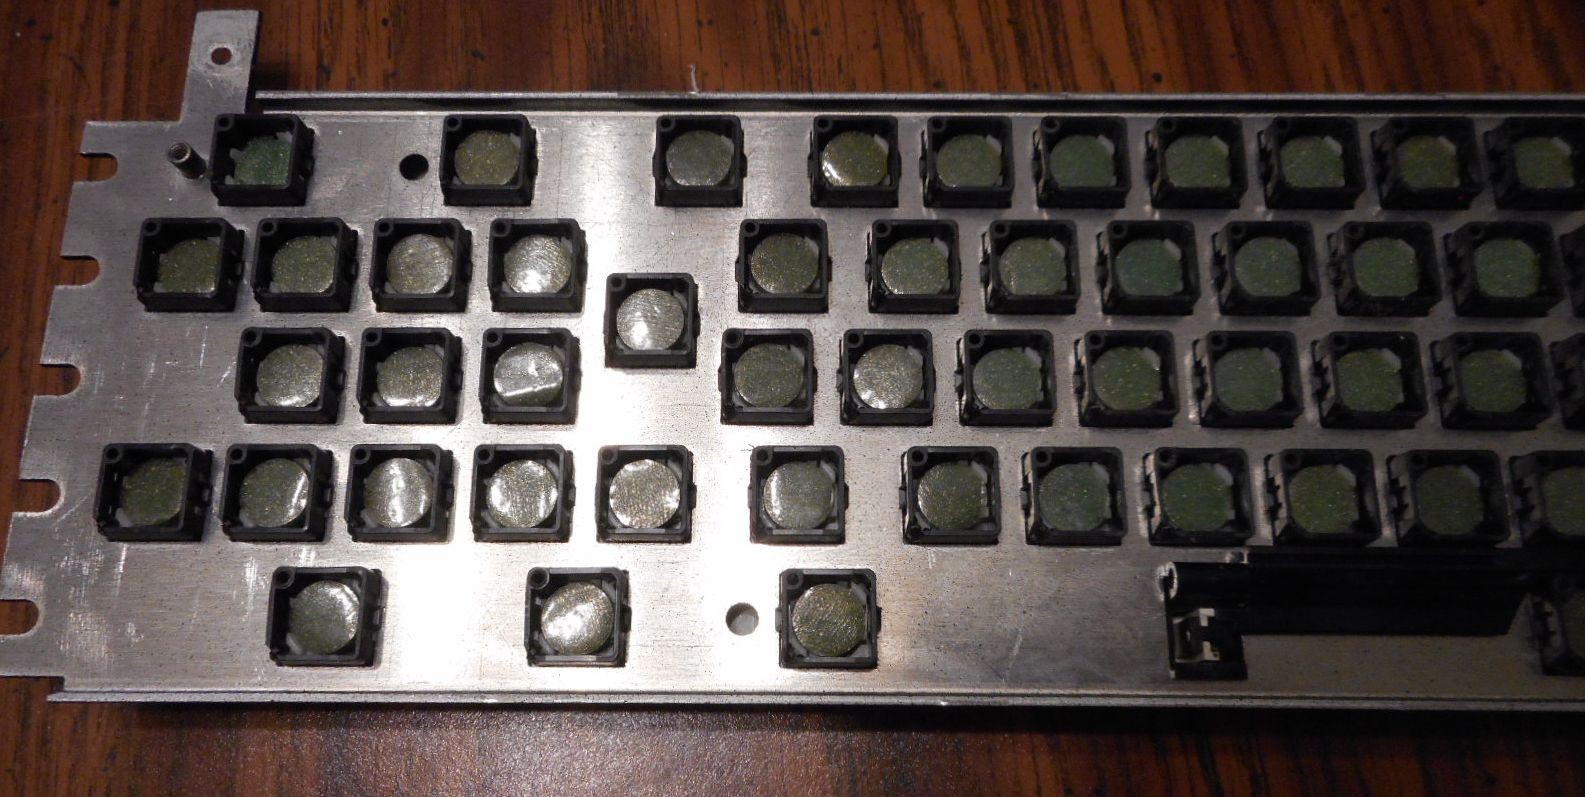
Here is a picture of my PCB. Note the contact surfaces for each key. Also note the pennies on top of the voltage regulator in the upper right corner. If you wish to test your keyboard while you have it taken apart, be sure to give some kind of heat-sink to that regulator so it doesn't burn up. A few coins worked well.![]()
Here is a picture of the underside of the keyboard. You can see the individual plastic keycap-spring combos, and the mylar side of the plastic-foam-mylar contact disks. You can already see that many of them are not in the best condition.![]()
![]()
Here you can see three old disks. The left most one is plastic side up, the middle one mylar side up, and the rightmost is on edge. These are the three best ones I could remove! As you can see on the left, the foam is already disintegrating.
The idea is that this disk is connected to the bottom of the keycap, which is then held slightly above the PCB until it is depressed and contacts the surface. When it does, the mylar changes the capacitance value for that key, triggering the input.The foam allows a little give between the trigger of the input and the bottoming of the keystroke, in theory yielding a lighter touch than a purely mechanical switch would.
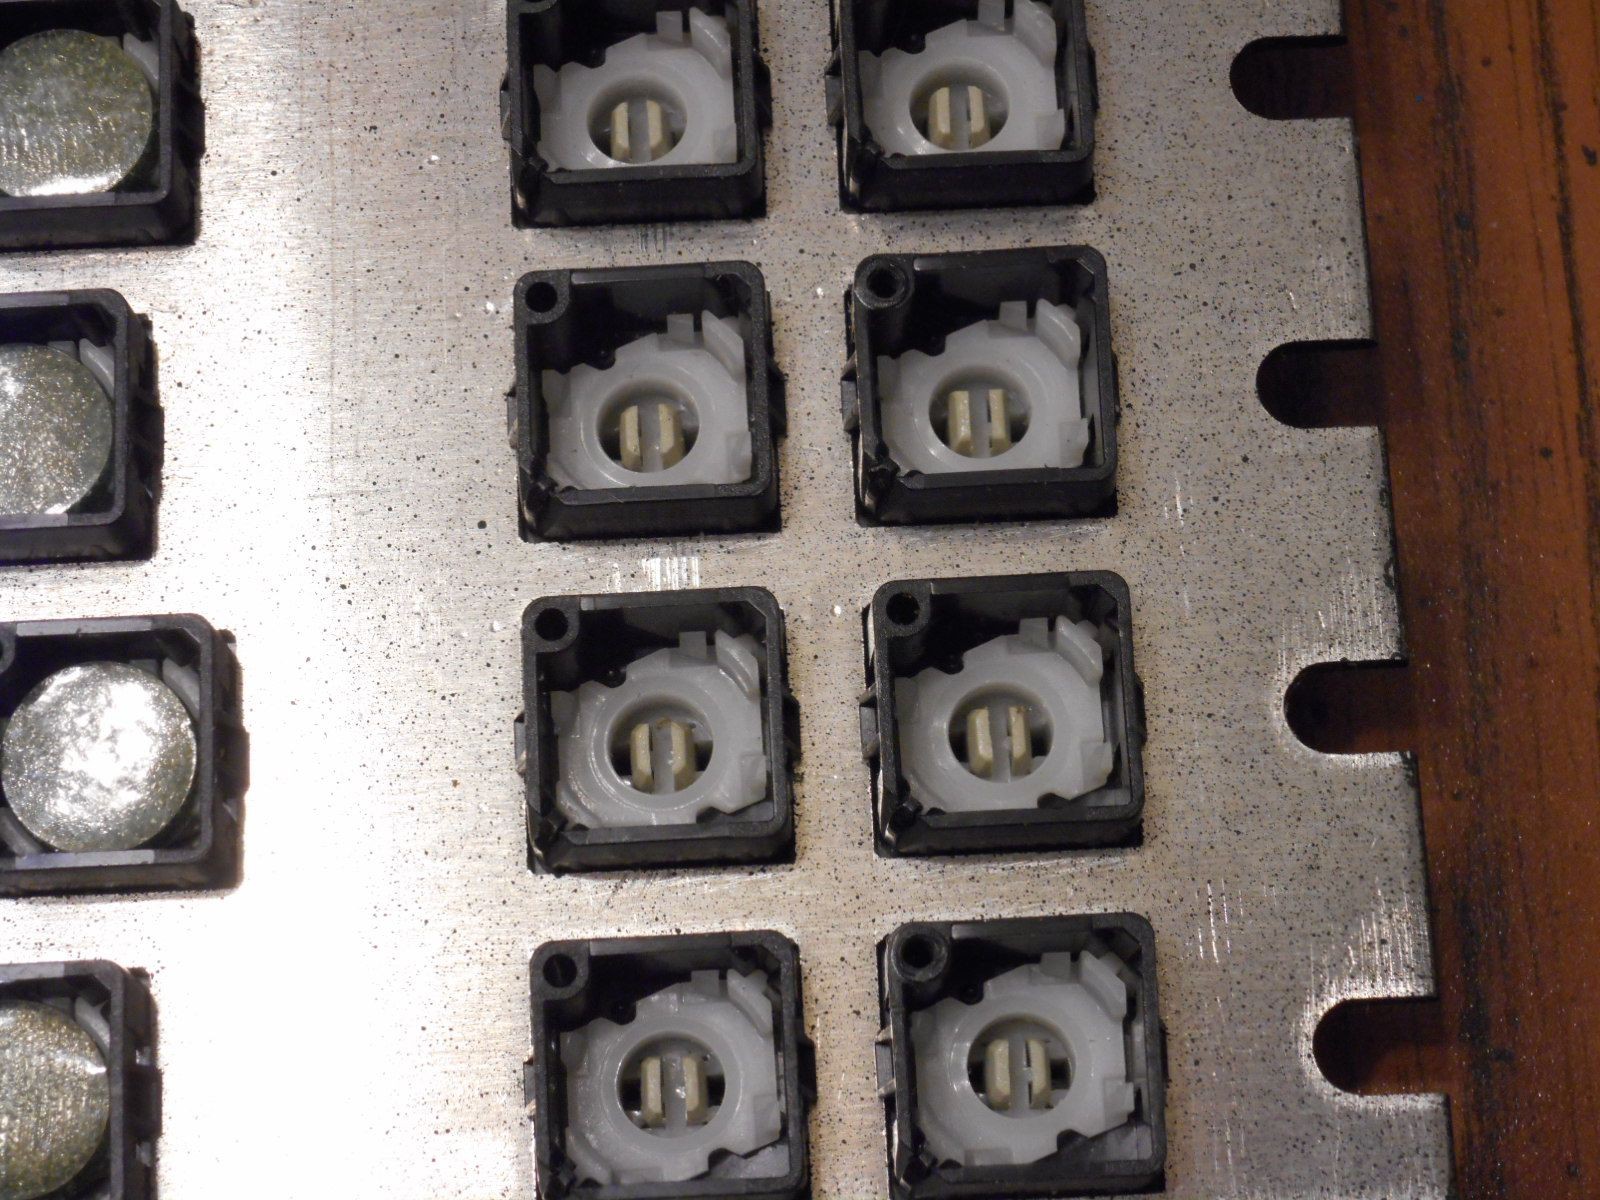
![]()
Here is a closeup of the keycaps themselves. You can see the little white plastic clips that the disc snaps into, four per key. This will come up later.
So overall, its a rather interesting approach, and I'm not sure why this was chosen over a more traditional setup. Cost I suppose. Perhaps weight as well?Well, either way, the crux of our problem is that plastc-foam-mylar sandwich I keep talking about. Well, what seems to happen is that over time, that foam will slowly degrade and either turn to dust or turn to a sticky goo. Mine had gone down the dust road. Perhaps more interesting was that when I picked up a piece of the mylar disc and tried to use it on the keyboard manually, it also did not trigger! So how to create a new set of disks?
-
Step 1 - Researching the Problem
09/13/2015 at 16:11 • 0 commentsSo now armed with the knowledge that the Portable probably maybe kinda works, I did what anyone would in my situation would, I set about Googling the snot out of the problem.
I came across two major sources of information about the problem and potential solutions:
- Vintage Computer Forums
- There were several threads about the issue, which is apparently a widely known one. (Good! I probably have a known problem rather than something more exotic!) However the forums weren't especially helpful in actually resolving the problem, but rather the information was mixed in a mish-mash of guesswork, vague solutions, and anecdotes of other's half-formed solutions. Apparently at one point a guy was selling replacement parts, but people weren't recommending him anymore.
- Old, Broken Junk
- Philip has an excellent website, and he had gone through a similar situation as I with his Compaq Portable. That whole project was covered in a Hackaday retro post back in 2014. Thankfully I didn't have to do quite so much resurrection as he did. About halfway through his post he describes the problems he had with the keyboard.
Ultimately both sources brought me to this conclusion:
There are some little plastic-foam-foil disks in the keyboard that act as the keyboard's contact switches, and they have more than likely self-destucted over the years. They would need to be replaced. - Vintage Computer Forums
Repairing a Broken Compaq Portable Keyboard
The Compaq Portable was Compaq's first product. It is an amazing machine, but its lousy keyboard doesn't hold up over time.