Close
0%
0%

StarPi

A Raspberry Pi based Astrophotography System

Similar projects worth following
A Raspberry Pi system to assist with Astrophotography. The completed system will have a simple to use browser based interface to a Pi camera mounted to the eyepiece of a telescope, Additional sensors will feedback location and the position on a star map. This will also be streamed to Stellarium open source software and both Stellarium and the browser will be able to send GoTo commands to the telescope and if motors are attached will track the target.

Conception

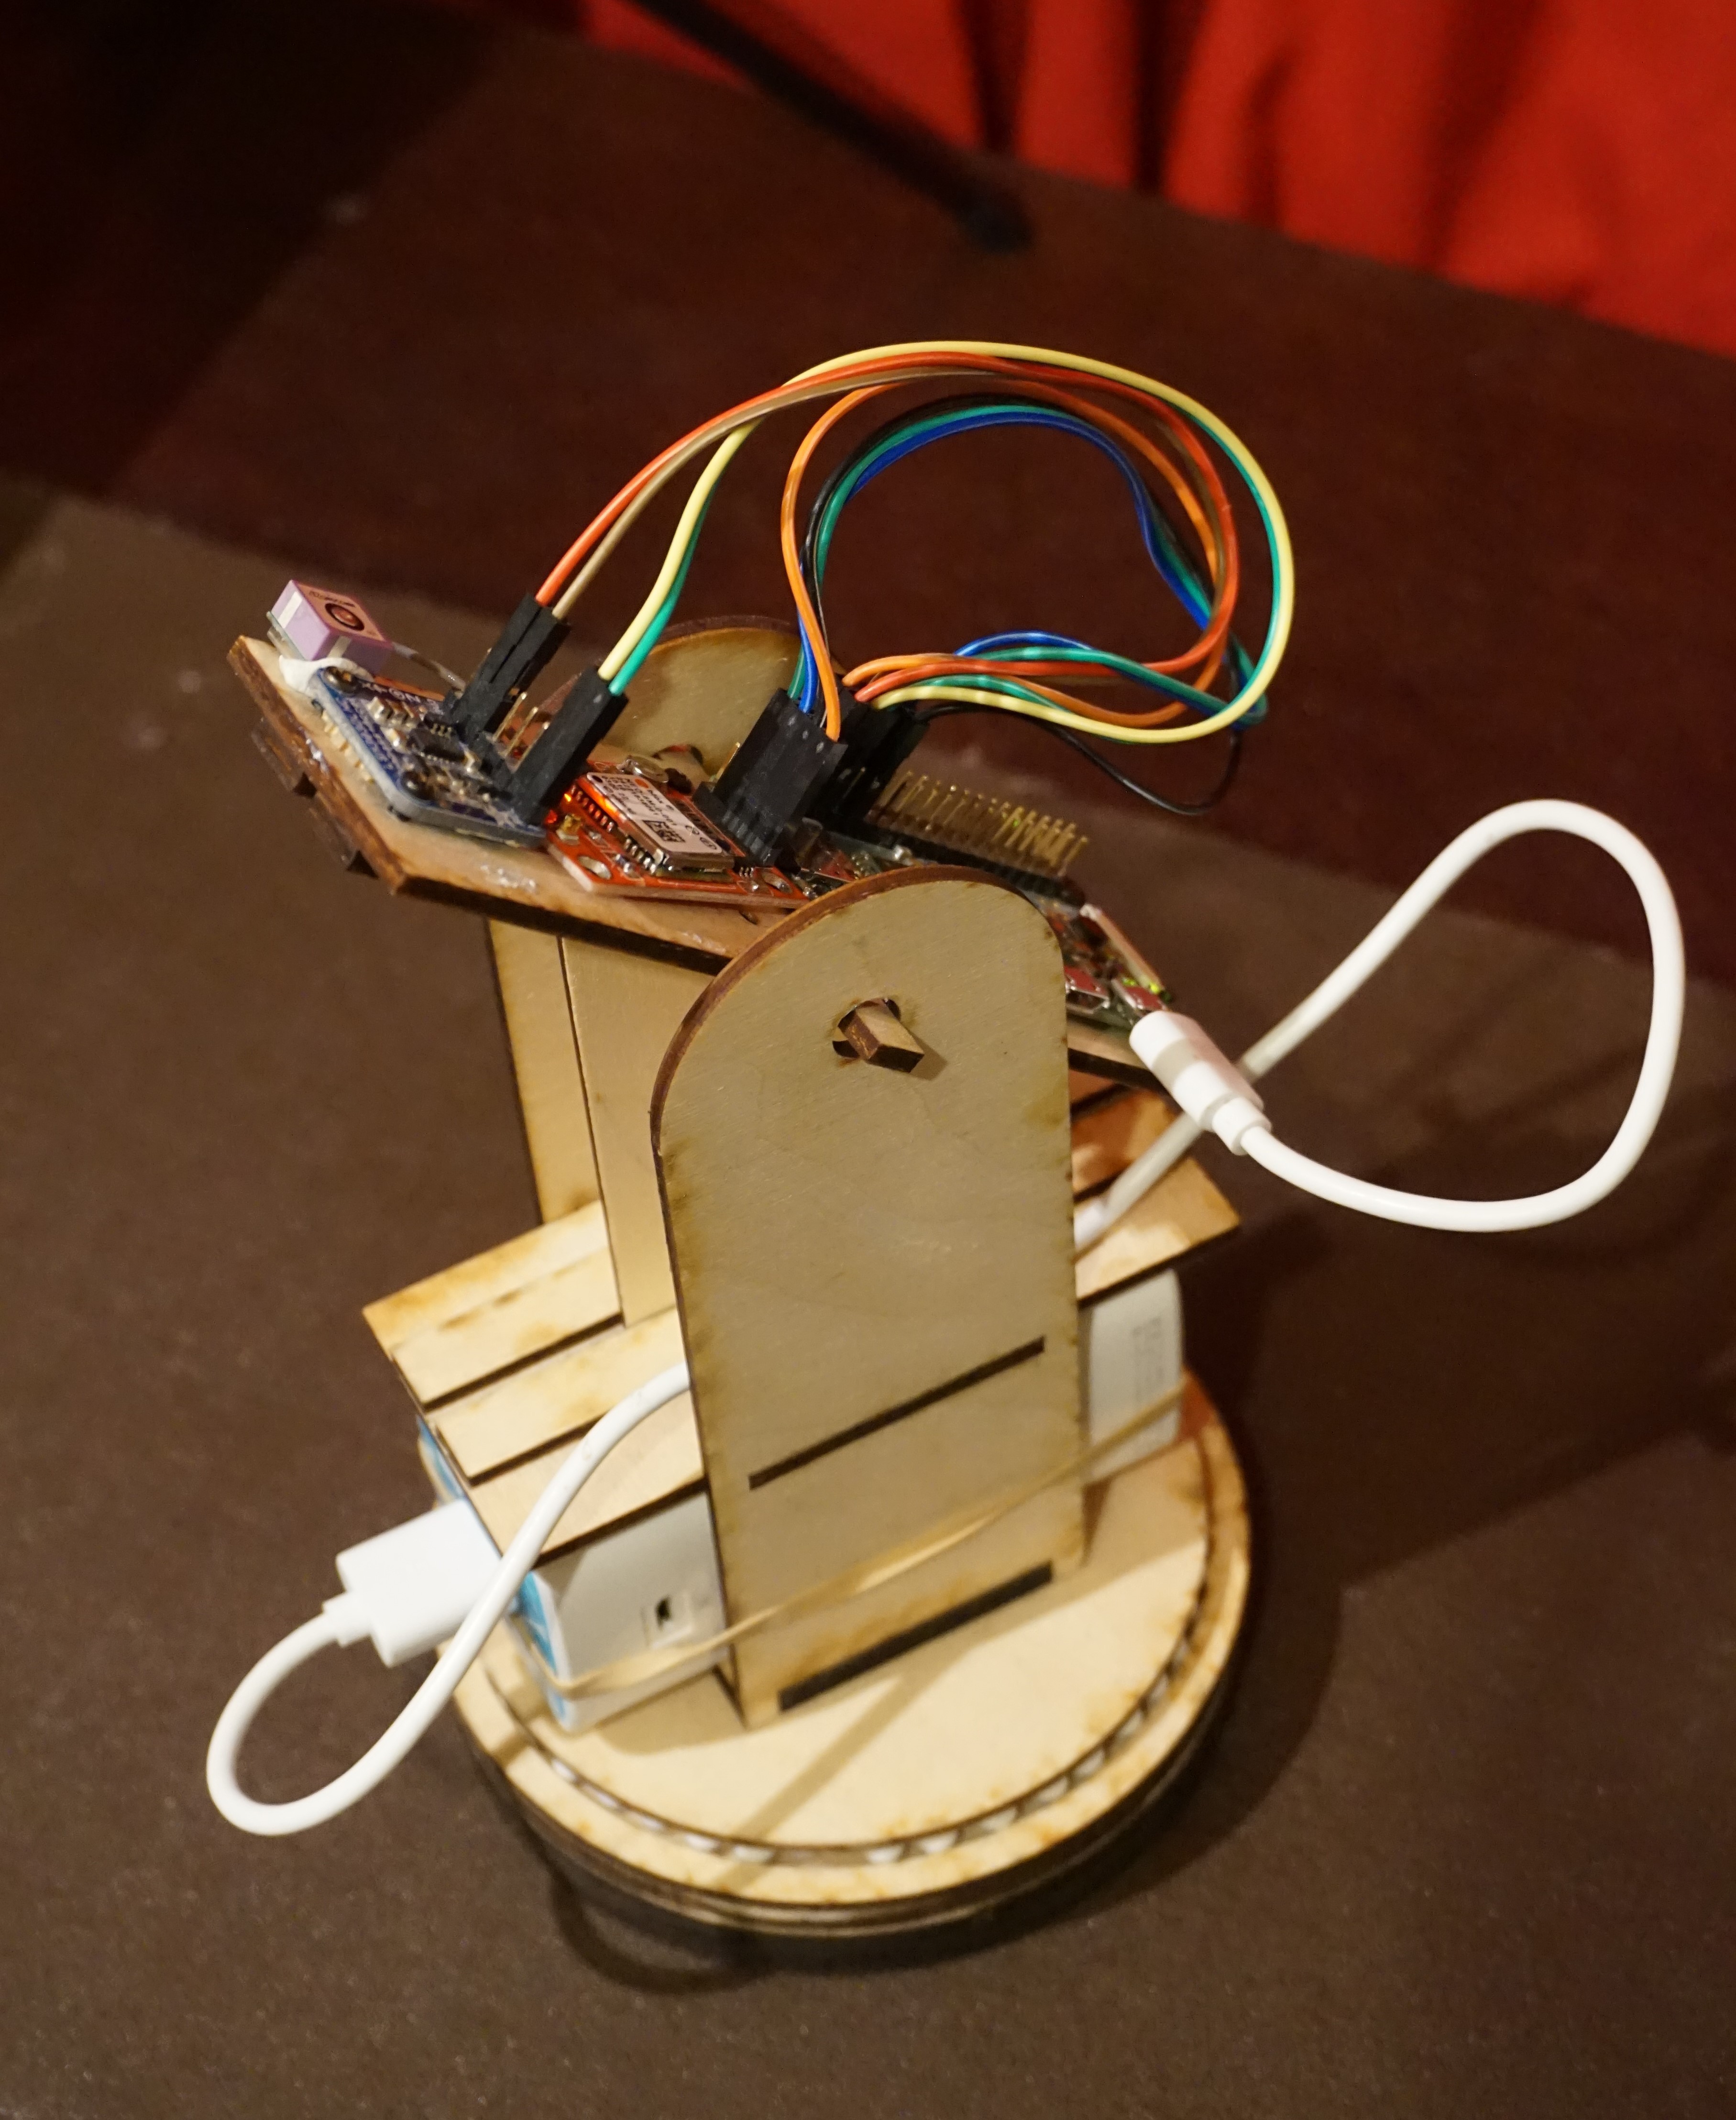
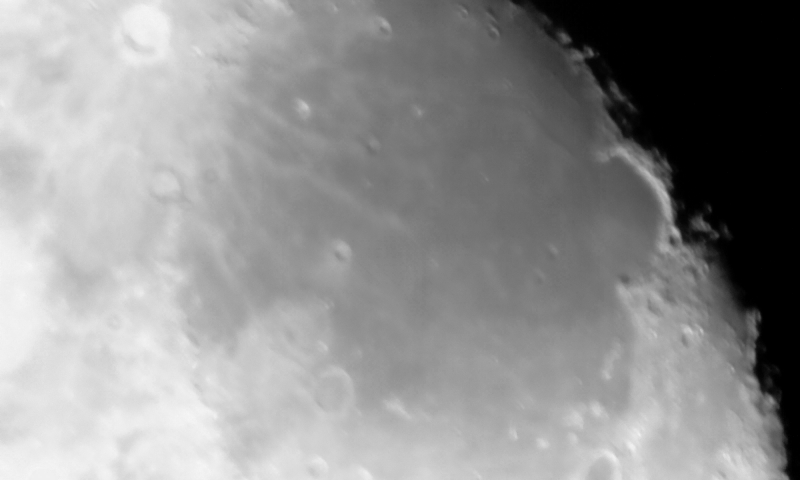
I was fortunate to be given an old telescope, At the time I'd just finished my 3D printer and needed something to print. After browsing Thigyverse I came across the PiPiece, an adapter to mount the Raspberry Pi camera to the telescope, by dmpalmer. After a little setting up I was able to view the sky at night through the Pi. I had one big problem. I had no idea what I was actually looking at.

After some surfing I came across Stellarium, An open source sky map. If you don't know it and have an interest in Astronomy, check it out. It's full of features, but the one that drew my attention was the telescope control addin. This acts as a client to telescope to send Goto commands and receive co-ordinates to display the current position the telescope is looking at in the sky.

It was the solution I was looking for, but it brought with it another porblem. Cost. I looked into the price of telescope tracking systems and found it was quite easy to spend hundreds of dollars on a system. I didn't want to spend that kind of money. With using the Pi already, it seemed logical to just build one.

rsdoc - 333.29 kB - 07/10/2016 at 21:03

Download

AutoCAD DXF - 187.37 kB - 07/10/2016 at 21:02

Download

StarPi_3D_printed_part_designs2.zip

collection of the various 3d printed part designs I have done for StarPi. part 2

x-zip-compressed - 225.94 kB - 05/30/2016 at 08:07

Download

Typical circuit.fzz

the typical connections needed to connect the sensors on breakout boards to the Pi

fzz - 8.23 kB - 04/25/2016 at 12:07

Download

StarPi_3D_printed_part_designs.zip

collection of the various 3d printed part designs I have done for StarPi

x-zip-compressed - 395.60 kB - 04/25/2016 at 11:57

Download

View all 6 files

  • 1 × Raspberry Pi Any Pi that has a camera connector
  • 1 × Accelerometer Any I2C based triple axis accelerometer
  • 1 × Magnetometer Any I2C based triple axis Compass
  • 1 × GPS Any serial or USB GPS device
  • 1 × Raspberry Pi Camera

View all 13 components

  • Progress

    Chris02/21/2018 at 22:06 0 comments

    I've spent some time working on the installation of StarPi. I tracked down the Malloc issue in the installation, I think this was caused by a conflict in GPSD version. I had an extra step in the GPSD install, which I didn't need. I've also tidied up the install script and makefile. It should finally now be possible for people to replicate. It still needs quite a bit of configuration for the choice of hardware, but I've defaulted it to the LSM303DLHC in a particular orientation to the telescope. I chose the LSM303DLHC as I found some breakout boards fairly cheap along with a cheap GPS breakout. These with the Zero W have brought the cost down considerably. 

    The second problem I've sorted has is an issue with the co-ordinate calculations. I found the ERFA library, which is the SOFA library with all the appropriate credits for the licence. This was fairly simple to add, but i did make it into a C++ class from C. The operation was better, but still not quite right. I started to debug the problem and discovered it was coming from the compass. while I was debugging I wasn't really able to get repeatable results, so I built myself a jig:

    It's made from scrap bits of laser ply from other projects and a load of BB pellets to act as bearings. There's two slots added to let a piece of 3 mm ply cut to an angle to lock the sensor bar in place. I've cut a few different angles to test with. This has let me debug and check the orientation calculation is OK. There is some offset in the magnetic heading when compared with a compass so a little calibration needs to be added. I then went back to the telescope and checked how accurate it was when pointed at the sky. I got the telescope pointed at Rigel and took a screenshot:

    There is definitely some calibration needed It's pointing to RA/DEC 4h59m30.82s/-9*27'16.5" when the Rigel was actually at RA/Dec 5h14m32.28s/-8'11*05.9". To add access to do this calibration I've started working on a socket interface that will also act as the interface to an ASCOM driver. This has replaced the websocketd interface. Eventually this will allow both the driver and a website to access the data. I've done some testing of the interface, but I've not yet updated the website to and have decided not to for the moment as I'm concentrating on the ASCOM driver when the sky is cloudy and still trying to get a photo of the stars when the sky is clear!

  • General Tinkering

    Chris05/14/2017 at 09:43 0 comments

    I've made some progress, but I've been trying bits in different areas so not much changed overall. The splitting up of the system is coming along, some design down, still more detail to be added. I had been using an mbed board until I managed to get hold of an ESP32 back in November. This is cheaper than the mbed board and has wifi on board. I have the GPS and sensor running and I was working on setting up the sockets when the Raspberry Pi Zero W was released. I'm currently undecided which to use as the ESP32 is the better option, I would need something else to run the magnetic model as It needs data to be updated every 5 years, so I need some way of updating this. I have already split the model from the main app, with a socket to interface to, with the intention of running it on another machine. I think I'll keep it that way even if I do keep up the Pi build as it could have uses in other projects.

    I've also been setting up an arduino with Onstep. I've been looking at configuring it to run on a ramps board, which I think is viable and this has the option of using an ESP8266 to support wifi. It also has an ASCOM driver to give it an interface to existing Windows software. I have decided to create one for StarPi and also look into a linux equivalent. Onstep uses stepper motors, so I've changed the motor mounted to the telescope to a stepper motor. The mount broke as it wasn't strong enough for the heavier motor. Fortunately one of the local makers is adding a CNC system to a mill at our Makerspace so I'm planning on machining a stronger part as soon as I can. This may also allow me to build a mount to motorise the other axis.

    On the astrophotography side of things, I've been struggling to get the Raspberry pi camera to focus on any objects other than the moon. I have tried a pi cam V1 and a Pi cam noir V2 with the lenses removed and have added the 7" Pi touchscreen to view and control the camera while I try to focus. I'd like to make an interface using Python and Kivvy to do the camera control. So far I've modified some basic scripts to control the camera, so I can try different exposures, and to control the backlight. There's a few things I want to try when the dark nights return, including using lower resolutions to get more light into each pixel and only displaying a cropped image to prevent loss from resizing. One of the photos I have of the moon is below, slightly altered as the original suffered from pinking:

    During April, I had a stall for StarPi at the UK Makerfaire in Newcastle-Upon-Tyne. There was quite a bit of interest, generally from amateur astronomers. I also met a willing guinea pig to try out setting up their own StarPi and I met an Irish maker called Rob. His project was a similar take on using sensors to work out where in the sky you are pointing. Again he was interfacing with Stellarium, but this time his pointing device was an umbrella! At the Makerfaire I found I have a bug with my calculations somewhere as Stellarium was showing the wrong hemisphere. Rob showed me the SOFA library. This is set of calculation algorithms for astronomy. I'm planning on using these to either debug my calculations or replace them.

  • Progress

    Chris08/21/2016 at 21:43 0 comments

    My replacement coupling arrived, I'd chosen a flexible coupling, but something had got lost in translation. The shaft diameters were both wrong. Fortunately the Maker Space has a Lathe. As a member I've helped get this up and running but not had a chance to use it yet. This was an ideal opportunity to try it out, and bore out the shaft diameter of the coupling. It was definitely the right tool for the job. I very quickly had the shafts coupled. I then mounted the motor to the mount, using the parts I'd already made. I gave it a quick test using a 12V supply. The top speed was high enough, I'm more interested in the slow end of the scale as I don't need much to keep it aligned to a position.

    Since my last post I've been to the Electromagnetic field festival in Guildford. I took StarPi to the Hackaday meetup to show what I've done. I really enjoyed meeting everyone and seeing the other projects that were brought and thanks to Hackaday, the free flowing beer was good too! I had a chat with a few people about StarPi and got some really good feedback about what I've done. The night skys at the festival were nice and clear and since I had the telescopes out I had a little experiment with the Pi camera to see If i was better off with the lens on or off and with or without the IR filter. Sadly I think there was too much ambient light to be able to see any of the stars, so I postponed it for a later date.

    I began to add some motor control to the project. This consisted of an interface to the LM298 that I'm using to drive the motors using the gpio and hardware PWM of the Pi and a PID control loop. The PID Is a port of the Arduino PID library. I've started to test the LM298 interface, but have so far failed to create a PWM signal from the B+ that I have. I've not looked into why yet, as I have decided to split up the project. The Raspberry Pi is currently doing quite a few tasks and I'm suspicious that the OS will start to get in the way of the control loops when heavily loaded with the plate solving. I've split the project into two parts. The Raspberry Pi will handle the Camera and Website, with the ability to run other tools, including the Plate solving and the correction for magnetic declination. I'm going to use a micro-controller to run the real time side of things. This will run the sensors and calculate the position on the sky map and take commands from the website to control the tracking.

    The board I've chosen to do this, is one I was given as a result of using a Wiznet part in the Hackaday Prize 2014. I was sent a WIZwiki-W7500 development board. This is an mbed enabled ARM board with on board hardware TCP/IP core that can handle up to 8 Sockets and has all the typical peripherals that you'd expect. I've began porting the project to the mbed, which is going well. The total work is to tweak the interface to the hardware, write a replacement for GPSD and write a socket handler for the website and Stellarium. If all goes well, I'm hoping to be able to spin a PCB for some dedicated hardware.

  • Update

    Chris07/10/2016 at 21:09 0 comments

    I've made some progress, but also have a growing list of issues. I'm a little closer to getting the install script working, but during testing, I got a malloc assertion:

    malloc.c:2372: sysmalloc: Assertion `(old_top == (((mbinptr) (((char *) &((av)->bins[((1) - 1) * 2])) - __builtin_offsetof (struct malloc_chunk, fd)))) && old_size == 0) || ((unsigned long) (old_size) >= (unsigned long)((((__builtin_offsetof (struct malloc_chunk, fd_nextsize))+((2 *(sizeof(size_t))) - 1)) & ~((2 *(sizeof(size_t))) - 1))) && ((old_top)->size & 0x1) && ((unsigned long) old_end & pagemask) == 0)' failed.

    I'm sure this means something to someone, but it's not meaning a lot to me. Using valgrind and a bit of trial and error, I think I've managed to track it down to the magnetic model library. It's only happening when I have satellite lock, as I'm not correcting for magnetic declination until I know the location, so it doesn't always appear when I'm testing indoors. I've decided to temporarily disable the correction until I can solve the issue, preferably when I'm somewhere outside for a while.

    To take a break from banging my head against mallocs error messages, I've been trying the astrometry.net solver. Most of the packages are available through apt-get, the only one that isn't is cfitsio. This one needs to be compiler from source, then the astrometry solver needs to know where it is during compilation. Once installed, I downloaded the index files, saved them to a usb stick and configured the solver to use them from there. The first run wasn't successful. After a bit of digging, I found that the packages it uses on wheezy aren't a high enough revision. A fresh start with Jessie and every thing started working. There's quite a lot of index files, so I need to figure out which ones to use when. The fewer index files used the quicker the solving process. I tested it with one the demo images and the process took 2 and half minutes. This included producing a list of stars in the image and their position. I only need to know the centre co-ordinates, which are included in the console output. I need to experiment with the parameters to try to speed it up and try it on an image captured through the telescope. I've not managed to capture anything with the telescope, the night sky hasn't been clear when I've been available. I also need to do some work with the alignment of the camera to be able to use it with the solver.

    I've designed a motor bracket to attach to the right ascension axis of the telescope mount and laser cut this out of 6mm ply. Naturally I've made some modifications to make it fit and updated the design to match. In order to connect the shafts I designed and printed a coupling. The first iteration had one grub screw for each shaft, but I wasn't able to align the two shafts. I tried again with four screws. After a lot of adjustment, I'm able to move the telescope, but still have a slight wobble. It's good enough to get me going while I wait for a proper coupling to come from China.

  • Replication

    Chris05/29/2016 at 22:34 0 comments

    I've spent my seed money on a second hand Tasco telescope with an equatorial mount. It needed a little TLC and still needs a proper collimation, but I've managed to get a good image of a rooftop. I've not been able to give it a try as there's not been any clear nights. It's not a motorised mount, only hand adjusted, so I need to retrofit motors to it. The right ascension axis has full 360' adjustment and a fixing close by that will allow me to mount a motor and couple it to the manual adjustment. The declination axis only adjusts in a small range, intended for correction of the alignment and not GOTO operations. I'm going to start by controlling the right ascension axis to give me the ability to track an object with the intent to add the second axis at a later date as the control loops in software should duplicate easily. To control these motors I've bought a L298N breakout, a 2A dual motor driver. This should be strong enough to drive both axis as they should not require a great deal of torque if the telescope is well balanced on the mount.

    Since the Raspberry Pi foundation has released a version 2 of the Pi's camera, increasing the resolution to 8M pixels, it was an obvious upgrade to get for this project. In order to mount the PiCam to the telescope I had to design my own adapter as the existing one's that are available did not fit the new telescopes eyepiece. I have it mounted, but would like to alter the design to include some adjustment in the position of the camera.

    I've also tweaked the design of the 3D printed parts used to mount the battery and the sensors. I've taken a modular approach, with a common base for each part that is the only part specific to the telescope, to reduce the design required to add to a telescope with a different diameter.

    I have also purchased a LSM303DLHC triple axis accelerometer and magnetometer. I wanted to use this as the axis of each device will be aligned to the same axis of the other device. This will be quite important as I need to add roll compensation to the compass reading for the equatorial mount as well as the pitch compensation that is already used in the horizontal mount. I have written a library for the LSM303DLHC and I'm in the process of testing it.

    To tie everything together I've have been working on an install script, this is still a work in progress to get everything working right. My aim with this is to have the only thing required to install the software is to get the git and run the script.

  • MakerFaire UK

    Chris04/25/2016 at 10:42 0 comments

    This weekend the MakerFaire UK was held in Newcastle-upon-Tyne. Luckily for me this is on my doorstep (I could walk there..) I was there with the local Maker Space :

    I spoke to a lot of people over the weekend and got some really positive feedback and ideas for additions to the project. There were even a few people who were wanting to try it on their own telescopes.

    I also spoke to Mark, the maker behind the PiKon telescope. He has produced a 3d printed telescope using the Pi camera. StarPi fits nicely with the PiKon, so I'll be helping Mark with adding StarPi to his system.

    Being at the MakerFaire gave me the chance to pick up a couple of alternative sensors to try with the StarPi. I now have the following to test with and I'll be on the lookout for more to support:

    ADXL345, MPU6050, HMC5983, HMC5883L, DS1302, DS1307.

    This would give the typical connections as:

    Note that the logic level converter needs to be a bidirectional converter and assumes that the I2C pull up resistors are on the breakout boards. The On/Off control for the GPS may vary between active high and low for different boards, so has been left open circuit.

  • Position Control

    Chris04/19/2016 at 20:28 0 comments

    While a simple clock drive can track an object once it has been sighted, it is not capable of performing a GoTo to a object, so while it would be an option I'd like to be available in a complete system, I am not wanting to include it in this portion of the design.

    Of the existing projects for Telescope tracking, I've found that most of the control schemes use an open loop system of calibrating on one or more existing reference points, then counting steps of a stepper motor to give the desired position. This is susceptible to errors from mechanical components and some systems do allow you to compensate for backlash and such, but this requires a level of knowledge from the user to be able to do so. I'd like to close the loop and try to provide a system that is simple to set up and use. To do this I'm wanting to use a DC motor and use the sensors as the feedback for a PID loop as follows:

    This is slightly different for the Equatorial mount, which needs to convert the feedback into Equatorial coordinates before feeding into the PIB block:

    Both of these use common blocks that I can configure to support both types of mount, so hopefully I can use a Horizontal mount to track satellites and an Equatorial mount to take long exposure photos. In the case that the position obtained from the sensors is not as accurate as required to eliminate both the calibration and any mechanical error, I would like to use the position obtained to speed up the plate solving process and use the difference as a correction factor:

    The latest image captured is tagged with the position and passed to the plate solving. The error between the position from the plate solving and the stamp is then used to correct the position from the sensors. Since I expect the plate solving to take a while and previous values of correction factor need to be included in the factor, it is fed into an accumulator before being used.

    I'd like to figure out what instabilities this second correction factor has and if this can be dampened out, but I'm hoping that since the movements of the telescope are slow during tracking that they won't affect the picture quality.

  • Design Choices

    Chris03/28/2016 at 18:43 0 comments

    There have been some design decisions made and I still have some to make. I thought I'd go through the thinking behind these choices.

    The mounting of the sensors separate to the Pi is for two reasons. The first is to remove the need to align the pi on the lens in relation to the sensors. This allows the Pi to be mounted in the most convenient position and to use the image flipping options of the RPI_Interface to make the image appear in the correct orientation. The second reason is to allow the removal of the Pi from the lens to view the sky with the naked eye without loosing the position. This will allow the GoTo to continue using the position for feedback. Because of these I have designed a mount for the Accelerometer, the Magnetometer and the GPS, although the GPS did not need to be included. I also designed a battery mount to remove the possibility of any wires becoming wrapped around the tripod of the telescope. These may need to be designed for each telescope as they are curved to sit on top of the telescope body and are held in place with Velcro straps.

    I currently have the choice of buying another mount, attaching motors to my existing mount or building an entirely new mount.

    The existing mount that I have is an Alt-Az mount. This moves relative to the Earth's surface in the Horizontal co-ordinate system. As mentioned in the comments, this has the issue of rotational effects during long exposure shots caused by the Earth's rotation. This could be compensated for by taking a video, splitting it into individual images, rotating these and stacking them together. There is software already available to do this, but this would be more suited to a faster processor than the Raspberry Pi.

    The mount does not have motor mounts or manual controls to move the Telescope to track an image. Any addition of motors would require some work to mount along with the counterpart of whatever mechanism is used. I don't want to damage the telescope when adding mounting these parts.

    The other type of mount that I'm considering is an equatorial mount. These require some initial alignment before use, but then the axis are relative to the Equatorial co-ordinate system. It is these co-ordinates that are used for star maps as they are not relative to the location of the viewer. The two types of equatorial mounts I want to consider are the German Equatorial Mount and the Barn door mount.

    The Barn Door is the simplest of mounts to build as it only has movement is one axis. This means that it can track an object once it has been set-up, but requires re setting to change the object being viewed. Essentially this is a tracking mount, not a GoTo mount.

    The GEM mount is a little more complex as it can move in 4 axis and as mentioned in the comments is the best for astrophotography. Two axis are used to align the Telescope with the Earth's rotation. These are then not used, so there is no need to motorise them. The next two move the Telescope in relation to the Right Ascension and Declination Axis. It is these two that can be motorised to give both tracking and GoTo functionality.

    I'm not really interested in reinventing telescope mounts or even spending time building one from existing designs, so I am going to put the seed funding towards a GEM mount and put the effort into other parts of the project. If you want to help out hit the like button!

  • Design

    Chris03/16/2016 at 21:22 0 comments

    To start off, I needed to know what this system would be able of doing. The very basics are to locate the position in the sky and stream this to Stellarium, allowing me to find out what I was looking at. After some research into the sky map co-ordinate systems, I found that I could determine the orientation of the telescope and combine this with the time and location to let me calculate the co-ordinates. This left me to think of how to do this.

    Sensing the orientation of the telescope was the first task. I had a look at accelerometers and magnetometers and found an open source driver, I2CdevLib, for I2C devices that supported multiple brands of the sensors I wanted. I thought that the ability to support a variety of devices would allow anyone who wanted to build a system of their own a choice, be it the cheapest or just what they happened to have.

    GPS was the choice for the time and location, maybe in future I can add support for GLONASS or other alternatives, but for now the open source support and availability of GPS made it more user friendly. The ubiquitous GPSD daemon for Linux was chosen as the driver for the GPS portion of the system. This allows the majority of GPS sensors to be plugged in and used behind the software API the library provides. Again the builder has the choice of what to use.

    With the basic concept down, I considered how the system would be used and came up with a list of features:

    position calculation

    motorised target tracking

    Website Camera control

    Website User interface and configuration

    Website status output

    Stellarium and other PC software integration

    Telescope mounted movement controls

    I'm intentionally designing the software to allow scope creep with the addition of new features through a website configuration system.

    The uses at the moment can be summarised with the following:

    Then I decided to split the software down in to parts, each with a well defined task. This can be seen in the UML design on the github.

View all 9 project logs

Enjoy this project?

Share

Discussions

Jeramey Wilson wrote 03/01/2019 at 00:53 point

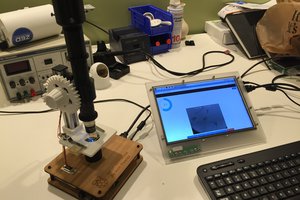
Is this project still ongoing? I am researching right now to do one myself.

  Are you sure? yes | no

Chris wrote 11/12/2019 at 20:12 point

Yes, but slowly...

  Are you sure? yes | no

Place wrote 01/24/2017 at 21:34 point

Hello Chris, your project is amazing! Congratulations :D

I saw from one of your picture that you modified in some way the rpi camera web interface. Could you share your modifcation please?

  Are you sure? yes | no

Chris wrote 01/27/2017 at 17:52 point

Hello Place, the source for the website is in the website folder on my github repo, top link above. Admittedly it's a bit of a mess, still learning web development. I installed the RPIcam interface then added my files to the same folder. I think most of the source you are after is in StarPi.php

I'm not finding the web interface very useful for the camera on the telescope, looking at other options at the moment. hope to do an update soon.

  Are you sure? yes | no

Chris wrote 08/21/2016 at 21:07 point

Thanks Jasmine, I hadn't seen that one. Was good fun at the meetup!

  Are you sure? yes | no

William Schoenell wrote 04/15/2016 at 17:03 point

Hi, nice project!

I work on an observatory control system completely written in Python that could be nice to you make a try. We already have a module that talks to stellarium and the old but gold XEphem and to make a driver for any telescope its a matter of writing few methods in Python.

http://chimera.readthedocs.org/

http://chimera.readthedocs.org/plugins.html#controllers

Good luck with your project!

  Are you sure? yes | no

Lee Cook wrote 04/15/2016 at 11:36 point

With a decent calibration routine (pick known stars isolating the various axis movements) you should be able to automate the tracking with only the need for an accurate GPS position.  Why the magnetometer etc?

  Are you sure? yes | no

Chris wrote 04/26/2016 at 19:20 point

The accelerometer is to get the angle of elevation and the magnetometer is to measure the direction. I'd quite like to remove the need for calibrating every time I want to use it. If I can get the software to do it for me, why not?

  Are you sure? yes | no

bgilsrud wrote 03/28/2016 at 19:30 point

Have you seen this before?  http://www.stellarjourney.com/index.php?r=site/equipment_onstep

I think you could solve the problem of "what I am I looking at" by plate solving the images that come out of the raspberry pi (see astrometry.net). The RPi sensor is really not suited to low light applications like this but you could pick up an old Meade DSI for < $50 that would allow you to do this.

  Are you sure? yes | no

Chris wrote 03/29/2016 at 20:54 point

Thanks for the link, It's an interesting project, I'm still looking at how I want to handle the motor system, so will be having a good look at it when I get chance. I'll also be looking into plate solving, I knew it was possible, but don't know what's involved. Not sure if I would do it as an add on or try and run it on the Pi. 

I chose the Pi cam because of it's cost and availability, I know it's not going to be the greatest sensor for the job, but I'm aiming at entry level kit and don't mind experimenting with it as I already have both the Pi cam and the Noir version. Cheers for the advice though, I'll be the first to admit I'm a total beginner..  

  Are you sure? yes | no

mac_ha wrote 03/25/2016 at 09:17 point

Very interesting project! Coincidentally I'm also looking to build something similar (see https://www.hackster.io/challenges/KinetisFlexIO/ideas/3356 ) , though mine has a cheap Equatorial mount, and I'm planning to use NXP Freedom board instead of RPi - just got confirmation that I'll get the free board for my idea!..

Regarding the comment on the mount - the Alt-Az mount can still be motorized to become a Go-To mount, albeit requiring more complicated calculations, and for tracking both Alt and Az motors must be running in sync, while for Eq mount one motor is enough for tracking. Even Meade has LX-90 series of fully Go-To fork-mount Alt-Az telescopes  (http://www.meade.com/products/telescopes/lx90.html) . So don't be discouraged, and I'll be very interested to follow with your progress! As I'm more of the hardware guy, and didn't think much on the software application side yet, I may borrow your idea of using Stelarium and  web-based interface, if you allow!

  Are you sure? yes | no

Chris wrote 03/27/2016 at 10:45 point

Thanks for the comments on the mounts, I'll be putting a log up with all my thoughts on the mounts, once I get them all together. 

As far as the Stellarium idea goes, It wasn't mine. There is an example on the Stellarium wiki of how to interface to it. http://www.stellarium.org/wiki/index.php/Telescope_Control_(client-server) . So feel free to use that and the web interface idea..

  Are you sure? yes | no

Chris wrote 03/22/2016 at 21:21 point

I like to look at the stars, but never know what it is I'm looking at. I'm sure I'm not alone. There's also the next generation of star gazers to teach. 


The primary aim of this project is to break down educational barriers into watching the sky. The cost of some telescope systems, can make them out of reach, so I'm also aiming to make a system that is as cheap as possible.
This is why I want the system to be expandable with the base system being only a PushTo system. Options to expand are to include automated tracking, position display and any other features that are dreamed up along the way. 


The system is to be easy to install on an existing telescope and mount, without alteration or damage to the telescope, or used with a home made set-up. 


I plan to address these issues by building a system that is made from readily available parts that can be used by anyone with no prior knowledge of how to use a telescope, by following only a how to guide to get up and running. The software will use a script to download and install the various parts onto a fresh install of a raspberry Pi. Ideally this will include all configuration of the Pi itself, leaving only the options to be configured through the browser interface.


If anyone does have feedback, let me know. You may point something out that'll save me a whole load of head scratching later..

  Are you sure? yes | no

Chris wrote 03/20/2016 at 09:29 point

Yes, I agree. I would like the system to be able to support both types of mount with some image post processing to compensate for the field rotation in the azimuth mount. It's one of the things that I'm considering while I'm looking at options to motorise the mount. I've currently got a choice of motorising the mount that I have or build/buy another type. I'd quite like to have options so that someone wanting to reproduce the system could chose the ones that suits their needs best. 

  Are you sure? yes | no

alebil wrote 03/20/2016 at 09:09 point

Hi, very interesting project.
To obtain a good result the telescope must be mounted on an equatorial mount not an alt-azimutal one, if the telescope is the one in figure problably the only obtainable result is some shot of the moon, if the exposure is longer the field rotation appear.

  Are you sure? yes | no

Similar Projects

Does this project spark your interest?

Become a member to follow this project and never miss any updates