Close
0%
0%

The Digi-Gurdy and Digi[Nerdy]Gurdy

MIDI electronic portable practice hurdy-gurdy: It's always in tune.

Similar projects worth following
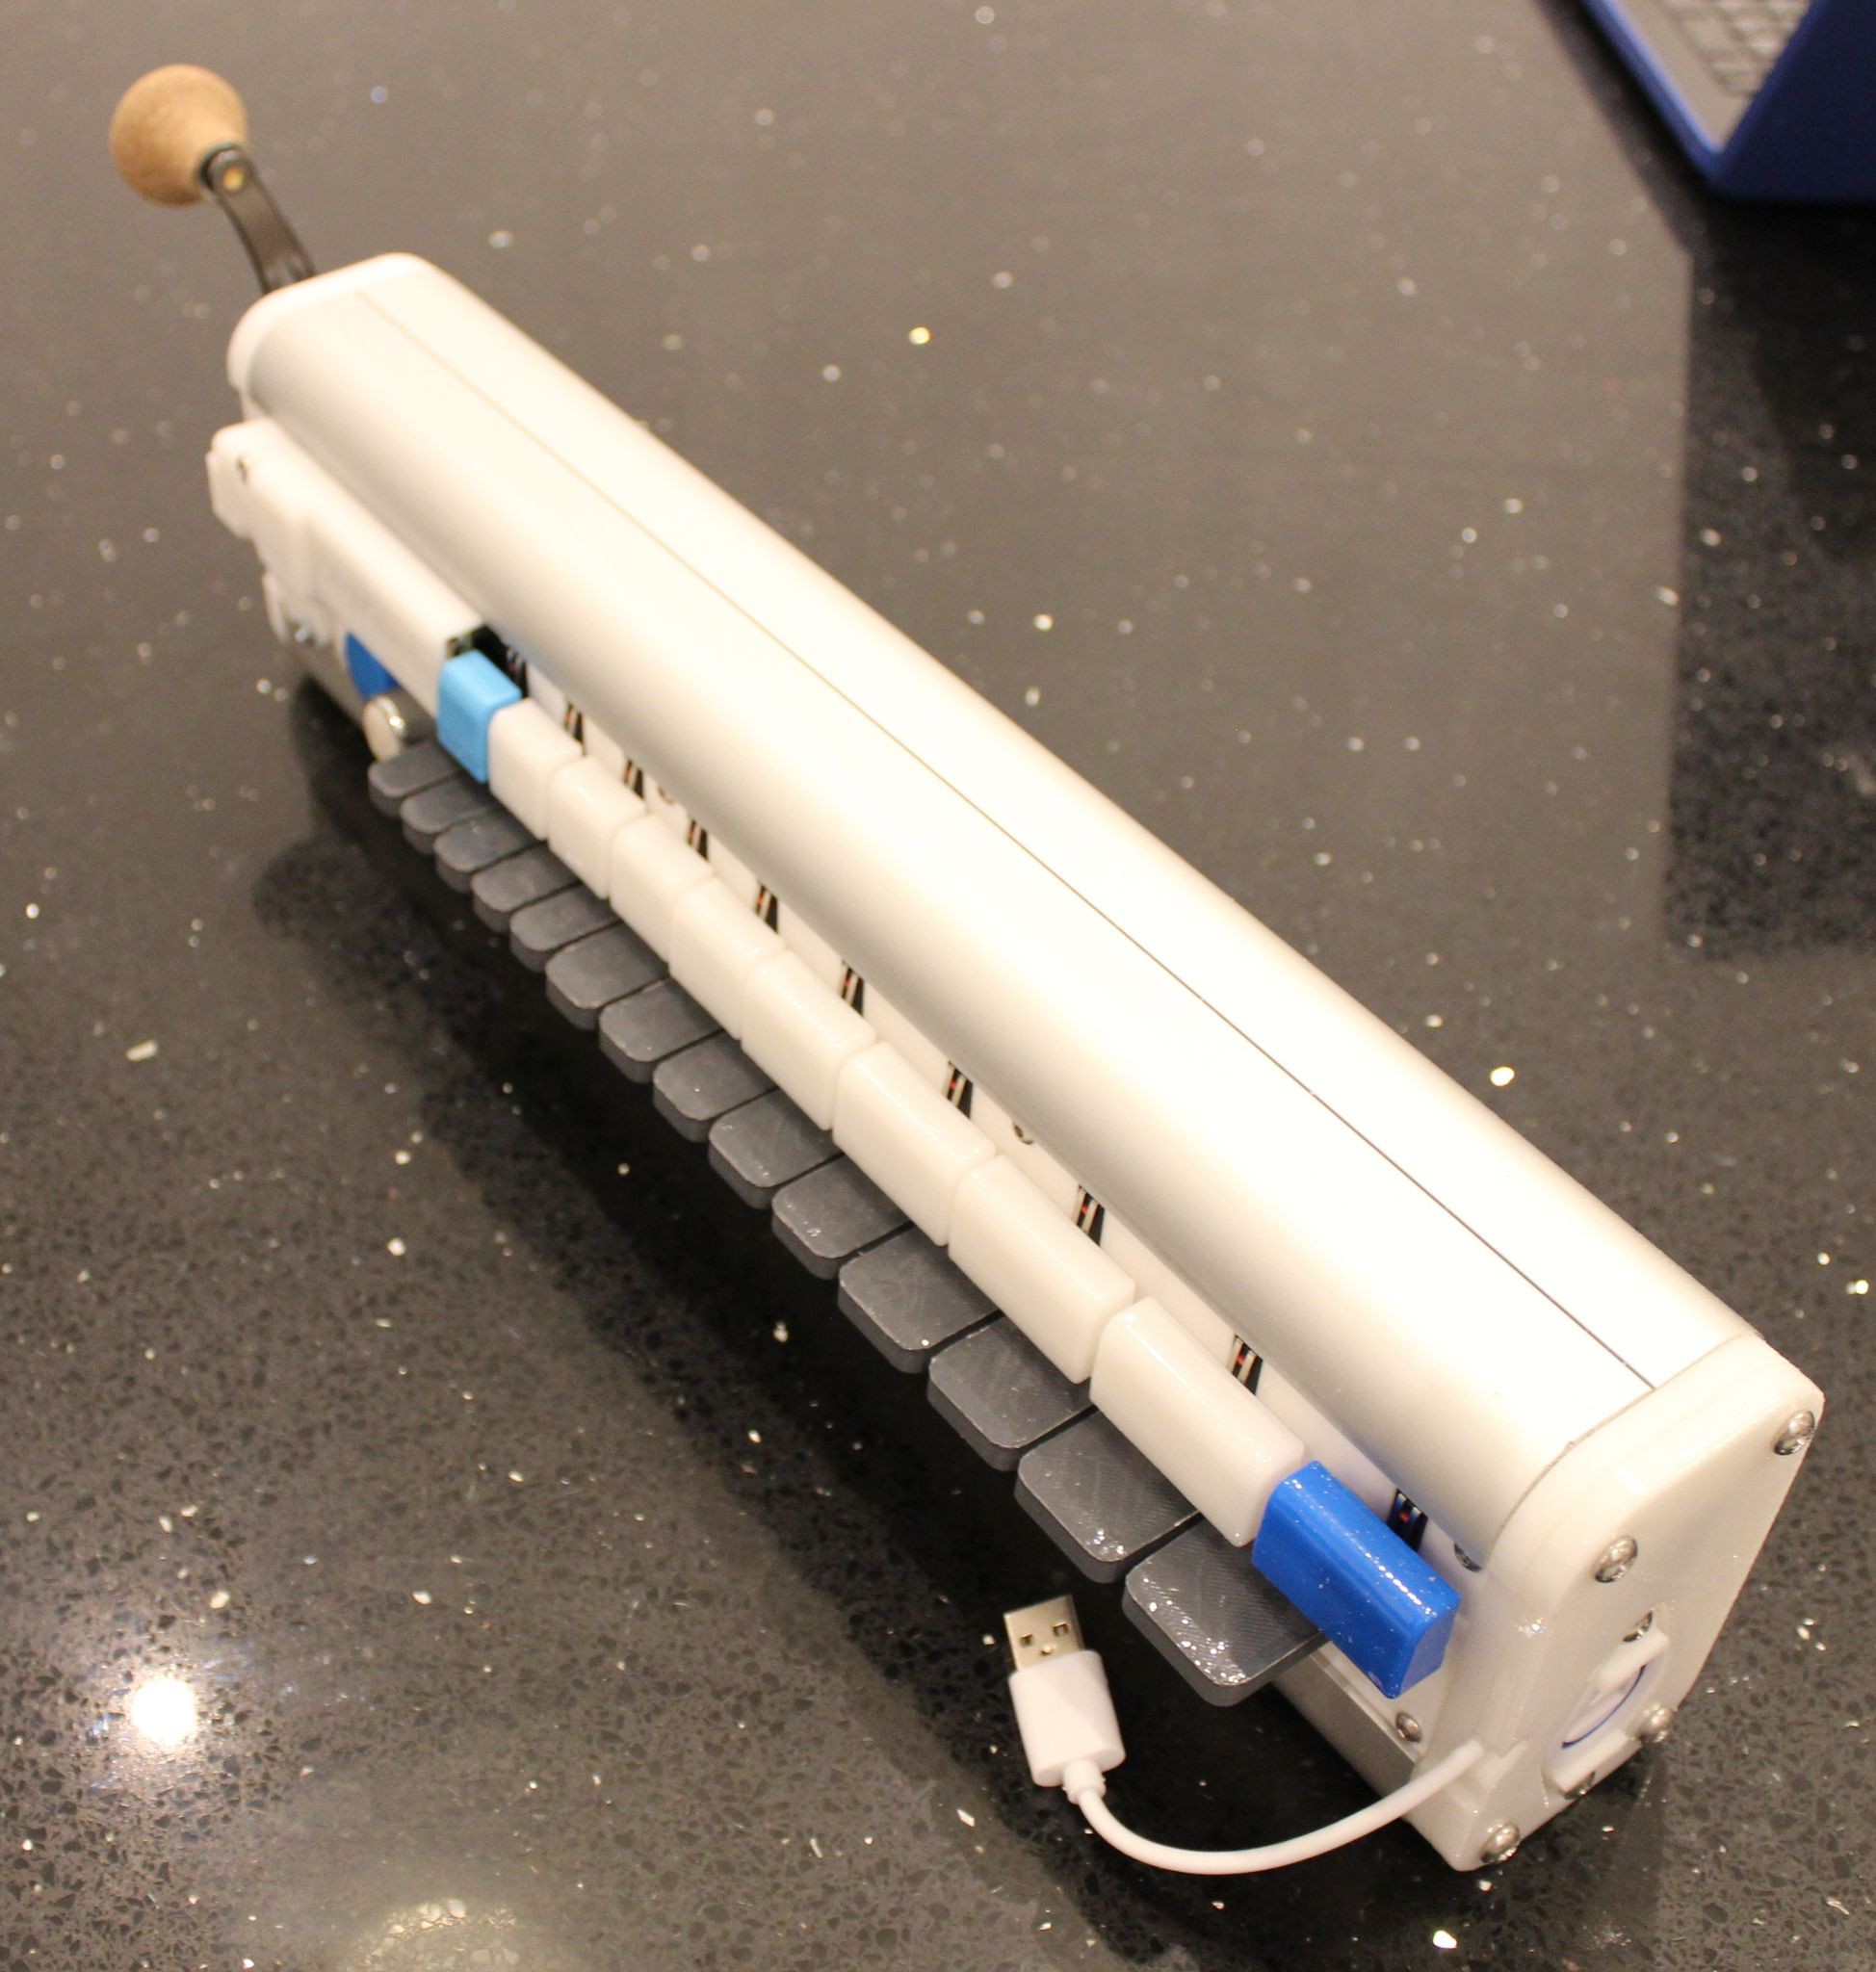
The hurdy-gurdy is an ancient musical instrument (10th century) with drones and melody strings bowed by a rotating wheel, played by pressing keys which contact them at different points. It has in more recent times featured in TV series such as “Black Sails” and “Walking Dead”. A major barrier for beginners is that they are very expensive, built to order with lead times of several months to a year and rather like bagpipes, they are noisy when practicing. For pipers, practice chanters and e-chanters are available to solve this issue while nothing similar is available for the hurdy-gurdy. The Digi-Gurdy and now the all laser-cut Digi[Nerdy]Gurdy with detachable keybox, are electronic devices, with correctly placed keys, that output MIDI via a USB cable to an attached or wirelessly paired phone or iPad running suitable MIDI player software, for practice anywhere using headphones, thus preventing eviction or divorce!

Video clips of it being played & overview of current versions of Digi-Gurdy 

Overview of current (January 2023) version. For more info: www.digigurdy.com


Scott Marshall has a YTube playlist of him playing and improvising on one (above).


DigiGurdy Users Group: https://www.facebook.com/groups/2385106478458532

April 2022: Major software rewrite by Basil Lalli. Click for his GitHub page

June 2022: New optical chopper wheel crank sensing.

October 2022: Official website created: www.digigurdy.com

What is it?  

In addition to the above, a hurdy-gurdy also has drone strings and a buzzing rhythm section operated by varying the rotation speed of the crank handle. It has been described as the stringed equivalent of the bagpipes and, as with bagpipes, there are design variations in the folk traditions of different countries. Links to videos of real hurdy gurdy players are provided.

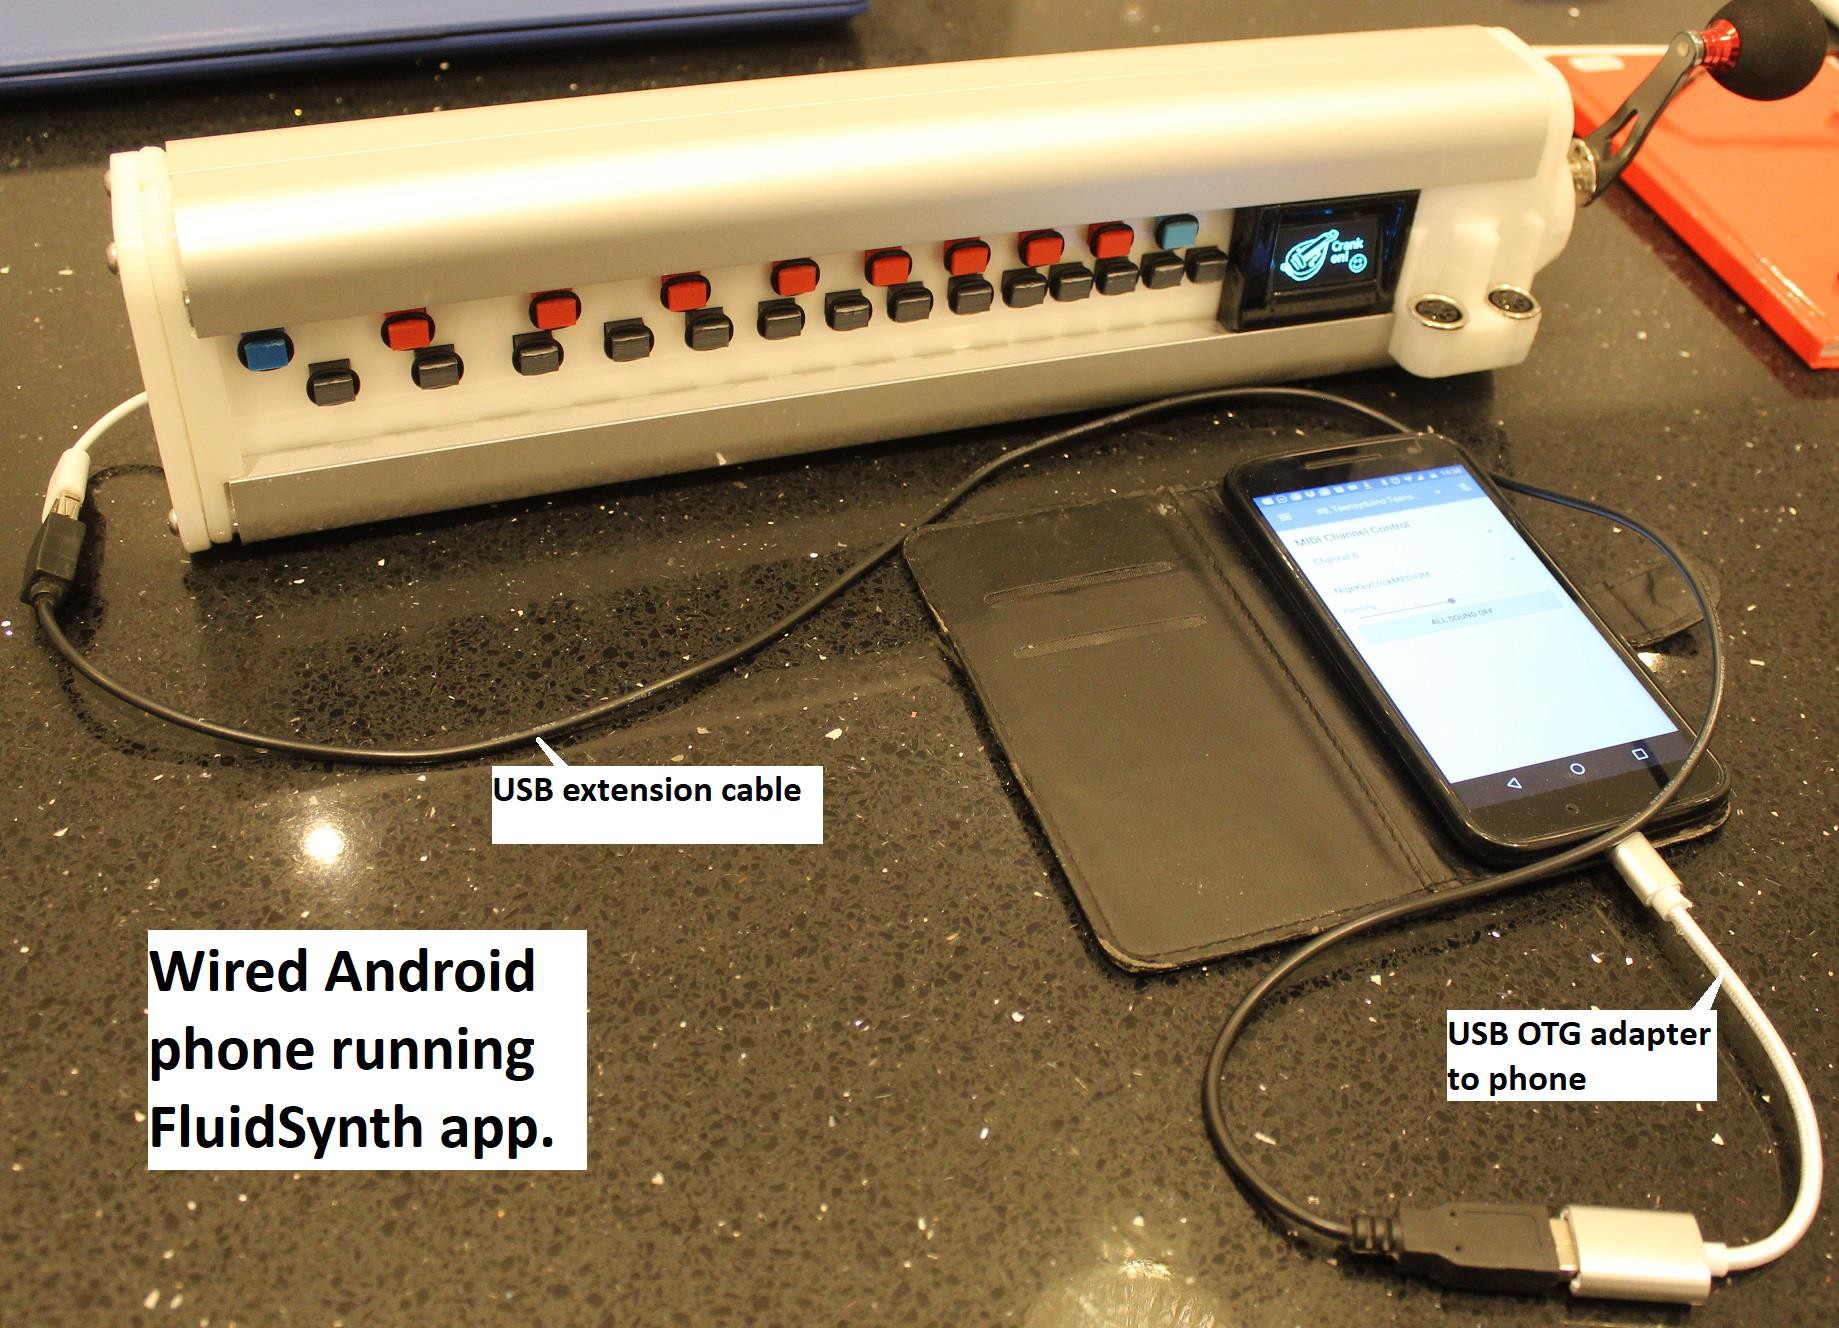
The Digi-Gurdy is an electronic hurdy-gurdy keybox, with correctly placed keys, that outputs MIDI (an industry standard digital communication system for electronic musical instruments) via a USB cable to an attached laptop or phone running suitable MIDI player software. When used with headphones this would give you a low cost, portable, compact and silent means of playing the equivalent of the melody strings, i.e. something to learn to play on wherever you may be. It would not even require a battery as it would be powered via the USB cable. It also has an industry-standard regular MIDI socket.

Are you building any?

See www.digigurdy.com

Video links: See project log # 20 for a series of 4 Build videos and two more on how to setup and use it with an iPad/Phone or Android phone

Why?  

1) Major barriers to entry for beginners are that while a playable electric guitar for example can be bought for around $200, a hurdy-gurdy is made to order by a specialist luthier and costs around $1500 even for a basic instrument with a waiting time of several months to a year.

2) In addition, it is noisy, making a good place to practice without upsetting your companions hard to find! This problem has been solved for bagpipe players with the availability of both practice chanters resembling a simple flute and electronic e-chanters allowing practice while wearing headphones.

How it works: The keys press on micro-switches and the brain of the device is an Arduino Teensy4.1 microcontroller. An OLED display shows you which note you are playing at any time. The new DigiGurdy versions are all laser cut.

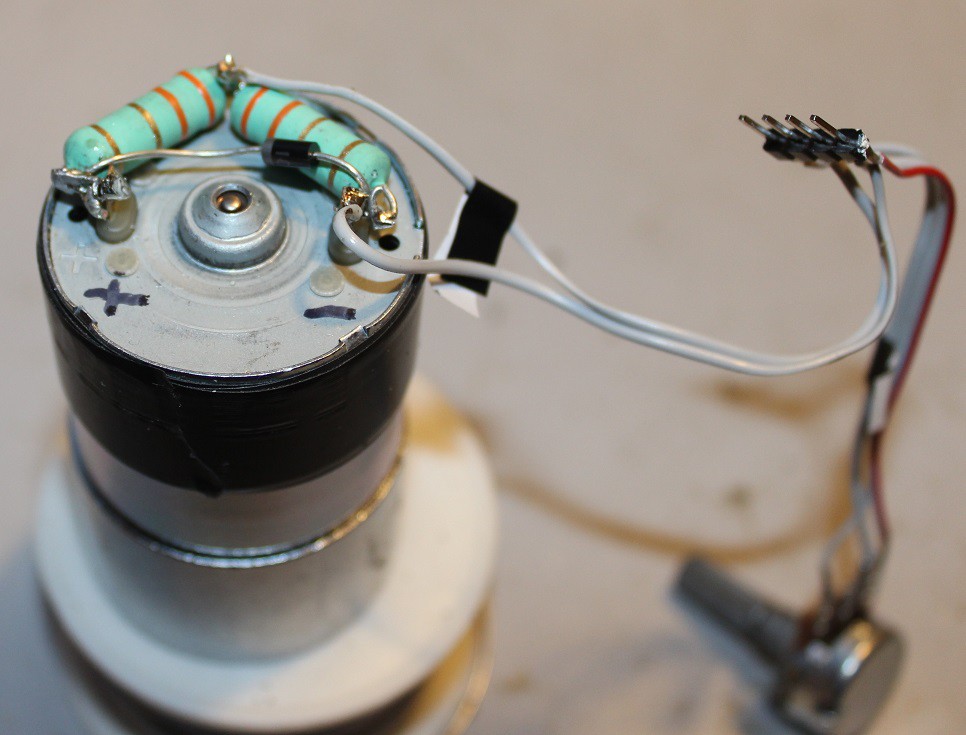
I previously simulated the crank using a hobby robot gearmotor as a dynamo. Update (2023) I am now using an optical sensor and slotted wheel to measure crank speed.

Primary objective: To produce a reasonably affordable design of electronic hurdy gurdy.

NOTE: Click on my name and send me a PM if you want to discuss anything.

Video examples of various styles of hurdy-gurdy players, in no particular order:

Nigel Eaton

Nigel Eaton with Led Zeppelin

Gregory Jolivet

Harry Wass

Efren Lopez

Tobie Miller

Andrey Vinogradov

Jiří Wehle, Prague street performer

Example of a younger player, Patty Gurdy.

Video about the Black Sails TV series soundtrack

Jimmy Page playing HG in the film: The Song Remains The Same

Guilhem Desq

Some Metal: Lamb Of God cover by Helvetion

OpticalCrankFasterRes20_SLOTS_V10_WORKS.ino

Arduino sketch for the Teensy LC microcontroller used in the improved crank with optical chopper wheel rotation speed sensor. This reads the 20-slot 3D printed wheel and converts the rotation rate to a steady voltage that can be read by an analog-in pin on the main gurdy Teensy 3.5 board as a direct exchange for the previously used gearmotor (acting as a dynamo or generator).

ino - 7.38 kB - 07/08/2022 at 20:46

Download

V2_GuideToBuildingImprovedCrank28.6.22.pdf

If you want to make an improved crank, I have been working on this also and here is a set of guidelines along with a circuit diagram. It is based on an e-scooter drum brake system and an optical chopper wheel and sensor.

Adobe Portable Document Format - 2.96 MB - 06/28/2022 at 12:11

Preview

ImprovedCrankCADfiles.zip

Collection of CAD files for the improved crank should you wish to have a go at making one of these.

x-zip-compressed - 236.60 kB - 06/28/2022 at 11:53

Download

UsingInternalBatteryV2_16.02.22.pdf

If you want to add an internal battery in order to use it wirelessly with a Bluetooth MIDI dongle there is some extra explanation of this here.

Adobe Portable Document Format - 1.42 MB - 02/16/2022 at 14:39

Preview

WIRING_FullLengthVersionV9.pdf

Adobe Portable Document Format - 575.94 kB - 02/16/2022 at 13:57

Preview

View all 14 files

  • Project Log #20: Big redesign as the laser cut DigiNerdyGurdy

    XenonJohn04/11/2021 at 12:13 2 comments

    Total redesign, main objective being to offer more features for same build cost. 

    Main changes listed below.

    1) New PCB which places key stems in more correct positions when viewed from rear of keybox. This means key stems are no longer in centre of each key, therefore....

    2) All new 3D designs for each key. As in a real hurdy gurdy the keys for higher notes are more complex as they overlap each other to some extent but must still not interfere with each other.

    3) I tried a snap-into-place key design but stems do not look nice when viewed from rear. Therefore they have holes in ends of stems to take a 3mm diameter 6mm long bolt. Bolts screw straight in as holes just slightly undersize......see, I make life easy for you.

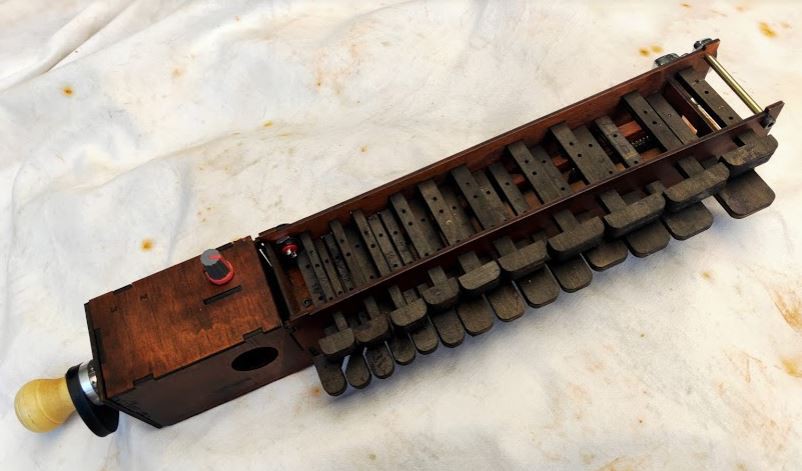
    4) Keybox now is fully laser cut ply and glued together. However top panel is removable with 4 screws so a) you then have access to rear of PCB to make any repairs and b) you can make a more elaborate top panel should you wish later on.

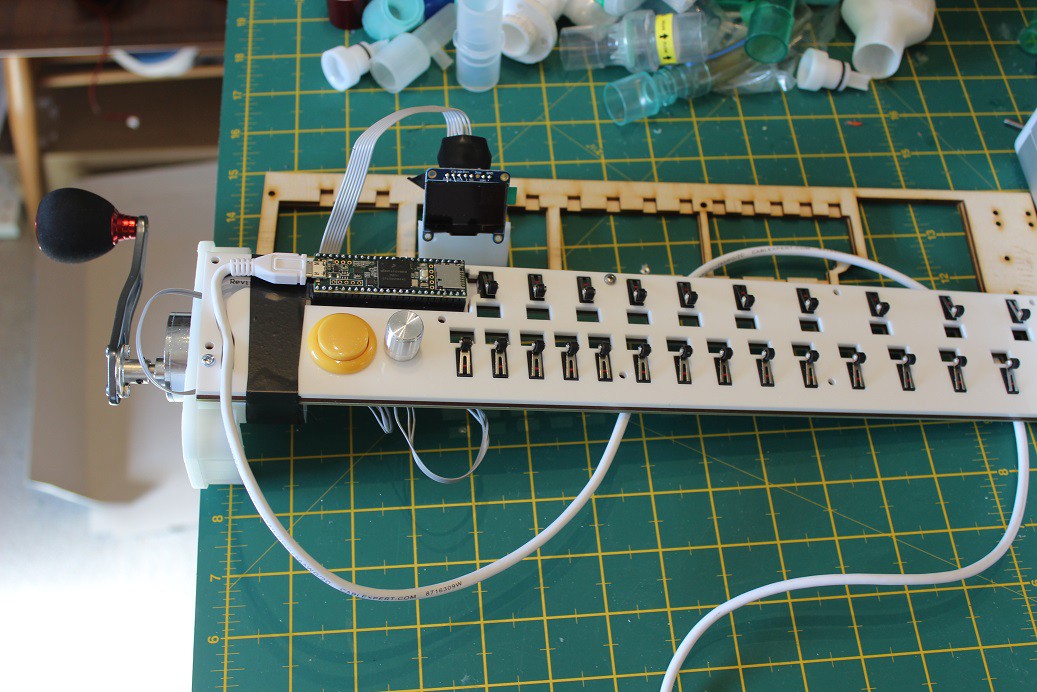
    5) Keybox is removable from soundbox, but will still fully function as a MIDI device emulating a hurdy gurdy (but without crank). This keybox will then fit into a bag should you wish to practice at work in lunchbreak or take it on holiday.

    6) Keybox "docks" with a soundbox designed by Jaap Brand of Nerdy Gurdy fame, to create a proper gurdy shaped instrument with keys and crank in correct positions relative to your body. Crank is on end of soundbox. Special connector plug allows it to dock and undock easily.

    7) Soundbox is much easier to construct than Nerdy Gurdy version as less curvaceous. This is a deliberate compromise to ensure easy buildability and almost no clamps are required when gluing it together.

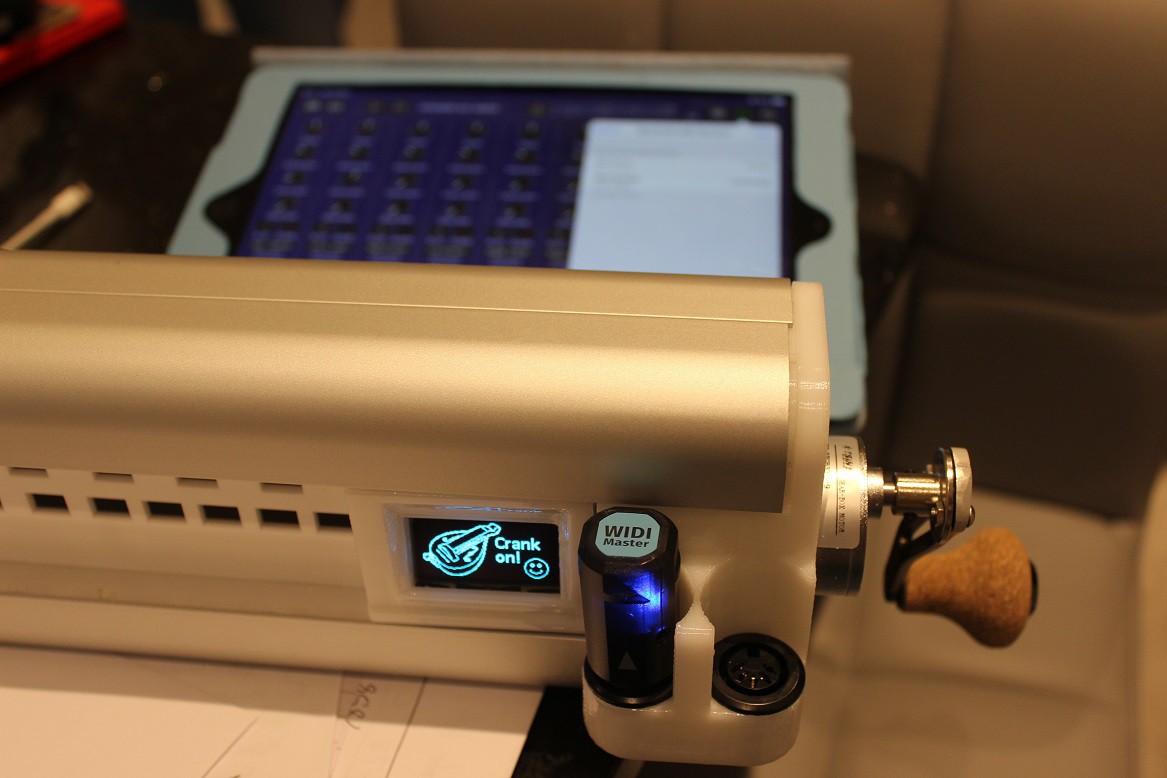
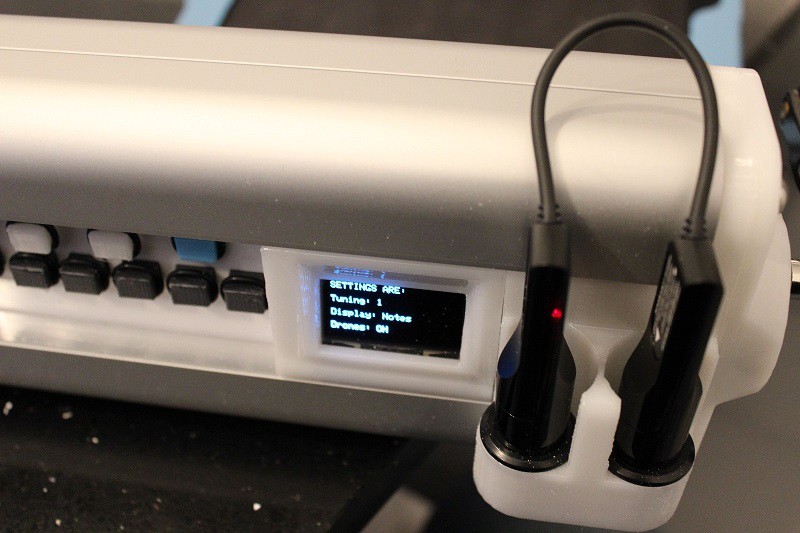
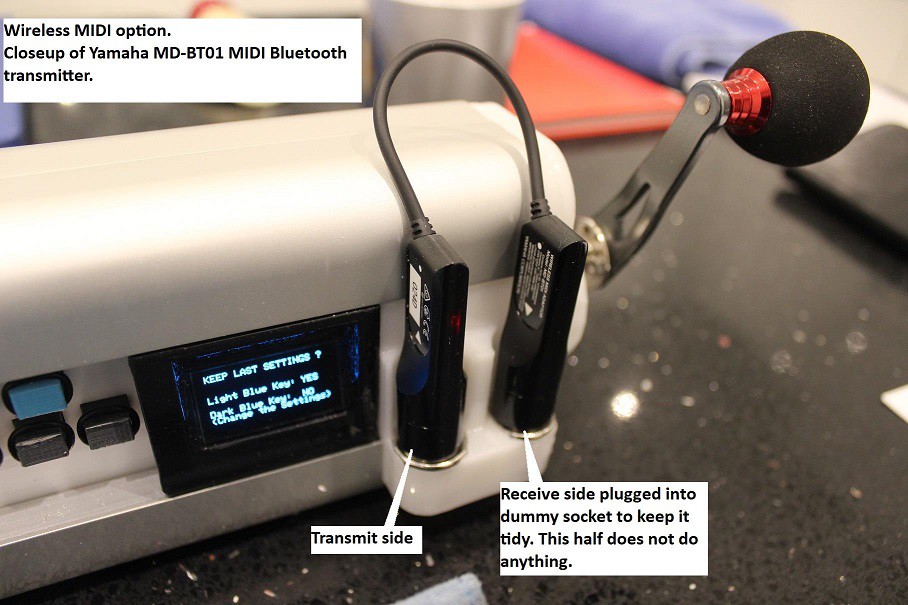
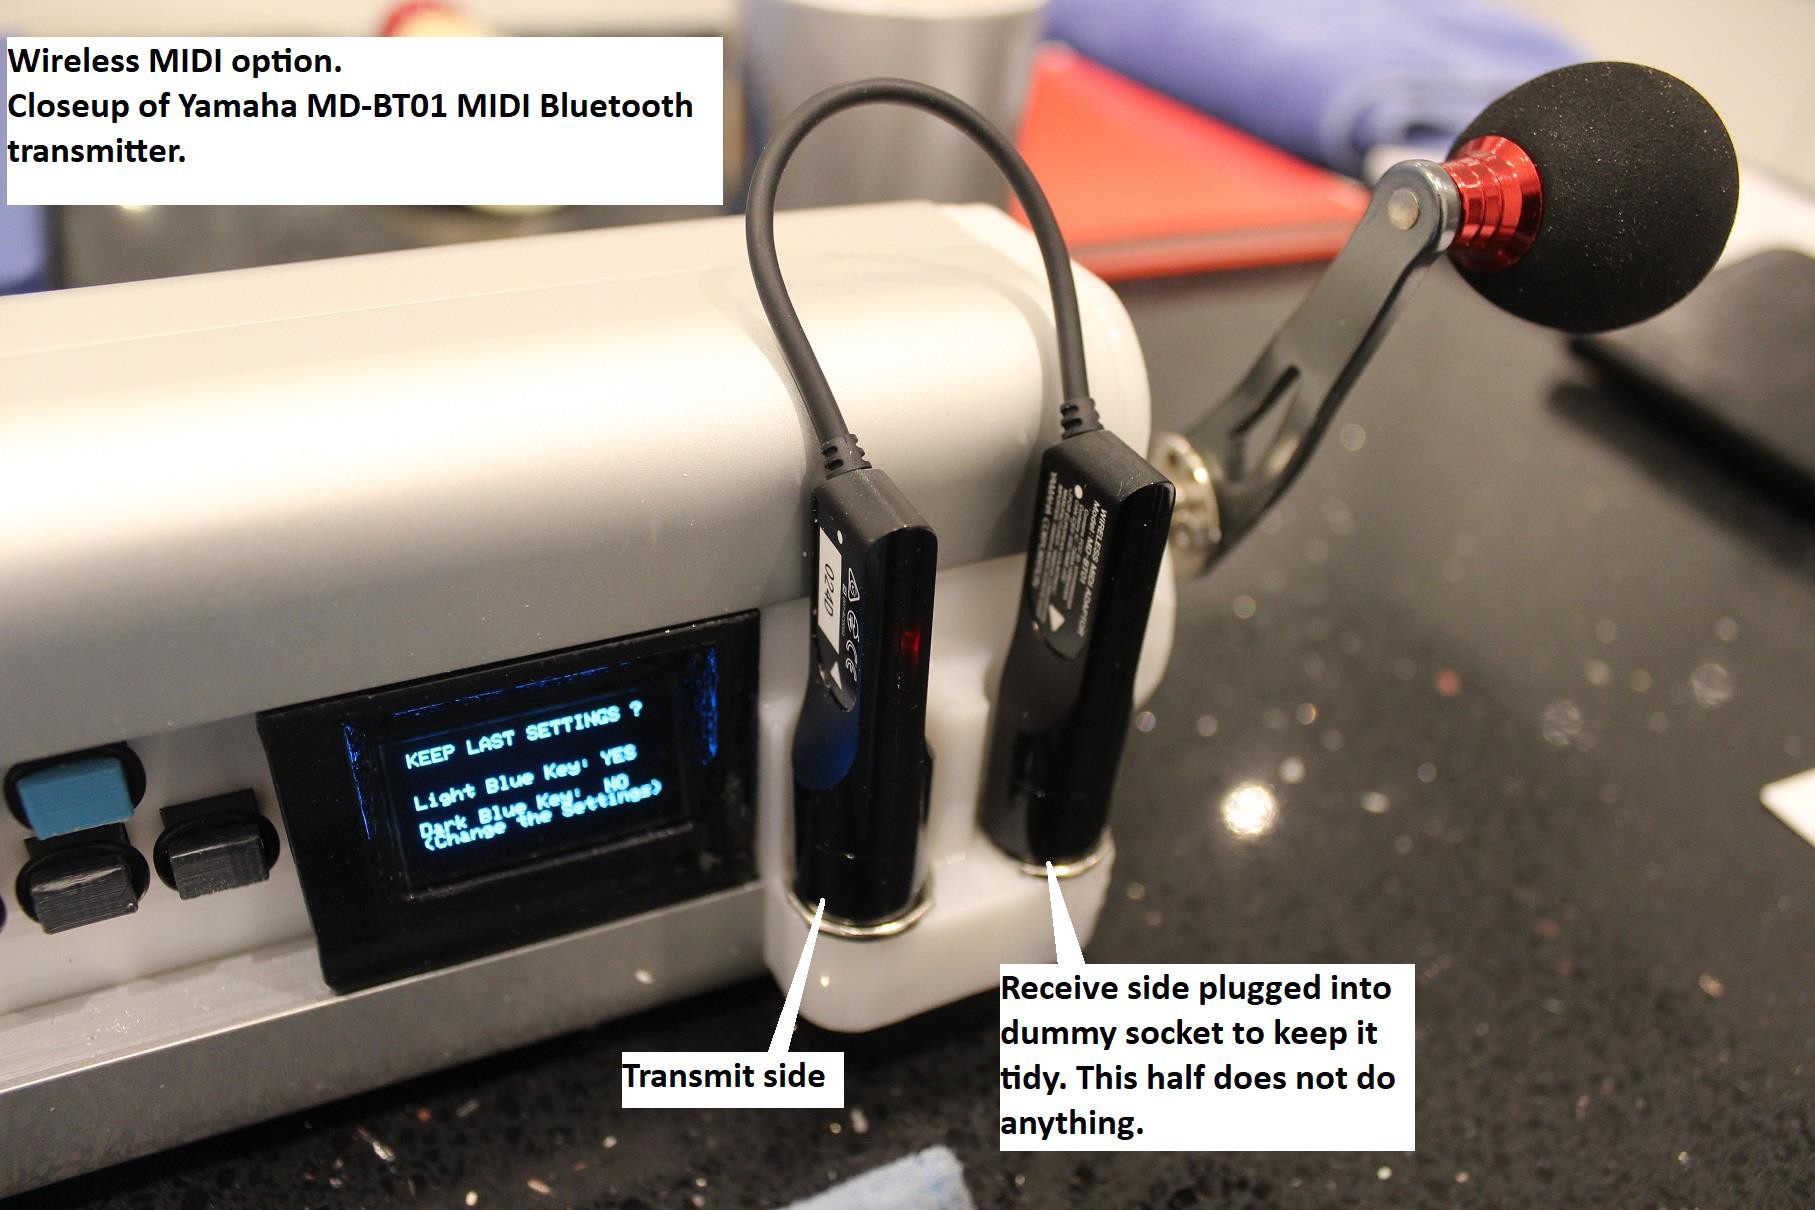
    8) MIDI sockets provided in keybox should you wish to use an aftermarket plug in MIDI Bluetooth dongle to transmit wirelessly to your paired iPad or phone. These are recessed now, to protect the dongle better.

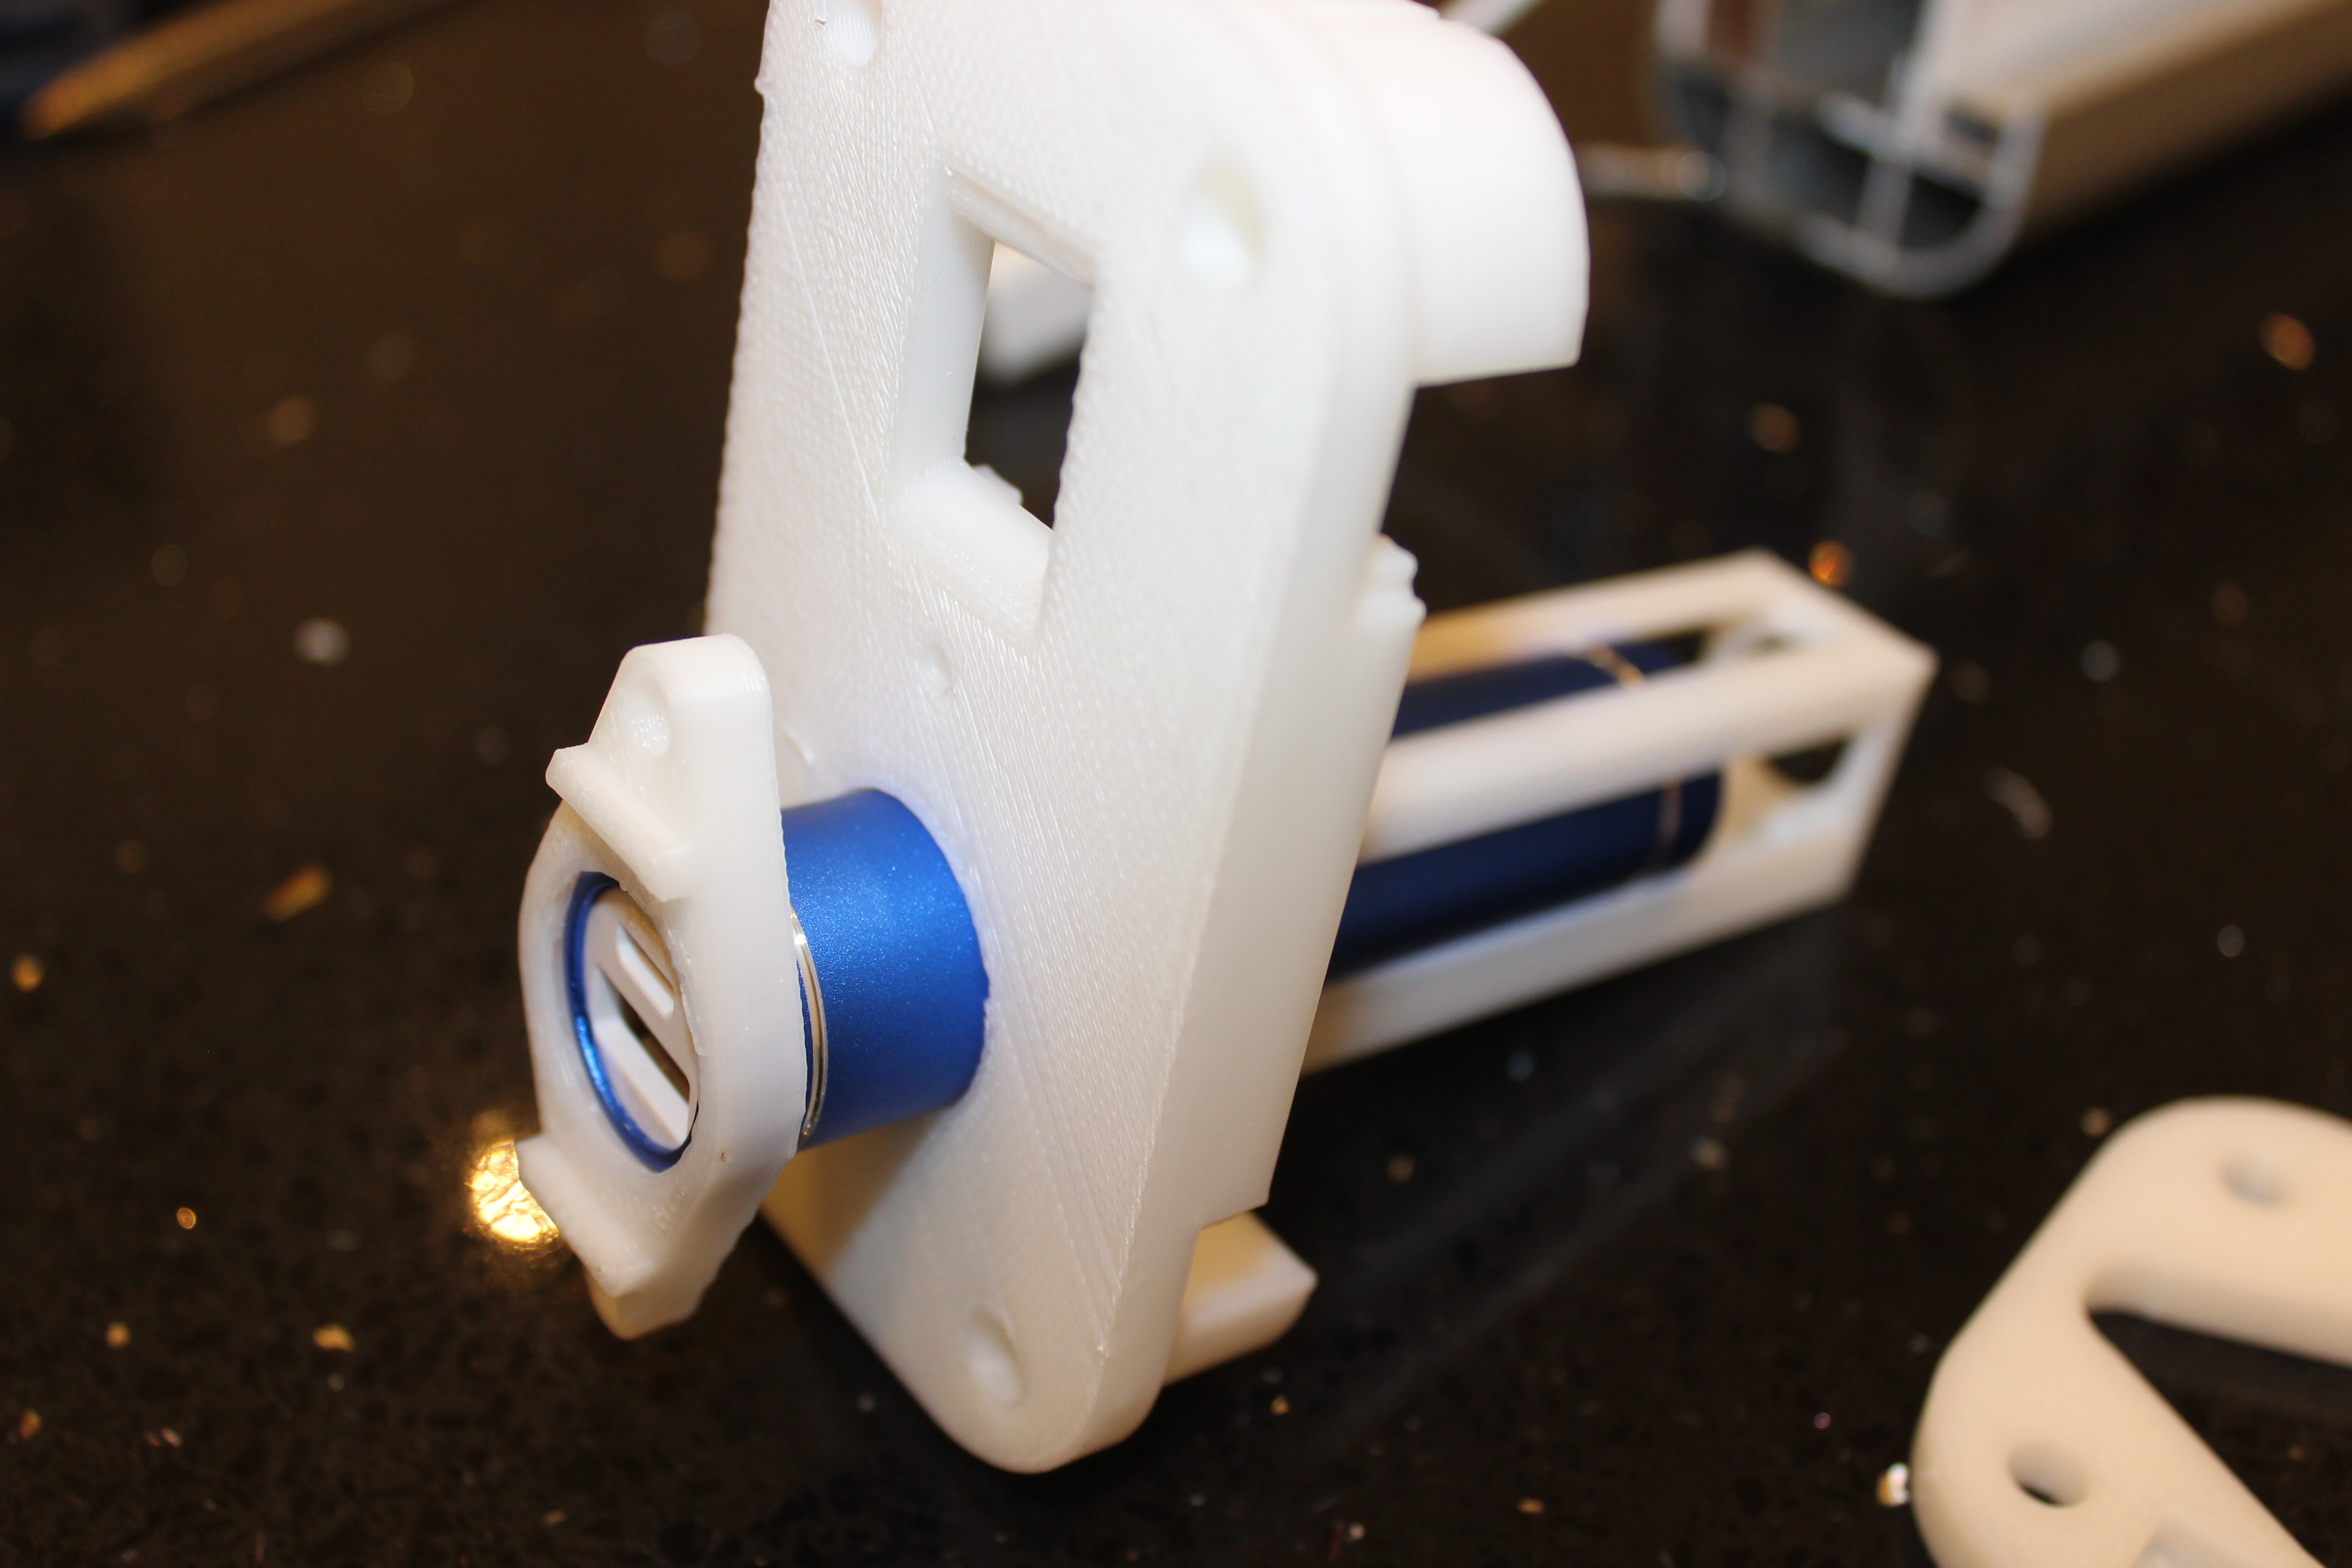
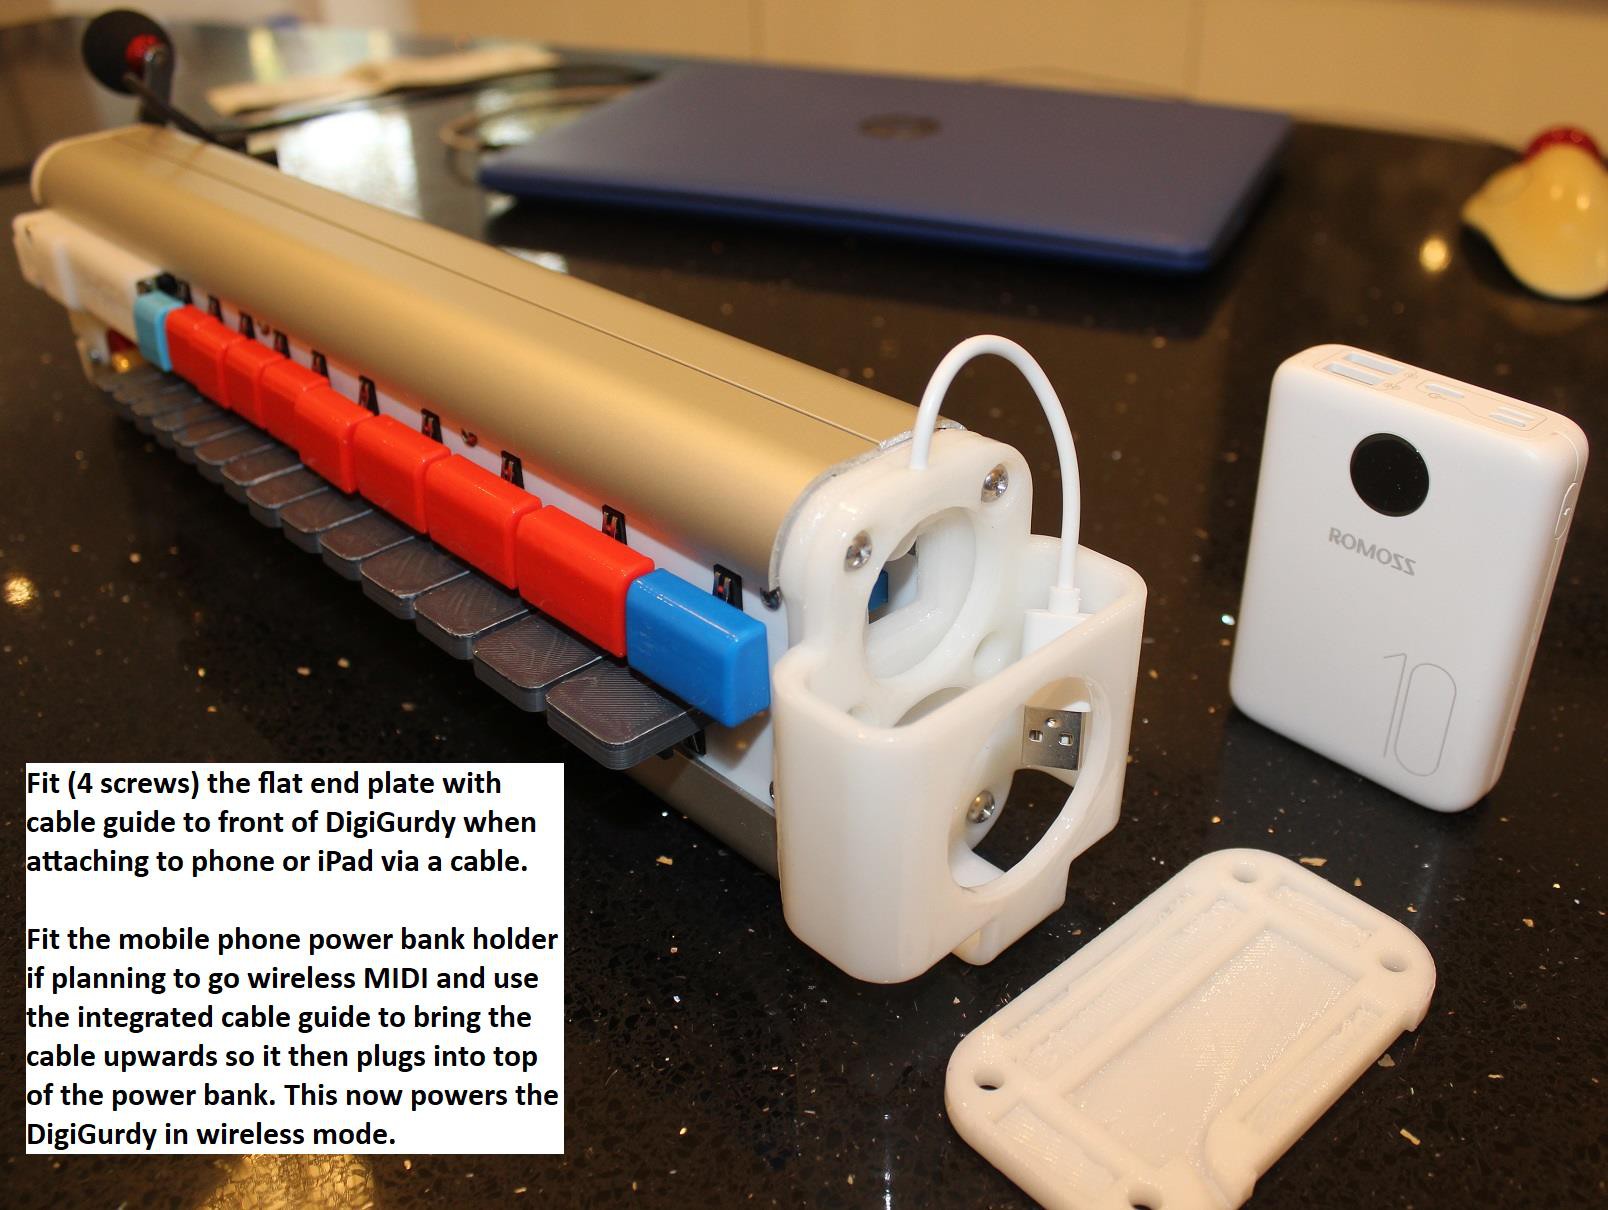
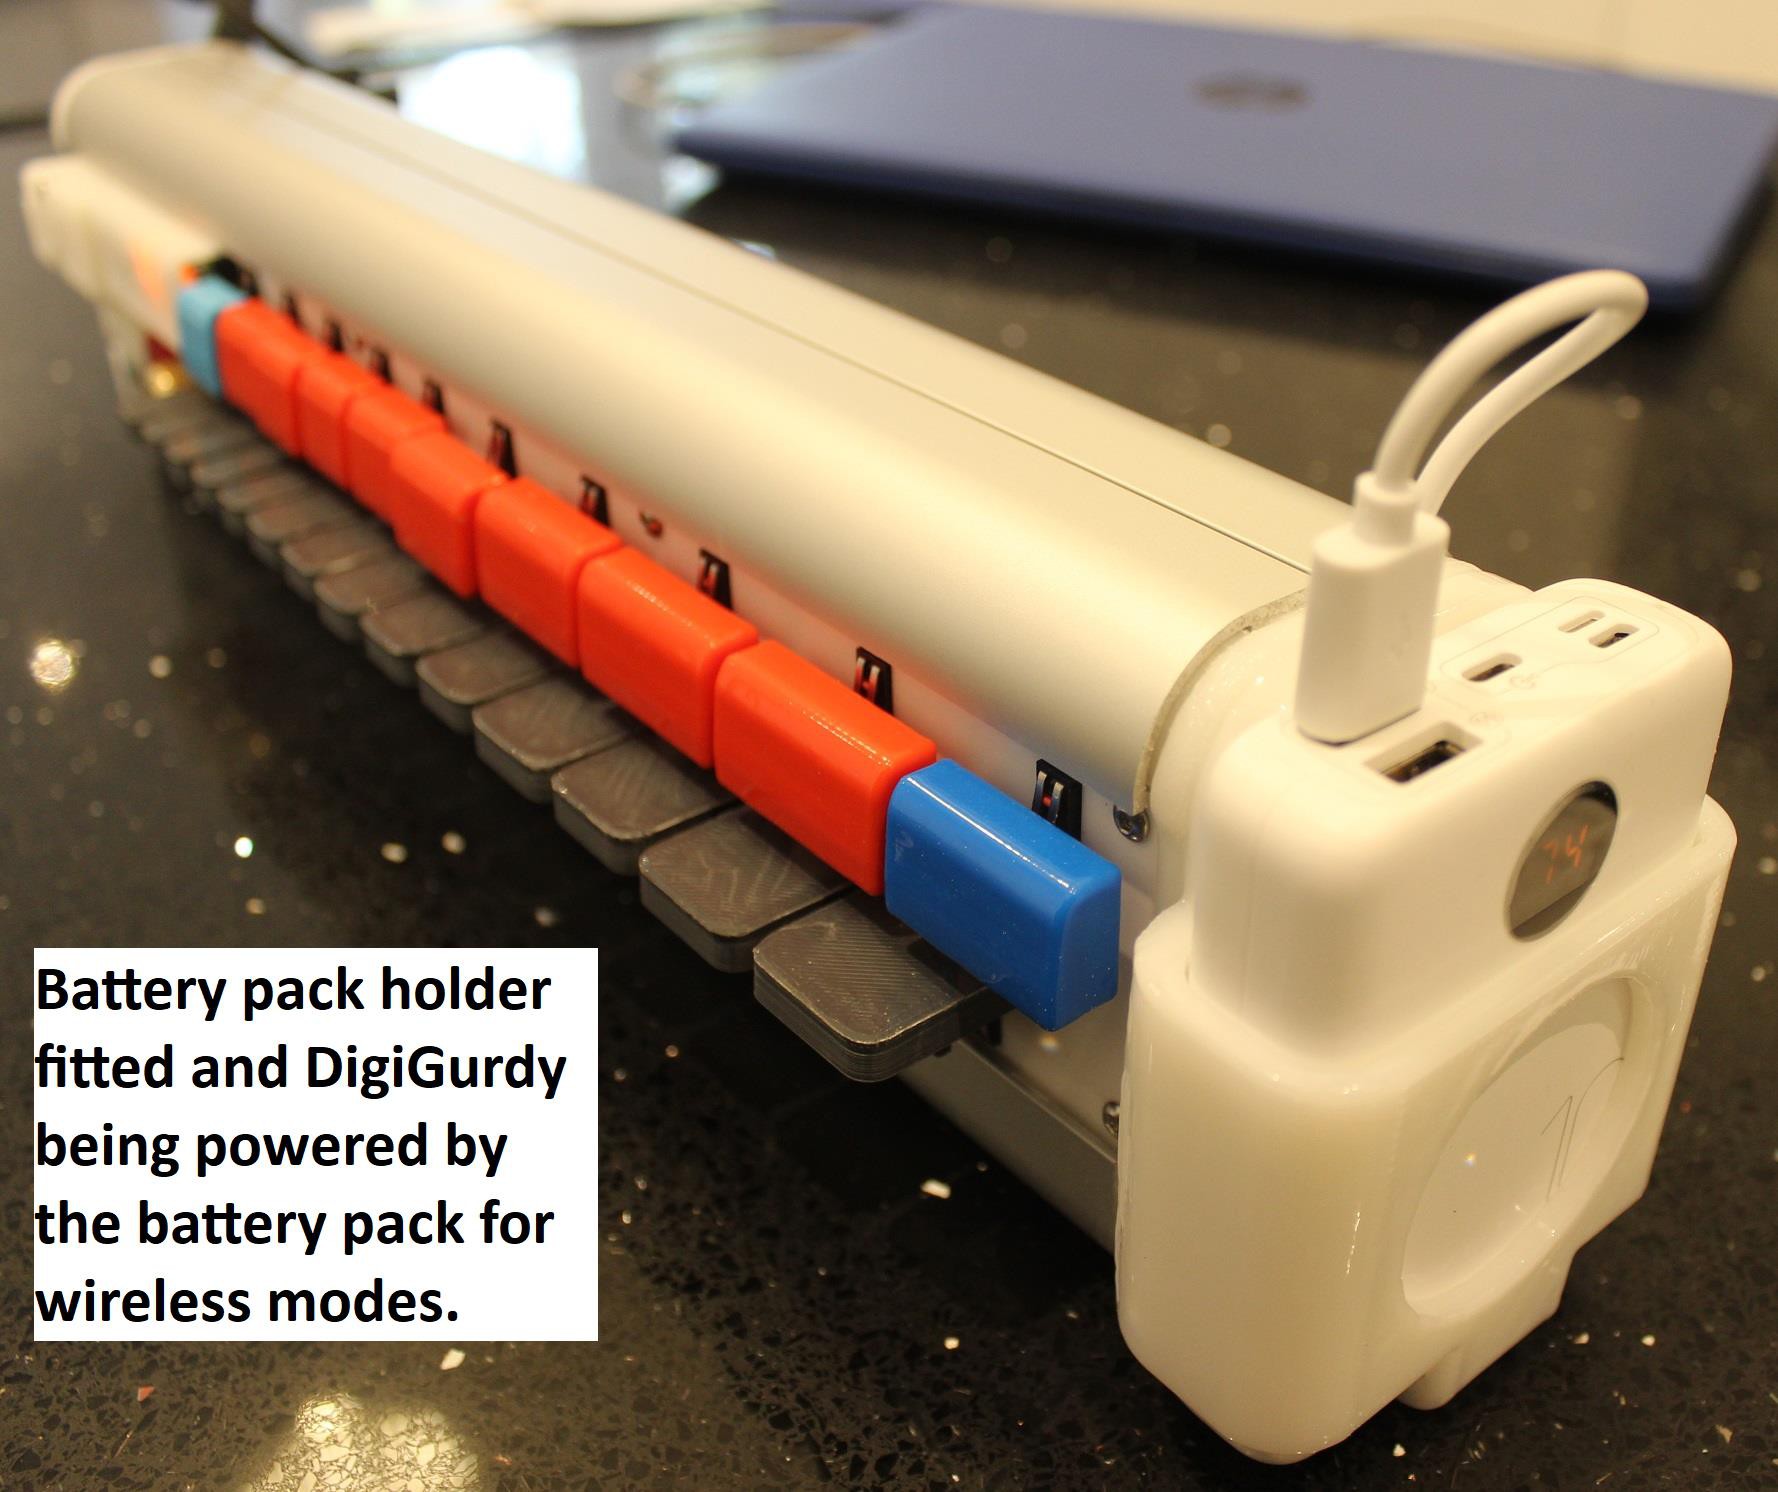
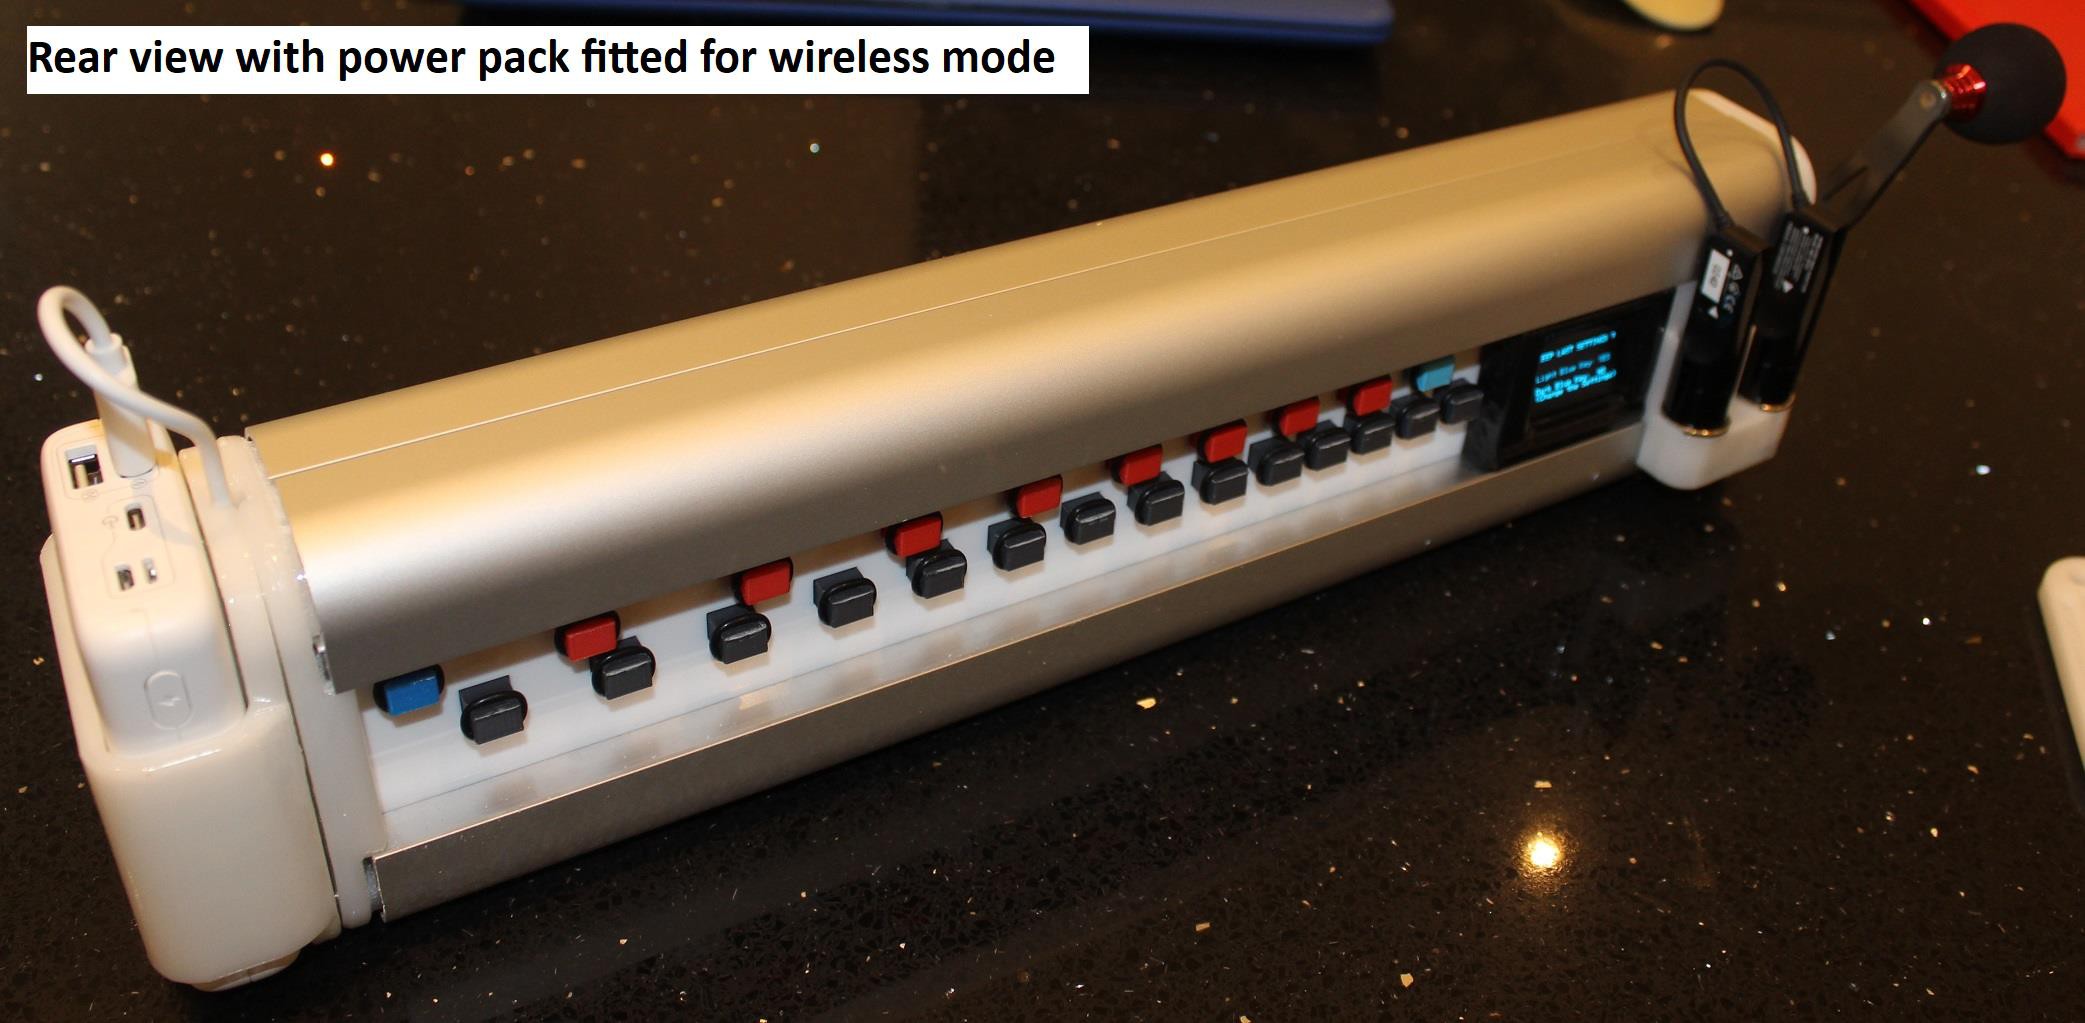
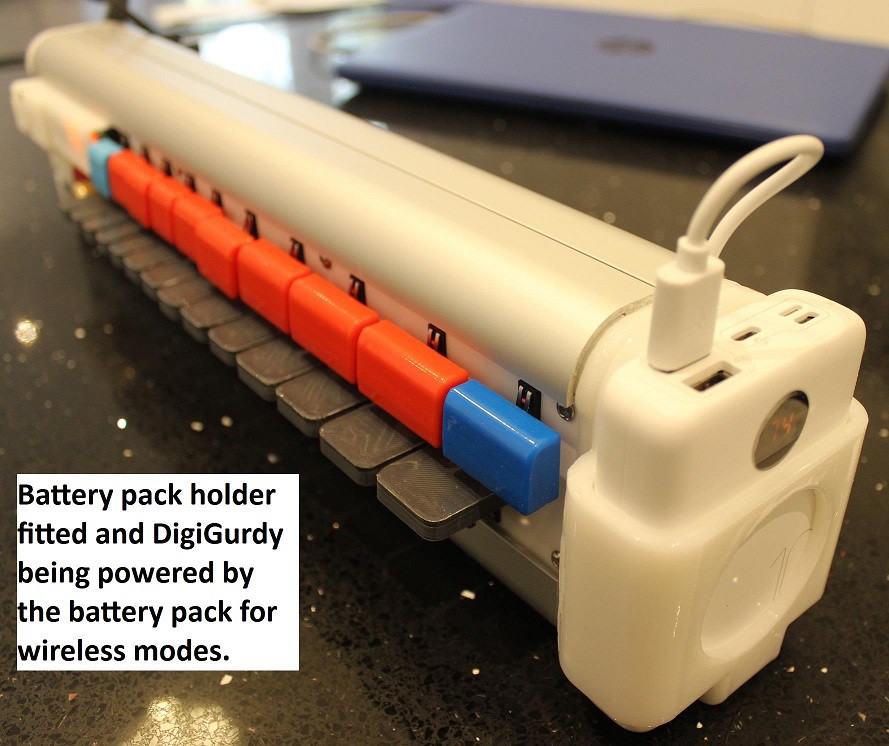
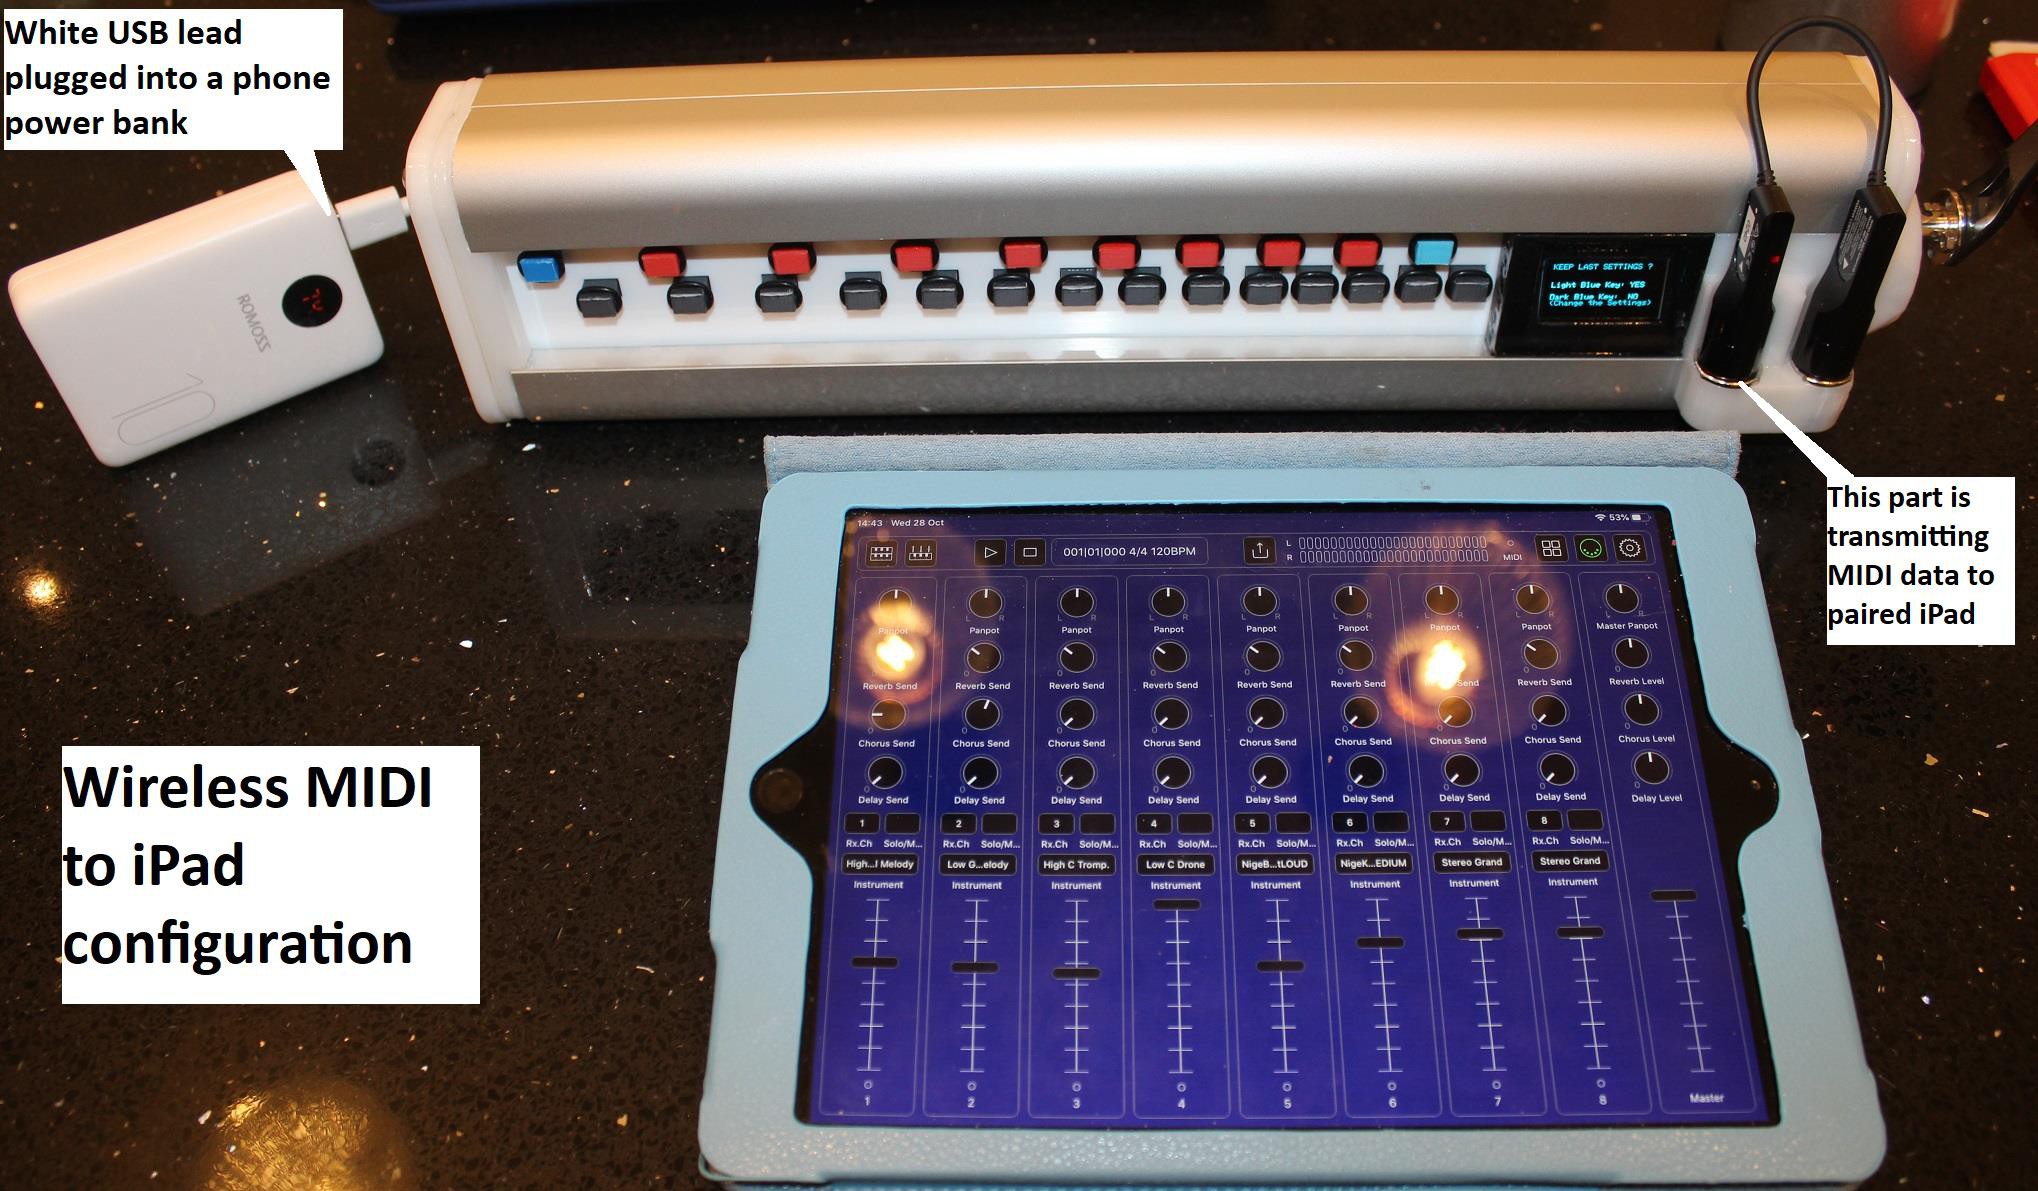
    9) Internal battery holder (a mobile phone emergency battery bank) is embedded in left hand end of the keybox. Should you wish to go fully wireless (i.e. when using a plug-in MIDI Bluetooth transmitter), the keybox can no longer draw power from the attached (via USB cable) phone or iPad and instead will now need its own power supply. Loop the short USB lead danging from left hand end of keybox around and plug it into this rechargeable battery module, and the keybox will now run on this internal power.

    10) Four detailed build videos for the Digi[Nerdy]Gurdy are below. Also there are two setup and use videos showing how to navigate and use the tunings menu, how to connect to an iPad or Android phone, and also how to use the internal battery module should you wish to go wireless when using a plug-in MIDI Bluetooth transmitter dongle.

  • Project Log #19: Internal battery for BT. Tunings. Alternative designs.

    XenonJohn12/28/2020 at 19:58 1 comment

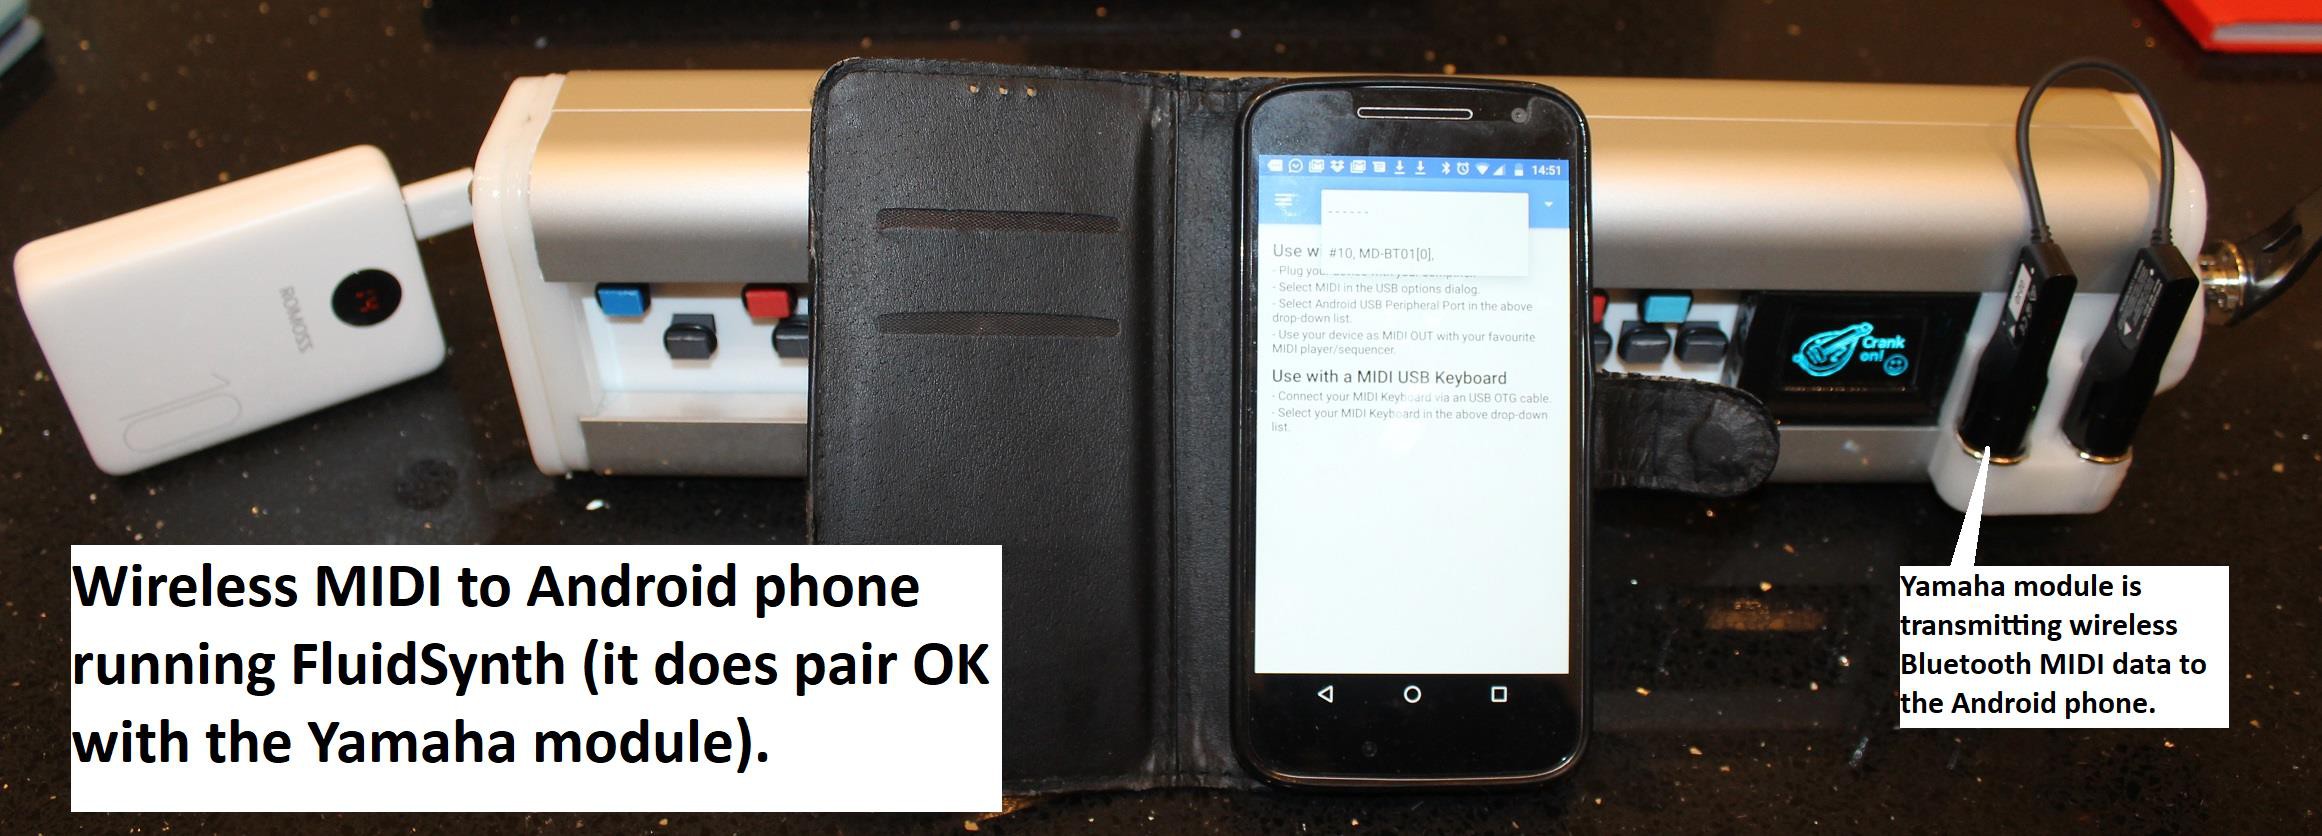
    1) Battery pack design: After a lot of experimenting I have settled on a design that allows a single 18650 based phone battery pack to be built into the left hand end of the DG. It just fits with <1mm to spare. This can be charged up using any mobile phone charger. The USB lead emerging from left hand end can either be plugged directly into for example in iPad, drawing power from the iPad as in previous versions or plugged into the USB socket of the internal battery pack to provide power if you want to use the DG wirelessly i.e. connected to the iPad via a plug-in USB MIDI module. These plug into the MIDI sockets now provided at the crank end. Examples of such Bluetooth MIDI transmitters are the Yamaha MD-BT01 and the WIDI-Master. Photos below.

    2) Tuning options: With a lot of help from people who know what they are talking about, I am working on an alternative method of tuning. Instead of the 14 set tunings which tell you how to set up each virtual string on the attached ipad/phone, in this variant there are just 4 basic tunings. 

    - You then use keys to increase all 4 strings by one octave, or move them down one octave.

    - In addition a capo allows you to move the trompette and drone strings up or down by one full tone.

    This gives you a large number of combinations, similar to the original 14, but presented to you in a way that some players might prefer, more in keeping with a real hurdy gurdy.

    Still debugging this but it does work and will be offered as an alternative code upgrade soon.

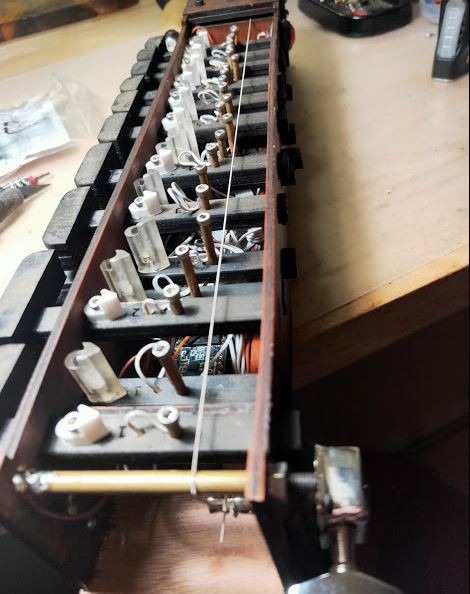
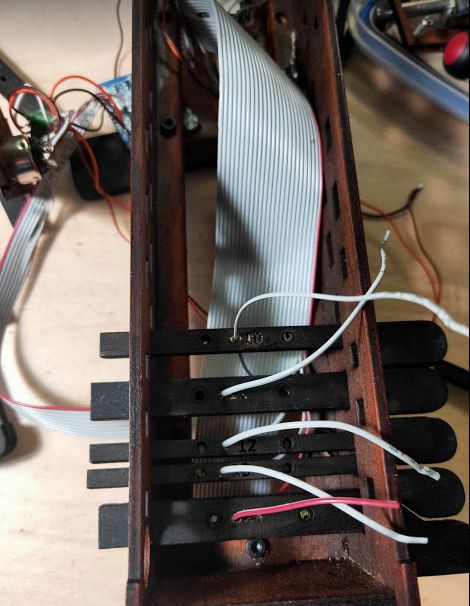
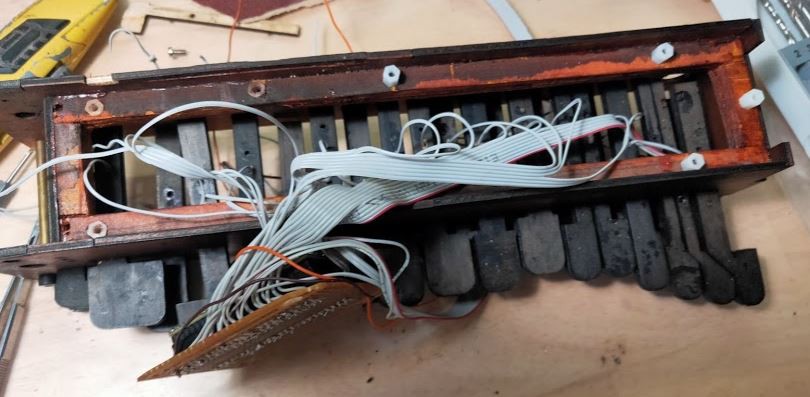
    3) Alternative keybox design by David Jacobs: This design is laser cut from 3mm ply and files have been attached with more photos in the file download section. Construction manual to follow. This uses same DG software but instead of using microswitches (which connect solder pins on the Teensy microcontroller to ground when pressed), it uses individual wires running to long or short brass contacts on each key. When the key is pressed they contact a metal string under tension so completing the circuit to ground. This gives the keybox a degree of feel that is more like that of a real hurdy gurdy. Images provided below. More in the downloadable file.

  • Project Log #18: Many improvements. Experiments with BTooth MIDI

    XenonJohn11/02/2020 at 14:30 3 comments

    Many improvements to the code. 

    - Strange extra click sounds all removed. Generally smoother sound.

    - Buzz sound is now at same pitch as the (virtual) trompette string.

    - 2 melody strings one octave apart.

    - 2 screen display options: Original with notes on stave plus also a Do, Re, Mi style notation.

    - Remembers your last-used setup. Useful with bs-16i on an iPhone.iPad as that also will remember your last used settings.

    Hardware improvements.

    Have changed the right hand 3D printed motor/crank housing design to include two 5 pin sockets to accept MIDI devices. When used with a Yamaha MD BT-01 Bluetooth MIDI transmitter you can link to the iPad or phone wirelessly. When in wired (to phone) mode, as in the previous versions, the DG is powered by the phone up the USB cable. When in wireless BTooth mode, you need to plug the now unused USB cable into something else to power the DGurdy. Initially I tried a large phone power bank in a holder on the left hand end. However, as the power draw of the DG is low, I have now redesigned the left hand end main 3D print so it accepts a smaller 18650 cylindrical battery and charger module from a smaller phone power bank. This fits internally within the DG and is a very neat solution. The USB cable can still be hard wired to a phone or iPad as before so you now have both options for connecting to your device, a) wired via USB cable or b) Bluetooth, if you buy a Yamaha module or similar later on plus the battery cell for the left hand end (readily available all over the world).

  • Project Log #17: Issues when connected to ios devices

    XenonJohn07/04/2020 at 18:45 1 comment

    The DG was intended to work with the free FluidSynth app, running on an Android phone.

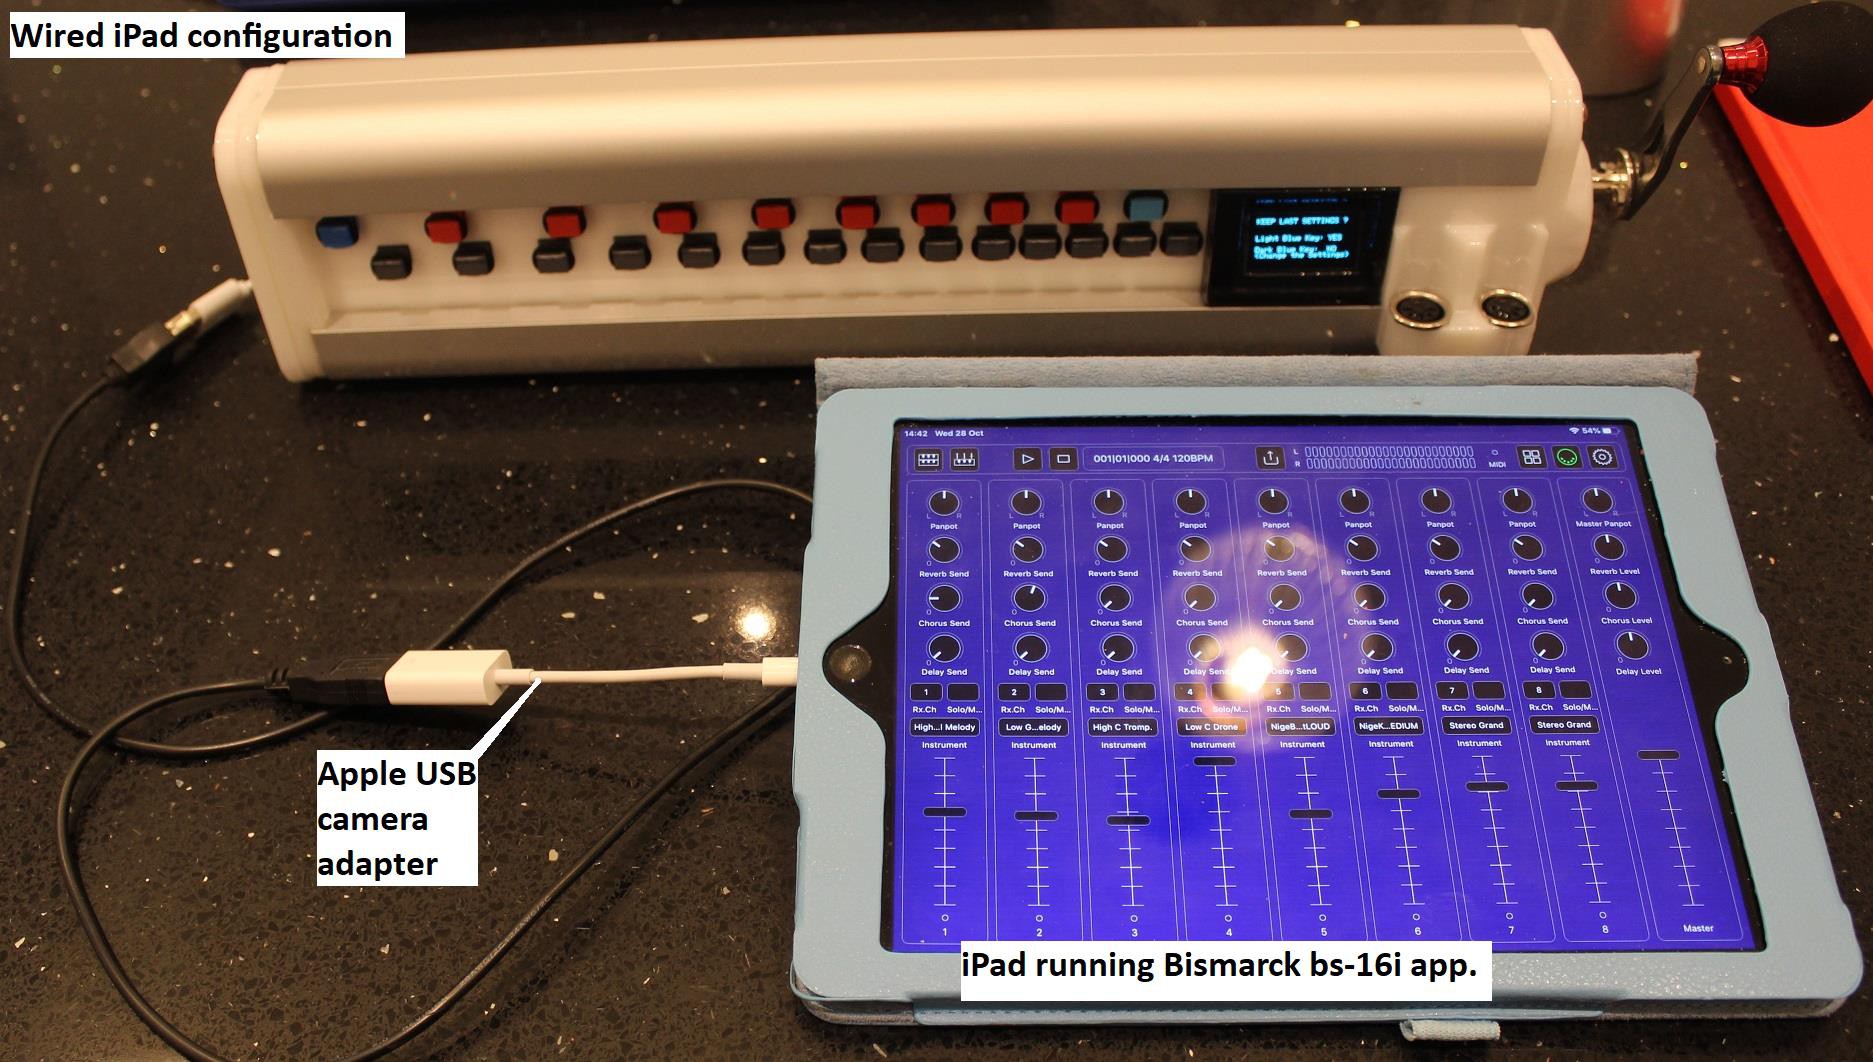
    Some have tried it with an iPad for example running Bismarck bs-16i. This seems to work OK most of the time but there are some bugs. 

    The main one is that when you stop cranking, sometimes a note can get stuck in the ON state and you have to unplug and plug the DG in again to the iPad to restart it. Am working on a software upgrade to try and fix it but even if I send a MIDI command to turn off every single note if crank has stopped turning for >1 second, the issue still happens sometimes which makes me wonder if it is an issue with bs-16i. Working on it !

  • Project log #16: Quick update on software and phones it works with

    XenonJohn05/31/2020 at 19:46 0 comments

    Quick update for people asking me what phones it works with, whether it works with an iPhone / iPad and potential PC based software.

    PHONES that definitely work using the (free) FluidSynth app for Android phones that I originally intended it work with:
    My old MOTO G4 works OK.
    Also from currently available new budget phones: 
    STK One Max    
    Nokia 2.2

    Apps that work:
    I have it working, as I originally designed it, with: 
    Fluidsynth Midi app (Free from Google Play store) on an Android phone.


    Others also have it working in these ways although I have not tried these myself yet:
    a) bismark bs-16i app on an iphone, [NOTE: You have to use the Apple camera adapter which is about GBP35], cheap ebay versions may not work.
    b) Also, Reaper with the TX16Wx software sampler plug on a PC.
    c) Also apparently works with a device called an Organelle M.       https://www.critterandguitari.com/organelle

  • Project Log #15 Version 5 finally built using the PCB's

    XenonJohn05/19/2020 at 17:44 0 comments

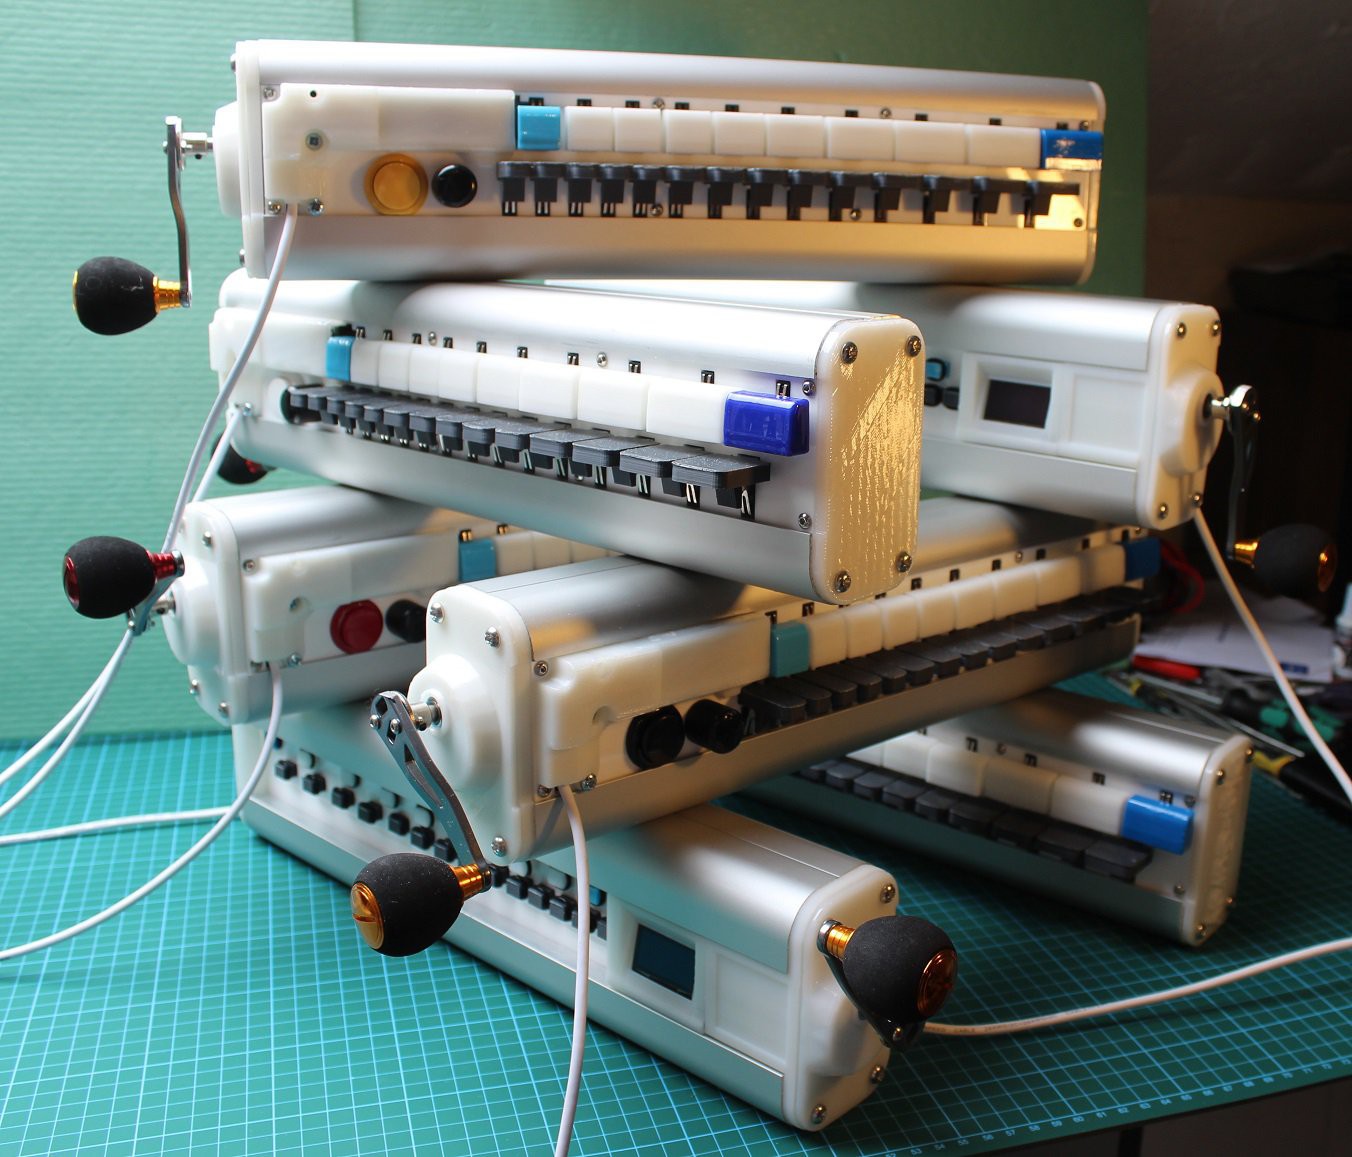
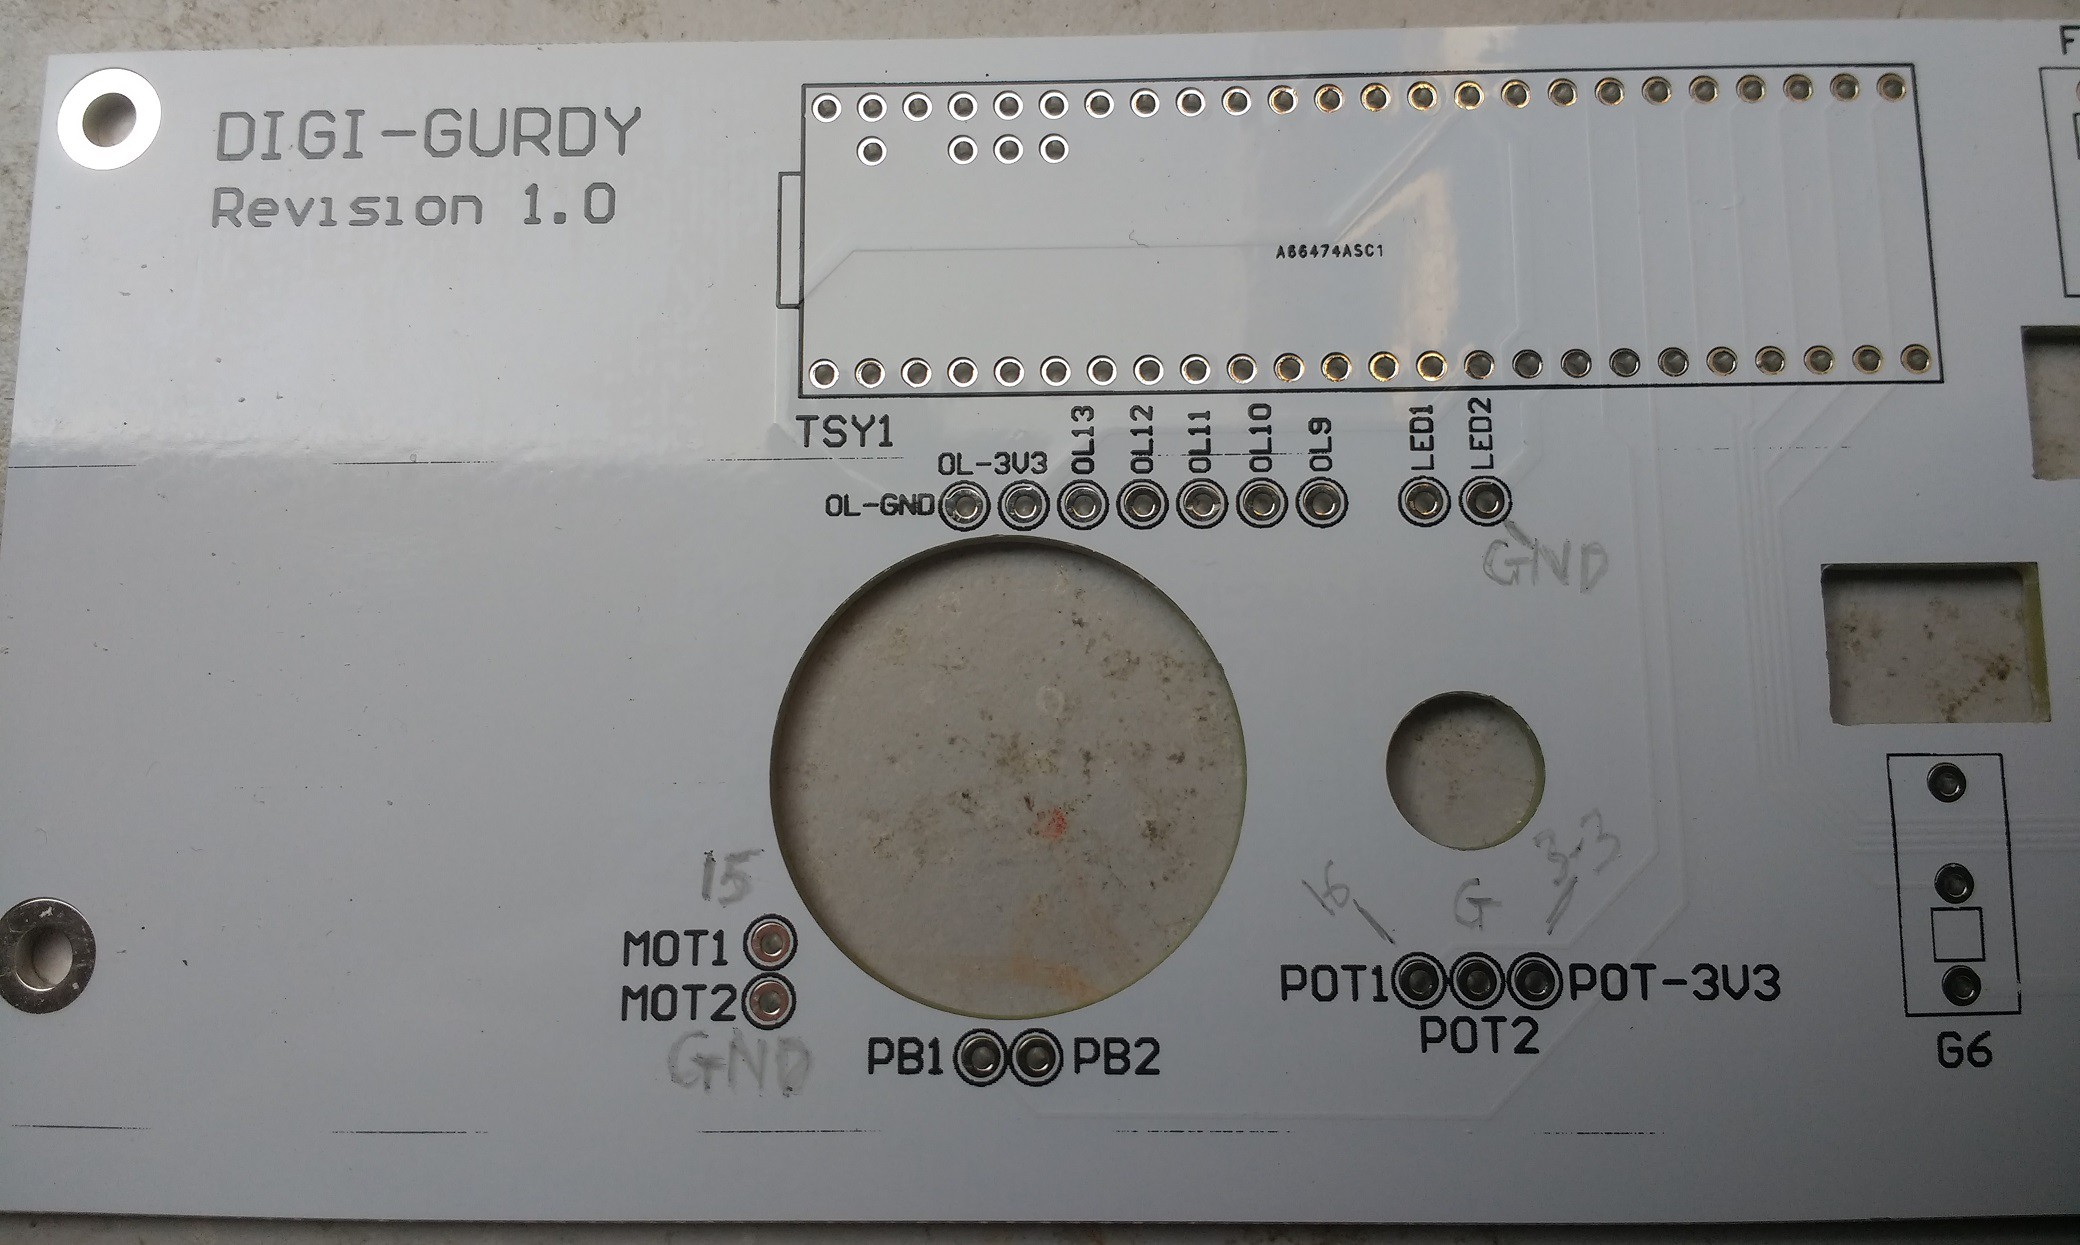
    Have been involved in a ventilator project but finally got around to making a few of the V5 DigiGurdy's which have a custom PCB inside onto which everything connects. Also has the unpluggable Teensy 3.5 on the front under a white 3D printed cover. I have made 2 videos describing everything about this version, see below. All white / aluminium and now using white laser cut acrylic for the front and rear surfaces. I have made 7 so far.

    DigiGurdy Jenga.

    This is 15min long but explains just about everything. The screen flicker on the display is due to my GoPro camera, it does not flicker in real life !

  • Project Log #14: PCB's have arrived for latest version

    XenonJohn04/26/2020 at 23:26 1 comment

    This is a very quick update. 

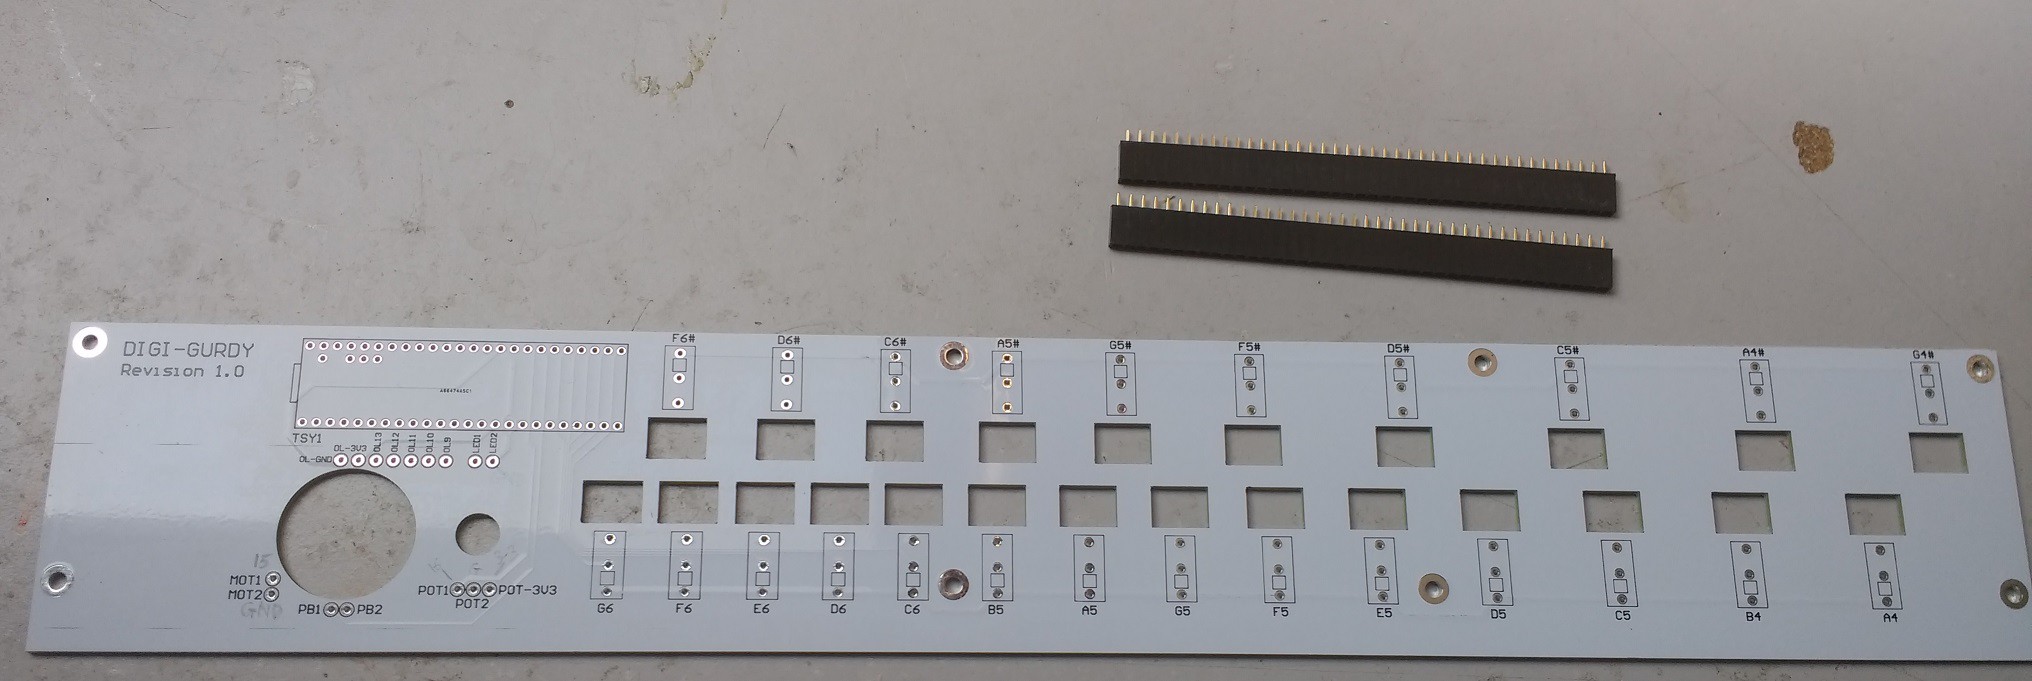
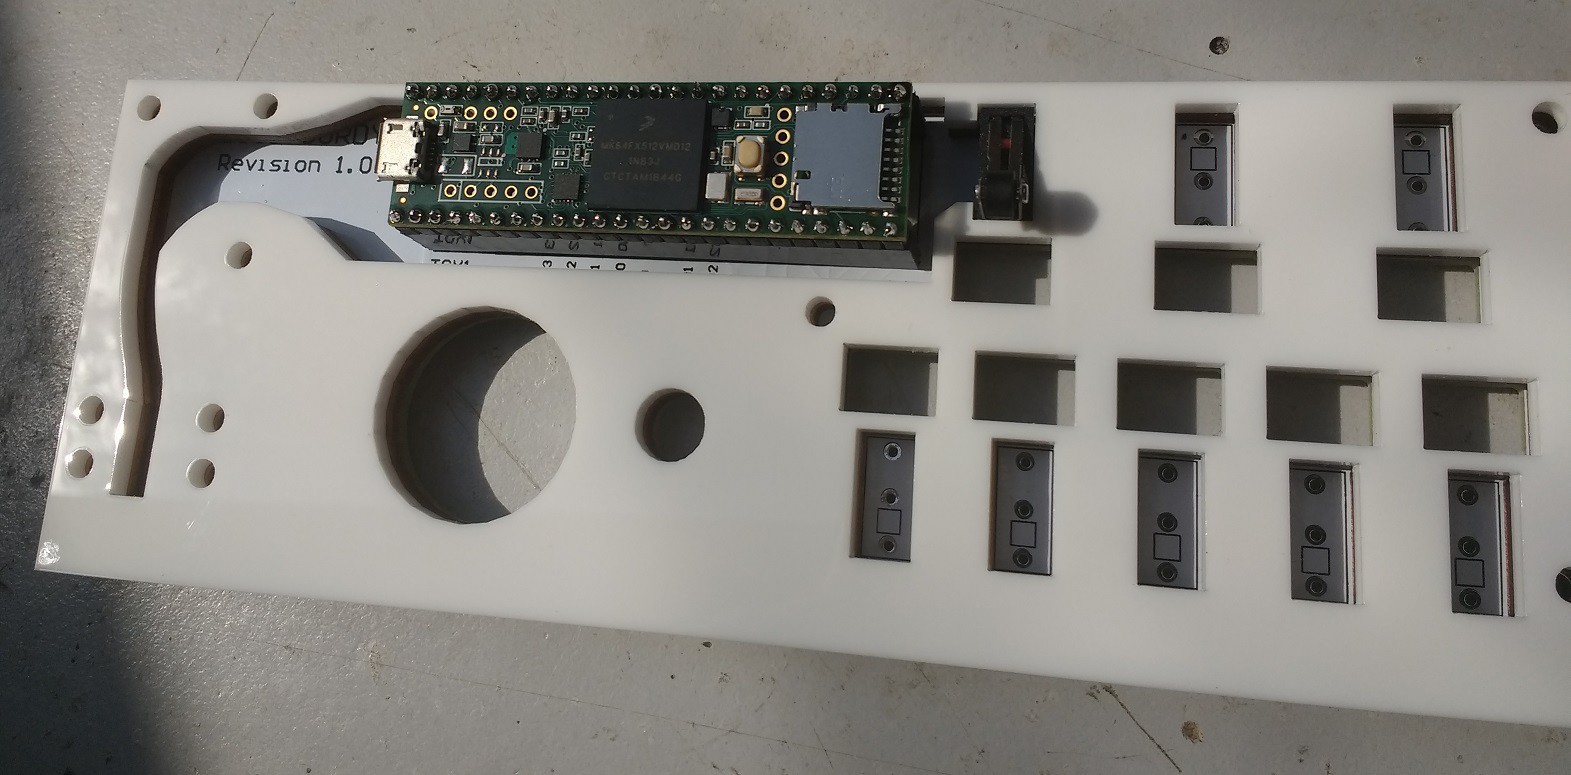
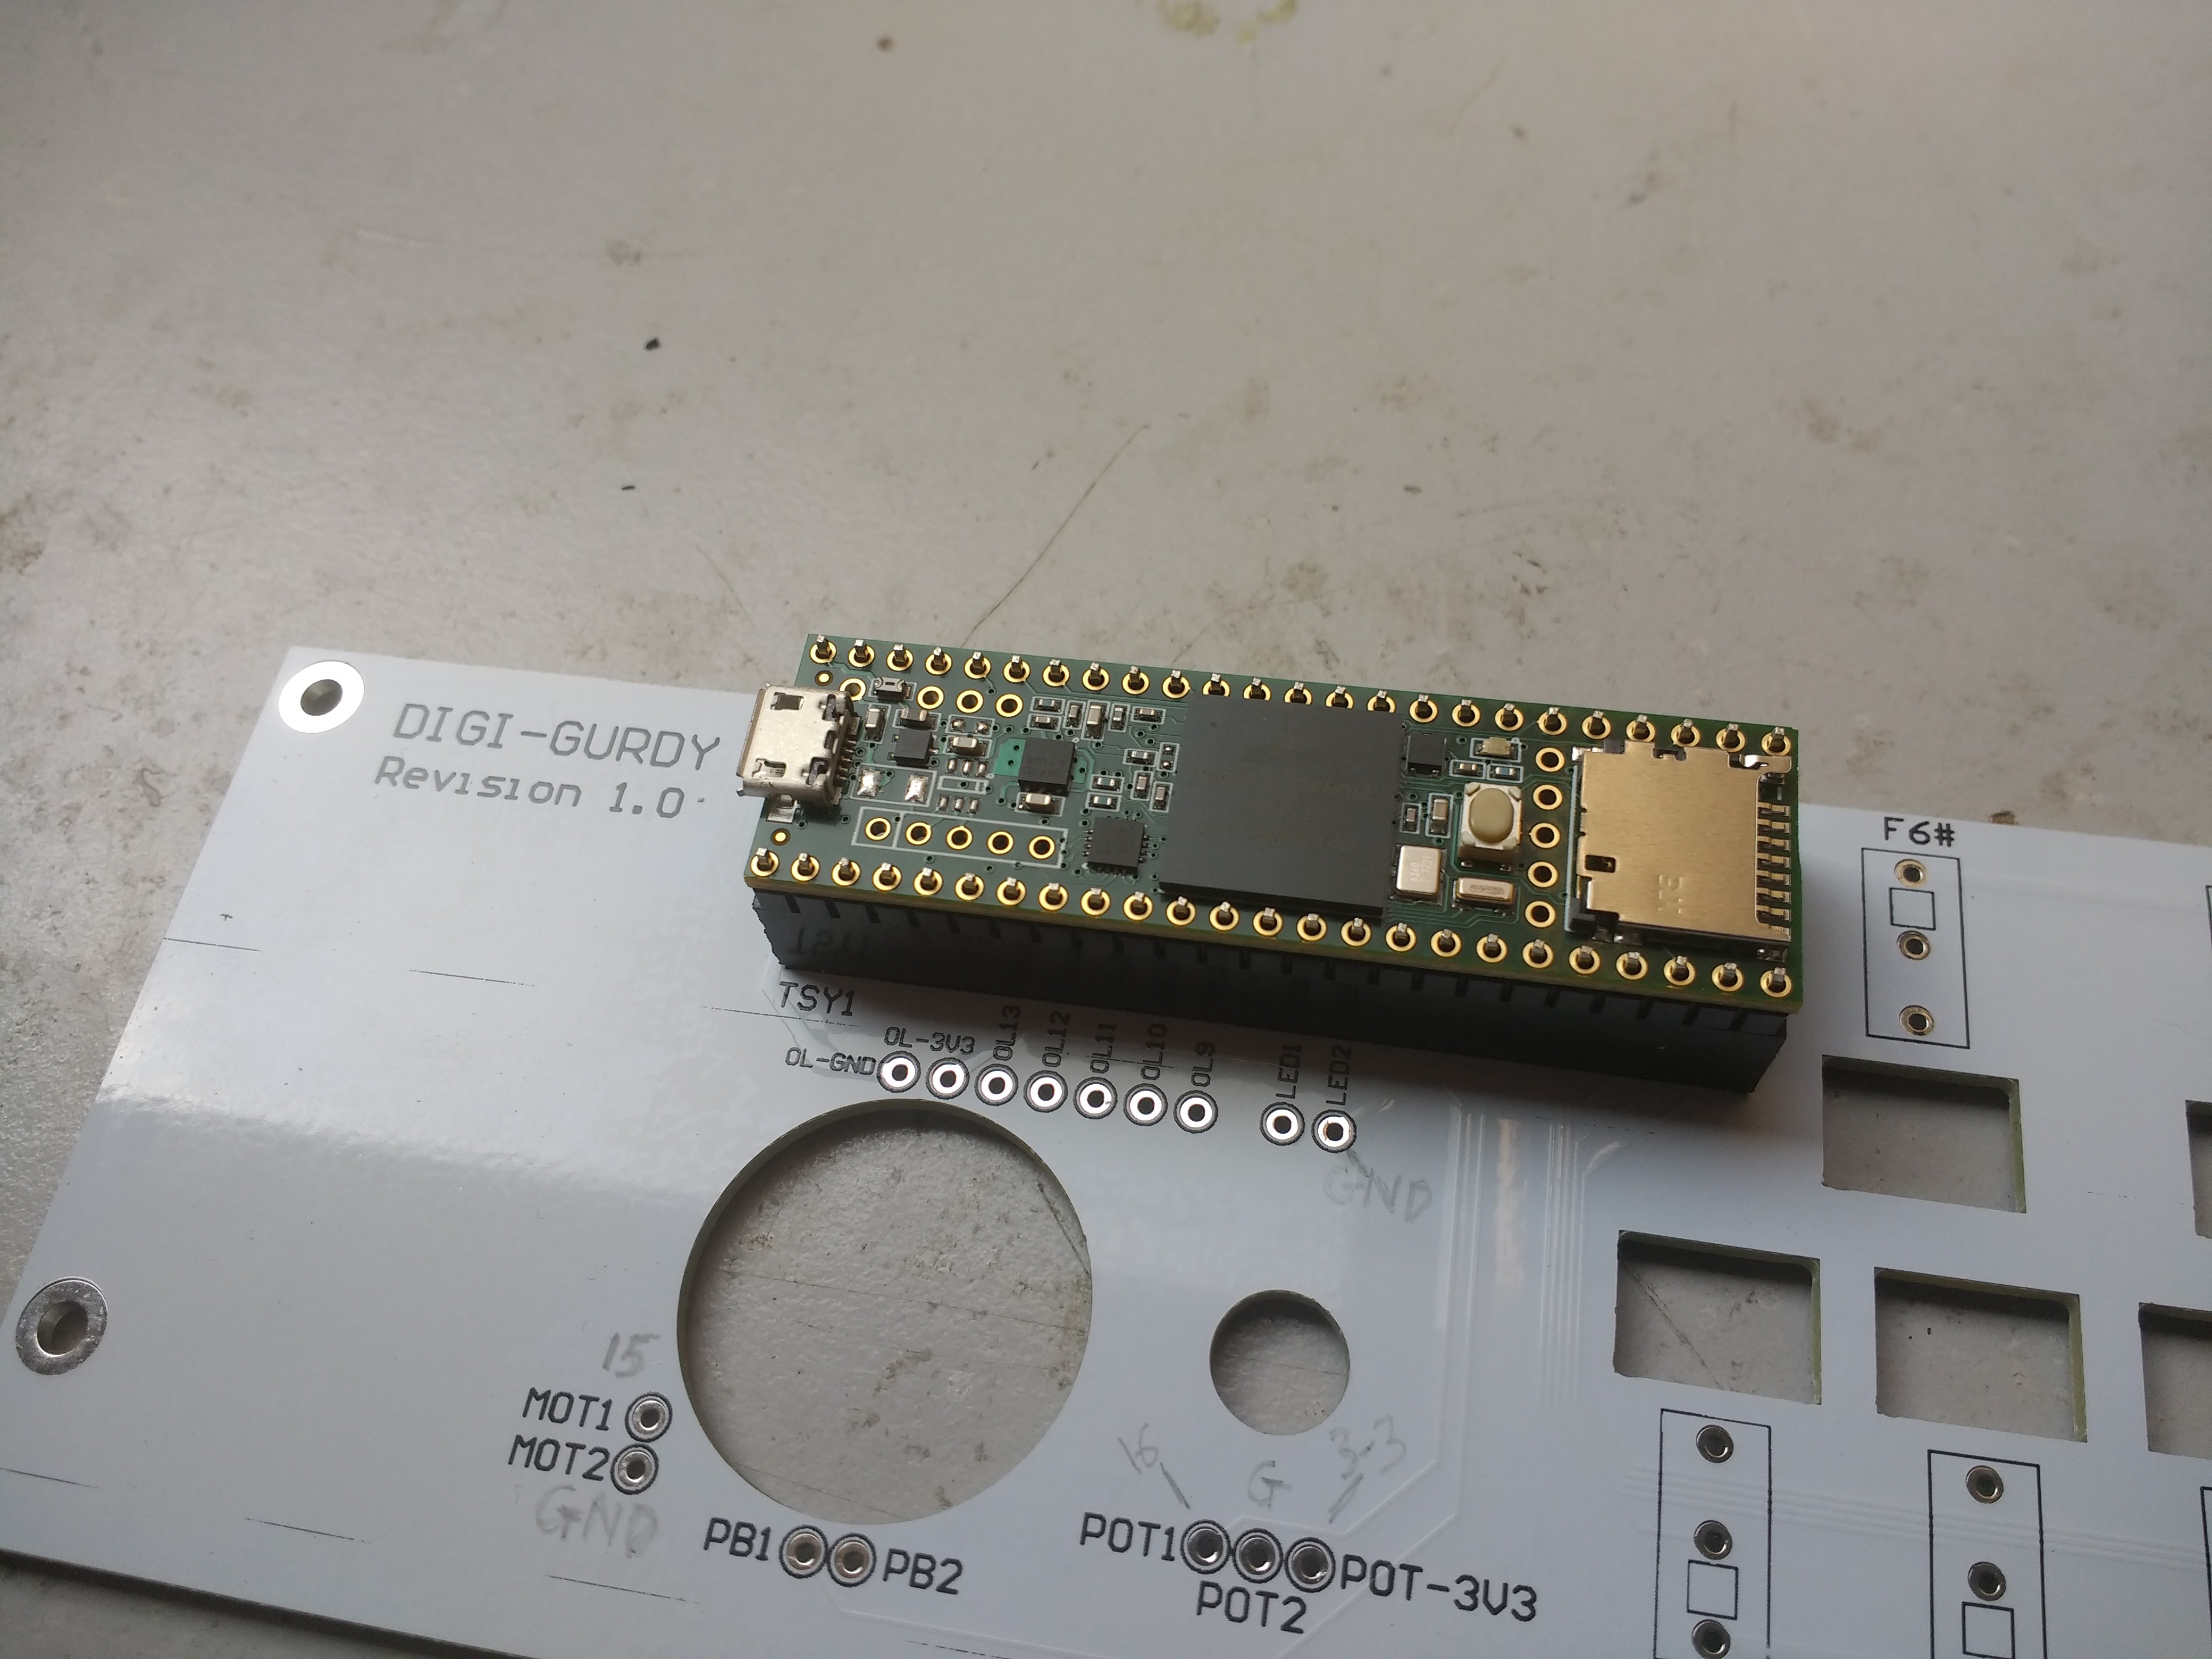
    20 PCB's have arrived from China which I can solder the microswitches to and also 2 rows of pin headers to allow the Teensy board to be plugged into the FRONT of the DigiGurdy. 

    The whole machine will be white as in the left-hander featured in Project Log 12b.

    The Teensy will have a small 3D printed removable plastic cover. This allows it to be unplugged and sent to me if not an Arduino enthusiast so I can mail it back to you with a software upgrade.

    It also allows an SD card to be slid into the end of it, should I wish to use that for something - working on it. For those who have suggested I design a custom board with WiFi connectivity for software upgrades, my answer would be that to do that I would have to employ someone and unless making 1000 of them, not much point. As it is I paid someone to design this PCB.

    It does speed up the build time considerably and is much neater.

    Other project taking up 99% of my time right now but I thought I would put one of these together just to check that it works - which it does.

    Photos below, just the electronics assembled for testing purposes.

    The USB lead will be held captive in the slot cut for it by the cover which will enclose the Teensy and this cable.

  • Project Log 12b: Version 4, neater & easier to construct

    XenonJohn03/06/2020 at 22:18 0 comments

    Version 4

    - Many software improvements based on suggestions from Nigel Eaton, David Jacobs and others.

    - Have sorted out a reasonable set of tuning options. Startup menu gives you 6 tuning options. Trying to offer a reasonable selection for the more experienced, but not an overwhelming set of options for the beginner either. Select one and it will then show you how to set up the FluidSynth app on your phone so it all works correctly and sounds as it should. The software does not "know" how you have set up the phone app so this is the easiest way to set both up so they work with each other.

    - Many changes to the 3D prints so the whole thing holds itself together just using the 4 long screws at each end.

    - Alloy channel now runs the full length of the device, enclosing the larger gearmotor crank mechanism.

    - Using white laser cut acrylic panels rather than plywood.

    - White USB cable.

    - Going for an aluminium and white plastic effect, rather like an *pple product.

    - 6th tuning option allows you to set it up as a Tenor gurdy.

    These are all shown in the video below. Please note in the video below I am demonstrating them on a LEFT-handed version i.e. back to front !

    To come.......

    I am awaiting imminent arrival of some printed circuit boards onto which the microswitches will be soldered directly. This will eliminate most of the internal wiring and simplify the build further.

  • Project log #12: Stronger Crank and many code changes

    XenonJohn01/24/2020 at 14:26 0 comments

    List of changes to original version based on feedback from a couple of early users:

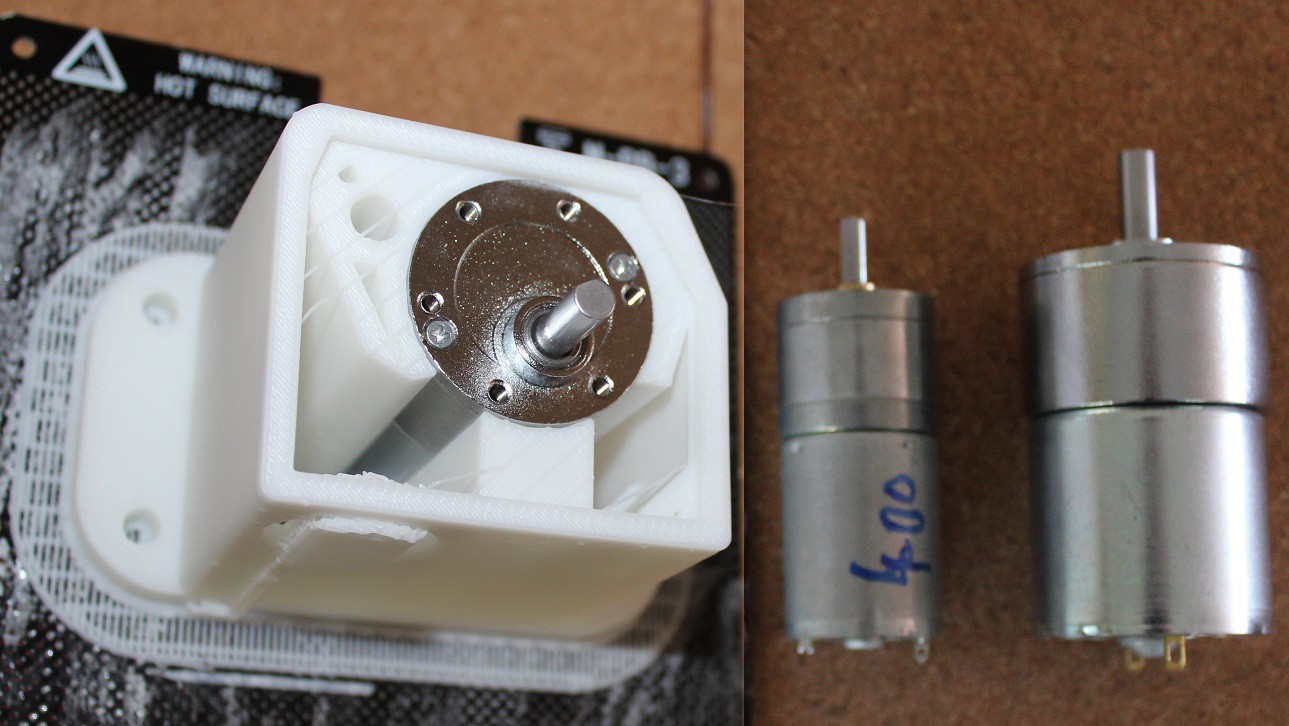
    1) Much stronger crank mechanism based around a larger gearmotor in new 3D printed enclosure with a 6mm shaft. The bulb has been removed as if it blew, the system would not work as intended. Replaced with wire-wound resistor bridge. 

    2) No run-on when you stop cranking. Originally this was intended to help beginners as it would sound even if you momentarily stopped cranking.

    3) Keys do not play at all unless you are either cranking or have pressed the gaming FIRE button.

    4) Drones did not sound right in previous code when using tuning other than G/C. As the DG code has to be aware of your selected drones on the FluidSynth app on the connected smartphone, this has been addressed by the OLED screen offering you 4 tuning options on startup. Once you select one, it then tells you what drones to select within FluidSynth. This keeps it all working correctly. Tunings are: melody G / Playing in key of G;  melody G / playing in C;  melody D / playing in D;  melody D / playing in G. Trying to keep beginners from information overload but also keep more experienced users moderately happy.

    5) If you intermittently crank with a note key held down, it will sound the note each time, in previous code you had to release and re-depress the key.

    6) In new FluidSynth soundfont (V10 onwards) I have added larger choice of different loudness buzz sounds and keyclick sounds. PM me for the soundfont. I will send by wetransfer as large file.

    7) Repeat MIDI - off commands being sent out on some channels have been much reduced. With FluidSynth these were not noticeable but if attached to a more sophisticated synthesiser program running on a laptop, this could produce problems.

  • Project Log #11: More design tweaks and assembling the first six.

    XenonJohn11/24/2019 at 15:19 0 comments

    I am assembling six DG's for some brave early adopters out there. 

    A few design changes: 

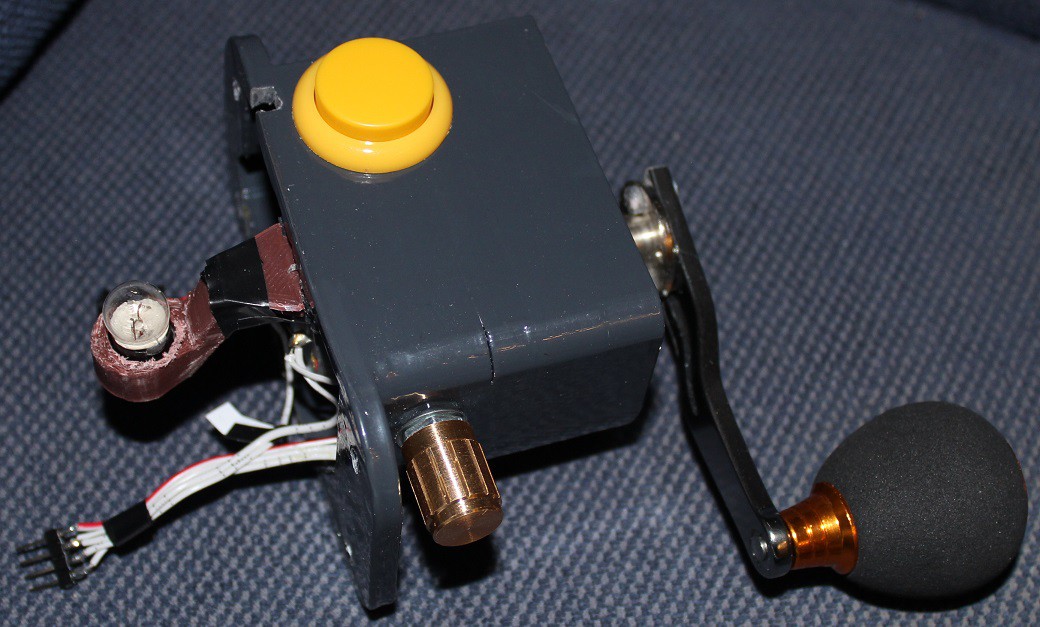
    i) On startup the software measures the voltage on the analog pin from the buzz-sensitivity potentiometer 200 times and calculates the standard deviation. If low, a crank module is present and if large it is not. This means I can use same software for both variants of the design. I have added a gaming button to the crank module now instead of a small switch, so you can play it by tuning the crank, or by pressing this button with right hand. If you want to remove the crank module at some point in the future, you can unbolt it, remove the glowing glass dome and remount the switch from the crank module into the hole where the glass dome was (it will fit exactly). Screw on an end blanking plate, which will be supplied and the machine will then work again just fine in crankless mode with no software changes required.

    ii) In demonstration mode there are now 22 songs.

    iii) Some changes to the code have been made allowing the crank buzz to operate a little more like the real thing.

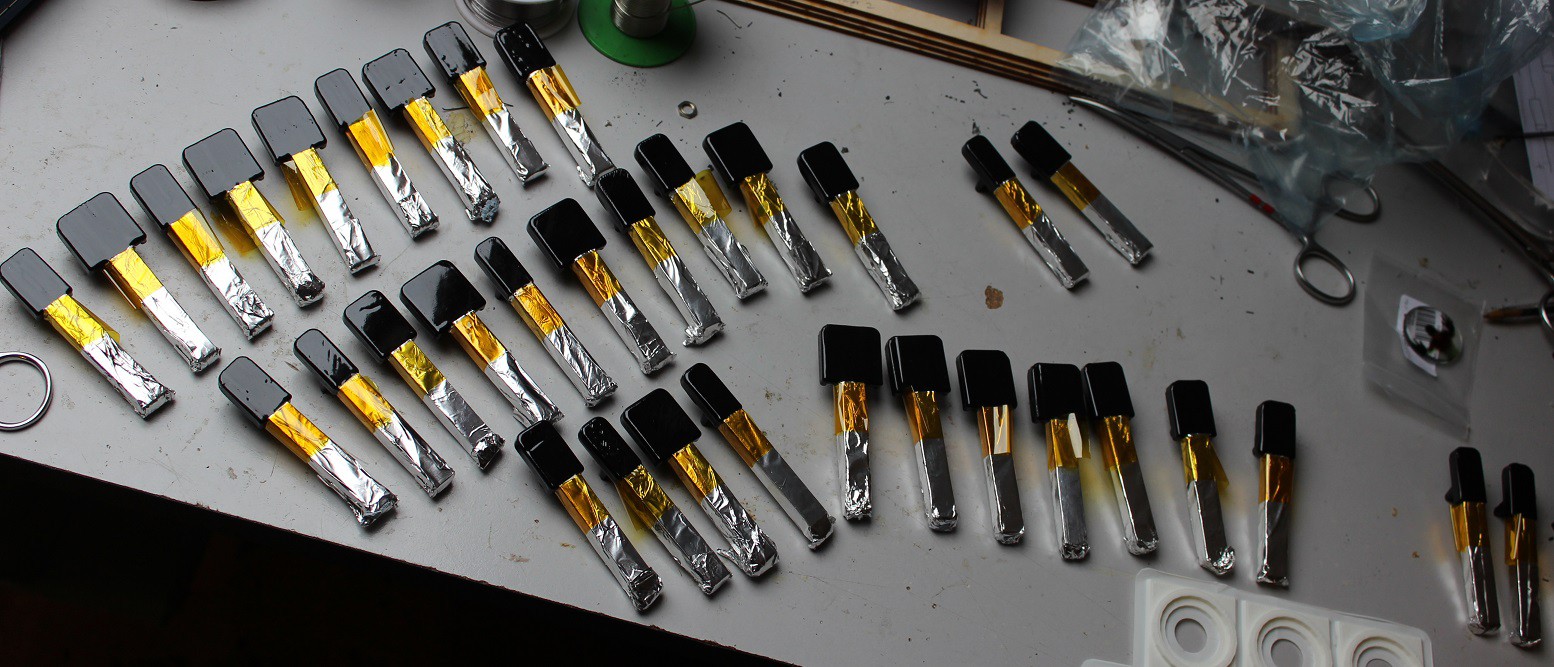
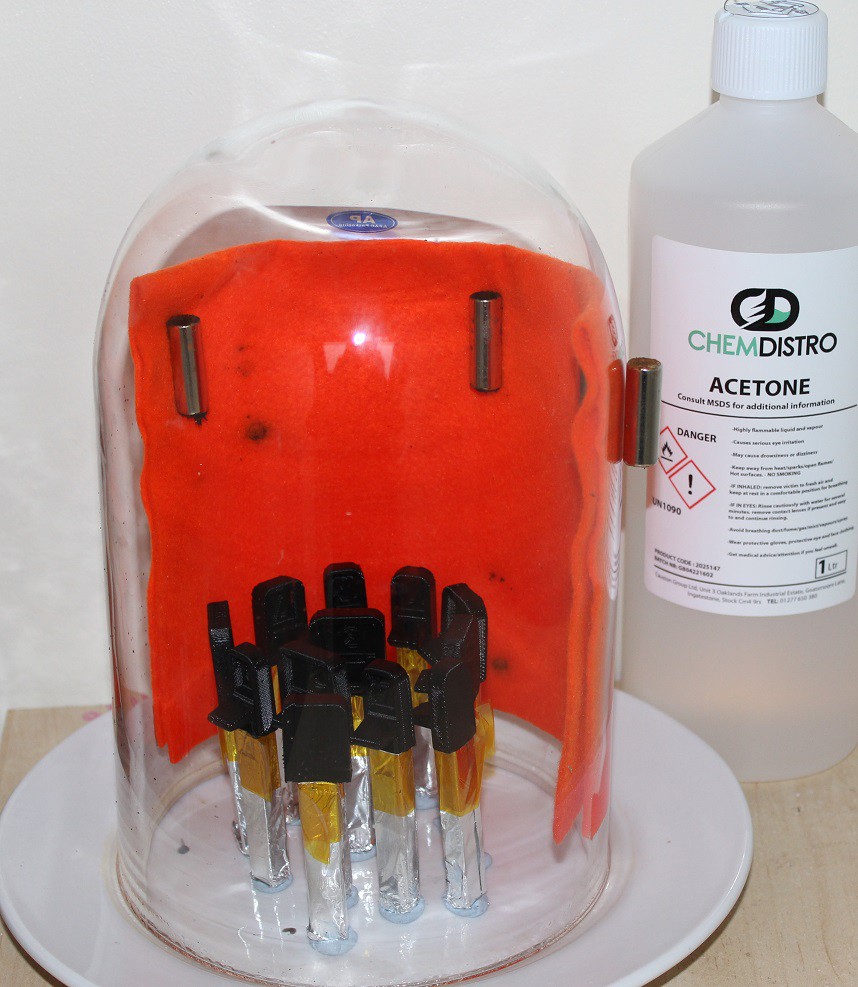
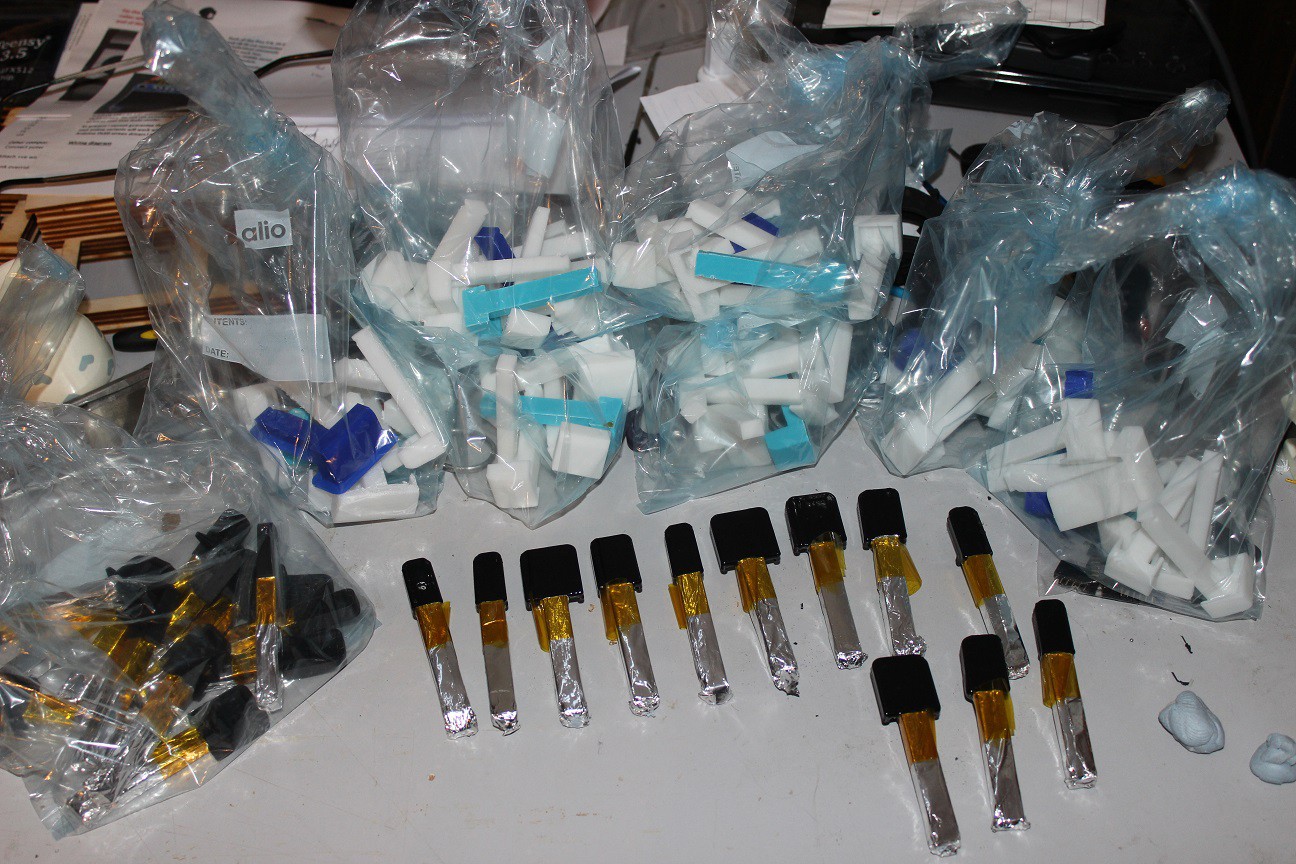
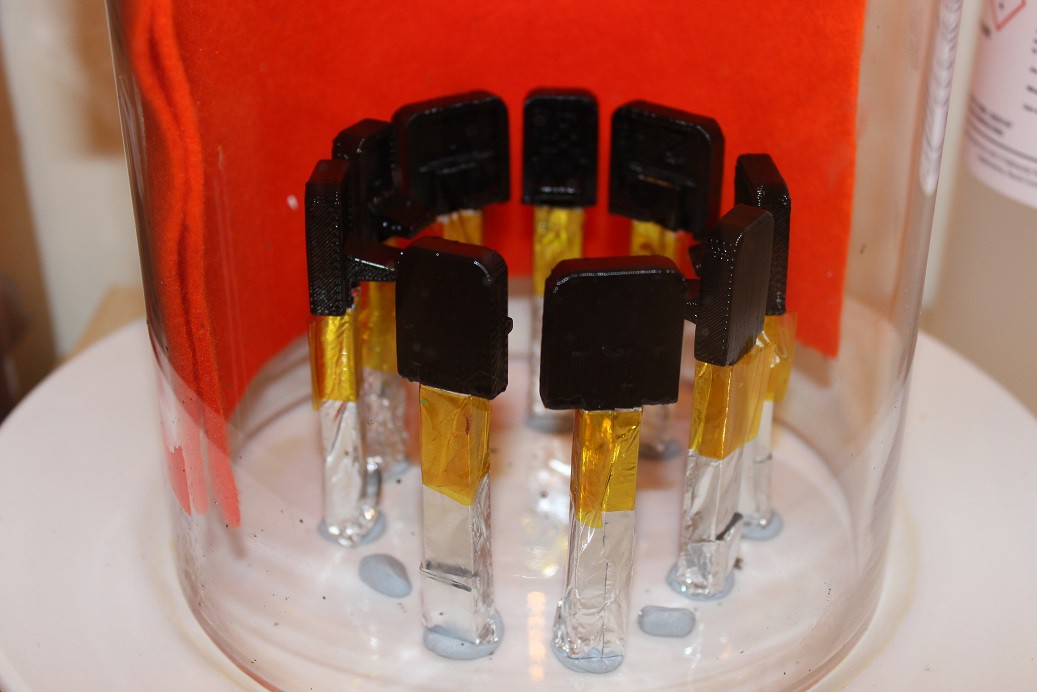
    iv) Acetone polishing of the 3D printed keys: I want the stems to remain unchanged as they fit the slots in the wooden laser cut panels perfectly, but I do want the key ends to be smooth and shiny, i.e. I want to acetone vapour polish the ends of the keys only. The solution is to wrap the stems in aluminium foil before placing them into my vapour chanber.

    Despite using laser cut panels to reduce the amount of 3D printing, as you can see I have been on a 3D printing-fest for the past 3 weeks to produce all the parts required.

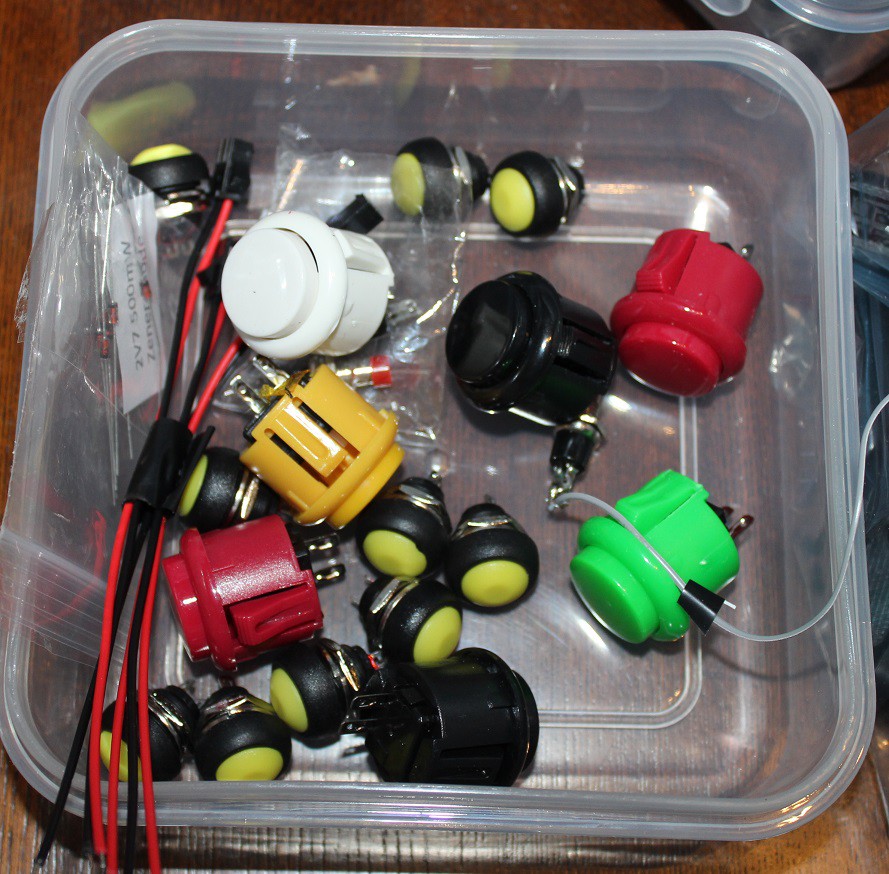
    Have experimented with various pushbuttons, the gaming ones work best.

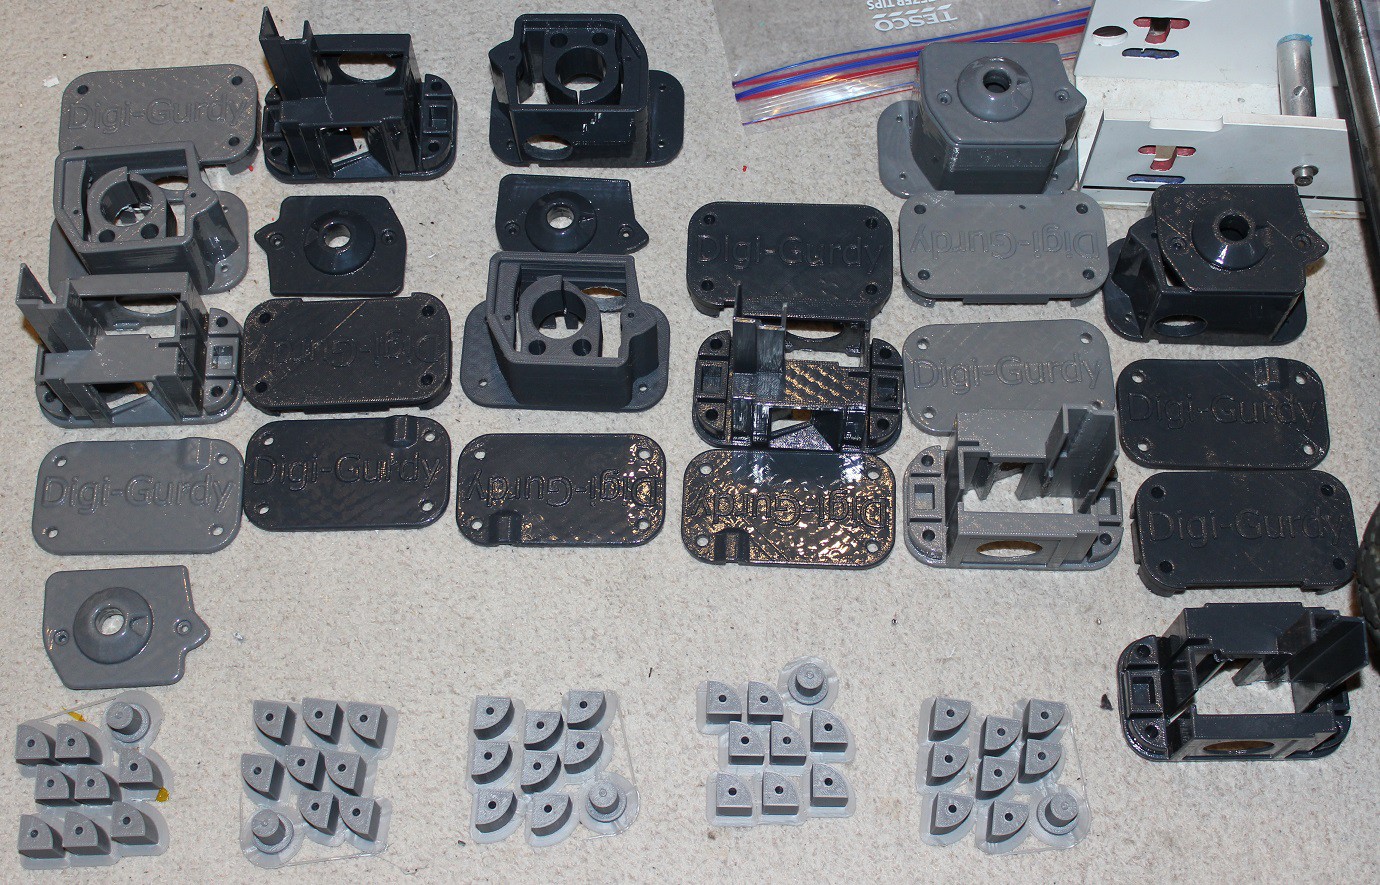
    Just some of the acetone polished keys.

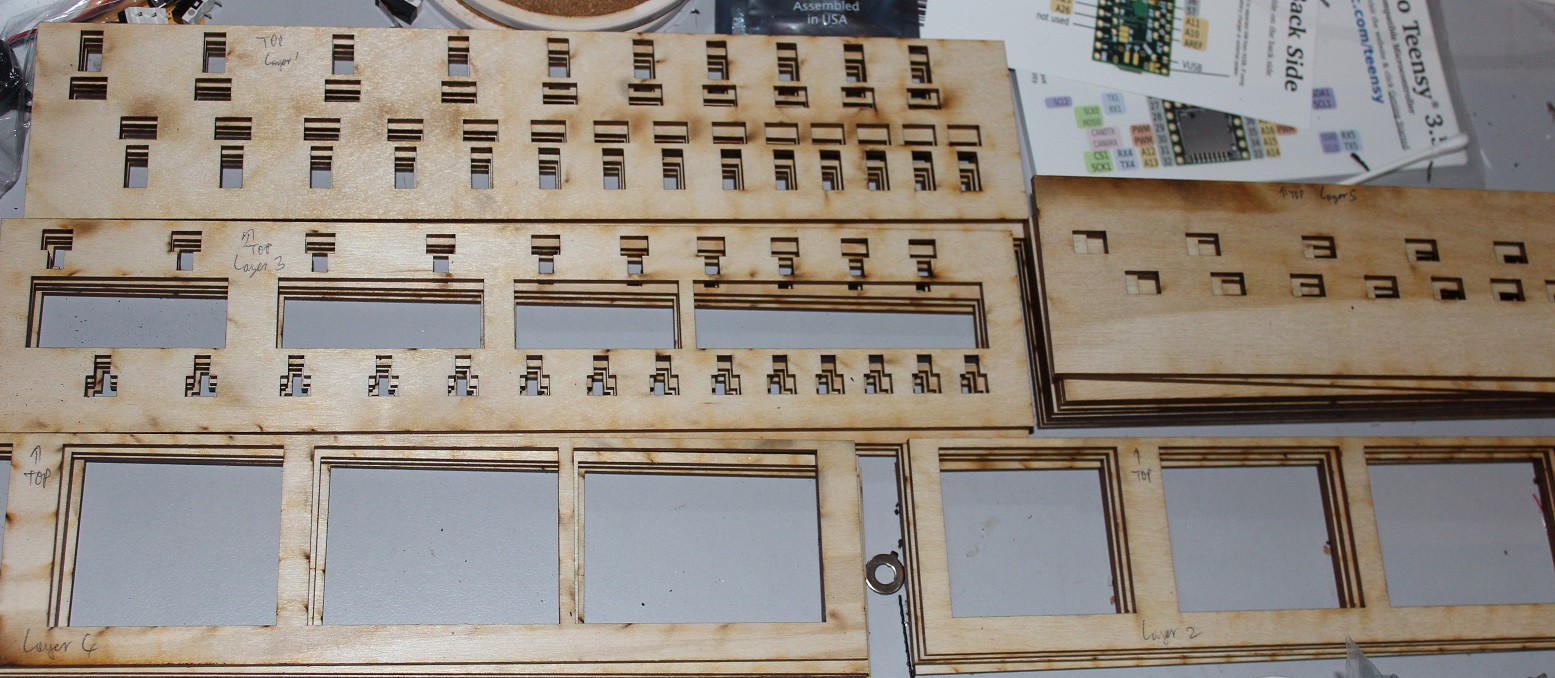
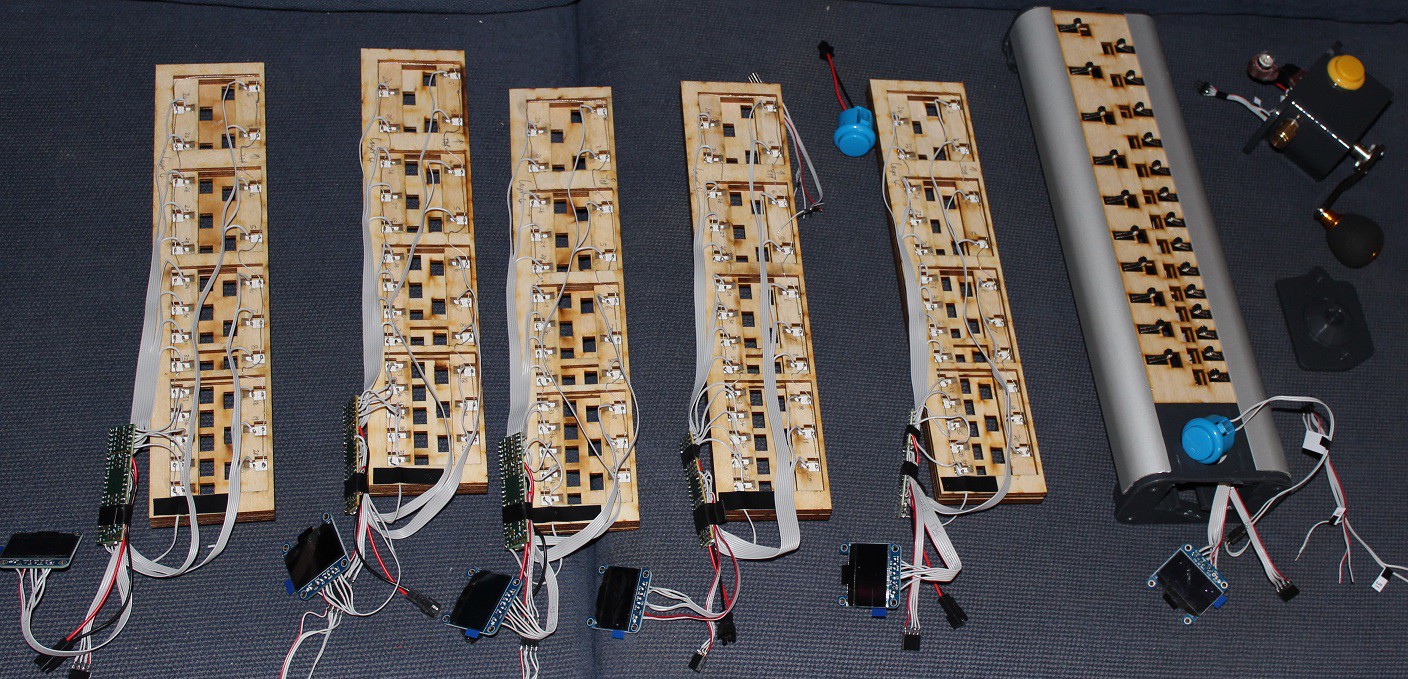
    Some of the laser cut panels.

    End structures and crank housings, printed and acetone polished.

    Six sets of microswitches mounted and wired up to Teensy boards along with the OLED screens.

    Key-Henge. My acetone polishing rig. The felt is soaked with acetone and held to inside of glass bell with magnets.

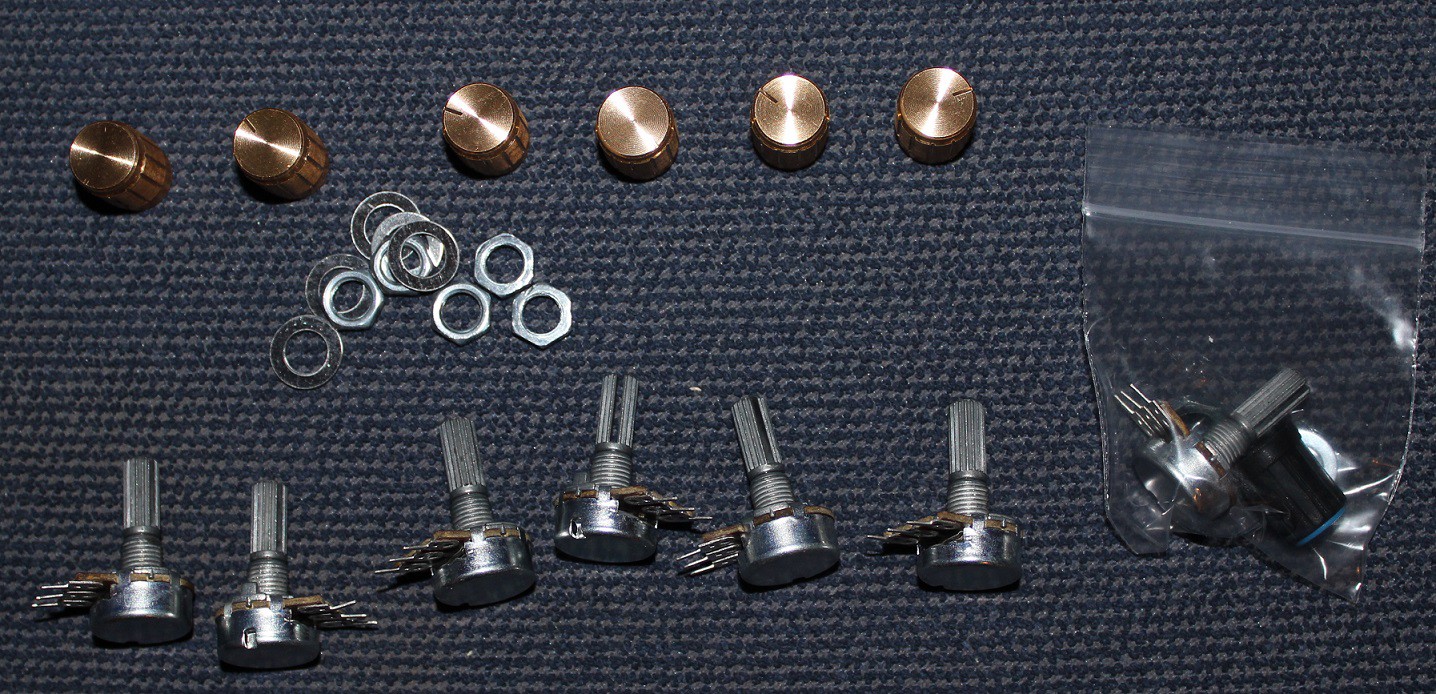
    Some nice potentiometers with gold anodized knobs.

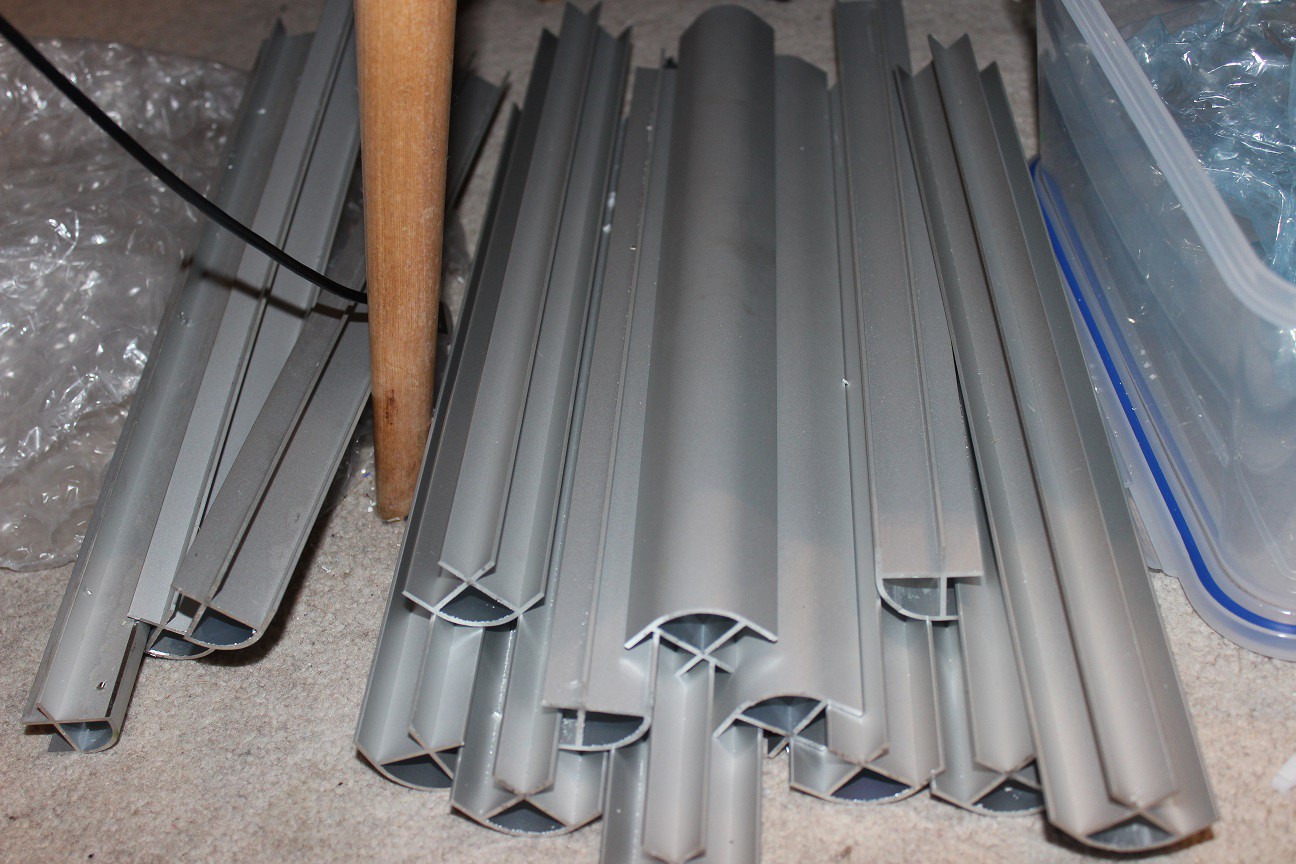
    Alloy extrusions all cut to length.

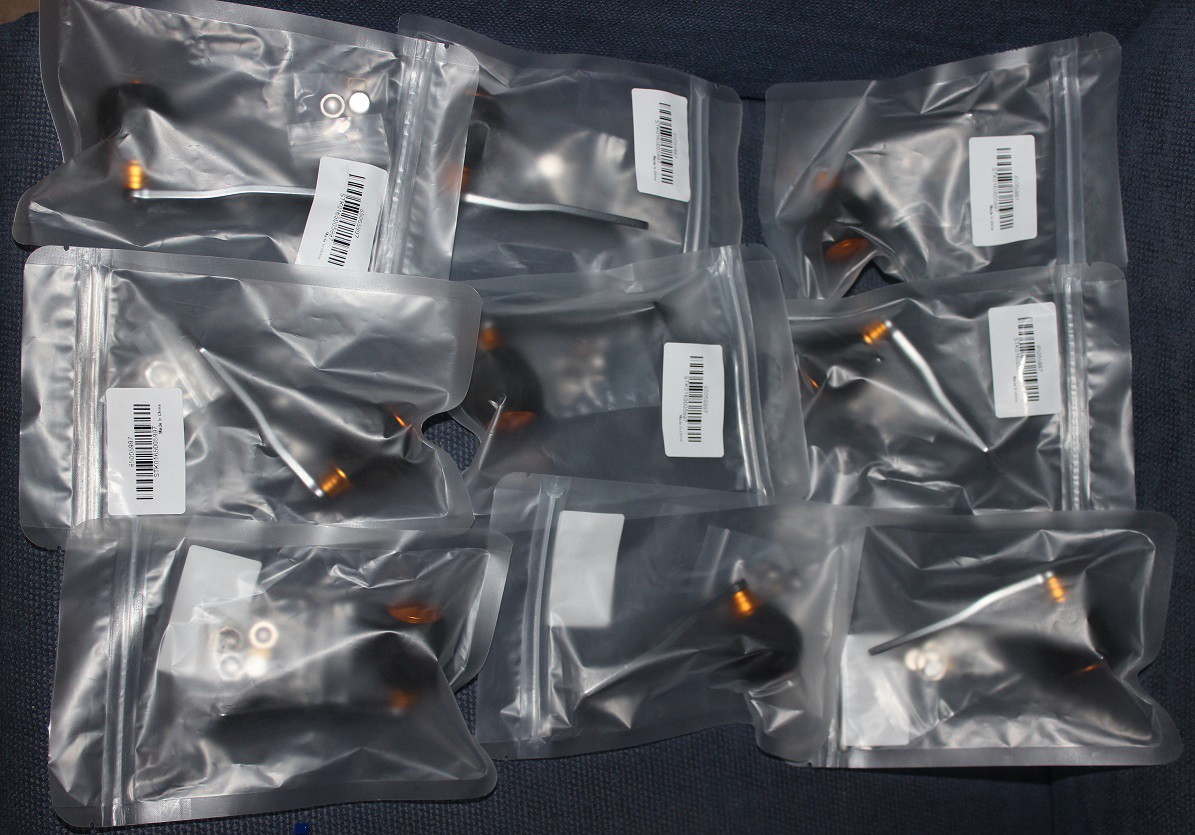
    Fishing reel handles from China.

    Better photo of the acetone polishing rig.

    Self contained crank module wiring now has multi-pin plug to connect it to main body of the DG.

    Bags and bags of 3D printed upper and lower keys, all of which are in the acetone polishing queue!

View all 20 project logs

  • 1
    Step 1

    The detailed build instructions have been uploaded as a .pdf in the uploaded files section.

    NOTE: 09/03/2020: The alloy channel is hard to get in the US however a reader has found this link to a store that WILL ship to the US:

    https://us-camperinteriors.glopalstore.com/products/17mm-radius-aluminium-camper-van-motorhome-furniture-corner-profile?_pos=2&_sid=d1b0b20d1&_ss=r&variant=5733713182748&fbclid=IwAR2sJTZZiJ0Q3Aa2qNHPDsxfWRudski_RyngcUXp0fKp1pCd1HYakyVVk0Y

    Meanwhile, the build instructions have been broken down into 2 parts: 

    a) Construction of the electronics and wiring loom and 

    b) Assembly of the aluminium extrusions and 3D printed parts.

    In the updates I have already included a video showing how to use the DigiGurdy from the visual viewpoint of a user (Project Log #6) and also a video showing how to use it with the attached FluidSynth mobile phone application (Project Log #7).

    I have provided a parts listing. However please look at the parts listing .pdf file in the uploaded files section which gives you a lot more details on each of the parts you need plus suggestions as to where to buy them from, i.e. the online search terms to use.

    Below I give you an updated video outlining all the main steps of the construction process.

View all instructions

Enjoy this project?

Share

Discussions

frank.s_68 wrote 02/01/2021 at 17:21 point

Hi John, I'm currently building one. Used parts of https://www.thingiverse.com/thing:4305281 which I've modified in a way that I couldhave printedthem on my 3D printer. Idea is now to cover up all with some nice wooden verneer which I have from previeous projects and add some metal weight (printed parts are a bit too light). What I'm missing are the soundfiles for FluidSynth. How can I get them ? Thanks and take care.

  Are you sure? yes | no

gpsqueeek wrote 10/05/2020 at 06:37 point

Hi John,

I'd be interested in getting one of your wondeful kits (either mounted or not). I sent you a couple of e-mails but they might be considered as SPAM by gmail ; or you might have other things to do, which is allright of course :-)

If you want to discuss switching to Teensy 4.1, I'd be happy to jump in, too !

Have a nice day and take care !

Squeeek

Edit : I got one ! I'm sooo happy ! I managed to make it run with my Linux Manjaro laptop, playing with QjackCtl and Qsynth (once I had paused PulseAudio at least)

Now it is time to learn how to actually play the gurdy... and also to tinker with the Teensy 3.5, I have a lot of ideas but I'll have to discuss this with the current users I think, to make things as good as possible !

  Are you sure? yes | no

XenonJohn wrote 06/18/2020 at 15:53 point
I will do. It needs a new construction manual though as a number of small changes. I am about halfway through creating it !

  Are you sure? yes | no

jose miguel wrote 06/18/2020 at 13:24 point

Hi John,

Could you please inform if files regarding version 5, PCB, modified front plate to access Teensy and new Teensy cover will be updated in files section?

  Are you sure? yes | no

subi wrote 03/09/2020 at 14:55 point

Hi John,

thank you for sharing your great project!
I've just ordered lot's of parts from UK and China and will try to build a digi gurdy with crank.
I'm a bagpipes and hurdy-gurdy player myself. This one would be a nice addition.

On the "Shopping List" I cant find a Potentiometer. Does any Poti with a Knob will do?

  Are you sure? yes | no

subi wrote 03/10/2020 at 14:04 point

Ups, I found the answer myself in your wiring Plan, sorry!  10k Ohm, 3,3V.

  Are you sure? yes | no

subi wrote 03/12/2020 at 15:51 point

I did it. I have ordered ALL Parts!
I'm from Austria and have ordered in UK (alloys), China (lots of Parts/ebay) and Amazon(de).

Thew new rectangular alloys I have not found anywhere except UK, but those are to expensive with the shipment cost, in my opinion. I will print them.

In total, Parts+shipment Costs are about € 212. Some items's include several pieces of the needed Part, means, spare Parts.

Right now I am thinking of printing all Alloy parts, even the ones I got from uk already (corner alloys). Why? Because i have no clue on how to cut them. Especially the long cut to fit the keys.

Delivery times from China are up to May, so enough time to print all parts.


My most concern at first was, that the lasercut acryl glass will get very expensiv. I found a company who cut's all 5 parts in Germany. White Acryl glass - 64 € including shipment cost. Don't know if that is expensive or not but it was the cheapest I found.

Edit: Forgot the Display, i have that already at Home so it was not within my calculation.

  Are you sure? yes | no

subi wrote 03/18/2020 at 15:38 point

I've got now all "not from China" Parts. Currently printing the third "alloy" channel. Had to fight with warping of such big parts but it seems to be fine now. Cant wait till i have everything from china to proceed.

  Are you sure? yes | no

Michael N wrote 03/23/2020 at 18:45 point

Hi subi,
would you share the company for the laser cuts? I'm from Germany, too ...
I asume, you will find the rectangular alloy profile in almost every German "Baumarkt". I haven't checked, but I remember a good variety from my last visit, when I loocked for the curved profile, based on the building description of the last version ...

Cheers
Michael

  Are you sure? yes | no

subi wrote 03/24/2020 at 13:28 point

I've sent you a PM with details.

  Are you sure? yes | no

Michael N wrote 03/03/2020 at 10:34 point

One more suggestion/question:

Would it be possible to read the crank signals of the trumpet to analyze/train ones coup playing precision, much like it is possible on the MidiGurdy of Marcus Weseloh?

See: https://www.youtube.com/watch?v=o-ZF2Ck1sW4

I would appreciate this kind of "biofeedback" training possibility very much, but I will not be able to program it myself, I'm afraid ...

  Are you sure? yes | no

Michael N wrote 03/03/2020 at 10:28 point

I love this project.

One thought: since many people have spare smartphones around, I thought it might be interesting to integrate a custom made smart phone holder underneath the gurdy in a way, so that the smartphone is positioned in a kind of drawer, so that it can be drawn or flipped out, when access is needed.
If, like me, a spare smartphone is available, one would not even need to take it out, if a usb-socket for charging would be part of the body.
Advantage would be that the cable connection would be more stable. So, it even makes sense, if you just connect your phone for playing and take it out afterwards. The drawer could even contain an audio jack inside which would connect to an external jack socket for connecting headphones or an amplifier directly to the gurdy body...
The drawer could be made in a way, so that a wider variety of phones can be used.

  Are you sure? yes | no

Christopher Baker wrote 01/24/2020 at 03:55 point

Is there any plans to sell these fully constructed?

  Are you sure? yes | no

XenonJohn wrote 01/31/2020 at 00:43 point
I have made 6 so far. Small improvements based on feedback as you can see. I have been asked for many more, which would take a very long time to construct as this is not my regular job after all. Working on ways to shorten the construction time at present to make this more feasible. Blown away to be honest by the amount of interest.

  Are you sure? yes | no

Michael N wrote 03/02/2020 at 17:17 point

Thank you for your amazing work. I have seen your New DG Design video of today on Youtube. It looks amazing. Will you release this design as part of this project? I started ordering electronic and mechanical parts, but haven't been printing or lasercutting the pieces, so I might better wait ...
Thank you so much. Great project.

  Are you sure? yes | no

llwy wrote 09/21/2019 at 16:29 point

Great work!

I checked your program. So you dropped the optical encoder and reverted to reading directly the voltage out of the motor?

One stupid question: at which point is the usbMIDI object created? I did not find any #include statement related to it and I could not find its initialization in the code.

Keep up the great work!

  Are you sure? yes | no

XenonJohn wrote 09/21/2019 at 22:36 point
I think the answer to the coding question is that the Arduino Teensy series have MIDI driver software built in which makes life much simpler when trying to get it all to work. The page to look at, with code examples, is this one:  https://www.pjrc.com/teensy/td_midi.html

They cost a little more than than the regular Arduino Uno/Mega boards, but having the built in MIDI functionality is worth it. They are around £30 i.e. about $30 if you shop around online - see how I devalued the UK pound there!

I am always looking at ways to keep the build as (relatively) straightforward as possible, in case I ever sell a few ready built or as kits. For example repurposing the keys to select options in menus saves me having to add lots of buttons and switches (inspired by my Sinclair ZX81 computer in the 80's which had up to 5 function options on a single key). The analog crank approach actually worked pretty well when I tested out the idea, having originally started off with an optical encoder setup. More testing required but at the moment it seems to be OK. A removable plug in crank module might be a good thing as people could mail them back to me when they break, while the keybox would still remains playable! The gearmotors are as low as £4 if you buy from China so semi-disposable.

To reduce the large mass of 3D printing involved I am experimenting right now with laser cut ply panels front and rear, which would then just leave 3D printed end structures plus the keys. I am keeping the alloy channels as they just make it look so nice. Update on this in 1 to 2 weeks.

  Are you sure? yes | no

llwy wrote 09/22/2019 at 10:33 point

Dear John, 

Thank you for the explanation. I was trying to test your code with a reduced number of button on an Arduino Pro Micro: I did not realize that the teensy came with its own specific libraries.

I'll order a teensy to test the functionalities.

Best,

Louis

  Are you sure? yes | no

XenonJohn wrote 07/21/2019 at 17:10 point
Bear in mind that there is a learning curve with 3D printers and it is worth printing a few things that do not matter to you very much just so you become familiar with your particular machine. One or two of the very low cost ones out there are now pretty good.

  Are you sure? yes | no

Jack Walsh wrote 07/21/2019 at 16:01 point

I was just putting together the main body of my digi-gurdy and noticed that there are apparently new print files for redesigned parts.  When will these be released?  I'm willing to start over!!  I particularly like the new key design -- the screws through the keys always seemed unworthy.  Thanks for all your work!!!!!

  Are you sure? yes | no

XenonJohn wrote 07/21/2019 at 17:08 point
If you can wait a few weeks I will soon have a lot more free time to really finish this off. On expert advice (Nigel Eaton) I have been encouraged to really try to get a working crank handle simulator completed as part of this project. This will mean the 3D files might change yet again. Crank work will be feature of next update, more parts on order right now.

  Are you sure? yes | no

Jack Walsh wrote 07/22/2019 at 14:38 point

Yay!!  Gives me some time to practice with just the keys!!!

  Are you sure? yes | no

Shannon wrote 07/05/2019 at 17:53 point

This project might well be the one that makes me buy a 3D printer. I'd still save money over buying an acoustic hurdy gurdy.

  Are you sure? yes | no

Similar Projects

Does this project spark your interest?

Become a member to follow this project and never miss any updates