 Kaushlesh C. ( KD9VFU )
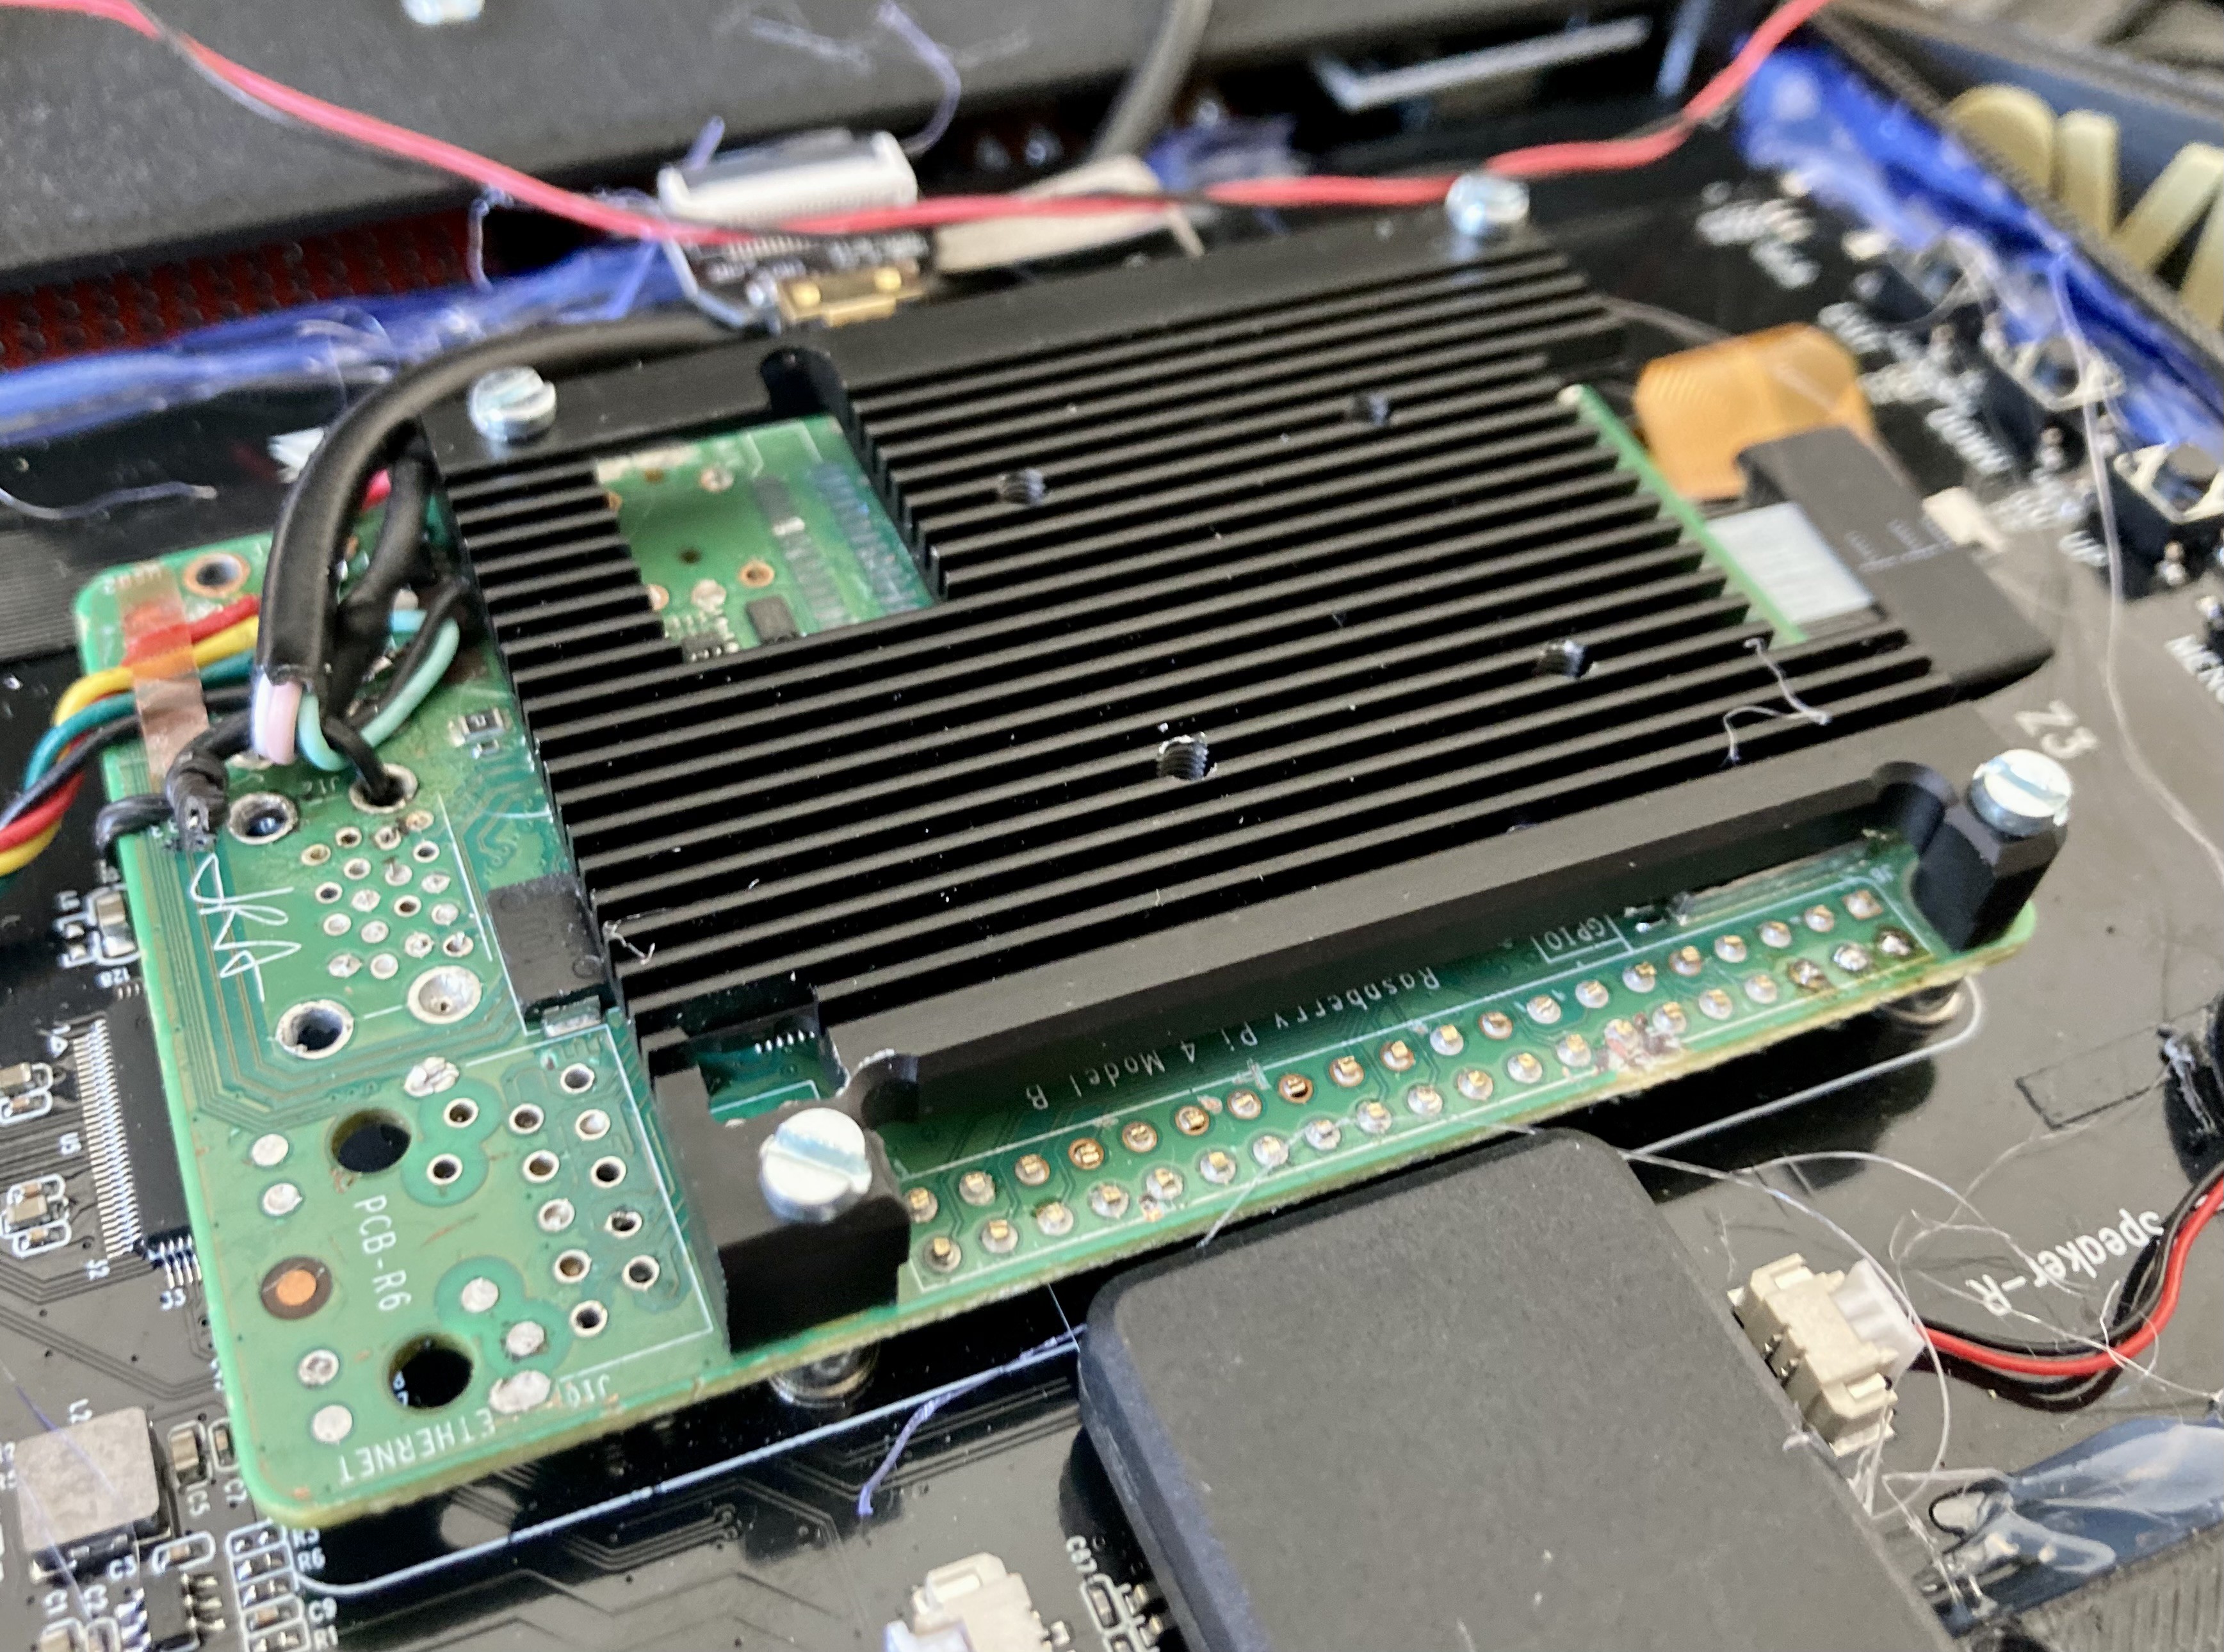
The current model is assembled from readily available components. The ultimate aim is to design a single, integrated PCB featuring all essential parts and connectors. This streamlined approach will result in a more compact, durable, and easy-to-service device. The build requires a Raspberry Pi, potentially a compute module, a battery, and a 3D-printed enclosure for the device.
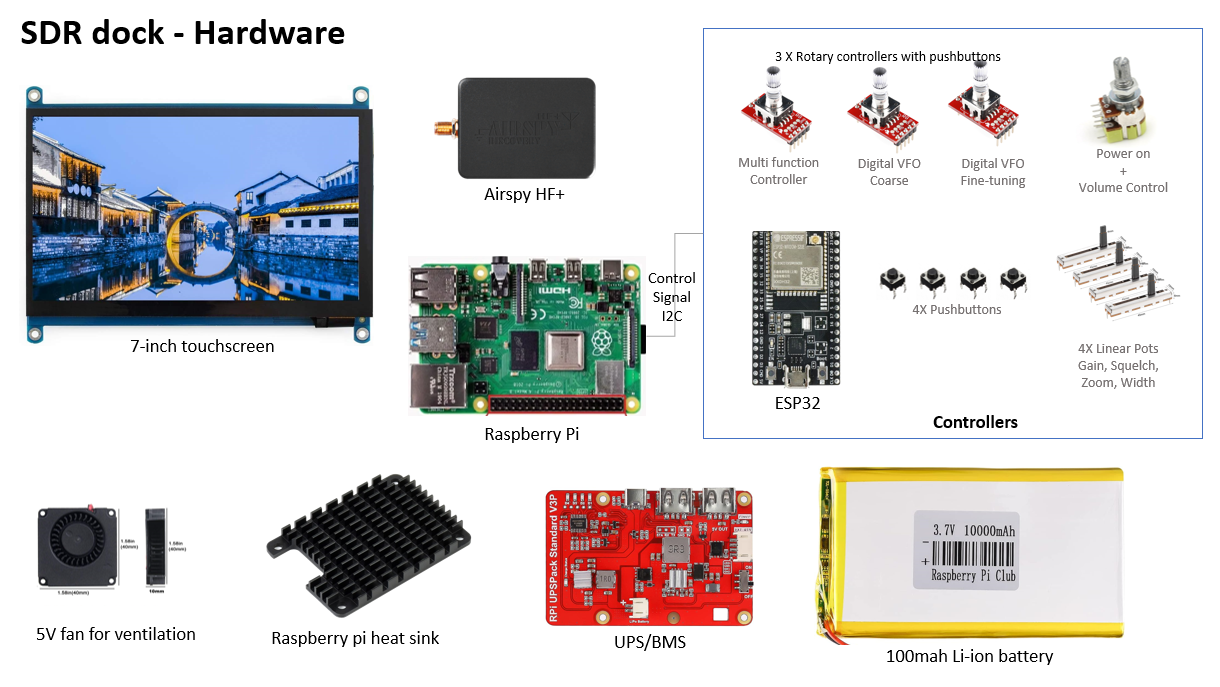
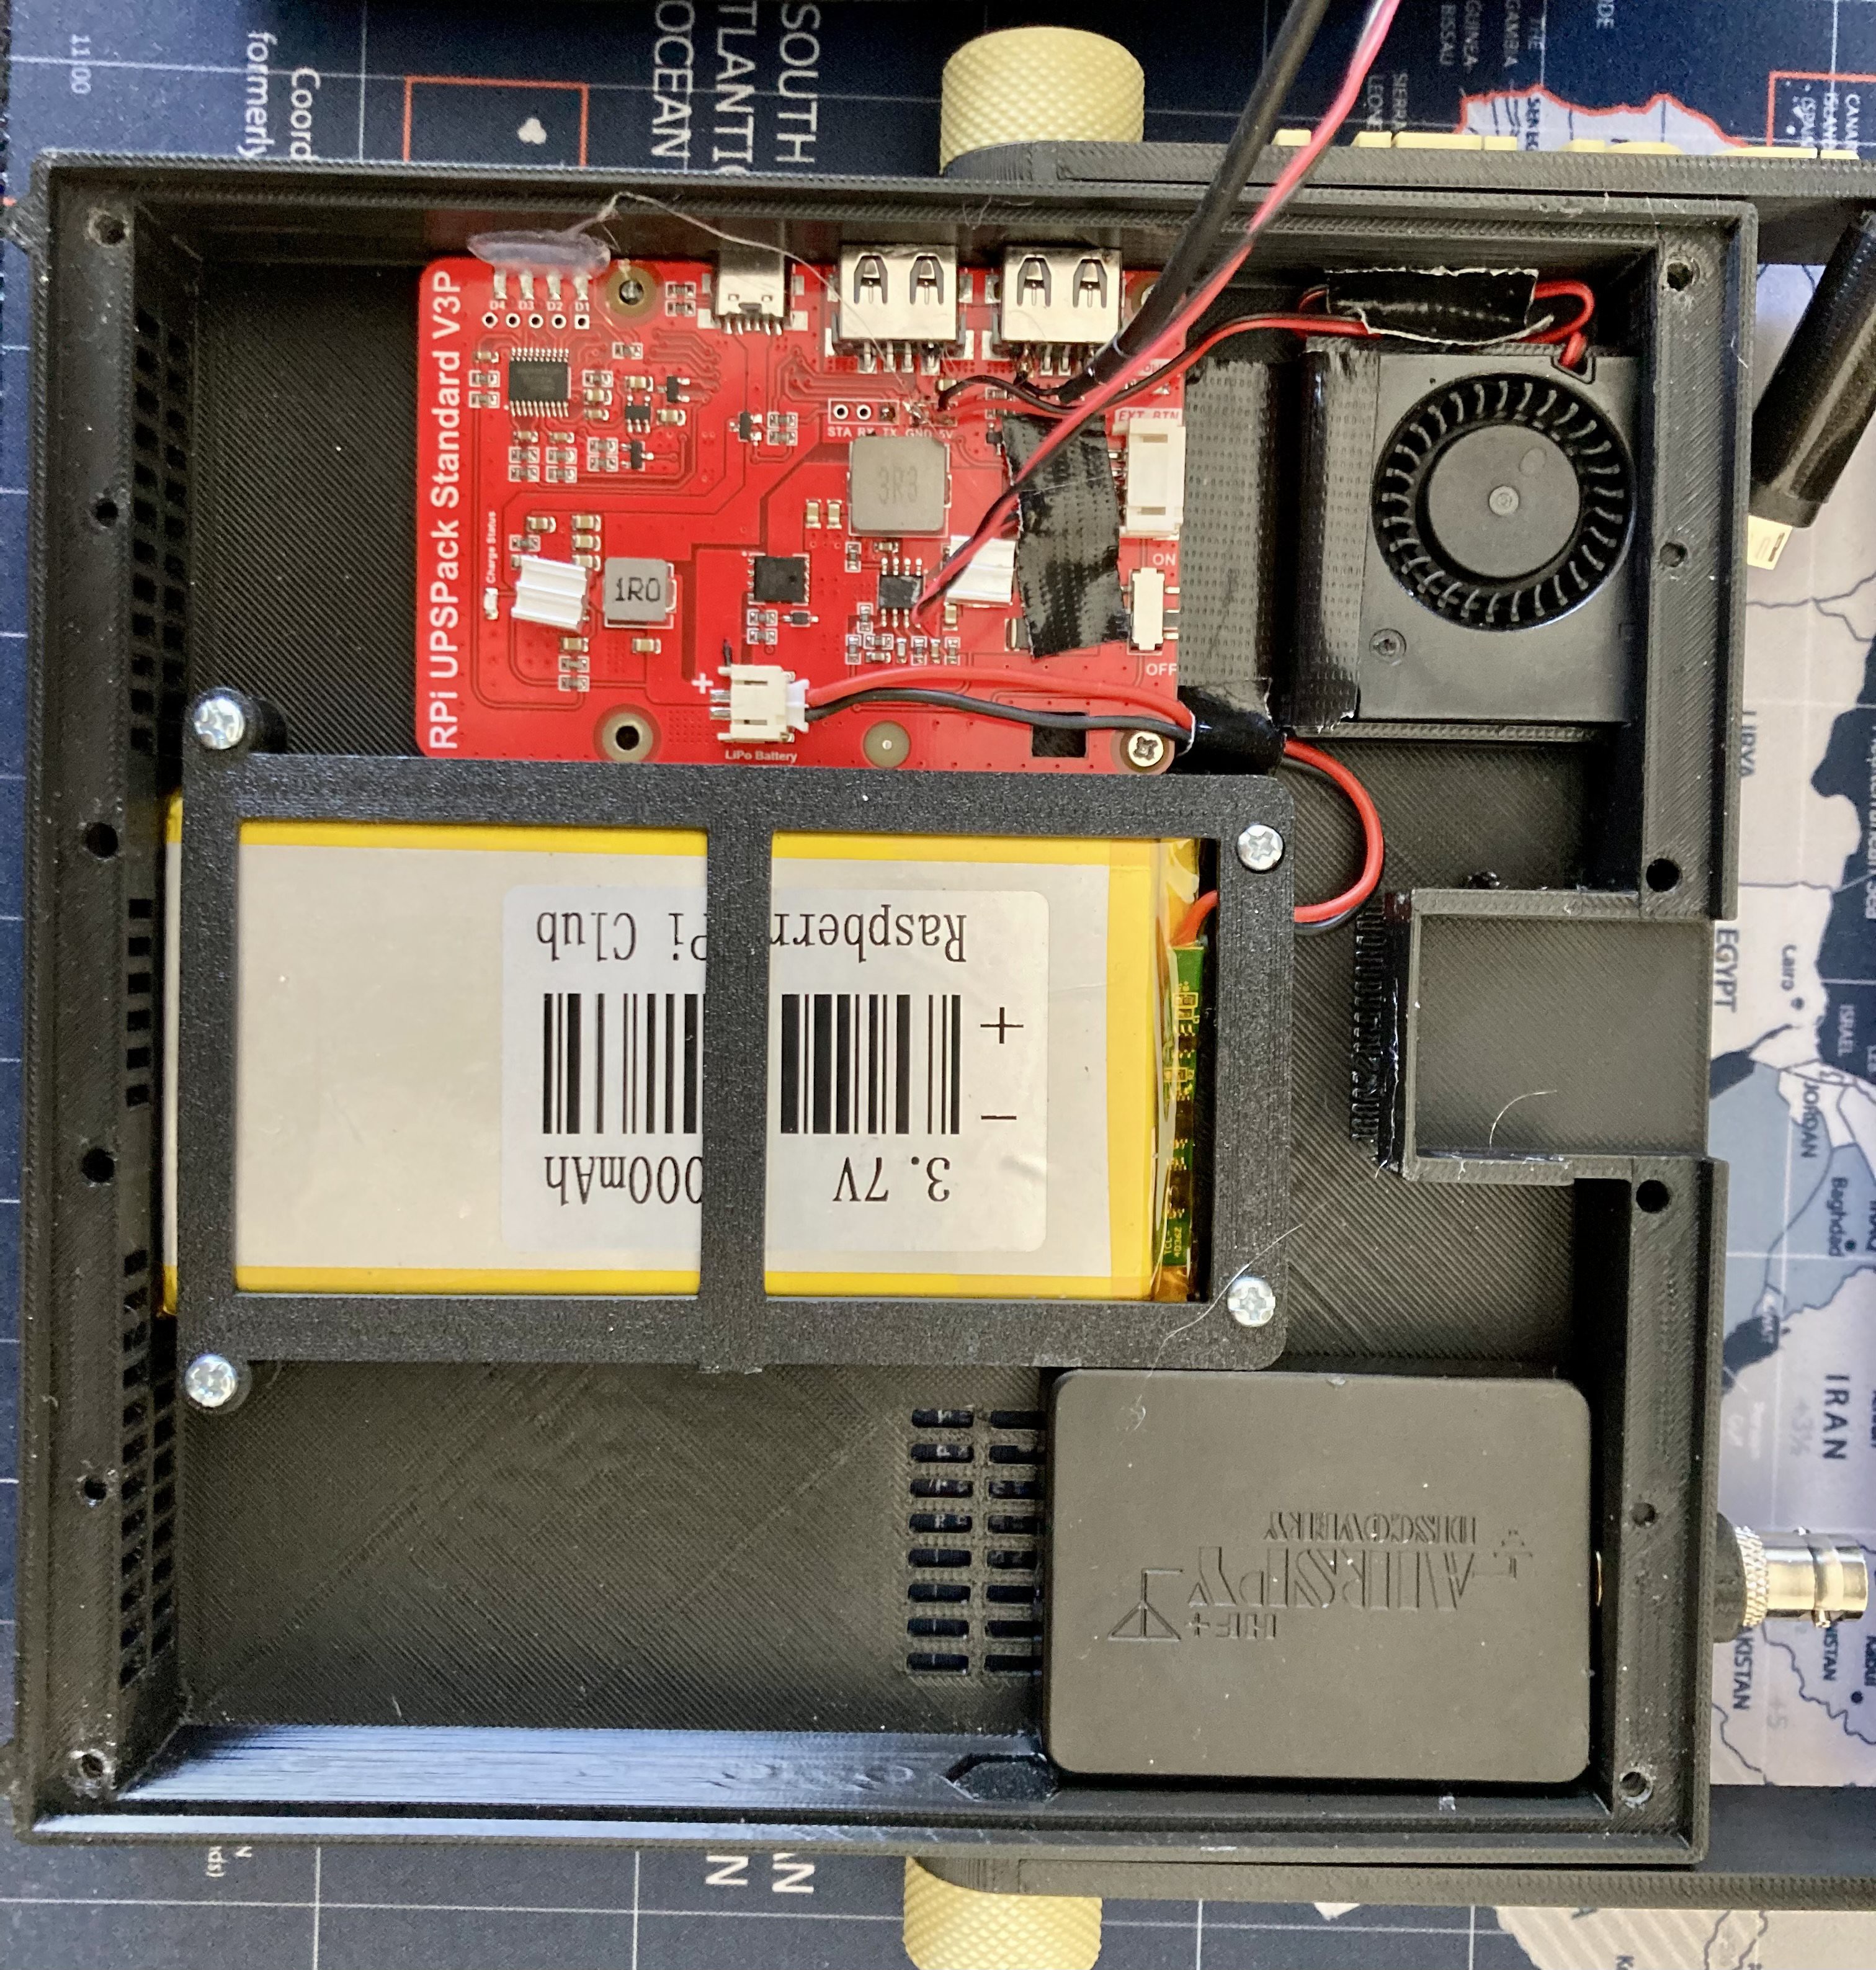
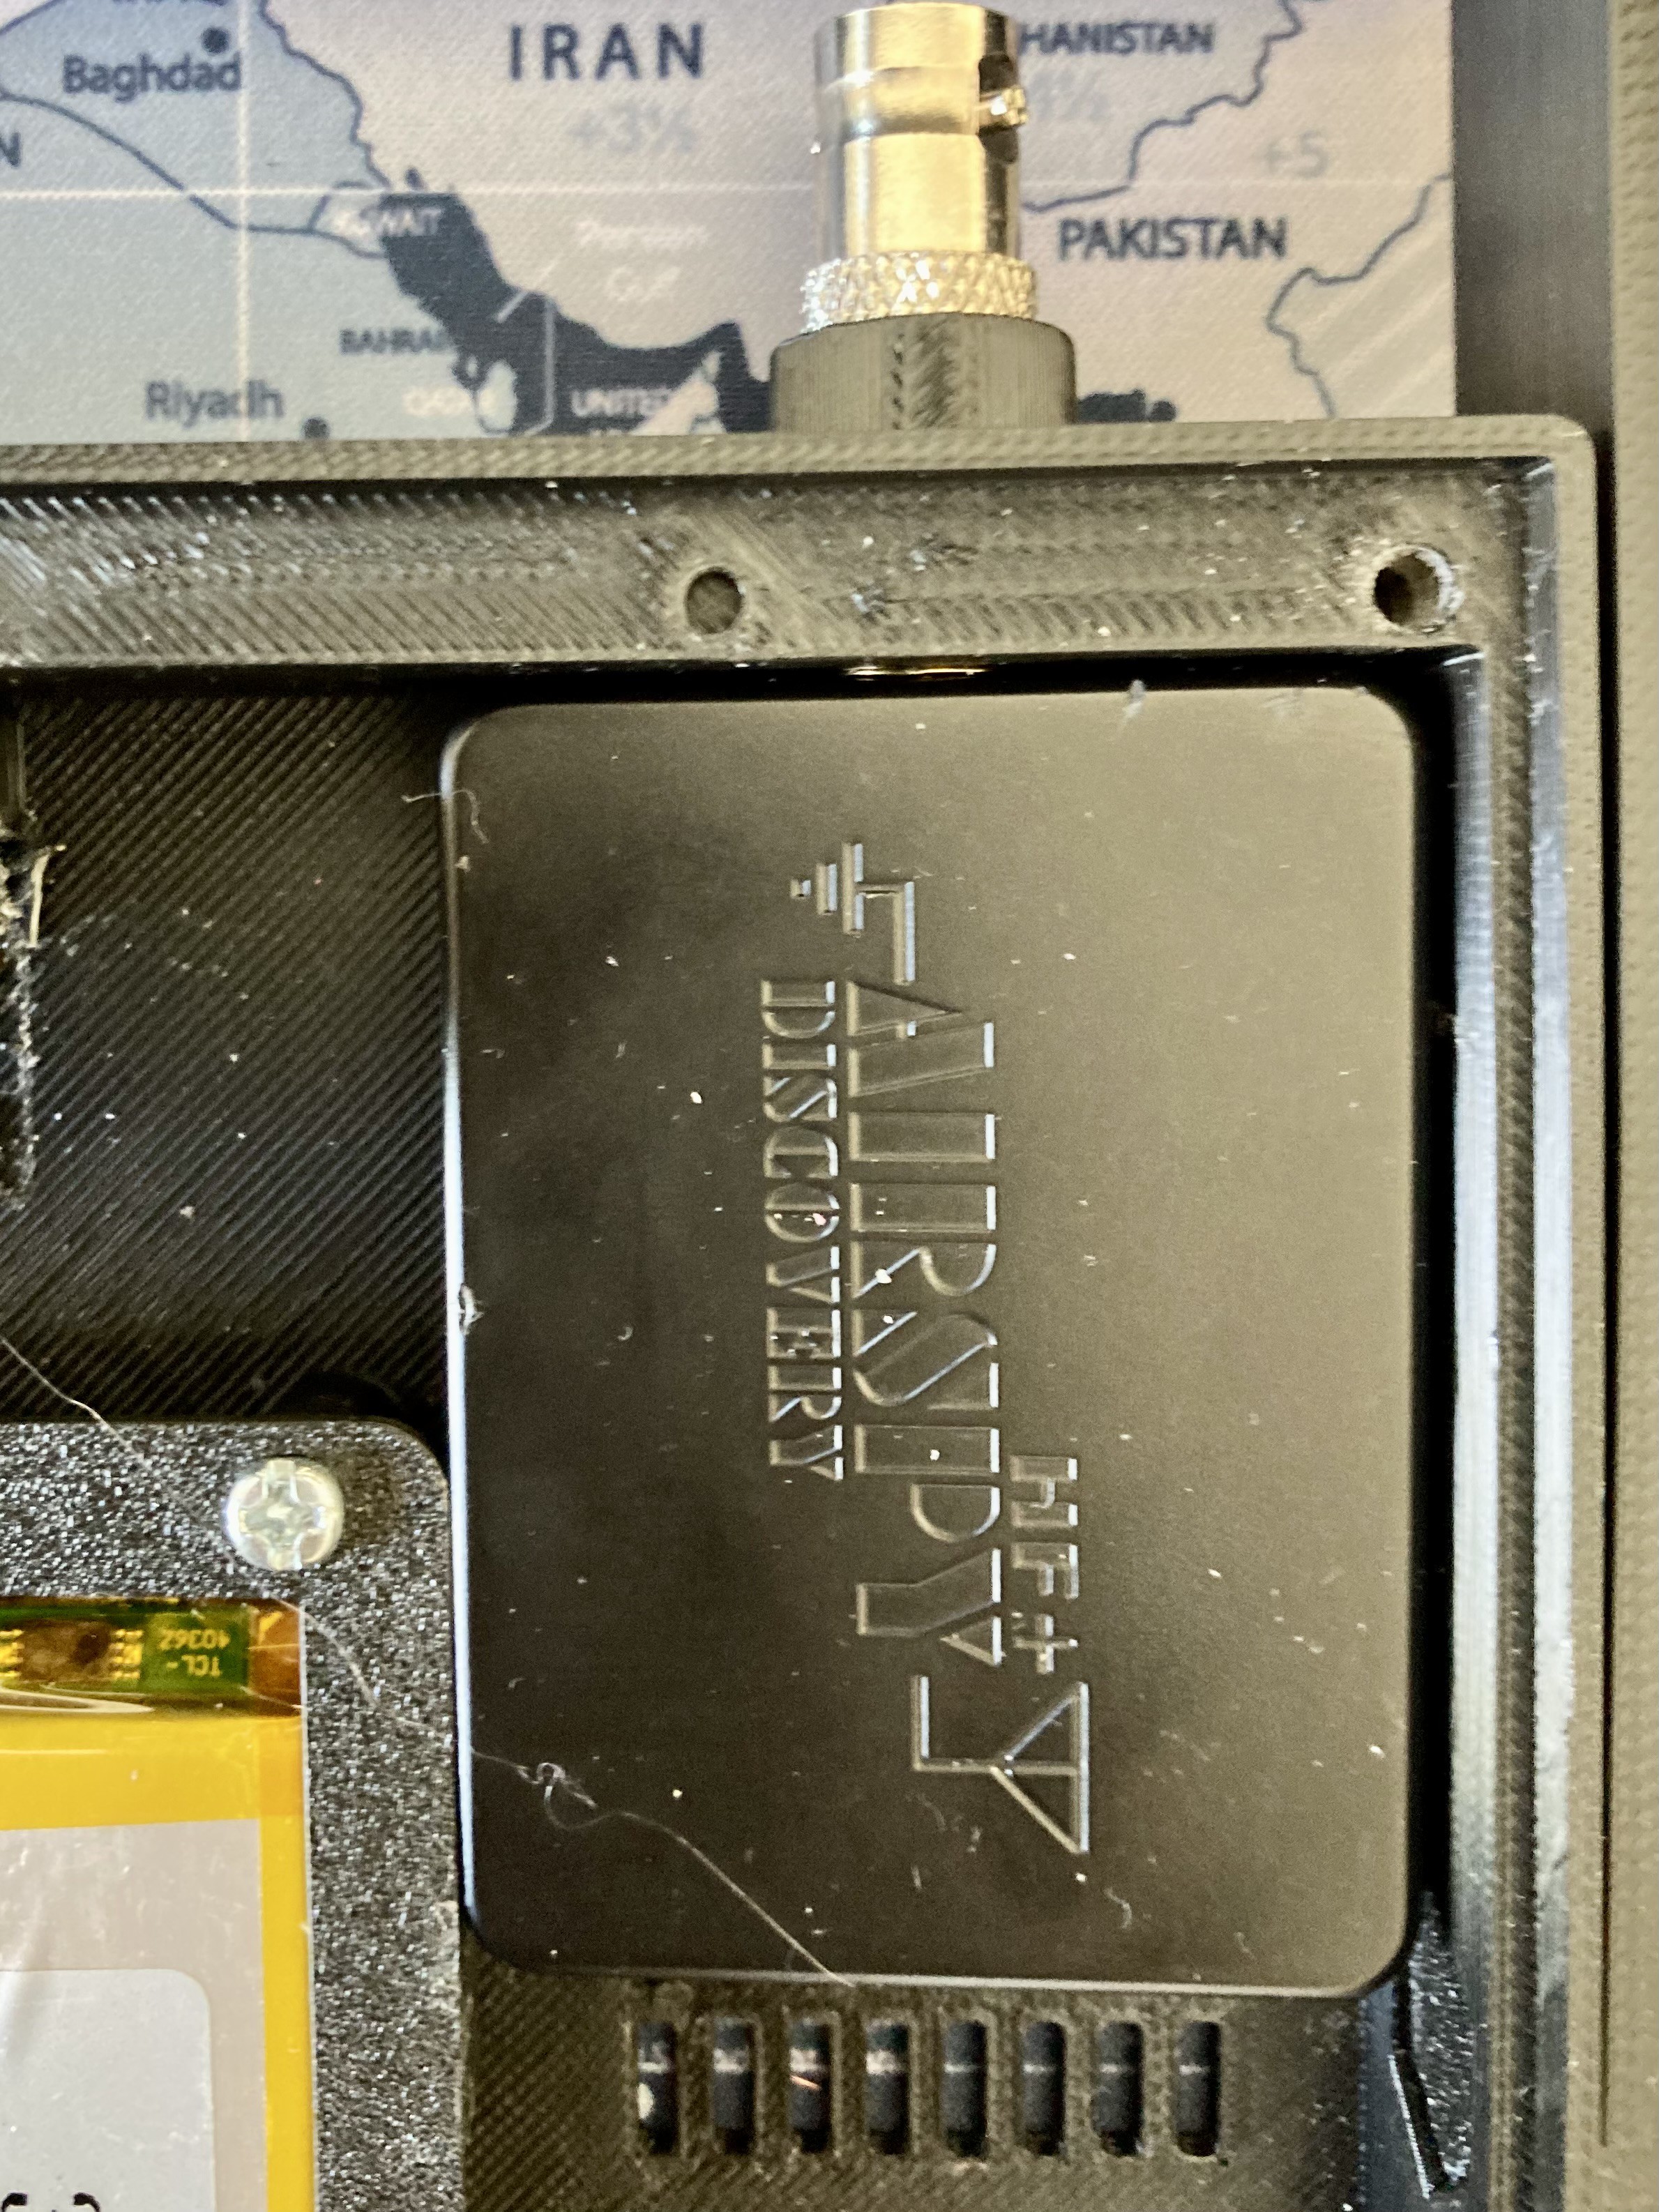
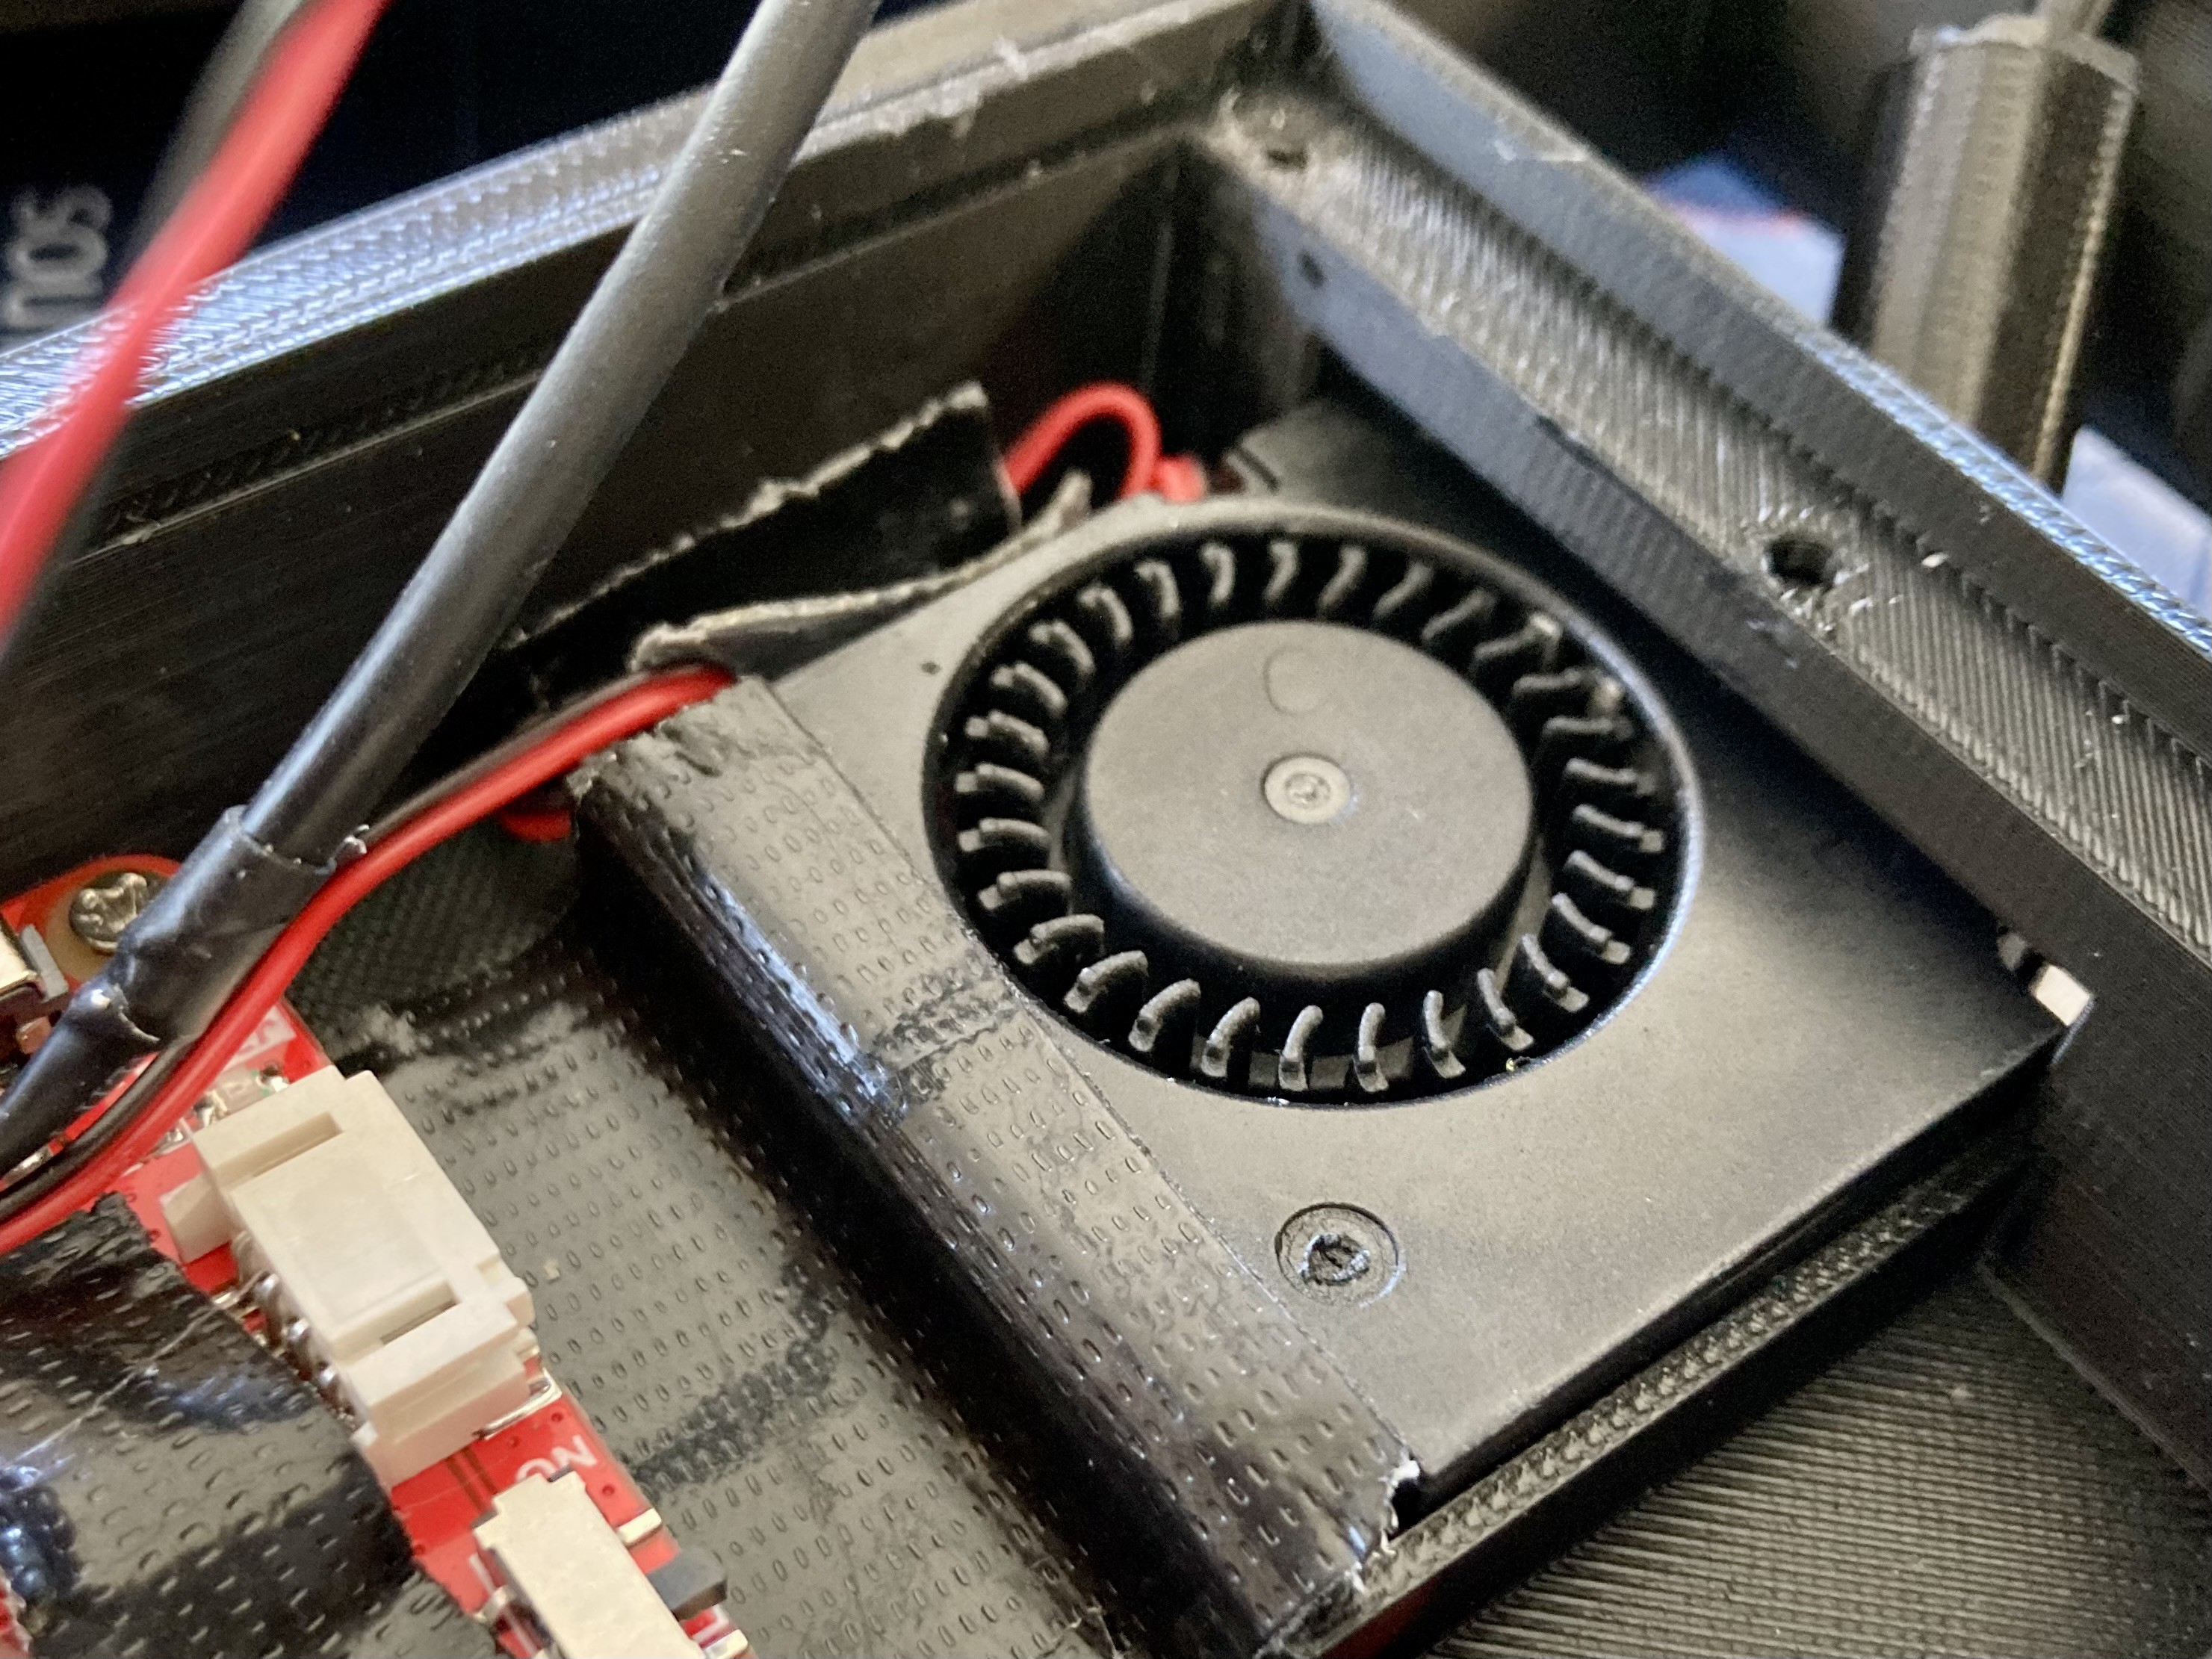
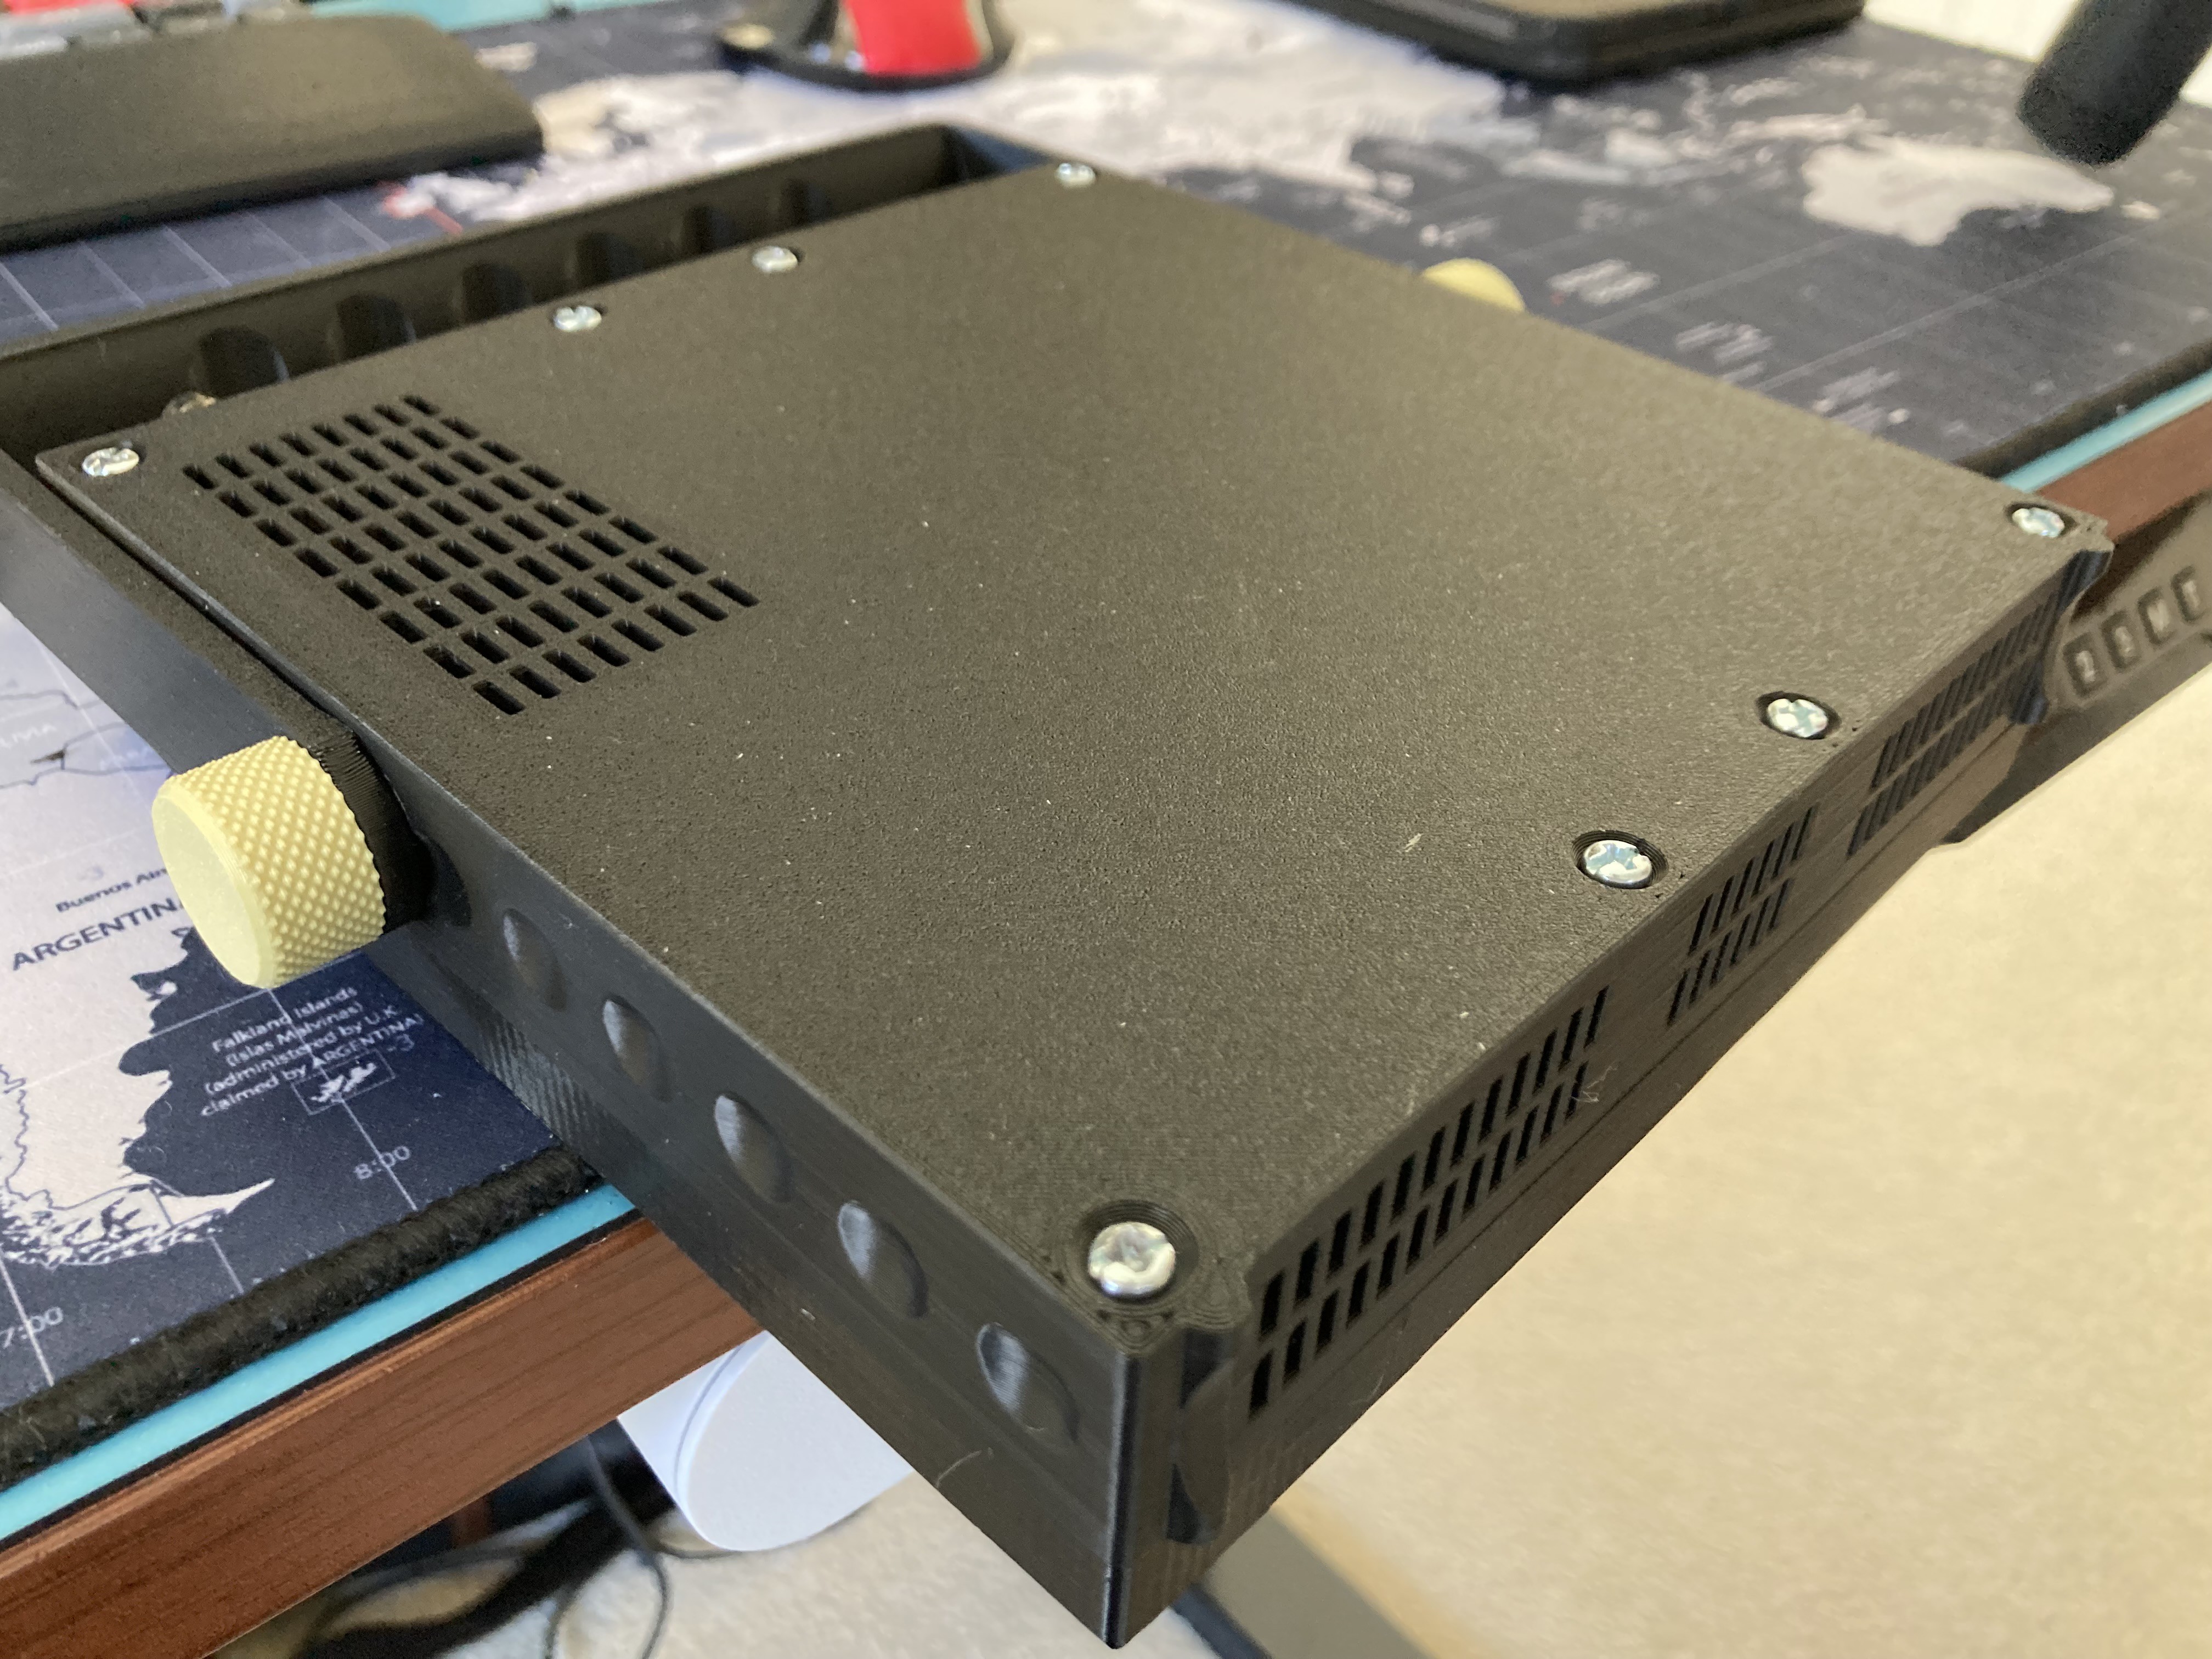
HARDWARE: The build checklist comprises all essential components. Additionally, you will need a 3D-printed case, epoxy glue, and some screws. All these items can be conveniently purchased from Amazon or similar platforms. Compatibility with various SDR dongles like RTL-SDR and Airspy Mini has been verified to fit within the enclosure.
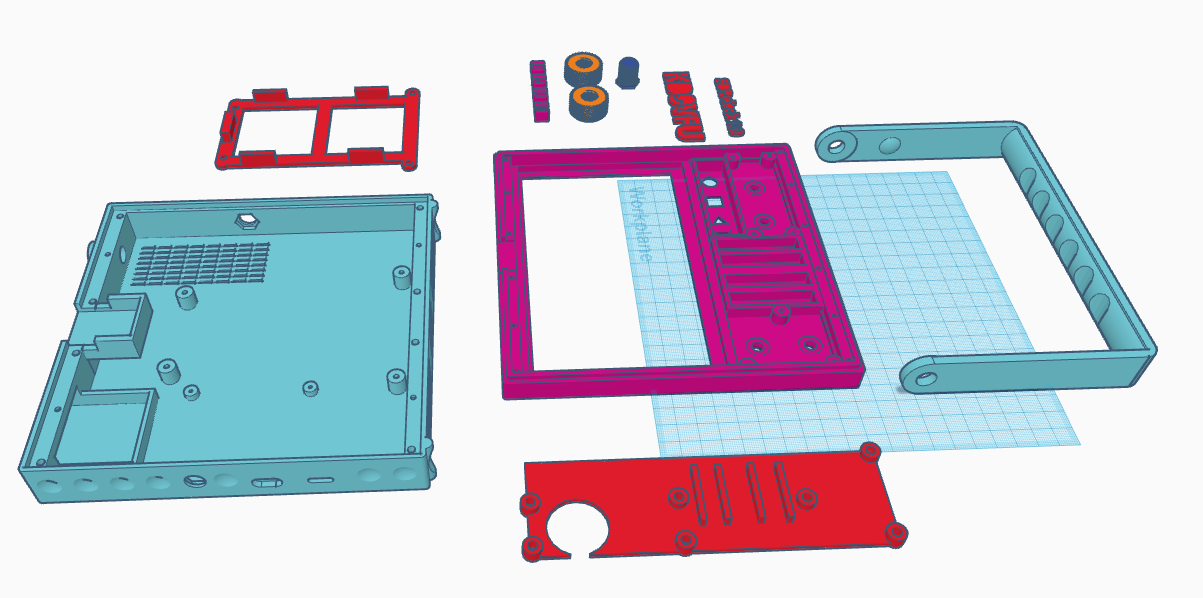
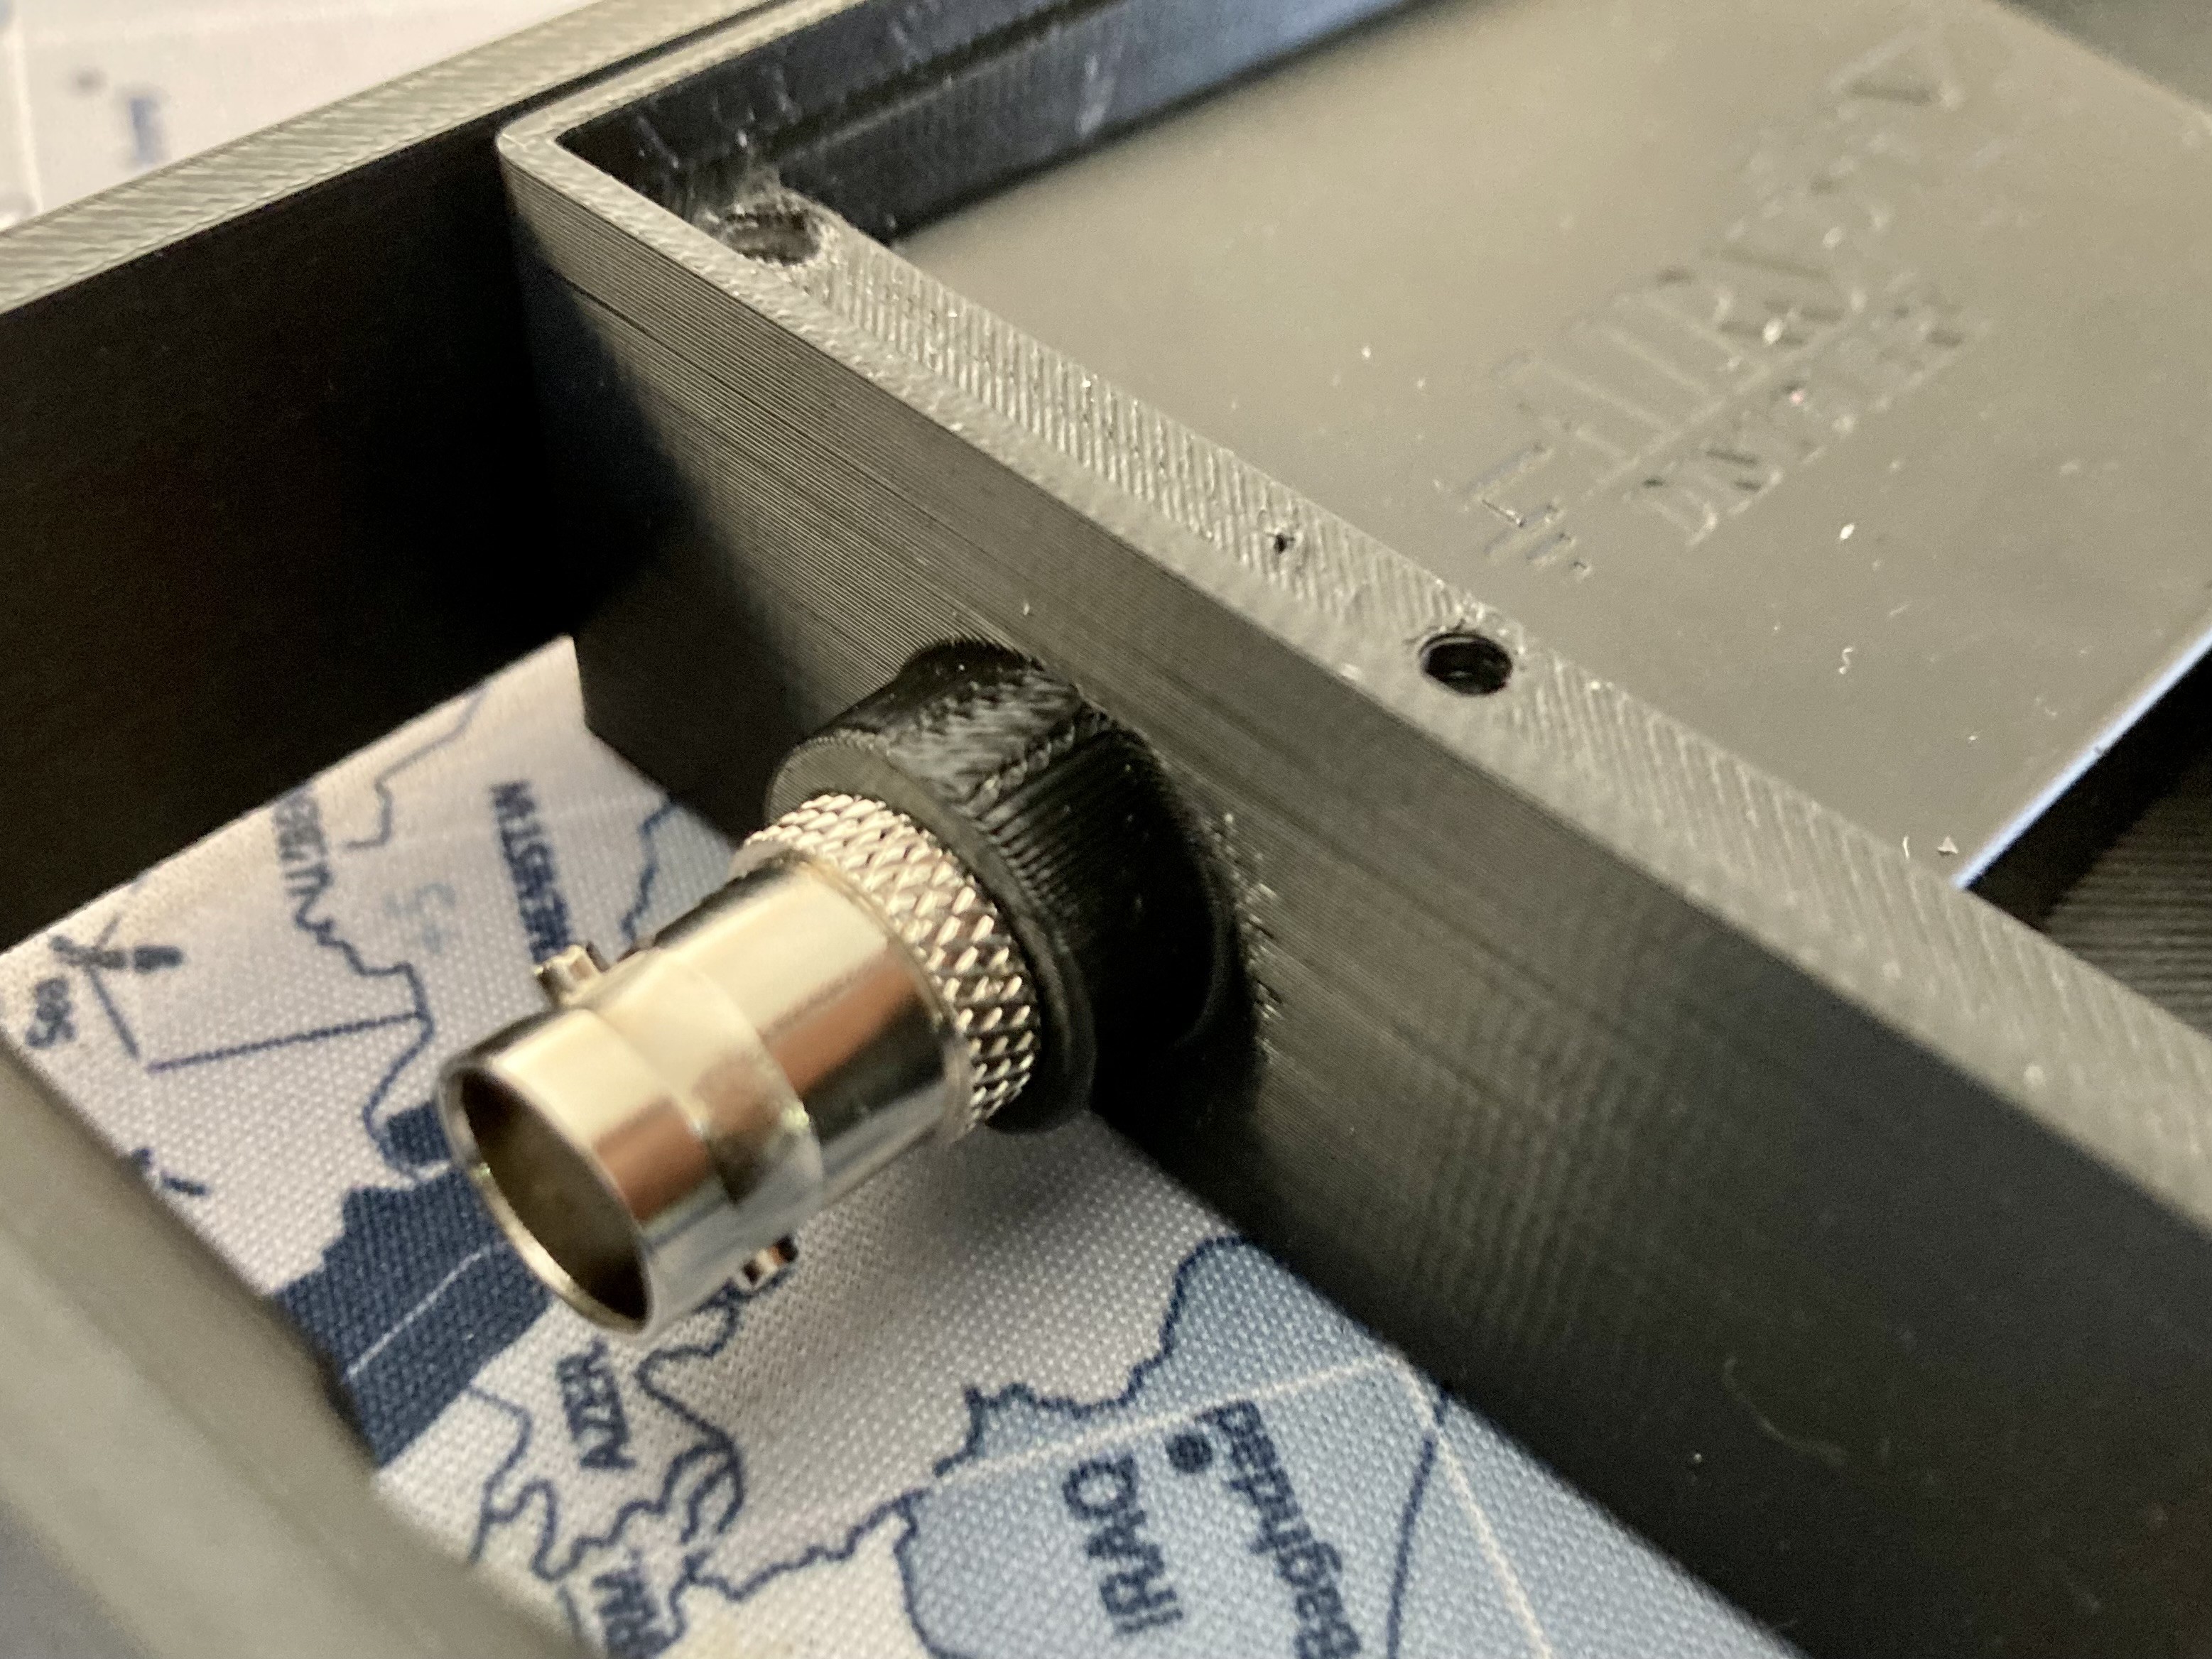
ENCLOSURE: The shell design is 3D-printable and requires just a few screws for assembly. The STL files for the project will be made available. Currently, the design is undergoing refinements, particularly to accommodate an antenna within the handle. Updates will be shared as they become available.
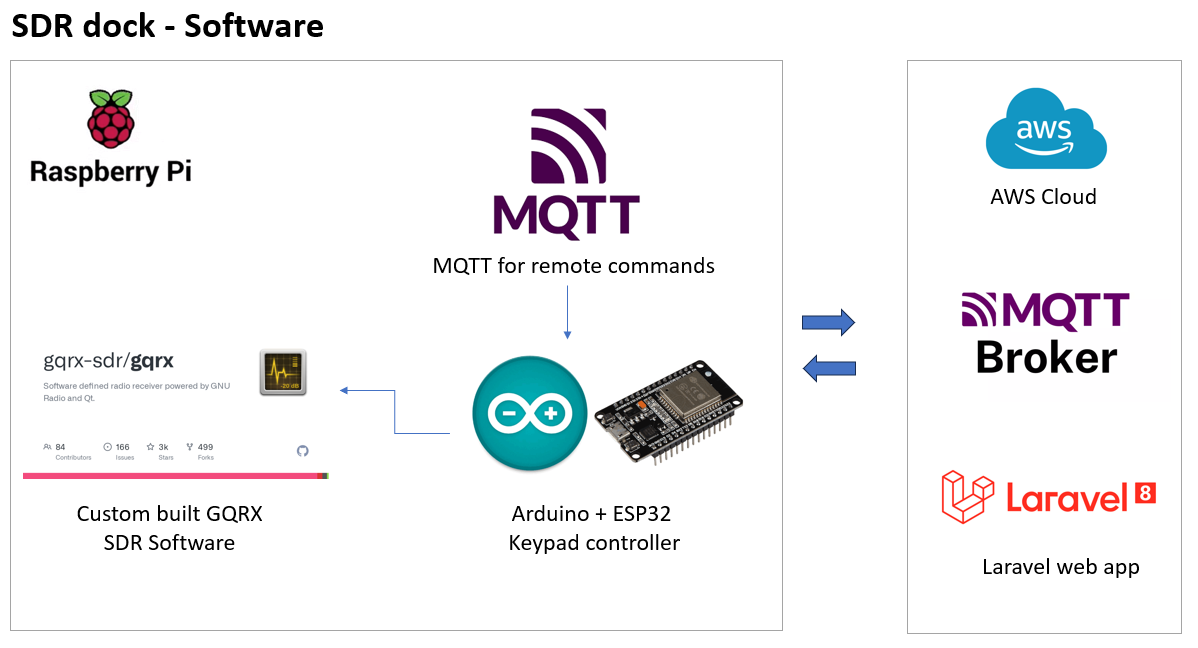
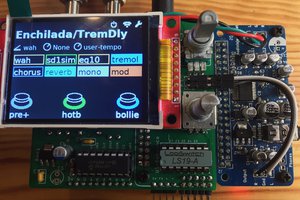
SOFTWARE : The software architecture is Raspberry Pi-based and either requires a customized GQRX build or a plugin capable of converting custom controllers, such as VFO sliders, into GQRX-compatible commands.
At the moment, three control options are under consideration: emulated keyboard inputs, rig control features, or a dedicated firmware or plugin. The selection will be based on compatibility and ease of customization with SDR software.
CLOUD: An optional feature allows for remote SDR control via cloud computing. It enables scheduled audio recording on specific frequencies, offering an efficient way to gather all the audio data you require. As a software enthusiast, I'll be adding cloud-based audio recording features to the interface.
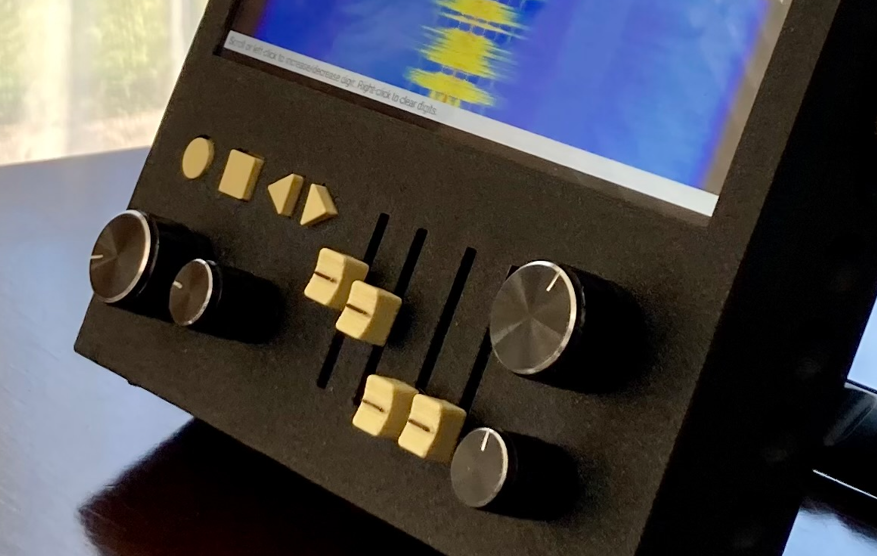
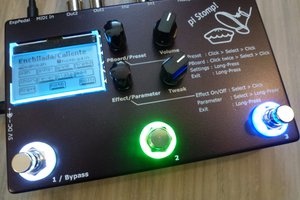
What distinguishes SDRDock is its tactile interface, complete with knobs and buttons that add a tangible element to the experience. It evokes the nostalgic joy of tuning an old radio to discover a hidden station, or the satisfaction of precisely dialing into a frequency. SDRDock aspires to resurrect these tactile joys in today's digital landscape, transforming the often-complicated task of adjusting SDR settings into a simple and engaging activity.
So, if you're intrigued by the expansive world of radio frequencies, SDRDock could be your ideal companion. It's not merely about tuning into frequencies; it's about transforming the radio spectrum into your personal interactive playground.


 Dmitry
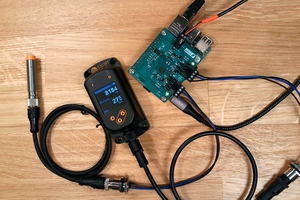
 Andreas Lau
SDRDock sounds like an exciting innovation for the software-defined radio (SDR) community, combining the power of SDR technology with user-friendly features. Here are some key points that highlight its unique features and benefits:
Integration of Essential Hardware Components: Integrating essential SDR hardware components onto a single PCB simplifies the setup process, reducing the complexity of connecting multiple components. This is especially valuable for beginners looking to get started with SDR technology.
https://www.usaudiovisuals.pk/
Raspberry Pi Platform: Utilizing the Raspberry Pi platform ensures compatibility with a wide range of software and provides a familiar environment for both hobbyists and professionals. It also opens up possibilities for customizations and software development.
3D-Printable Enclosures: The option for 3D-printable enclosures adds a level of customization and flexibility. Users can design and print enclosures tailored to their specific needs, making SDRDock adaptable to various use cases and environments.
Compatibility with Various SDR Dongles: Supporting multiple SDR dongles enhances the device's versatility. Users can choose from different SDR dongles to suit their specific frequency range and performance requirements.
Tactile Interface: The inclusion of user-friendly knobs and buttons is a significant advantage. It simplifies the interaction with SDR software, making tasks like tuning and adjusting parameters more intuitive and enjoyable.
Accessibility for All Skill Levels: Whether you're a beginner looking to explore the world of SDR or a professional with specific needs, SDRDock caters to a broad audience. Its user-friendly interface and versatility make it accessible to users with varying levels of expertise.
Engaging Experience: By turning complex SDR tasks into an engaging experience, SDRDock encourages exploration and experimentation in the radio spectrum. This could spark creativity and innovation within the SDR community.
Overall, SDRDock seems like a promising addition to the SDR landscape, offering a user-friendly and adaptable solution for SDR enthusiasts and professionals alike. It has the potential to make SDR technology more accessible and enjoyable while supporting a wide range of applications, from radio hobbyists to research and development projects.