Close
0%
0%

The X-PC

Old laptops reconfigured into new computers for schools.

Similar projects worth following
All updates for this project are now posted here:
https://hackaday.io/project/185851-the-x-pc-hackaday-prize-2022-entry

I work in the technology department in a school, where we use a lot of laptops (HP 6730s) for our CAD work.
Unfortunately they get a lot of abuse and so I ended up with a stack of broken laptops destined for the bin. The main problem I was facing was keys going missing from the keyboards. These have already been replace in the past, but it doesn't take long for keys to get picked off again, so just replacing the keyboards wasn't the solution.
The power supplies are also an issue, they get broken or go missing. These have also been replaced but again this wasn't a long term solution.
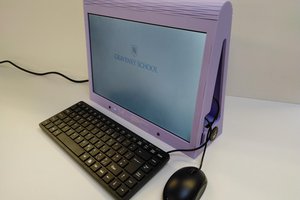
I wanted to reconfigure these laptops into something better suited for use in a school. So I created the X-PC.
Why X-PC? Just because they are ex Windows - pc's - I've also removed Windows and installed Linux (more on that in another post).

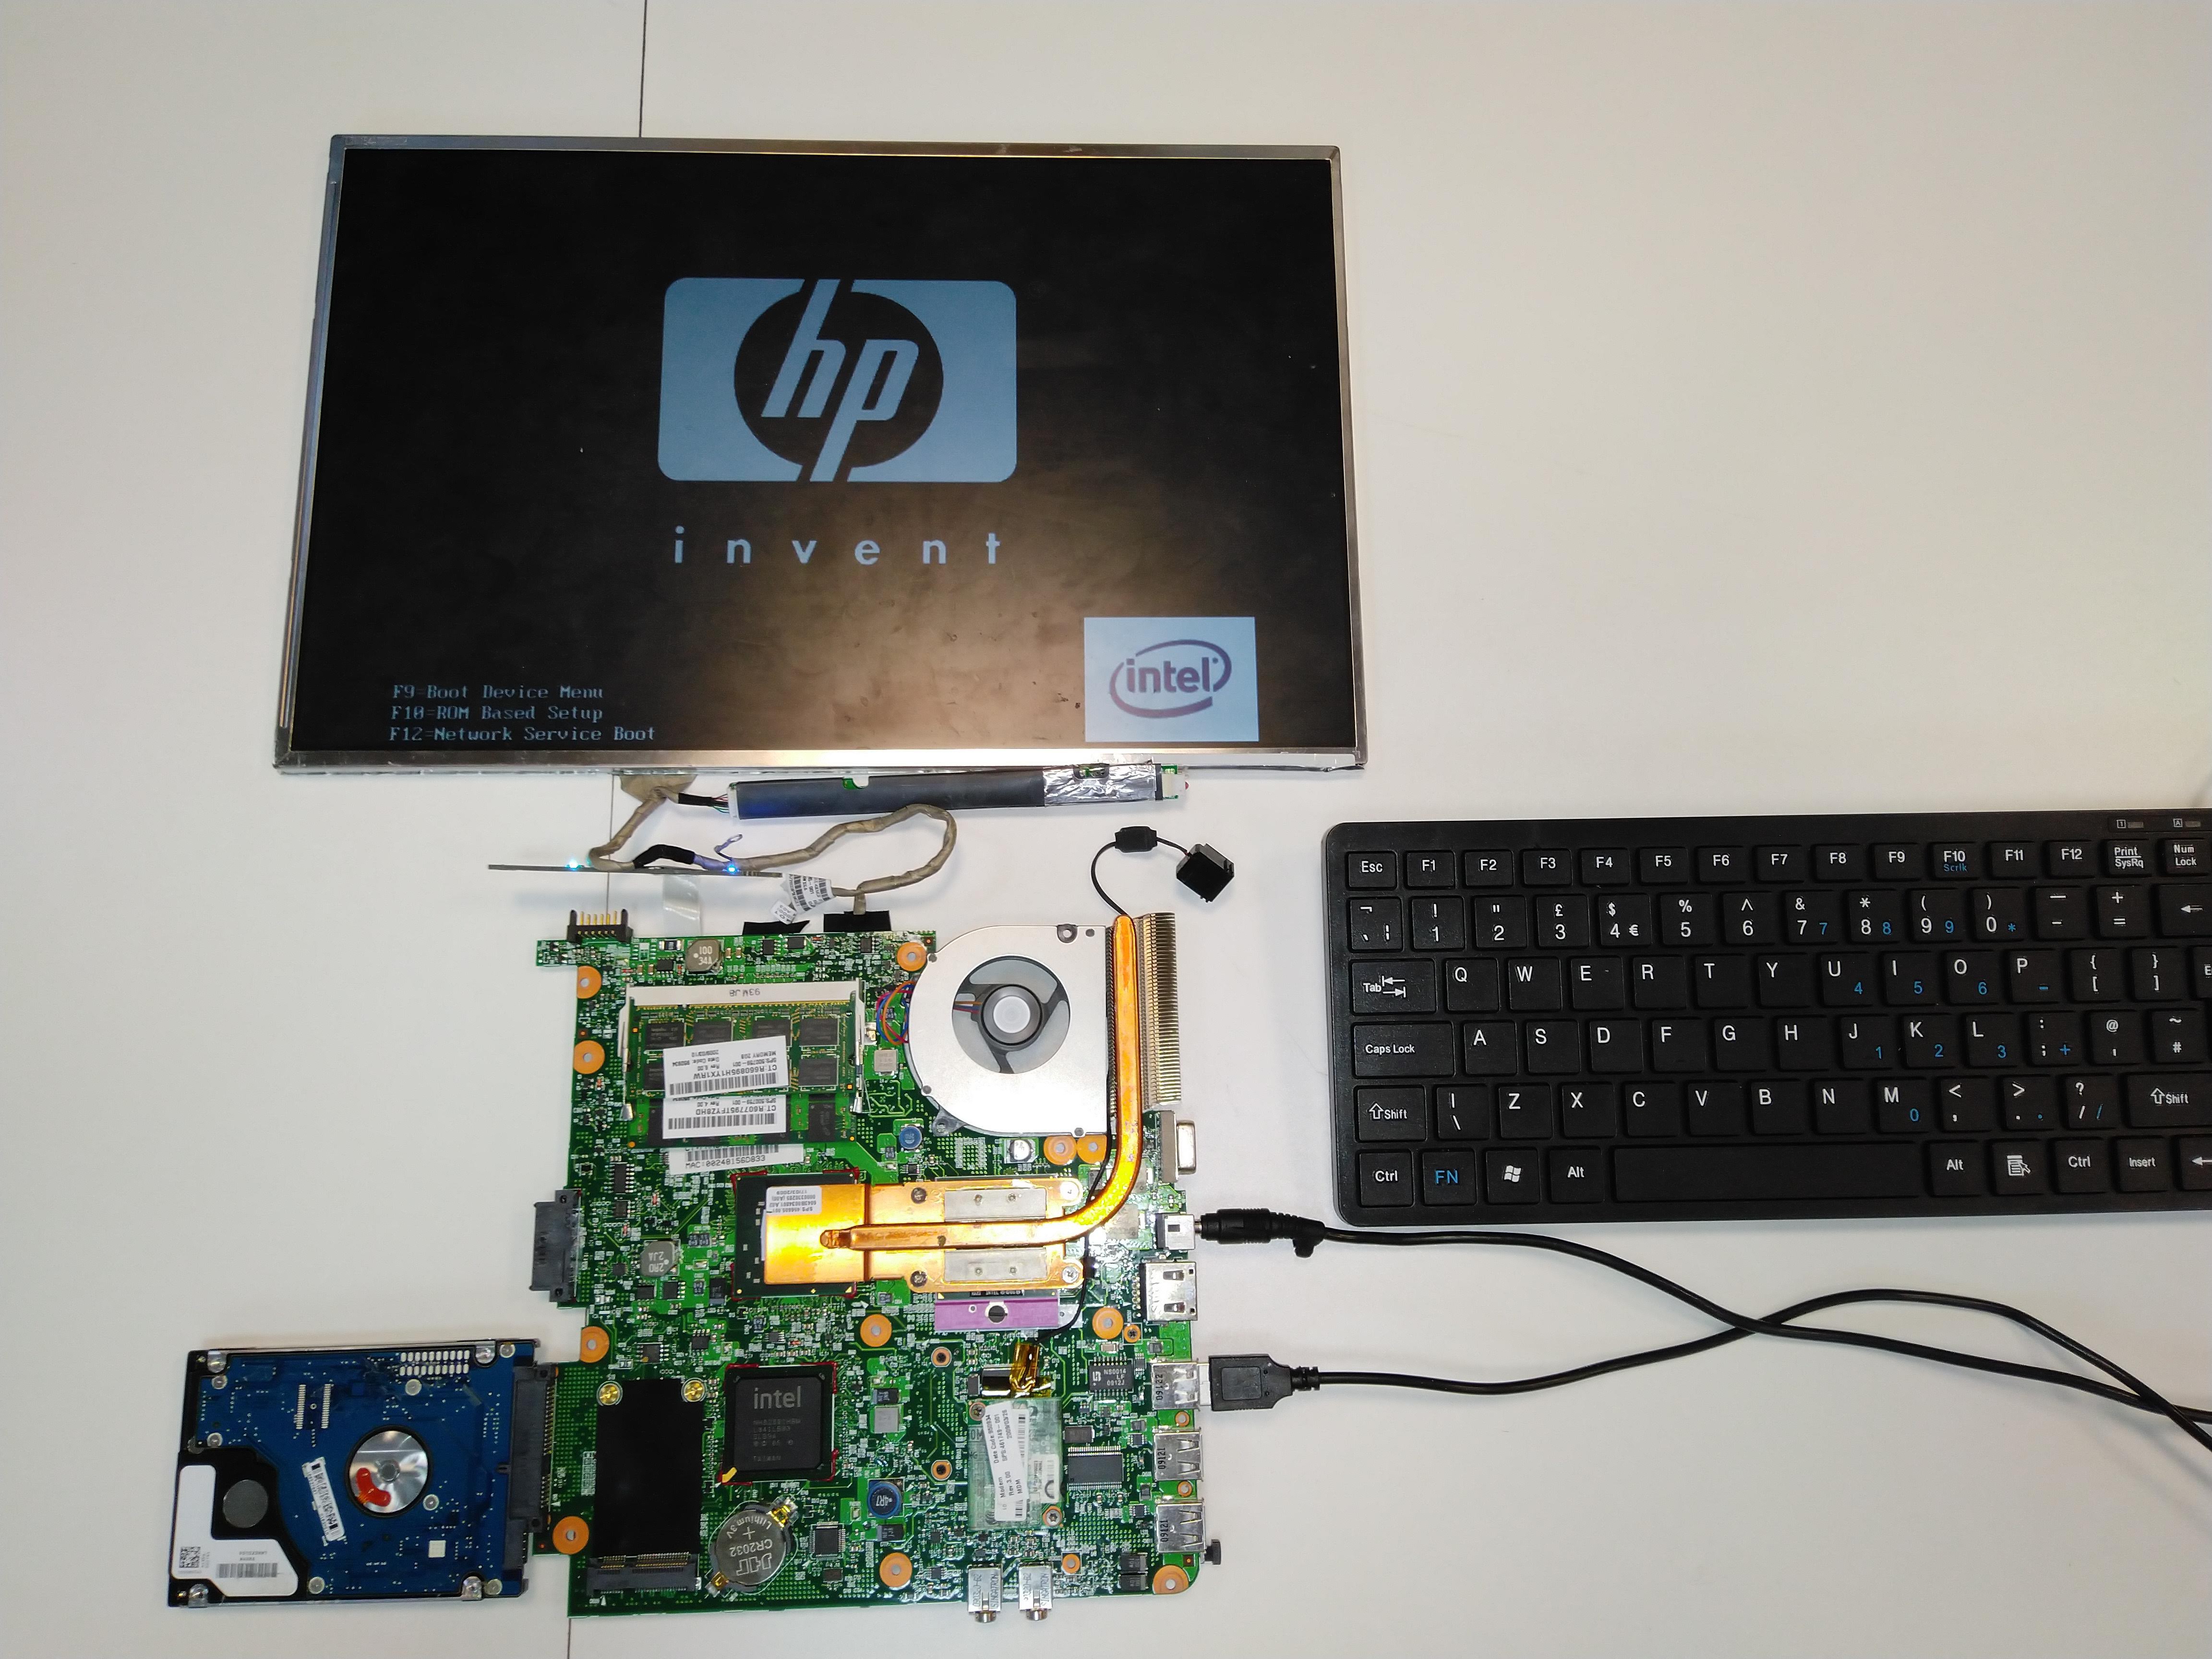
The motherboards were in good working order as were the screens, so I started to disassemble one. Once all the parts were removed, I connected a USB keyboard and powered it up. Everything worked so I set about designing a new housing to hold all of the bits.

There were a few things I wanted to achieve with this design.

1. Attached USB keyboard and mouse - cheap to replace if they get broken and fixed to the computer so they can't go missing.
2. Attached internal power supply unit -  so It can't go missing and less chance of breaking.
3. Restricted access to the computer ports and switches - The students tend to fiddle with everything on the computers especially the WiFi switch, and plug things in where they're not supposed to be plugged in.
4. Portability, a carry handle and the ability to store the keyboard and mouse.
5. To be manufactured from acrylic using a Laser cutter.
5. Good looks!

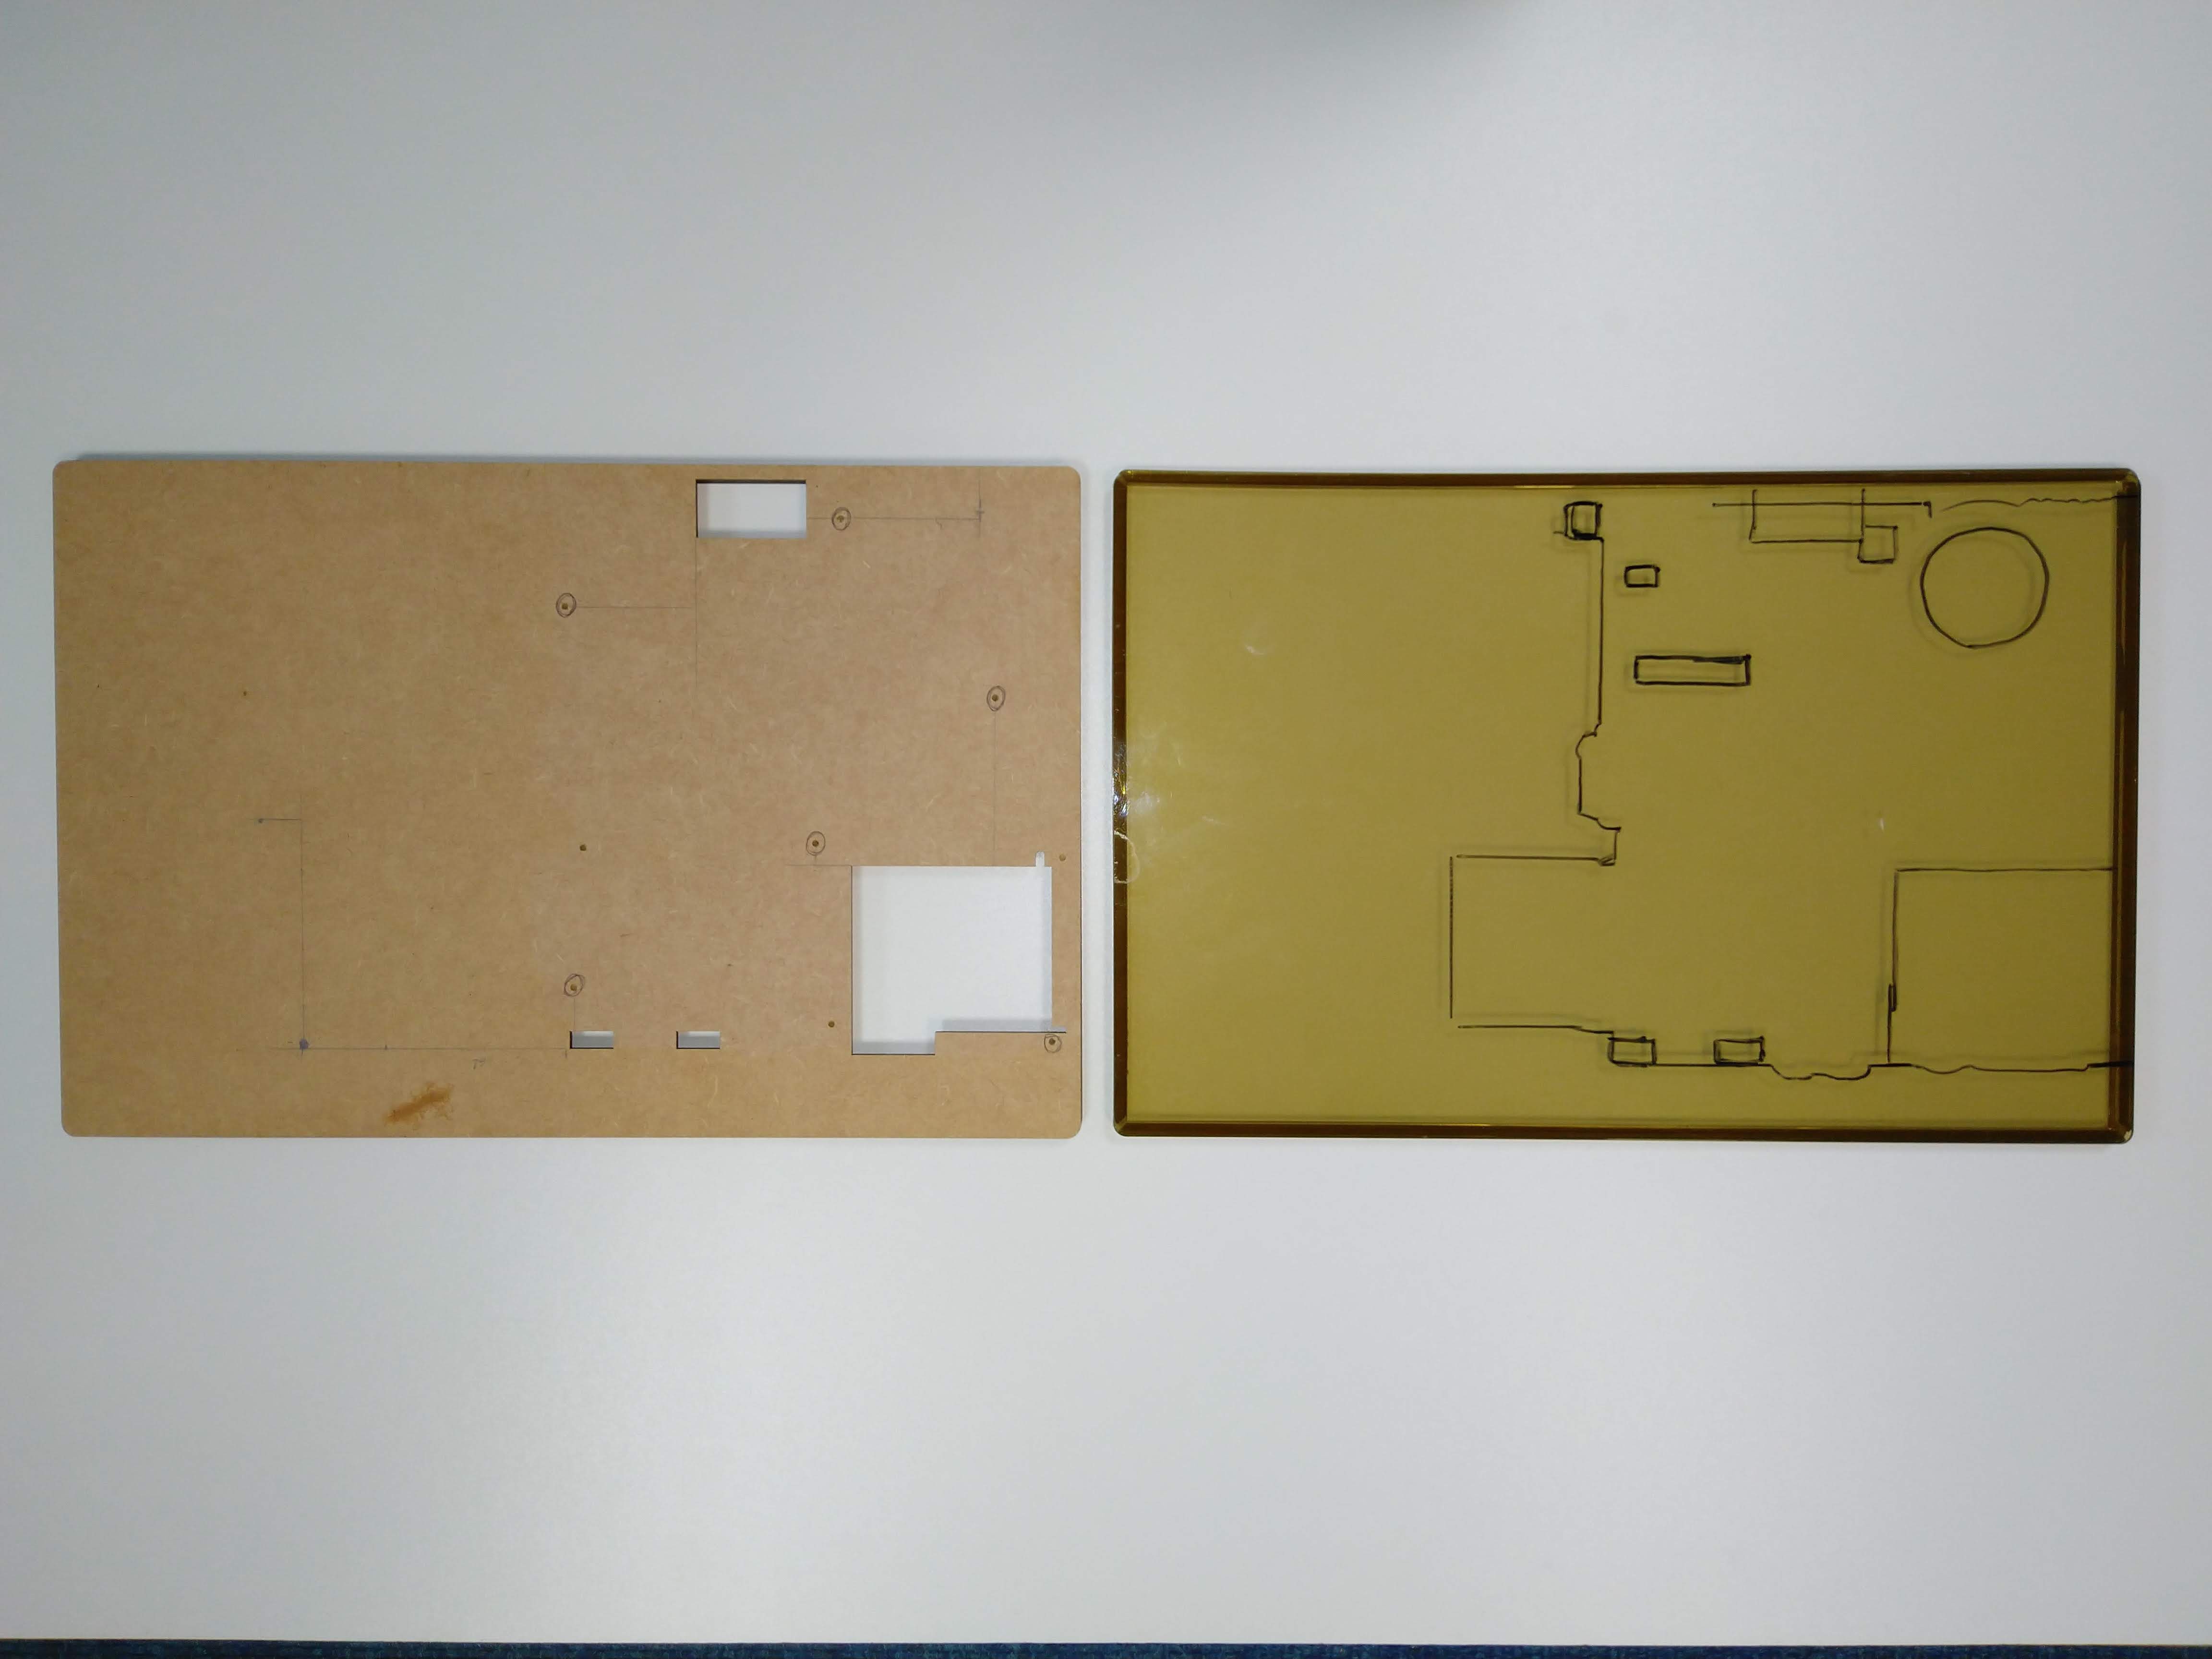
First I started to design a mount for the motherboard. The tricky bit here was getting all of the mounting holes to line up.
I used a piece of transparent acrylic to trace the outline of the motherboard and any protruding parts. I then marked and measured the mounting holes that I wanted to use.
I laser cut a prototype out of 3mm MDF to test the positions. It took a few attempts to get this right.
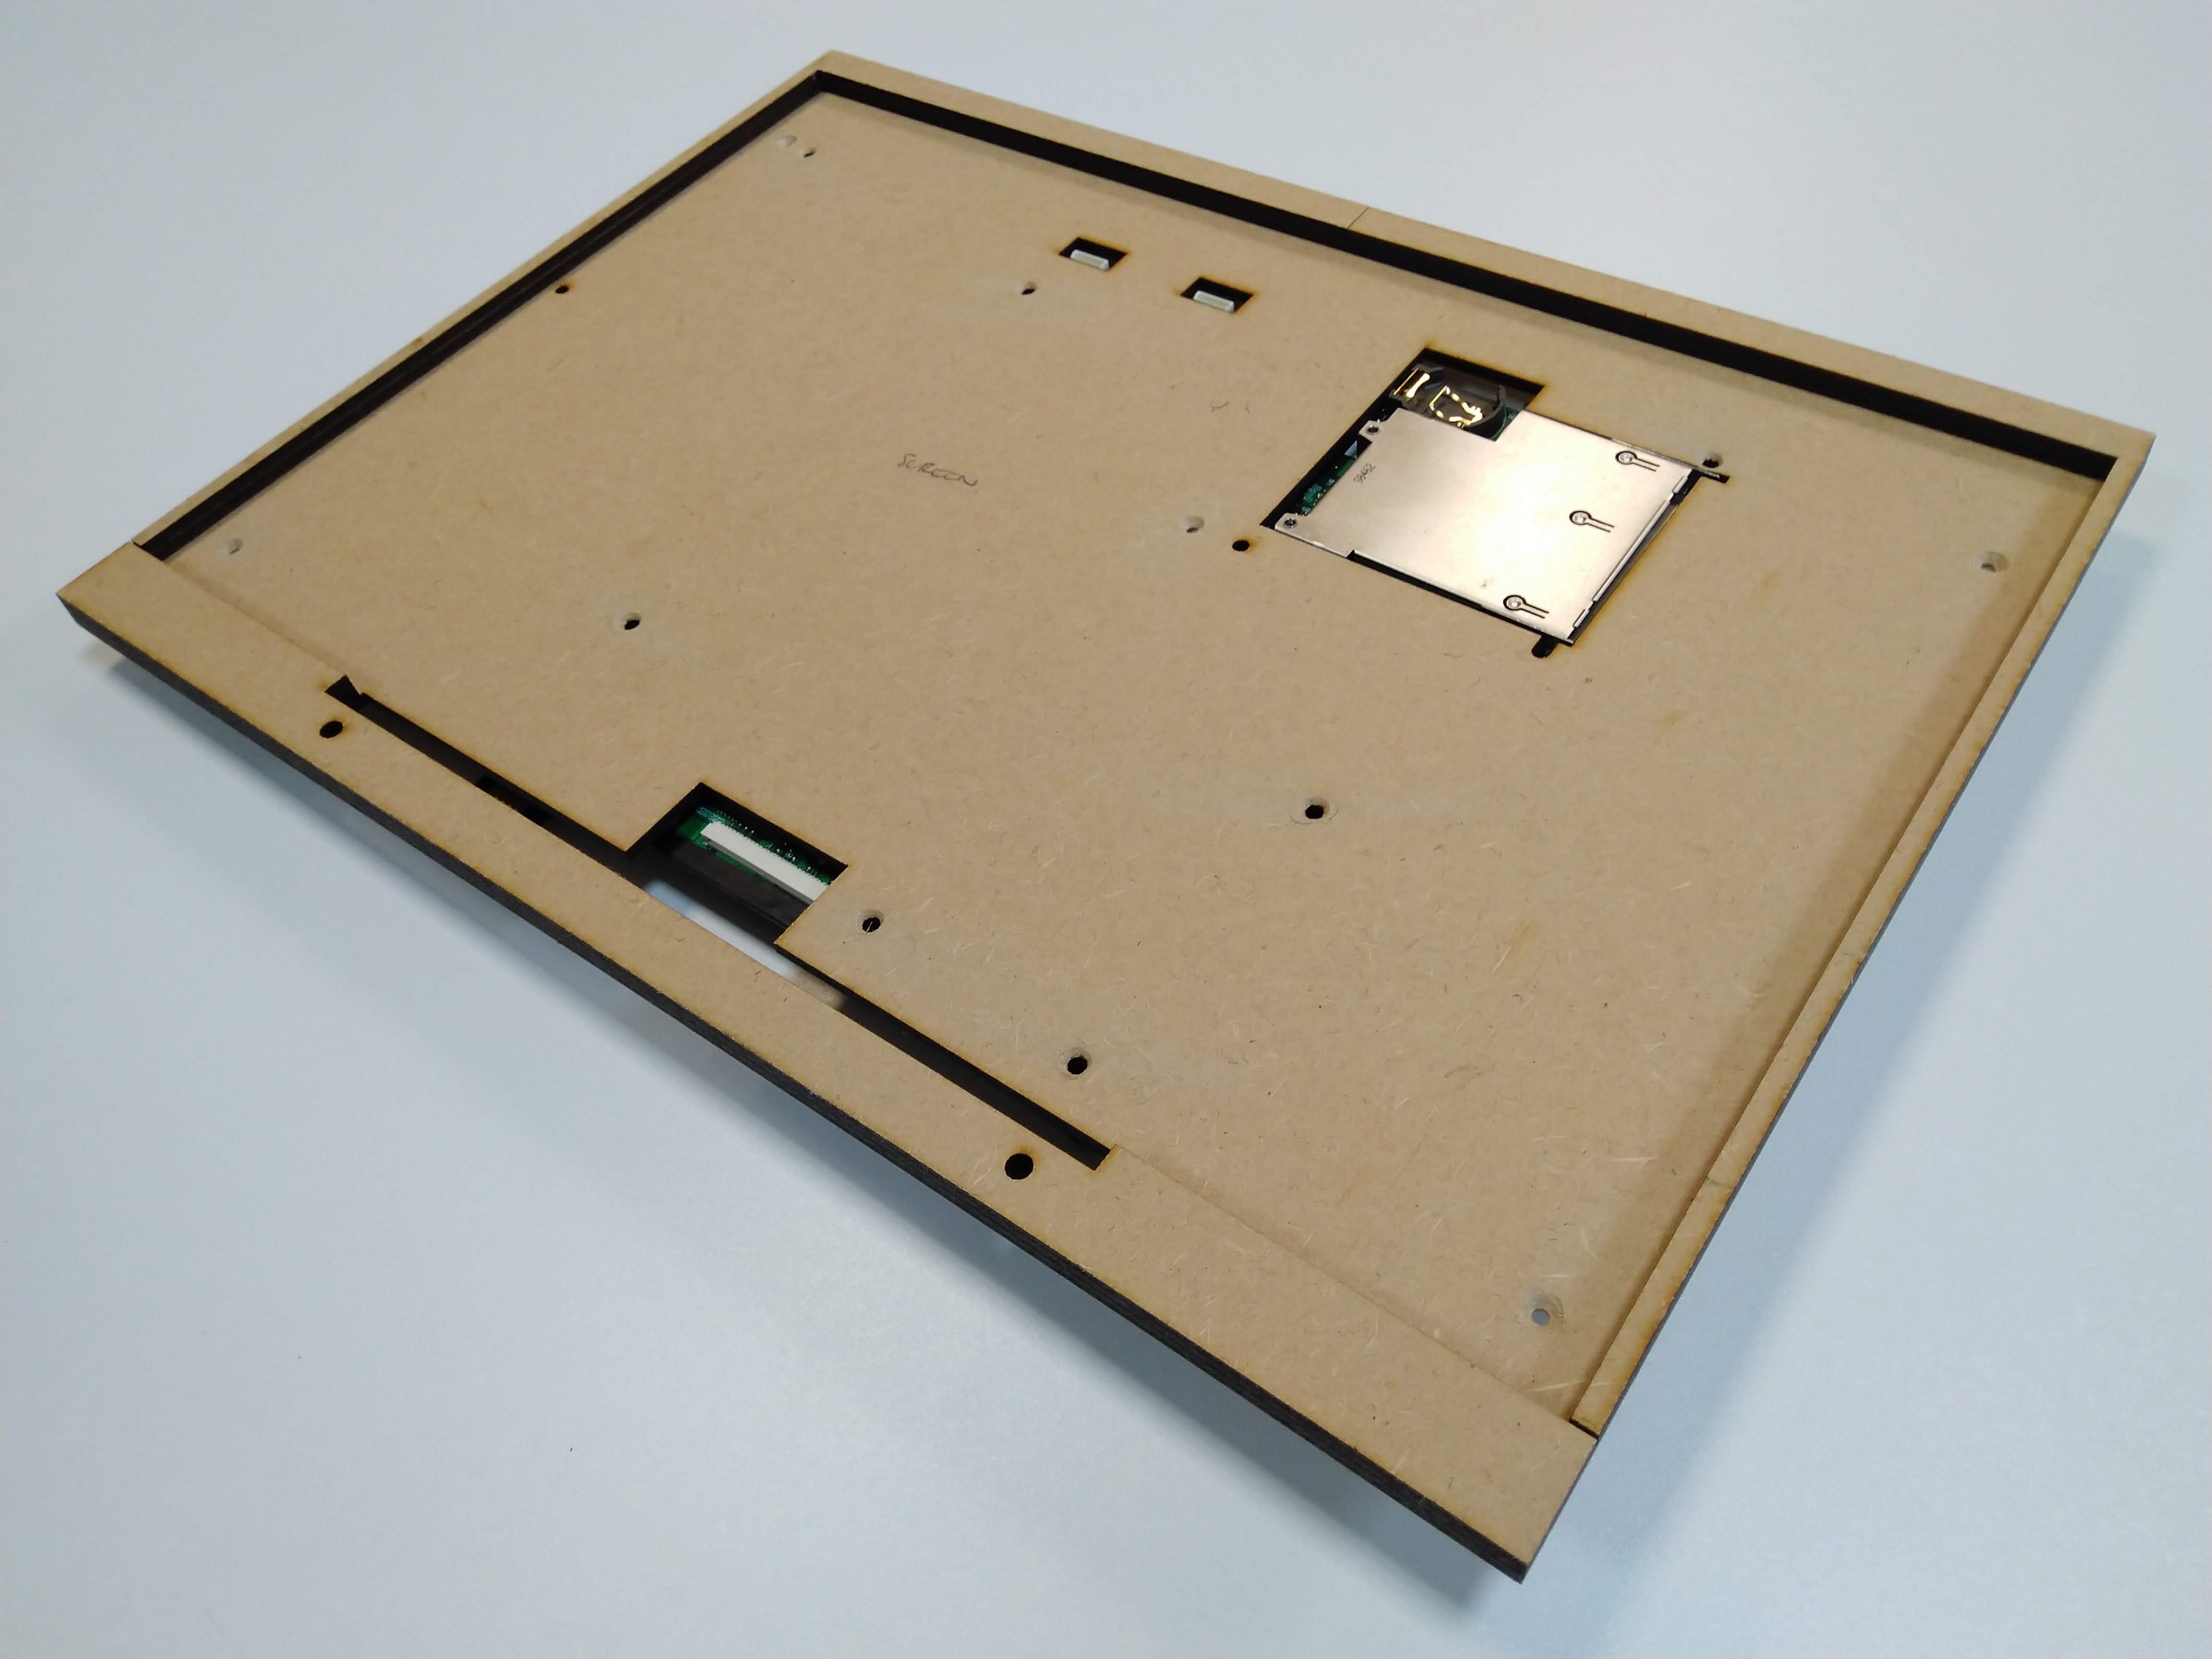
After a few more iterations I'd made a panel with a bezel to hold the screen and mounting holes for the motherboard to attach to the back.
Next I started to design the frame to hold everything together. I toyed with the idea of using a hinge to adjust the angle of the screen a bit like as MS Surface (possibly reusing the original laptop screen hinges) but soon moved away from this as I wanted to keep it simple and have less chance of parts breaking.

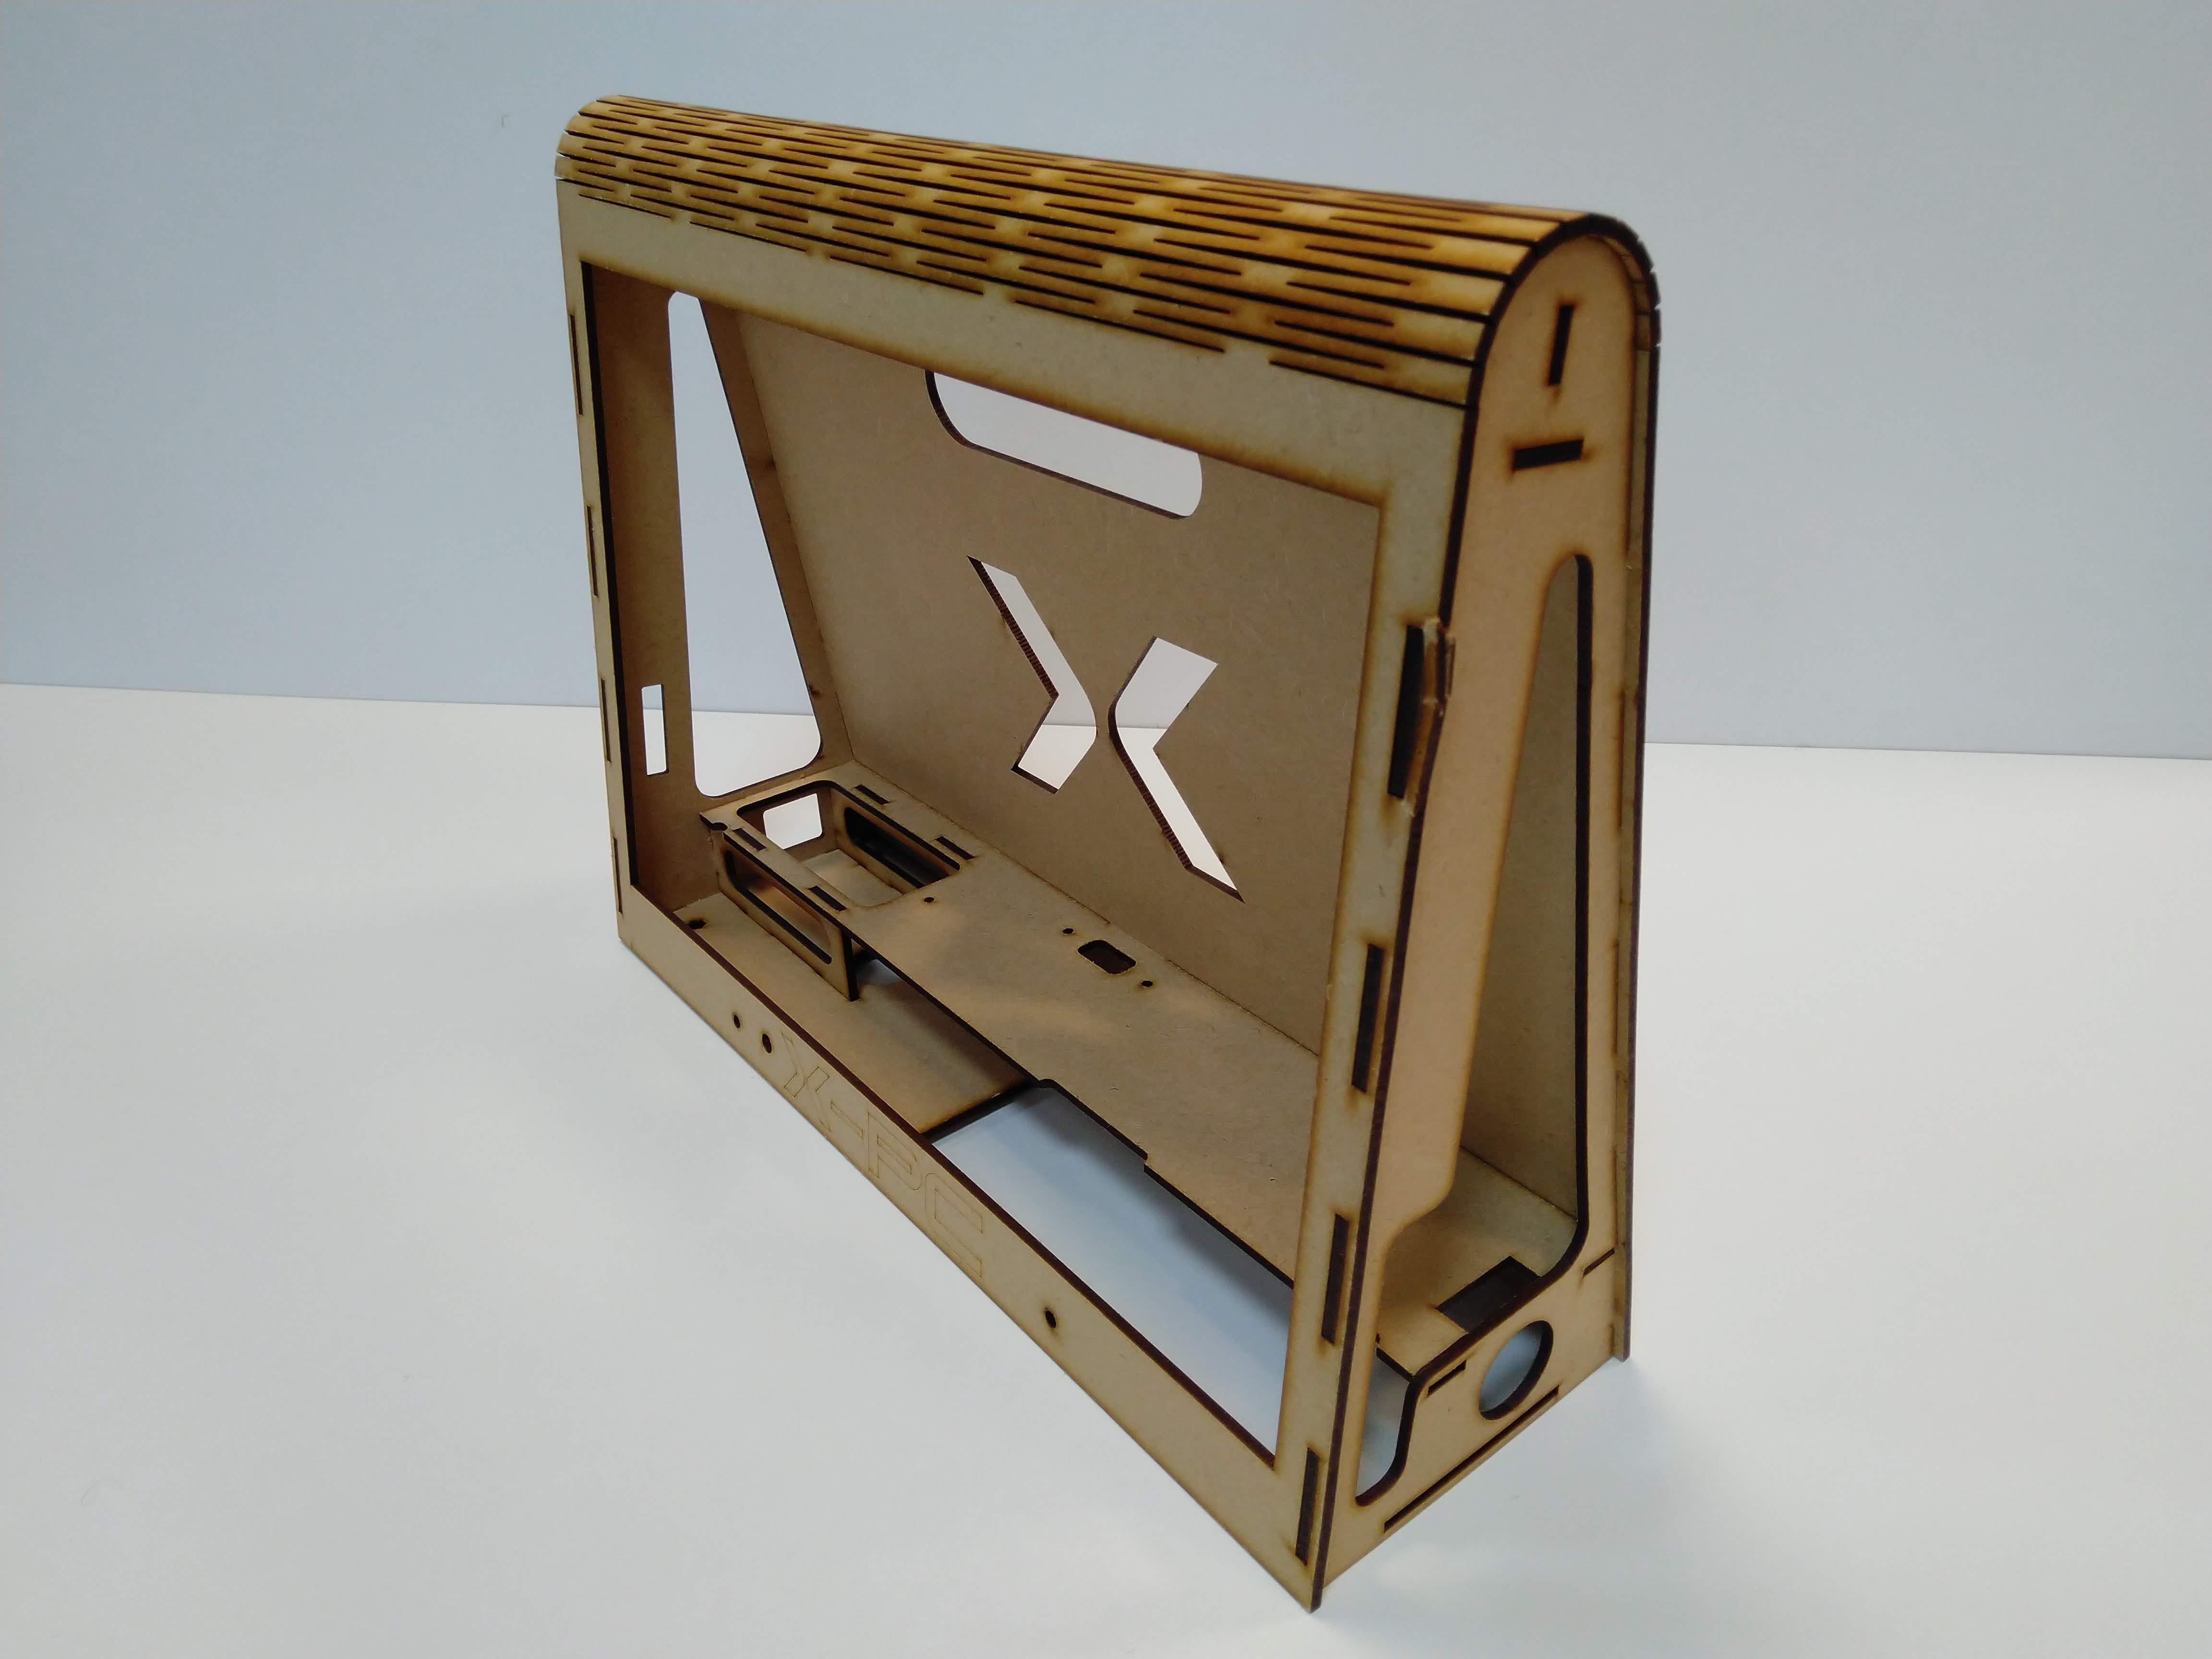
I started looking at an A-frame design, this seemed like a good solution as it has an angled front for the screen a wide base for stability and a space to store the keyboard. I also liked the idea of using a living hinge at the top to add a curve to the normally angular looks of laser cut designs.
Here's my prototype after a few iterations:
And my final version in acrylic:
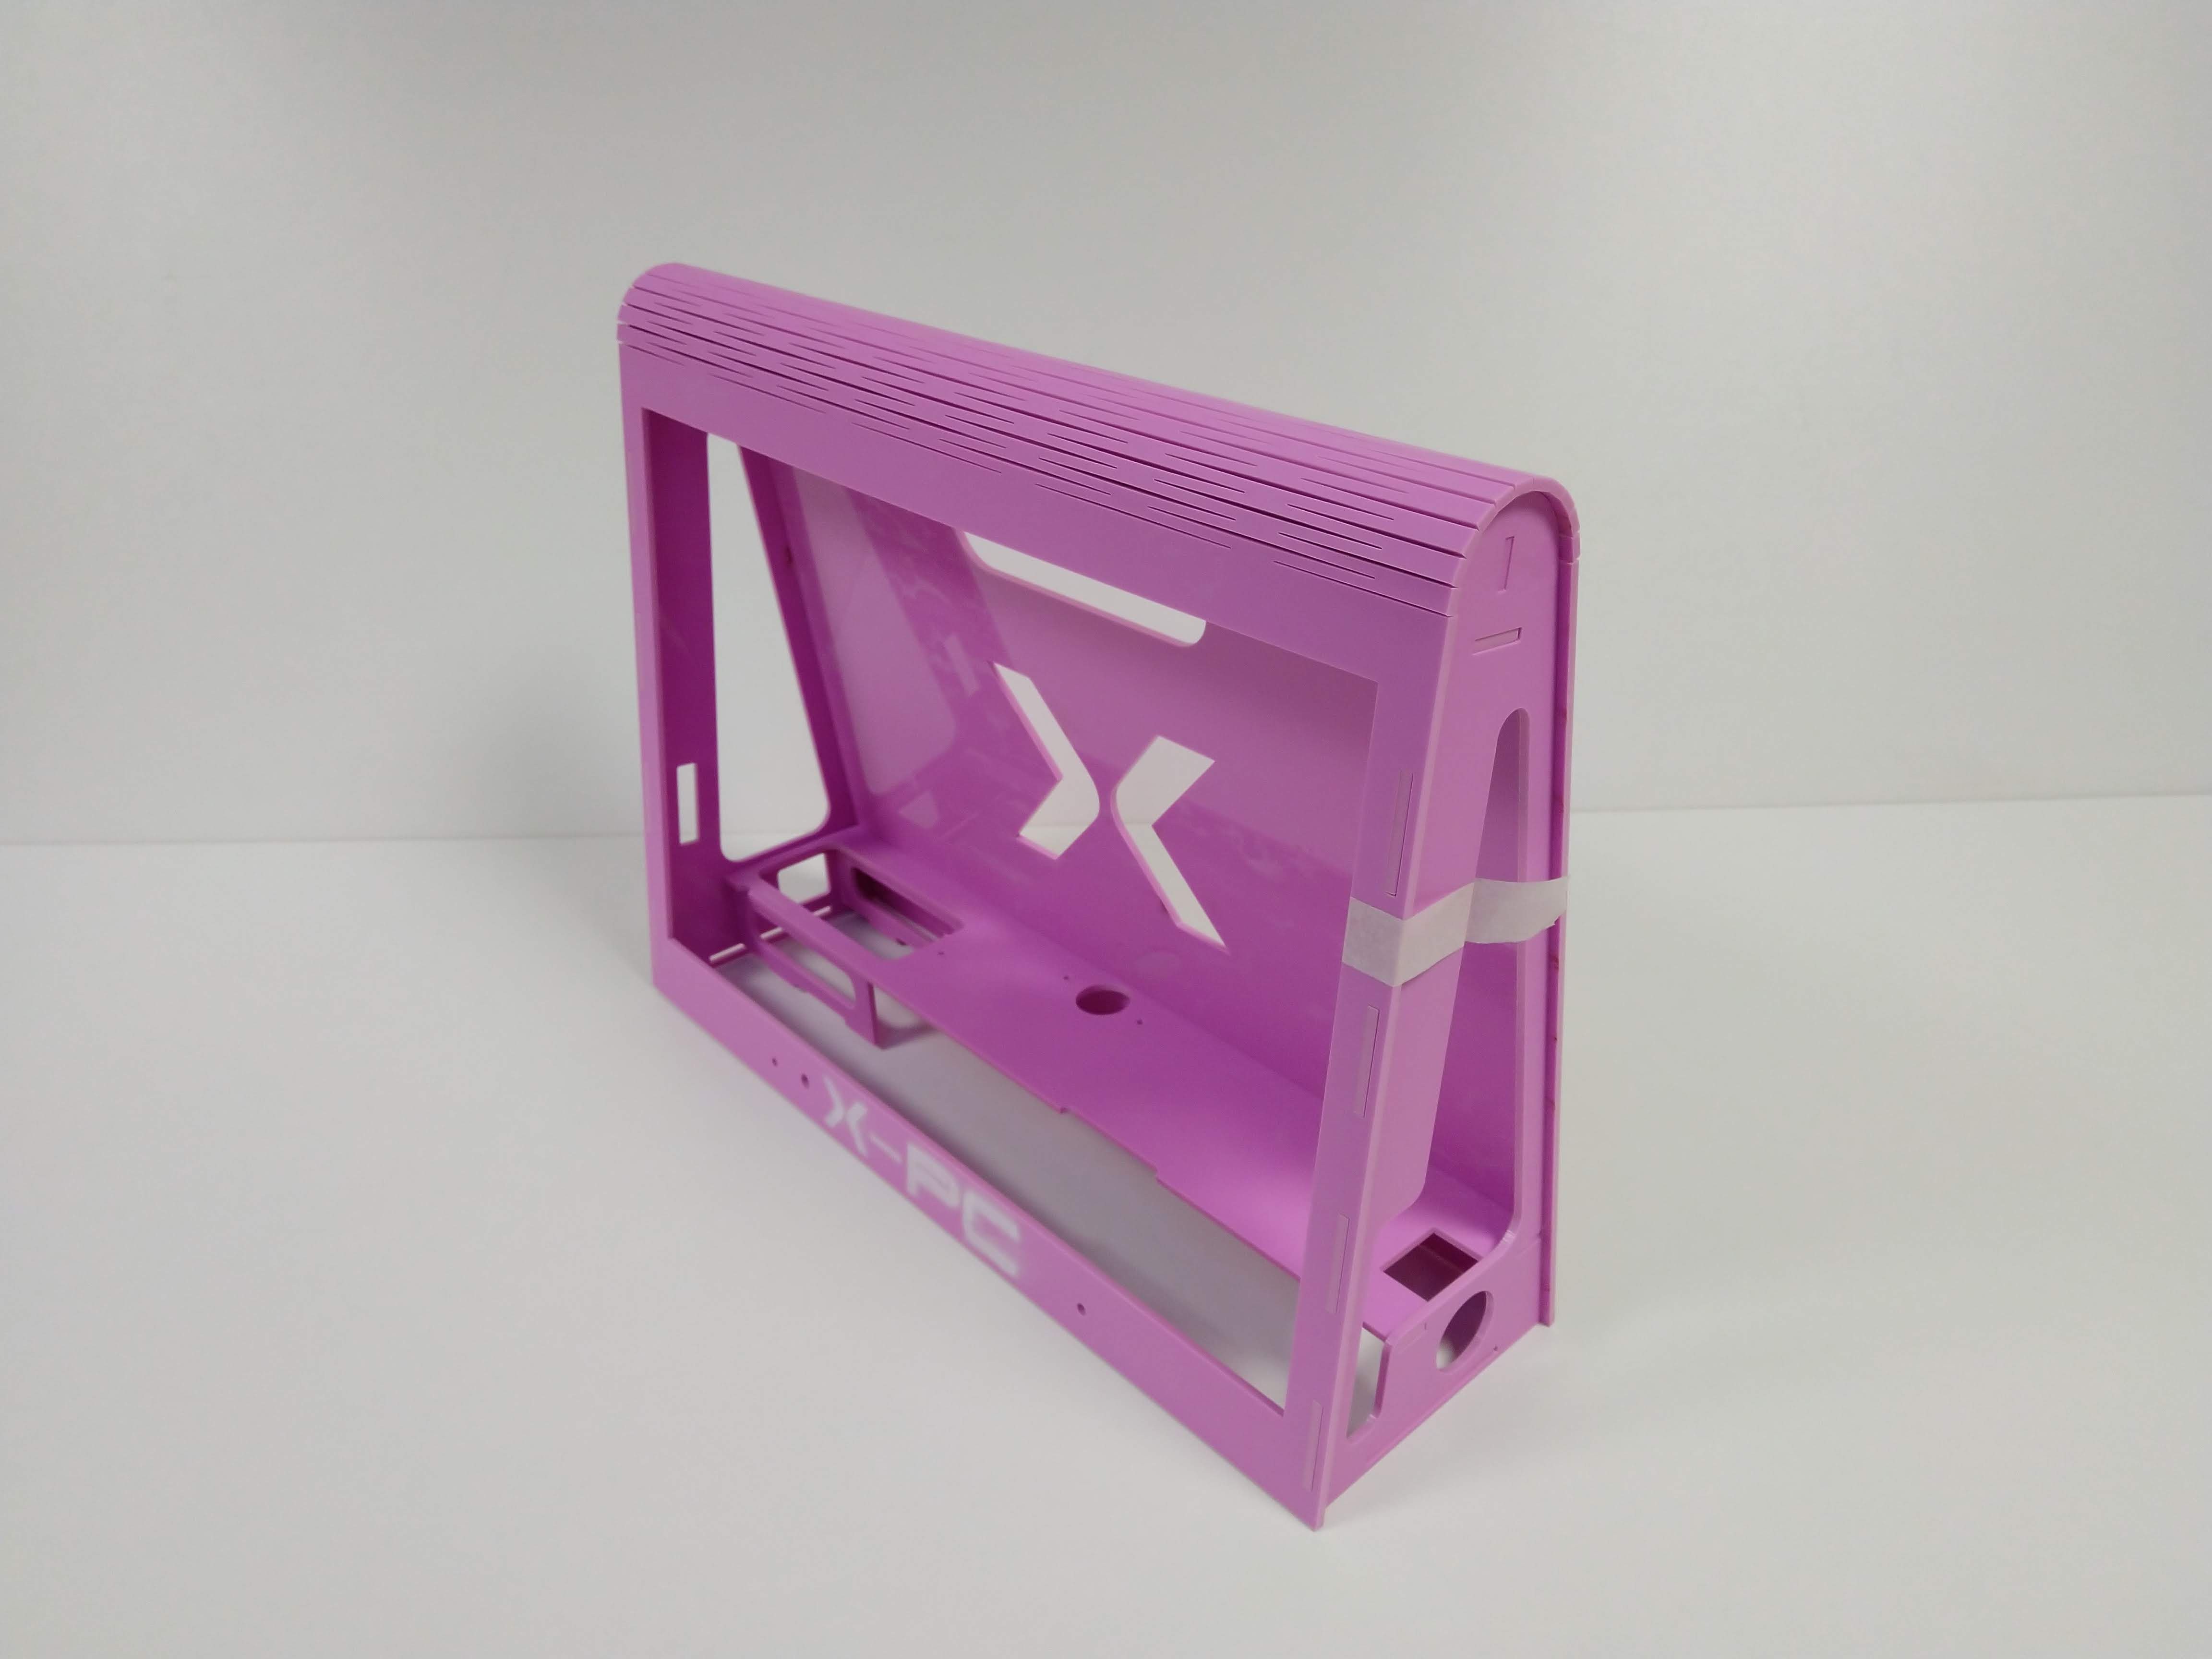
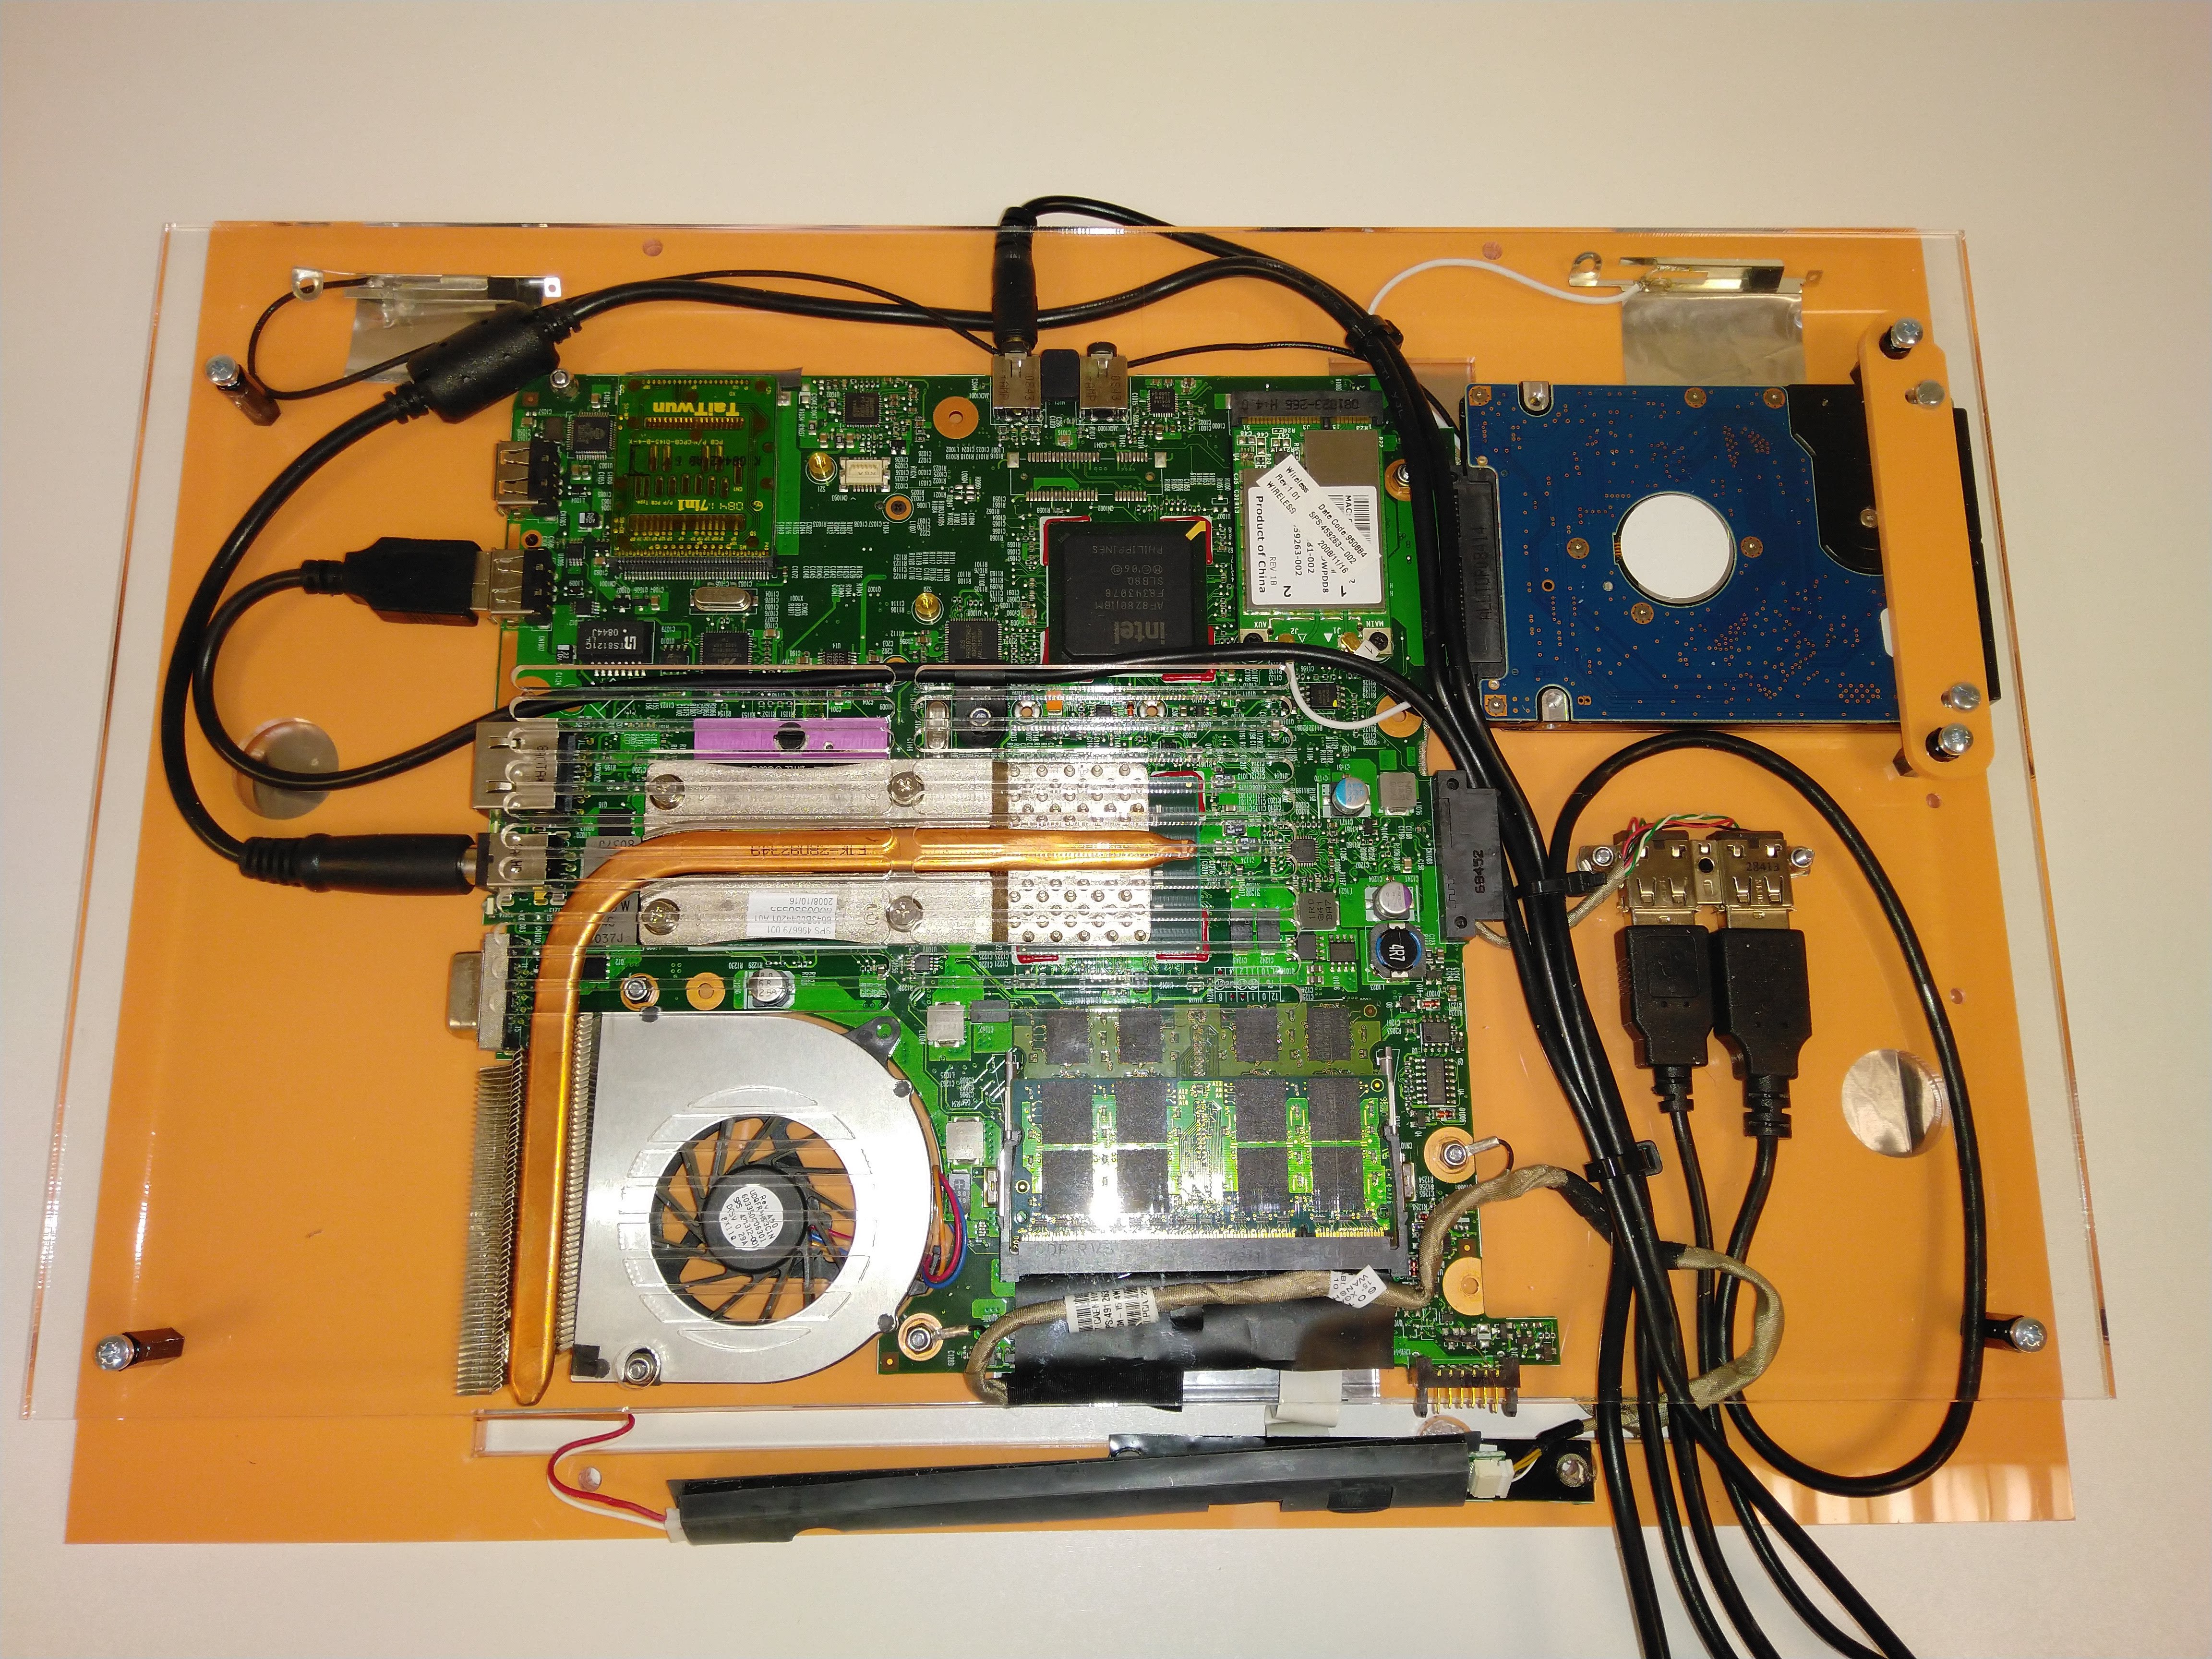
Here's an assembled screen and motherboard mount with a clear acrylic back panel for protection.
This whole unit slides up inside the front of the A-frame and is held in place with a couple of screws.
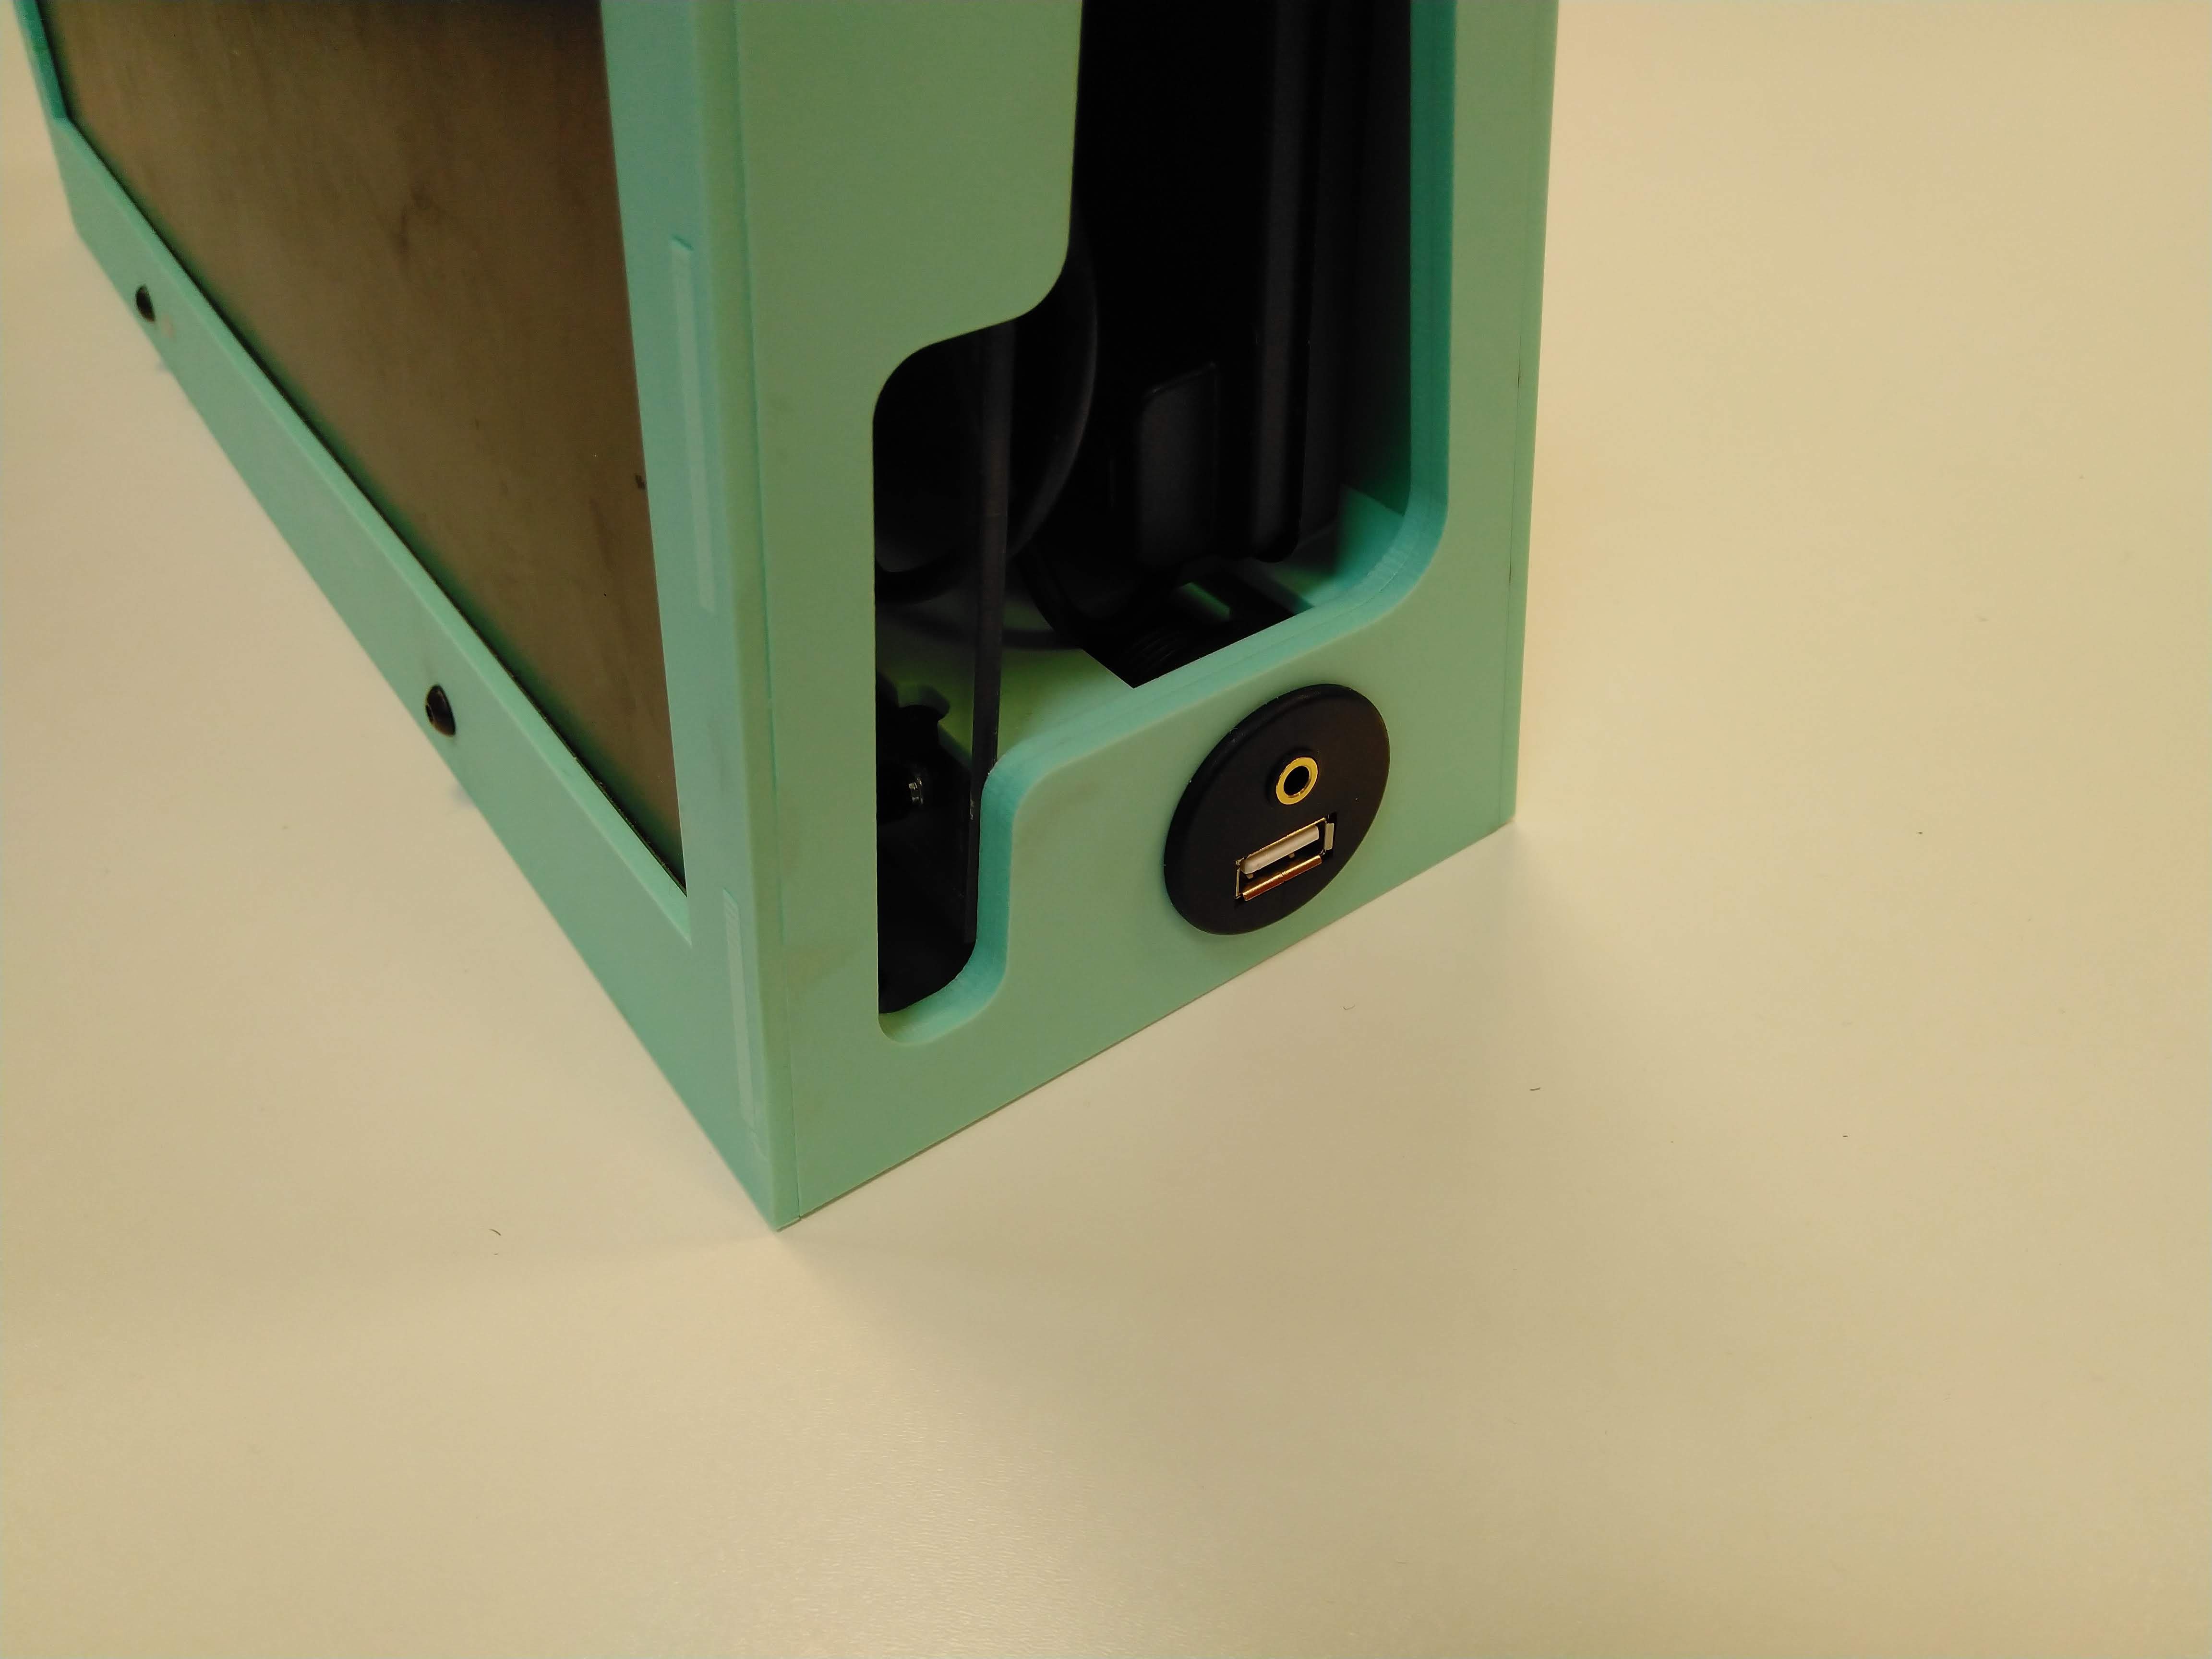
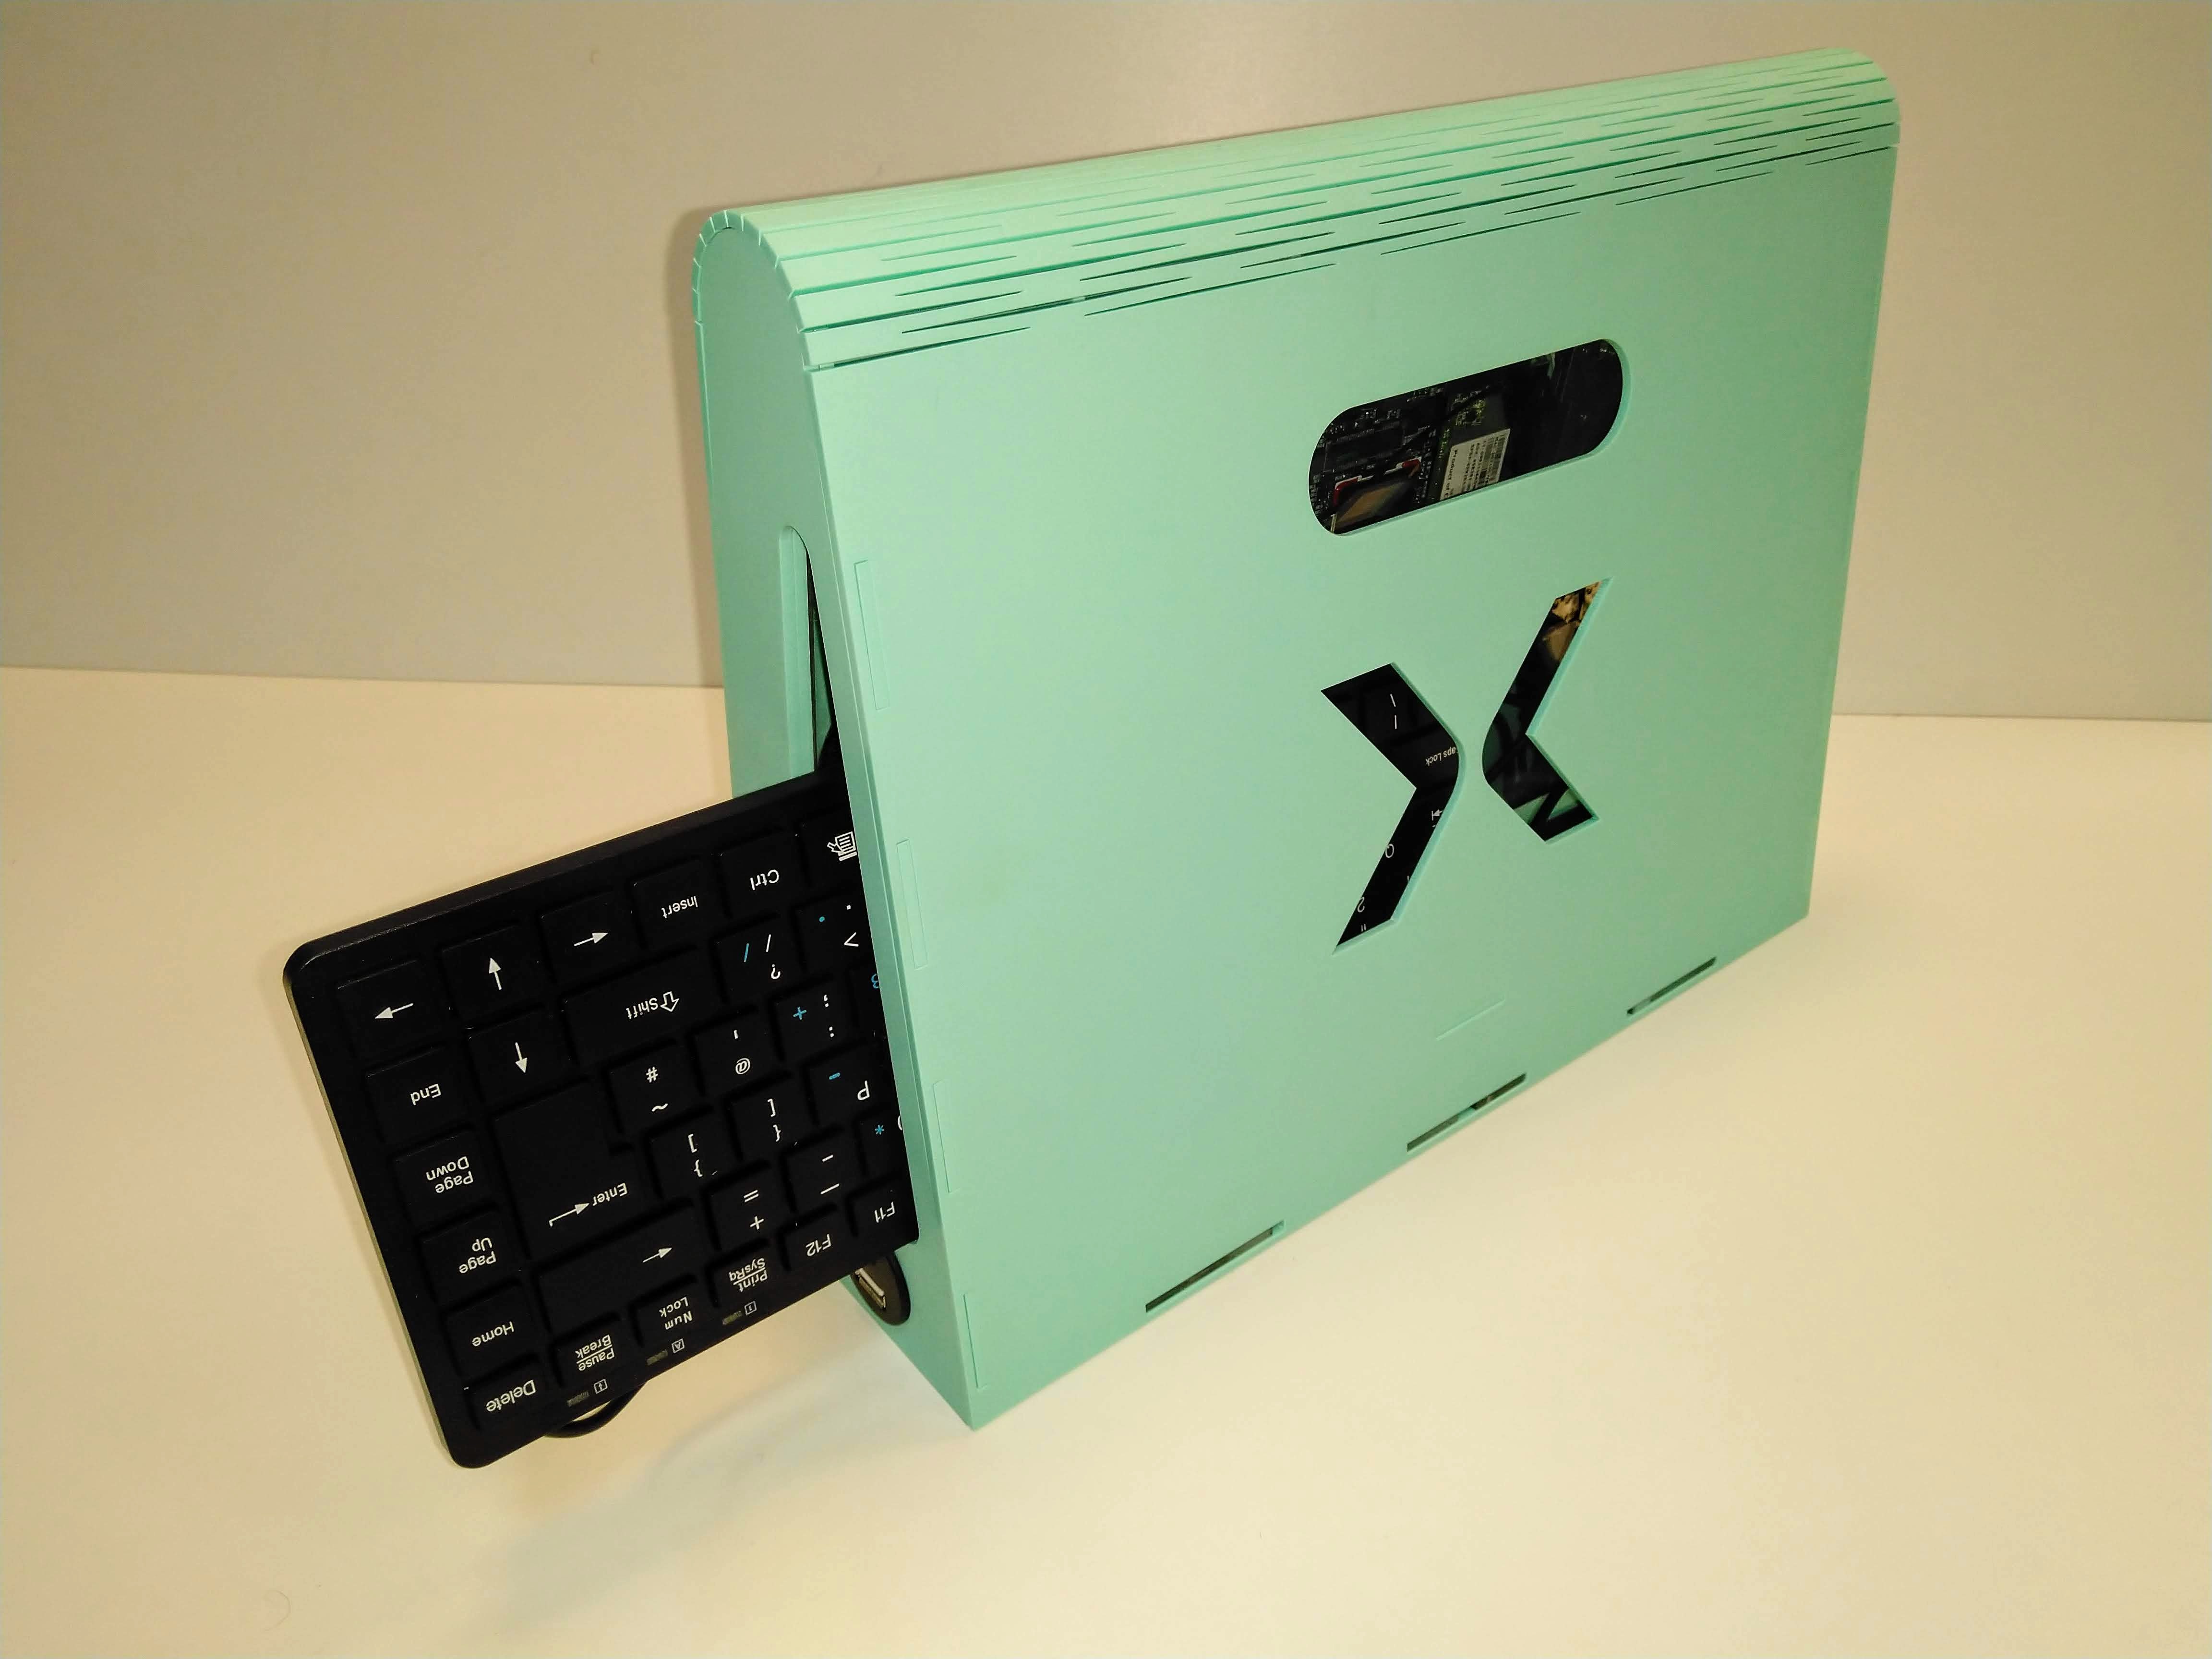
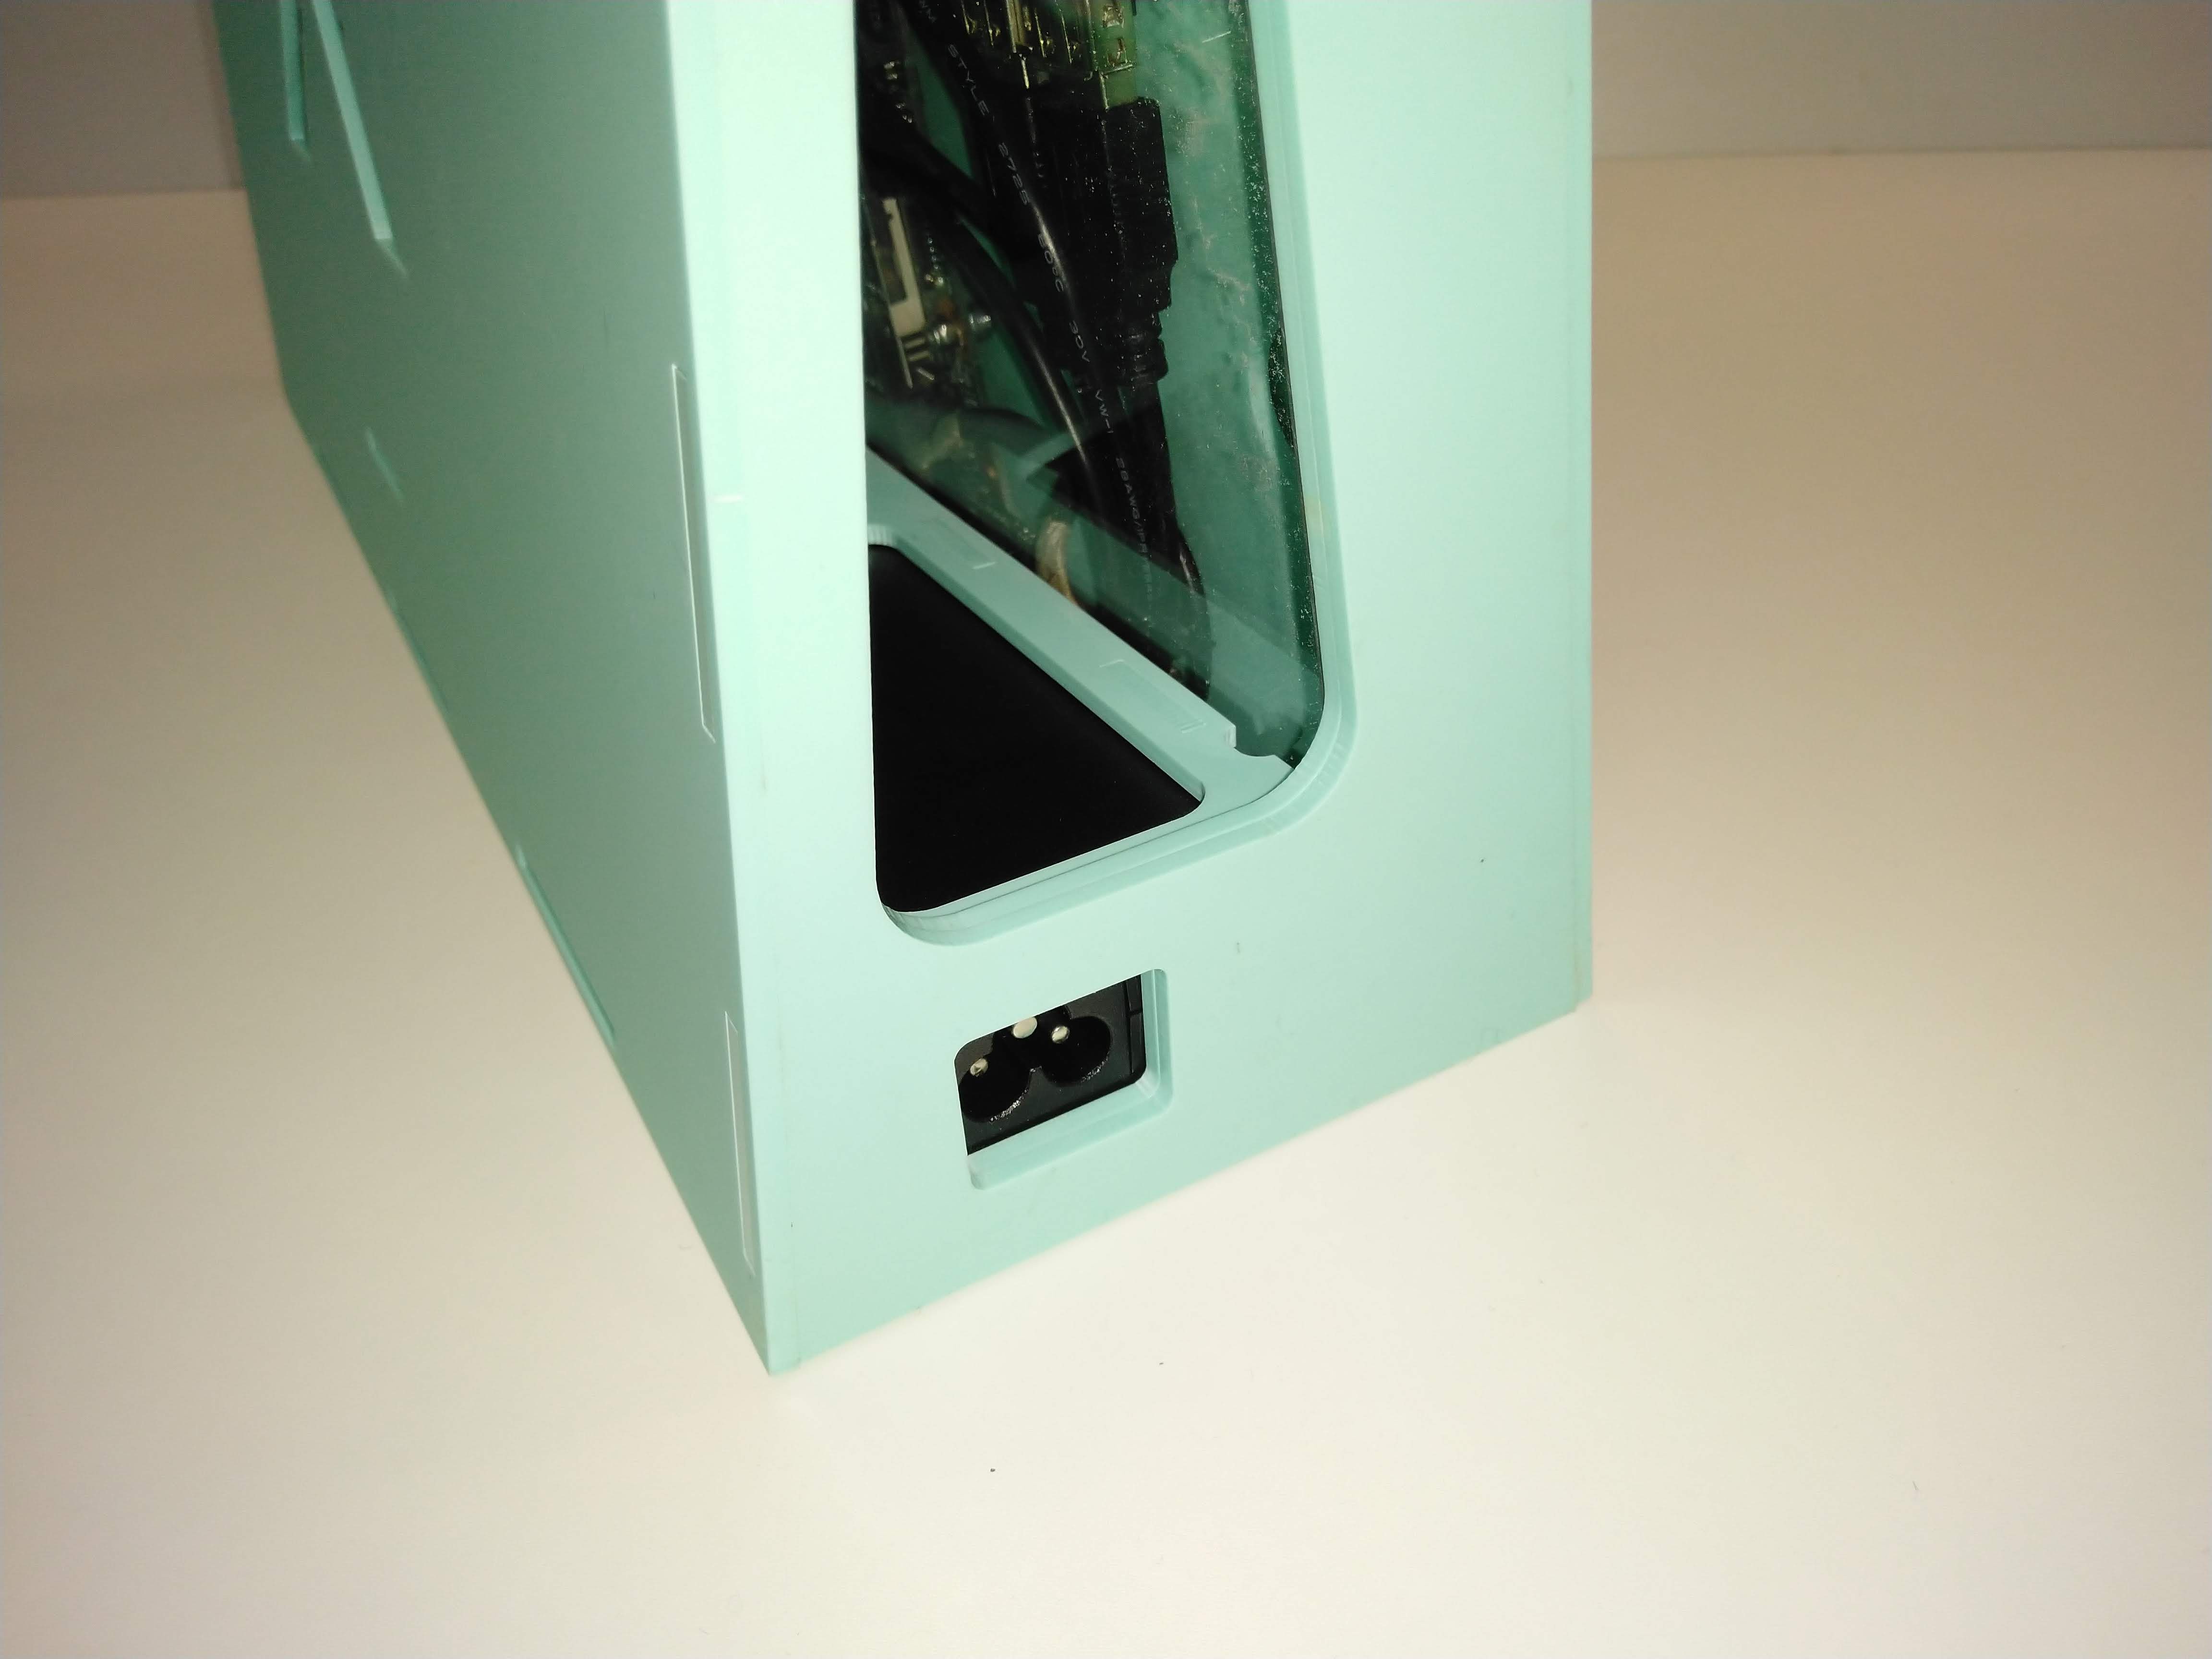
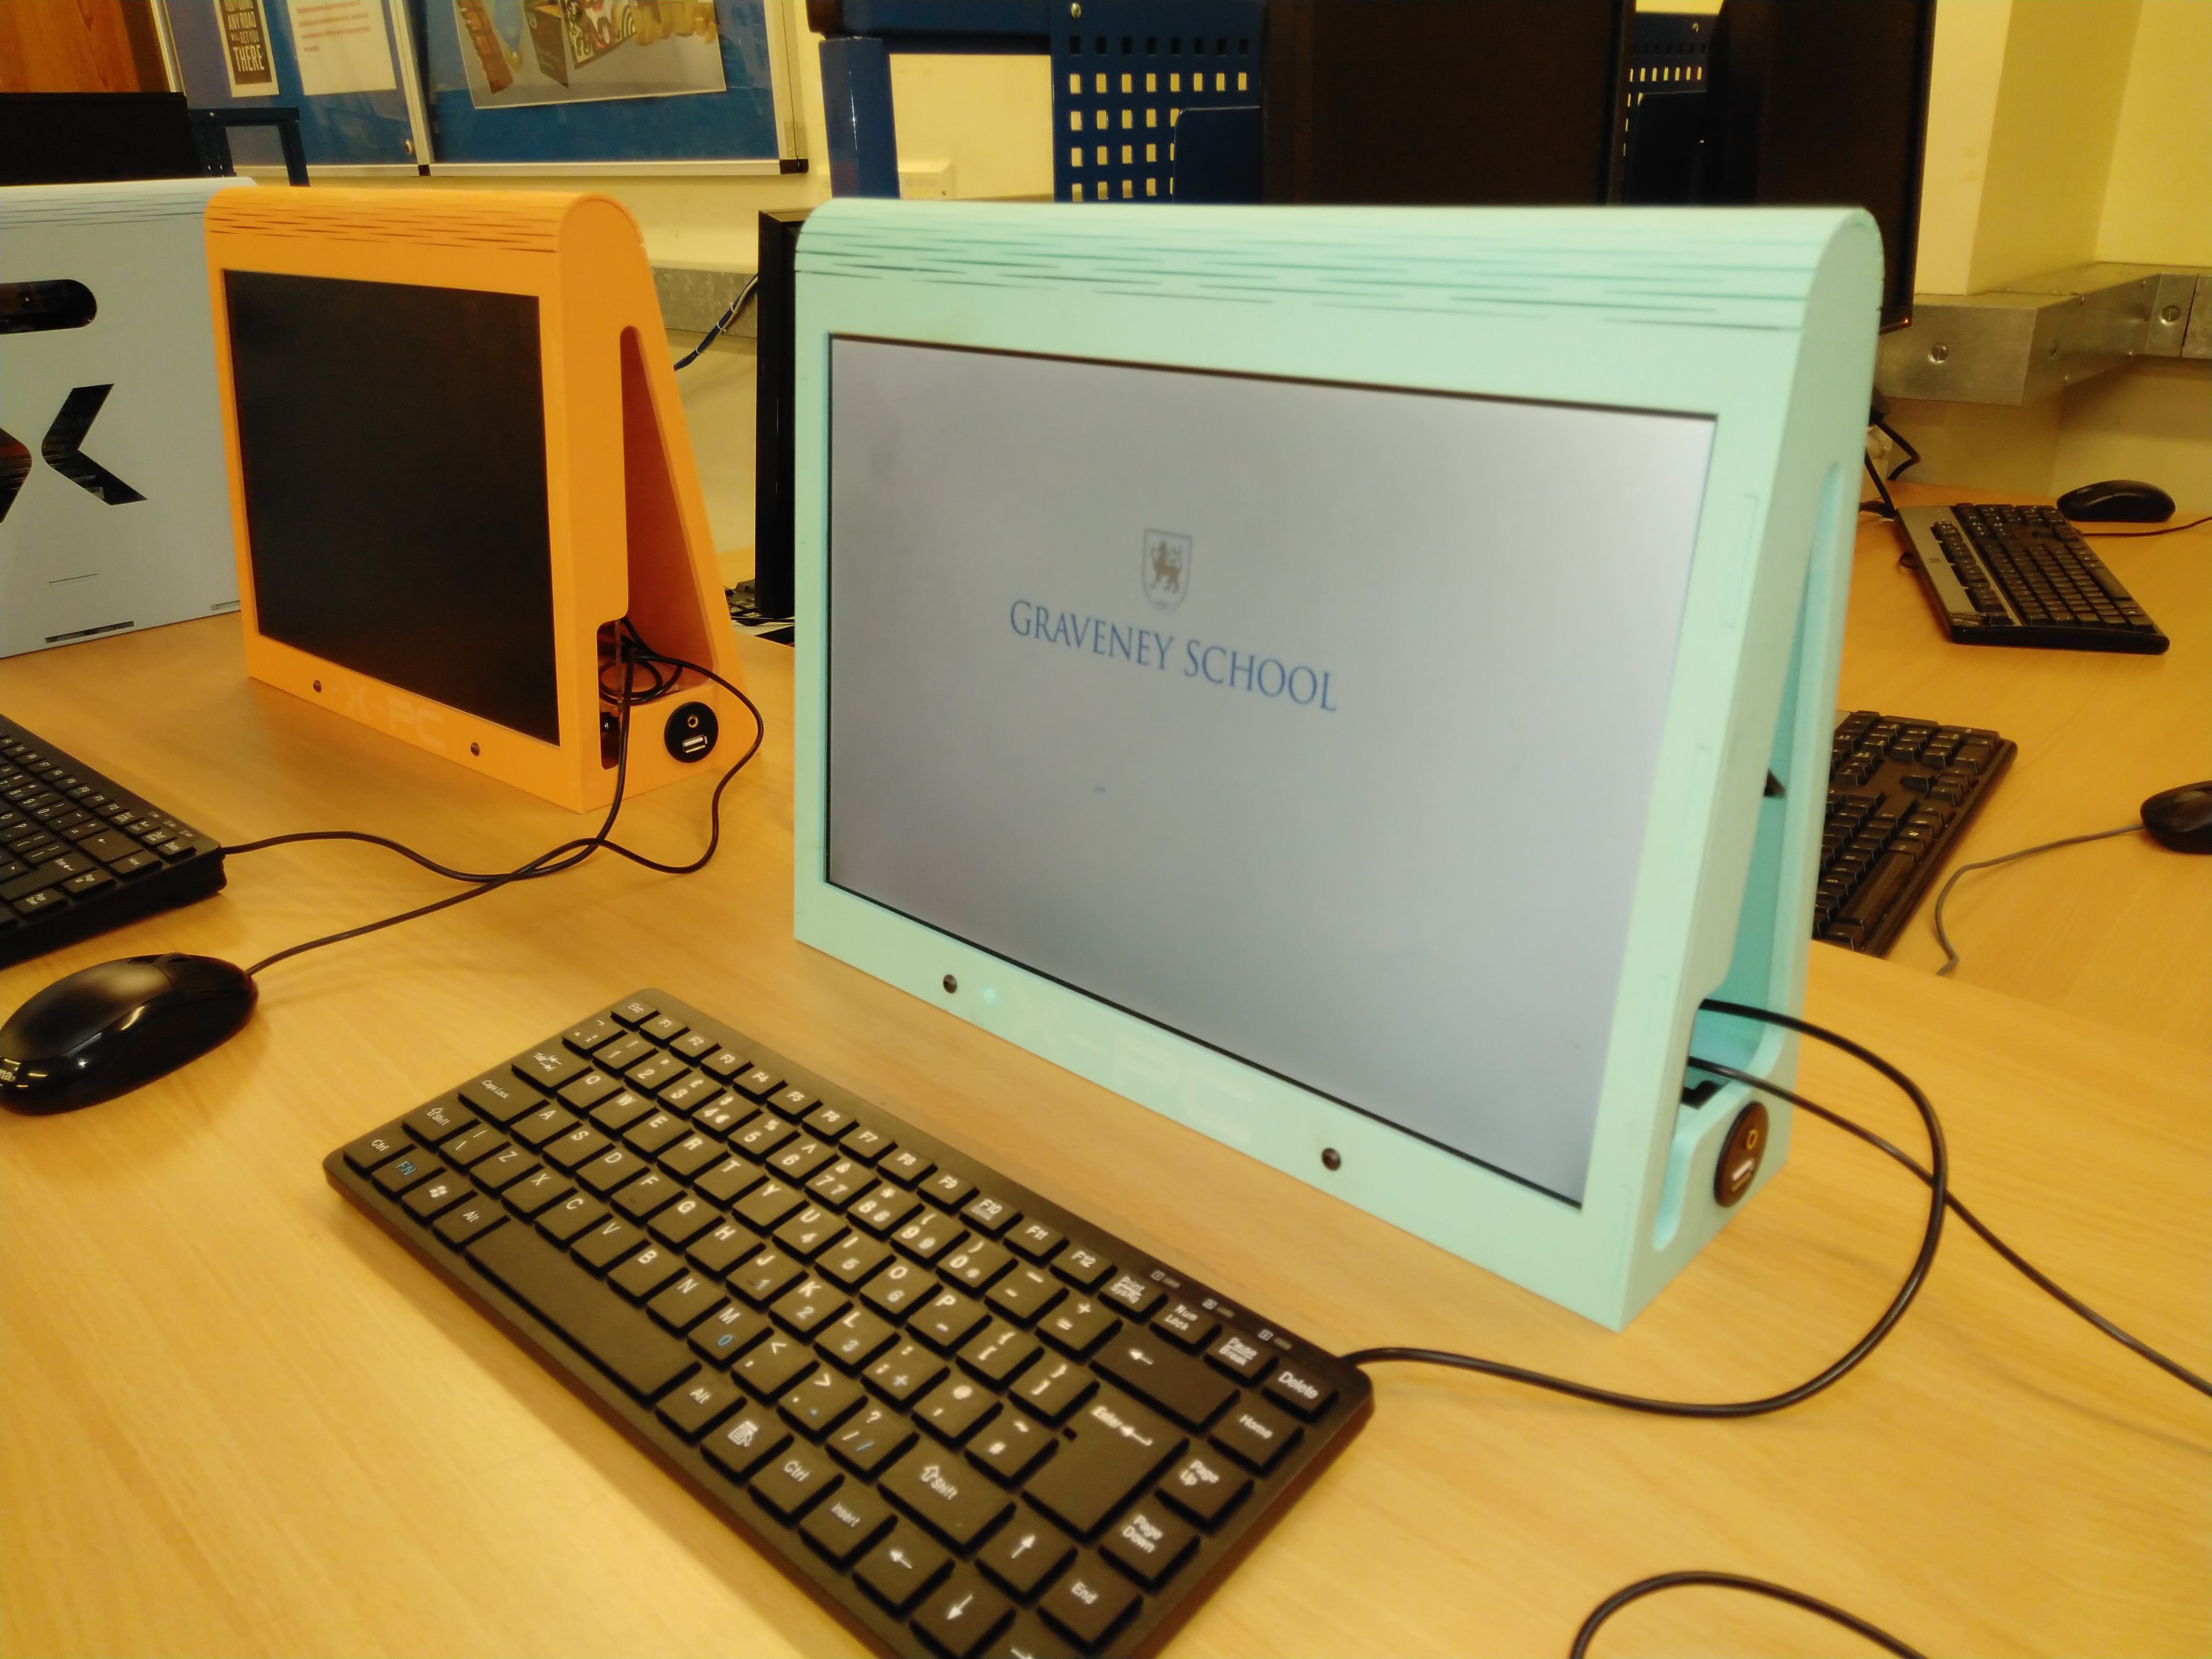
Some pictures of an assembled unit, showing keyboard storage, internal PSU and the USB and headphone socket (from a car dashboard mounting kit).
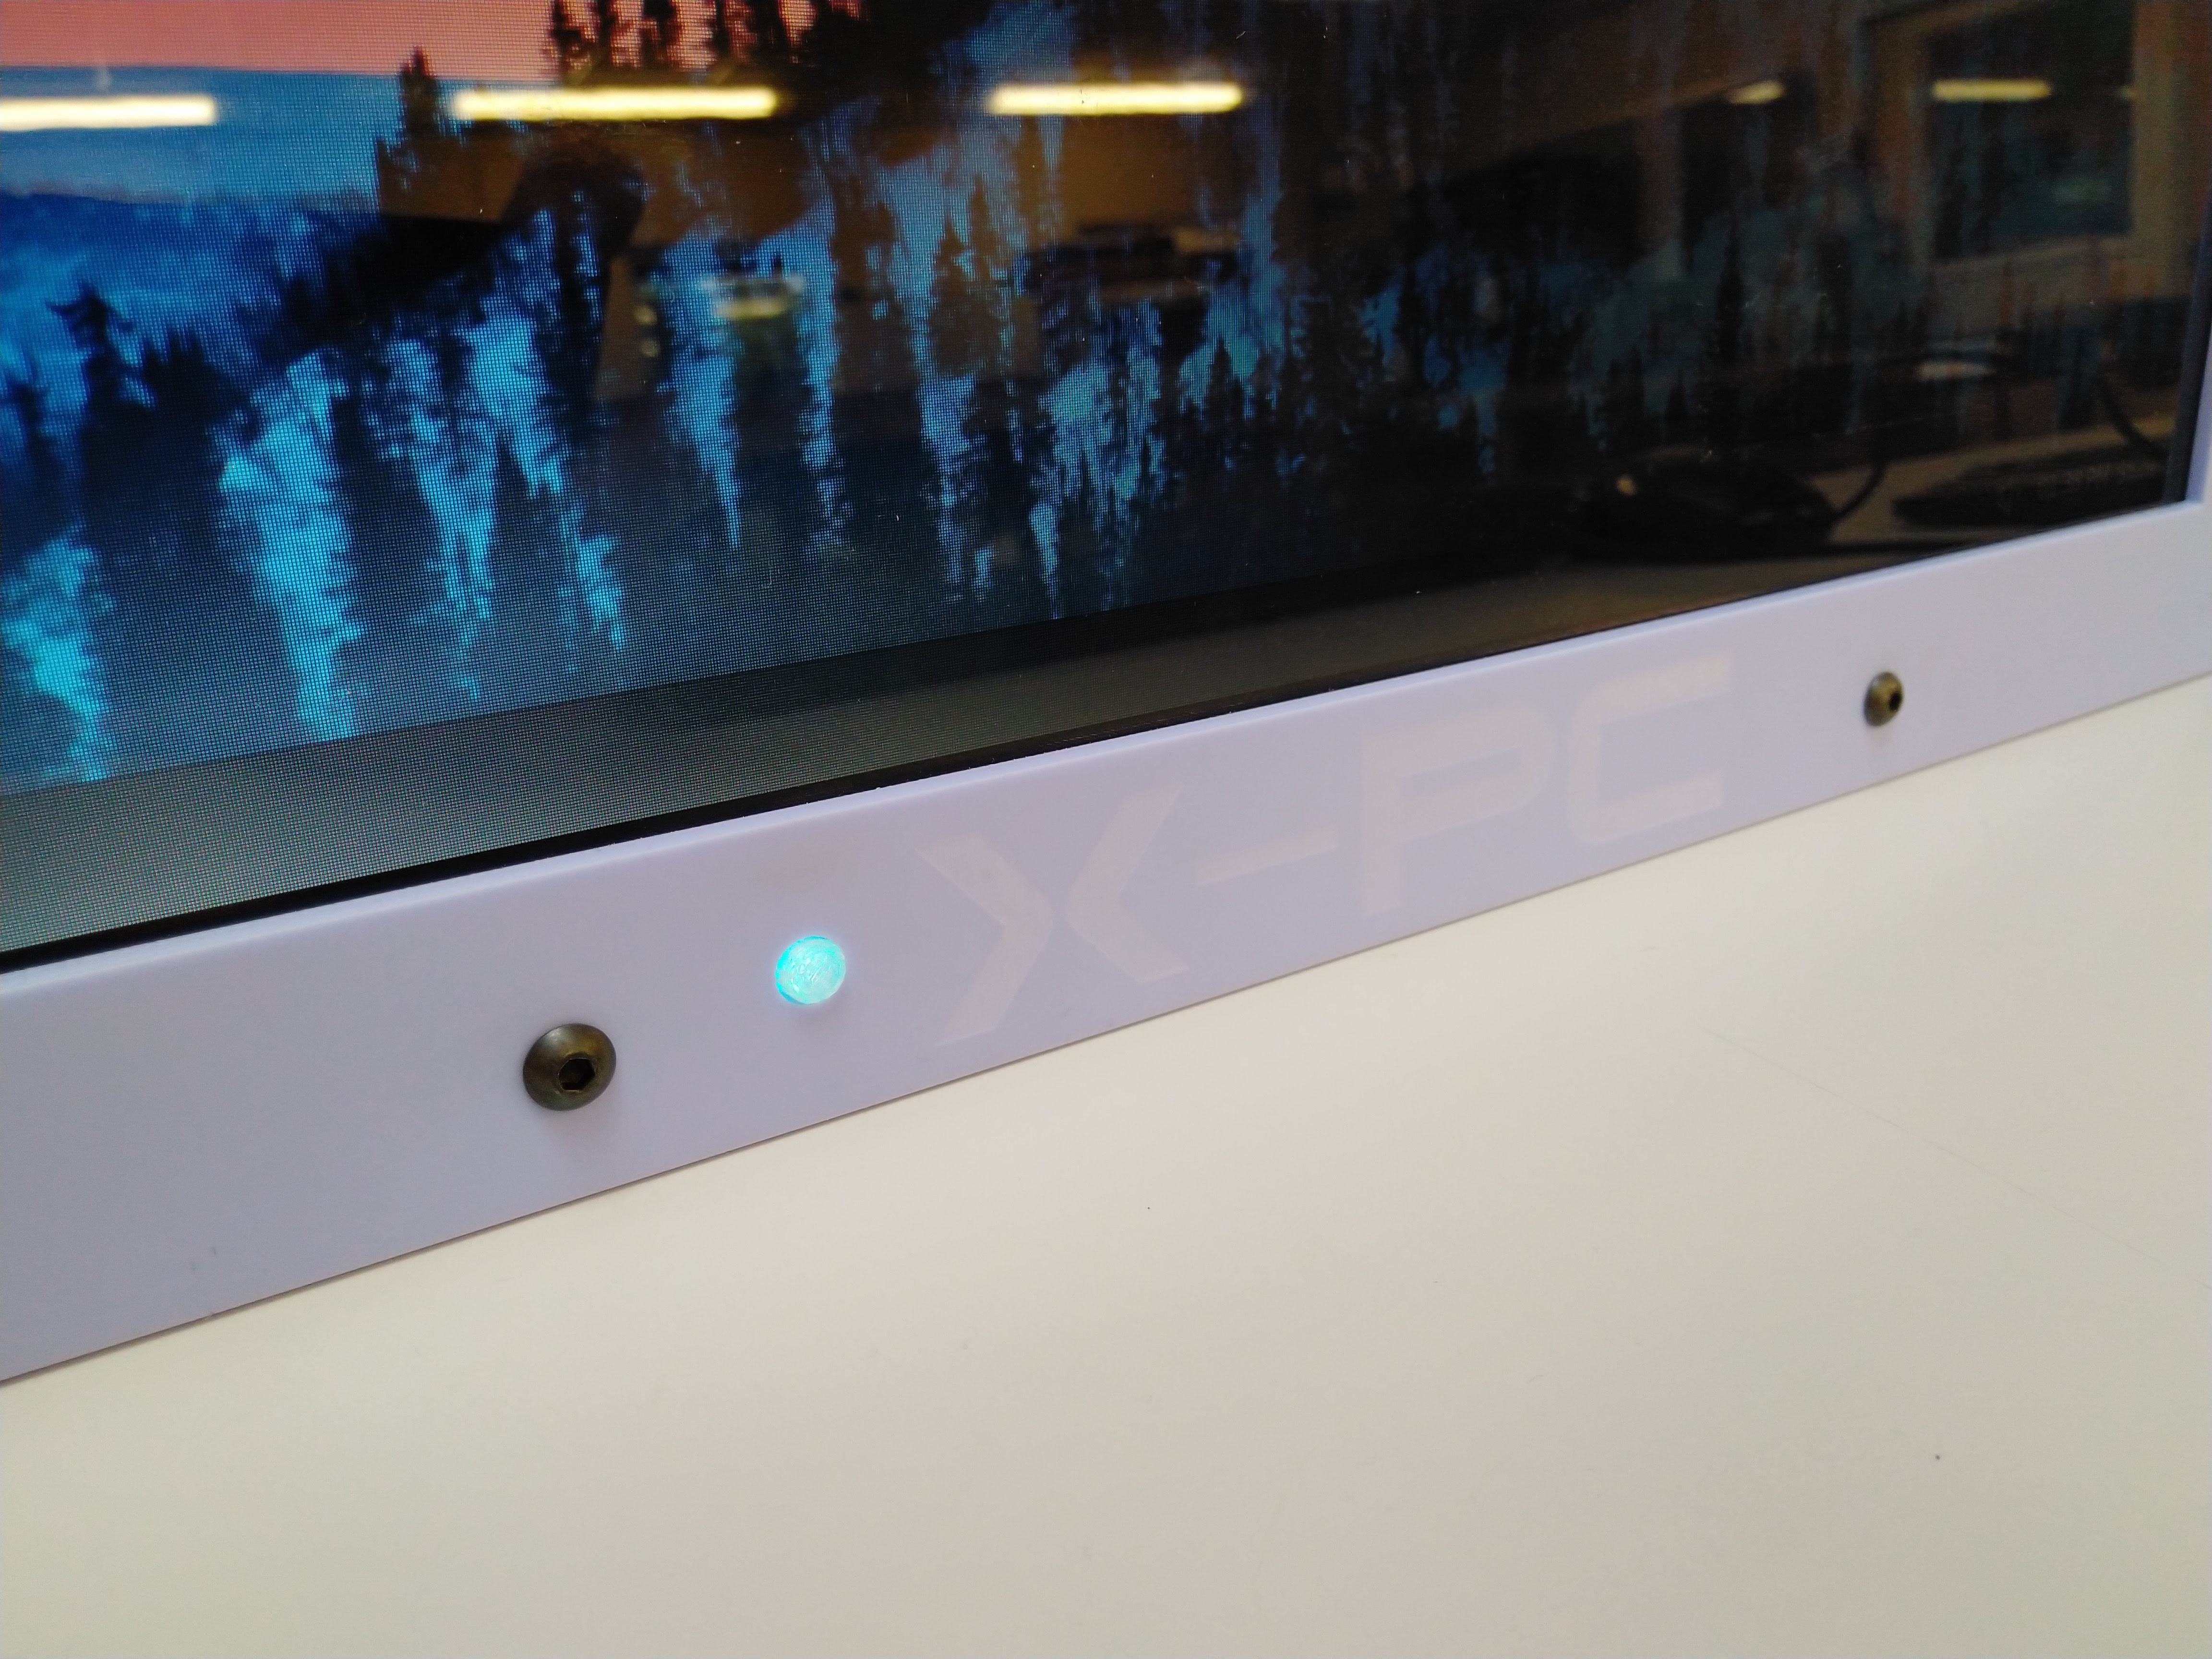
The power switch PCB is mounted at the bottom of the front panel, I 3D printed a button in clear PLA so it would light up when switched on.
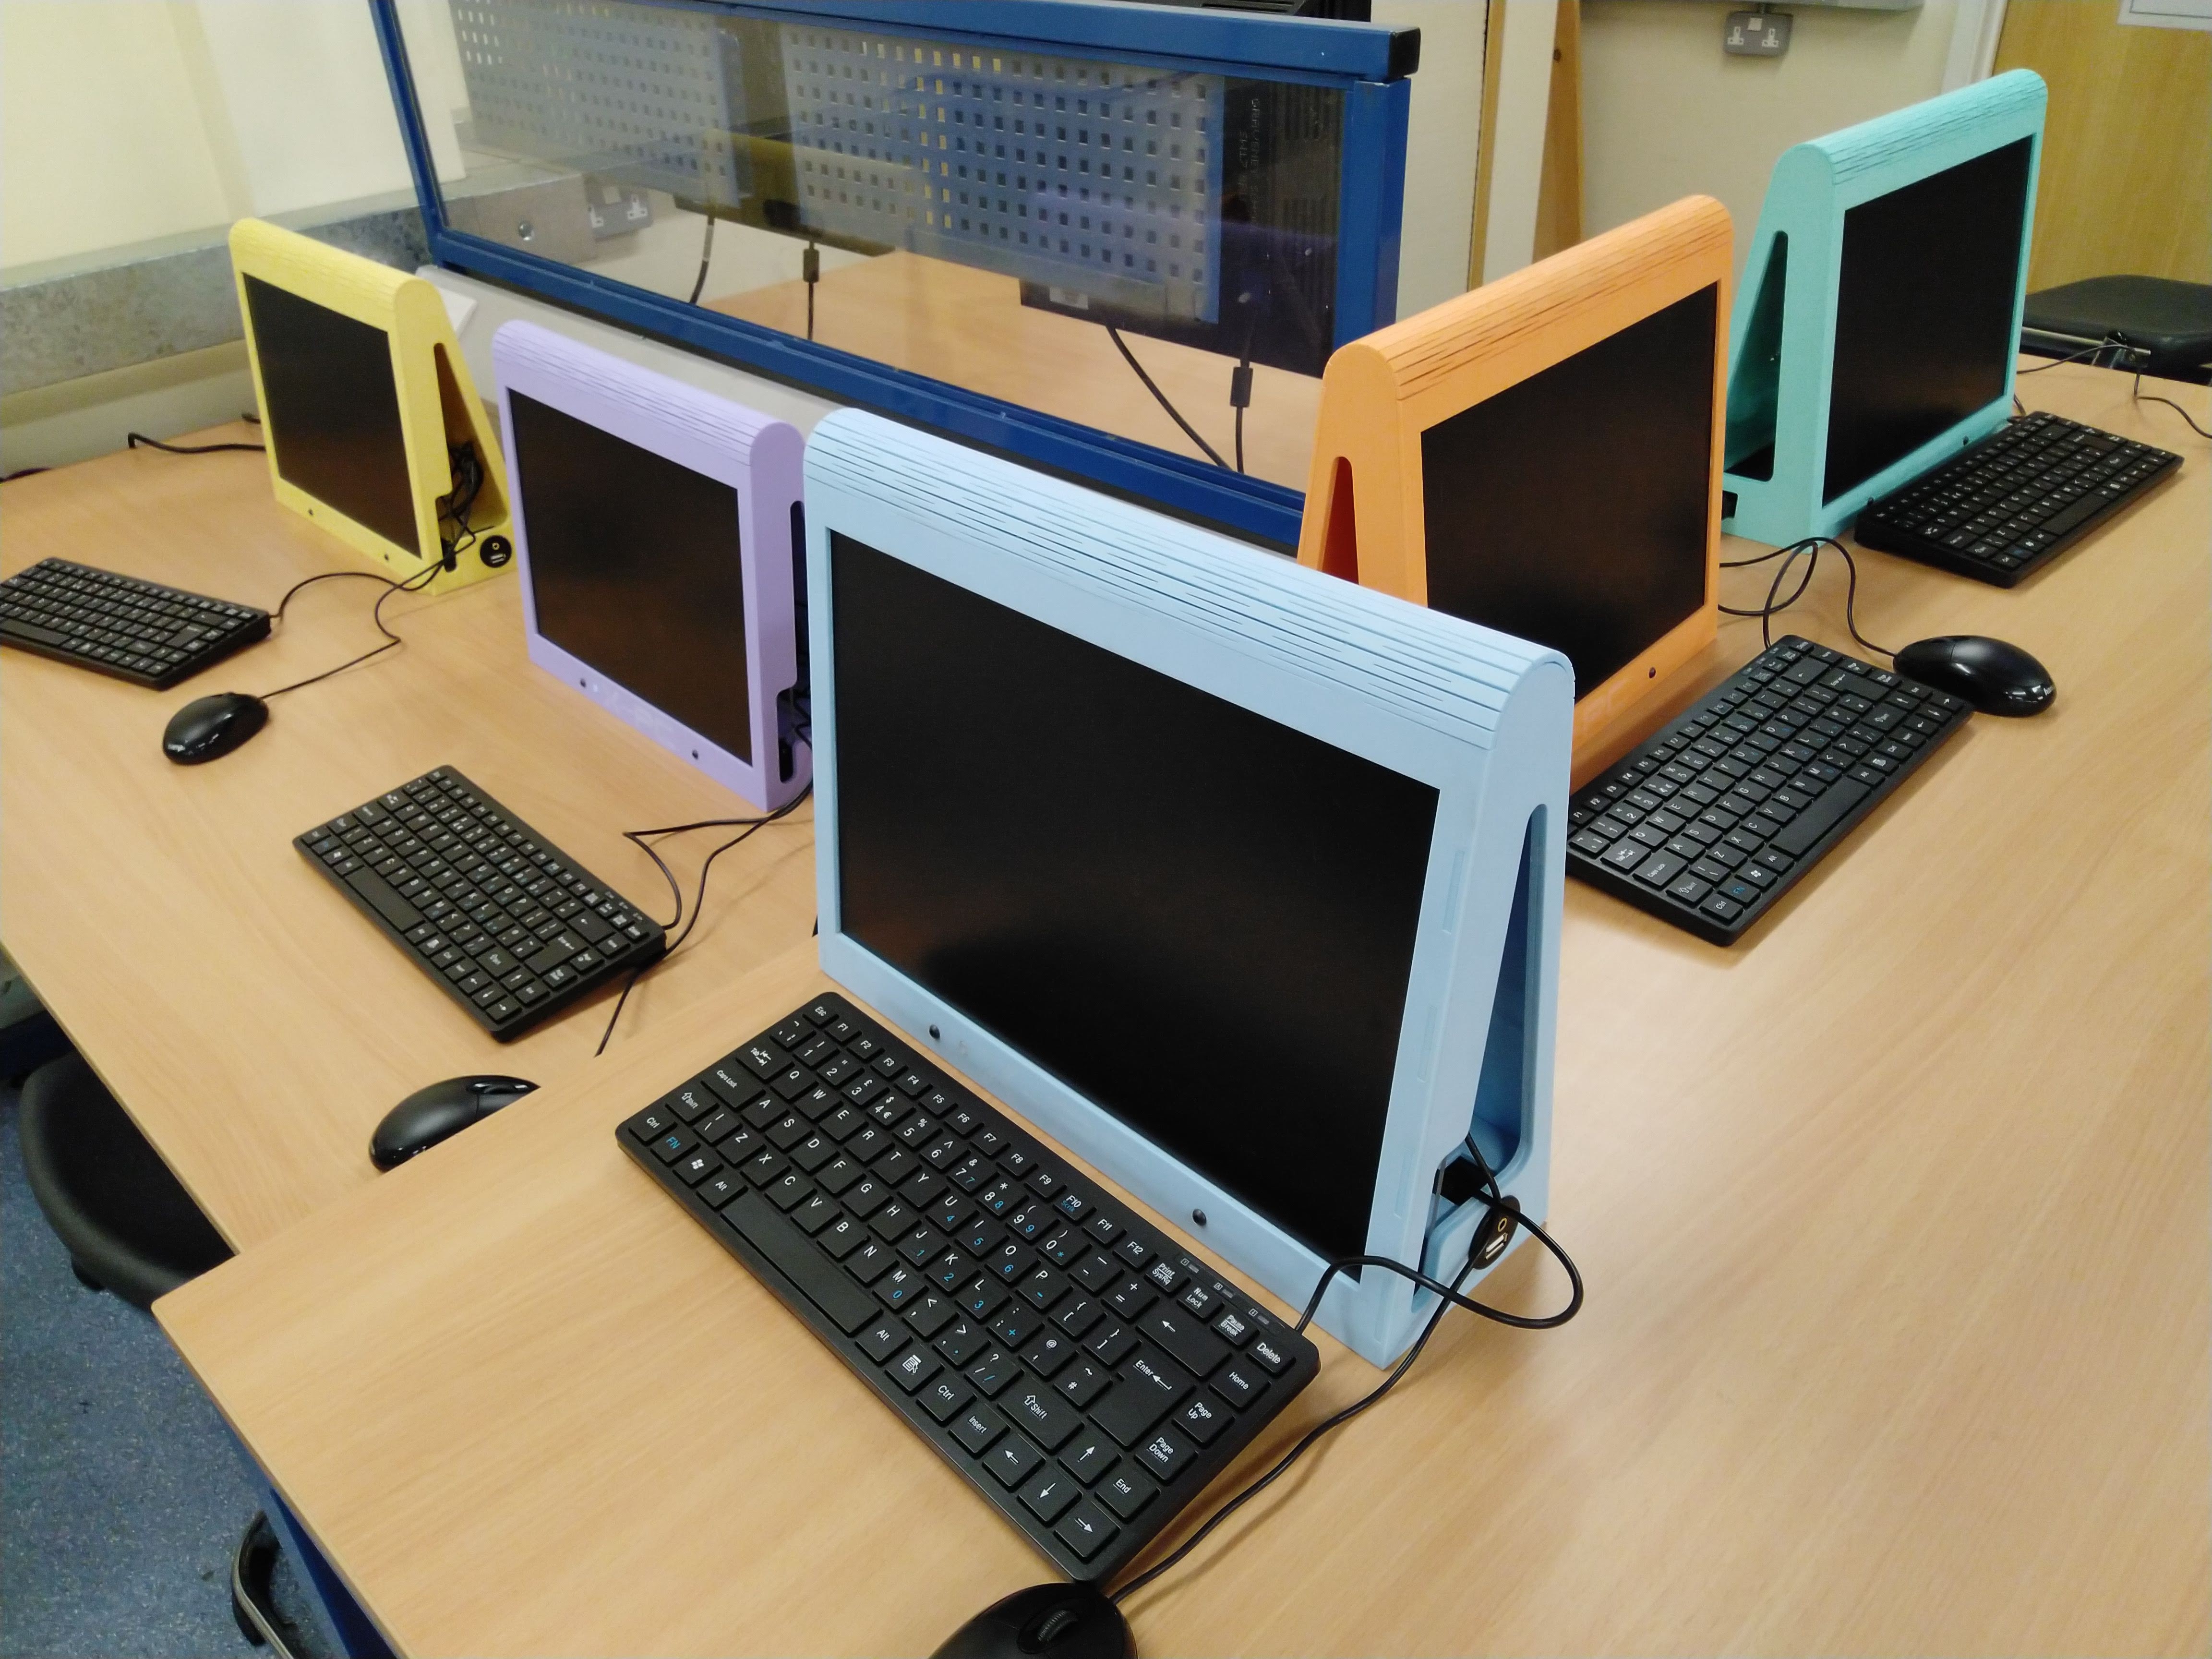
In the classroom:
What's next ?
I've been given about thirty more old laptops. So I'll start converting these into more X-PC's, unfortunately they have slightly different motherboards so I'll need to modify the design to make them fit.
I'm also planning to do a Raspberry Pi version (obviously!).  


X-PC_MB_Cover.dxf

If you use the optimised version, you'll need this file as well. These parts wouldn't fit on the 1000x500 sheet but they can be cut in a different colour as they are not seen from the outside.

AutoCAD DXF - 203.05 kB - 01/15/2021 at 09:38

Download

X-PC_V1_Seperated.dxf

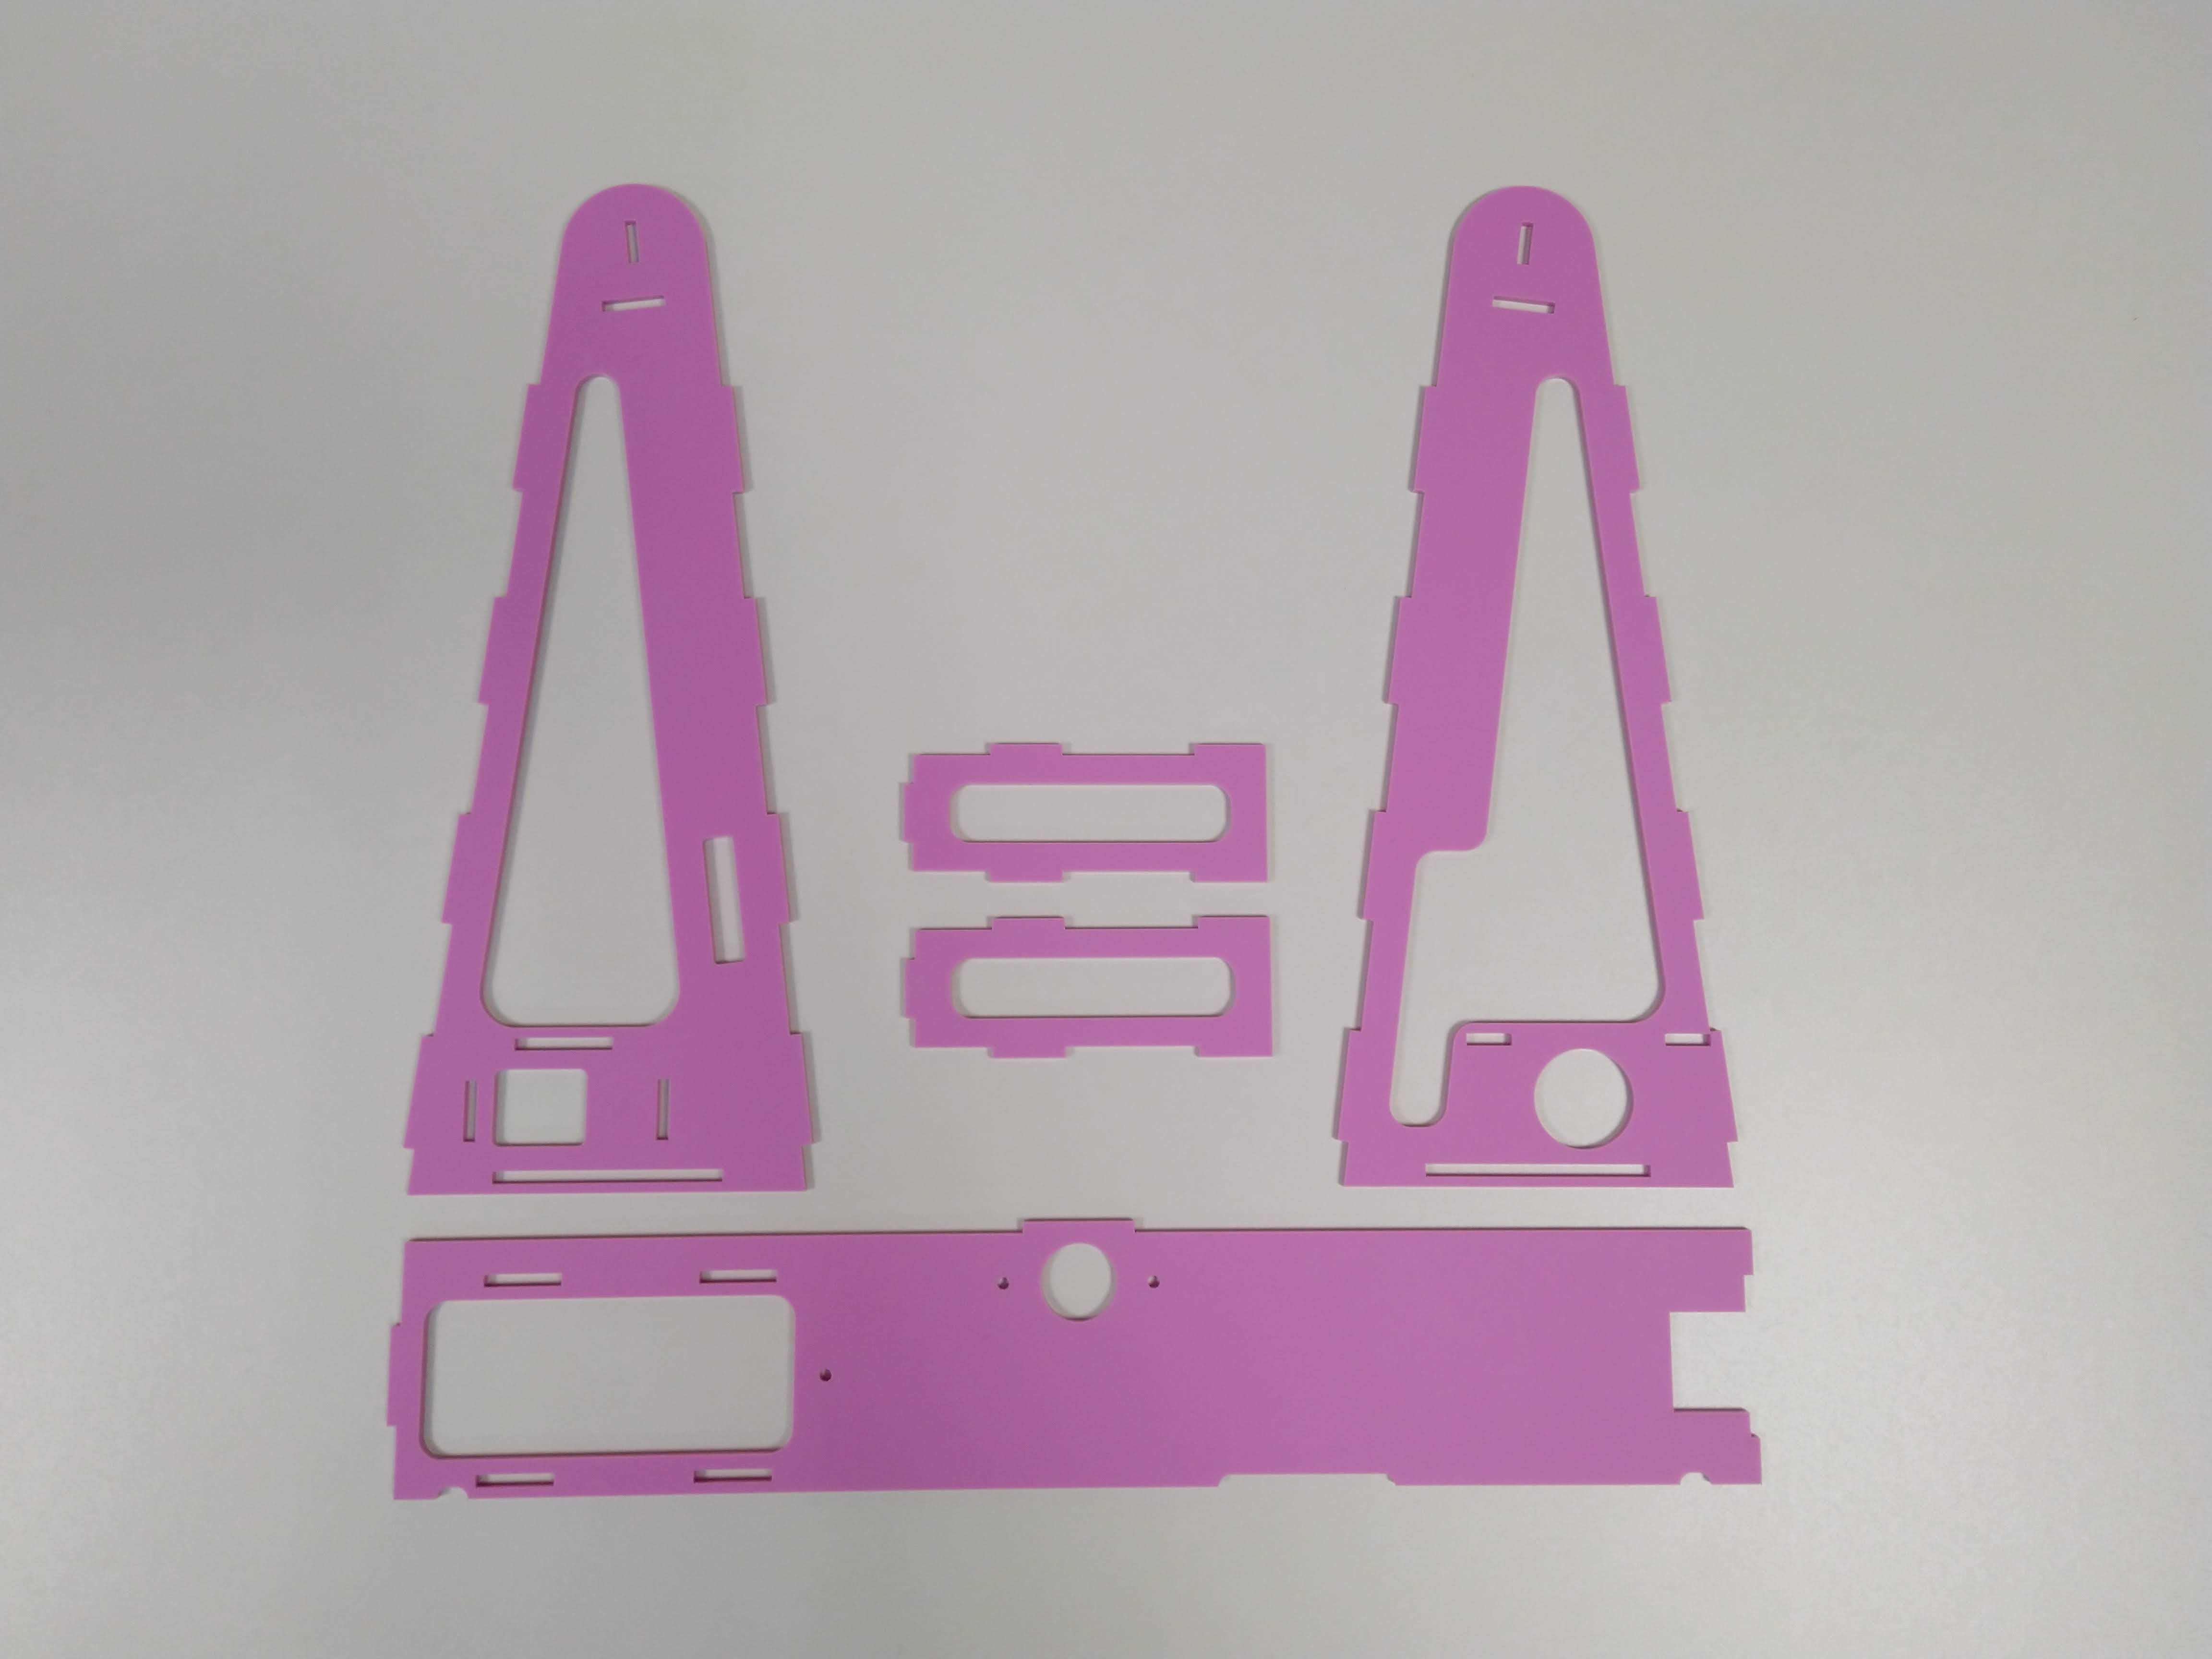
All the parts for the X-PC. To be Lasercut in 3mm acrylic.

AutoCAD DXF - 1.64 MB - 01/15/2021 at 09:29

Download

X-PC_V1_1000x500_Optimised.dxf

Parts for the X-PC. Optimised to be lasercut on a 1000mm x 500mm x 3mm acrylic sheet.

AutoCAD DXF - 1.32 MB - 01/15/2021 at 09:29

Download

  • 1 × 3mm Pastel Acrylic 1010mm x 505mm I used this pastel acrylic as I liked the colours but you can use any colour you like!
  • 1 × Liquid solvent cement
  • 1 × M3 x 32mm Hex Spacer
  • 1 × M3 x 15mm Hex Spacer

View all 2 project logs

  • 1
    X-PC Frame Assembly

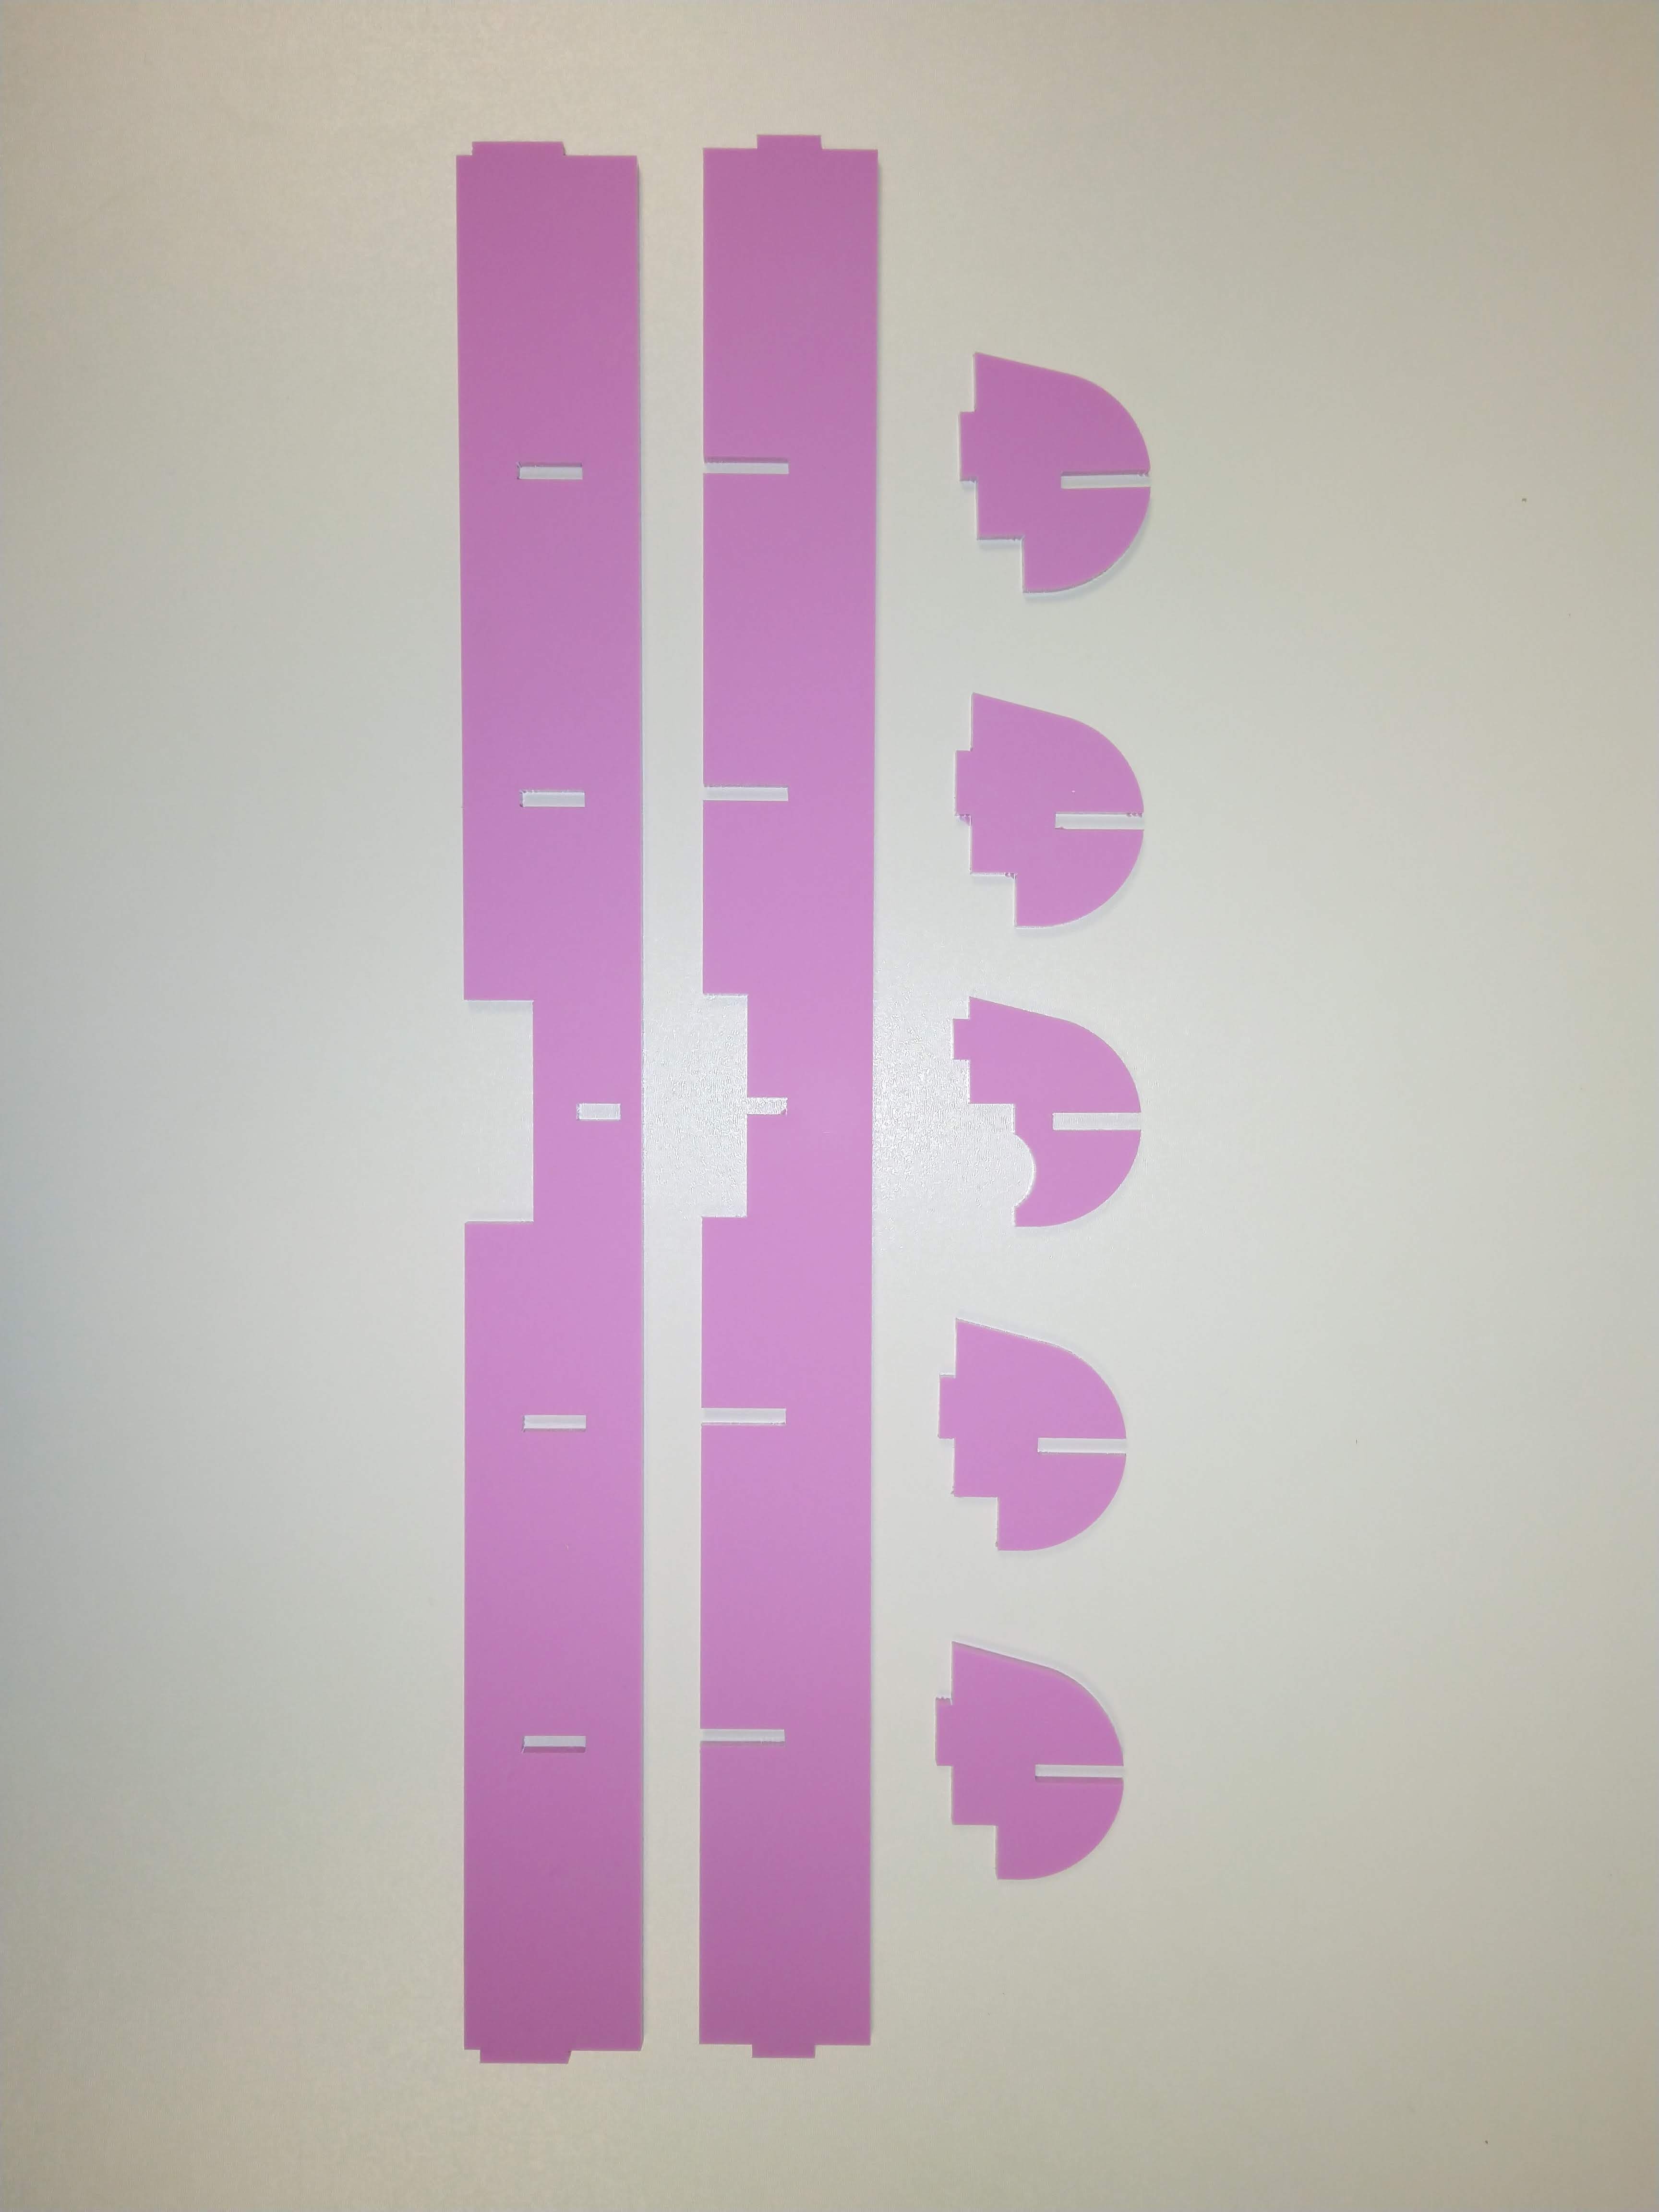
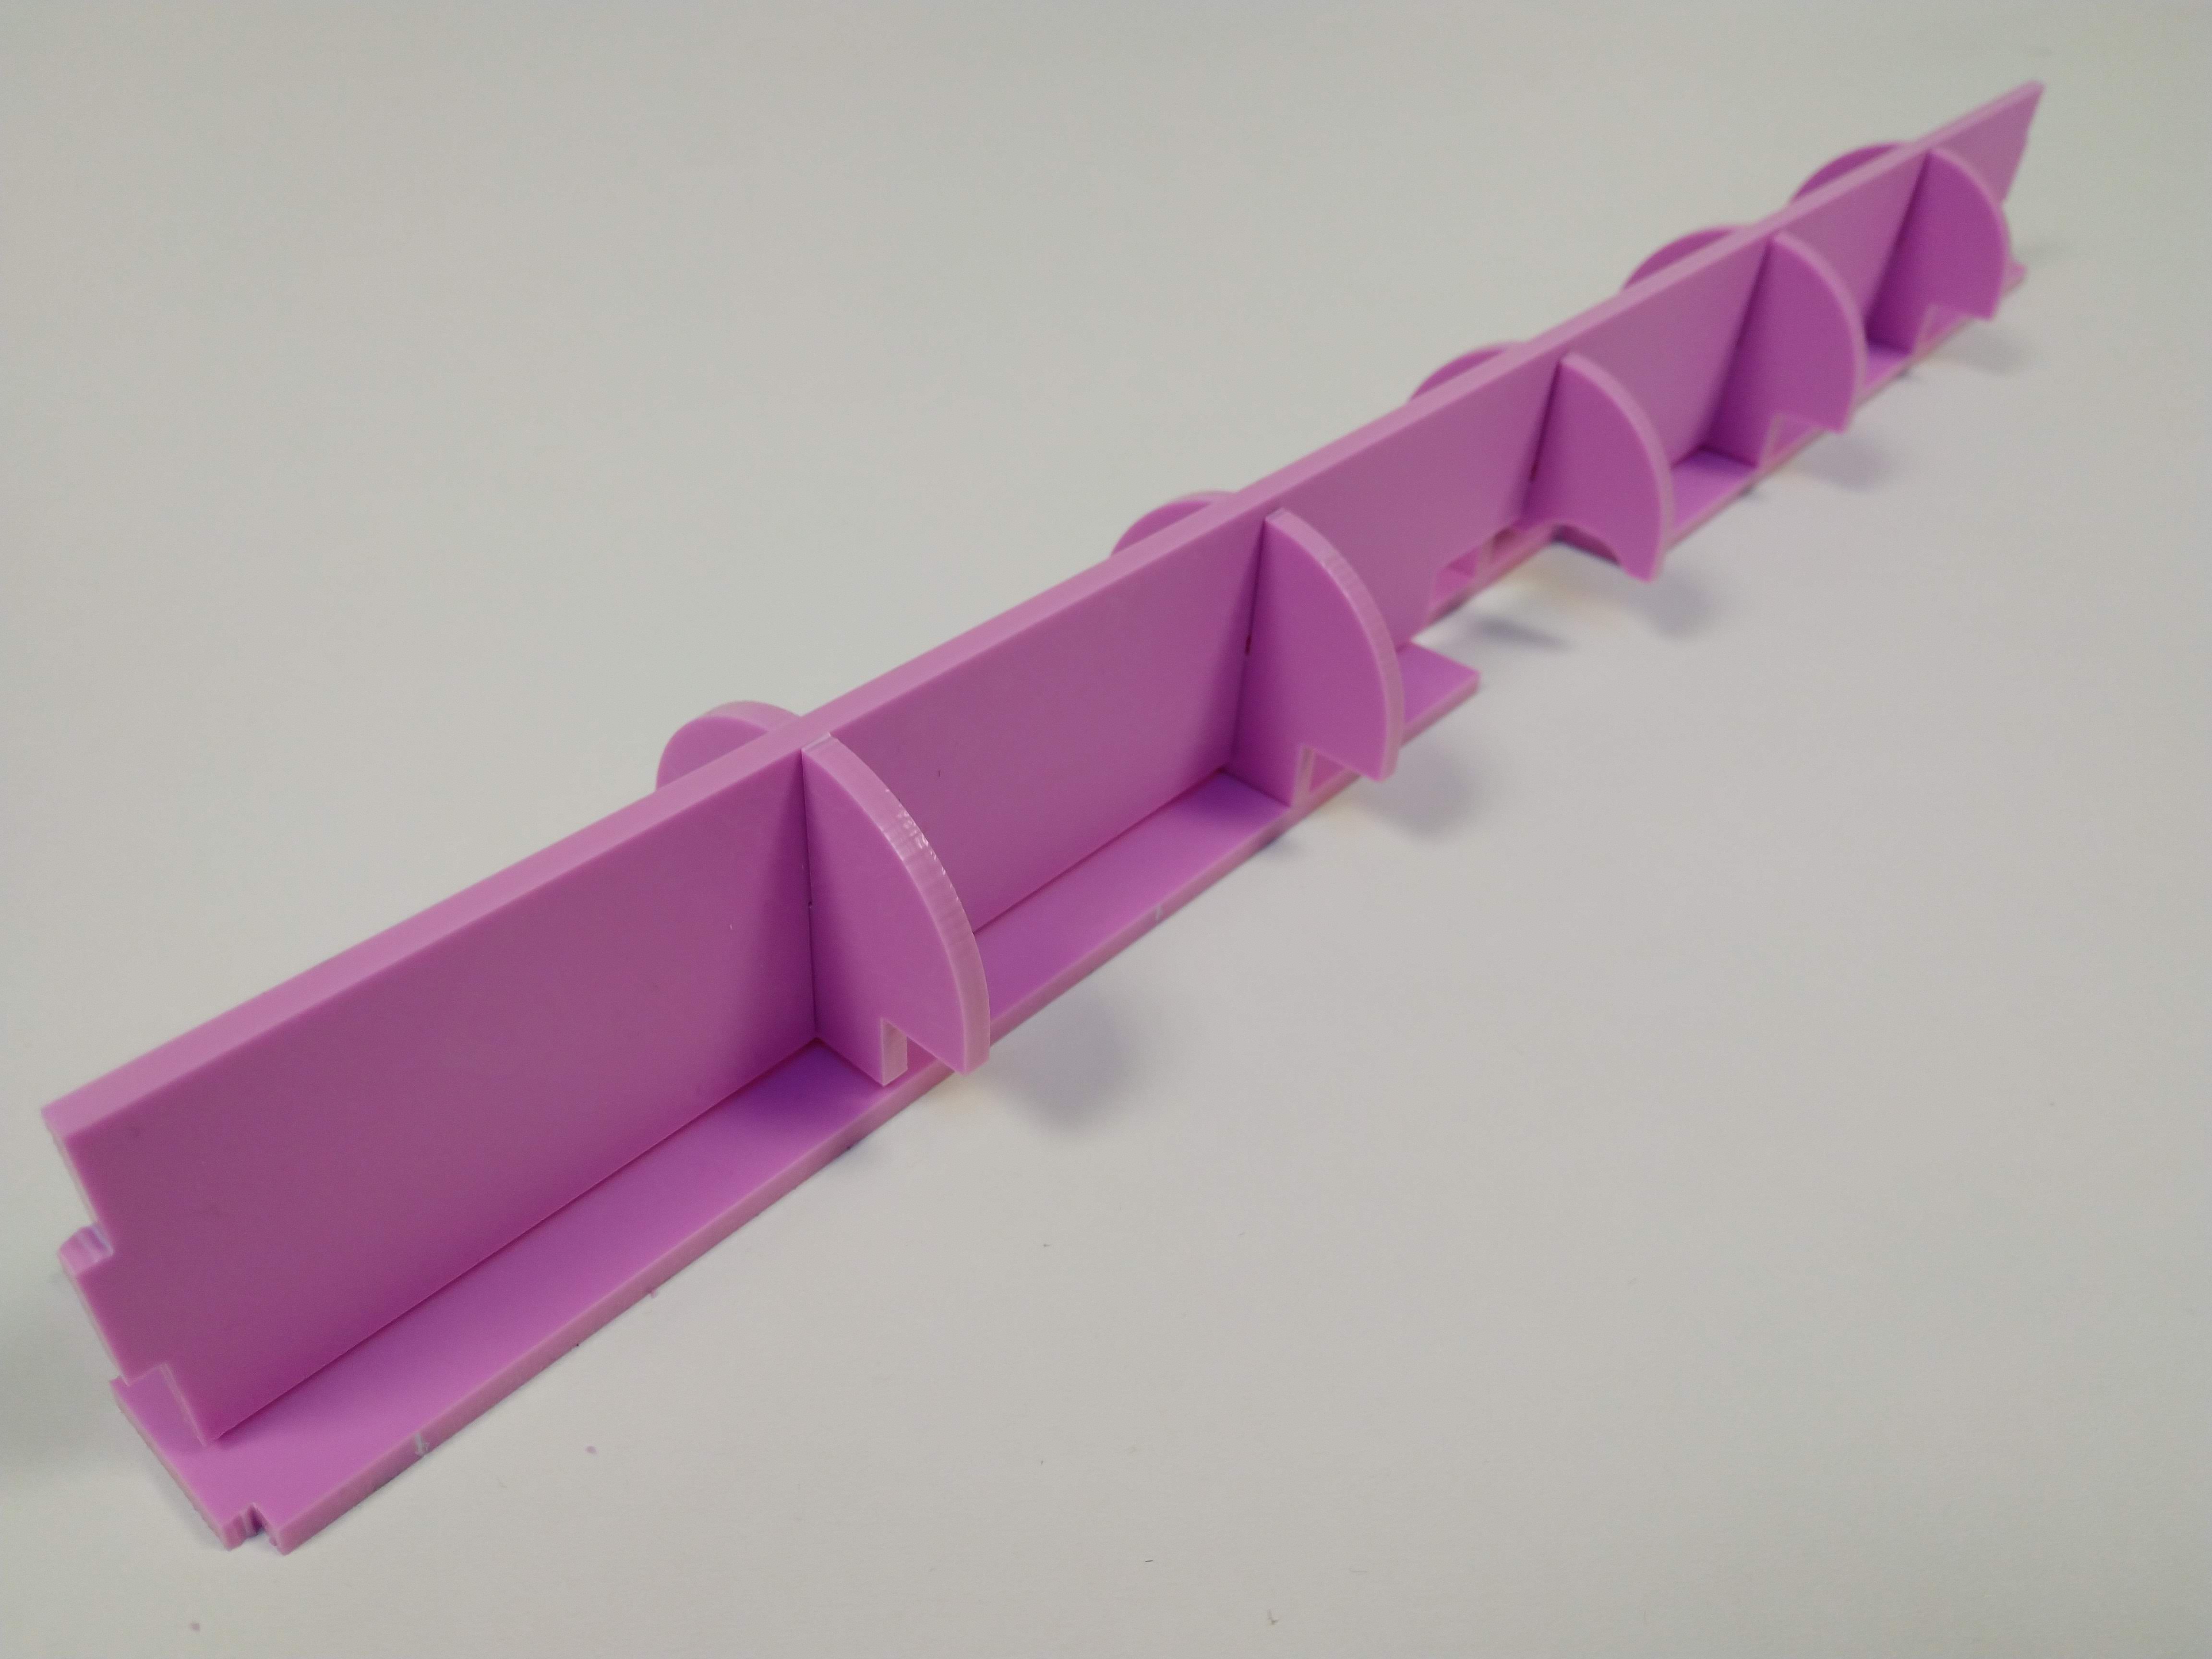
    Follow the pictures to assemble the frame. All the parts are fixed together with liquid solvent cement - I used a syringe with a blunt needle but you can also use a paint brush.

    I've labeled some of the parts to help put them in the correct position.

    Start with the top frame strengthener.

  • 2
    Step 2
  • 3
    Step 3

    Now on to the inner frame.

    Note: This picture is from an earlier version. I've moved the position of the hole in the bottom plate to the other side in the current version.

View all 16 instructions

Enjoy this project?

Share

Discussions

Arya wrote 05/20/2021 at 08:11 point

wow, these look gorgeous! As a laptop motherboard repurposing aficionado, I approve!

  Are you sure? yes | no

charlie_robson wrote 01/15/2021 at 15:16 point

Beautiful work. When I saw the picture of the finished items I thought it was a render. Bravo for saving these machines and in such a gorgeous manner.

  Are you sure? yes | no

jfdzar wrote 01/10/2021 at 18:24 point

Hey there! Great Work!

I am a helper of this project: https://www.labdoo.org/

We sanitize old laptops for educational purposes. At the end we wipe the HDD and install a custom distribution of Linux with educational content. I though maybe you would be interested in the distribution but I think you have already figured it out.


Sometimes is very frustrating to me because I have to discard laptops which have really good hardware but for example the keyboards are completely messed up or they have a problem in the power supply.

With your project Idea I will make further research to try to recover this laptops as well!

Thank you for your inspiration!

  Are you sure? yes | no

Neil Lambeth wrote 01/15/2021 at 11:29 point

Thank you! The Labdoo project looks great, you have helped a lot of students! 

  Are you sure? yes | no

Richard Cook wrote 01/07/2021 at 17:47 point

Awesome !!!  I have taken apart many laptops and my first question for you was going to be "Why?" .... and you answered it beautifully in your first paragraph!   I am a Toastmaster and have learned a lot about communication and leadership (and am also a retired Electrical Engineer) so I can say with some authority that this is a very good project and presented well.  Keep up the good work!

  Are you sure? yes | no

Neil Lambeth wrote 01/07/2021 at 18:55 point

Thank you!

  Are you sure? yes | no

jcm_dupuy wrote 01/06/2021 at 23:32 point

Do you offer help and advice to other would be "repurposers"?  In these times of home learning, it would be great if the school could offer practical support for those families who cannot afford to have a computer per kid.  If I were to circulate this page to my son's school [in the UK], how would be advise them to proceed?  Very small niggle: As a "leftie", I wonder if the mouse cord is long enough to swap the mouse to the left of the keyboard?  

  Are you sure? yes | no

Neil Lambeth wrote 01/08/2021 at 15:09 point

Yes, I'd be able to offer advice.

The issue here, is that at the moment you would need to use the exact same laptop for this to work. Hopefully someone can adapt the design to work with other laptops (I don't know if other schools use the same model). I'll be posting the design files soon, I'm just making a few tweaks.

I did think about left handed users - the mouse cable actually comes out of the middle of the storage space, you can just pop it back through and out of the other side (the cable is also quite a bit longer, I just tucked it in for the pics).

  Are you sure? yes | no

jcm_dupuy wrote 01/08/2021 at 23:00 point

Thank you so much for your prompt response.   I will be awaiting for the design files and will forward them to the IT department at our local school if it's ok with you.

  Are you sure? yes | no

bat wrote 12/25/2020 at 23:42 point

excellent idea and realisation. just wondering why you didn't expose the ethernet ports... WOL is a good tool if you have a lot of these boxes to manage. also net booting could be an option for keeping the boxes always up-to-date.

all in all, i love the result and the mindset. and it also looks cool.

  Are you sure? yes | no

Neil Lambeth wrote 01/07/2021 at 18:51 point

Thanks! I'm not using the ethernet port as I wanted them to be mobile and the built-in WiFi still works fine. I also didn't want any exposed ports that are not being used as the students will just poke things into them.

  Are you sure? yes | no

Dan Maloney wrote 12/22/2020 at 21:29 point

This is a great way to repurpose those barely used machines. Any pushback from students/administrators/teachers/parents on switching them to Linux?

  Are you sure? yes | no

Neil Lambeth wrote 12/23/2020 at 08:50 point

Thanks! Switching to Linux has actually been quite easy. I've themed it to look like windows so some users haven't even noticed. A lot of the software we use now runs in the browser (Google Docs, Onshape) so it's no different on Linux. We still use Windows software but it's fairly old so it runs fine using Wine.

  Are you sure? yes | no

Neil Lambeth wrote 12/21/2020 at 17:29 point

Thanks, no it doesn't complain at all about the missing battery!

  Are you sure? yes | no

Gerben wrote 12/21/2020 at 16:50 point

Pretty cool.
Doesn't the PC complain about missing the battery?

  Are you sure? yes | no

Similar Projects

Does this project spark your interest?

Become a member to follow this project and never miss any updates