Close
0%
0%

Put a Raspberry Pi CM4 into an original iPad

Open up a 2010 iPad, remove its logic board, and fabricate a new board based around the Raspberry Pi CM4.

Public Chat
Similar projects worth following
The 2010 iPad is completely unsupported, and is almost useless. It will still run old apps, but almost all internet-connected apps are broken. Even browsing the web in Safari is difficult, since iOS 5 has out-of-date TLS CAs.

But still, it's a pretty good piece of hardware in many ways. If we were to replace the logic board, we could still use these parts:

* Case
* 25 watt-hour battery
* capacitive touchscreen digitizer
* 1024x768 LCD
* 2x wifi/bluetooth antennas
* mono speaker
* TRRS port
* microphone
* ambient light sensor
* four buttons (lock/unlock, volume up, volume down), one switch (rotation)
* The wifi/BT module
* 30-pin connector

In this project, I am building a replacement logic board around a Raspberry Pi CM4.

Apple sold millions of iPads the year they were introduced. These devices were capable of browsing the web, watching movies, and playing games, with up to 10 hours of battery life and an intuitive touchscreen display. Apple essentially defined what a tablet should look like, and competitors are still playing catch-up.

However, all the original iPads are many years out of date. While some apps still work, and some can be made to work by jailbreaking the device, due to a lack of software support by Apple, these tablets are unable to do many of the things they used to be capable of.

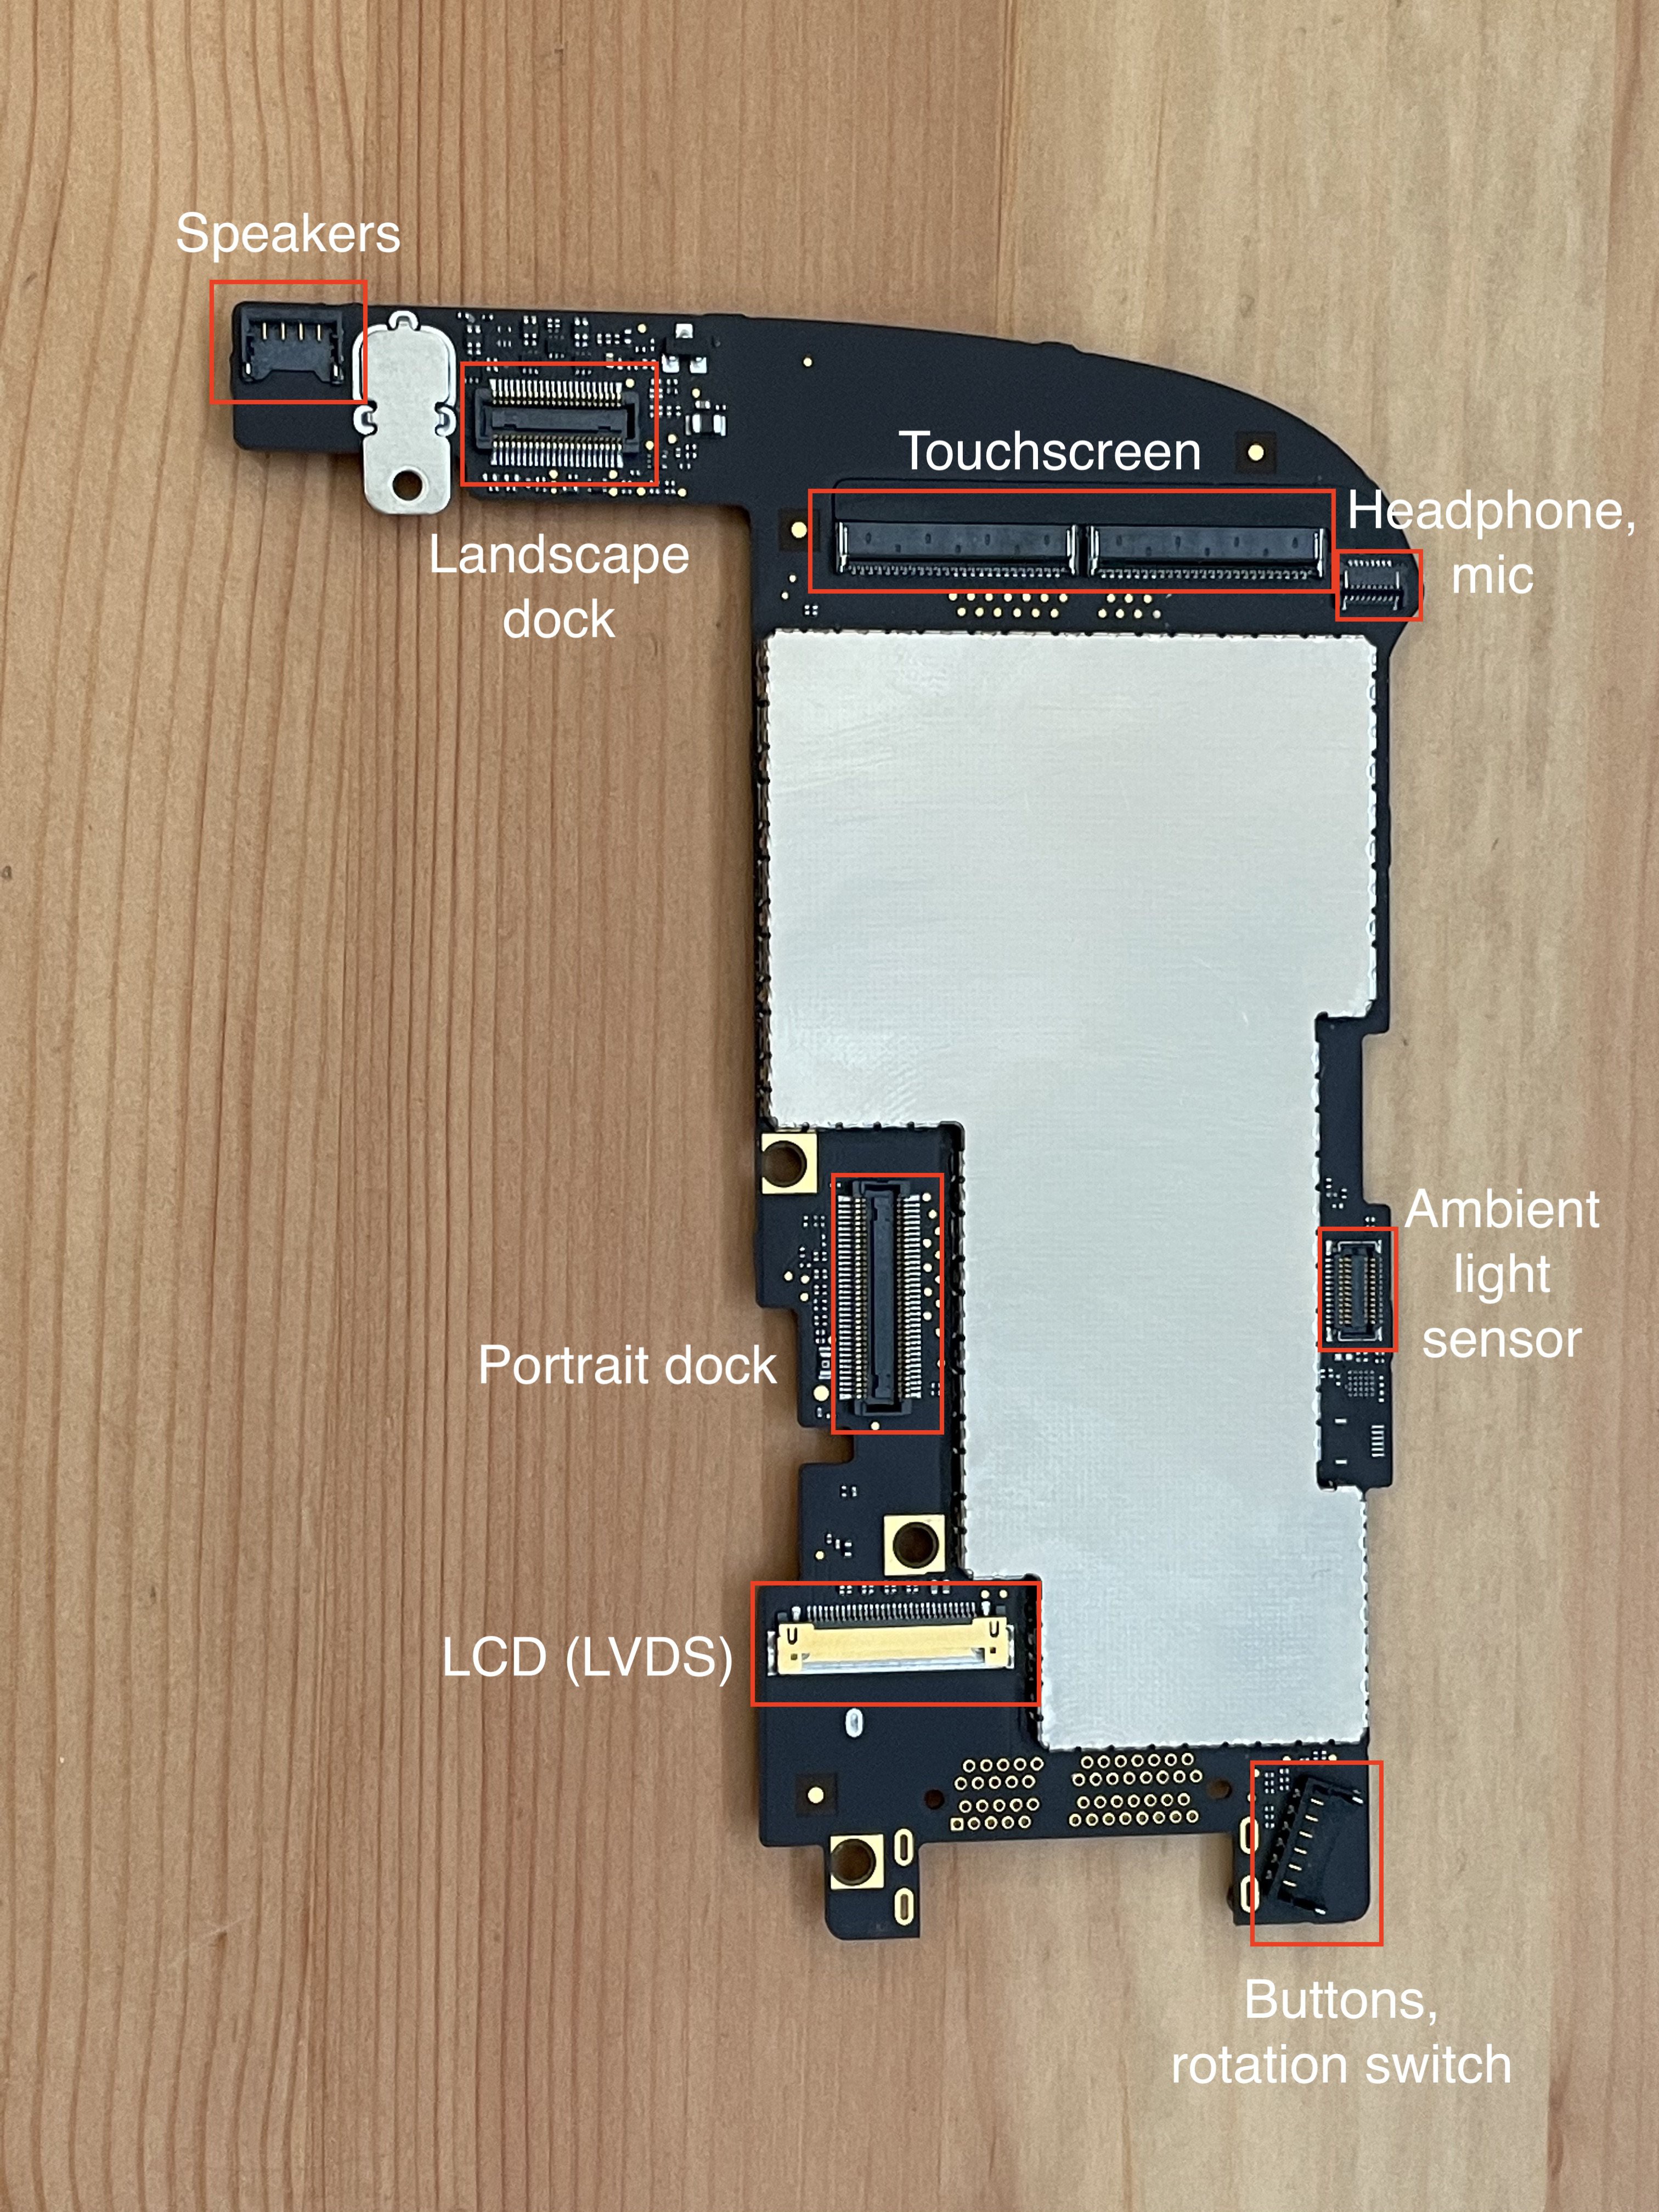
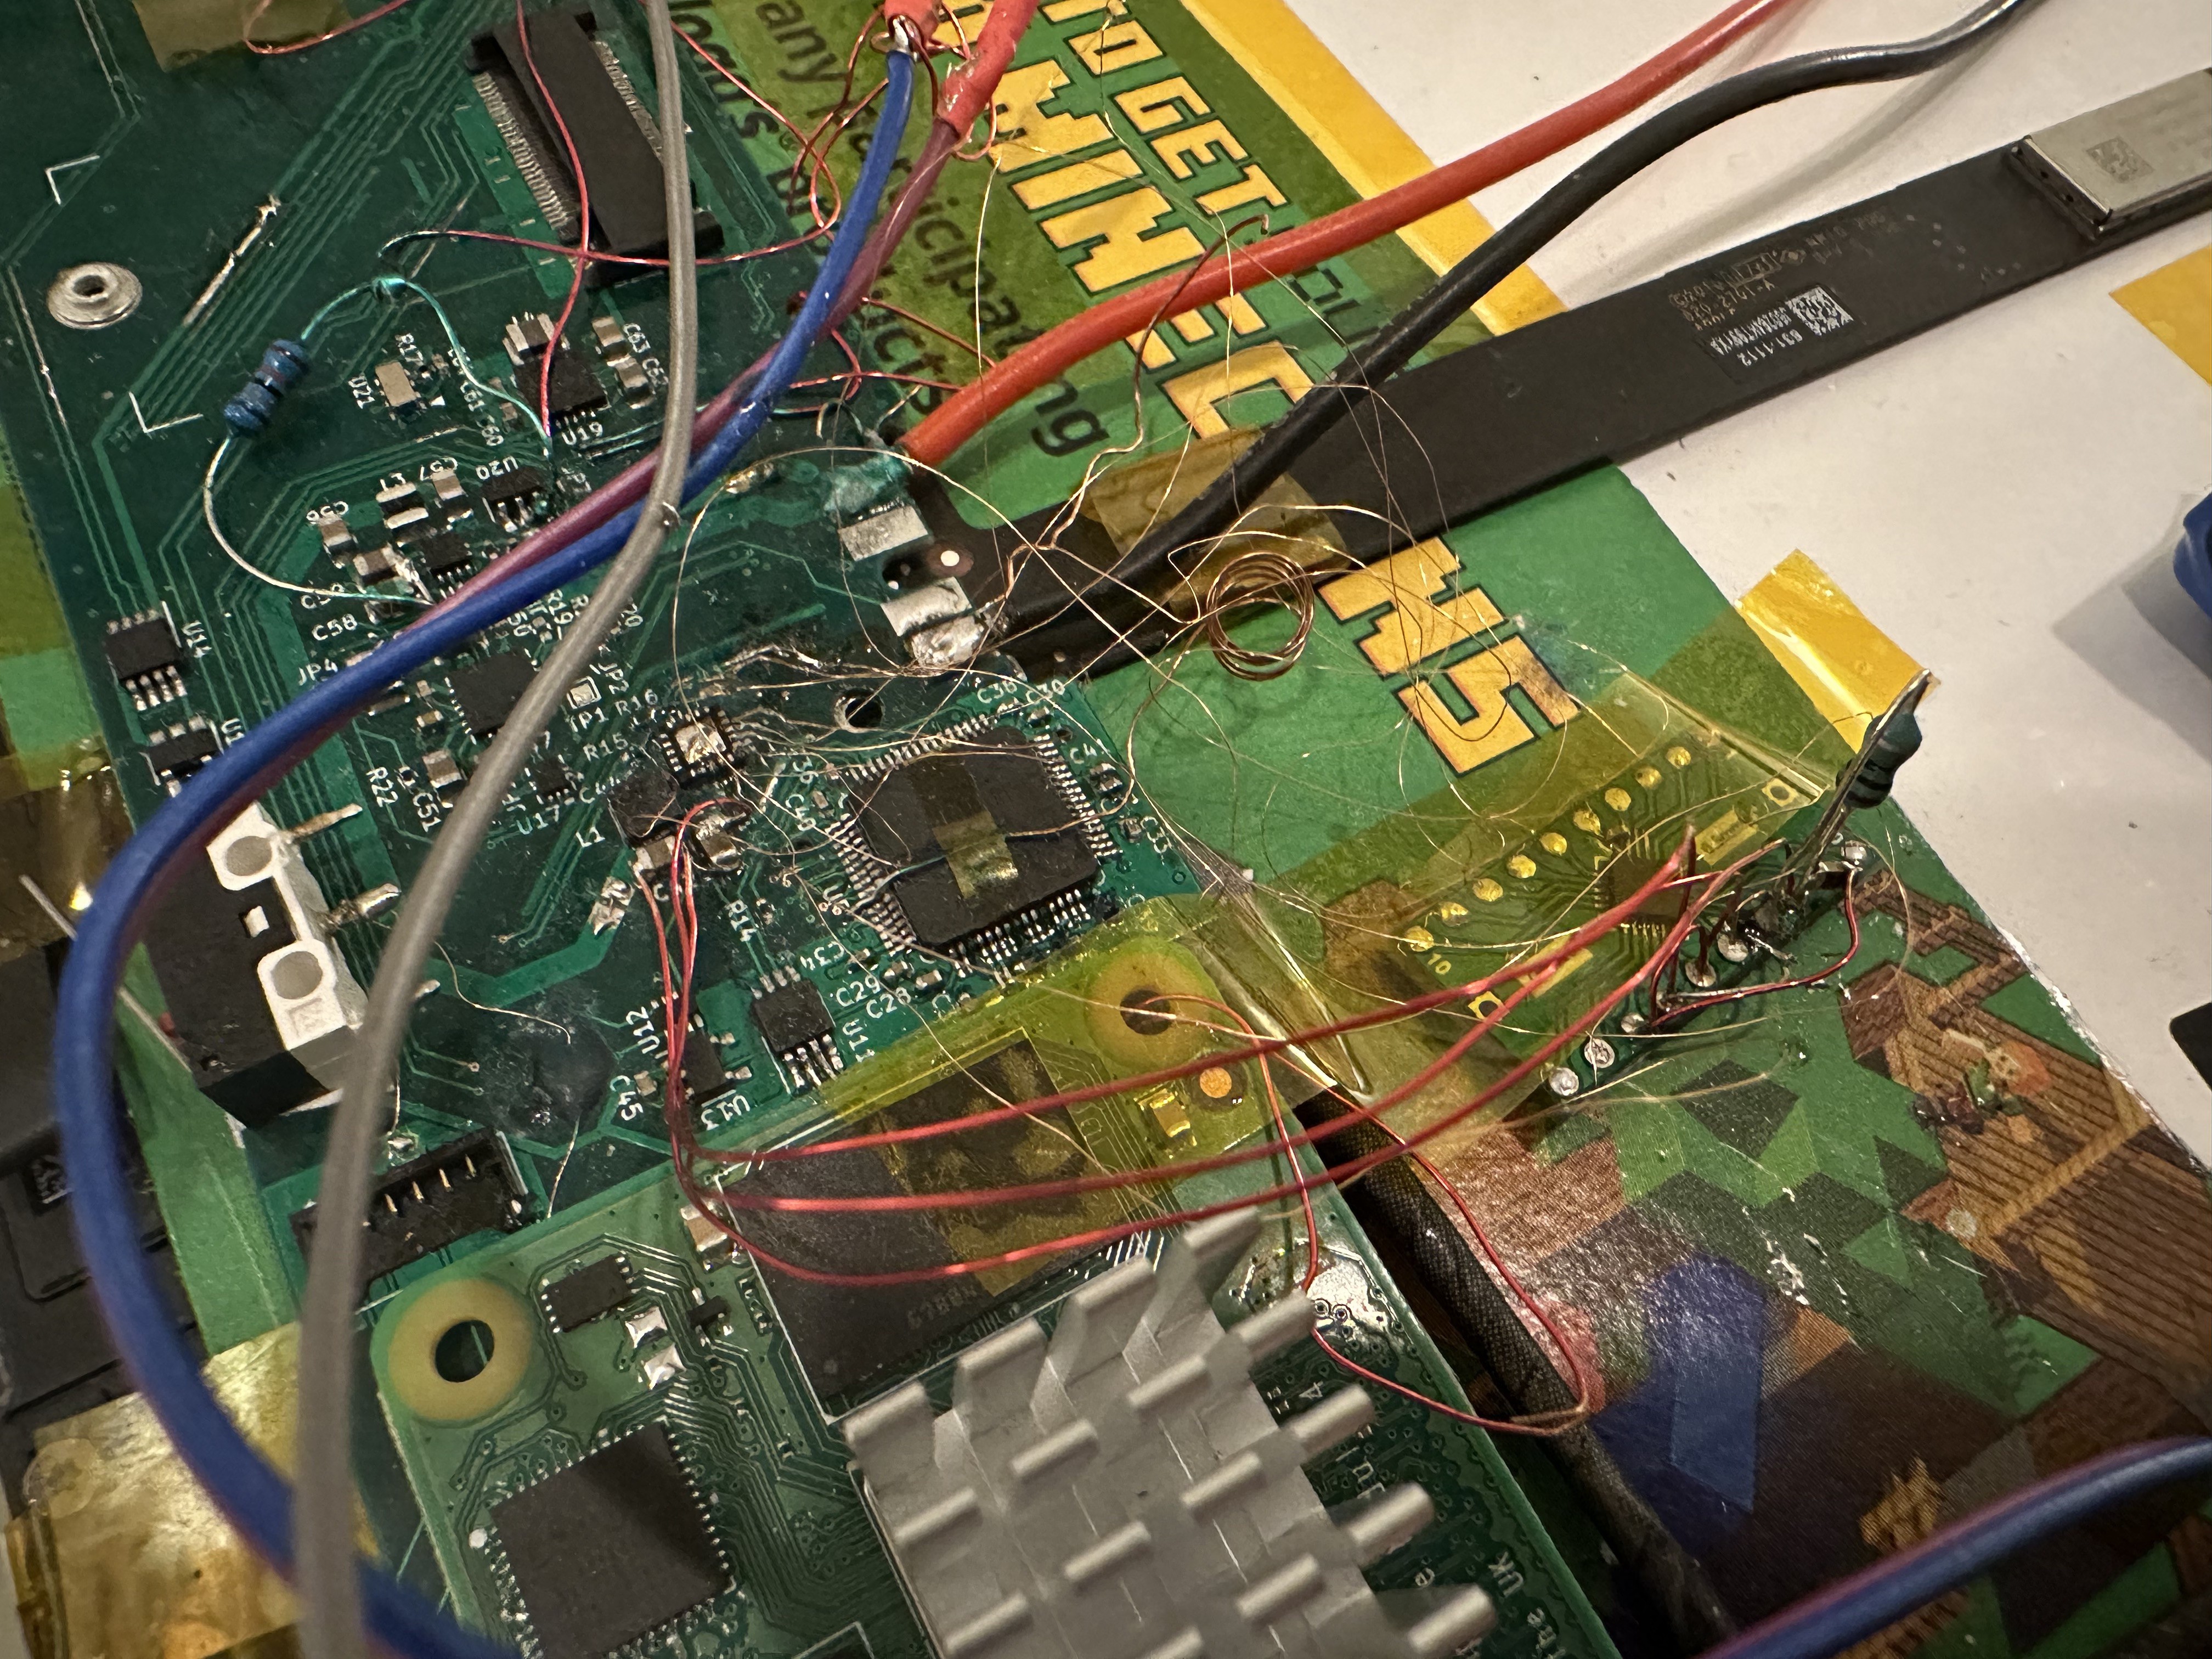
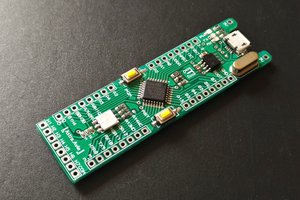
The hardware isn't terrible, though! The iPad has a nice touchscreen, an okay LCD, a beefy battery, and enough buttons and ports to make it still useful as a computing device.

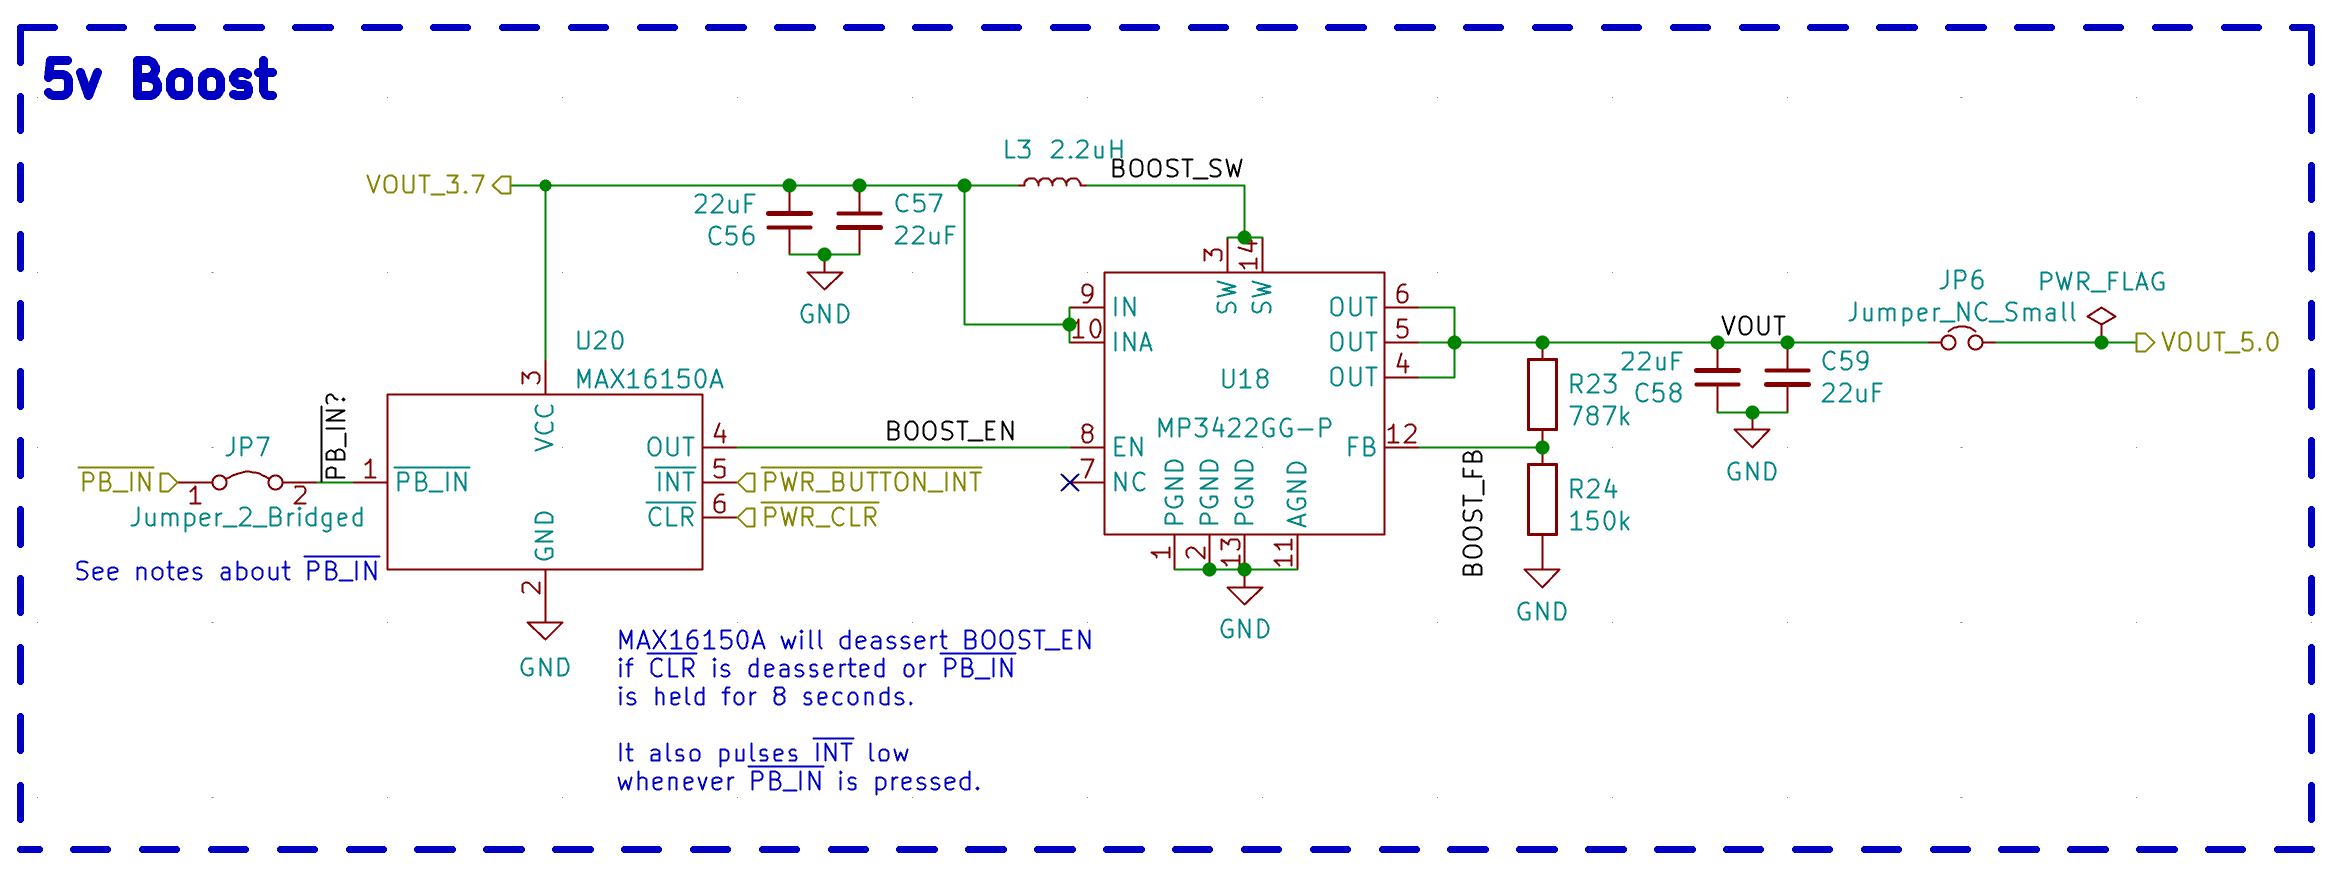
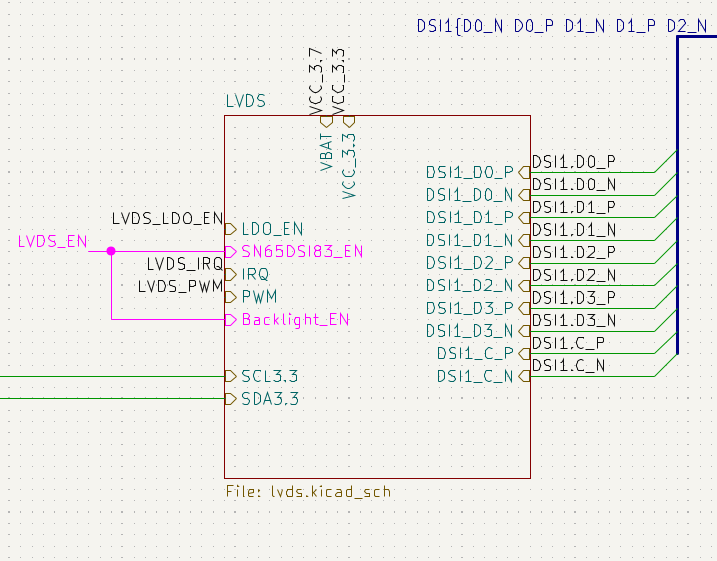
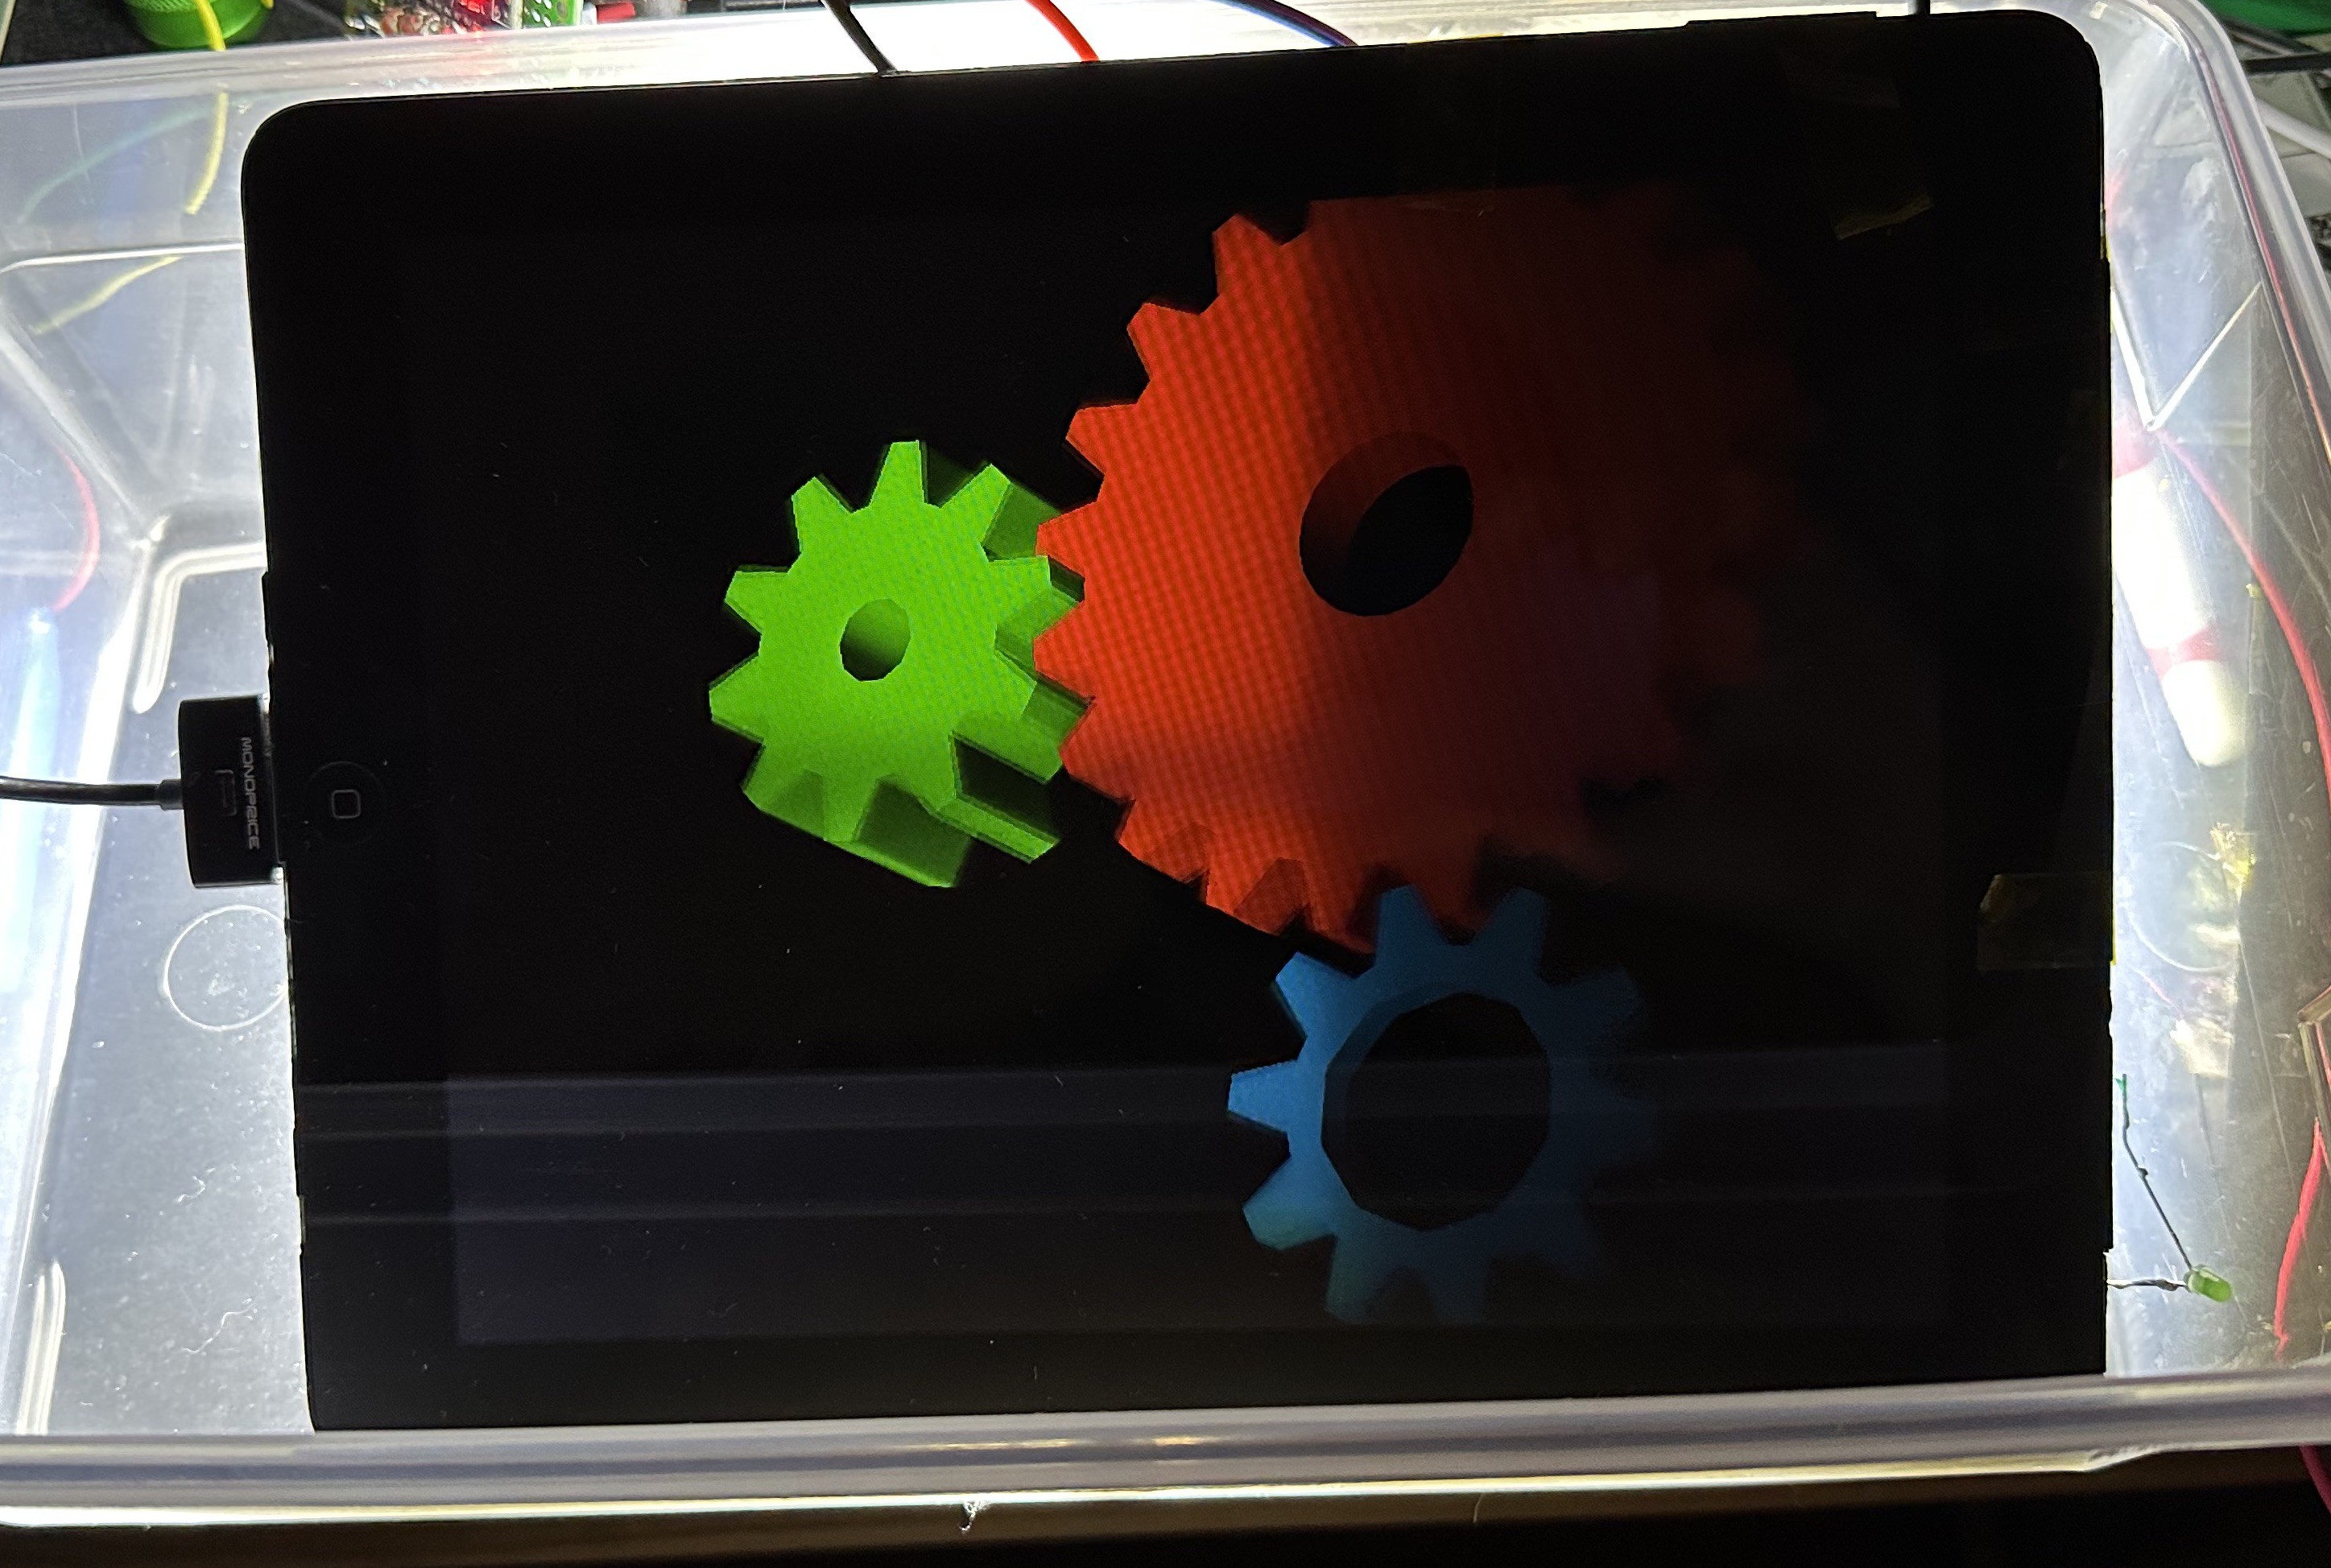
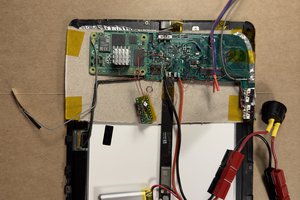
With this project, I intend to make a logic board for the original iPad based around the Raspberry Pi CM4 or another similar SoM. This will allow people to upcycle their obsolete iPads into fully-functioning tablets, which should be able to run Linux and Android.

Hopefully by giving these venerable devices a new lease on life, we can keep some of them out of landfills.

  • Debugging the power button

    Evan01/23/2023 at 00:27 0 comments

    Hey, I'm back with a simple one today. Between the holidays and general life stuff, I haven't found time to work on this project for a while. Motivation on hobby projects seems to ebb and flow. Hopefully it's starting to flow again.

    I saw a post on the Facebook group "Raspberry Pi and DIY Projects" where someone was using the MAX16150 IC to handle power on/off for their Pi, and it inspired me to try and get my MAX16150-based circuit working.

    One of the typical application circuits from page 16 of the MAX16150 datasheet, showing it controlling the enable pin on a power supply for a power-hungry device.

    The MAX16150 monitors a push button on its PB_IN pin. A short press of the button will either turn on the OUT pin, or if it's already on, send a brief low pulse on the INT pin. The MCU (the CM4 in my case) can detect this pulse and handle it gracefully, by e.g. starting a soft shutdown.

    If you press the power button for 8 seconds, the MAX16150 will deassert the OUT pin (pull it low), cutting power to the downstream device. This is consistent with the power button behavior of most computers, tablets, and phones.

    If the CLR pin goes low, the MAX16150 will deassert the OUT pin. This is used to give the MCU a way to shut off its own power, and also provides some power watchdog functionality -- if the power goes low for some reason, like a short circuit or a dead battery, the MAX16150 will shut off the power.

    I more or less followed the typical application circuit above in my own design:

    On my current revision of the PCB, the PWR_BUTTON_INT net connects to GPIO22 on the CM4, while PWR_CLR connects to the nEXTRST pin on the CM4.

    nEXTRST is meant to indicate that power is good on the CM4, so it can be used for driving the RST pin on EXTernal devices that need to be powered when the Pi is powered. I assumed this would mean it would go low when the Linux kernel halts.

    However, this approach has two problems:

    1. Turns out that nEXTRST is not pulled low when the kernel halts.
    2. nEXTRST stays low for around 200ms after 5V power is applied to the CM4.

    The second problem is more severe. After asserting the OUT pin, the MAX16150 will ignore the CLR pin for 2x its interrupt period (32ms on my version. Different versions exist, but they're less "add to your Digikey cart" and more "call the factory to custom order".) When that 64ms has elapsed, if CLR is still low, the MAX16150 deasserts OUT again, which cuts power to the downstream device.

    It turns out that this isn't an artificial delay on the nEXTRST pin - it actually just takes about 200ms for the CM4's 3.3V supply to start when 5V is applied.

    I had originally worked around this by cutting the CLR<->nEXTRST trace on the PCB and then connecting CLR to 5V with a resistor. I then connected an extra push button between CLR and ground, to give me a way to cut power. However, this meant the Pi had no way to turn off its own power, and I had to manually click that second button any time I did a shutdown, or it would sit there, halted, drawing a nontrivial amount of power.

    I've improved on this bodge in a way that I think is suitable to incorporate into my next PCB revision:

    • I cut the PCB trace near the CM4 connector to disconnect it from the CM4's nEXTRST pin.
    • I bridged it to a GPIO trace that I'm not currently using.
    • I changed the 5V<->INT resistor for a 10k, and added a 20k resistor to ground.

    This causes the INT pin to come up as soon as the 5V supply is good, but also keeps the voltage at a safe enough level for the GPIO pin, which is only 3.3V-tolerant.

    At bootup, the GPIO pin seems to have a weak pull-down resistor, so the INT pin ends up with around 3.0V on it instead of 3.3V, but this is high enough for the MAX16150 to treat it as high.

    With the following configuration in /boot/config.txt, I now have startup and shutdown behavior that works exactly as I intended.

    dtoverlay=gpio-shutdown,gpio_pin=22,active_low=1,gpio_pull=up,debounce=10
    ...
    Read more »

  • Attempting to tune the touchscreen controller

    Evan10/21/2022 at 11:15 1 comment

    For reasons documented in a previous log entry, I am using the GT9110 touchscreen controller from Goodix. (Essentially, this is the only suitable touchscreen controller I could find in a footprint that I could actually use without spending hundreds of dollars per PCB revision.) In a later log entry, I got the GT9110 and Linux talking to each other.

    Goodix is quite a frustrating company to buy from as a hobbyist. In comparison to some chip manufacturers like TI, who publish loads of documentation about their chips on the internet, Goodix is very stingy with their documentation. As far as I can tell, there's no way for hobbyists to get the documentation except hoping to find a leaked datasheet posted online somewhere. When you do find a datasheet, it's not particularly helpful. Some guidance on how to tune your touch panel (rather than just a table of registers with ~5 words about each) would be nice.

    Goodix being extremely unhelpful to someone trying to design a board with their touchscreen controllers.

    Maybe I'll try reaching out to whatever AliExpress vendor I bought these chips from. I doubt they'll have the documentation, though.

    Trying to tune the touchscreen controller

    So I had the touchscreen detecting my touches, but it also detects phantom touches; mostly along a vertical line a quarter of the way in from the right side of the screen. 

    To recap how capacitive touchscreens work: The screens contain two layers of transparent traces, typically made of ITO, a transparent conductor. On one layer, you have traces going across the screen horizontally; in the other layer, traces go across the screen vertically. (This website has a pretty good graphic explaining this.) The touchscreen controller will send a signal to each "drive" trace (in my case, horizontal) and measure how much of this signal capacitively couples to each "receive" trace (vertical). When you bring your finger near the screen, some of the signal from the drive line will couple to your finger instead of the receive lines, which makes a measurable difference in coupling.

    I have a few hypotheses as to what might be happening:

    • That channel might have a bad connection on the board
    • The chip itself might have a fault on that channel
    • That channel might be receiving EMI from some nearby components, either on the PCB itself or in the touchscreen/LCD panel. Potentially this could be crosstalk between the transmit and this receive trace.)

    I got a hold of a programming guide for the GT911 (the little sibling to the GT9110 -- same family, but fewer channels. I bet it's the exact same silicon die inside.) This gives me information on the i2c register maps.

    (Aside: Apparently these chips support a mode called "HotKnot" in which two touchscreens can transfer data to each other!?!? What a bonkers feature.)

    These are the registers which seem relevant to tuning sensitivity:

    Address Name Notes
    0x8053 Screen_Touch_Level This seems to be the signal level threshold above which a touch begins to be reported. Higher numbers = less sensitive.
    0x8054 Screen_Leave_Level This seems to be the signal level threshold below which a touch stops being reported. Higher numbers = less sensitive.
    0x806b Pannel_Tx_Gain The lowest 3 bits set the DAC gain, where 0 produces the largest signal and 7 producest the smallest signal.
    0x806b Pannel_Rx_Gain The lowest 3 bits set the ADC gain. It seems like 7 is the most sensitive and 0 is the least sensitive.
    0x806d Pannel_Dump_Shift Setting the lowest 3 bits to N > 0 will cause the touch signals to be shifted by N bits left. This would be useful if I wanted even more receive gain than Pannel_Rx_Gain can give, but I want less.

    I'd like to be able to overwhelm any noise by cranking the Tx power up and decreasing the RX sensitivity. Unfortunately, the configuration I had started with was already using 0 for the ADC and DAC gain, so it was...

    Read more »

  • Trying my hand at driver development

    Evan10/18/2022 at 07:19 1 comment

    One issue which contributes to the backlight flicker is the undervoltage protection (UVLO) feature of the TPS61177A. This is configurable over i2c, but defaults to 3.5V, which is pretty high.

    In order to set this at startup, I decided to try and write a kernel driver for the TPS61177A. I partly followed https://docs.kernel.org/i2c/writing-clients.html and partly cargo-culted some stuff (mostly related to regmap) from the sn65dsi83 driver. (I've poked around in that driver in previous debugging sessions, which helps me understand its structure more than some other random i2c device driver.)

    The driver essentially just sets the 0xa2 register to the value 0x02, which corresponds to a UVLO voltage of 3.0V. (Ideally, they'd have options between 3.0 and 2.55, but alas...)

    After a few hours of struggle, I got this to configure the UVLO voltage over i2c, but I've run into a hardware-level problem with this approach: in order to save GPIO pins, I used the same GPIO for both the sn65dsi83's enable pin and the tps61177a:

    Screenshot of part of my schematic, showing that the enable pins for the LVDS bridge (sn65dsi83) and backlight driver (tps61177a) are shorted together.

    This means that the drivers for both chips are competing for control over the GPIO pin; this seems to cause the second driver to fail to load. (In this case, the sn65.)

    There's an easy workaround, for now: I can manually tell the tps61177a to save its configuration to EEPROM. Long-term, I'd like to reduce the number of manual steps that someone would have to take in order to get this board working, and that means either a driver like the one I've written, or some userspace solution like a startup script.

  • Backlight flickering investigation + device tree overlay for the battery charger.

    Evan10/16/2022 at 07:37 0 comments

    I've been investigating the backlight flickering that I showed in my previous log entry. My main hypothesis was that the long wires between my breakout board and my main PCB were adding too much inductance, causing increased ripple. I had moved an input decoupling capacitor to the breakout board, which helped some but didn't entirely solve the problem. Adding more capacitance on the input side didn't help much more.

    One thing I noticed is that the problem drops entirely when the tablet is connected to the charger. This made me suspect that maybe my battery is the problem.

    Looks like there isn't much difference between the VBAT measured at the battery terminals and VBAT measured on the breakout board (at least at speeds the Saleae can measure; it's possible that the breakout board sees switching transients.)

    But yikes, the battery is dipping ~400mV under load? That seems like a lot. Assuming that's happening while the board is drawing 2 to 4 amps, that's 100 to 200 milliohms of internal resistance on the battery. I dunno what the internal resistance of a LiPo battery is supposed to be, but this feels high. Perhaps my test battery is aged - internal resistance goes up with use + abuse. (I'm using a separate battery for testing; just a random 2000mAh cell I had lying around, because the iPad battery is glued to the back of the case and doesn't have wire leads, just spring terminals.)

    On the topic of battery health...

    I've heard one way to keep lithium ion/polymer batteries healthy is to limit the maximum charge voltage to something lower than 4.2V, like 4.0-4.1V. The battery charge IC I'm using (TI's bq25895) supports this functionality, so I've added a device tree overlay which sets this parameter. This also lets us read the battery voltage and charging current (but not discharge current?) easily in Linux:

    meatmanek@cm4:/sys/class/power_supply/bq25890-charger$ cat status 
    Charging
    meatmanek@cm4:/sys/class/power_supply/bq25890-charger$ cat voltage_now 
    3924000
    meatmanek@cm4:/sys/class/power_supply/bq25890-charger$ cat current_now 
    -400000
    meatmanek@cm4:/sys/class/power_supply/bq25890-charger$ cat constant_charge_voltage_max 
    4096000
    

    Hopefully this helps keep the 12-year-old iPad battery in good working condition.

  • Starting to look like a tablet

    Evan10/15/2022 at 07:10 0 comments

    I soldered my backlight controller IC onto a QFN breakout board and bodged some connections over to my PCB, so that I could view my LCD without having to provide an external backlight.

    The mess of wires here is mostly bodge connections from that QFN breakout to traces on the PCB -- battery power, i2c, PWM and enable pins, and the anode + cathode pins for the LCD backlight.

    This works, but has some issues: the backlight flickers a lot when the Pi is under load (or using wifi or something?) I think the backlight controller is hitting its under-voltage lockout. At first, I had left the large decoupling cap on the main PCB, but in this configuration the backlight would strobe for about a second on boot, then would shut off. Moving the capacitor to the breakout board helped, but the flicker remains. I may add more capacitance.

    I also think one of the LED strings isn't connected correctly, causing the "stagelight" appearance at the top of the screen.

    (The backlight in the iPad, like many other LCDs, is 6 strings of LEDs:

    Example schematic from the datasheet for the TPS61177A, the backlight controller I'm using.

    This keeps the voltage at something reasonable -- about 20V in the iPad -- and also means that a single LED failure doesn't cause the whole backlight to go out.)

    The video

    The touchscreen doesn't work quite right - it's detecting phantom touches. I've decreased the sensitivity, which helps slightly, but also makes it miss some real touches. This makes it pretty frustrating to use. (In the video, you can see me struggle to shut down the Pi using the shutdown menu while the touchscreen keeps trying to read MagPi.) The GT9110 chip I'm using has terrible publicly-available documentation, so tuning its configuration will be lots of trial and error.

    Even with all these problems, it's really beginning to feel like a tablet.

  • The LCD works!

    Evan10/07/2022 at 07:41 4 comments

    After finding and fixing a few silly mistakes, I finally got the LCD working:

    The iPad's LCD displaying glxgears, backlit by a makeshift backlight — the circuitry for driving the built-in backlight had a mistake that I haven't fixed yet, documented in this project log.

    The issues I discovered that I had to fix were:

    1. The registers for HFP, HBP, and Hsync pulse width are 8 bits on the sn65dsi83, but I was trying to set several of these to values above 255. This was causing them to wrap around, meaning my horizontal line frequency was different than I wanted. I had to adjust these values to be <=255.
    2. I recalled that someone had told me that 4 lanes of DSI doesn't seem to work with the sn65 (at least with the current version of the Linux driver). I had most recently been testing with 4 lanes, so I was getting no LVDS output. Switching to 3 lanes (and adjusting the desired LVDS clock speed downwards so that the DSI clock would be under 500MHz) got the sn65 producing LVDS signals that seemed to work.
    3. The LVDS connector on the other side of my board had come off. At some point I had tried swapping out the sn65 IC for a fresh one, thinking I might have burned out the LVDS outputs by shorting them to the inconveniently adjacent 1.8V supply pins. During this rework process, the solder on the LVDS connector must have gotten hot enough to melt (it is essentially right behind the sn65).

    I'm fortunate that the LCD doesn't seem to mind if I use a different timing configuration than is specified in its datasheet.

    Next steps:

    • Merge all my various git branches into one branch (the LCD, the touchscreen controller, the RTC, and the sound card)
    • Get PCBs made of the bodge board that I've designed which should let me connect the TPS61177A chip onto my board the right way around.
    • Try closing up the case.

    Once I do those things, this should be a functional tablet! Mostly. There's still the whole software thing to deal with. And I need to figure out how to either use the iPad's original wifi/BT chip or connect the CM4's antenna port to one of the iPad's own antennas. Also I'd like to test the NVMe slot. Oh, and I haven't tested the audio codec+speaker amplifier on this revision of the board, I think.

    But still! Tangible progress!

  • Some progress on the LCD

    Evan07/04/2022 at 06:24 4 comments

    The iPad's LCD wants its video input data in the LVDS format, but the CM4 can't output LVDS. It can, however, output DSI video, and there are chips like the sn65dsi83-q1 from TI which can convert from DSI to LVDS.

    About a year ago, I had gotten the sn65dsi83 somewhat working on the previous revision of my board. However, I ran into an issue with that board design that was difficult to work around: That board was designed to work as a hat for a full-size Pi (for ease of controlling which parts of the board were connected), so it only supported the 2 lanes of DSI that are exposed on the 15-pin display FFC on the Pi 4. This made it impossible to get clock speeds in the right ranges to make everything happy:

    The LCD panel from the iPad wants an LVDS clock between 97MHz and 103MHz. The sn65dsi83 driver calculates a DSI clock speed for for a desired LVDS clock frequency based on the pixel rates required and how many lanes of DSI you're using. (In this case, it wanted a 600MHz clock, which the sn65 would then divide by 6 to get 100MHz.) The Pi's DSI driver, vc4_dsi, then rounds this requested DSI clock speed up to the nearest integer division of 1.5GHz. In the case of 2 DSI lanes, this meant the Pi was trying to send a 750MHz DSI clock, and divide by 6 to get a 125MHz LVDS clock. These clock speeds are out of spec for both the sn65 (which only supports up to 500MHz DSI clocks) and the panel (which wants 100MHz clocks).

    The fix would be to use 4 lanes of DSI -- with 4 lanes, the sn65dsi83 driver would request a 300MHz clock (which the vc4_dsi driver would happily provide, as that's one fifth of 1500 MHz), which the sn65 would then divide by 3 to get the 100MHz LVDS clock. I set aside any further work on the sn65 until I had my second board revision.

    Picking up where I left off

    Now that I've got my CM4-based board (which has all 4 lanes of DSI routed), it was time to try getting video working again.

    One of the first things I did was to skim through the updates on this massive thread on the Raspberry Pi forums, which is the de facto place to discuss using the sn65dsi83 with the Raspberry Pi. So, so many updates.

    An engineer from the Raspberry Pi foundation, who goes by 6by9 on the forums, maintains a branch of the Linux kernel with patches to the sn65dsi83 driver. I pulled the latest version of their branch and merged it with the changes from my branch from last year. I double-checked the settings in the device tree overlay file (updating e.g. which GPIO pins are connected to the enable pin on the sn65 and its voltage regulator).

    Before trying it out, I looked at the area of my board near the sn65 to check for short circuits and such. (This is my last copy of the chip, and they're only available from a few places, which are selling at quite a bit above MSRP.)

    Satisfied that I wasn't going to fry the chip, I enabled the dtoverlay. I was greeted with this error message on boot:

    [   18.154108] sn65dsi83 10-002d: failed to attach dsi to host: -517

    I used some tricks I've learned during this project to get more information out of the kernel at boot: specifically, adding a bunch of dyndbg flags to the kernel command line in /boot/cmdline.txt:

    ti_sn65dsi83.dyndbg="+pmf" vc4.dyndbg="+pmf" panel_simple.dyndbg="+pmf" drm_kms_helper.dyndbg="+pmf" component.dyndbg="+pmf" 

    (This enables debug messages in the ti_sn65dsi83, vc4, panel_simple, ... kernel modules.)

    After adding some more debug messages to those modules, I ended up with this in my boot log:

    [   17.888125] calling  sn65dsi83_driver_init+0x0/0x1000 [ti_sn65dsi83] @ 366
    [   17.900948] sn65dsi83 10-002d: supply vcc not found, using dummy regulator
    [   17.902829] systemd-journald[136]: Successfully sent stream file descriptor to service manager.
    [   17.907747] systemd-journald[136]: Successfully sent stream file descriptor to service manager.
    [   17.918315] systemd-journald[136]: Successfully sent stream file descriptor to service manager.
    [ 17.942603] systemd-journald[136]:...
    Read more »

  • Getting the GT9110 touchscreen controller working

    Evan07/04/2022 at 02:49 4 comments

    I've been testing out the GT9110 for the past few days, and finally got it working today.

    My board uses a Goodix GT9110 touchscreen controller, which is closely related to a few other parts (GT911, GT928, etc.), and is basically the only touchscreen controller that I could find which met my requirements:

    1. Has enough drive and sense pins to work with my touchscreen
    2. A reasonable footprint which doesn't require expensive, high-density PCBs (which excludes the mXT2952, an 0.5mm-pitch BGA)
    3. Available in small quantities for a reasonable price (which excludes the MXT2912TD-A)
    4. Actual datasheets are available (which excludes a bunch of Cypress chips)
    5. Linux drivers are available

    (I should note that I haven't found an English datasheet for the GT9110, only one in Chinese. However, I did find English datasheets for related chips, like the GT911 and GT9113. These, plus Google Translate, were enough to lay out my PCB.) 

    On my previous iteration of the board, the i2c communication to the GT9110 was unreliable -- it wouldn't respond on i2c until a little while after the INT pin went high, which made the Linux goodix driver unhappy. I had guessed that might've been because the bodge I had to do for the INT pin wasn't making a good connection.

    Initial progress

    I dug up the device tree overlay file I had written for testing, and updated the GPIO numbers to match my new board revision.

    Fortunately, the new board doesn't have the same communications issues from the old board -- the Linux driver was able to talk to the GT9110 successfully, and create a file under /dev/input/event*.

    Getting stuck

    However, beyond initializing the driver, nothing else would happen. The INT pin would go high during driver initialization, and wouldn't change when I touched the screen. No further i2c communication was happening. Looking at the drive pins with an oscilloscope, I could see nothing was happening.

    An error immediately stood out to me:

    [   67.112771] Goodix-TS 1-005d: Direct firmware load for goodix_9110_cfg.bin failed with error -2

    I searched the web for a goodix_9110_cfg.bin, but couldn't find any example files. I did, however, find a few relevant threads:

    Nobody seems to mention needing a goodix_9110_cfg.bin (or goodix_911_cfg.bin, goodix_928_cfg.bin, or whatever); everybody managed to get their touchscreens working after a while by fixing basic issues with their device tree overlay files.

    Thinking I might have the wrong settings for my interrupt pin, I tried various combinations of pull-up/down/hi-Z, interrupt configuration (IRQ_TYPE_EDGE_FALLING, IRQ_TYPE_EDGE_RISING, IRQ_TYPE_LEVEL_HIGH, IRQ_TYPE_LEVEL_LOW). None of these seemed to help - several of those combinations prevented i2c communications entirely.

    Eventually, I gave up on that and focused on the firmware load error again. Adding a bunch of debug printfs to the driver and watching i2c communication with my logic analyzer (I'm using the Logic 8 from Saleae), I could see that it was:

    • Identifying the GT9110 on i2c
    • Trying to load the firmware from disk, and complaining that it isn't there. (The internet tells me it's looking in /lib/firmware, among other places)
    • Reading a bunch of data from the GT9110 starting at register 0x8047, which is the beginning of the configuration registers.
    • Leaving the INT pin high, never signalling that it had data.
    My board with the logic analyzer hooked up. I neglected to put proper test points on the board, so instead I've just gotten into the habit of scraping some solder mask off with a scalpel and soldering a bit of enameled wire to a trace to give me something to hook a probe to. The bit of cereal box is there to prevent any accidental short-circuits between the back of my board and the metal on the screen.
    Zoomed-out view of driver...
    Read more »

  • Real-time clock: It's nice when something is easy.

    Evan06/29/2022 at 07:18 0 comments

    At the very last minute before ordering my PCBs, I realized I probably wanted a real-time clock on the board somewhere. I searched on Digi-Key, found the RV-8263-C7, which was:

    • in stock (not anymore, lol)
    • cheap
    • tiny
    • requires minimal external components (just a decoupling cap and a pull-up resistor on an output enable pin)
    • has a Linux kernel driver (this chip has the same protocol as the PCF85063)

    I found an empty spot on my board with I2C and VBAT lines nearby, and laid it out in a few minutes.

    Tonight, I decided to see if it was working:

    Throw together a quick dtoverlay file:

    /dts-v1/;
    /plugin/;
    
    / {
        compatible = "brcm,bcm2835";
    
        fragment@0 {
            target = <&i2c1>;
            __overlay__ {
                #address-cells = <1>;
                #size-cells = <0>;
                status = "okay";
    
    
                rv8263: rtc@51 {
                    compatible = "microcrystal,rv8263";
                    reg = <0x51>;
                    // quartz-load-femtofarads = <12500>;
                };
            };
        };
    };

    (This is basically just device tree overlay boilerplate plus the example from the documentation.)

    Compile with make -j4 ARCH=arm64 CROSS_COMPILE=aarch64-linux-gnu- dtbs, copy the output dtbo file to the CM4's /boot/overlays directory, and run dtoverlay pipad-rtc.dtbo to load the overlay. Test with sudo hwclock --systohc then sudo hwclock --get. Add dtoverlay=pipad-rtc to /boot/config.txt, reboot, check sudo hwclock --get again, and it's still working.

    Remove the fake-hwclock package and disable the systemd unit with the instructions on https://pimylifeup.com/raspberry-pi-rtc/, and double-check that it's actually reading the hardware clock on startup (and not just using NTP) by using rfkill block wifi to turn off wifi, reboot, and check that the time is accurate.

    No incorrect PCB footprints or unwired pins, no Linux kernel debugging. Just things working correctly on the first try. Feels good.

  • Figuring out why the CM4 wouldn't boot when attached to my board

    Evan06/26/2022 at 08:27 1 comment

    In my previous log entry, I had fried my CM4 by shorting 5V to 3.3V, so I had to order a replacement, which arrived last week.

    The next thing for me to test is whether I can boot the CM4 on my board, so I installed Raspberry Pi OS and set enable_uart=1 in /boot/config.txt. With the CM4 still in the CM4IO, I verified that I could see boot messages and log into the CM4 over serial.

    I bodged some wires onto the UART traces on my board and connected them to my USB-serial adapter. I moved the CM4 off the CM4IO and onto my own board, and booted it, and.... nothing. Zero output from the UART.

    I figured it must be crashing somewhere during the bootloader or early kernel boot settings, so I moved the CM4 back to the CM4IO and:

    1. added console=ttyS0,115200n8 loglevel=7 earlycon=uart8250,mmio32,0xfe215040 to my /boot/cmdline.txt, to get early kernel messages.
    2. set BOOT_UART=1 in boot.conf to get output from the bootloader.

    Still nothing...

    After a while, I figured out that the TX pin on my 100-pin connector wasn't properly soldered to my board. Of all the pins to have issues, it had to be that pin!

    At this point, it still isn't booting, but I can at least see kernel messages. I would get a warning at some point during boot:

    [    3.178888] ------------[ cut here ]------------
    [    3.183639] Firmware transaction timeout
    [    3.183693] WARNING: CPU: 2 PID: 1 at drivers/firmware/raspberrypi.c:67 rpi_firmware_property_list+0x1dc/0x250
    [    3.197794] Modules linked in:
    [    3.200888] CPU: 2 PID: 1 Comm: swapper/0 Not tainted 5.15.32-v8+ #1538
    [    3.207583] Hardware name: Raspberry Pi Compute Module 4 Rev 1.1 (DT)
    [    3.214098] pstate: 80000005 (Nzcv daif -PAN -UAO -TCO -DIT -SSBS BTYPE=--)
    [    3.221144] pc : rpi_firmware_property_list+0x1dc/0x250
    [    3.226432] lr : rpi_firmware_property_list+0x1dc/0x250
    [    3.231719] sp : ffffffc00960b9b0
    [    3.235068] x29: ffffffc00960b9b0 x28: 0000000000000000 x27: 0000000000000004
    [    3.242300] x26: ffffffc009a5d008 x25: ffffff8002aa8b80 x24: 0000000000001000
    [    3.249530] x23: 0000000000000014 x22: ffffffc008e8a9c8 x21: ffffff80020b7200
    [    3.256758] x20: ffffffc009a5d000 x19: ffffffc009491158 x18: 0000000000000010
    [    3.263986] x17: 0000000000000001 x16: 0000000000000019 x15: 0720072007200720
    [    3.271214] x14: 0720072d072d072d x13: 74756f656d697420 x12: ffffffc0093a6670
    [    3.278442] x11: 0000000000000003 x10: ffffffc00938e630 x9 : ffffffc0080ec768
    [    3.285670] x8 : 0000000000017fe8 x7 : c0000000ffffefff x6 : 0000000000000001
    [    3.292899] x5 : 0000000000057fa8 x4 : 0000000000000000 x3 : 0000000000000001
    [    3.300126] x2 : 0000000000000000 x1 : 529515f3f0203b00 x0 : 0000000000000000
    [    3.307354] Call trace:
    [    3.309824]  rpi_firmware_property_list+0x1dc/0x250
    [    3.314760]  rpi_firmware_property+0x78/0x110
    [    3.319169]  rpi_domain_on+0x6c/0x90
    [    3.322789]  genpd_power_on.part.23+0x188/0x220
    [    3.327375]  __genpd_dev_pm_attach+0x104/0x238
    [    3.331870]  genpd_dev_pm_attach+0x6c/0x88
    [    3.336014]  dev_pm_domain_attach+0x28/0x40
    [    3.340249]  platform_probe+0x58/0xe0
    [    3.343957]  really_probe+0xc0/0x318
    [    3.347573]  __driver_probe_device+0x80/0xe8
    [    3.351892]  driver_probe_device+0x88/0x118
    [    3.356123]  __driver_attach+0x78/0x110
    [    3.360004]  bus_for_each_dev+0x7c/0xd0
    [    3.363890]  driver_attach+0x2c/0x38
    [    3.367505]  bus_add_driver+0x194/0x1f8
    [    3.371385]  driver_register+0x6c/0x128
    [    3.375265]  __platform_driver_register+0x30/0x40
    [    3.380026]  xhci_plat_init+0x38/0x44
    [    3.383737]  do_one_initcall+0x54/0x2a0
    [    3.387619]  kernel_init_freeable+0x250/0x2d8
    [    3.392031]  kernel_init+0x2c/0x130
    [    3.395564]  ret_from_fork+0x10/0x20
    [    3.399186] ---[ end trace b159b7c67bd50e8b ]---

    Then after a few more messages, it would hang.

    From what I can tell from this issue where people saw the same "Firmware transaction timeout" warning, this happens when the code running on the VC4 locks up.

    Getting more output

    The internet told me to add initcall_debug to my kernel command line to get more output on startup. This prints a message per kernel subsystem on boot....

    Read more »

View all 24 project logs

Enjoy this project?

Share

Discussions

Hassla wrote 06/29/2022 at 13:47 point

Really nice your frequent updates currently.

  Are you sure? yes | no

Tom Cubie wrote 06/28/2022 at 02:43 point

This is Tom from Radxa, this project is very interesting and we can help to troubleshooting hardware issues and get everything working. You can join our discord https://rock.sh/go

"Since the Radxa CM3 / RK3566 clearly has less software support than the Pi (I think as of the time of writing, you can't even get HDMI output, let alone LVDS"

I think this is the mainline kernel status, for the Rockchip 4.19 vendor kernel, we have everything working already.

  Are you sure? yes | no

Michael Shaub wrote 06/28/2022 at 00:27 point

this is awesome! Are you planning to make parts available on Tindie? I’ve been wondering why I kept my original iPad. Now I know!

  Are you sure? yes | no

Evan wrote 06/29/2022 at 18:42 point

Maybe! A lot of the parts are getting hard to find, and I dunno if I want to provide customer support 😆

  Are you sure? yes | no

jimmyplaysdrums wrote 06/27/2022 at 23:39 point

Very cool. Looking forward to seeing more!

  Are you sure? yes | no

Hassla wrote 06/20/2022 at 22:59 point

Awesome work, keep up the good work!

Hopefully you can revive your CM4.

  Are you sure? yes | no

Evan wrote 06/21/2022 at 19:21 point

Thanks for the words of encouragement! My replacement CM4 came in, and I'm working on getting it booting. Hopefully will have another project log soon. I bought the replacement PMIC chip from AliExpress, so it'll take a month or two to arrive.

  Are you sure? yes | no

Hassla wrote 01/26/2022 at 11:40 point

@log13

An absolute beauty of a board, hopefully all works as intended.

  Are you sure? yes | no

iamcanarin wrote 11/16/2021 at 15:15 point

This looks like a good solution for UPS : https://www.omzlo.com/articles/pivoyager-the-smart-ups-for-the-raspberry-pi

  Are you sure? yes | no

iamcanarin wrote 11/08/2021 at 11:09 point

Hi, just want to say how awesome work you did so far. I also had an idea to fit Raspberry Pi into the old iPad. I was wondering since speakers are "dumb",  wouldn't it be enough to let us say use something like  PCM5101A from https://www.waveshare.com/wiki/Pico-Audio parts which are already tested to run iPad speakers, or am I missing something?

  Are you sure? yes | no

Evan wrote 11/10/2021 at 19:28 point

Yeah, that looks like it should work. Seems like that's using the PCM5101A codec + the [APA206](https://octopart.com/apa2068kai-trg-anpec-87202072?r=sp), which looks like a speaker amplifier. If I have trouble solving my [audio quality problem](https://github.com/EvanKrall/pipad/issues/12#issuecomment-962888071) on the tlv320aic3206, I'll look around at different codecs. The PCM5102A seems to be the same part as the PCM5101A but with better audio quality specs.

One reason I went with the tlv320aic3206 is that it can drive 16 ohm headphones directly, whereas the PCM510x specifies a minimum load of 1kOhm on its LOL/LOR, so it may require an additional headphone driver circuit.

  Are you sure? yes | no

Hassla wrote 11/16/2021 at 18:52 point

The TLV320AIC3206 is really interesting, I wanted to use the PCM5100, TPA6133A2 and PCM1863, to subsides the CS4206 or the succesor CS4207, but these are not I2S. So the TLV320AIC3206 could probably used for my application with 2 or 3 Speaker and a Headphone out and input.

  Are you sure? yes | no

Hassla wrote 09/24/2021 at 15:50 point

Did you proceeed with working on this project? Or did you set it aside.

I have currently set it aside in favor of other projects, because the main chips, like the CM4 itself or the SN65DSI85, are simply not available. And of course during the design I fell down the rabbit hole with USBC and the thousand possibillity with DP/HDMI over USBC etc..

Cheers

  Are you sure? yes | no

Evan wrote 09/24/2021 at 18:49 point

Yep, I'm still working on it. I picked up a few sn65dsi83's while they were still in stock, and have been trying to get it working since. Hopefully I don't destroy any of them.

I'm going to have at least one more board revision (to switch from my 40-pin prototyping layout to the CM4 connectors, and to fix some issues I've found), but so far the only new parts I'm going to need are passives, connectors, and a SMPS chip which seems to still be in stock.

You might try picking up a later iPad screen - I think they switched to eDP when they went to the retina screens, and it looks like the SN65DSI86IPAPRQ1 (MIPI to eDP) is still in stock at TI / Mouser / Arrow. I briefly looked into this because I was curious if I could upgrade this to a retina display. I think the later screens are a bit shorter in one dimension and a bit longer in another, but it might be possible to modify the mounting hardware to make it fit.

EDIT: oh right, you said you're hacking a Macbook. Maybe you want to use the RTD2660H if you can't find any other MIPI-LVDS bridge ICs? https://learn.adafruit.com/hdmi-uberguide/rtd2660-hdmi-vga-ntsc-pal-driver-board

  Are you sure? yes | no

Hassla wrote 09/26/2021 at 18:02 point

That's nice to hear!

Yeah the RTD2660H was my first Idea, like Joel Hill http://joel.hillspawn.com/apple_pi/2019/09/02/display.html , used in his attempt to use a macbook and a RPi together.

Die SN65DSI85 was my first Idea, since it was already paired with the RPi from some guys in the RPi Forum. But I am going to look out for another MIPI to Dual LVDS.

But since i cant even get a CM4, I suppose i just wait for the World of Chips become normal again.

  Are you sure? yes | no

Evan wrote 12/01/2021 at 19:35 point

If you're not glued to the CM4, you might look at the recently released SOQuartz from Pine64[1] and the Radxa Rock3 CM3[2]. Both are based around the RK3566, are pin-compatible with the CM4, and can supposedly output LVDS signaling on the MIPI-DSI pins. The Radxa board has an extra 100-pin connector which breaks out some more IO. It's got USB3, HDMI, and eDP, so it might be perfect for messing around with USB C alternate modes.

The SOQuartz seems to be available on the Pine store, but I can't find the Radxa CM3 anywhere in stock. I'm going to pick up an SOQuartz and see how it goes.


1. https://wiki.pine64.org/wiki/SOQuartz
2. https://wiki.radxa.com/Rock3/CM3

  Are you sure? yes | no

Hassla wrote 12/02/2021 at 20:59 point

Yeah both of the alternative CMs are interesting, especially with LVDS and USB3 & SATA straight out of the box. Since the prject dont have any timelimit, I probably stick with the RPi. But I am still looking in the other two. oThanks for that.

  Are you sure? yes | no

Evan wrote 12/13/2021 at 06:49 point

I think the SOQuartz only breaks out 2 lanes of the combo LVDS/MIPI-DSI transmitter to the cm4 pins: https://files.pine64.org/doc/quartz64/SOQuartz_SOM_schematic_v1.1_20210816.pdf page 15, top left. They break out all 4 lanes of the other MIPI-DSI transmitter, but that doesn't support LVDS according to the rk3566 datasheet.

I assume Pine64 did this to be as similar as possible to the CM4, which only has 2 lanes on DSI0, and 4 lanes on DSI1.

  Are you sure? yes | no

Evan wrote 12/13/2021 at 08:24 point

The Radxa CM3 has the remaining two lanes of LVDS broken out to the third board to board connector, and the wifi/2GB/16GB model is in stock at https://shop.allnetchina.cn/collections/frontpage/products/rock3-computing-module


I guess that may still not be enough for your display if you need dual LVDS.

  Are you sure? yes | no

Hassla wrote 08/22/2021 at 16:45 point

Just a comment to appreciate your project. I like it very much, since I am in the progress of trying to hack a Macbook A1286 i really enjoy your work. Keep it up!

  Are you sure? yes | no

Evan wrote 08/23/2021 at 06:24 point

Thanks! I bet there's a lot of similarity internally -- I think the iFixit teardowns of the iPad mentioned they used some similar parts in the iPad as on the contemporary Macbooks.

If you start writing up your project somewhere, let me know!

  Are you sure? yes | no

Similar Projects

Does this project spark your interest?

Become a member to follow this project and never miss any updates