Close
0%
0%

Ubo Pod: Build Apps with Rich UX on Raspberry Pi

An open source dev kit to build Raspberry Pi app with rich UI/UX with an easy to use SDK

Similar projects worth following
I have always wanted to build a modular, open source system that can be extended and altered by other makers and serve as a platform for learning and developing new applications. Often when developing an application for an end-user in mind on Raspberry Pi, I had to hack together a UI to be able to communicate with the user.

Given the popularity of Raspberry Pi among makers/developers and the fact that I have used RPi in many of my past projects, I decided to solve this problem once for all by bringing all modes of UI together in an appealing and compact design, and set out to build Ubo Pod.

Ubo Pod is an extension to RPi that adds a rich UI/UX layer which can easily be customized and extended. It is modular and open source, and comes with an SDK and a set of sample applications to quickly get you started. It is the perfect platform for learning programming, implementing and deploying headless applications, and even building custom hardware - the only limit is your imagination.

In developing Ubo modular and open source platform, I also wanted to address the following pain points that I personally encountered during many projects in the past.

1 - A polished product that is yet open source

I have found that many open source projects are often not designed with the end-user in mind. In other words, they are not polished enough or suitable for use similar to consumer-grade products. I wanted to create something that can be also shipped to the end user after deploying an application on it.

2 - Rich UX

Raspberry Pi and other single board computers are not equipped with hardware peripherals for headless operation (they require connecting a monitor and keyboard to interact with). Because of that, for any application that requires user interaction of some sort (audio, GUI, etc), additional hardware needs to be added and configured. This can complicate the matters for many developers who just want to focus on building the experience. 

3 - A platform for learning and exploring

I wanted to empower other builders to create their own shields by offering base PCB schematics and design guidelines and eventually create an ecosystem of open source shields that serve various functions. I also wanted to system play well with other learning modules such as STEMMA/Qwiic Connect modules from Adafruit and Sparkfun. 

4 - Easy of customization

Raspberry Pi cases and enclosures are not designed to work well with the RPi HAT ecosystem. This is mainly due to the challenges in the mechanical design of the enclosures. I wanted to introduce a system for swappable shields that work well with the enclosure design as well.  

5 - Making things easier for software developers

I also wanted to offer a pathway for software developers who are coming to hardware development and are intimidated by putting together a hardware system from scratch. I aimed to achieve this by building a self-contained system, abstracting complexities, and hardware layers as much as possible and offering clean API and interfaces in the code to talk and interface with the hardware components. 

6 - An extensible and modular system

Although I focused my design primarily around Raspberry Pi, I wanted to keep the design flexible and modular such that it can be easily altered for other single board computers and configurations.

7 - Privacy and Security

One important aspect of the design was to ensure decisions are made to protect user privacy when required and add any necessary hardware security capability to enhance overall system security. 

Prototyping journey

The idea for Ubo Pod began in the beginnings of 2021. I had just left my last full-time position and decided to travel to an isolated beach village in Mexico to escape the craziness of COVID lockdown and do some self-retrospection. 

One of the things I had always enjoyed the most in my life was to build. To use my skills to craft new things and do deep thinking about design and implementation. I yearned to go back to my design and engineering roots. During this time, I reflected on what to build next. I wanted to build something that lives on and grows by the power of community and the only way I could accomplish that was by building an open source hardware/software product.

I plan to post regular updates for under log section for each phase of the project, outlining the challenges and design decision I made in more details. 
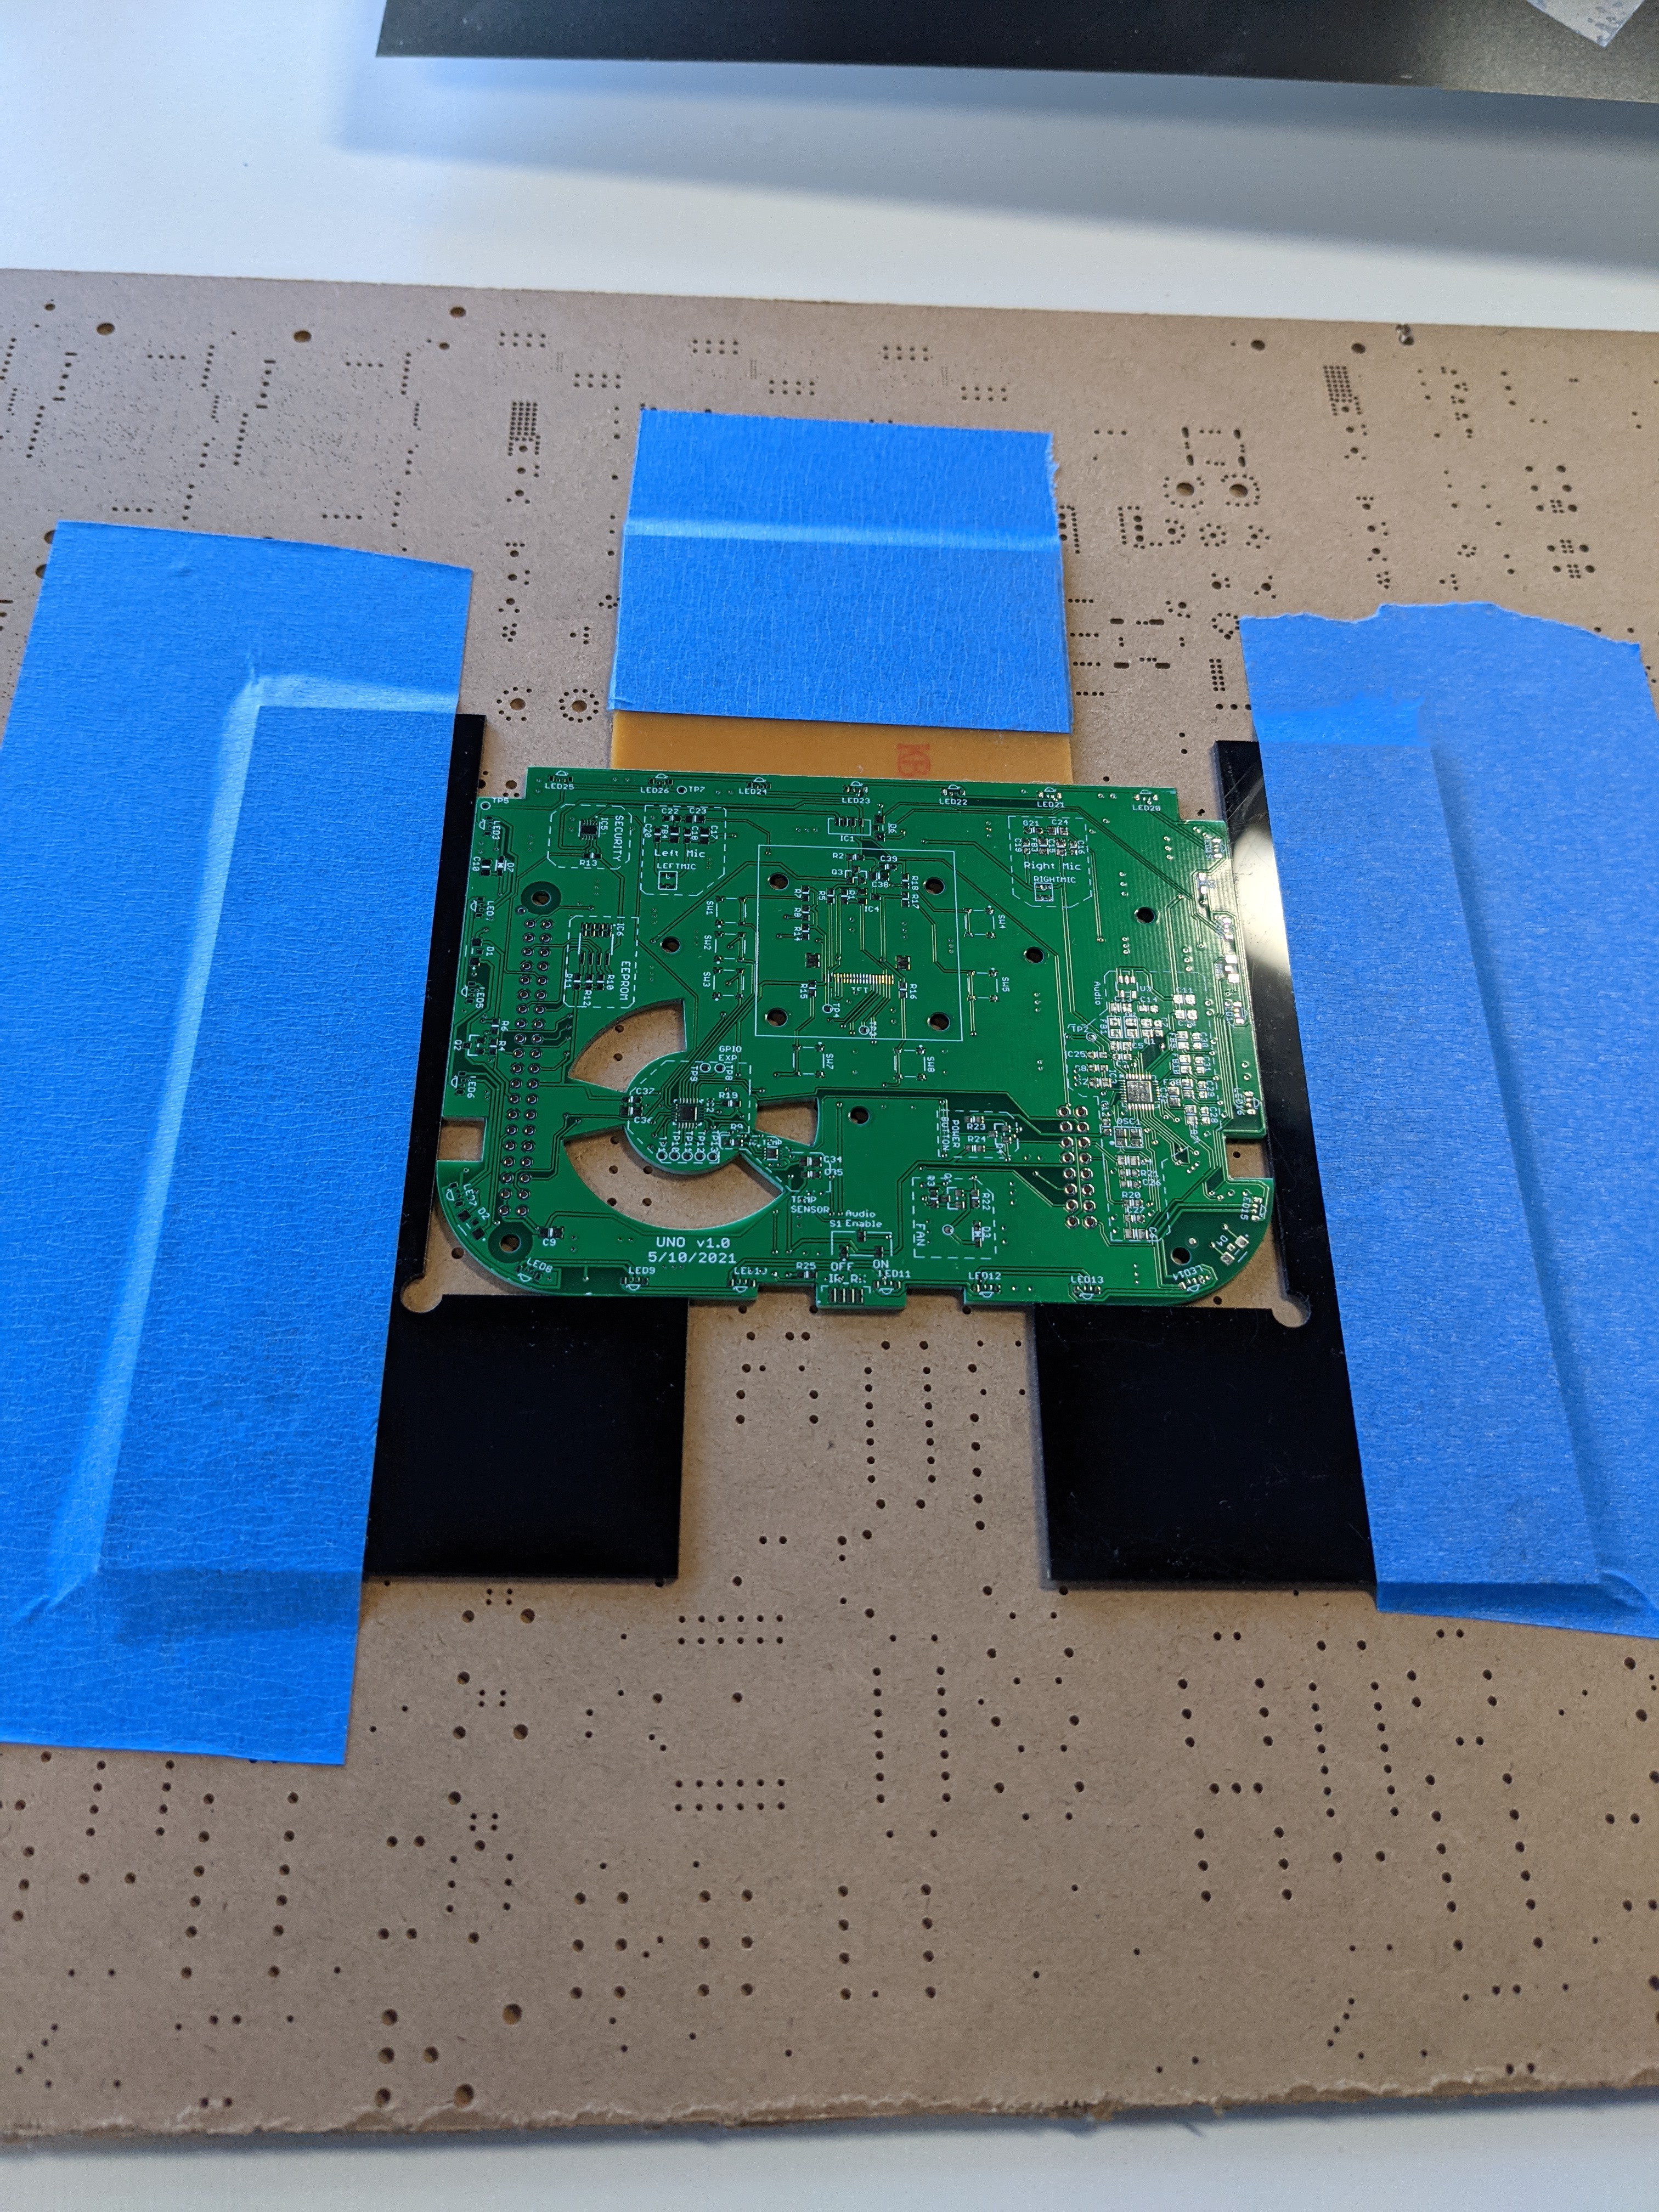

First assembly of top PCB
setting up the job for stencil

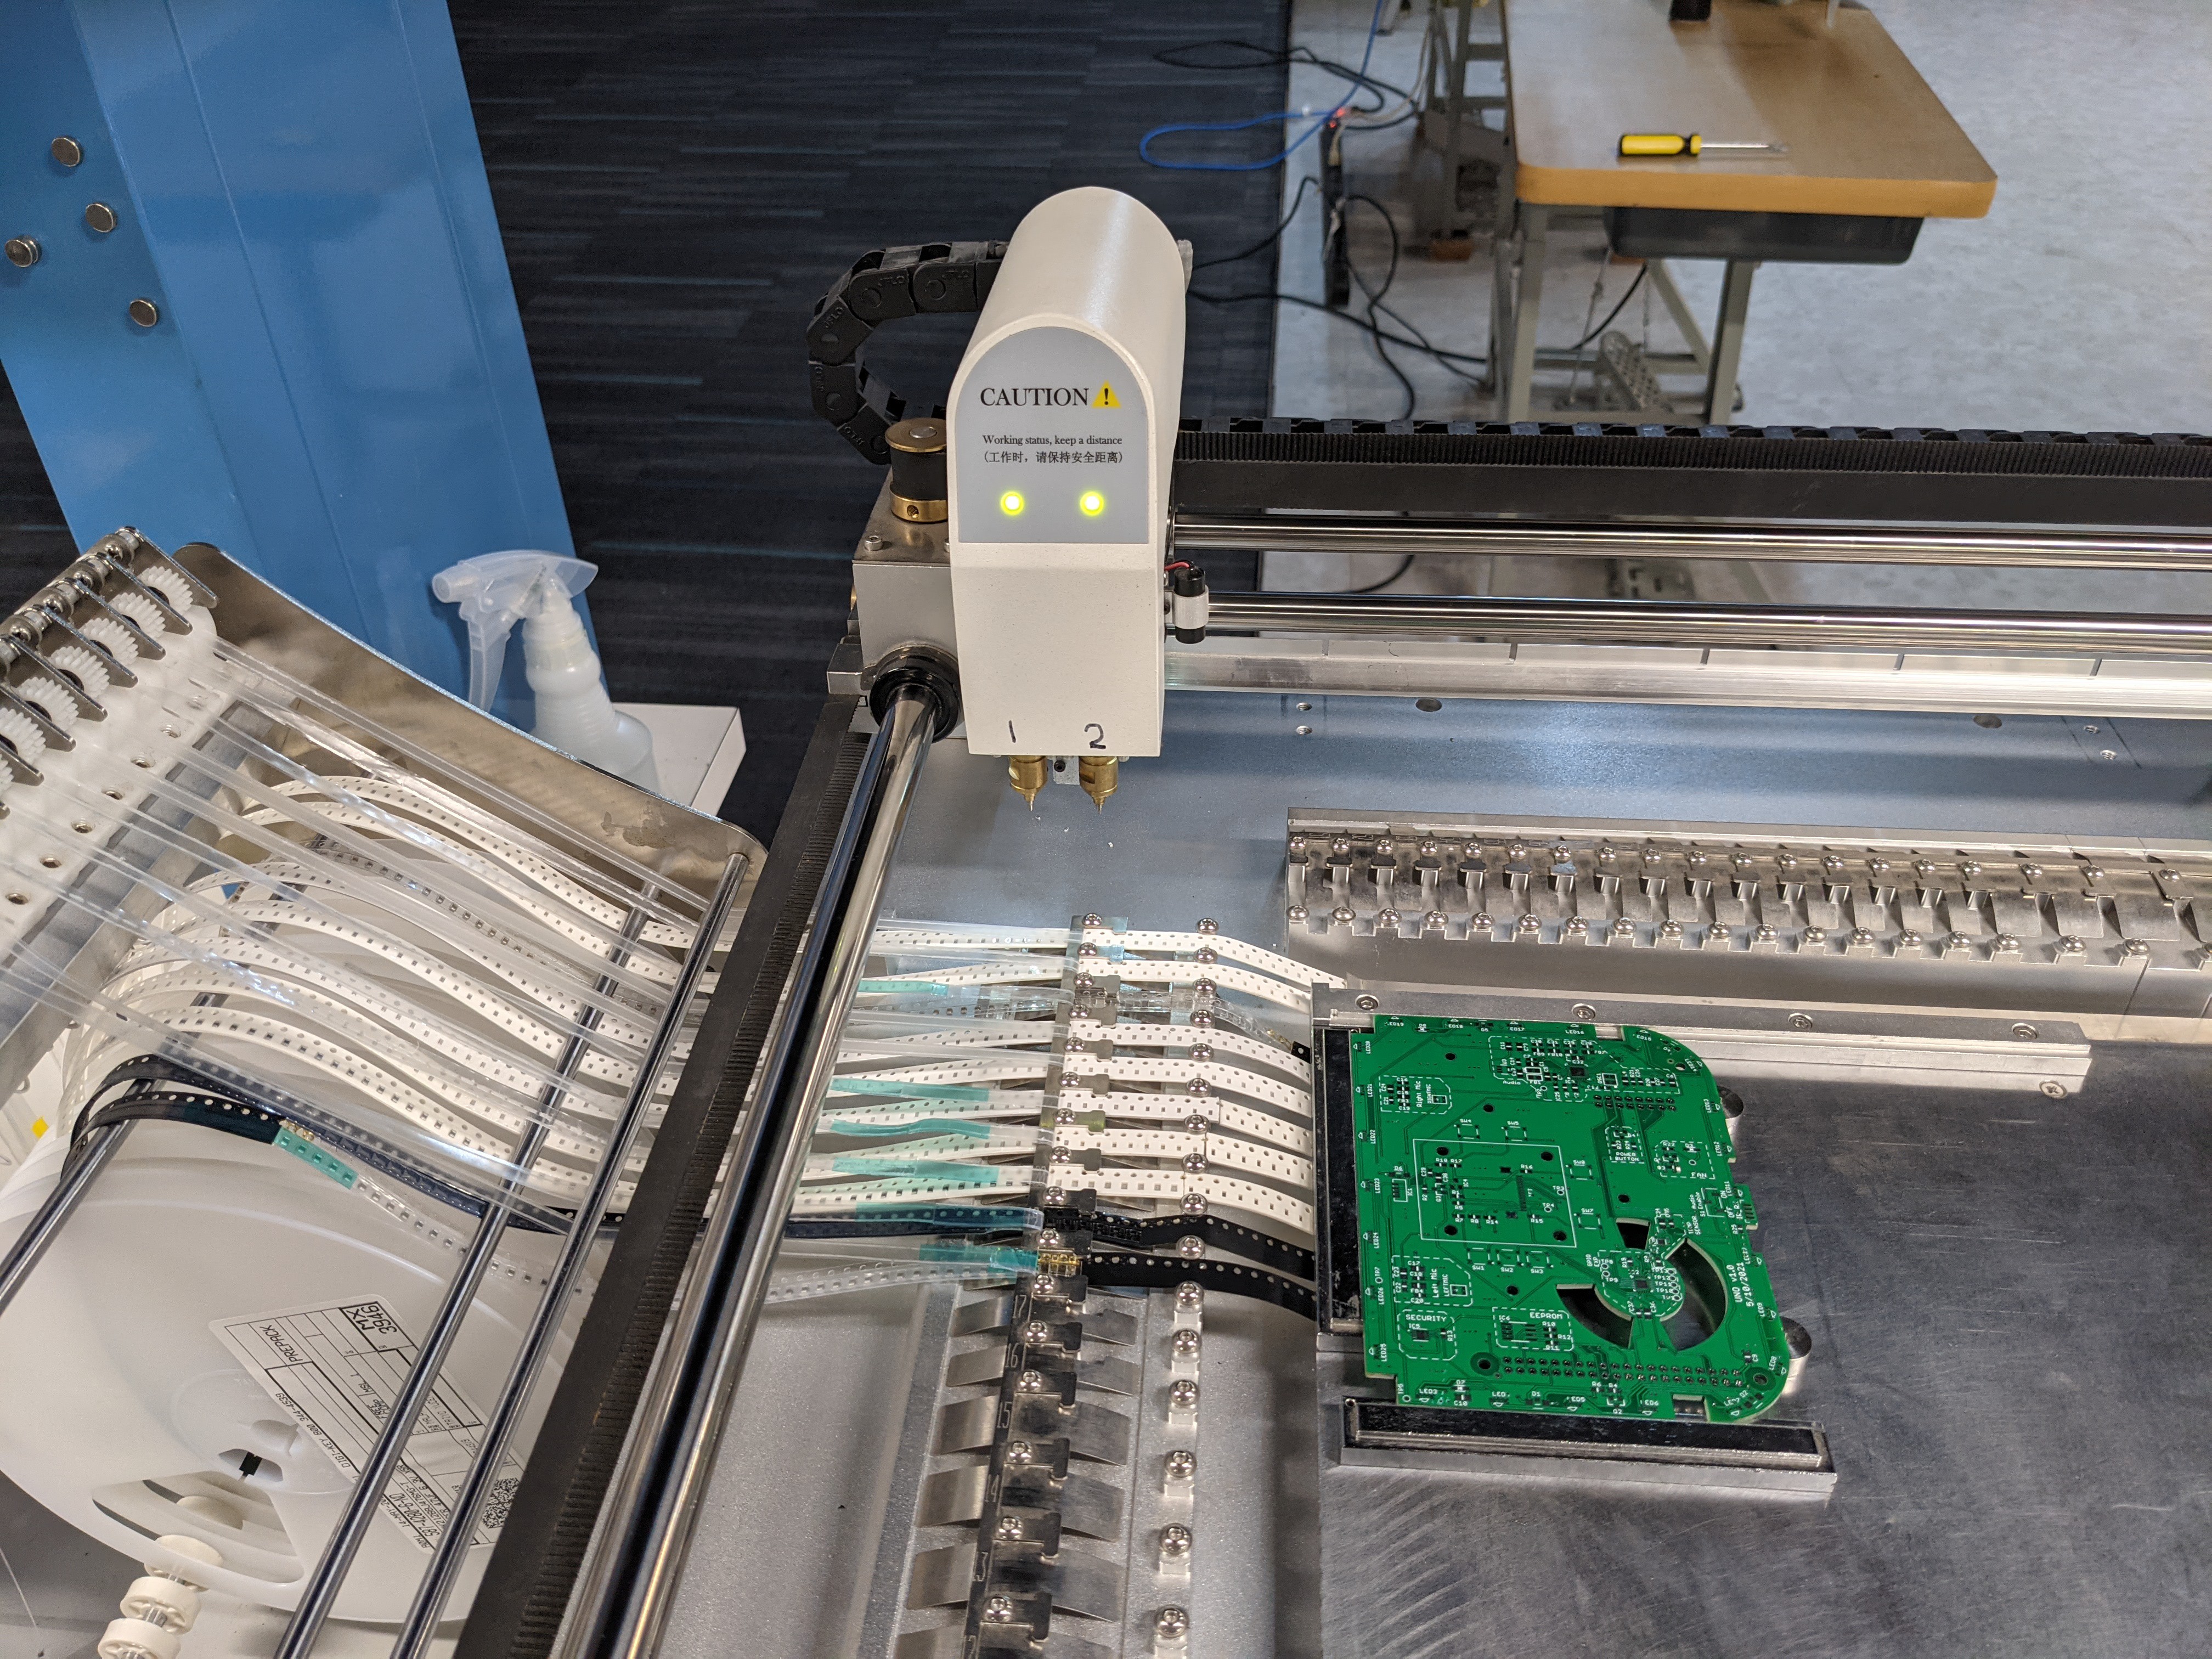
First assembly on Neoden pick and place machine
job setup on PnP machine

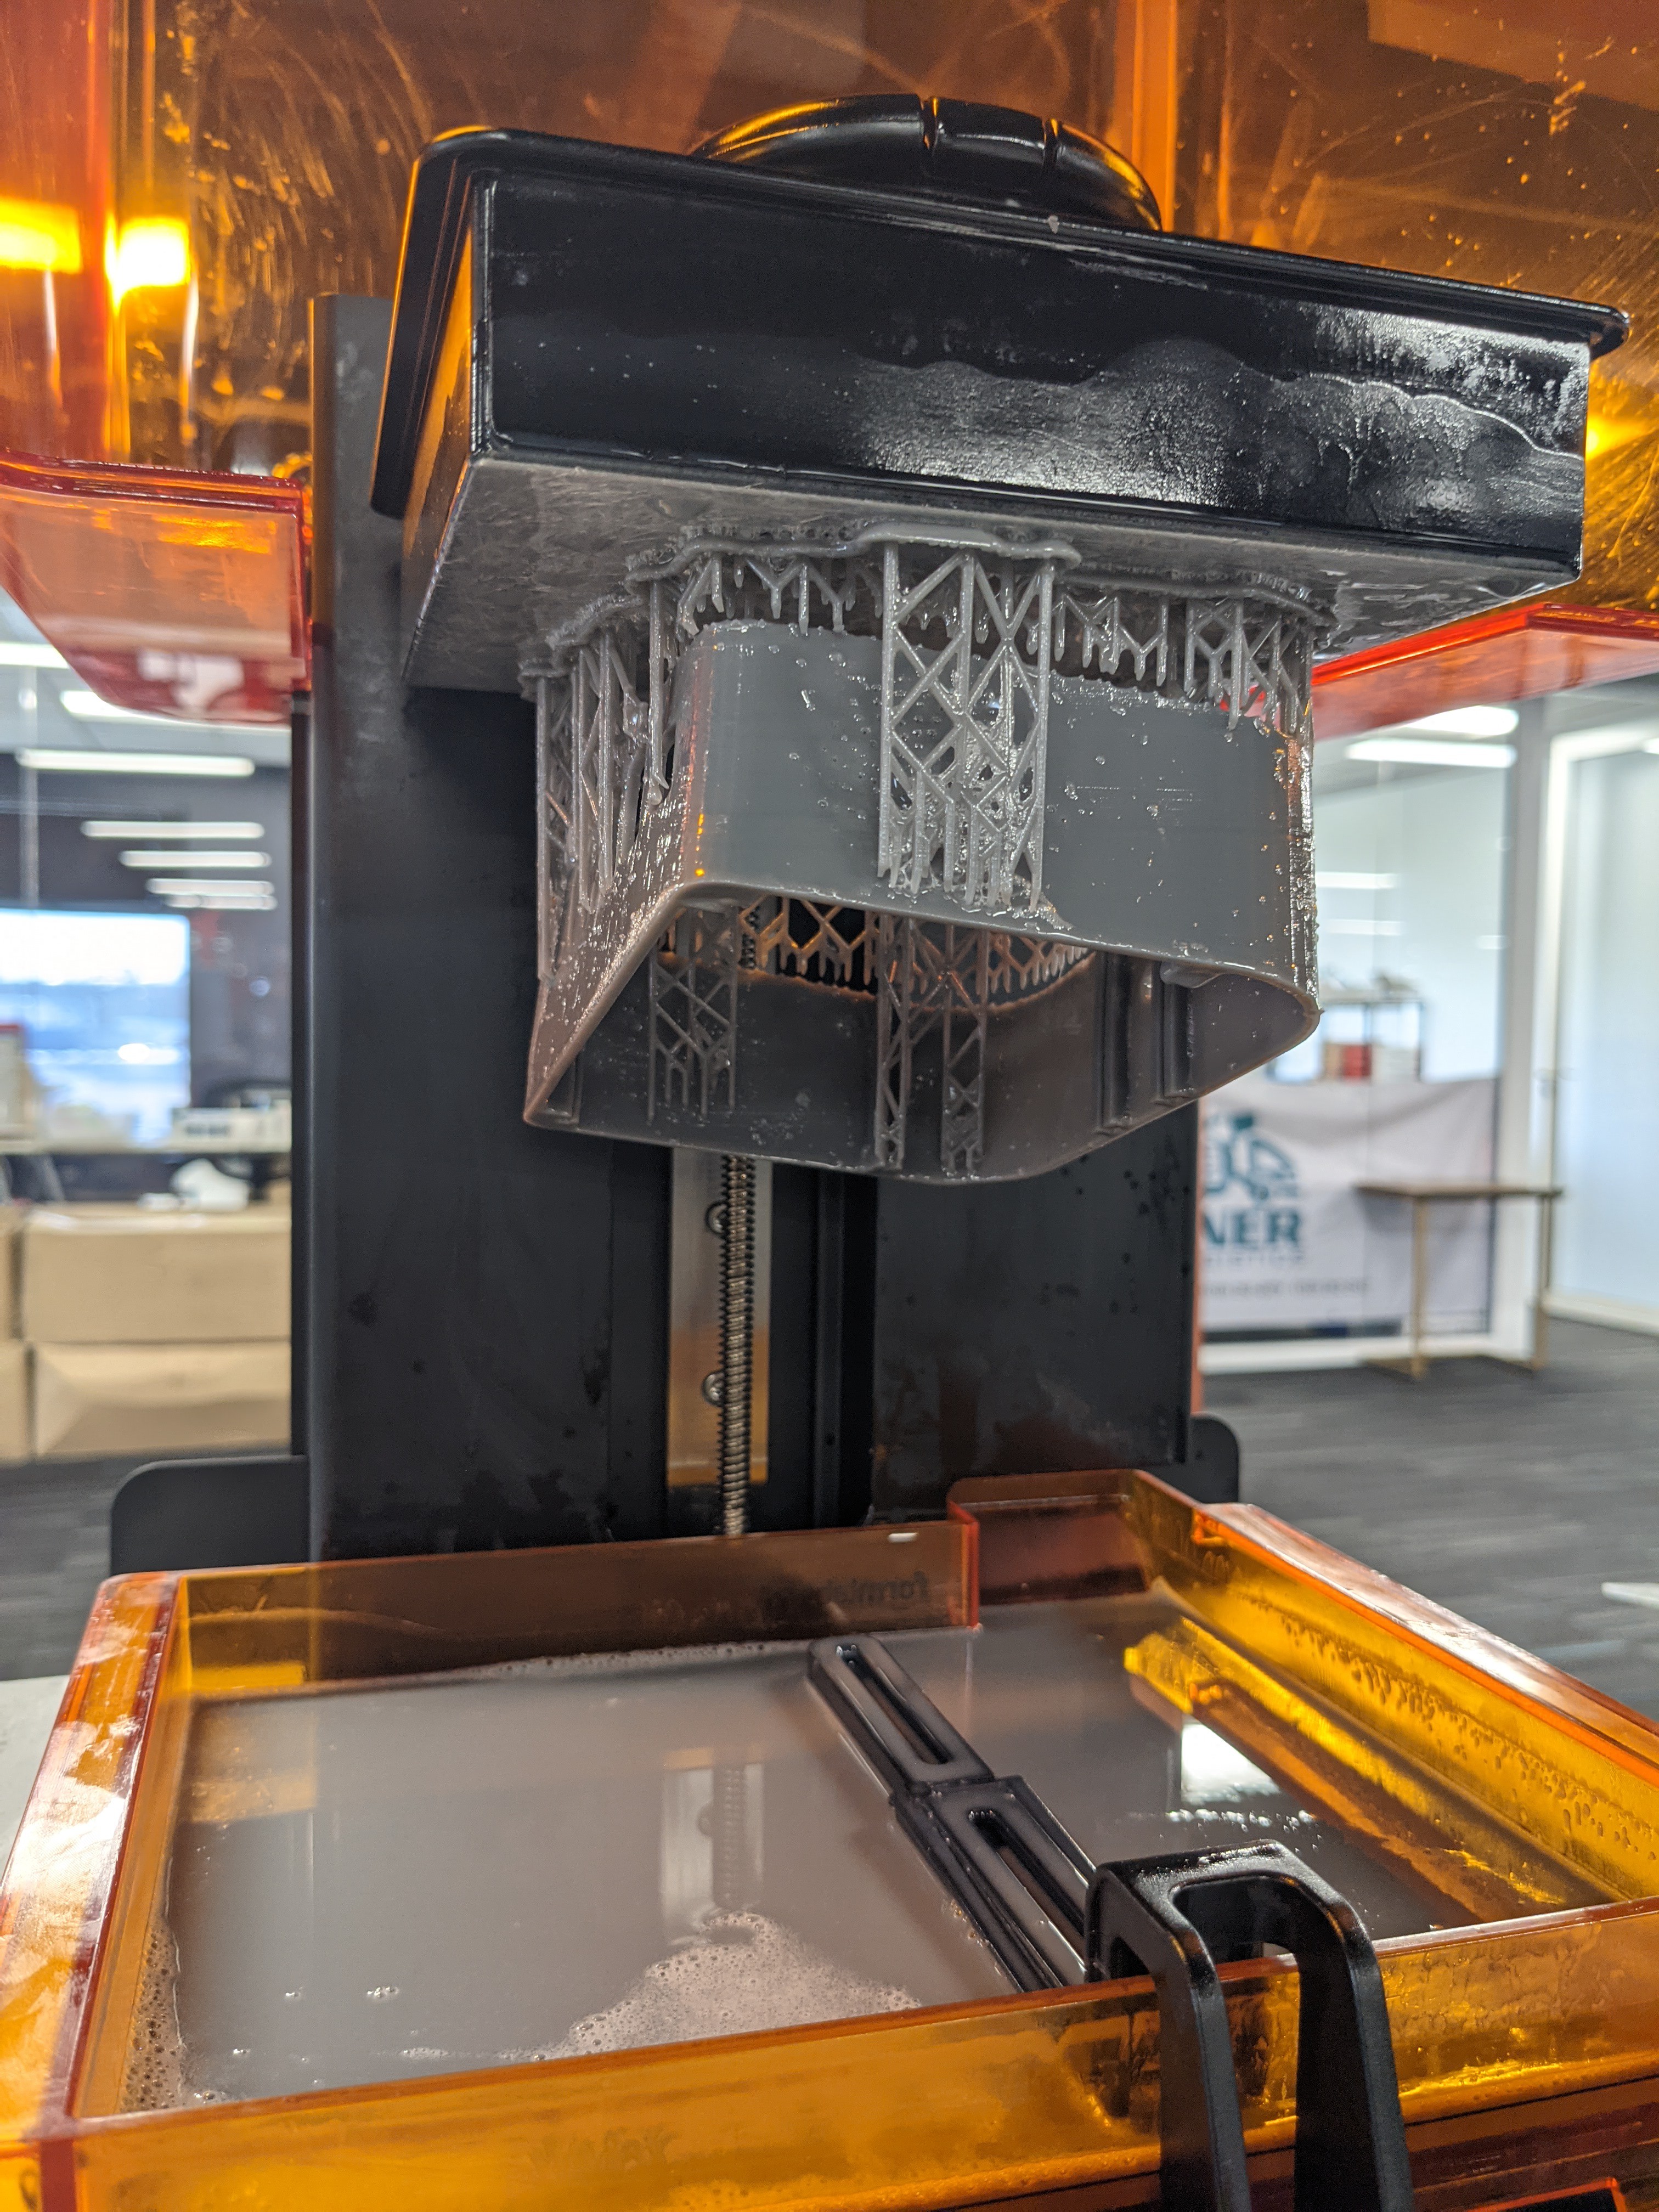
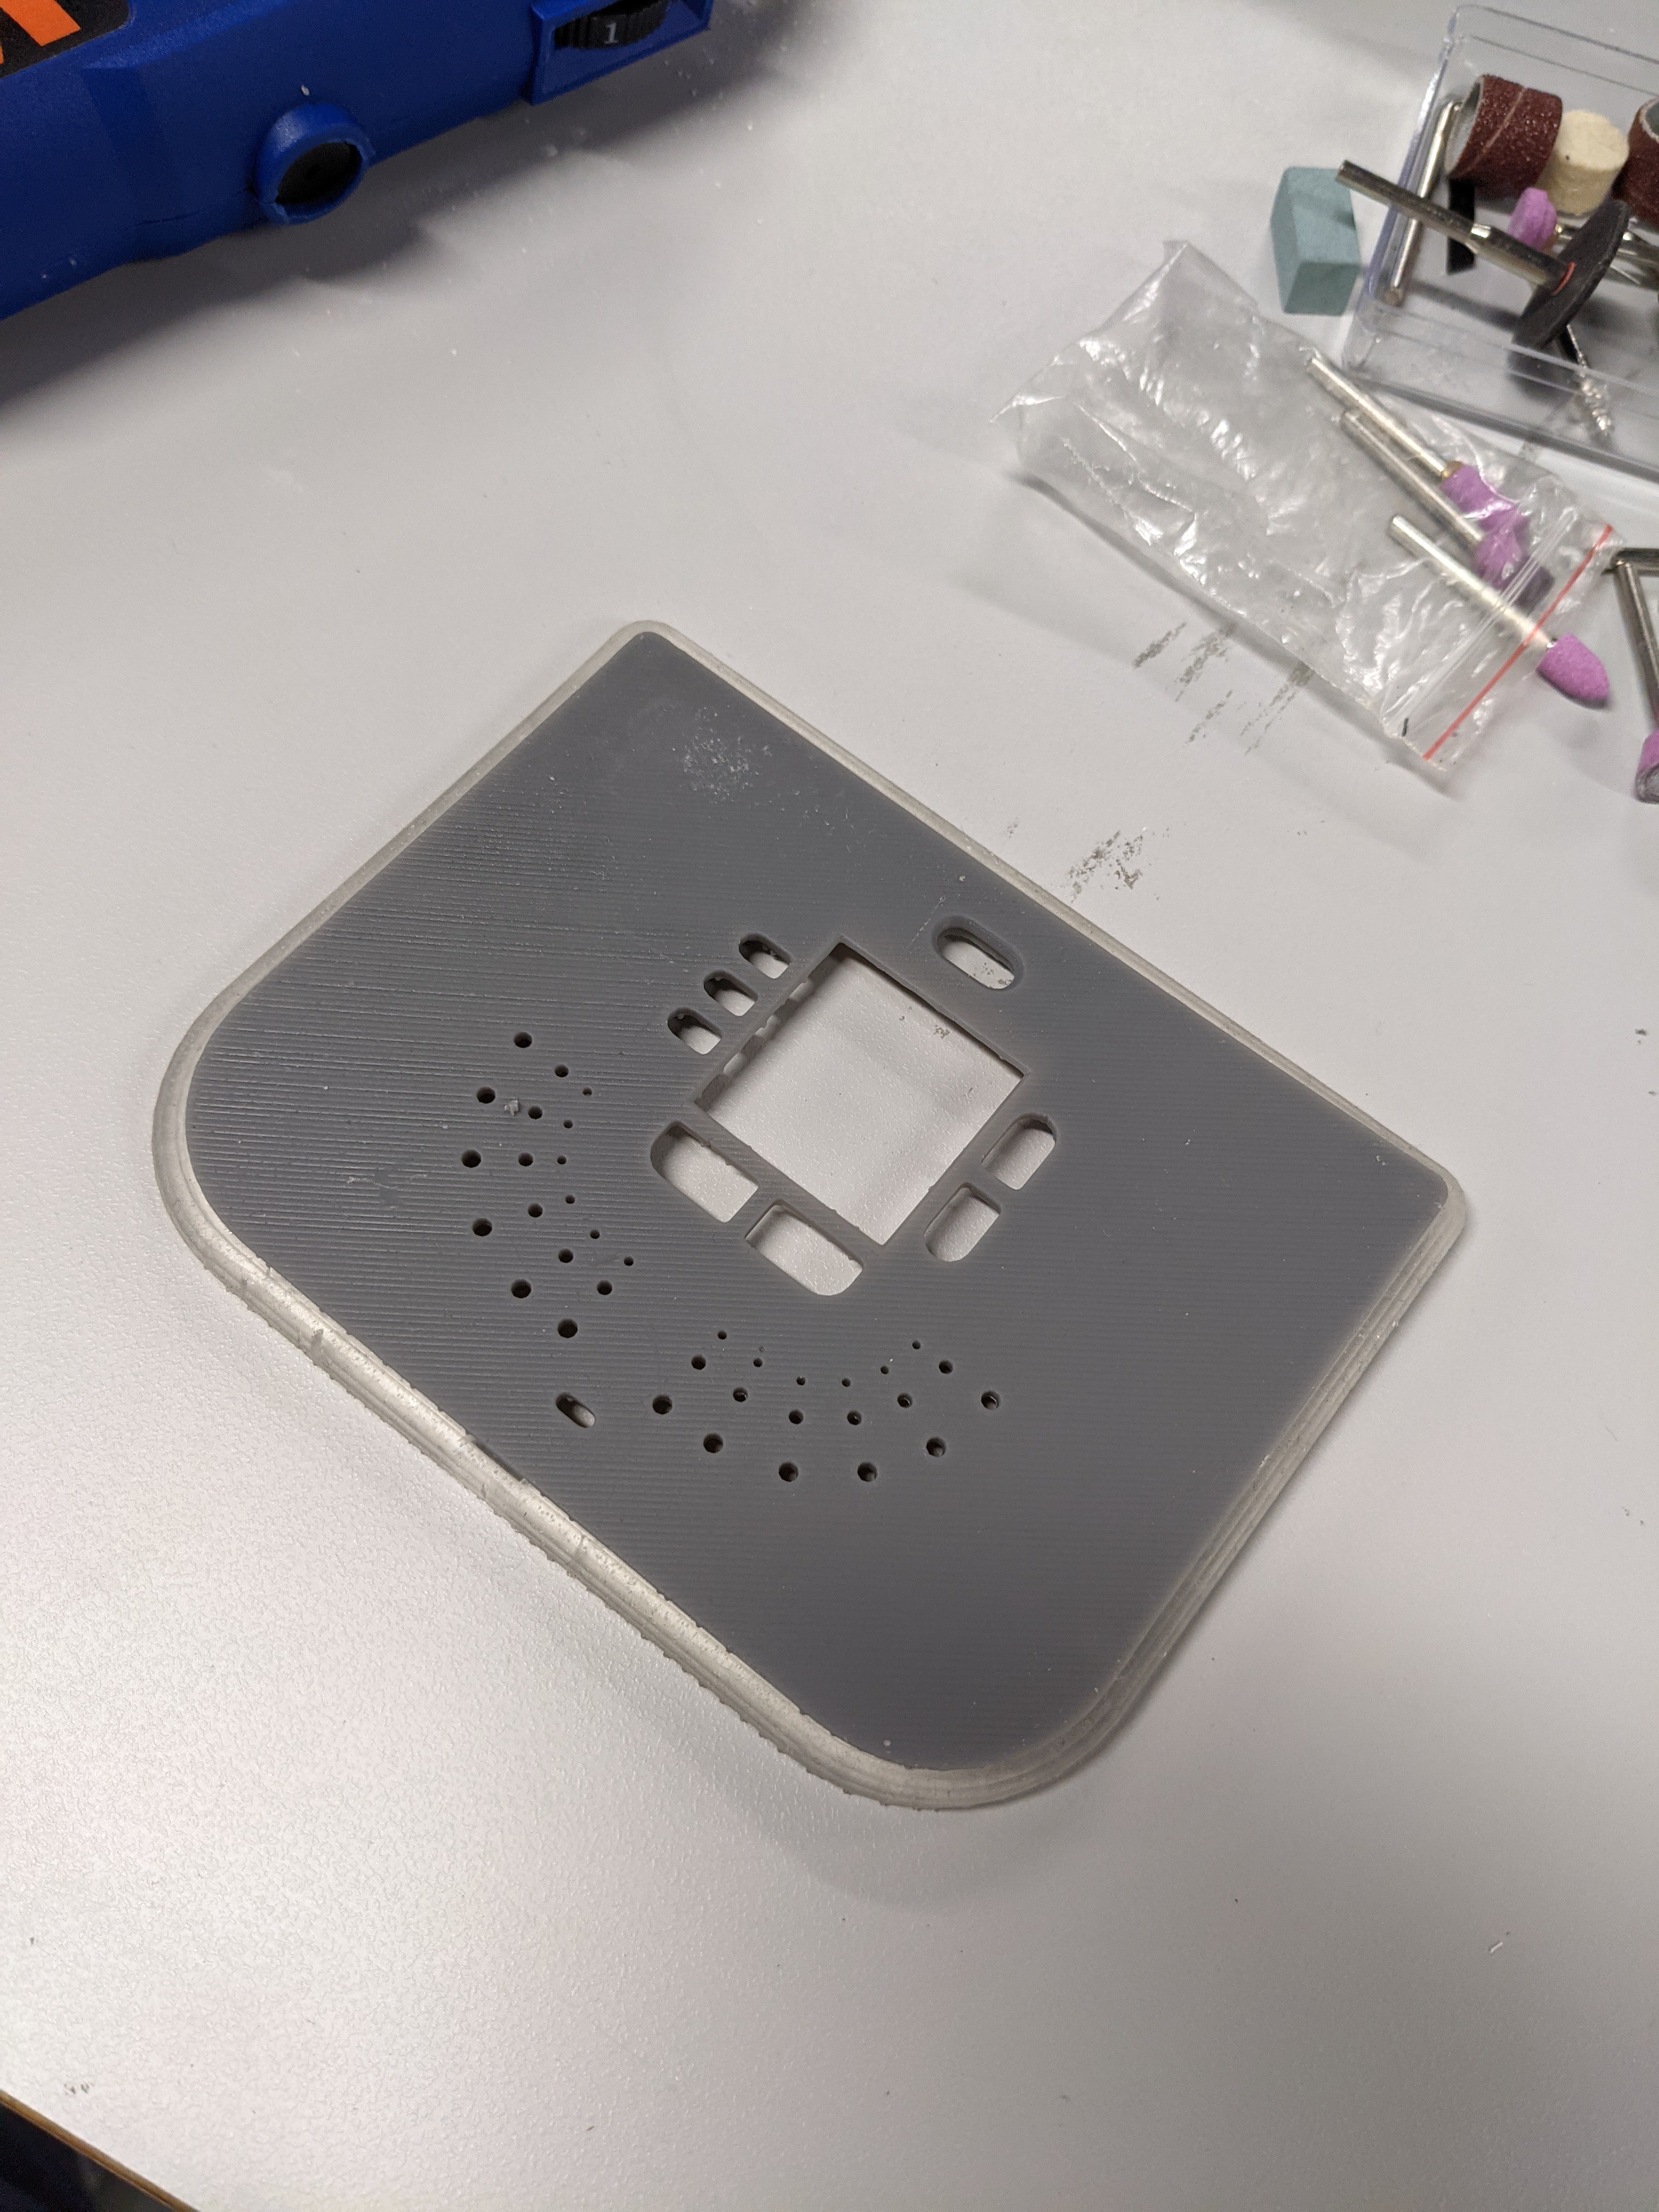
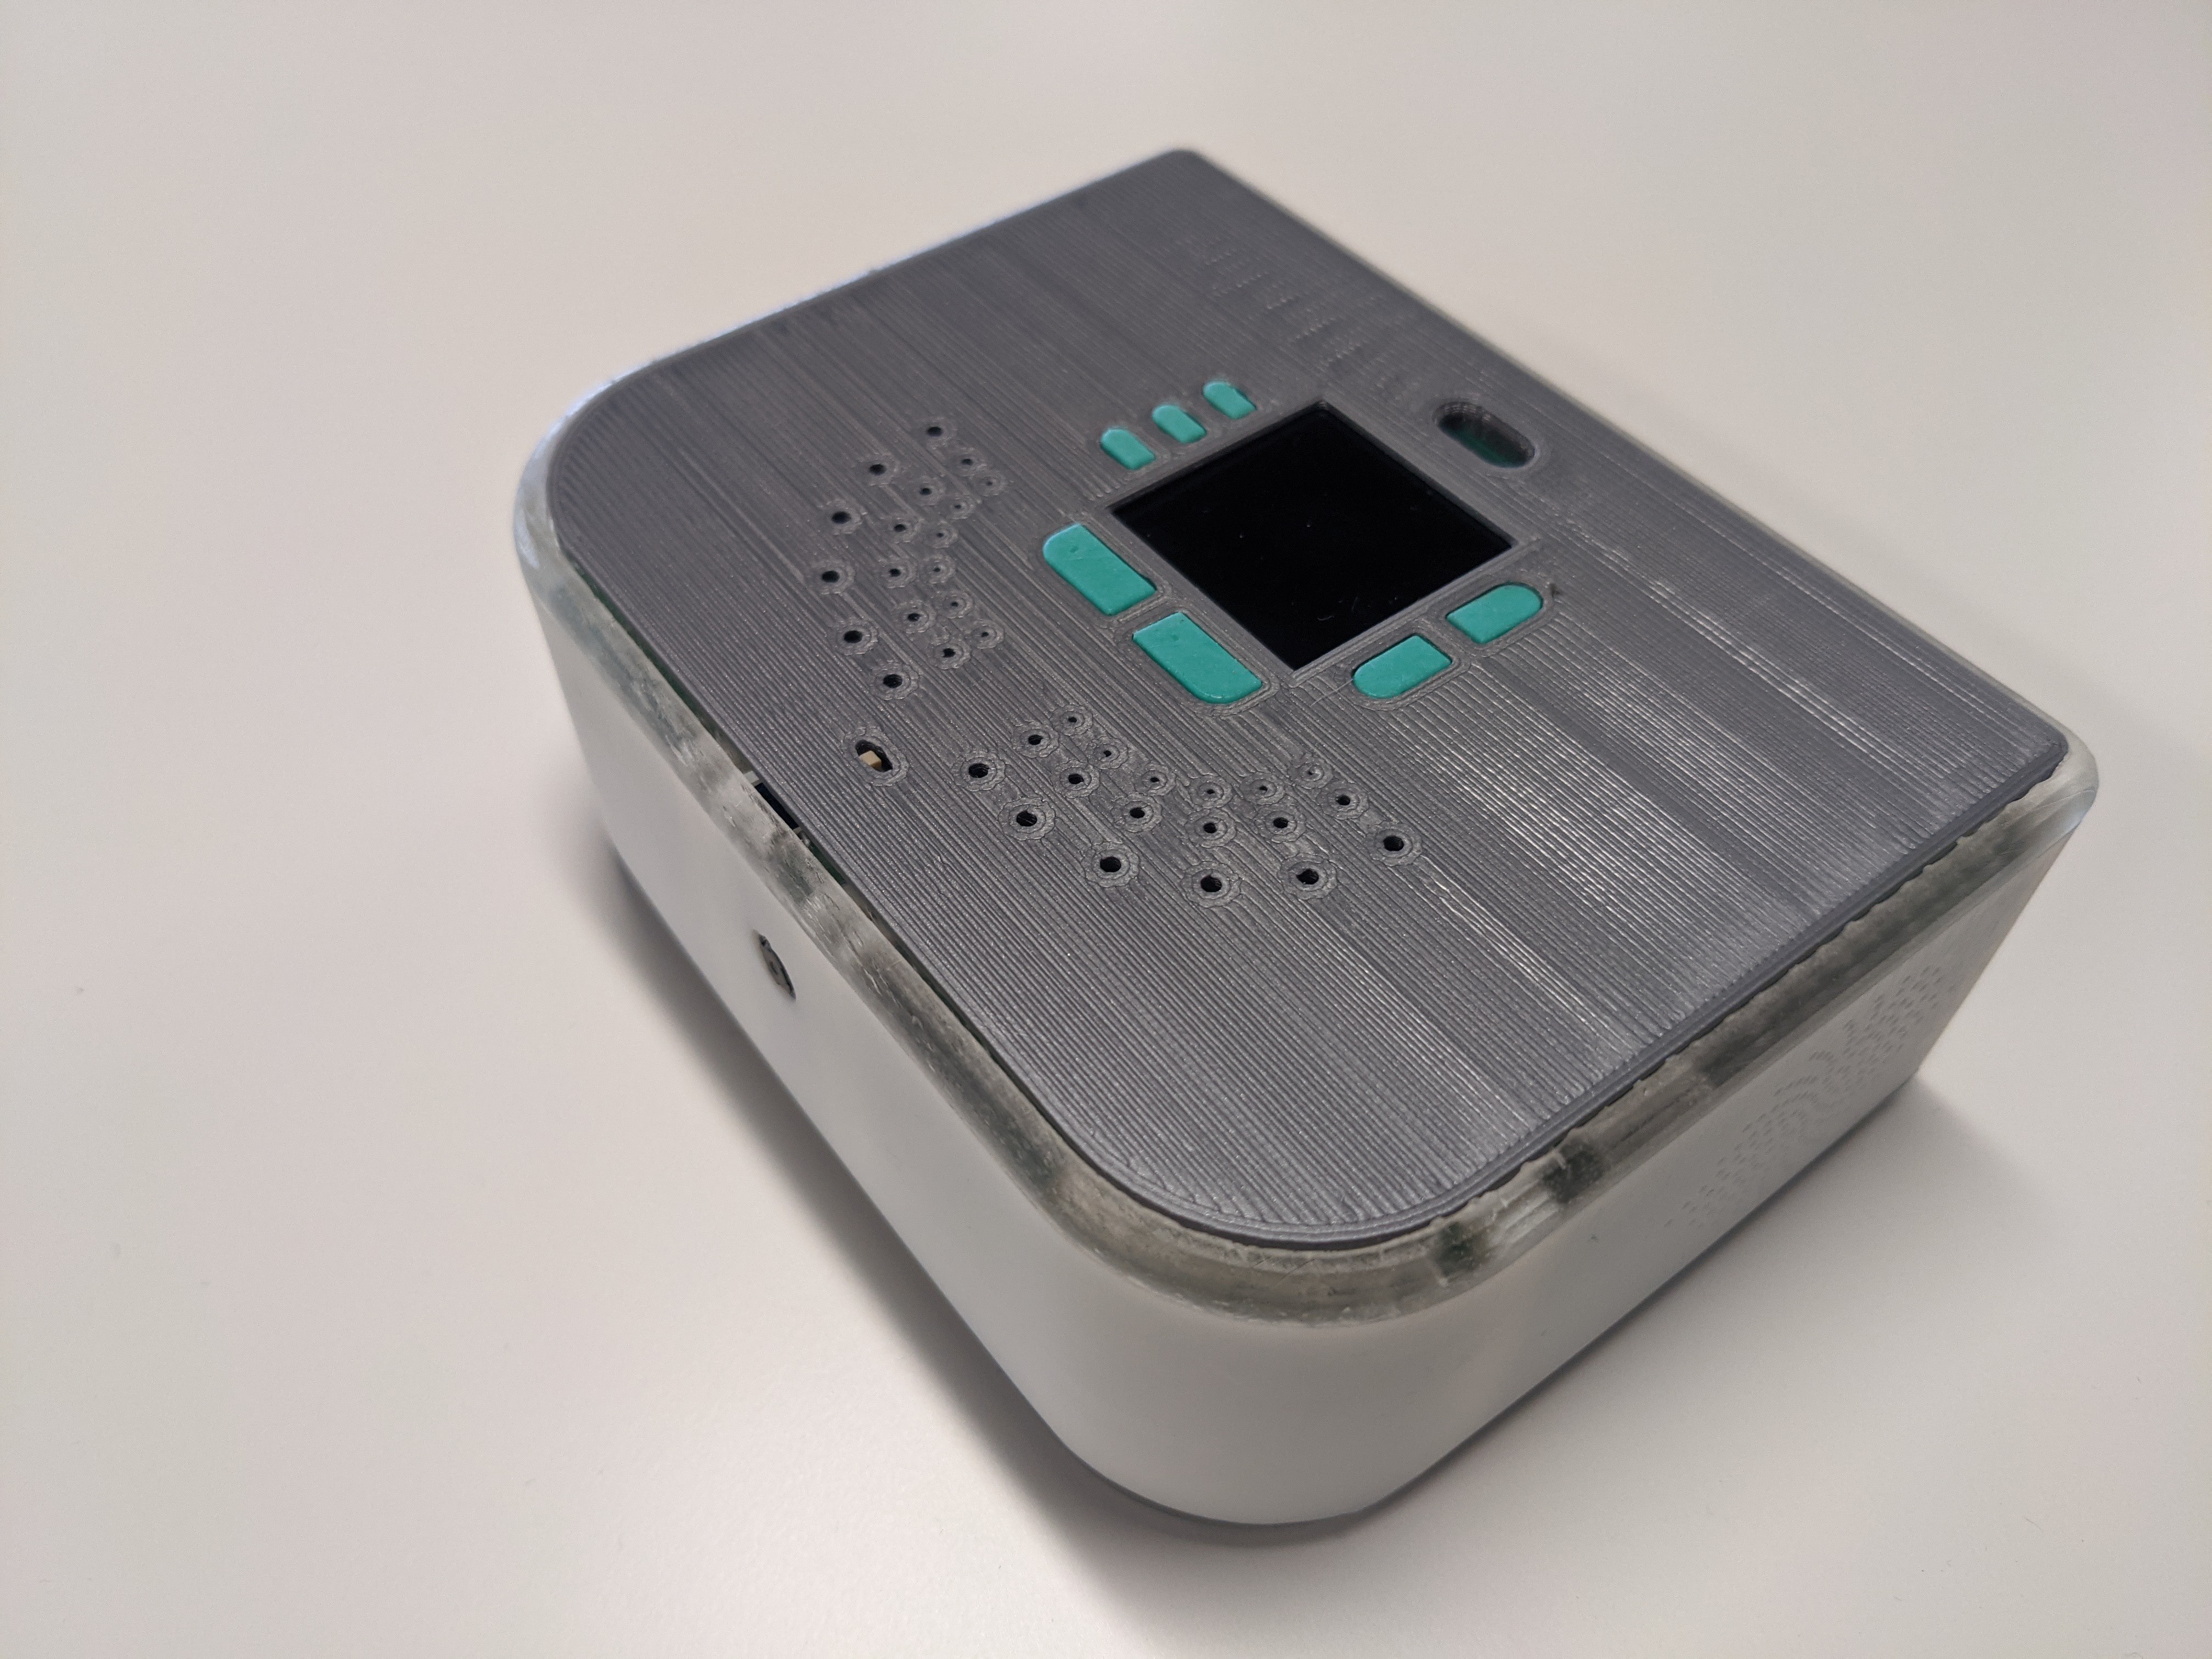
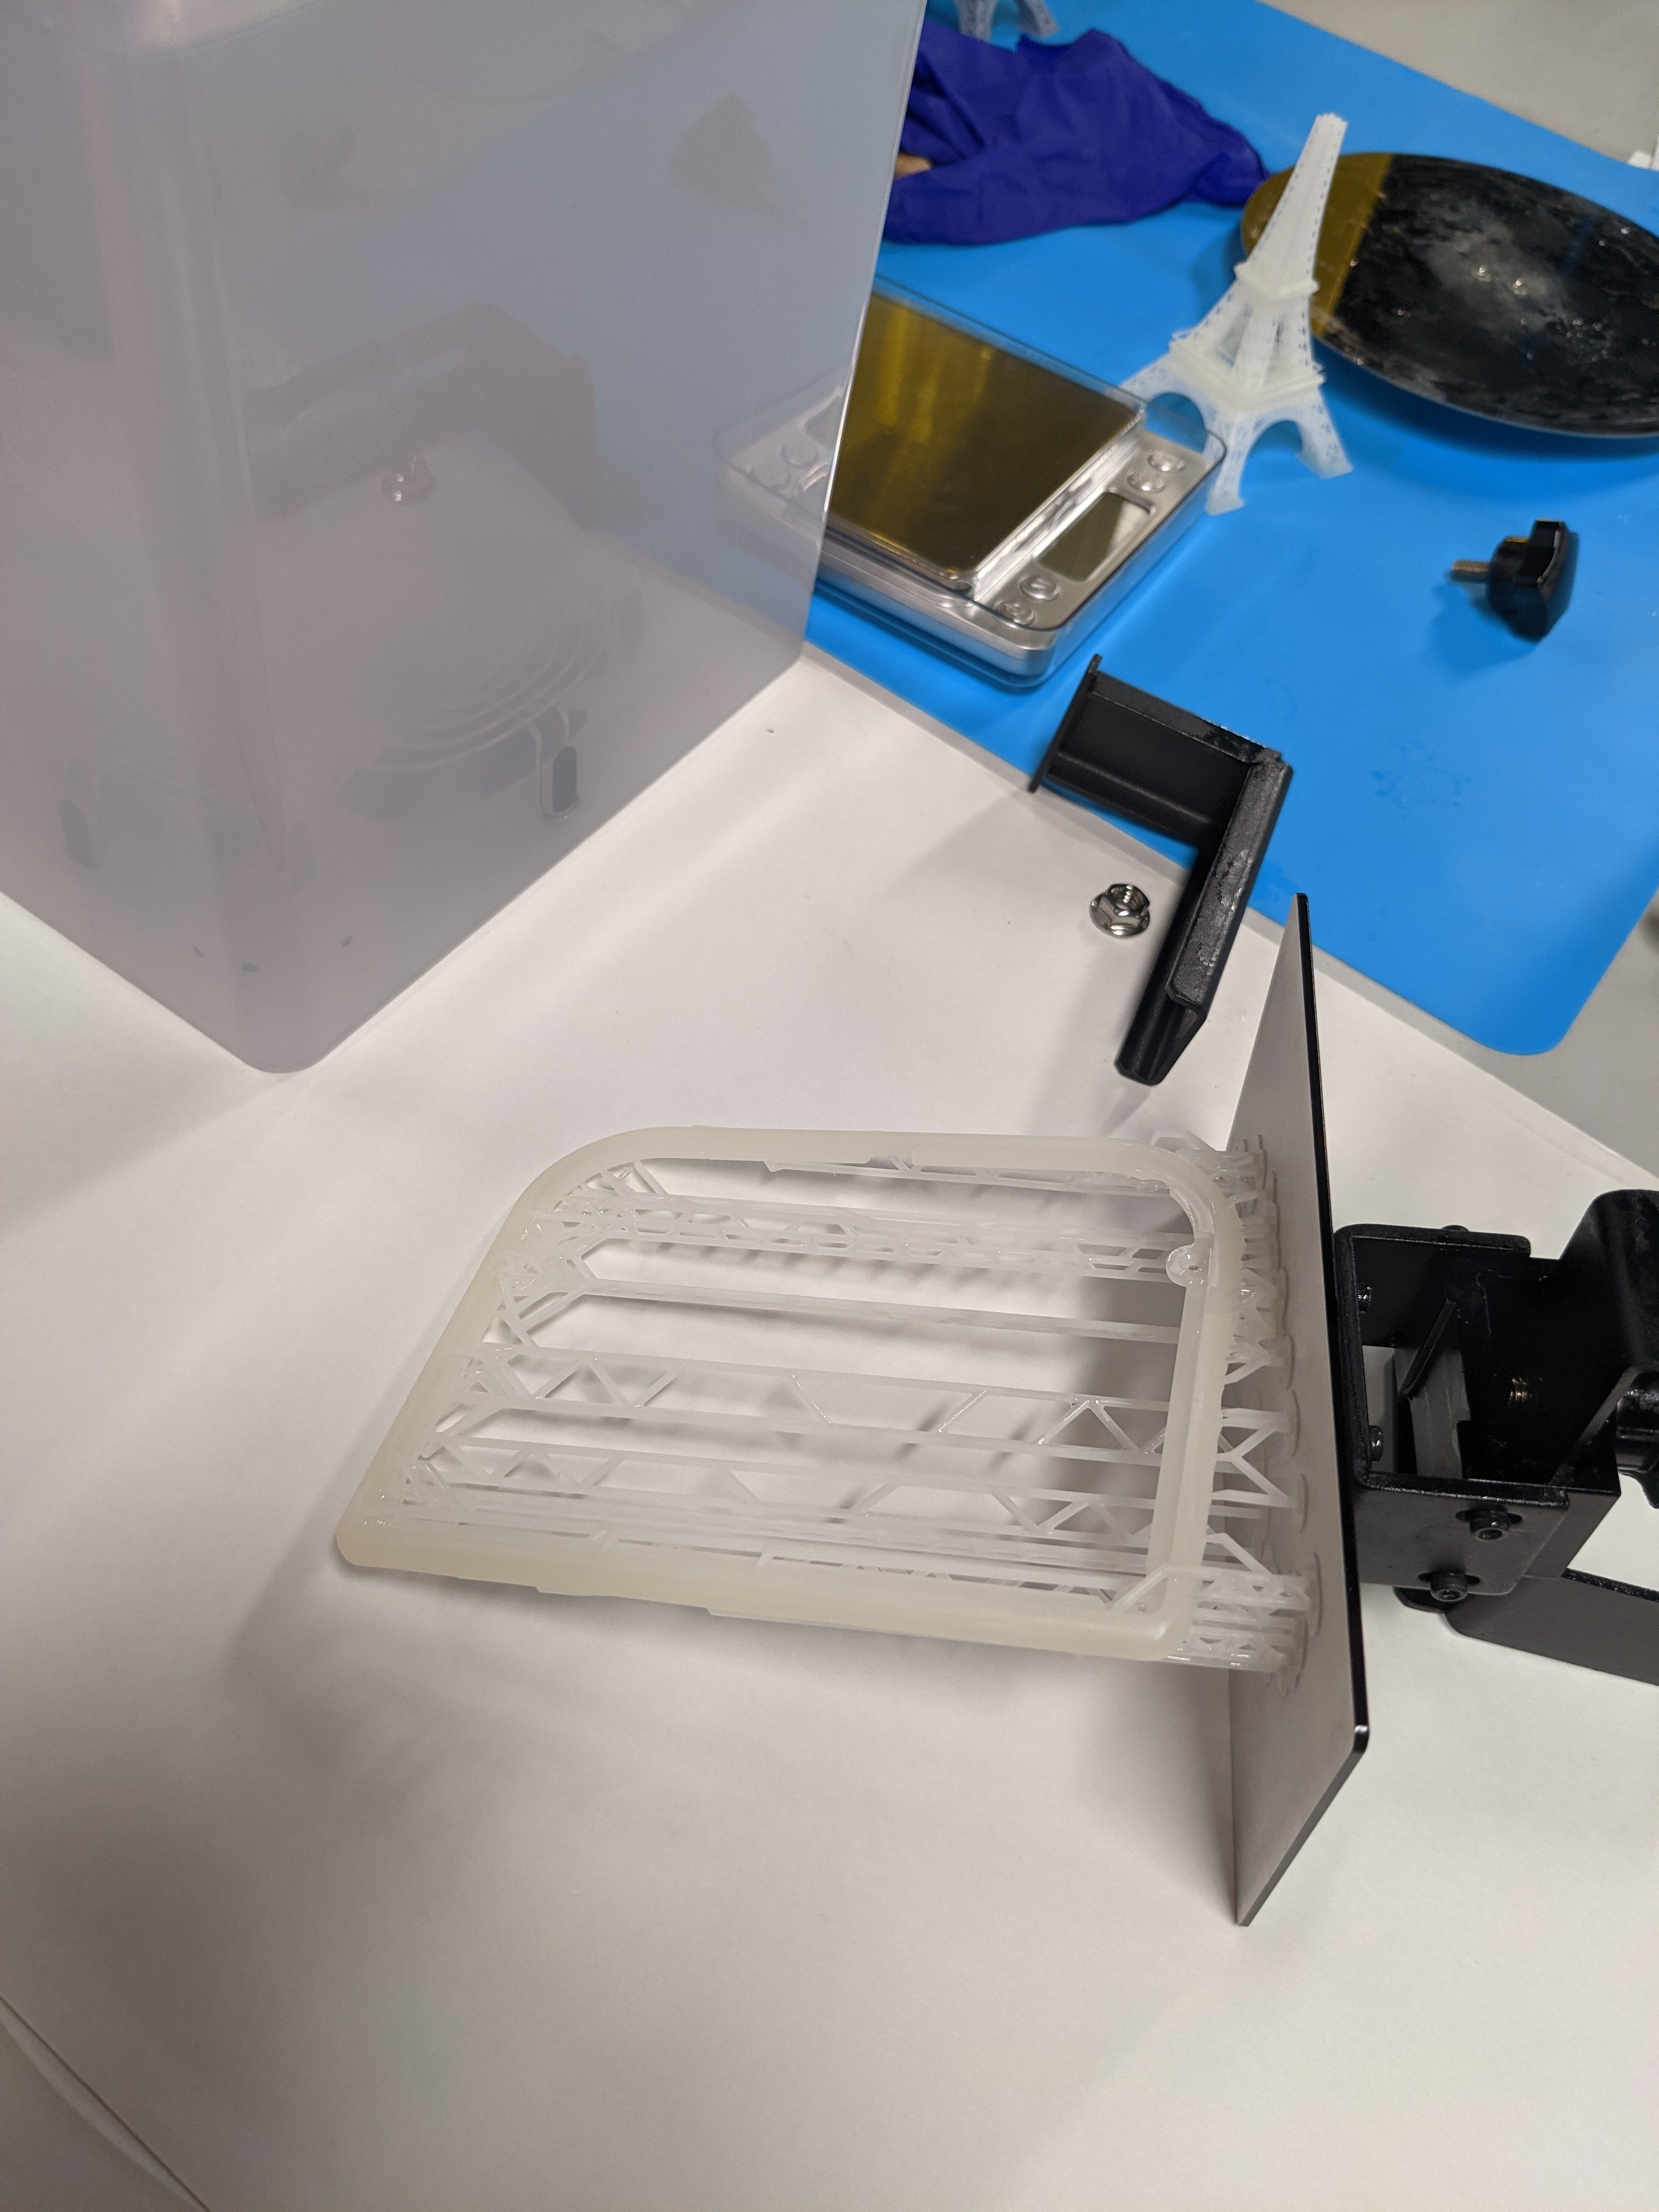
First 3D print of enclosure
This was done Formlabs 2 with gray resin

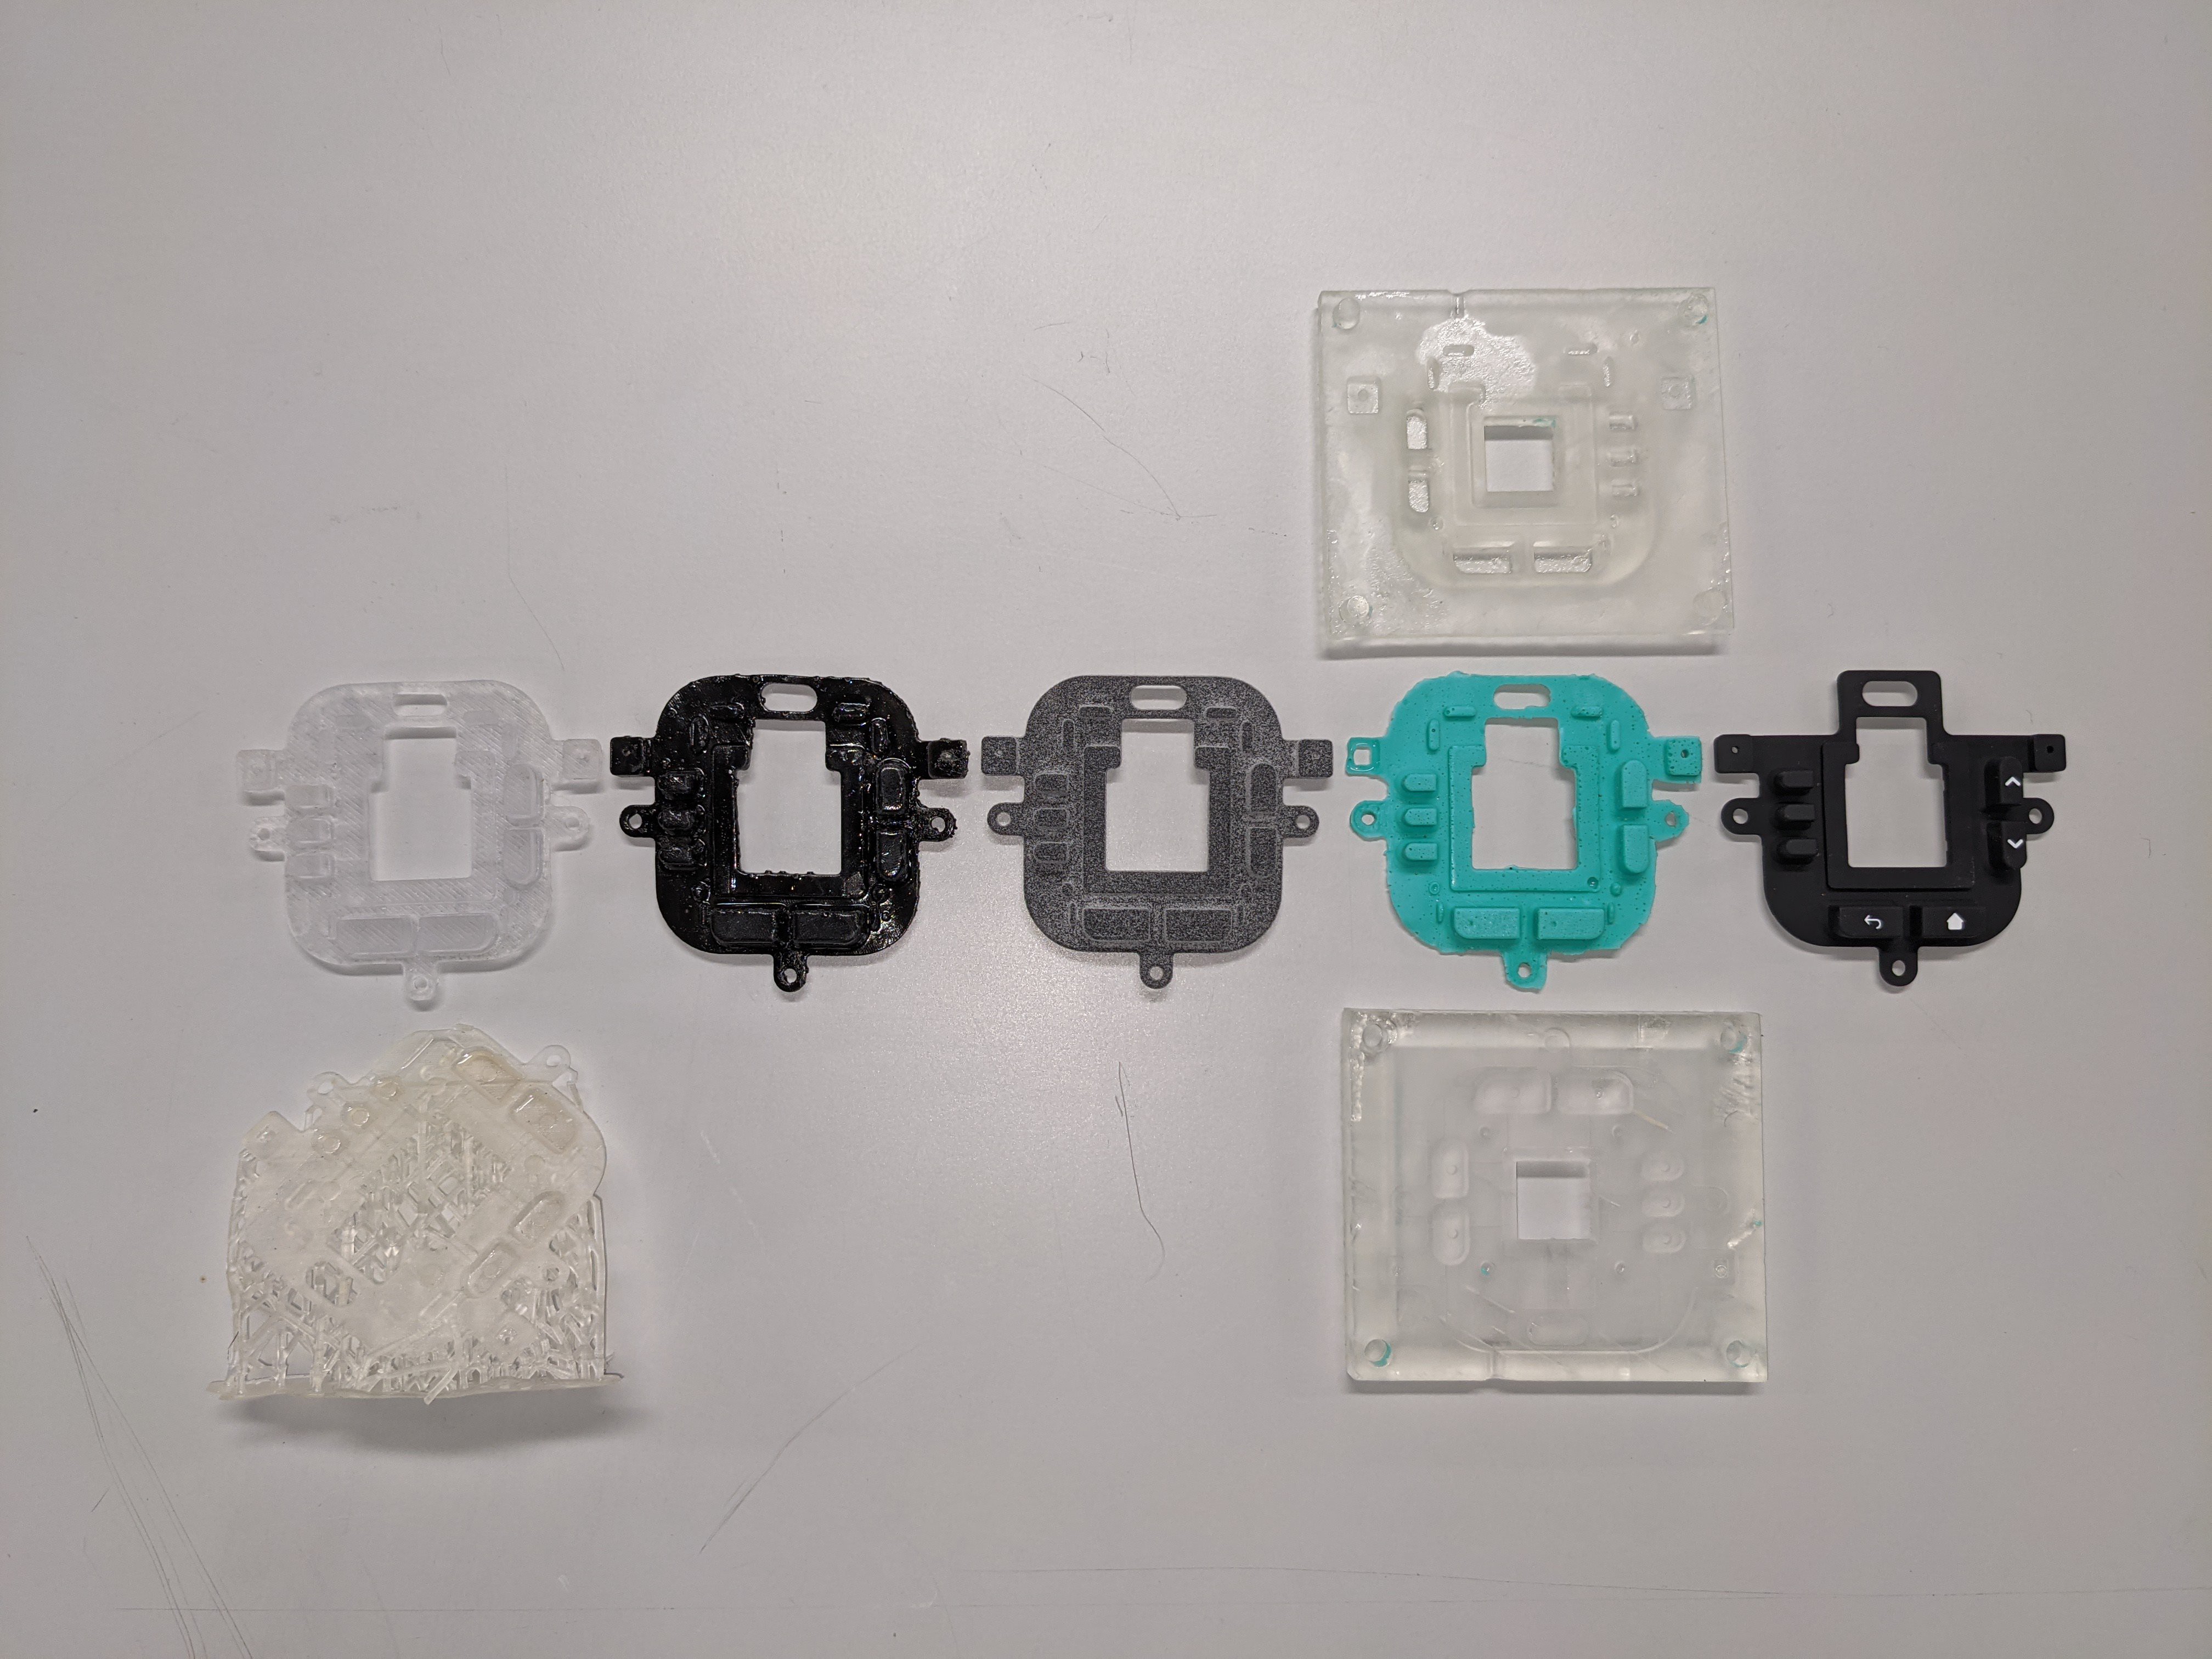
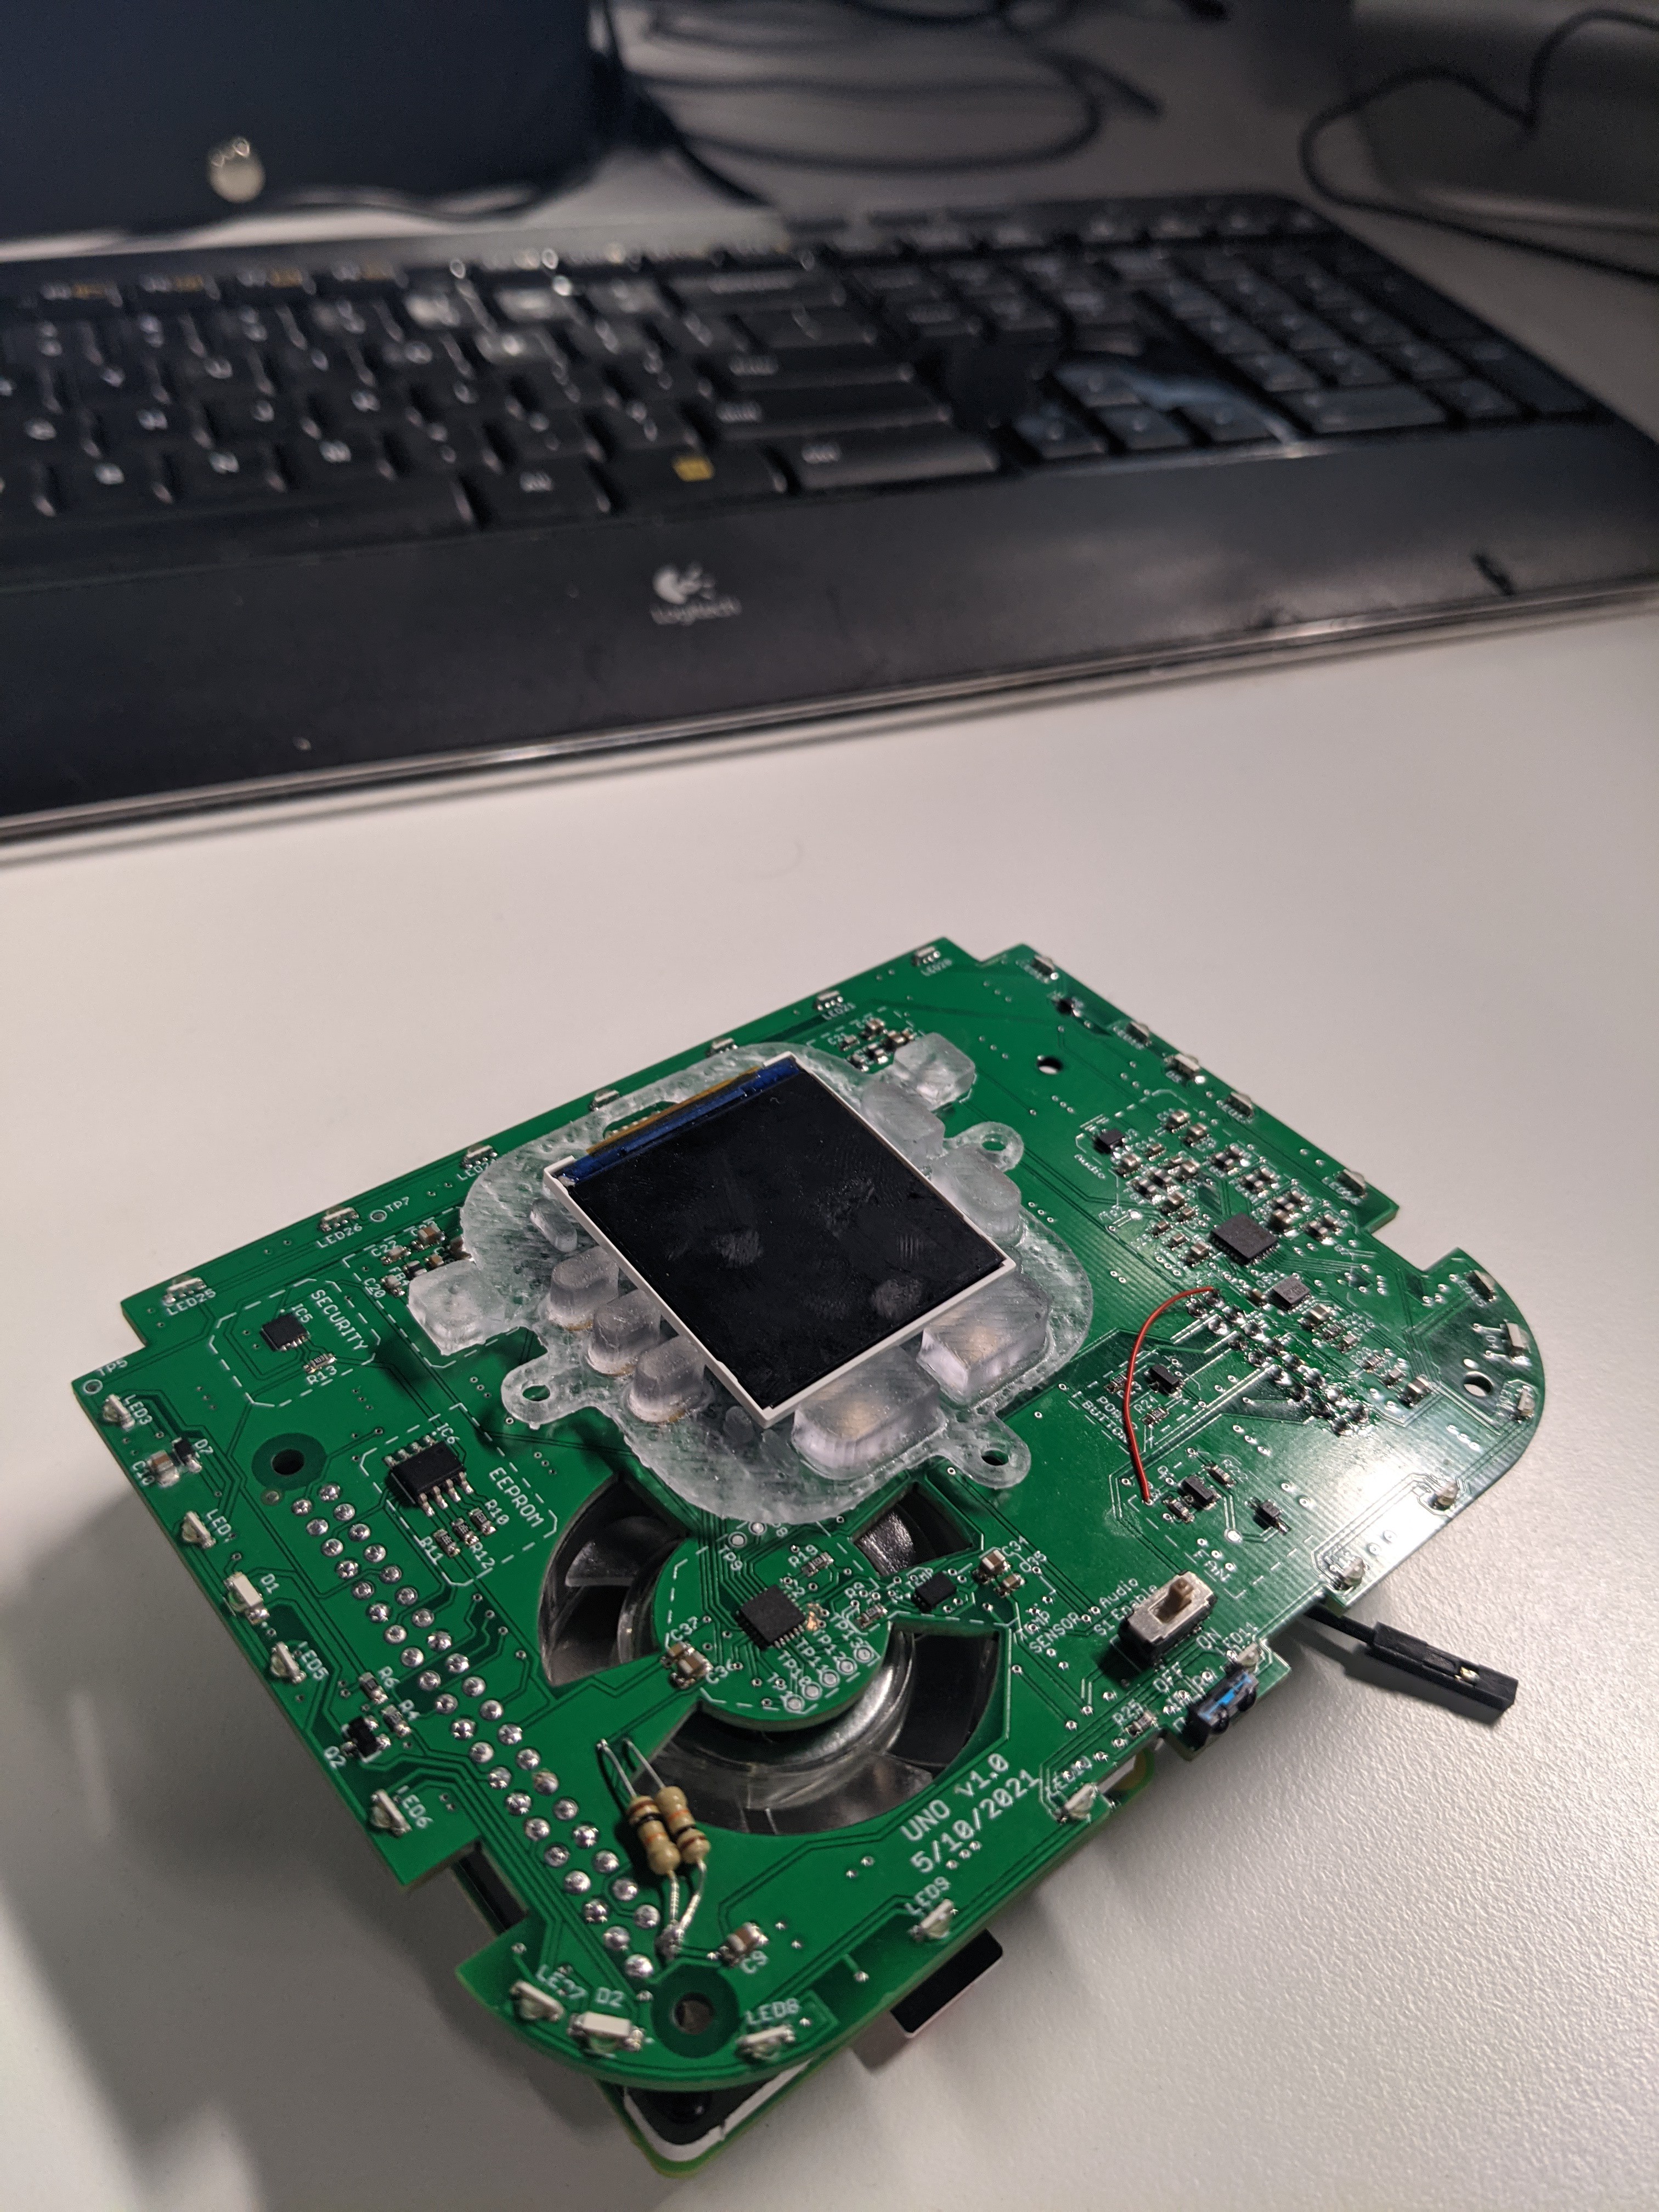
early build with 3D printed keypad
more on keypad prototyping in different post

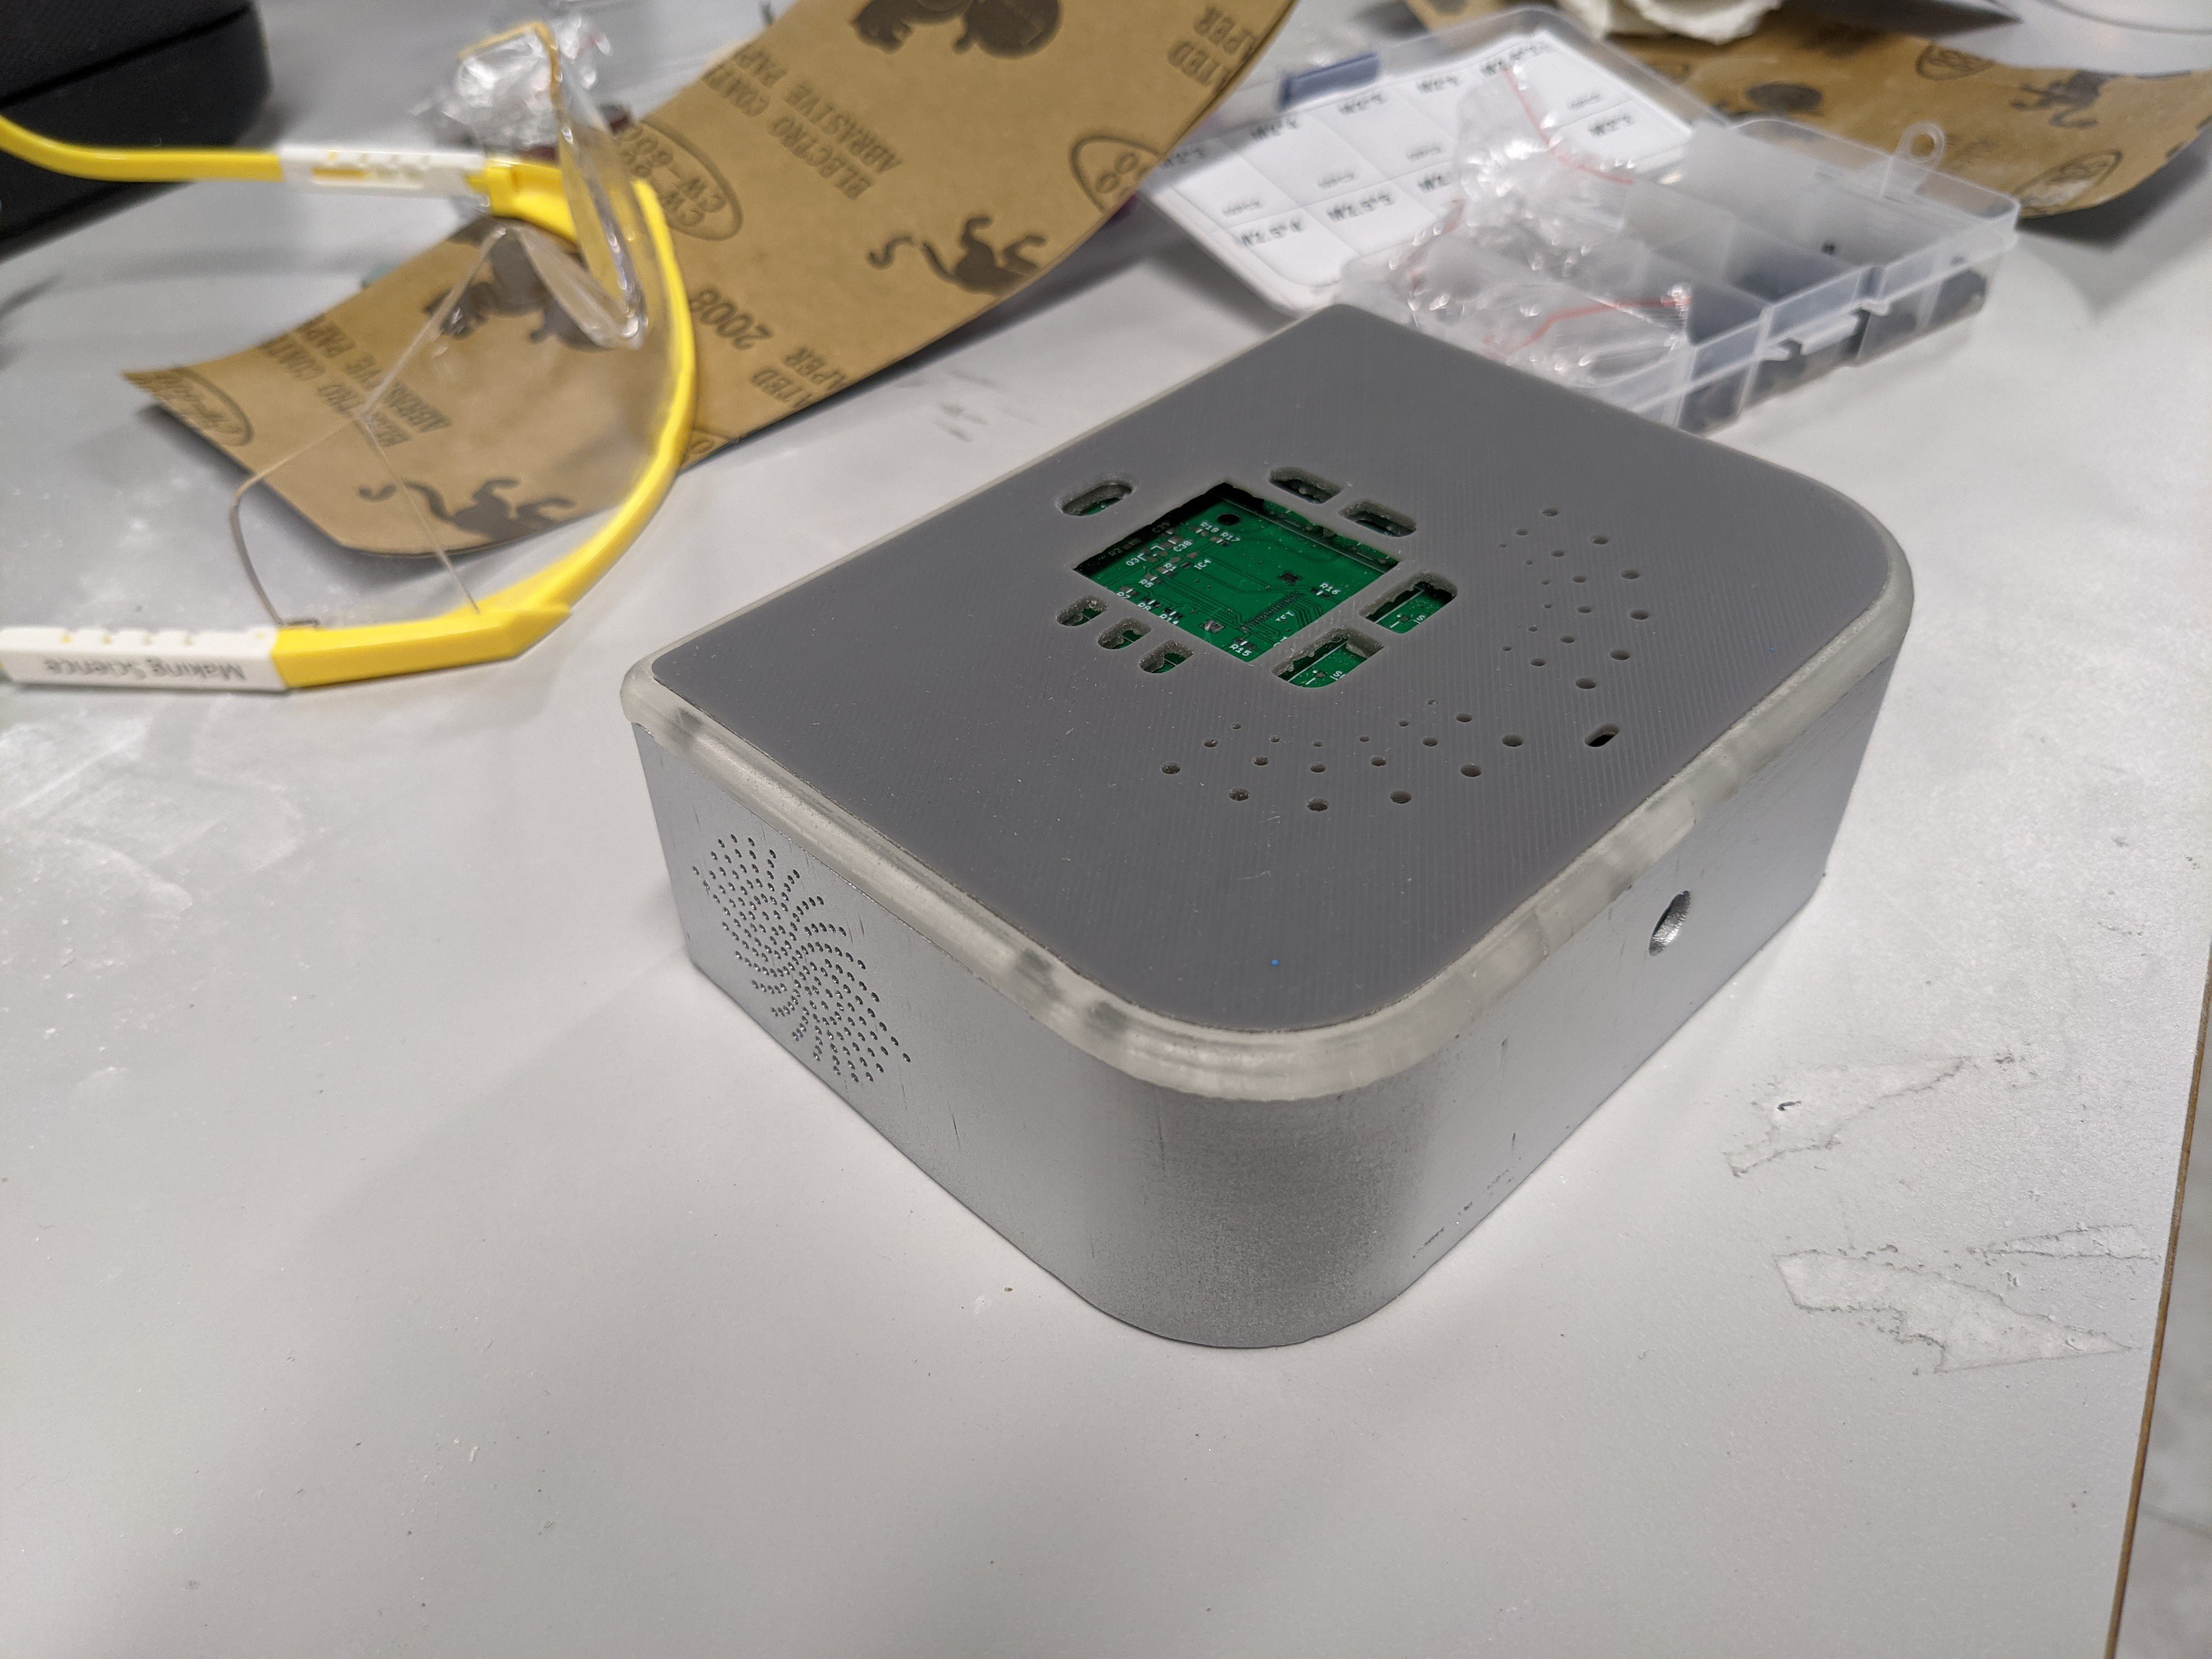
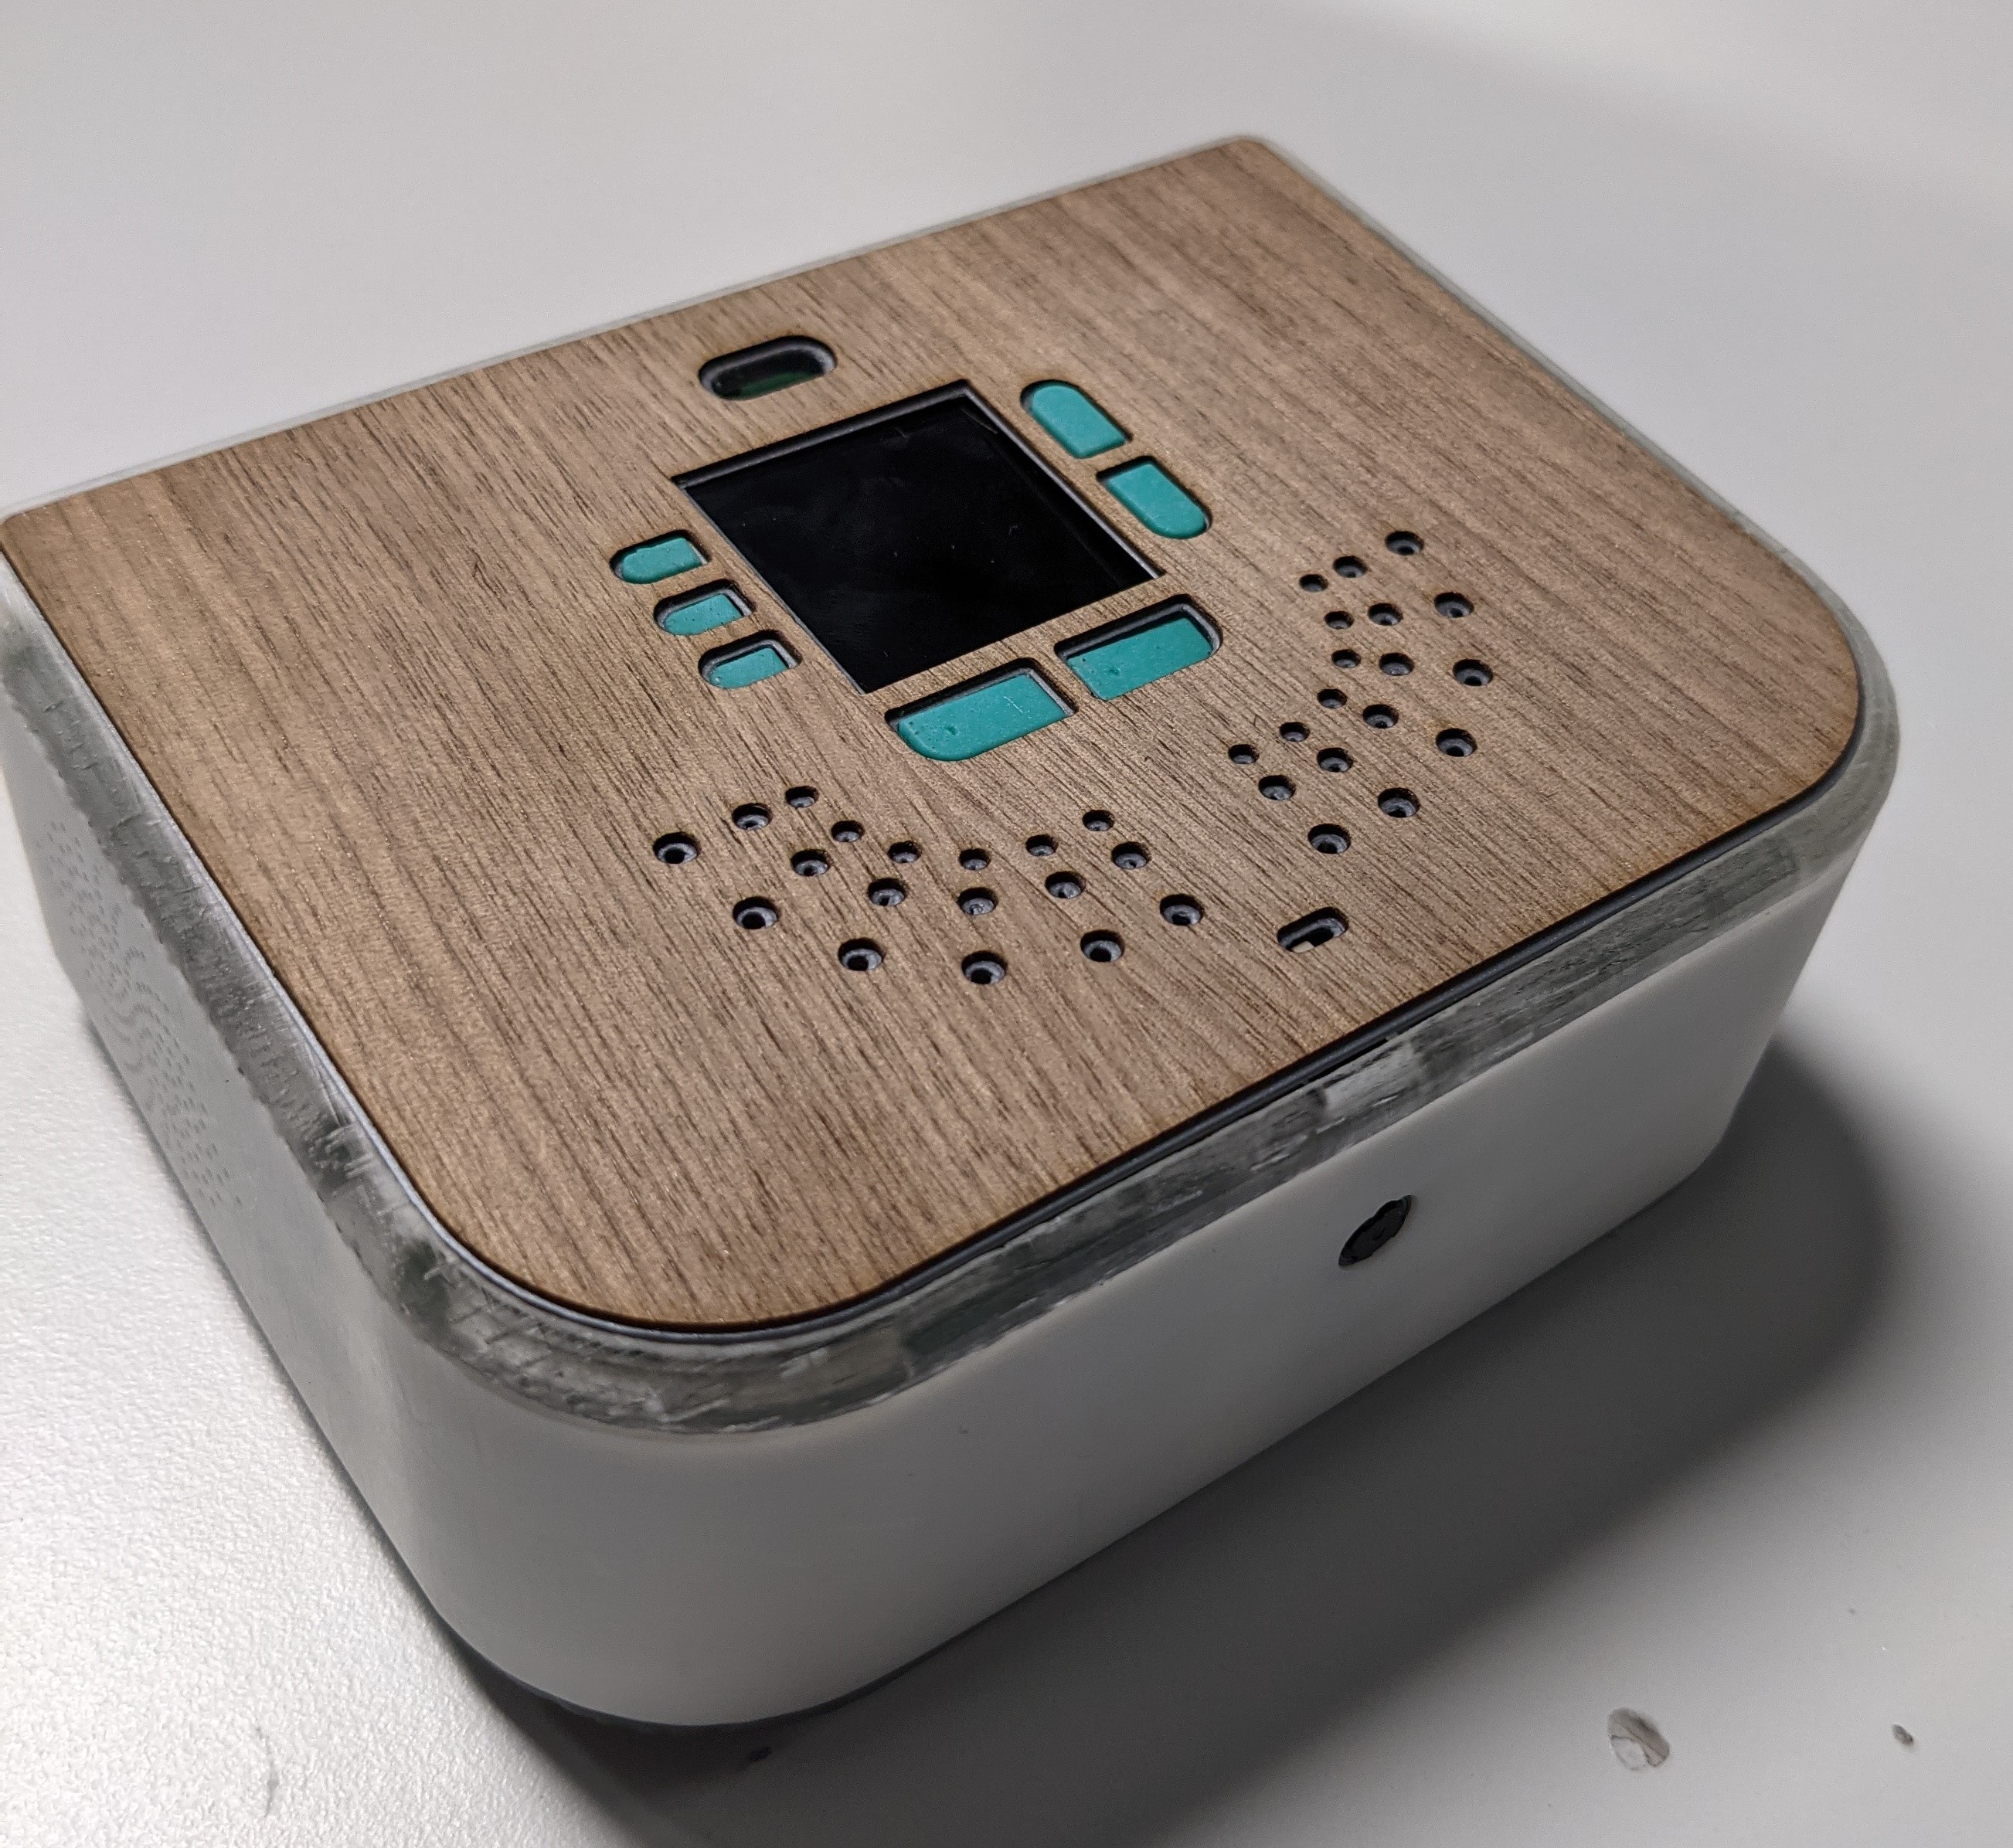
first completed 3D printed enclosure with light ring and top cover
enclosure is spray painted


High-level design decisions:

In this section, I would like to go through some high-level design decisions that were made in the early stages of product development. 

1 - Hardware peripherals:

One of the most important decisions I had to make was to select what...

Read more »

BOM_sideboard.xlsx

sheet - 11.60 kB - 04/29/2023 at 11:05

Download

veneer.dxf

wood veneer laser cutting file

AutoCAD DXF - 247.40 kB - 04/23/2023 at 15:24

Download

  • 1 × Raspberry Pi 4 4GB RAM
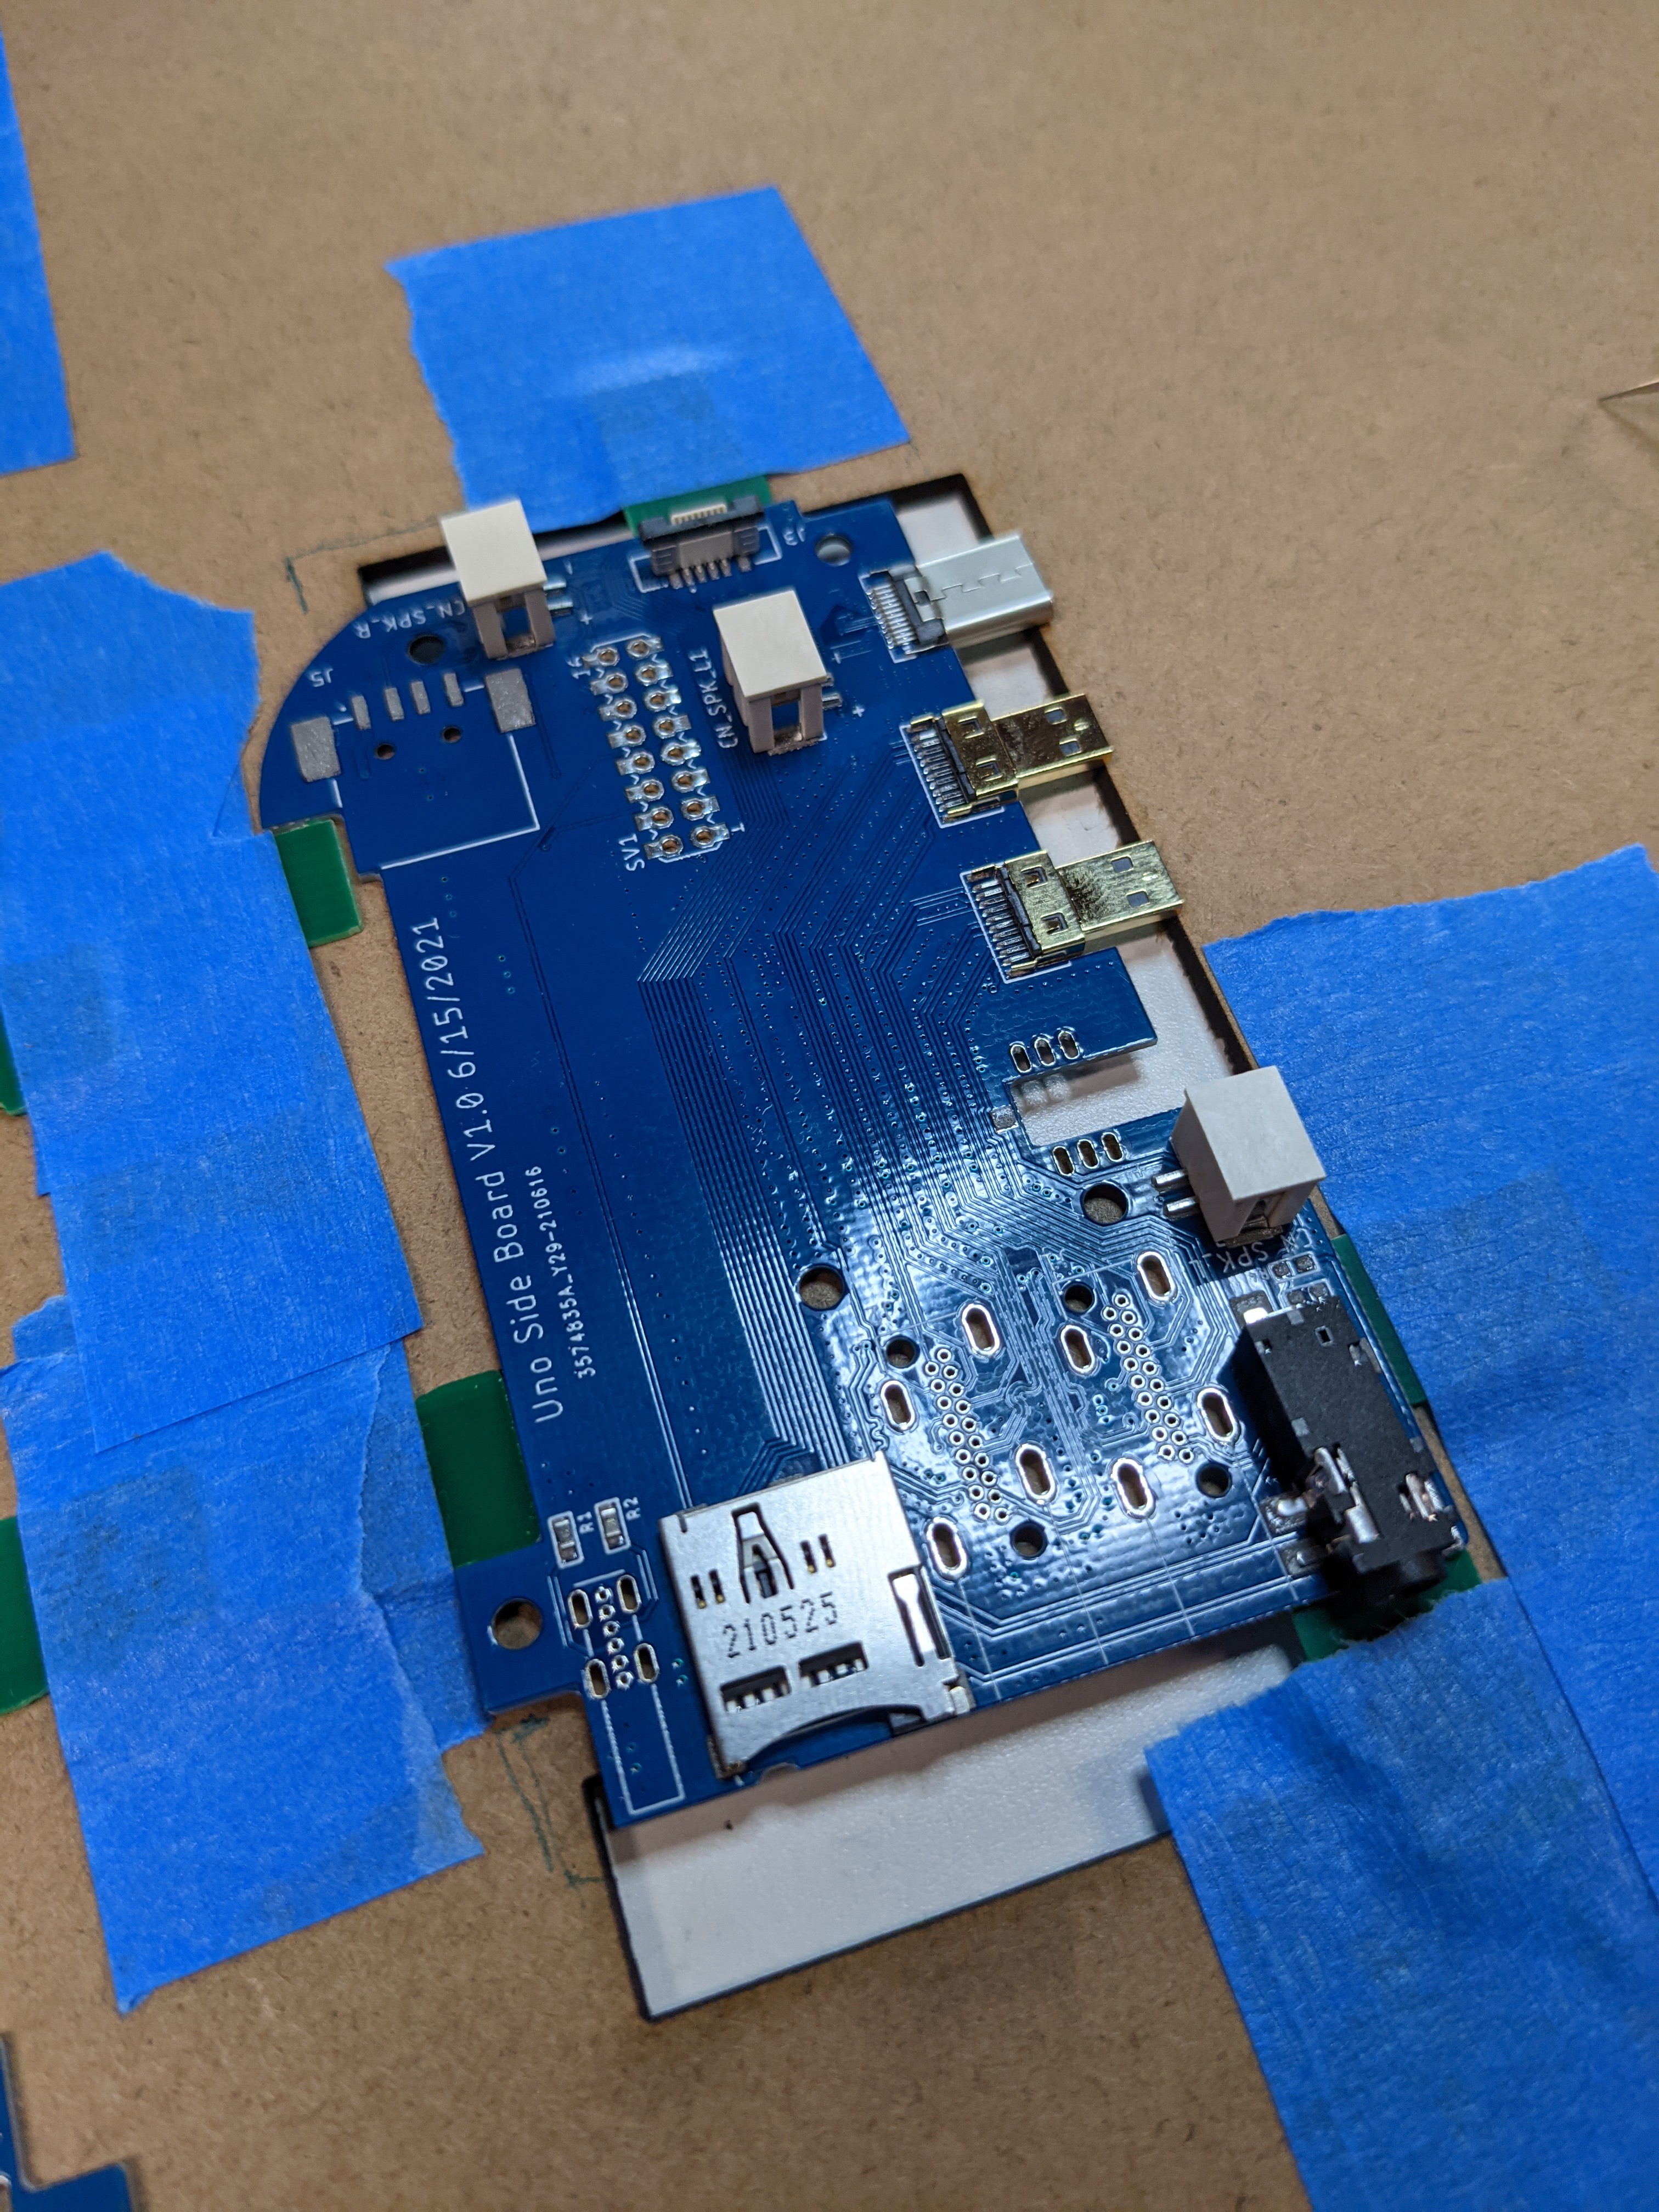
  • 1 × Ubo "Side Board" Custom PCB for HDMI x2, Audio, Power & MicroSD ports, additional internal USB port and internal/external STEMMA QT connectors.
  • 1 × Ubo "Top Board" Color LCD Display, Keypad, IR tx/rx, RGB LEDs, Light Sensor, Microphone, Audio IC, Temperature Sensor
  • 1 × Ubo enclosure RGB Diffuser Rnig, Wood Veneer Cover, Aluminium Body, Base with Mounting Stand-offs
  • 1 × Internal Speakers 2 speakers press fit into enclosure and connected to Side Board

View all 7 components

  • GUI Design

    Mehrdad Majzoobi08/03/2023 at 05:31 0 comments

    Ubo Simple GUI Software Architecture

    In this document, I propose and discuss basic design principles behind Ubo GUI architecture and the driving forces behind certain decisions. This is a work in progress and this document is solely offering insights and proposals on the design. I would love to hear your thoughts and any suggestions on how to best design the UX.

    The main objective behind Ubo GUI design is to offer a simplified graphical interface to the application developers so that they can easily understand and use it within minutes. 

    In order to accomplish that, we need to offer a very simple API and data abstraction layer as well as a set of examples that can serve as starting points for developer applications.

    Simplicity must be followed in every aspect of the design (window manager, API/Interface, templates, etc). By physical design (LCD size, keypad design, etc), this GUI is only intended for simple interactions, and is not indeed to replace a desktop or mobile-like experience.

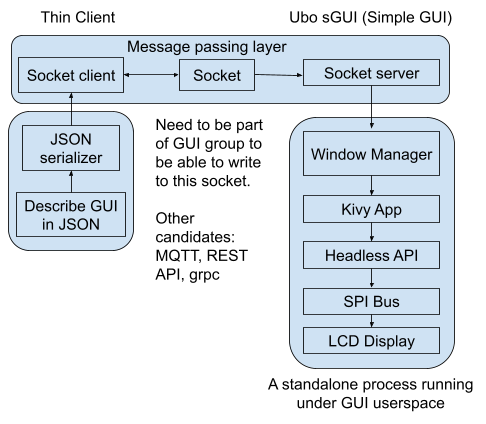
    The picture below shows a high-level architecture of the proposed GUI design:

    Figure 1. Proposed GUI High-level software architecture

    From developers perspective, they only need to understand the JSON data structure to describe their GUI layout and function. The rest is handled by the GUI processor and the developers do not need to necessarily learn what is happening inside the GUI processor service. However, if the developer wishes to define a new GUI experience that is not offered by the SDK out-of-the-box, then they will need to dig deeper and understand the design logic and architecture of the GUI software.

    As depicted in Figure 1, the proposed GUI software architecture consists of a server and clients. The server is constantly listening on a socket and whenever a client (user application) wants to interact with it, it will send a JSON object to the server. The server can also respond if certain actions are performed on the registered callback. The details of server/client implementation (what type of server/client to be used) have to be determined.

    This can be implemented via POSIX socket, simple REST API, MQTT, etc.

    The advantage of this server/client design is that multiple applications can send data to the display (for example, error messages, notifications, etc)

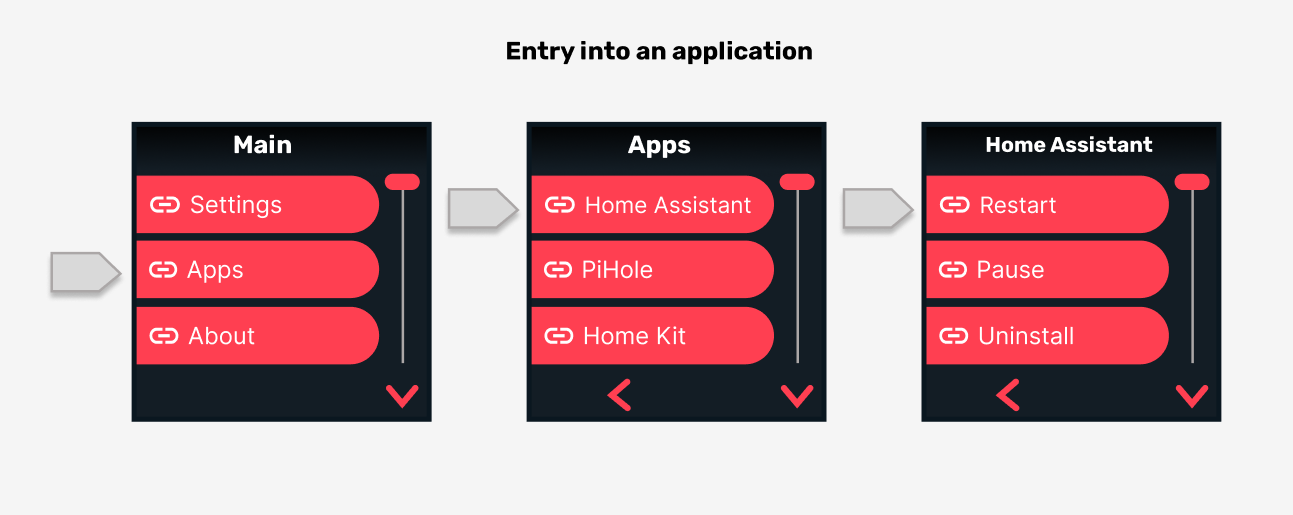
    The system application will own and manage the flow of the GUI and will offer an entry point for foreground user applications. However, when applications run in the background, they would still be able to send notifications, show error messages, etc. Below is an example of entry into the application menu through the system menu.

    Figure 2. Nested Navigation. System navigation can connect to app navigation

    The GUI will offer the following pages and modes of interaction:

    1.1 Home

    The home screen is the default screen of Ubo. It is usually the landing screen after boot-up. The home screen includes a notification bar on top (or bottom) as well as some shortcuts to show some information digests or access certain items such as the opening system menu (similar to taskbar experience).

    1.2 Navigation

    This is the main mode of interaction with the GUI. By pressing the buttons on the keypad, the user can navigate through a linked list of items with leafnode corresponding to informational items or an action. For example, an item can initiate an action, be on/off toggle switch, or just display some info such as software version. Each application can define their own navigation instance (which would include actions and information unique to that application). App navigation can be accessed through system menu/navigation as shown in Figure 2.

    1.3 Notifications and prompts

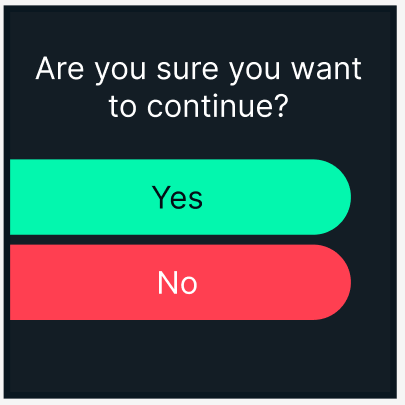
    User applications must be able to show notifications and prompts to the end-user when necessary. Here's an example of prompt:

    The window manager needs to understand the urgency and priority of these messages and current state of the GUI and make a decision to show the message immediately...

    Read more »

  • LED Ring Design

    Mehrdad Majzoobi04/25/2023 at 14:47 0 comments

    In this project log, I will discuss challenges I faced during the design and prototyping the LED ring feature of Ubo pod, things I tried, and the solutions I came up with.

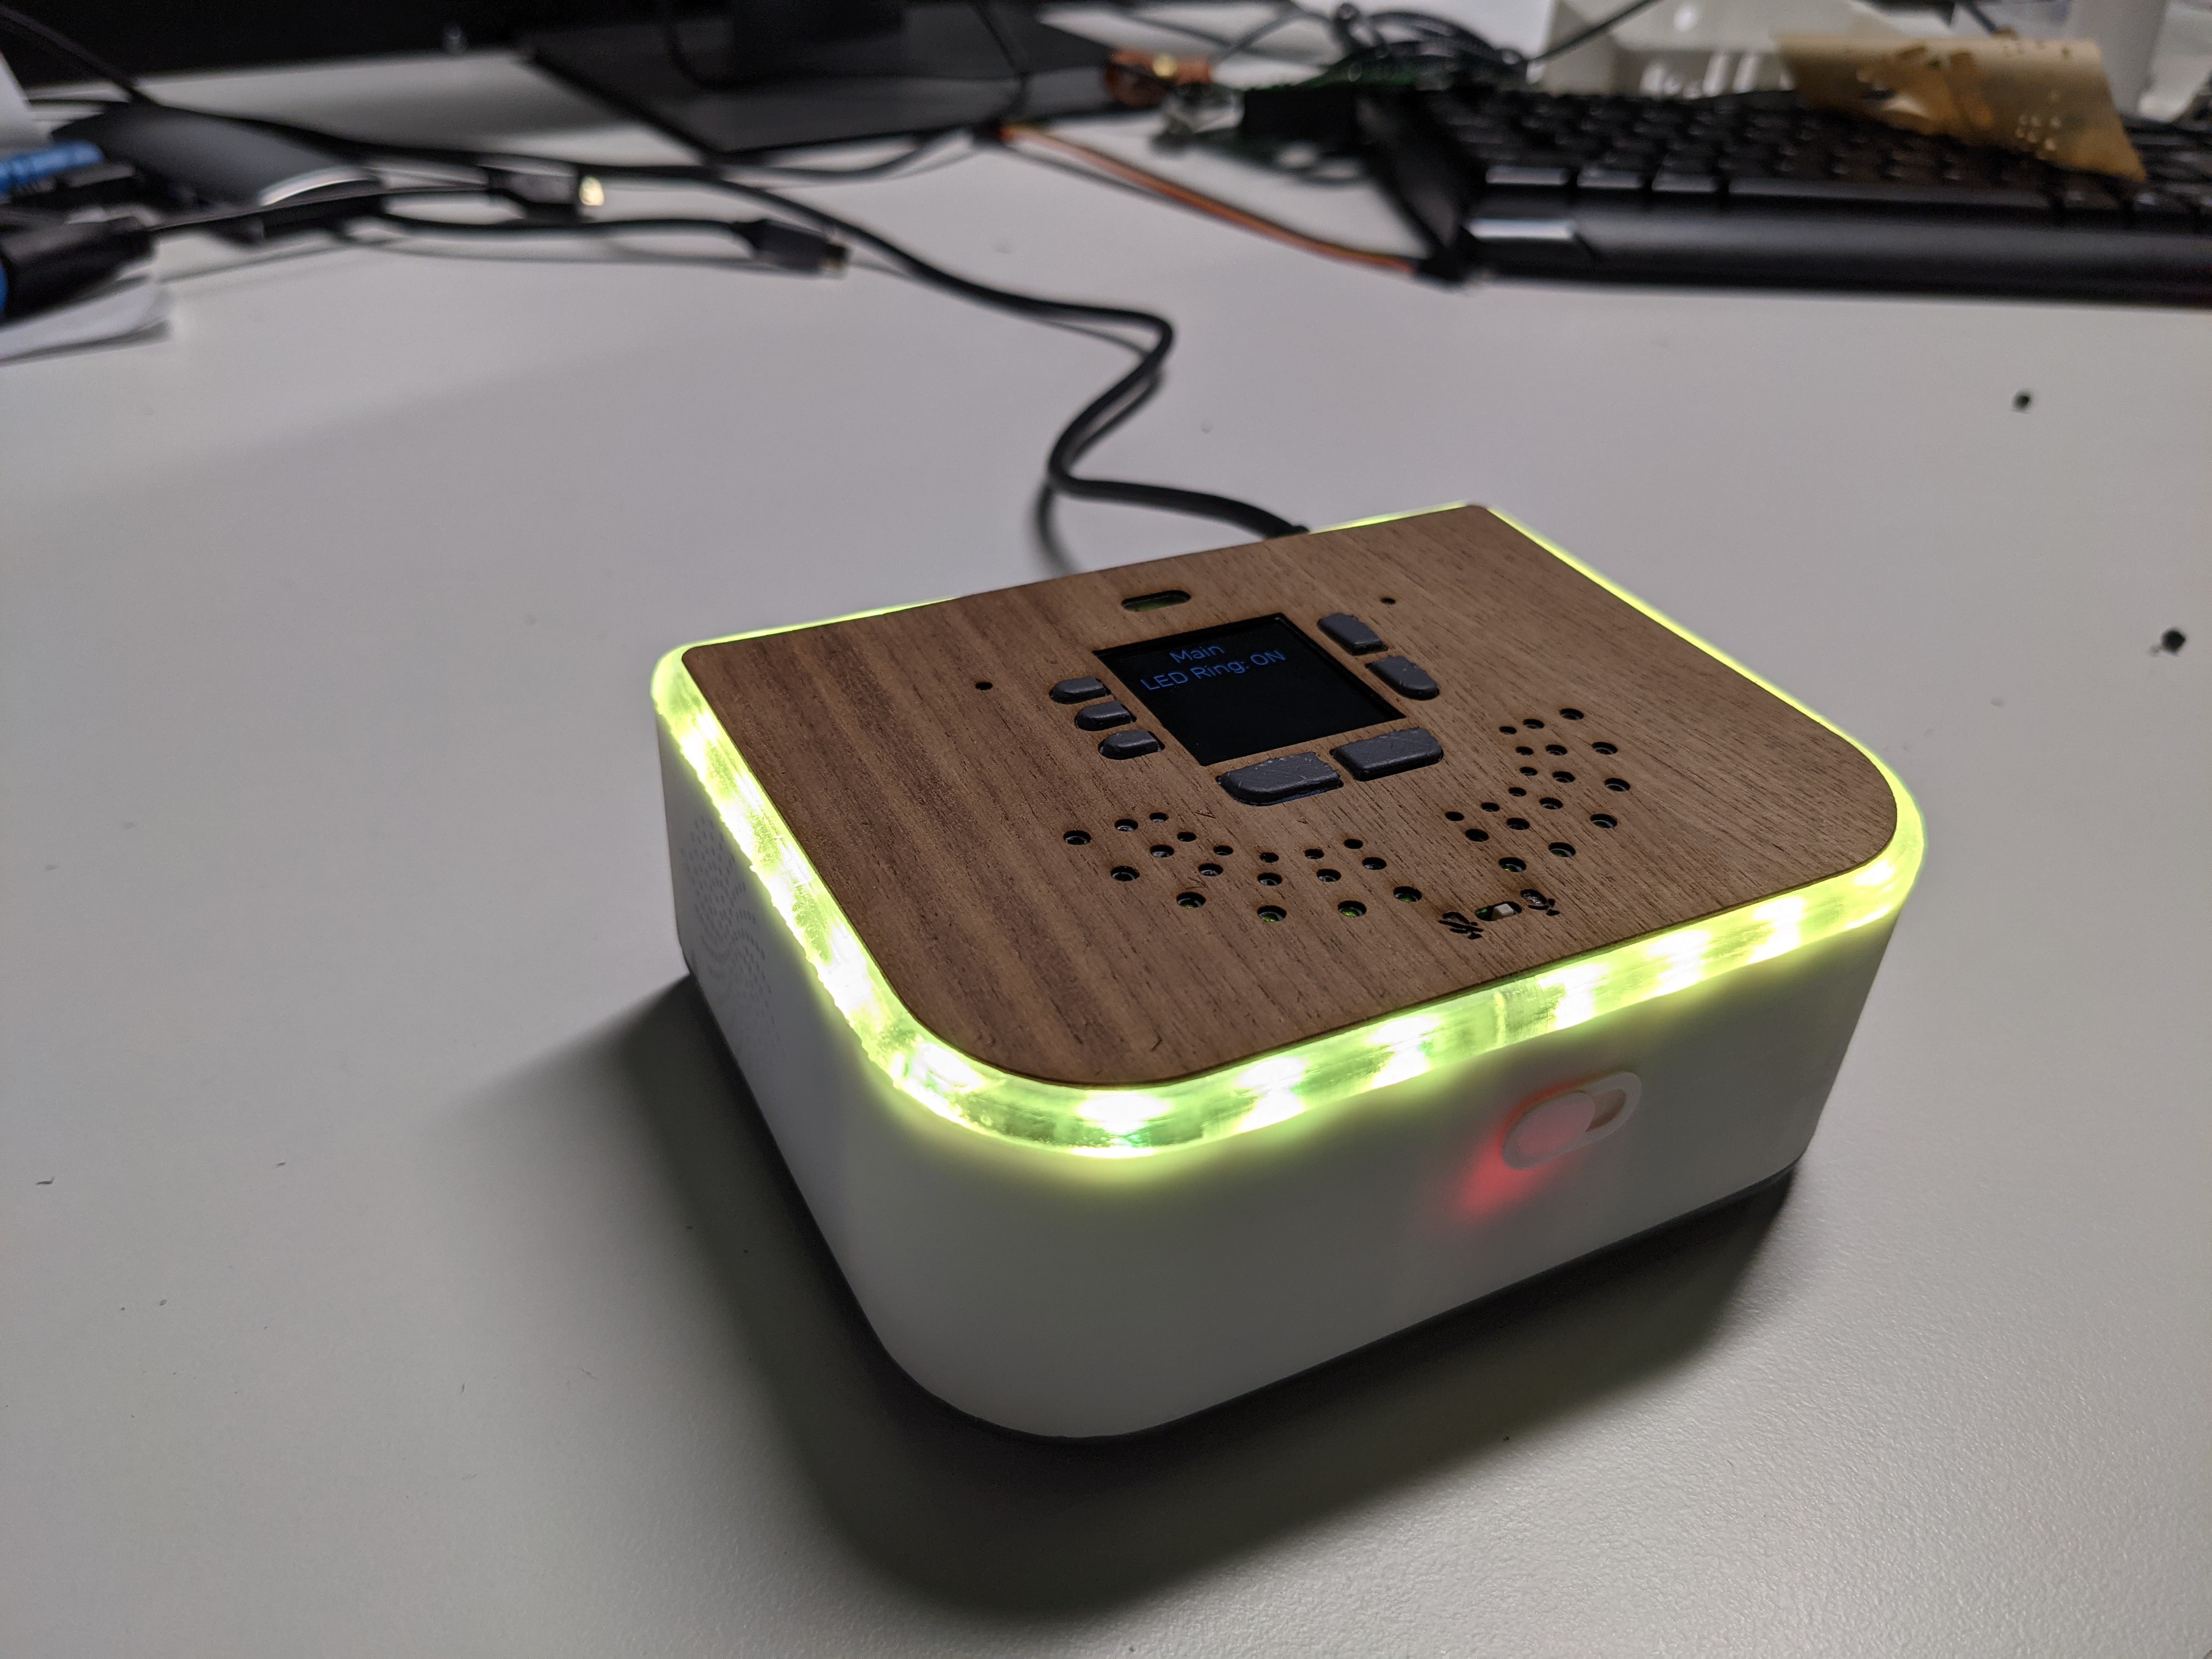
    In order to display notifications and visual cues at a distance I had decided to include an RGB LED ring to Ubo pod (similar to many other smart home product). This feature would allow developers to effective communicate notifications to users silently and catch user's attention. 

    Choosing the LED component

    The first decision I had to made was which type of LED component I need to select. 

    I knew that using a non-addressable LED was not going to be a feasible choice here since in that case I had to deal with addressing them with another IC and routing 4 wires to each LED light would become a nightmare. 

    Therefore, I narrowed down my search to different types of addressable RGB(W) LEDs. The two main contenders were Neopixel and Dotstar LEDs. There's an awesome comparison of these types of LEDs posted by Adafruit on this page.

    Since I needed to add a bunch of LEDs to form a full ring, the cost per LED was an important factor. I ended up putting 27 LEDs on the PCB! 

    I had previously used Neopixels in other projects and I had an inclination from the get-go to use them. However, there were a few things that bugged me about them and a few things that I liked. 

    Basically, the main cons for Neopixel LEDs were:

    1. PWM driver conflicts with RPi sound card 
    2. Requires DMA and application requires super user privilege on Pi.

    and the Pros were:

    1. One Data-In and Data-out line. Makes routing easier 
    2. Very common and comes in variety of packages 
    3. Low cost

    On the other hand, DotStar LEDs had the following pros and cons:

    Pros:

    1. No need for DMA and could be driven for regular GPIO pins
    2. No conflict with Pi audio 

    Cons:

    1. More expensive than Neopixel LEDs
    2. Less variety and options for packaging
    3. Routing 2 Data-in / Data-out lines would take more space

    The cost factor and the existence of more packaging options finally convinced me to stick with Neopixel in my design, specially since I was adding a separate audio driver chip for HiFi audio and was not relying on Pi low quality PCM audio moving forward (considering on-board soundcard conflict issue).

    Next challenge: Light Diffusion

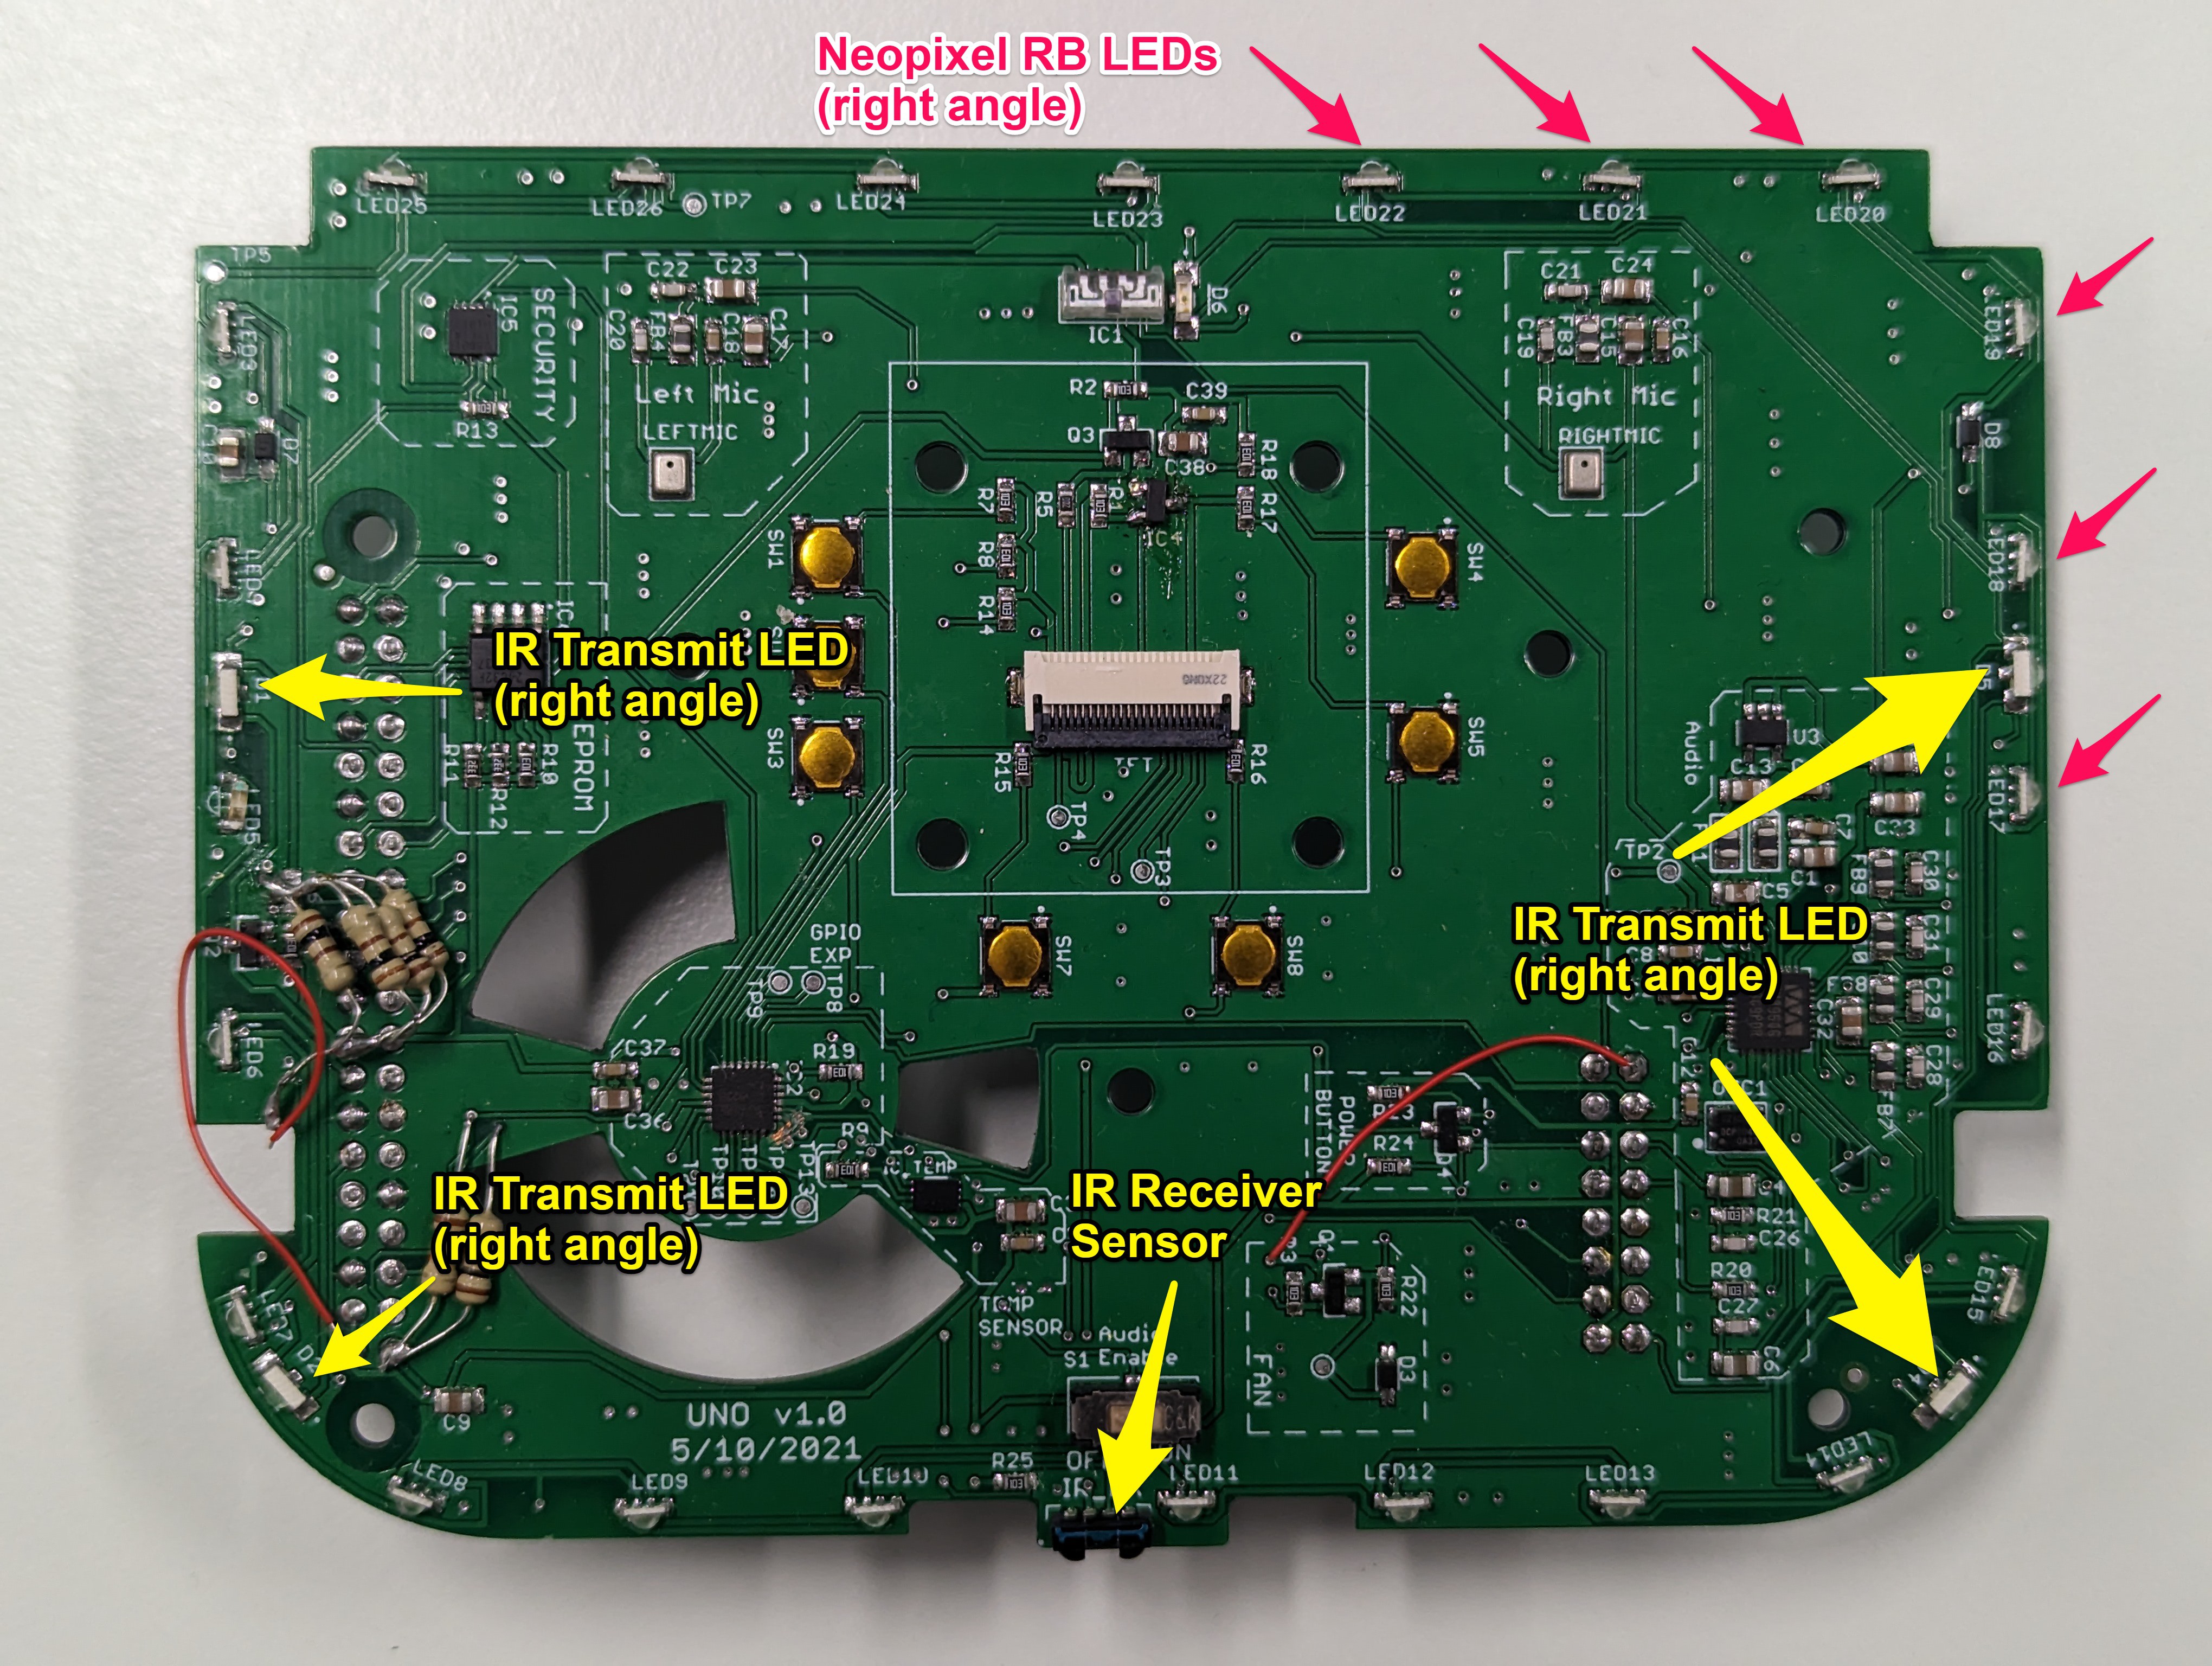
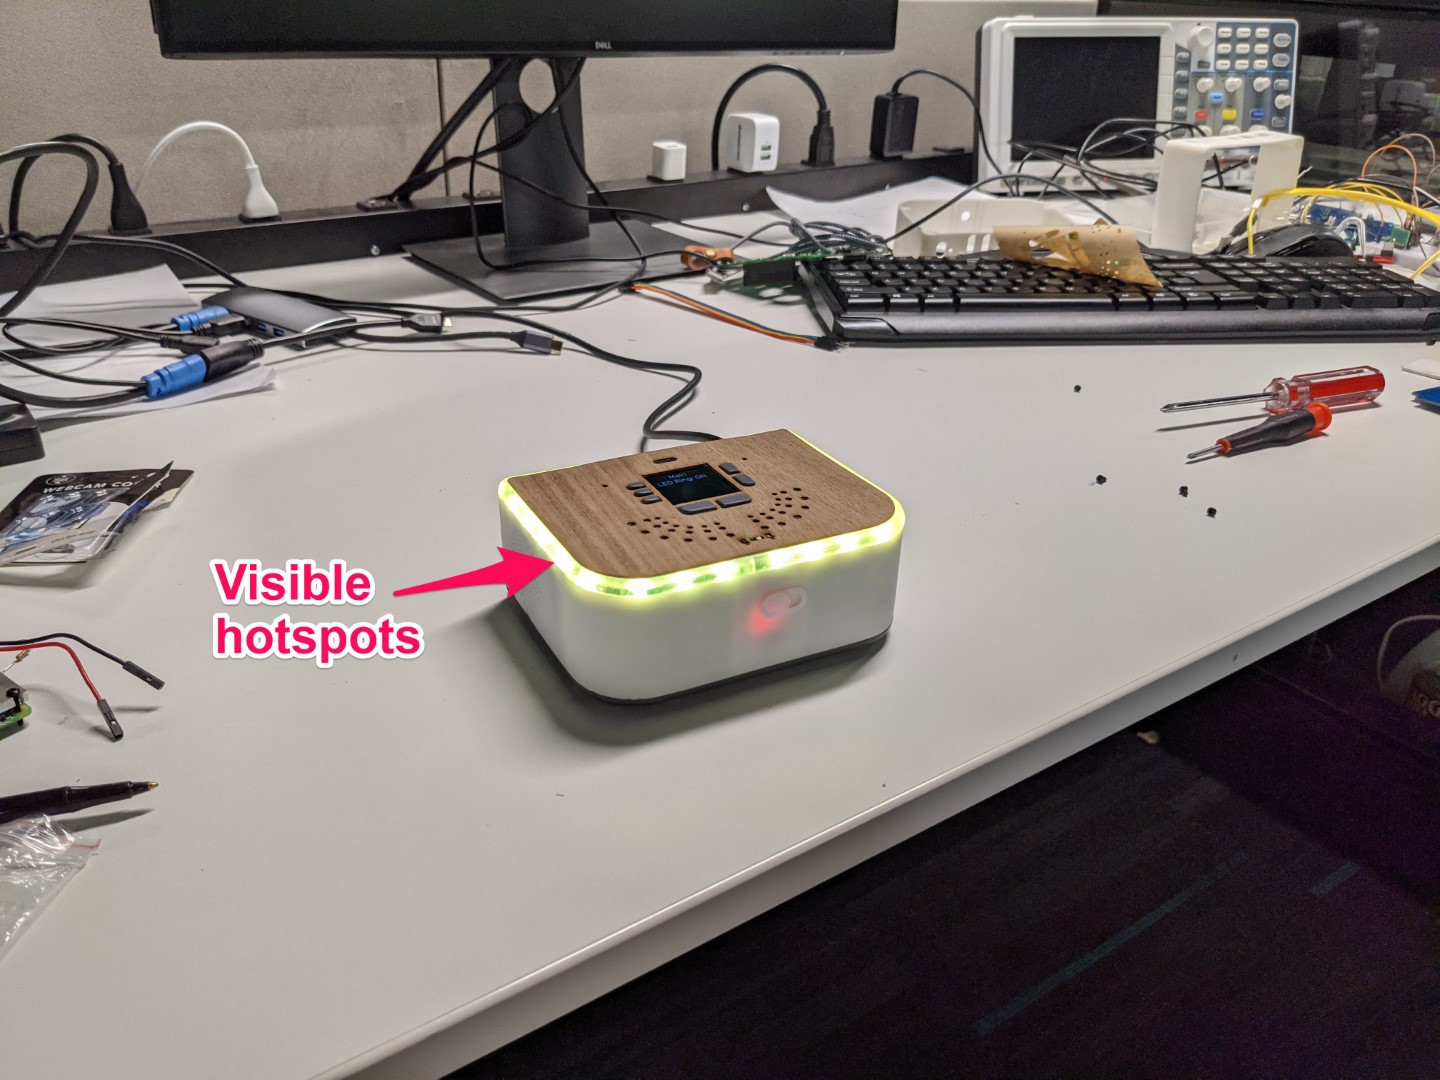
    This was a seemingly easy task at the beginning, however, a special design constraint turned it into one of the most challenging optical design work that I had undertaken before. The design constraint was to: diffuse RGB LED visible light to remove hotspots but let IR light pass through with minimal loss. The constraint stemmed from the decision to place the IR receiver sensor and transmitter diodes behind the same light ring.

    The picture below shows the first prototype. In the first prototype, I placed both the right angle addressable Neopixel RGB LEDs, InfraRed (IR) receiver sensor, and transmitter diodes on the edge of the PCB. 

    Since the RGB LEDs were too close to the LED light diffusing ring, this created visible hotspots and LED lights were not properly diffused. 

    To address this issue, I need to do several things (combination of following actions):

    1. Move back the RGB LEDs on the PCB for better diffusion
    2. Try top view LEDs instead of right angle so that light does not hit the ring directly
    3. Two-stage diffusion for RGB LED and single-stage diffusion for IR (more info on this later)
    4. Make the ring opaque (but not too opaque to block IR signal and decrease IR range)

    The idea was to try to diffuse the RGB LED light as much as possible without increasing the opacity of the light ring material. In other words, increasing the opacity of the light ring material had to be the last resort since it would affect the IR light signal strength and lower IR range.

    Since moving back LEDs required major change in PCB layout, I decided to try changing the LED type first to top view from side view first. This required only a change...

    Read more »

  • Hardware Hacking w/Boomboxes

    xBeau04/24/2023 at 21:06 0 comments

    One of my frequent questions to self these days is, can we put an Ubo in it?

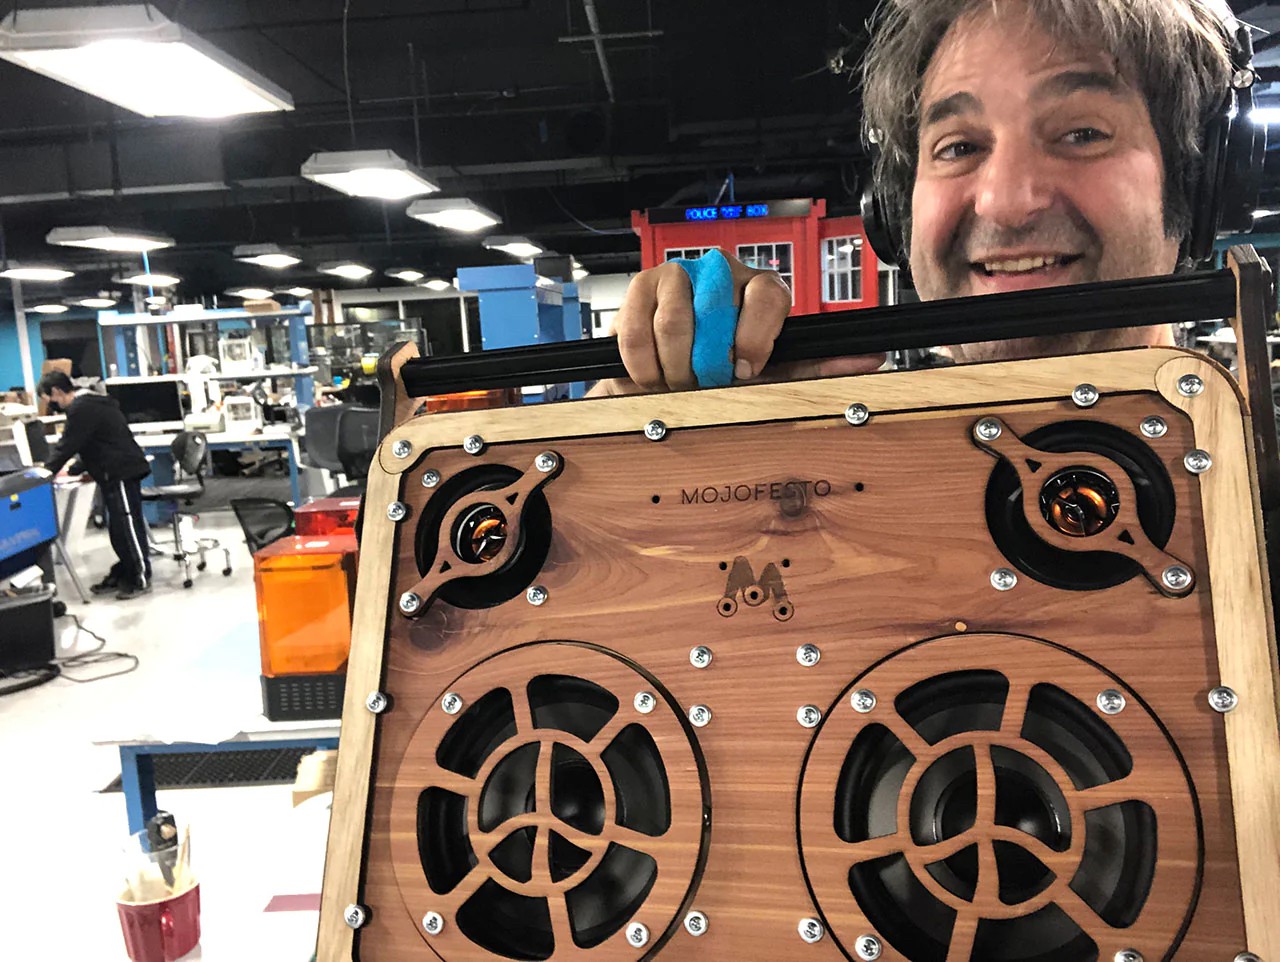
    Among the great things that come from working at a co-working space dedicated to hardware start-ups, are some of the great people and projects that just happen to be your neighbors. Noel here created makeboomboxes.com and we've been kicking around the idea of "Ubo-izing" it. So an exploration to go from aluminum to wood is underway.

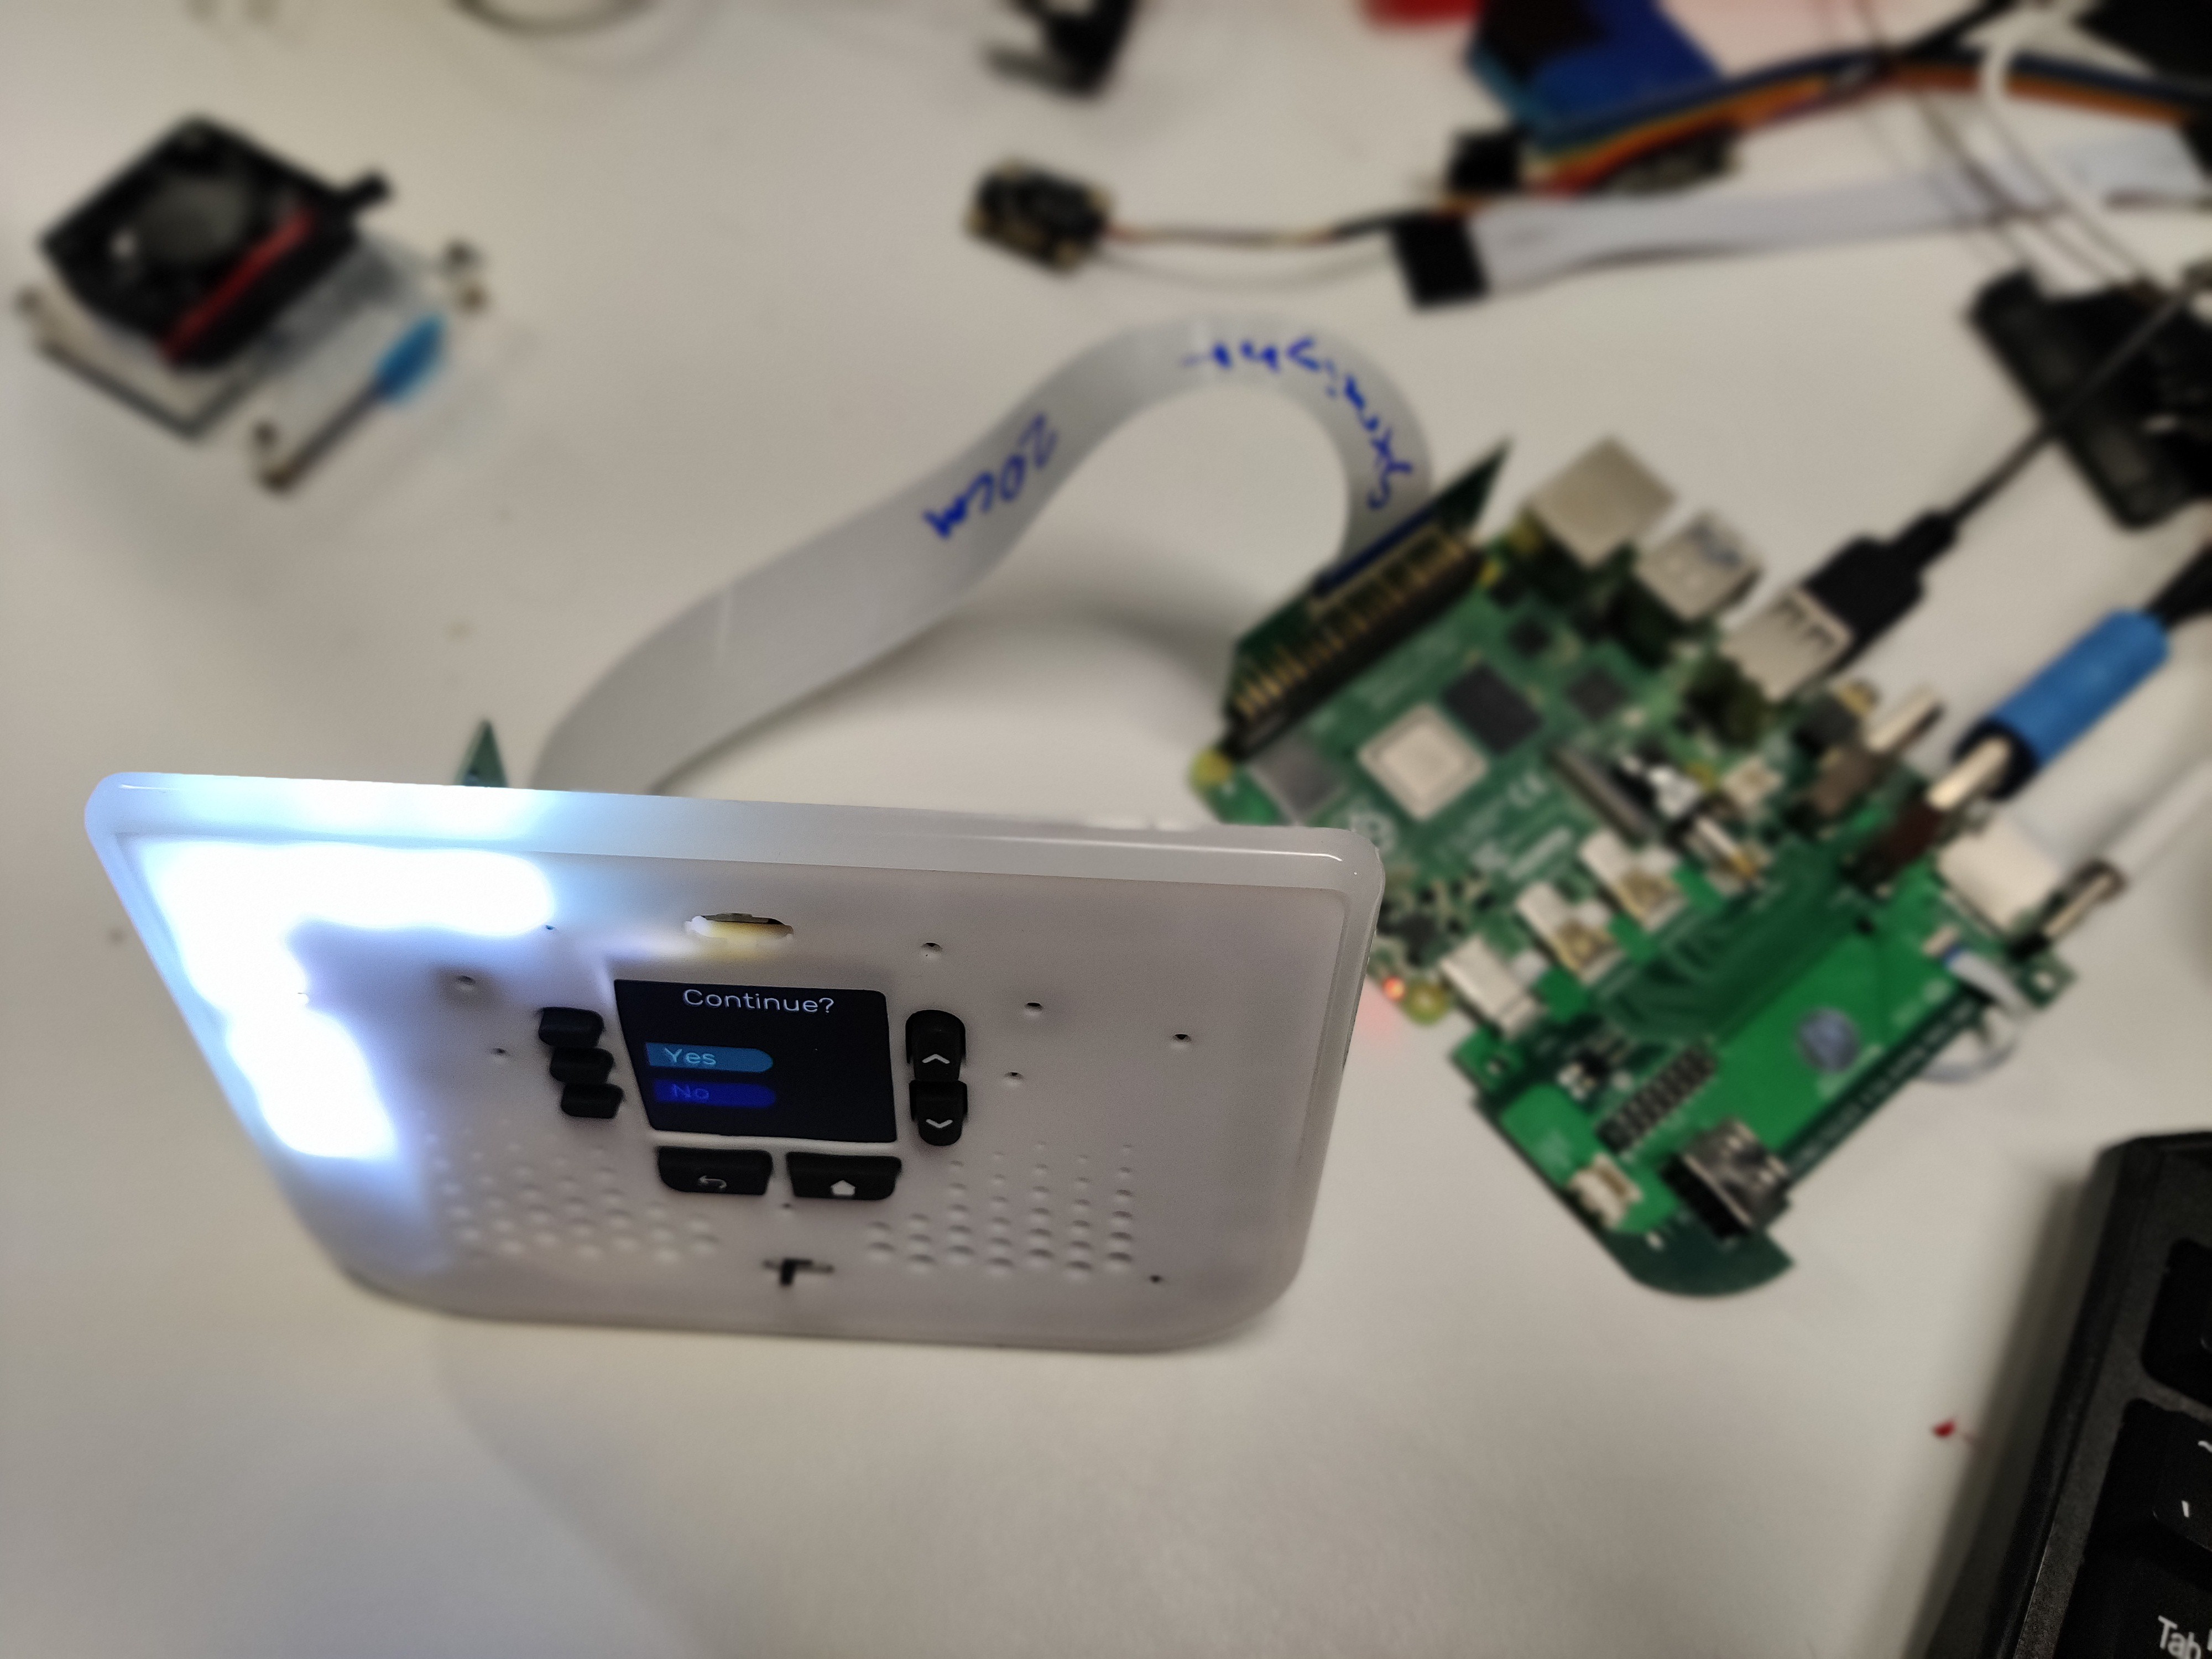
    I look forward to adding another progress update soon, and in the mean time I wanted to pass along something fresh off the desk. We are playing with making the board more flexible, by extending the 40-pin GPIO header with a flex cable adapter starting with a Adafruit FPC adapter and 20cm cable. Here's the first proof of concept test to let us put the display and buttons on top of the boombox, and then mount the pi out of the way elsewhere on the inside.

    I think this looks promising enough to say "Yes", I will continue. This will still require making a custom cable to convert the 2x8 header coming back off the top board to a 3.5mm stereo audio connection and a GPIO to re-connect the power going to the fan.
  • Hello Hackaday Prize 2023!

    xBeau04/24/2023 at 20:30 0 comments

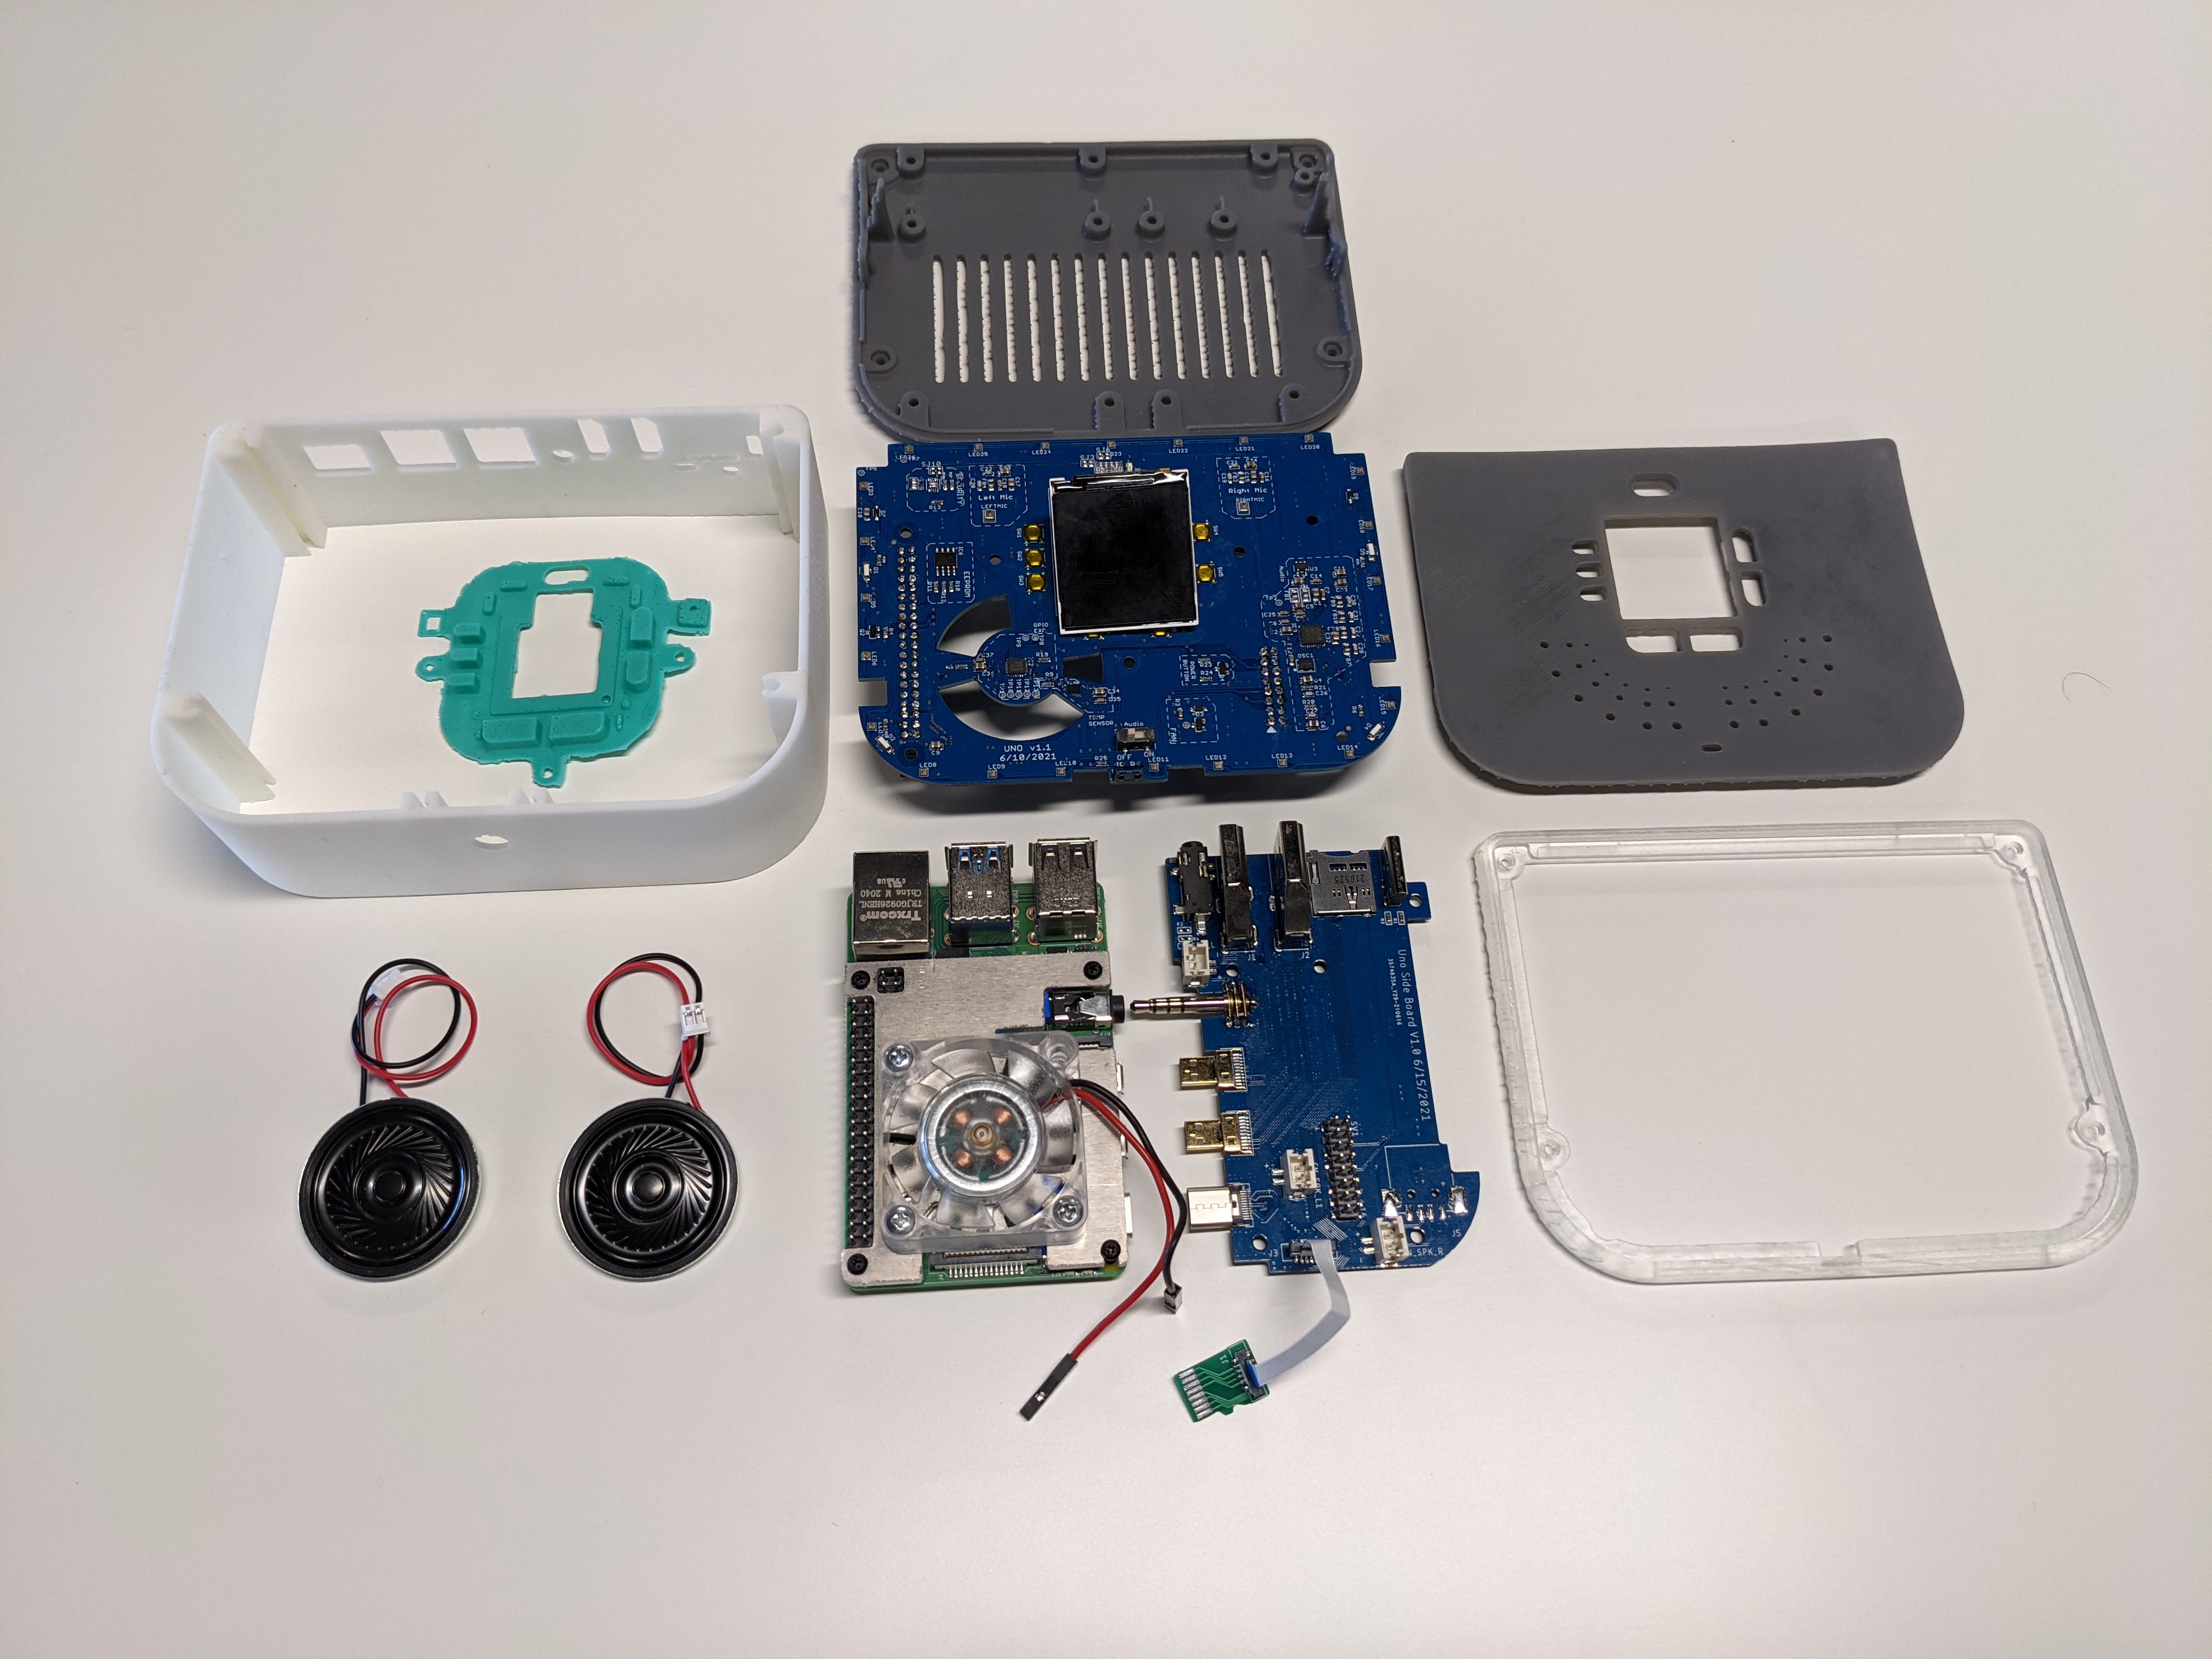
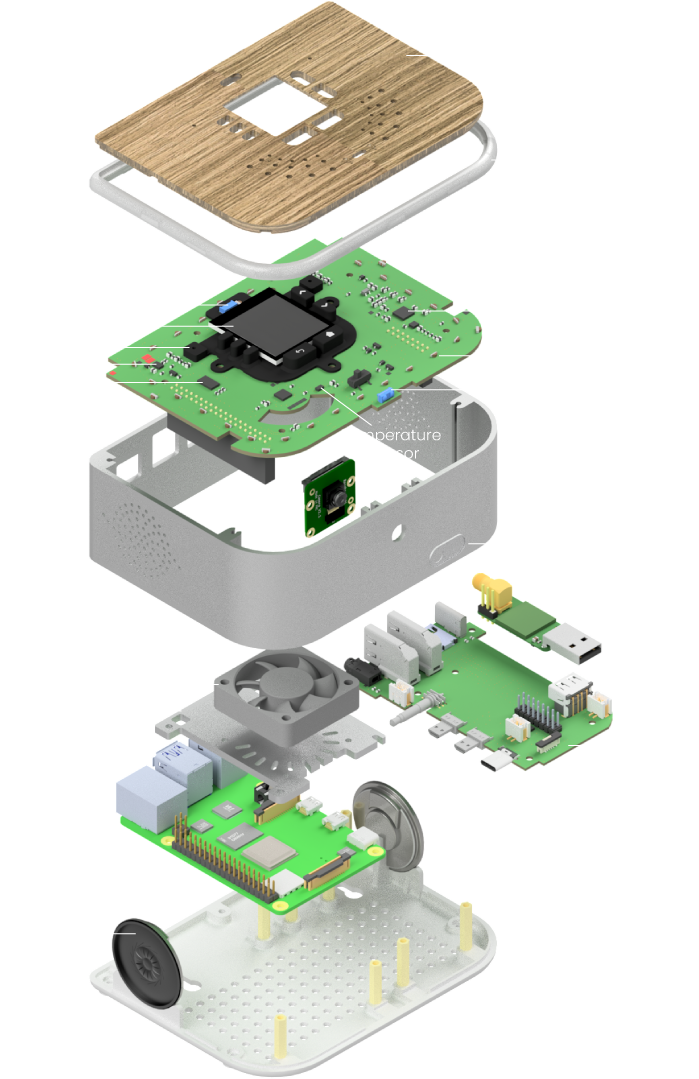
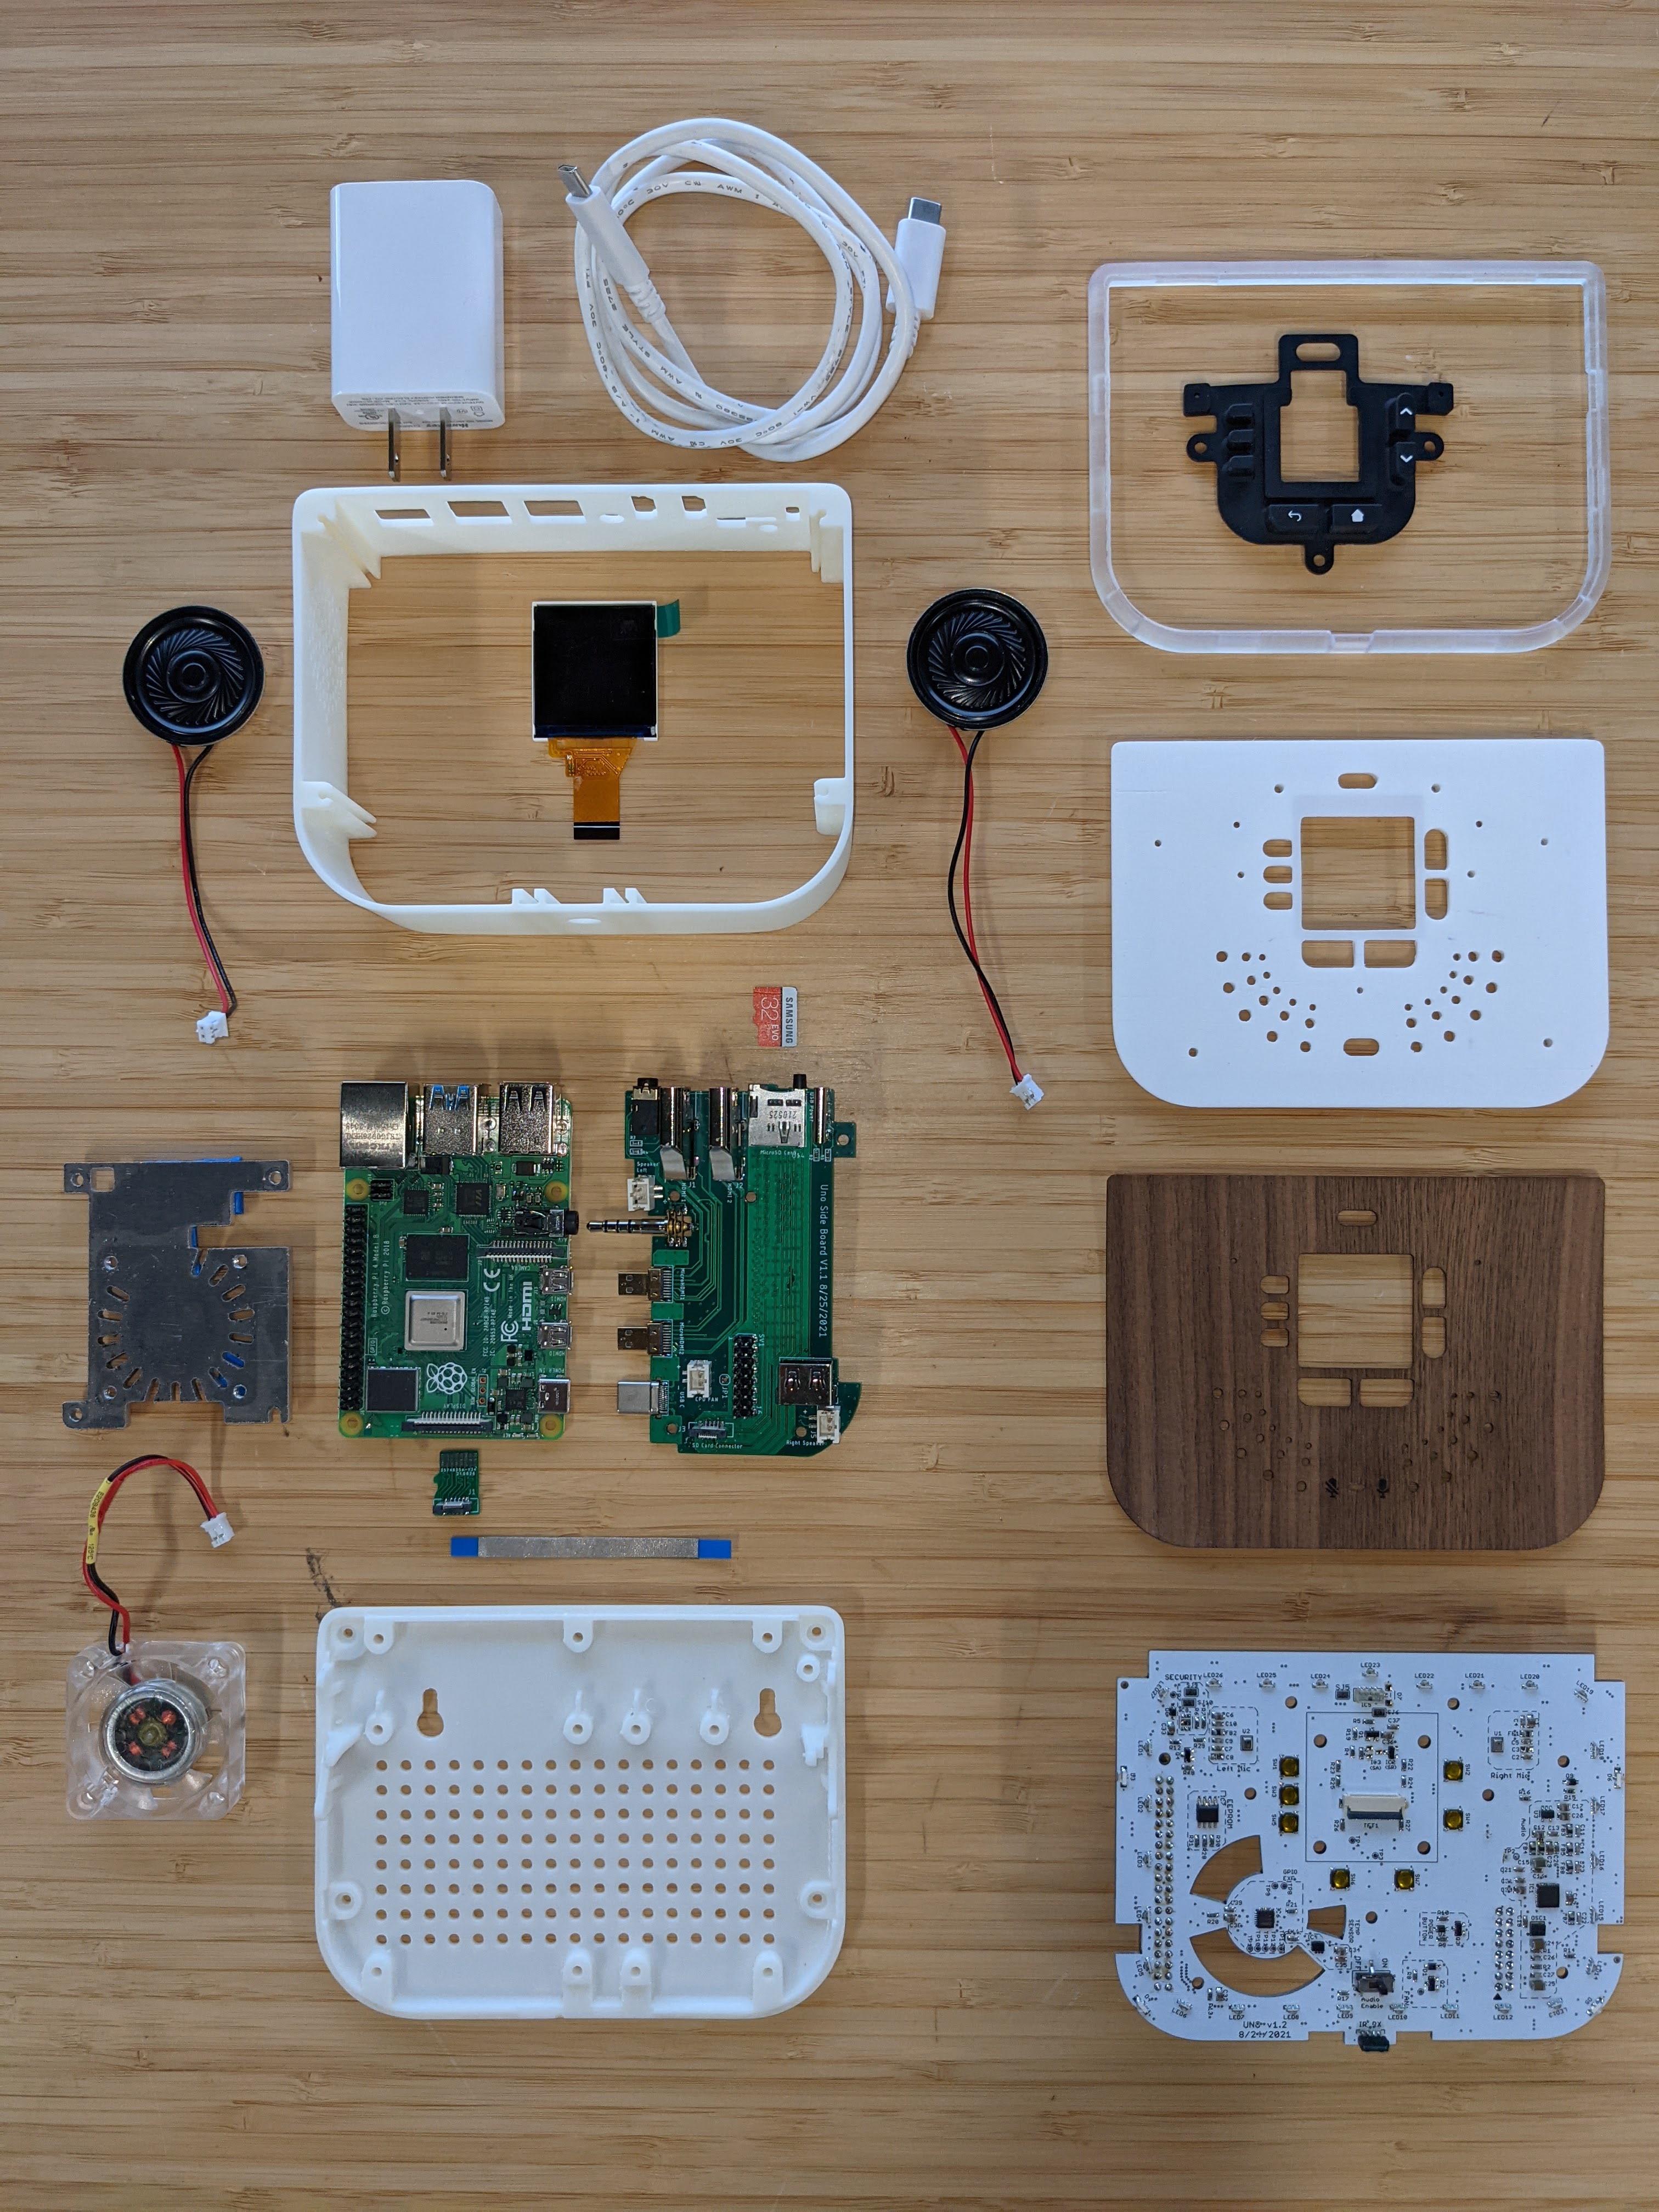
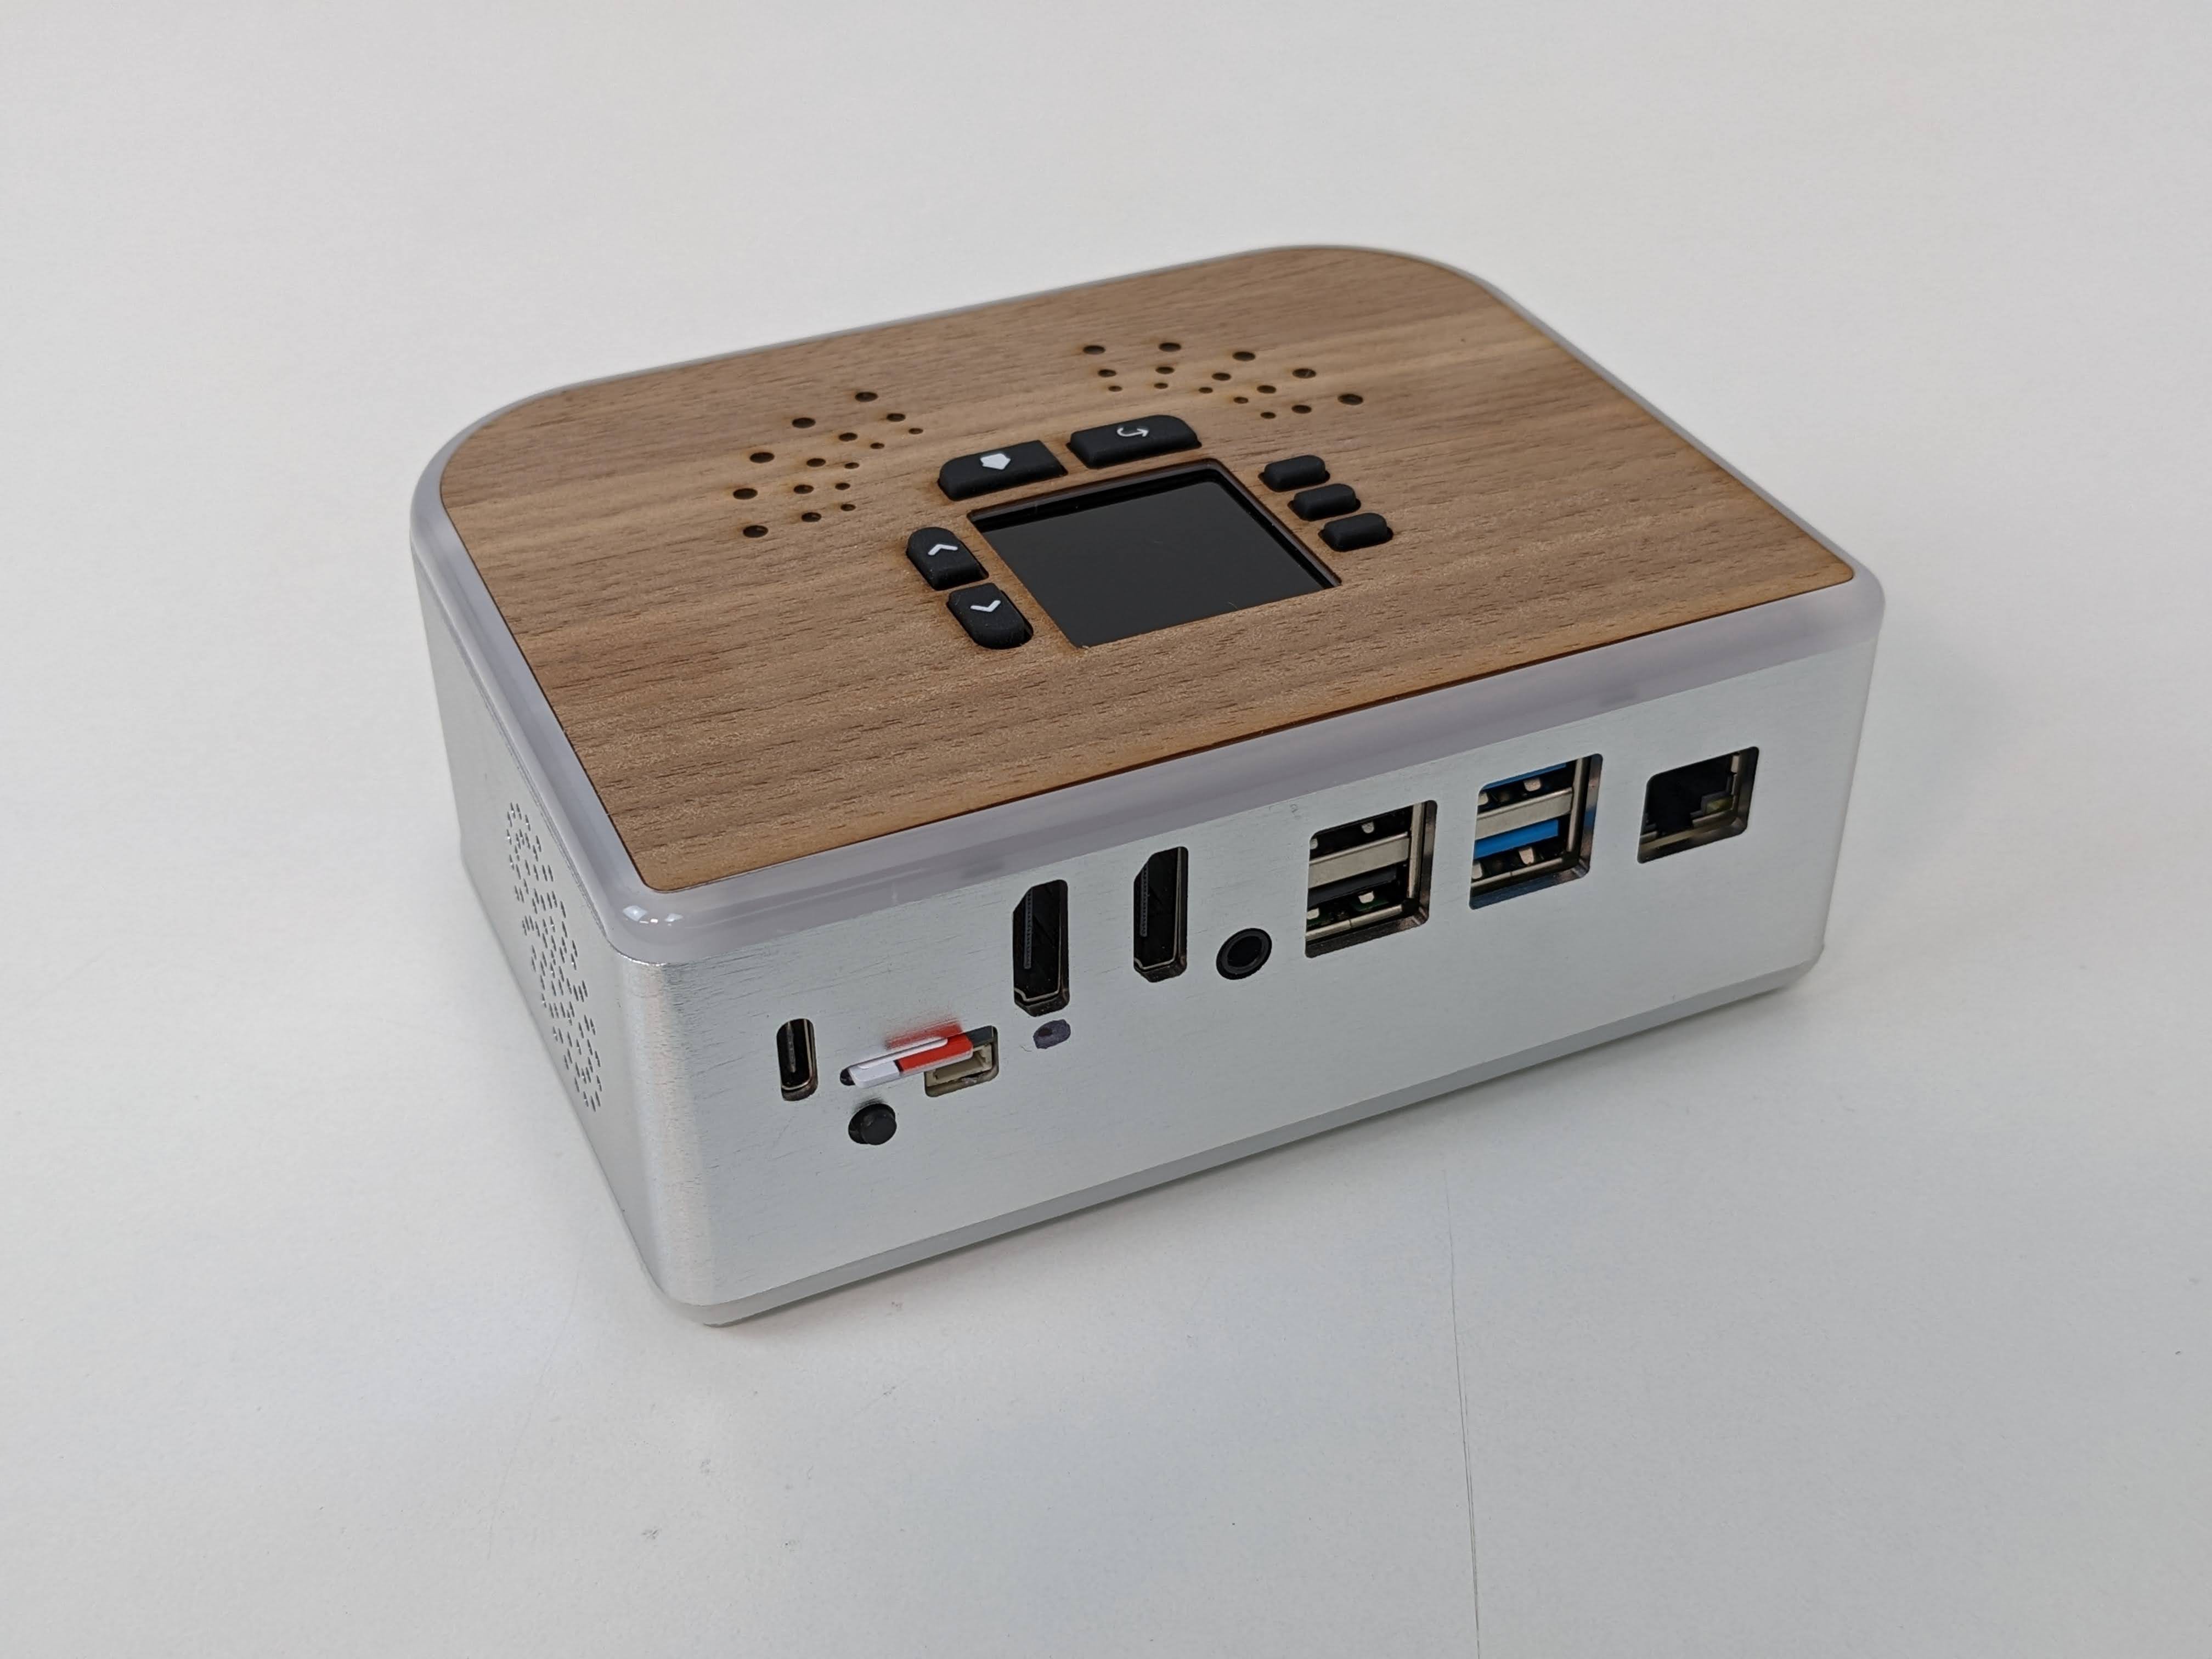
    Here are the core components of the hardware inside Ubo. The enclosure wraps around a Raspberry Pi 4 which plugs into the Side Board re-routing the HDMI, power, audio and SD card so that they are all available to access on the back of the enclosure along with the Ethernet and USB ports.

    * Note this is an image of several early pre-production prototype pieces, such as 3D printed body, and base. The current body is an aluminum extrusion, and the base is injection-molded.

    The top PCB, shown on the lower right, supports a 1.54" 240x240 resolution color display along with 27 RGB LEDs (SK6812), and two microphones able to record 48 KHz stereo audio. The customized heatsink allows for running without active cooling for most tasks. With the fan the CPU can be overclocked to 2.1 GHz without throttling. Integrated sensors include +/- 1C accuracy temperature sensor (PCT2075) and 0-120 Kilolux ambient light sensor (VEML7700).

    The full schematic with all of the hardware component details are available at https://github.com/ubopod/ubo-pcb

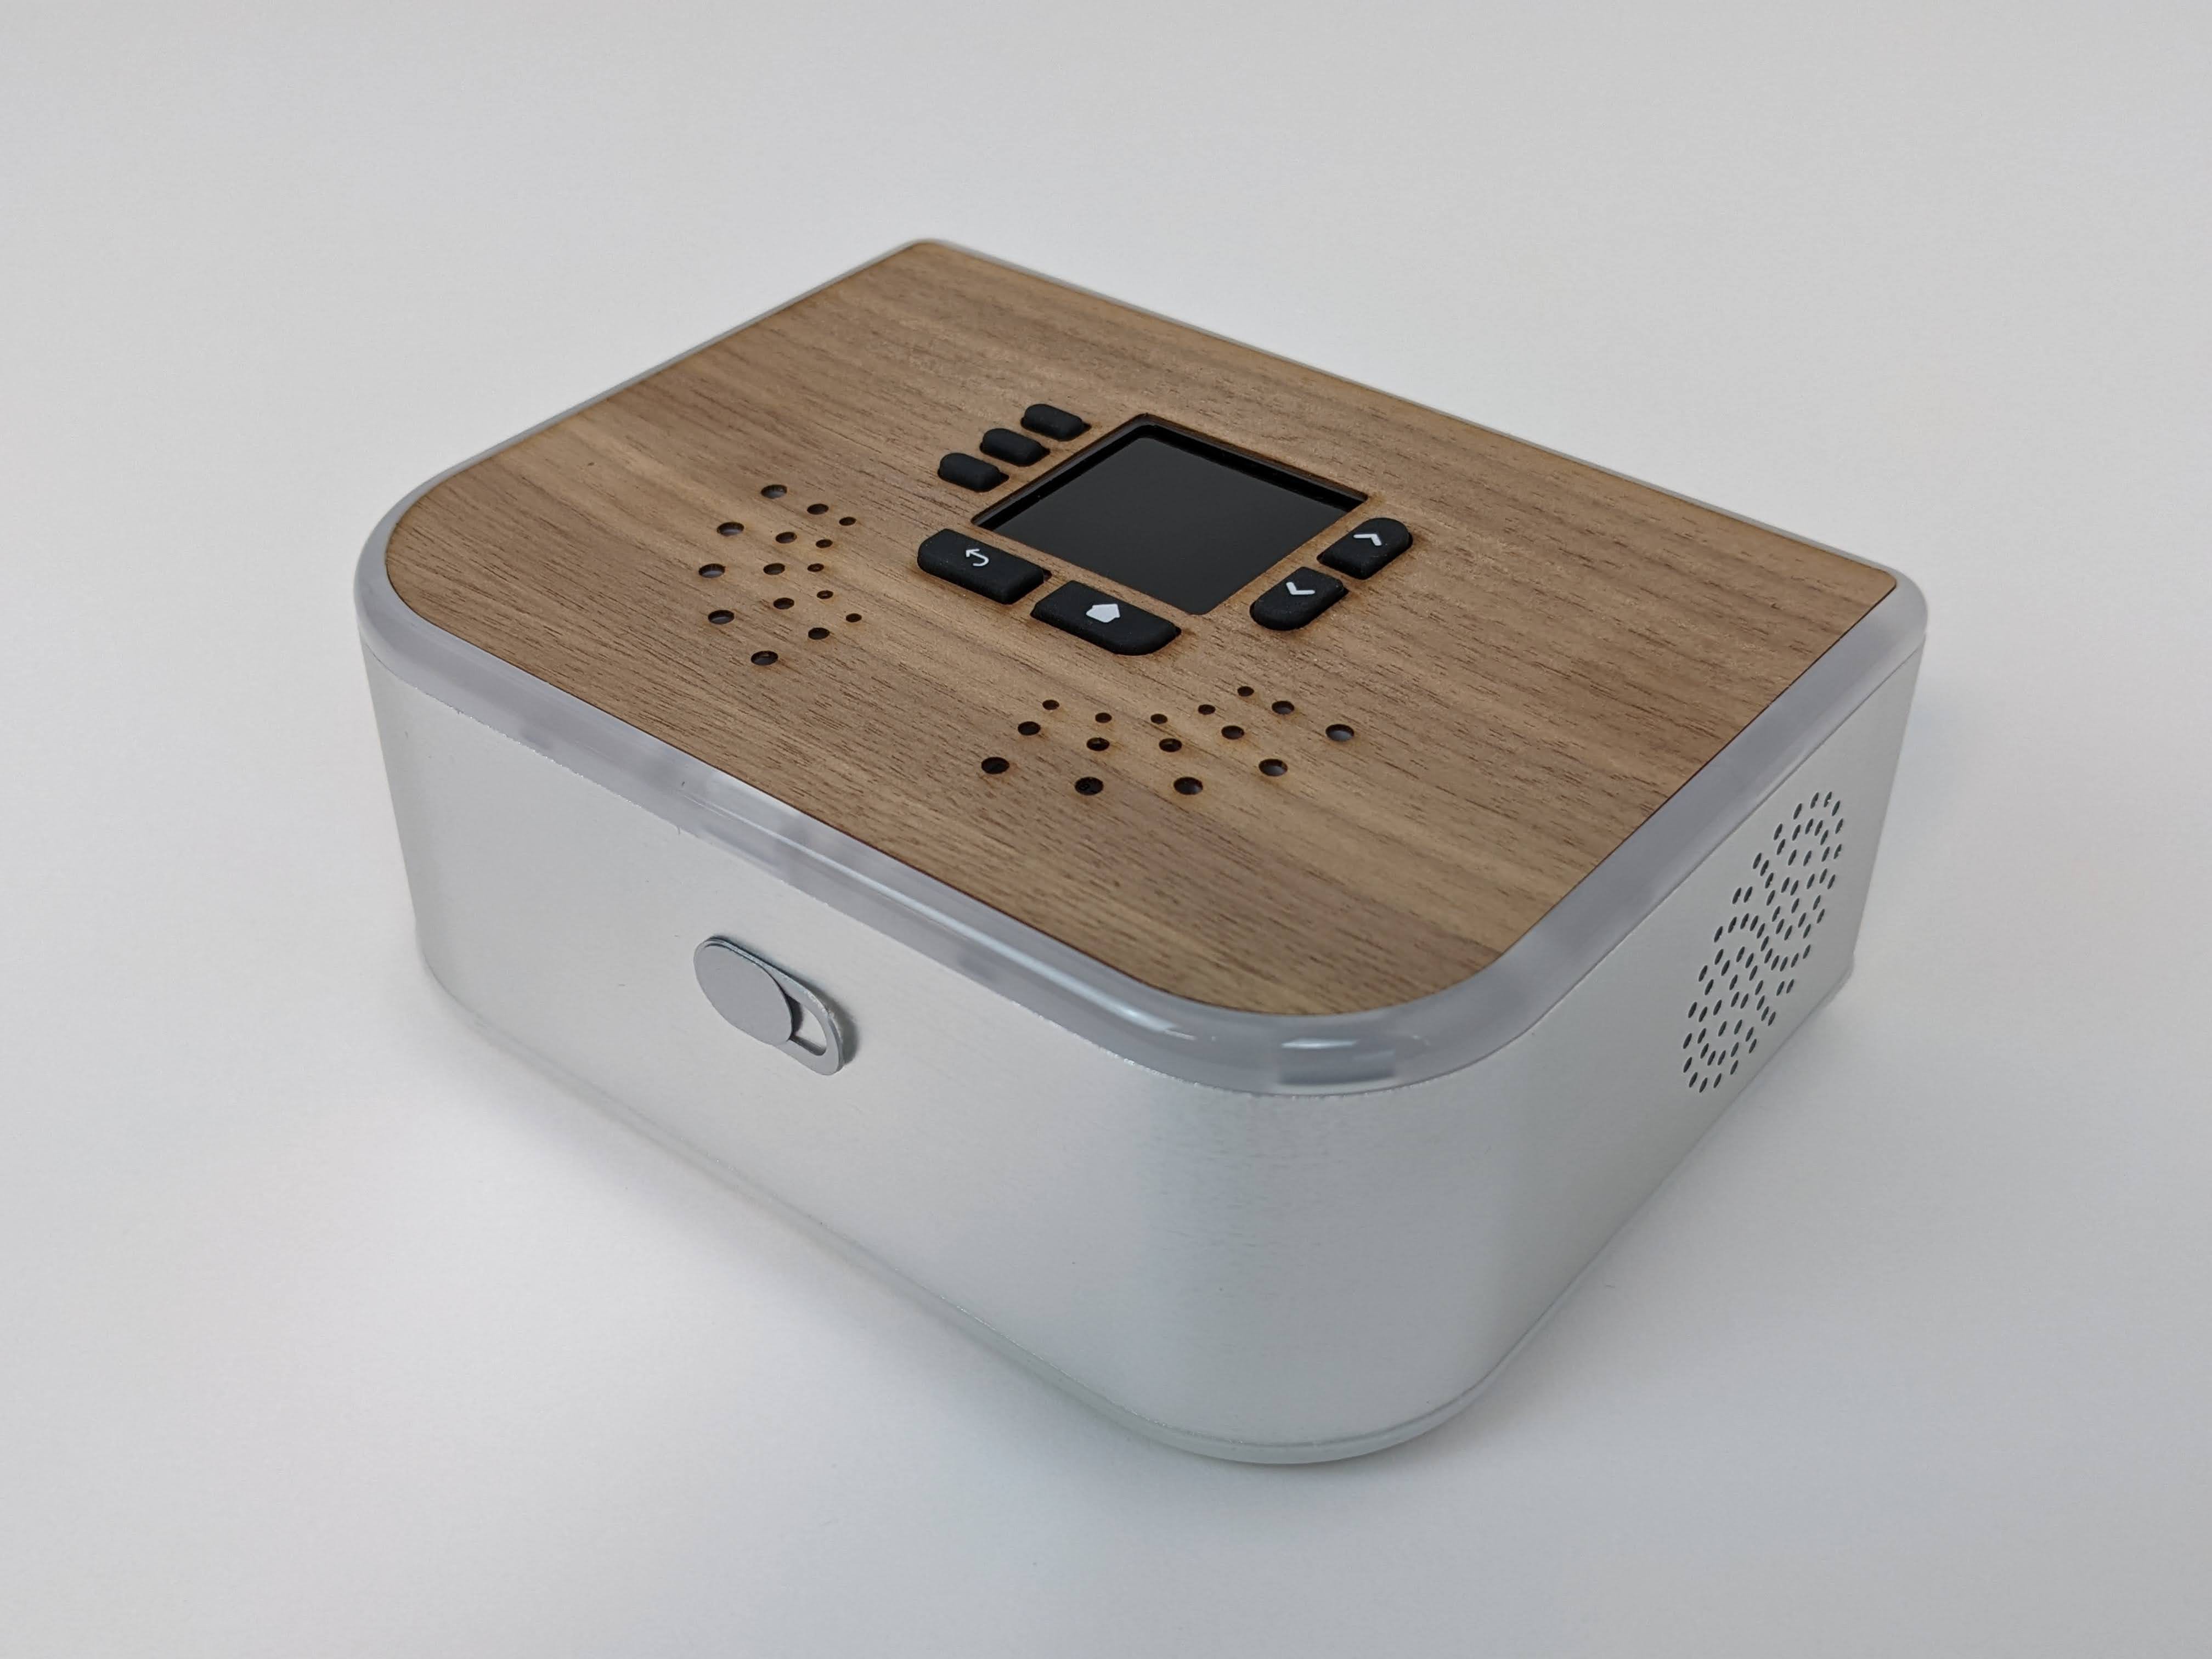
    And here is the finished result, freshly prepared for our first Hackathon...

    While we really enjoy digging in to the hardware, and look forward to sharing a lot of insights and learning along the way, sometimes you just want to get to the code! During our hackathon we started to test and get feedback on the SDK that we are developing as well. Like the hardware, our software development is open source and will continue to be updated at https://github.com/ubopod/ubo-sdk

    We are quite proud of the development that has gone in to the customized PCB boards and enclosure. However, we don't want this to be your only option. While current code base is highly focused on specific hardware, it is intended to be as customizable as possible. In other words you can just bring your own Raspberry Pi and get started with that. A lot of the libraries play well with Circuitpython and can be used with any number of sensors and input/output devices to create a version of your own.

    We look forward to the journey and input from the Hackaday community and continue to hone our overall direction, also fueled by the challenge of Re-engineering Education.

View all 4 project logs

Enjoy this project?

Share

Discussions

Similar Projects

Does this project spark your interest?

Become a member to follow this project and never miss any updates