Close
0%
0%

Vectr - 3D Gesture Controller and Sequencer

Vectr is an open source 3D sensing controller and sequencer for modular synthesizers or anything you can dream up.

Similar projects worth following
Vectr is a 3D sensing controller and sequencer for modular synthesizers. It's open source though, so you could use it to control just about anything. It senses your hand in front of it and uses the position information to generate analog control signals which can control any synthesis parameter. It's not just a controller though. It can recorded sequences, store them, load them back, manipulate them, play them forwards, backwards, and more. It can synchronize recording, playback, and overdubbing to external control signals, or be used as a centerpiece in a modular synthesizer, generating control signals to synchronize an entire system. I'm working on a number of performance modes like scratching, live overdubbing, freezing and more. The outputs can be scaled, quantized, slew rate limited, and inverted.

Version 2.0 of the firmware was released May 2015 with a slew of new features, including time quantization and step sequencing.

As soon as a I saw Microchip's new 3D sensing technology, I knew immediately what I wanted to build. I imagined controlling audio with a whole new level of precision with huge dynamic possibilities. I've spent the last year developing it, coming up with ways to expand the musical possibilities and the usefulness of Vectr as an instrument. But, Vectr is also open source hardware and software, so you can use any of its functionality to suit your own purposes. I have imagined all sorts of applications for this technology, and time willing, one day I'll make them. It's very intuitive to play with. The results of your actions are immediately apparent. It's amazing how quickly this new interface technology becomes natural.
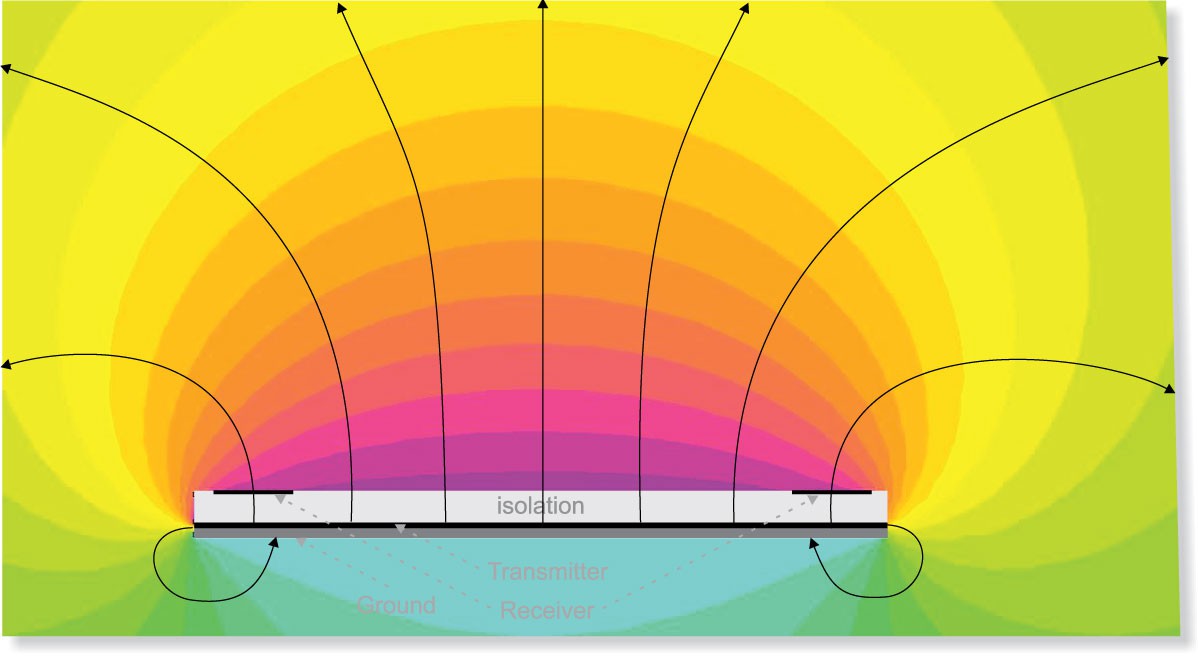
Vectr uses Microchip's MGC3130 3D sensing technology with a custom developed sensor circuit board. It's able to resolve the position of an object over the sensor in a volume which is about 3.5inx3.5inx6in with 16 bit precision. I read this data using a PIC32 microcontroller, which is running FreeRTOS. The microcontroller manages all the system tasks, interacting with all the peripheral integrated circuits and controlling all the different operational modes. The 3D sensing is performed using capacitive sensing several orders of magnitude more sensitive than a capacitive touch screen. Using multiple electrodes all being affected by the same transmission, the sensor is able to detect the location of disturbances in a static electric field.
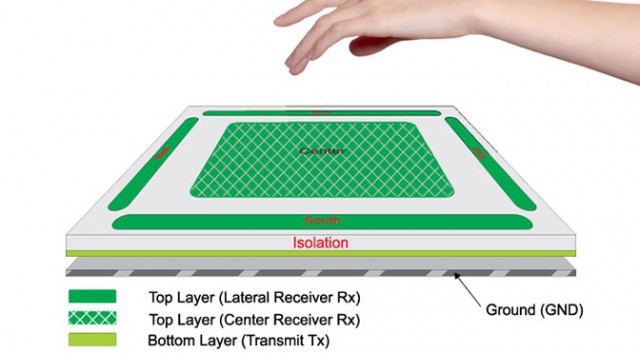
Vectr uses a quad 16 bit DAC to generate analog control voltages in the range of -5V to +5V. There is one analog output for each of the cardinal directions of the 3D sensing. 

Vectr uses 36 LEDs for visual feedback. They change in brightness relative to the position of the object in front of the sensor. They are right angle LEDs mounted around the perimeter of a piece of laser cut acrylic, in which dots have been laser engraved in the front to create a 3D floating effect. The LEDs are multiplexed using shift registers and MOSFETs driven with PWM signals from the microcontroller. The brightness algorithm and LED driving is actually a fairly intensive process, but the result is quite mesmerizing.
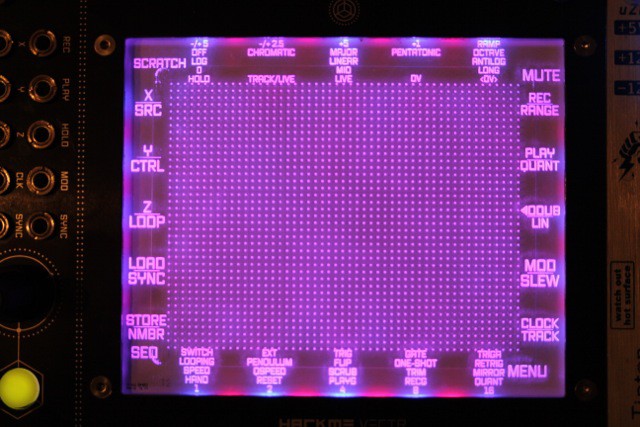
The LEDs are also used to indicate progression through the menu system which allows the user to change all sorts of parameters and behaviors. Each of the analog outputs is independently configurable. The analog output ranges can be scaled and limited to ranges like 0 to +5V or -2.5V to +2.5V, etc. The analog outputs can be quantized so that the voltage fall on note values in a 1 Volt per Octave scheme. The notes can be on different scales like Chromatic, Major, or Pentatonic. Combining the range settings with quantization you can play scales of different octave lengths. Setting all three outputs to quantization and playing multiple oscillators can have quite astounding results. 

Vectr can also record sequences of hand movements. It contains serial SRAM to record for up to 50 seconds. It stores the raw data from the 3D sensor so any parameter available in the menu system can be adjusted after the sequence has been recorded. This provides for massive facility to record and then manipulate the sequence live. The user can speed up and slow down the sequence by making circular gestures, clockwise for faster and counter-clockwise for slower. 

Vectr has an overdub capability where you can re-record each of the outputs individually without affecting the others while they are playing back. This way you can create dynamic sequences with continuity. Then, Vectr also has flash memory for storing the sequence to bring it back later after power down. Vectr can hold up to 5 recorded sequences, which can easily be recalled at any time. Each of the recorded sequences stores all the menu settings with it.

Then, there are performance modes. There is sequencer mode, where you can access up to four recorded sequences quickly and switch between them seamlessly. There is quick mute mode where you can turn...

Read more »
  • 1 × MGC3130 3D Sensing IC
  • 1 × PIC32MX450F256H Microprocessors, Microcontrollers, DSPs / ARM, RISC-Based Microcontrollers
  • 1 × DAC8554 Quad 16 bit DAC
  • 1 × MCP3201 Data Converters / Analog to Digital Converter ICs (ADCs)
  • 1 × TL074 Amplifier and Linear ICs / Operational Amplifiers

View all 8 components

  • Final Assembly

    Matt08/20/2014 at 14:18 0 comments

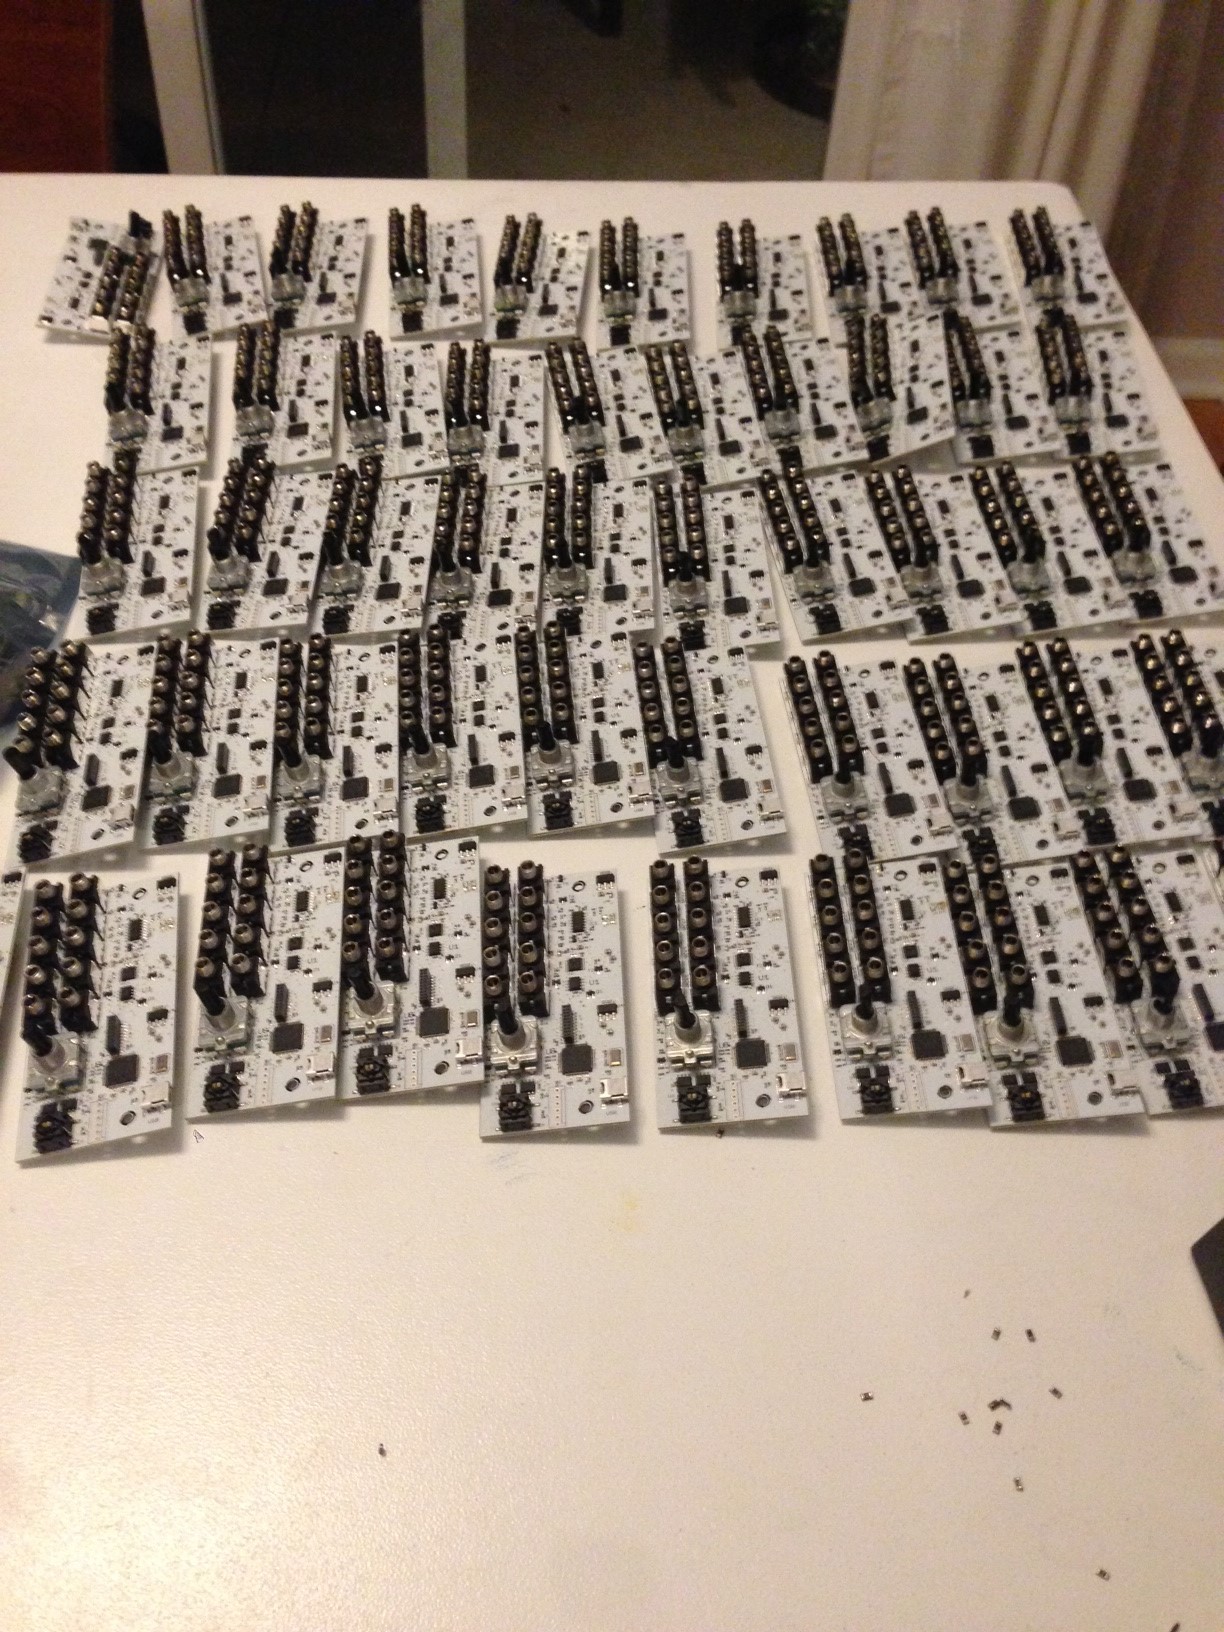
    I've been working at maximum capacity getting units ready to ship to Kickstarter backers. It's been kind of insane. I've got a vacation coming up and I'm trying to get about 45 of these built before I go. The first build is always the hardest. Some of the components had some rework to correct some minor errors and that has made it a little harder to put them together. I had some vias underneath 1/8" jacks that needed to be epoxied. Some of the jacks are then lifted a little which makes it a struggle to get them in the faceplate. This will be alleviated if I do another run with a corrected circuit board. At least that's the biggest challenge and not some fatal flaw. 

    Sitting putting together your creation for hours and days upon end gives you plenty of time to reflect. When you've worked on something as intensely and as long as I have on Vectr, you begin to wonder how your design will be received. At the very least, you can stand back and say, 'Wow, I built that." But I think the real reward comes when you see someone's eyes light up as they play with your creation or when someone takes the time to send you a thank you note. Because in the end there isn't much point in building things if you can't share them. I just hope that people find this to be a fun, interesting, and beautiful device. And maybe I'd like to see one in a really cool Youtube video...

  • Starting Building

    Matt08/18/2014 at 17:01 0 comments

    I have gotten a number of circuit boards manufactured and have started assembling the units to deliver to the Kickstarter backers. It has taken many months to gather all the components and many more months before that to design all of them. Now, I just need to go through the steps of building and shipping about 50 devices. The final steps are programming the boards, assembling the units with screws and nuts and such, testing each device, and shipping them out.
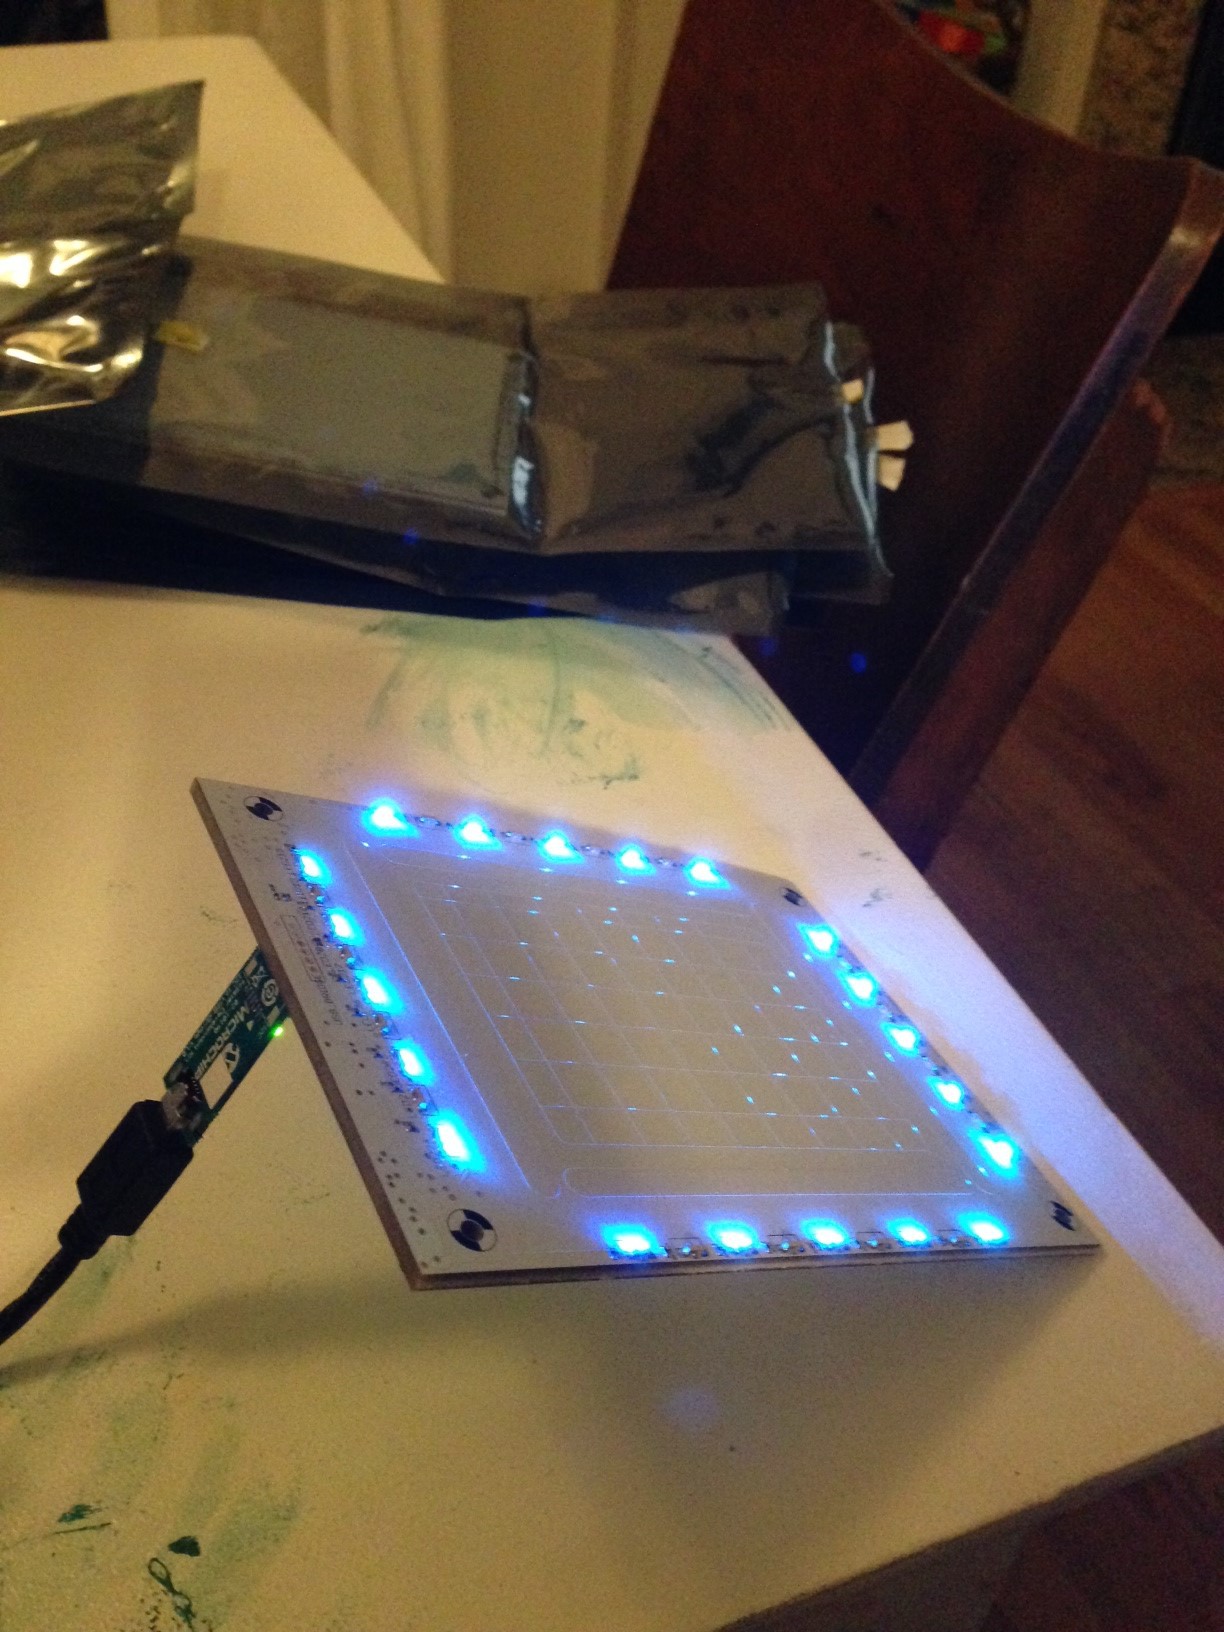
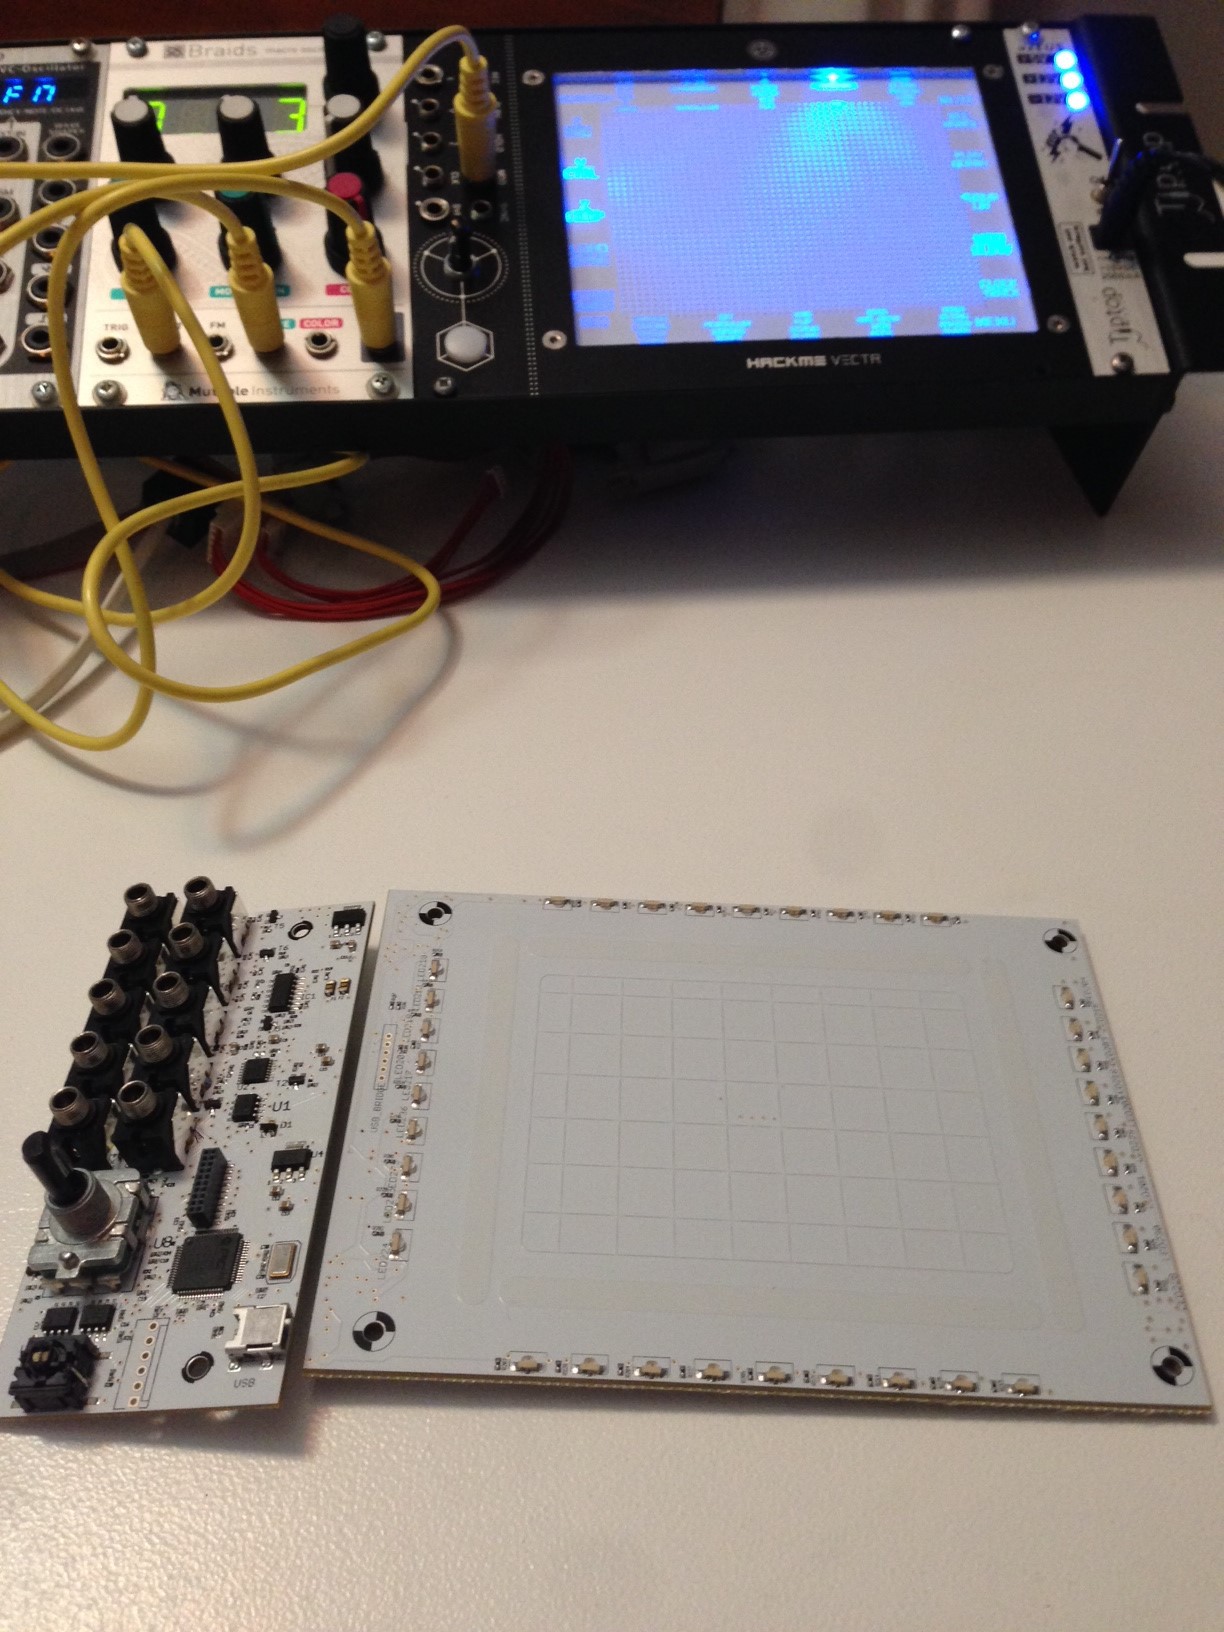
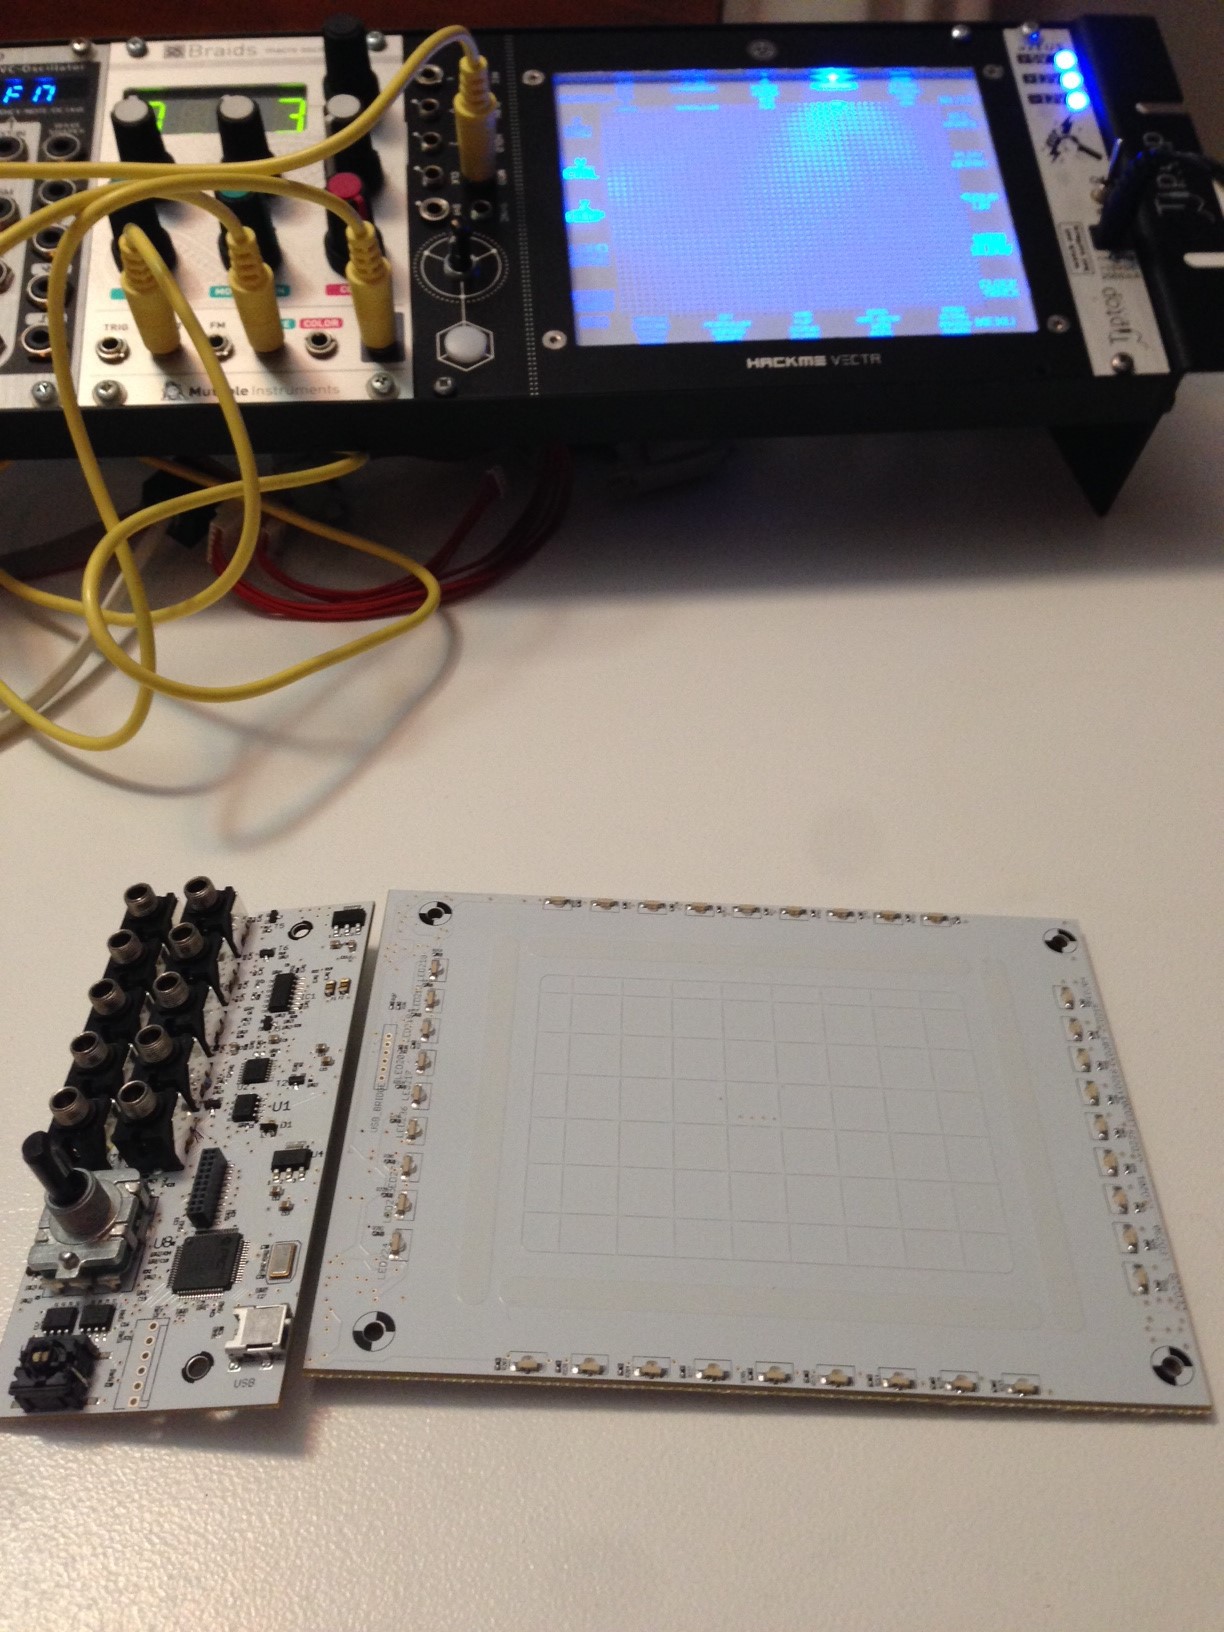
    This weekend I worked on programming the boards. There are two circuit boards in the device. Each board requires programming. The 3D sensor board requires parameterization which normalizes the sensing space and defines values for a number of parameters which affect the user interaction. The parameterization is a single file that just needs to be programmed. It's not unique to each board. As far as I know, Vectr is one of the first devices in the world to use this IC, so I'm mostly on my own as far as the required processes and the best methods, but this seems to be a reasonable process. The image below shows what this programming looks like. One of the development kits comes with a USB to MGC3130 device that handles the firmware upgrade. You can see it plugged into the sensor board. The LEDs light up on their own as they're not being driven, but it's nice to see that they work. You can also see that this is a thick board. I found that extra thickness benefited the sensing.

    The microcontroller needs firmware as well. Vectr uses a PIC32 microcontroller, so this process is straightforward. 

    Next, I'll be assembling units. Maybe I'll even get some help with that.

  • Crystal Stability

    Matt08/08/2014 at 12:27 0 comments

    I got the boards from manufacturing and had 8 sets to check out. On some of them I noticed some strange behavior, they occasionally would be slow to start up or would stall at start up and not get going. It's not a huge problem, but I'm testing to make sure there are zero problems. These types of problems come from one of four places: power, reset, clock, or firmware. I know that the power situation is good and the reset circuit is straight out of the datasheet and I also know what the beginning of the code should do, so I went looking at the clock. Sure enough, this crystal is a little slow to stabilize. I played with the parallel capacitance values for a while, but that didn't change anything. So, I went to the datasheet for the microcontroller to see if there was anything I was misunderstanding. I came across this feature called Internal/External Switchover, which allows for "Two-Speed Start-up." What it does is start the microcontroller for the internal RC (Resistor/Capacitor) Oscillator while it waits for the primary crystal oscillator to stabilize. This worked the trick, I tested it on a number of units and powered them all up a hundred times to make sure the problem was banished. Phew. Problems arising at this point can either be very expensive or time consuming. I'm glad to find solutions.

  • Manufactured PCBsVerified

    Matt08/01/2014 at 13:12 0 comments

    I received the first circuit boards from the manufacturer for verification. I found a few things, most notably that they had put the switch in backwards and that I may need to adjust my crystal parallel capacitance, but otherwise, they work great. The 3D sensing is very clean, accurate and works over a really nice distance. I tested all the other circuits and everything appears to be working, including a first for me, getting a working USB bootloader for user field upgrades. I have imagined different variations on the firmware to enable functionality like composition or extra performance features and I've planned in the ability to connect over I2C to expansion modules or other devices.  It was pretty stressful waiting for these boards to come in because it was a sizable investment. The wife never missed an opportunity to remind me.  All in all, I'm very excited to be nearly finished with this project. I've been working really hard to finish the software. This project has been by far the most difficult challenge I have ever tackled. I'm so close to success. Smells like solder.

View all 4 project logs

Enjoy this project?

Share

Discussions

K.C. Lee wrote 08/10/2014 at 15:28 point
Very nice build! Crystals (and oscillators) are known to take a while to build up amplitude. That's one of the reason why power supply supervisors are usually set to 200ms or so.

Good luck!

  Are you sure? yes | no

Matt wrote 08/11/2014 at 12:52 point
Thanks!

This crystal varies quite a bit. Some take longer than others. I'm just glad there's an available feature to be able to tolerate the variance.

  Are you sure? yes | no

Matt wrote 07/19/2014 at 02:45 point
I've been working on it for over a year.

  Are you sure? yes | no

zuul wrote 07/18/2014 at 21:21 point
wow, pretty cool, how long has that been in development for?

  Are you sure? yes | no

Similar Projects

Does this project spark your interest?

Become a member to follow this project and never miss any updates