-
Yet another fork
09/29/2017 at 02:41 • 0 commentsApparently I failed to announce here that the YGREC16 architecture now has a little brother : #YGREC8!
The YGREC16 has been growing too large and even though it is still relevant, a smaller scale is required to keep the physical implementation reasonable and timely...
Of course it reuses all the techniques that have been developed since #SPDT16: 16-bits arithmetic unit with relays:-) The only significant compromise is the instruction set, which must use 1R1W to keep the instructions small.
Oh and all the Numitron stuff is now moved to the proper, individual project : #Numitron Hexadecimal display module -
DIY backplane construction
07/10/2017 at 01:57 • 0 commentsThe computer contains 18 vertical boards, all joined by a horizontal backplane: see the log Structural sketches
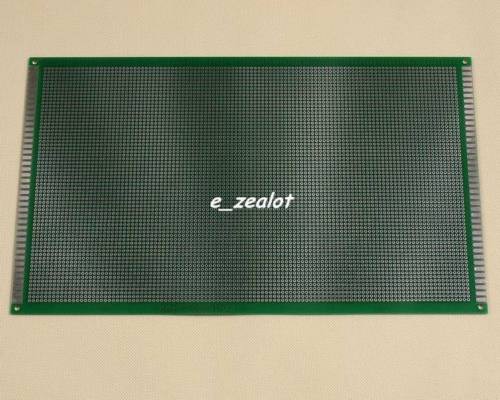
The vertical "bitslices" boards can be easily made as 20 identical boards so they are quite cost effective. However the backplane is large, complex and costly. Prototyping will be hard...Fortunately I found 18×30cm perf boards on ebay: cheap, large and easy to fix (though wiring it all will be another marathon).
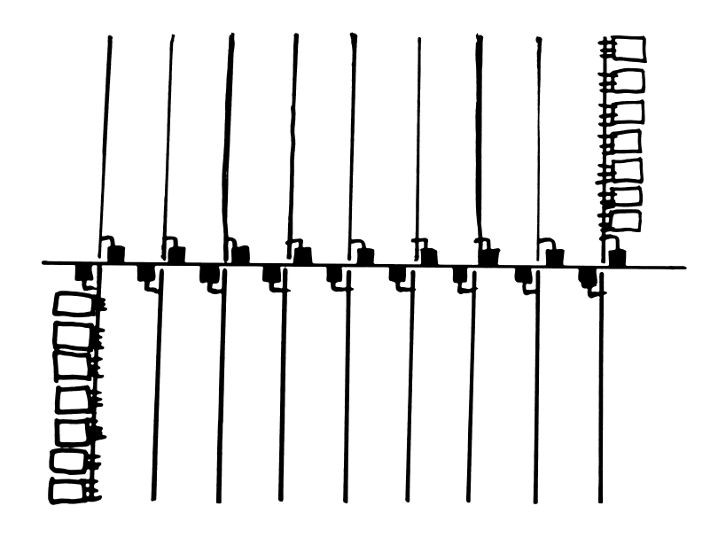
Now, there is a little issue : how can one wire everything on both sides of the board ?![]()
The point of this log is to document the solution : it's not one board but actually two similar boards where the wiring is on one side and the connectors are on the other side. Both boards are then joined together, on their wiring side, using mating connectors, so neighbouring cards can communicate.
(insert sketch here in the future)
Overall, I get a 300mm wide backplane, which is enough for the width of 9 bitslices: one inch or 25.4mm is enough for one board, 9 boards take 23cm and there is margin on both sides. For long bitslice boards (the DRAM will take some room...) I can add more such cards. All the wiring can be inspected and modified as needed.
This system can be adapted to other implementations of the YGREC architecture :-)
-
Chime on me...
06/22/2017 at 22:39 • 0 commentsAfter the not-success of the previous tubular bell system, I went searching for a better electromagnet and a better chime. Thank you eBay !
I received two chimes, both made in China but with different quality and different notes. I think I'll use both :-) One for user signals and one for system errors.
They are shorter, with a higher pitch than the tubes. The more expensive one sounds better but the sustain might be a bit too long :-DI might use it for the system errors.
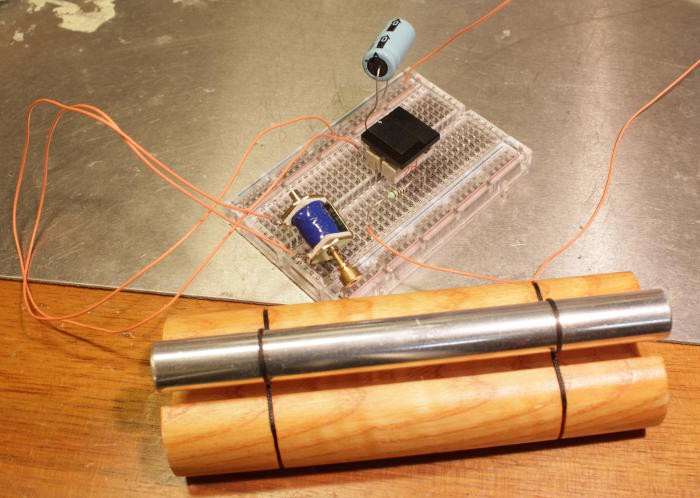
The operate horizontally, suspended by strings. They work even better upside-down ! This is fortunate because the the electromagnets I have found have no spring to hold the hammer back. But gravity is enough (when the coil is totally de-energised) so there is no spring to add. It's a very fortunate combination of mechanical parameters.
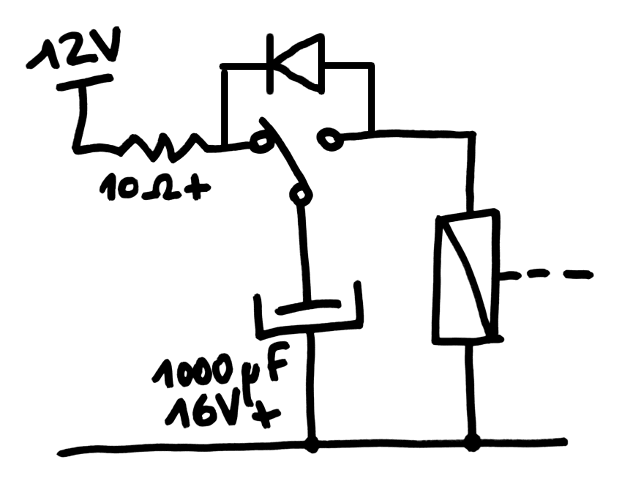
The electronic circuit is pretty simple : a charge capacitor is being held at +12V (through a current-limiting resistor) and a SPDT switch (either mechanical or a relay) discharges it through the 30 ohms coil. 1000µF is a good compromise, I tried 470µ and 2200µ and both have issues...
![]()
I didn't implement it but I should add a diode (top of the diagram): this would dissipate the energy in the coil for a faster return to standby position.
You can hear the sound in this obligatory video:
-
Display technology again
06/13/2017 at 12:04 • 2 commentsForeword: this page led to the creation of #Numitron Hexadecimal display module
I try to stay true to the project's philosophy, which implies the use the technology that was available in the 40's and 50's (or at least, would make sense). Relays, incandescent lamps, carbon resistors, electrolytic capacitors are fair game (even though I use capacitors that are way more sophisticated than what was available then). Good silicon diodes appeared in the 60s-70s but are deemed indispensable so they are OK'd.
Vacuum tubes are in the spirit as well but not my taste : I don't want to have 200V in some wires, or to have to generate any high voltage. 24V is already high enough for me ! So this rules Nixie tubes out (they require 130 to 200V depending on the models).
![]()
That's sad because Nixies give a really vintage look that adds a lot to the "charater" of the processor as a piece of ... bizarre stuff. And Nixies are interesting because you just need to power one out of 10 electrodes, which fits my decoding system rather well.
![]()
Another kind of Nixie tubes used VFD and work in the 30 to 60V range, which is more acceptable, but they require some power for an electrode (?) and they are organised as 7 segments. The nice side is that they can display hexadecimal digits, but they need a 4->7bits decoder which adds more complexity...
So the digital non-7segments displays are a requirement (at least for the instruction disassembler board). This brings us to the "Edge-Lit Displays" and the #"Lixie", an LED alternative to the Nixie Tube where one (out of ten) panel is turned on.
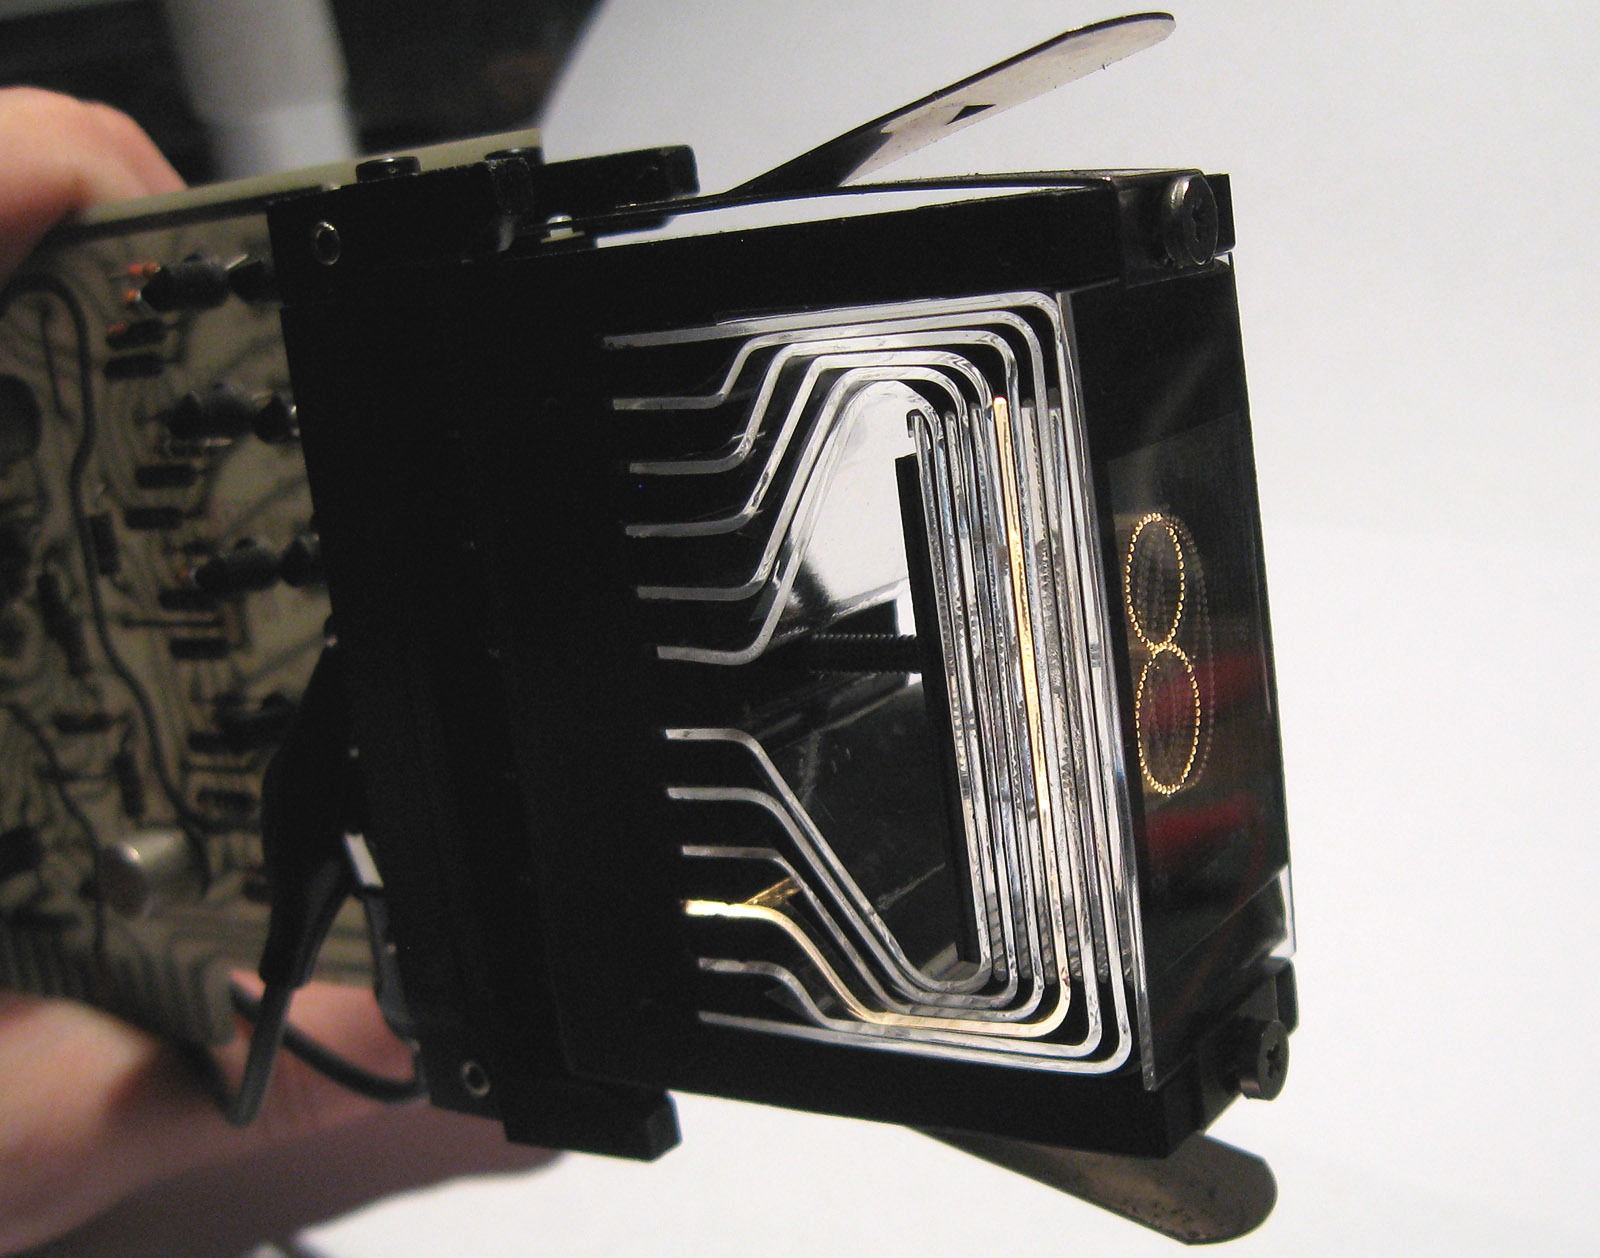
While searching for different kinds of Nixies, I found this beauty on eBay: 3x IND-1803 Edge Lit Incandescent Displays and 1x IND-1818 nixie tube era (seller boilingflask2426) I guess the "nixie" keyword brought me there... Look at this beauty :
![]()
The auction is finished but the page still describes the display modules thusly:
"
Up for sale is a lot of 3 IND-1803 edge lit displays and 1 IND-1818 display with drivers in good used condition. This is an obscure model of display that has plates with dimples placed in the shape of numbers. The plates are bent back to lightbulbs on the back of the display, when a bulb is lit, the light travels down the plate and lights up the holes. One photo shows the display with the cover removed so the plates can be seen. The IND-1803 displays 0 through 9 and the IND-1818 displays 0 and 1, so there enough displays here to make a 4 digit clock if you can live without 24 hour time. You could also replicate the 3 digit timer from the bomb in the James Bond 'Goldfinger' movie, the prop for which used this style of display. These displays still have their driver cards attached, which includes the hard to find board mount connector for this part. Note that these are the models that have two dots located on either side of the digit instead of a comma, which is good if the buyer intends to use these for a clock. The look of this display with the cover removed can really only be described as "totally awesome".
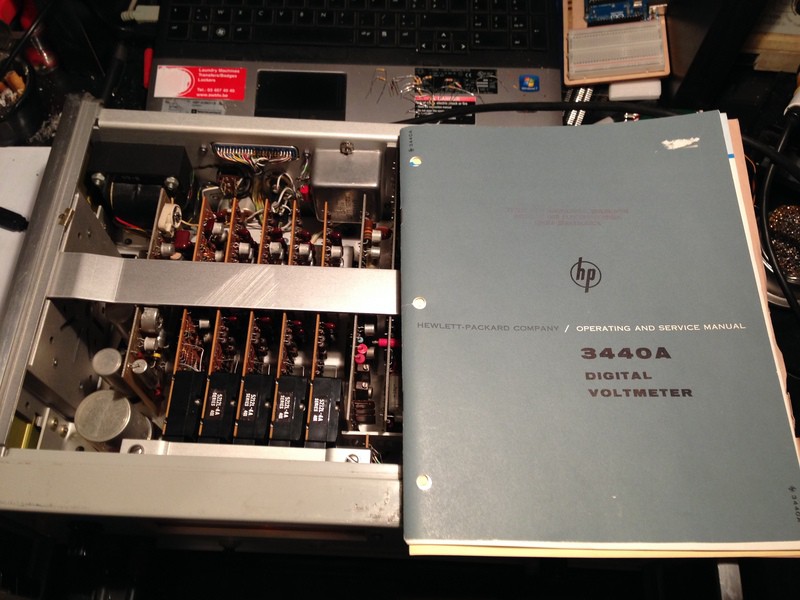
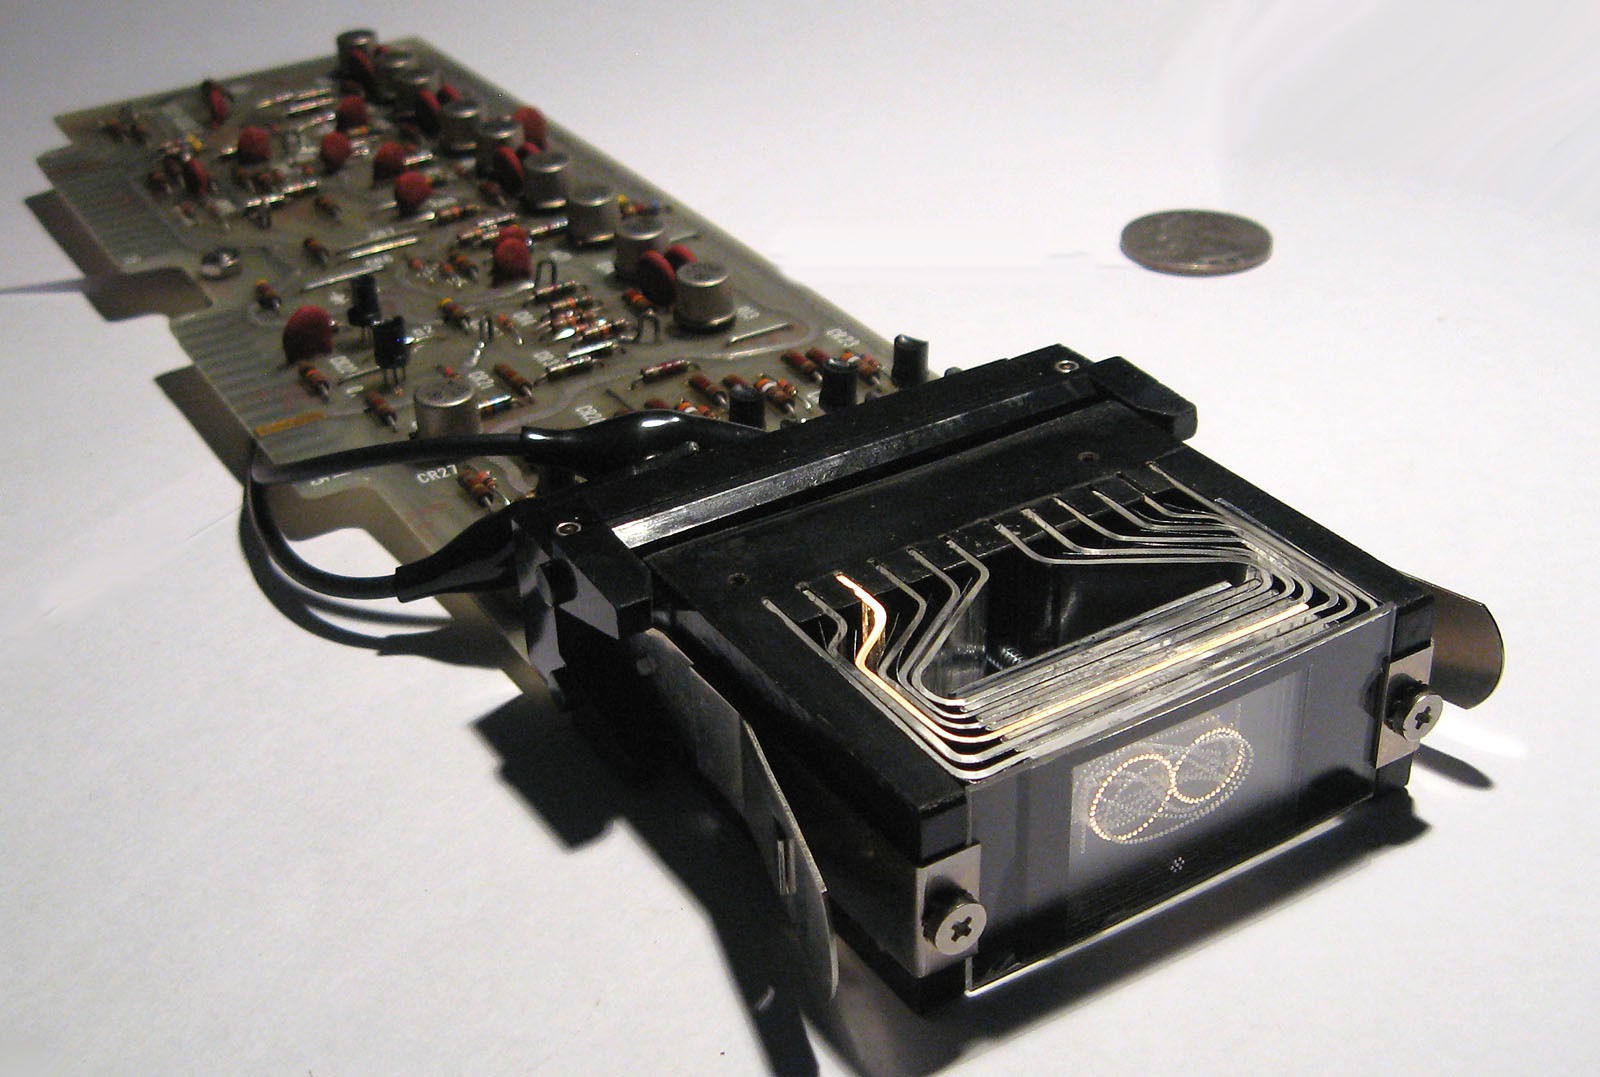
(note from 20171105: it now occurs to me that these boards are "pulls" from a 50's era early digital voltmeter or something like that... I can't figure which brand or model yet though but look at http://www.hp9825.com/html/dvms.html, or inside this HP3440A
![]()
and it looks quite similar to
![]()
More display porn can be found at http://www.industrialalchemy.org/articleview.php?item=1093
I'd love to have a similar system for the #Clockwork germanium !
Unfortunately this doesn't look possible at this moment...
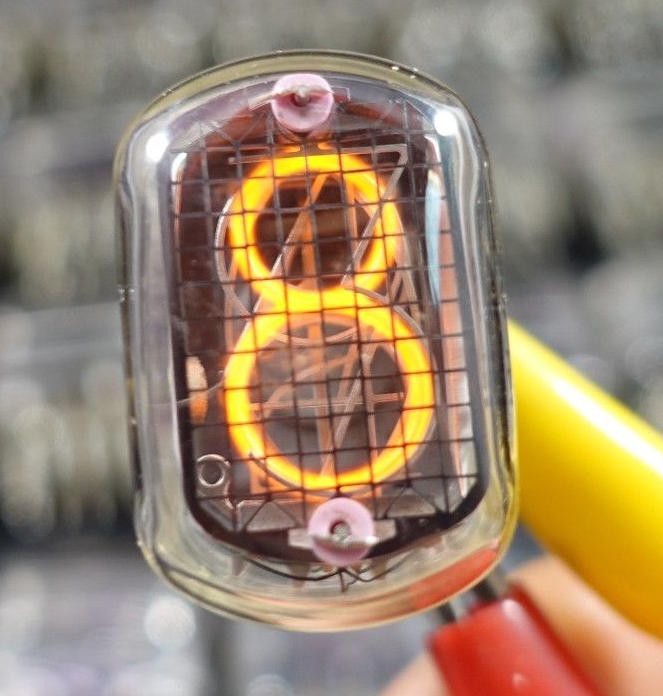
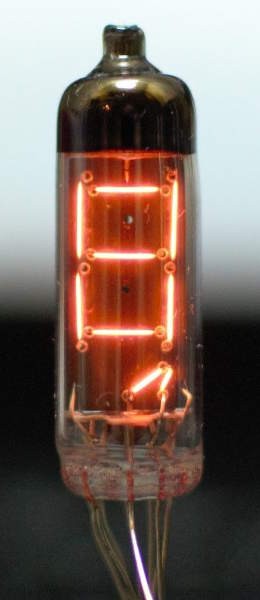
And then I stumbled upon another style of "Nixie" tube, I could even qualify as the "poor man's Nixie" but not in the derogatory sense. Let me introduce you to the IV-9, a Soviet-era tube clone of RCA's Numitron, that encloses 8 incandescent filaments to form a lovely, funky 7-segments display. It's not as classy as the usual Nixie but it looks so vintage!
![]()
The look is one thing, the electrical characteristics are another : each segment draws 17 to 22mA, under 3.15V to 4.5V. This is totally compatible with the power supplies of the YGREC-РЭС15 ! With the keywords "IV-9" and "Numitron", Google finds enough public informations to get started, such as http://blog.thelifeofkenneth.com/2011/12/numitron-display-tube-tutorial.html
The IV-9 seems to be the most popular, other versions have appeared with more compact form factor: IV-13, IV-14, IV-16, IV-19, IV20... But they are way more expensive ! I have also seen a TIL311 replacement using the IV-9 :-)
Displaying the digit 8 will draw 22×7=150mA, which is significant but not excessive compared to the power drawn from one relay's coil. That's for one digit and I will install 6 of them. The total consumption could draw up to 1A but certainly less.
I think I'll connect the IV-9s to 3 output ports (3×16 bits) to display numbers or whatnot. The 7-segments decoding will be software-driven with a diode ROM somewhere in the data or instruction space.
This solves one issue I had with how to display data. It's reasonably cost-effective and easy to program, has a great vintage look... But the original concern is still there : how do I display numbers on the instruction disassembler board ?
Of course, let's not forget the flip dots but the assemblies I have are single dots or dot arrays, unsuitable for easy digital display...
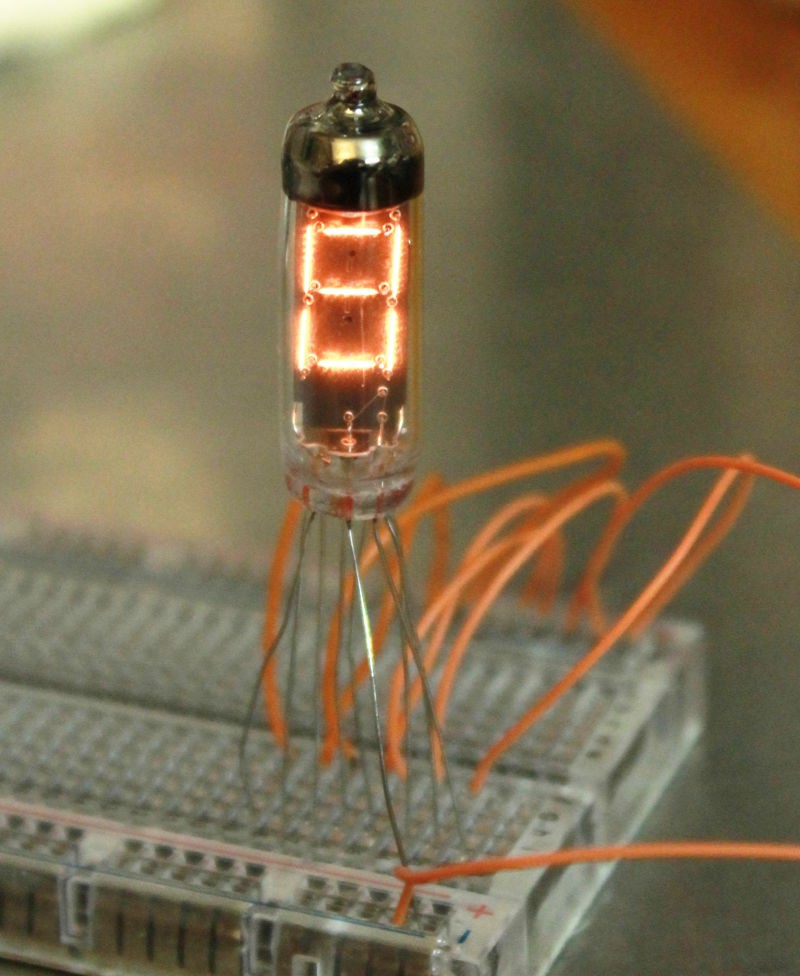
20170629 : I received the IV-9 ! I love these tubes !
slow start and slow stop, small size, consumes reasonable power (125mA @ 3.3V) : I'll have to make a 7-segments decoder !
-
Relay DAC
05/23/2017 at 17:43 • 0 commentsSome people have already implemented relay-based DACs (such as the sound card of TIM-8) so there is nothing groundbreaking here. However, since it's my first relay-analog converter, a log was important! I had shelved the galvanometer-hexadecimal-display in the last log, but I now have the voltmeter so I had to test it.
I chose a model with a wide display area and screws on the front so I can easily modify the display grades. It's lousy but it seems to work.
Then I tested the display against a known good source and it actually works well.
The resistance is measured with an ampmeter in series at 10V: 0.976mA, or R=10245 ohms. This gives an estimate of the required resistors in the R/2R ladder, the relative error and the power that it draws (hint: low).
I don't know exactly yet how I'll provide 16V (the galva uses 15V but the R/2R ladder drops 1V minimum) but several rails that can be combined, for example the difference between the +6.6V and the 24V rail is about 17V, a series potentiometer (5K ?) will adjust the needle. The differential supply will certainly fluctuate quite a lot and heavy filtering (regulation, capacitors and/or diodes ?) will be required...
The display is quite large and slow but cheap and easy to use so it is not suitable for the main display but can serve for auxiliary display...
-
Instruction display panel
05/20/2017 at 11:08 • 0 commentsAfter I completed the instruction switch panel, came the necessity to build the corollary: the panel that displays the instructions. I had a sketch but soon realised that the system used too many relays, making it both power-hungry and expensive. For example, the hexadecimal display with 4 digits requires 16×4 LEDs, no big deal, but also 15×4=60 relays to demultiplex the nibbles ! According to the display:
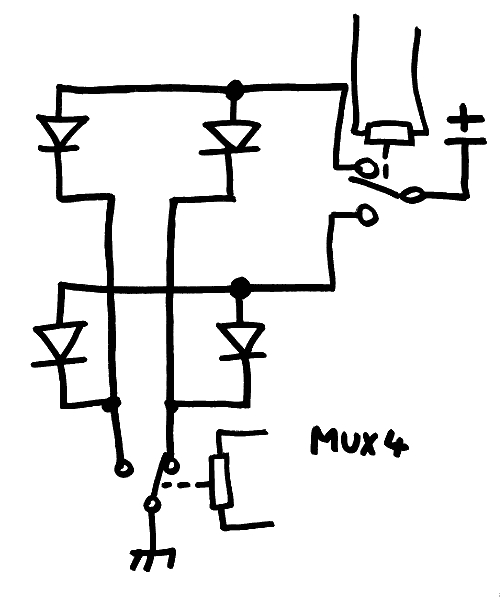
![]() there are
there are- 2 × MUX4 (3 relays each)
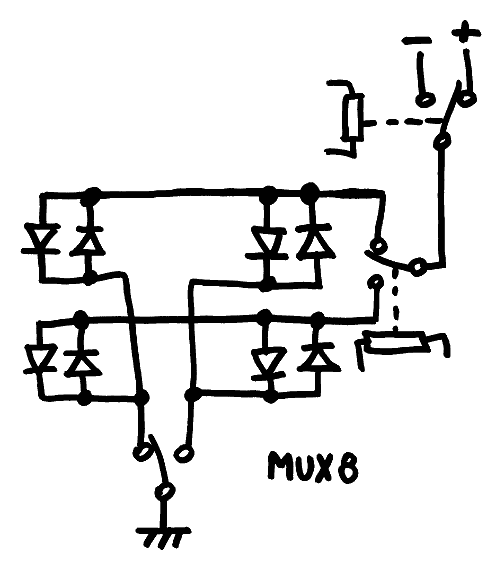
- 2 × MUX8 (7 relays each)
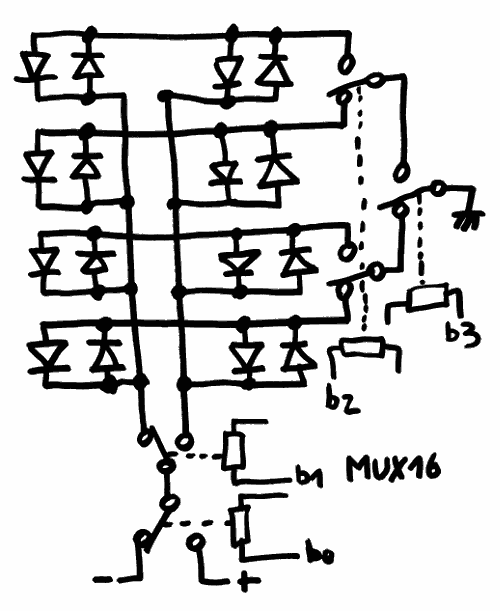
- 2+4 × MUX16 (15 relays each)
- 1 × MUX32 (31 relays)
so the total is 141 relays, or 4 boxes of 36 pieces, with some pretty high fanouts (despite knowing strategies to balance them). This also uses a significant amount of PCB surface !
Discussing with @Dr. Cockroach about a similar concern with his #IO - The Inside Out Cardboard Computer - bis, (he uses a servo to point to one out of 16 numbers), I came to the conclusion that I should try a galvanometer. It's reasonably cheap and simple : a R/2R network driven by one relay per bit, and you're done.
However readability is not great and despite having found a 0-15V model (which is great for displaying from 0 to F), this causes the other problem of getting 15V (actually 16 !) in the first place... See the rest in the log Relay DAC
Then I realised that I got the initial MUX thing wrong.
The light dots can be either a LED (which is a diode) or a Glühbirnchen (which can be wired in series with a diode). I couldn't find suitable flipdot elements (too large, harder to drive) so let's stick to diody elements.
MUX4 isn't really a problem with only 3 relays but... This can be reduced to only two ! The LED can be arranged in a 2×2 array with one relay for the rows and another for the columns. It's only one relay saved per MUX4 but the fanin is just one coil per bit.
The same idea can be extended to the MUX8 : one MUX2 for the rows and one MUX4 for the columns. But wait ! the MUX4 is already an array, so we need to go in the 3rd dimension... With LED, this is easy as connecting them in pairs with reverse polarity. As a result there is one relay for the 2 rows, one relay for the columns, and one relay that selects between +3V and -3V. 8 relays are saved. Splendid !![]()
For MUX16 however, I'm not sure a 4th dimension exists... This forms the bulk of the display, the CND and SRC fields can use single-dotted display but the IMM field (4 hexadecimal digits) would be awesome with 7 segments (I'm ok with the diode matrix). At this point I'm forced to use a "standard MUX4" for the row, with 3 relays instead of two, and one bit has a higher fan-in than the others (which is quite annoying because I'd love all the board's bits to have a single coil fan-in). I could cheat with a DPDT relay but no model matches the RES15's characteristics. Anyway, MUX16 is reduced from 15 relays to 5, thanks to diodes !![]()
MUX32 would use two standard MUX4 and total 3+3+1=7 relays instead of 31. Impressive what some careful design can do :-)![]()
Total : 2×2 + 2×3 + 7 + 6×5 = 47 (instead of 141), this is totally reasonable....
I'm concerned however about the imbalance of fan-in between the various bits, this makes the design more complex. I could add resistors in series to balance the single coil signals but it's wasteful...
Another concern is the digital display : bipolar matrices don't ease 7-segments decoding. I'm thinking about the #"Lixie", an LED alternative to the Nixie Tube approach but I'd need a tiny version and readability would be worse than the large displays...
20170323 : OK, another simplification : what if the digital display was in octal ? This would save 4 relays (though unlike Seymour Cray I'm not an octal guy).
Even more desirable: more input signals will have a fan-in of one coil.
This leaves a couple of MUX16 and one MUX32...
I'm trying to come up with a "4th dimension", and I was thinking about voltage or current. It's easy to turn a light above a higher threshold (add some diodes in series) but not to turn another off. Unless there is a relay somewhere... So this is going in the direction of using an input relay to amplify the signal.
I'm also thinking about an optical system that could replace the Lixie...
-
I can see now
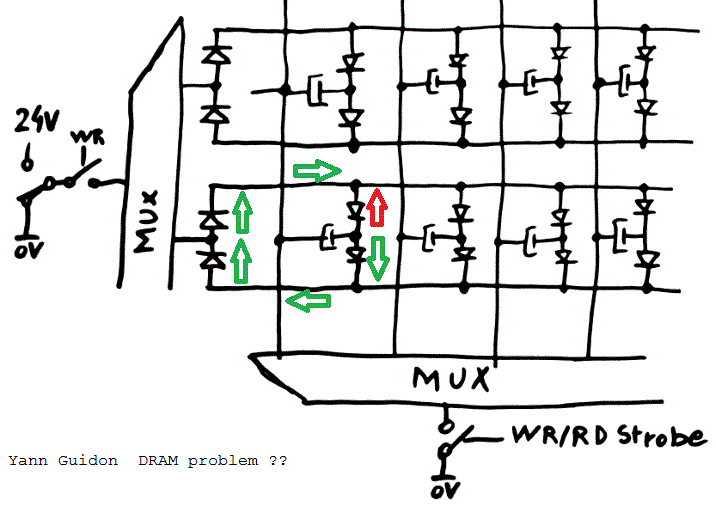
04/26/2017 at 17:59 • 2 comments@roelh was suspicious that my "new DRAM array" would work.
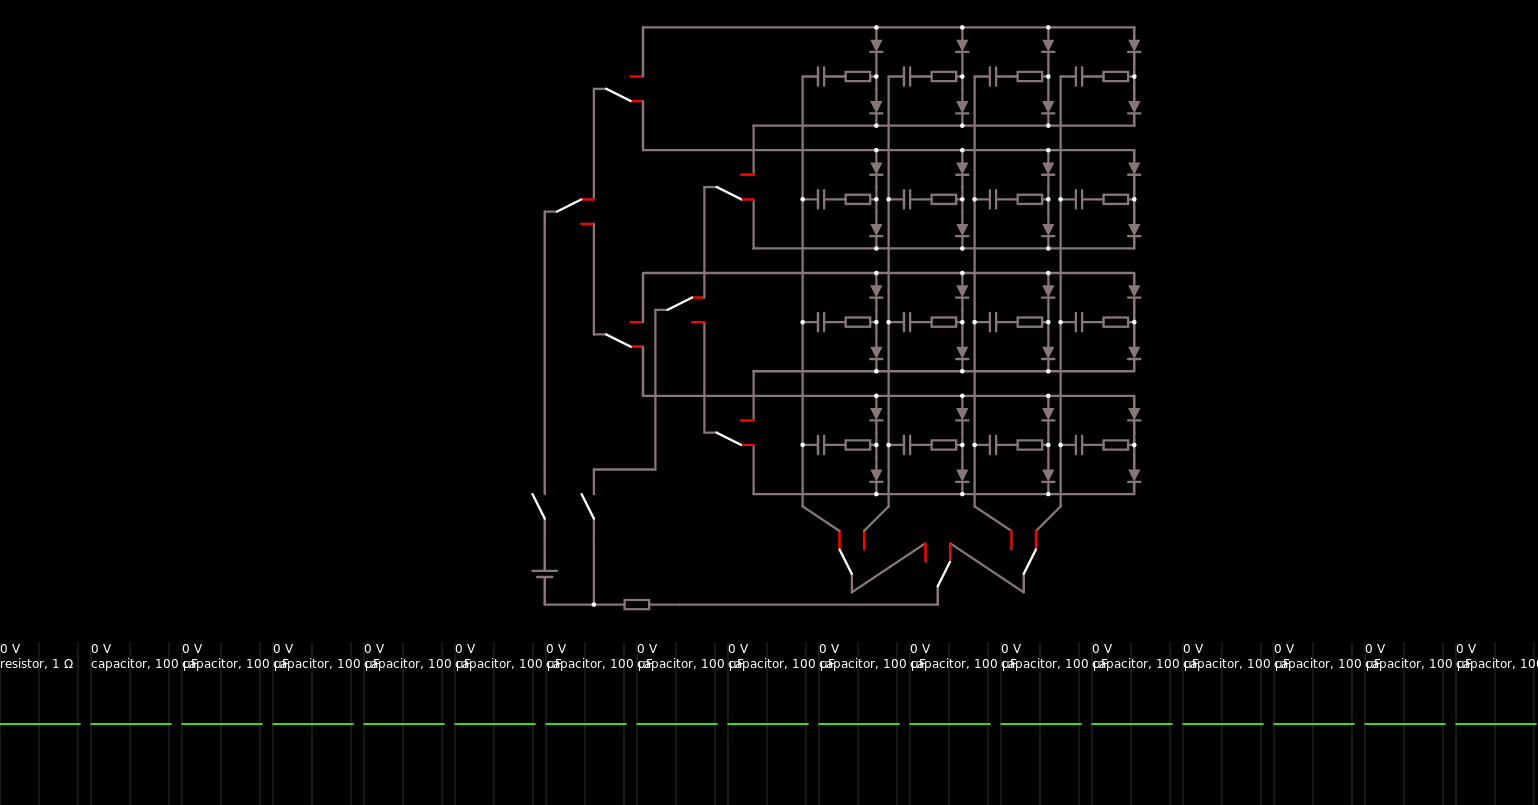
![]()
It took him a while and conviction, and it was difficult to wrap my head around it.
I'm too lazy to finish the prototype, but it would be useless for 2 reasons :
- Probing the capacitors would disturb the array and storage
- I don't have enough channels to observe a 16×16 array !
So I resorted to simulation.
Spoiler alert : @roelh was right. But why ?
After I did the experiments, I realised that I was influenced by the flipdot array and impressed that it could drive several rows at the same time. Using the re-steering diodes makes sense.
But the rows are always driven so the current "loop" that roelh identified don't occur. In my case however I leave many rows undriven. And the simulation shows really bad consequences.
In practice...
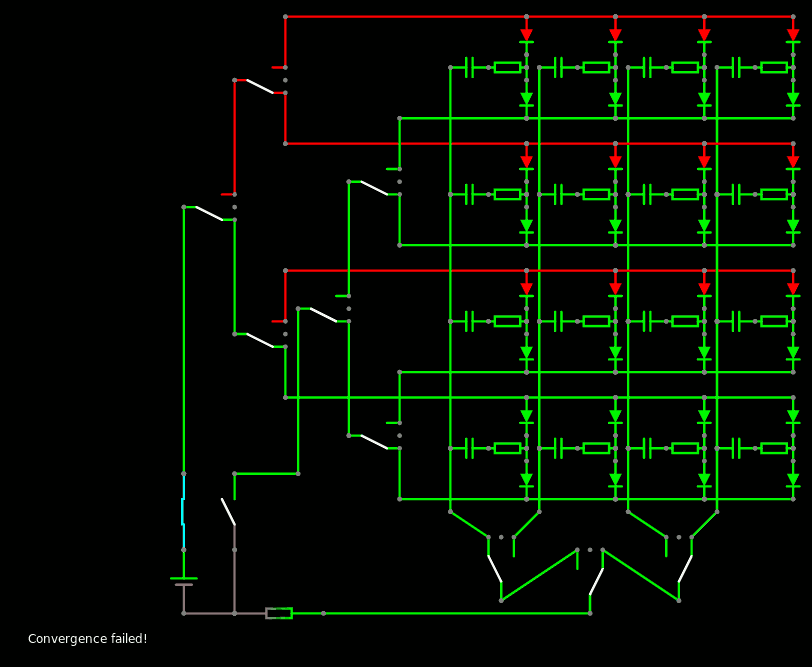
Just go to http://www.falstad.com/circuit/circuitjs.html and "import from local file" the circuit that I have uploaded.
![]()
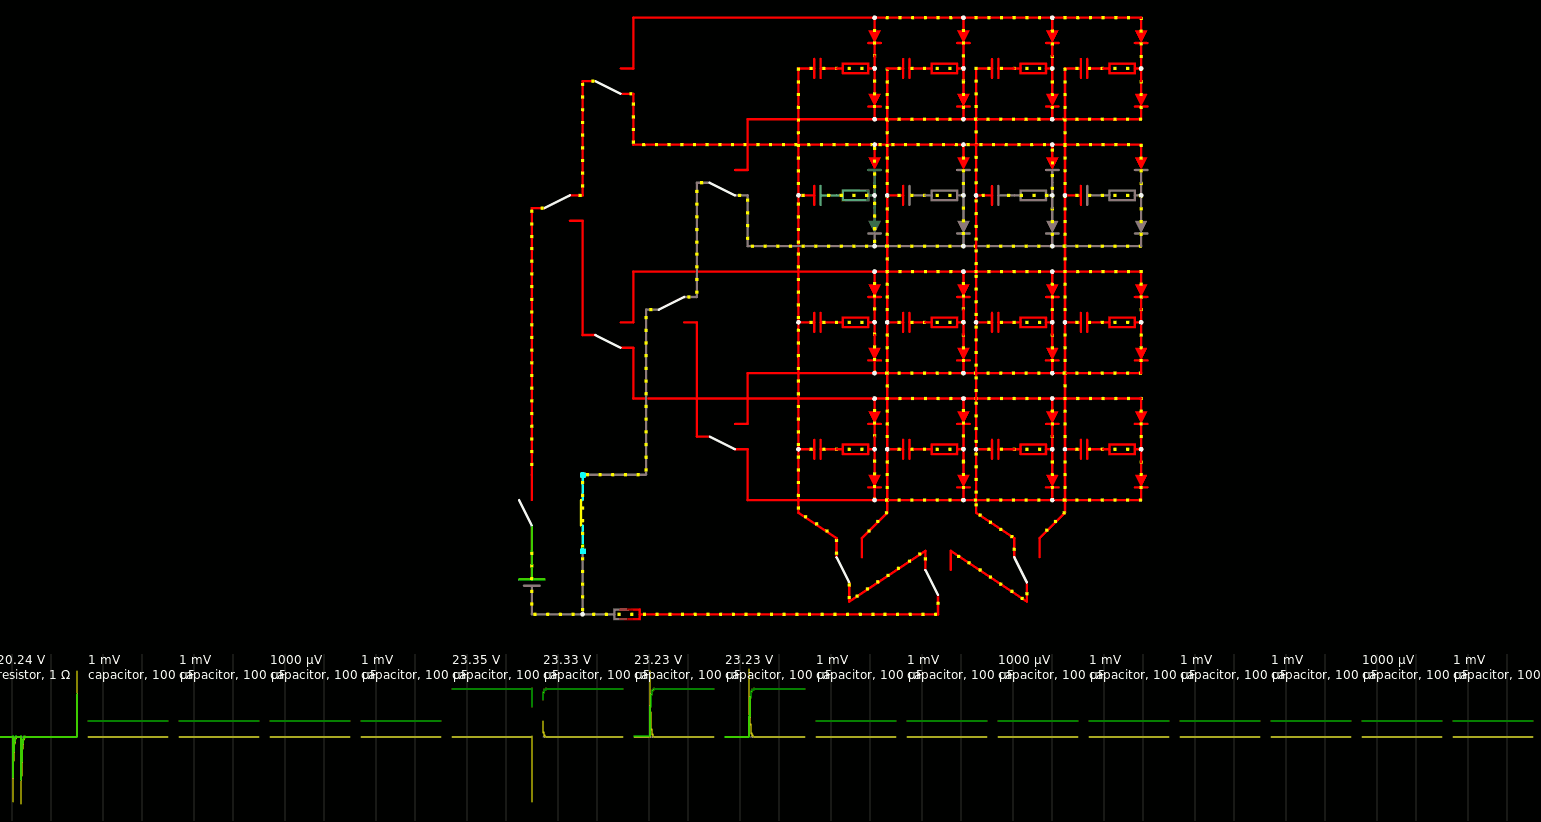
Click on the push buttons and the SPDT switches to steer the current. You'll see the capacitors' charges vary. I added a bit of ESR to reduce the pulses. Be ready for some ... lag. The simulator gets confused after a few manipulations and I have already encountered errors...
![]()
I have "probed" all the capacitors (with virtual scopes) to check that charging one doesn't influence the others.
![]()
I have chosen a topology of double binary tree because I don't want the data to have too much fanout. Using the recent tree command topologies, the double tree is actually practical and has a fairly balanced fan-in.
Conclusion : I must reorganise the DRAM geometry.
The double-tree that selects the row is a big burden which shouldn't increase so I consider reducing the rows to only 8 per bitplane. In parallel, there are 18 bitplanes with 8 rows each, which amounts to 18×14=252 relays.
As a consequence, the backplane must handle more columns : 512/8=64 columns, or 64 relays. It must withstand the simultaneous switching current of 18×100µF so I consider using a small series resistor to mitigate the transients.
I think about building DRAM modules made of 8 rows and 16 columns.
-
Now it should be enough
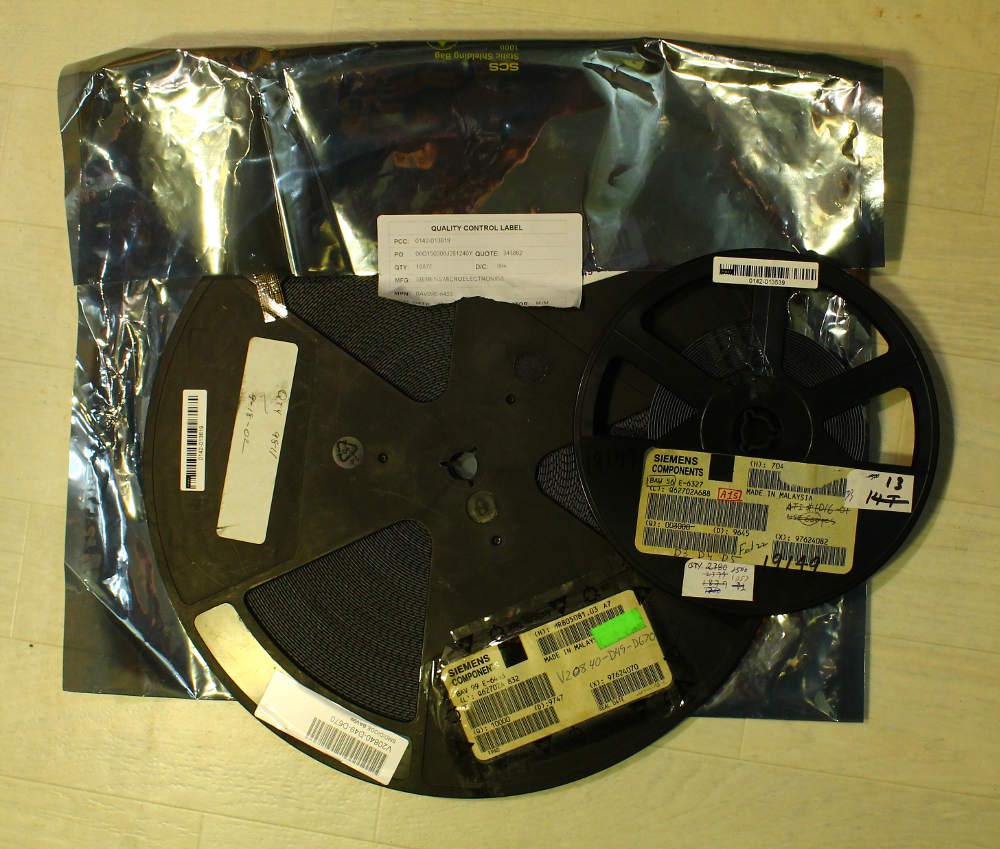
04/22/2017 at 09:03 • 1 commentThat moment when you order 5 lots of 2K diodes, and you receive a pretty large reel of 10K diodes.
"normal" reel size for scale.
The DRAM should be covered now, and there is only 1 part and 3 soldering joints instead of 4 soldering joints and 2 parts.
I also received the KOA diodes in SSOP24. The 1100 pieces should be enough for about 730 instructions. Good thing I extended the PC to full 16-bits width :-)
-
The instruction register (cont'd)
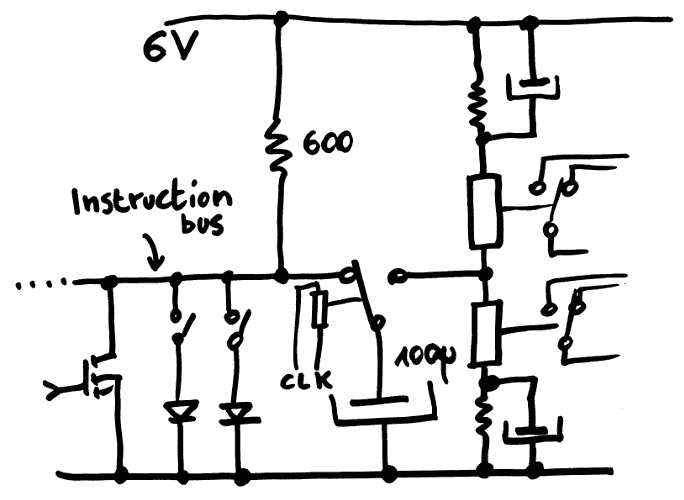
04/20/2017 at 09:41 • 2 commentsHere is one of the 24 bits of the instruction register.
3 relays each amount to 72 relays.
![]()
The instruction bus uses 6V signaling to provide more swing into the capacitor, but not enough to damage the diodes (the KOA diode networks are limited to 7V in reverse polarity).
The sensor is made more sensitive by charging the capacitor with a higher voltage swing, bringing more charge to upset the coils. The middle point is centered by resistors, but large capacitors are required to keep the ends at a somewhat constant voltage. I got a stock of 1500µ capacitors so the swing ratio is at least 1/10.
The reduction of the current on the instruction bus is pretty important. If 60mA per bit was required, then a INV instruction (FFFFFFh) would draw 1.5A ! Hopefully this is now reduced to about 10mA, or 240mA for a full FFFFFFh instruction. This increases the longevity of the parts...
I'll have to prototype the above circuit !
-
I hope that's enough this time
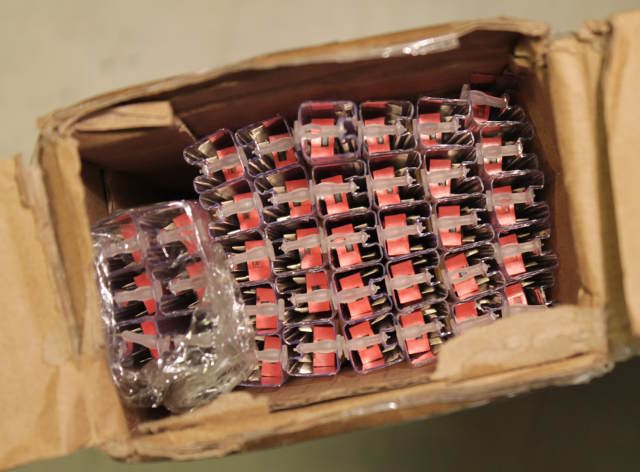
04/17/2017 at 21:23 • 1 commentI just received a pretty large package.
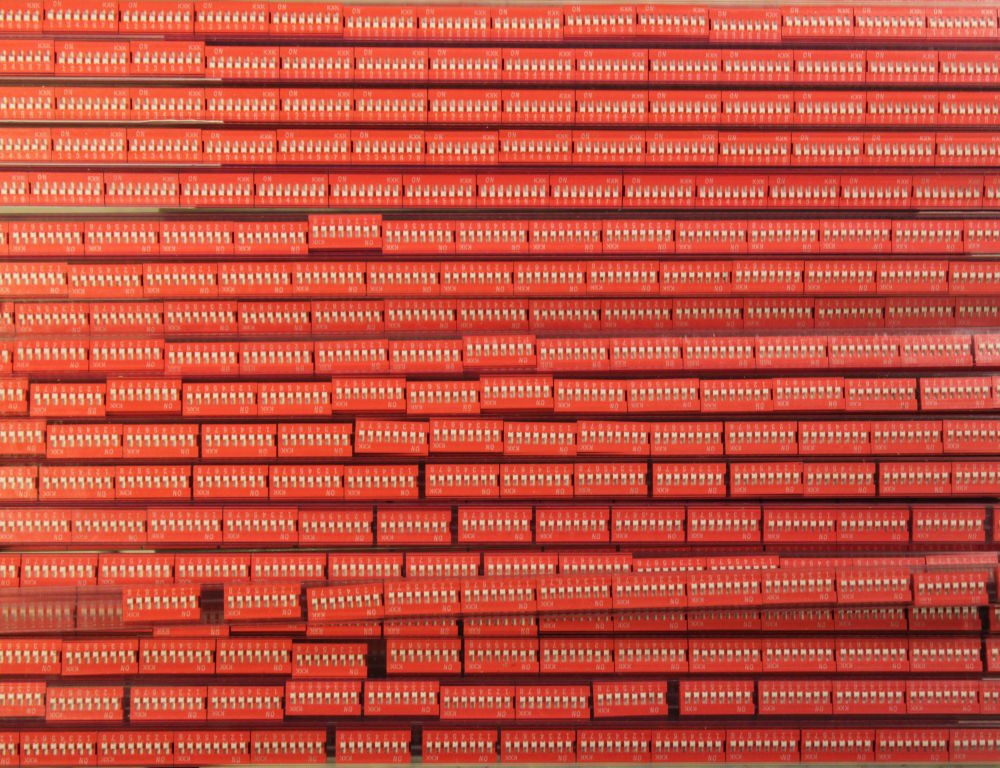
That's 750 8-positions DIP switches.
with 24-bits words, that's approx. 256 instruction words, or 4 boards of 64 instructions...
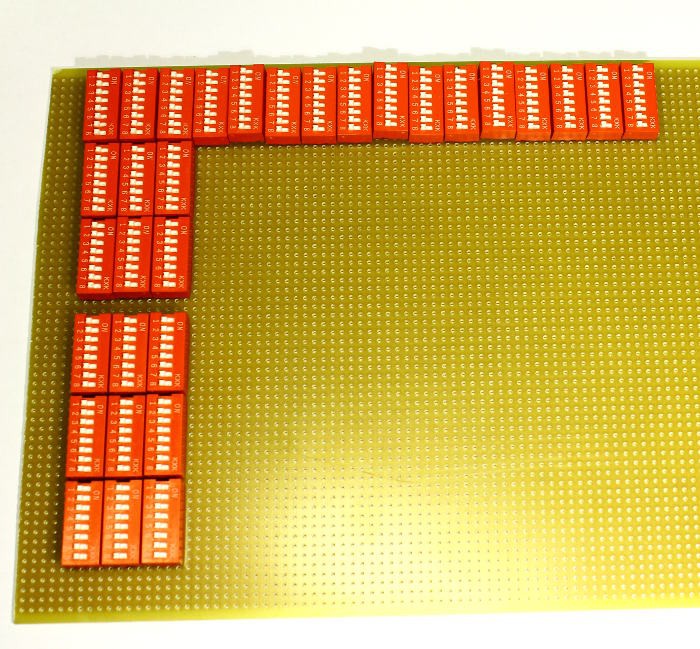
Or 8 boards of 32 instructions, to fit in a 16×20cm board :
However there's a little gotcha:
The DIP package must be slightly too large because they don't fit well on a 2.54mm pitch board.
Once again this proves that you must have your definitive parts before you commit to a final design ! I'll have to adjust the snap grid size when I do the PCB layout. This also shatters my hope to make a nice compact prototype, 2.4mm will be lost for every row...
 Yann Guidon / YGDES

 there are