Close
0%
0%

Otto LC

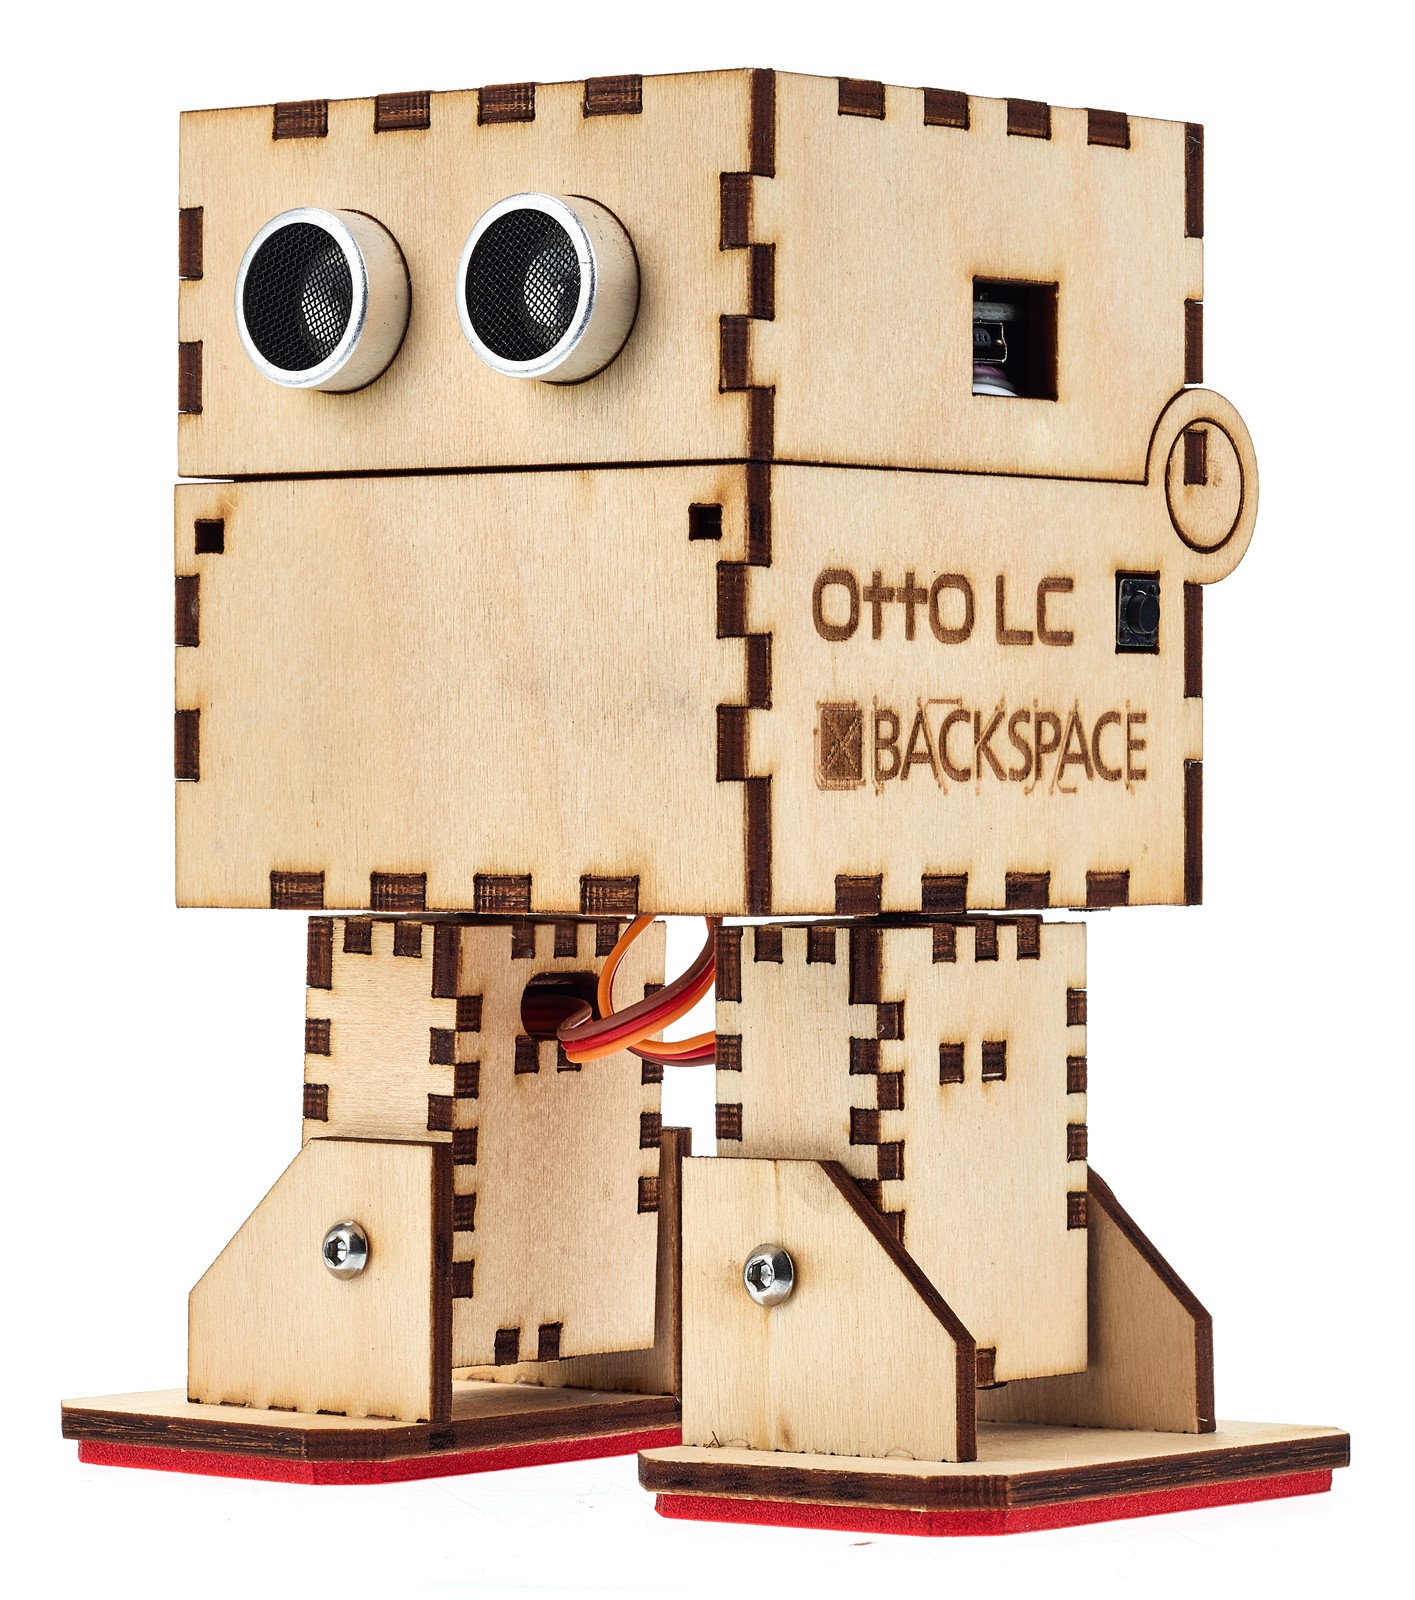
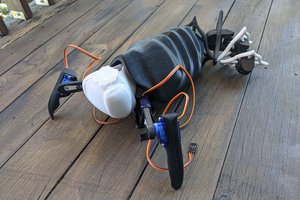
A Laser cut chassis for the Otto DIY robot.

Similar projects worth following
Otto LC is a chassis for the Otto DIY robot that can be made using a laser cutter (though the LC). It is primarily intended to be cut from plywood but could also be made from other materials (may be with a bit of tweaking). In addition to the features of the original chassis it also allows mounting a mode switch for looping through different programs.

We wanted to do a robot project for children and found Otto DIY here on Hackaday. While it is a very nice project it uses a 3D printed chassis. While 3D printing is really cool for building one robot it just takes too long for 20 robots. As the chassis is basically made of 3 blocks plus the feet it was a natural step to recreate it in Boxes.py a software to create boxes on a laser cutter.

If cut with sufficient burn correction (aka kerf) most pieces can be put together without glue (but with significant force). This is nice for one robot but turned out to be not very practical for children who often lack the strength (unless you want to hand them a mallet).

Besides the servos and the electronics only two little screws are needed in addition to the laser cut parts.

  • 2 × Screws M3x6mm (or similar)
  • 1 × Micro Push Switch 6x6x4.3mm
  • 1 × Small Sliding Switch
  • 1 × Set of Otto DIY Components without the 3D printed parts See https://hackaday.io/project/11776/components for the list
  • 2 × Additional Jumper Wires female on one side Other side doesn't matter as it gets removed

  • More Pictures

    Florian Festi03/09/2018 at 12:14 0 comments

    Finally we do have good pictures. I added the first hand full to the gallery. Here are some more:

    May be I need to do something with his facial expression. He looks so happy with his mouth open. But that's not how he is supposed to walk around.

    With his mouth closed he looks a bit worried. I promise: We will take care of you!

    A lot of details on a single picture:

    The programming port with the USB port of the Arduino Nano, the custom engraving on the side, the button to switch between modes and the hinge for opening the head/body. The hinge "axle" is pressed on a tab which is part of the back wall. This allows having a hinge without needing additional parts. It also opens the full 180°.

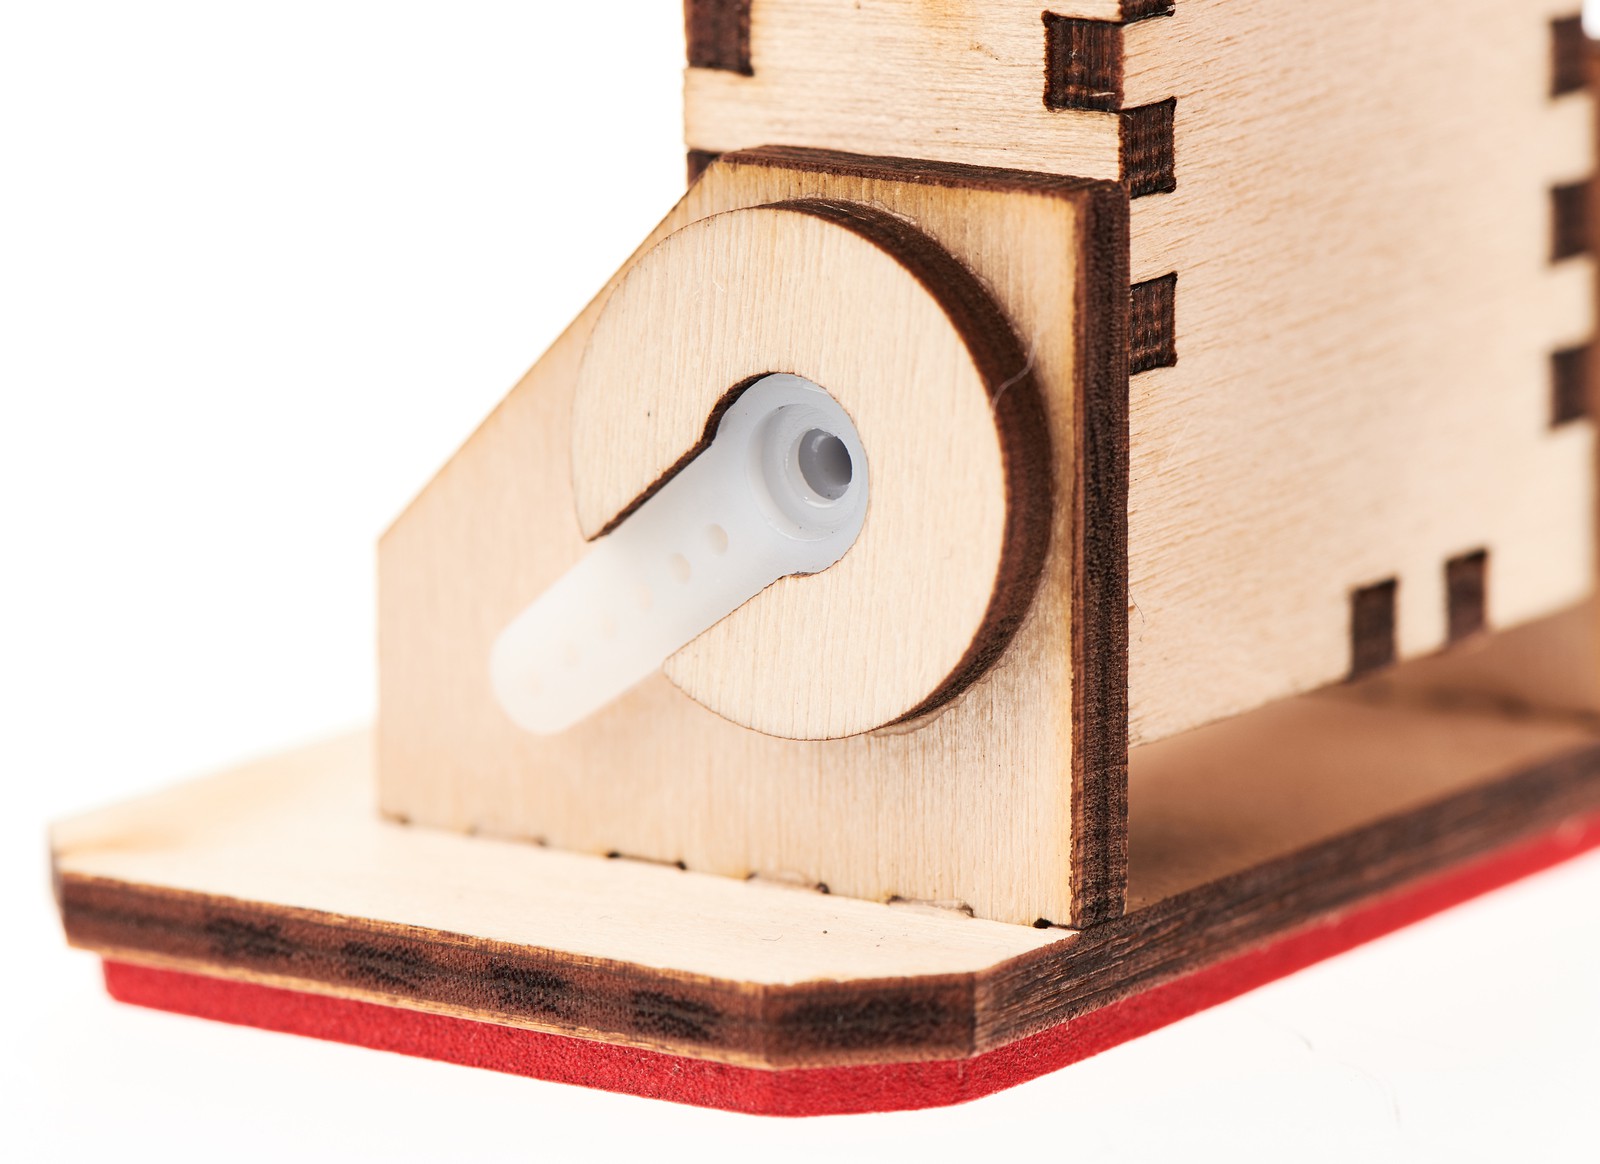
    Here the details of the new ankle. The C-ring needs to be glued on. It allows adjusting the angle of the foot so we don't loose travel due to the large steps the servo horns can only be adjusted in.

    And once more from below:

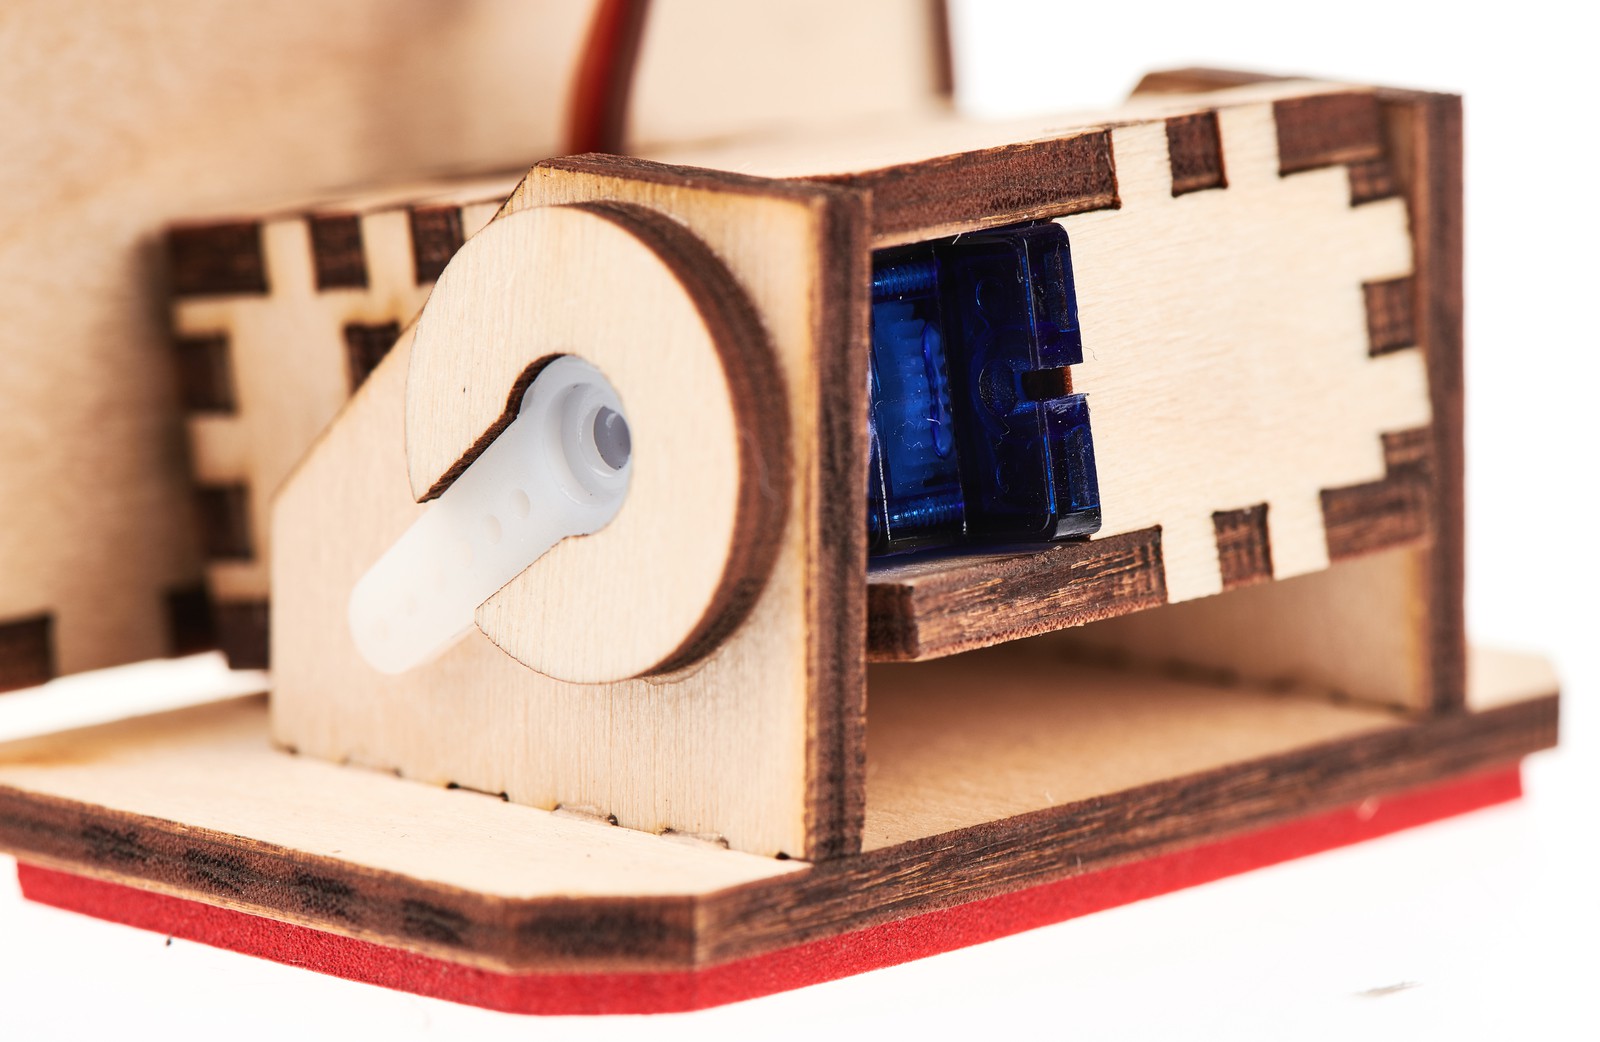
    The servos actuating the feet are just built into the legs. There are no screws nor glue needed for holding them in place. This picture shows the bottom plate of the leg holding the servo up and bracing against the mounting tab.

  • Otto Bot More Stable

    Florian Festi12/18/2017 at 23:19 0 comments

    The Otto Bot had still been in the "Unstable" group all the time. Very soon next year a school class is going to build a whole set of Otto Bots. Also there is not much left to do. I did some last tweaks and set the default for leg length to 34mm instead of 37. This is barely enough to fit the servo in but makes the robot a bit more stable.

    This makes it stable enough to move it into the "Misc" category.

    As we are going to laser cut a bigger number (ok, only 15ish) of Otto Bots having to deal with separate pieces would be a pain in the ass. So I added a new "tab" feature that add little gaps in the circumference of the parts. Right now it is only supported for Edge classes and straight lines.

    While proper Edges get the tabs automatically parts drawn "by hand" with .edge() and .corner() or .polyline() need to get their tabs also added by hand. I will add tabs to corners in the future but the situation there is a bit more complicated (and not as pressing).

    First tests have shown that value of 0.2mm works well  with our laser cutter. The parts stay in the sheet but are easy to snap out.  Making the tabs bigger results in a surprisingly strong connection of the between the pieces and their surrounding.

    In theory the tabs should be enlarged by "burn" on both ends. But "burn" is not only used to adjust for the width of the cut but also the determines the stiffness of the fit between parts. So I rather decouple burn and and tabs. This way the proper value for the tabs will just work no matter what burn value is used.

  • What happened so far

    Florian Festi08/19/2017 at 13:24 0 comments

    When we decided to do a Otto Bot workshop in early 2017 I drafted the chassis pretty quickly. Although the legs are a bit complicated - the body basically is just a hinged box I already had - it quickly looked like a robot. But only with the workshop approaching got the last details fixed - e.g. the holders for the PCB, the "teeth" holding the head shut, the hole for the main switch, the final size of the ankle screws.

    In parallel a group of people was working on a new firmware for the robot and a GUI for moving and calibrating the robot and to create new movement pattern. They currently still lack proper documentation and I have not yet decided whether to make them part of this project here or if they should get their own place - either here on HackaDay or may be just on GitHub.

    As a result of this effort the chassis grew an additional mode switch that allows switching between different programs.

    We also did building instructions in German with a lot of pictures.

    With this in place we did two workshops with 5 kids each.

    Lessons learned:

    • Kids do not that the strength put the part together if they are cut very stiff - adults often do neither unless one uses tools like a vice or a mallet.
    • Pressing the ankles onto the servos is hard and prone to damaging the servo gearing.
    • Pressing on the legs is a bit better as they can get pulled on by a screw.
    • Building the robot takes kids 3 1/2 hours + the soldering of the electronics which we did in fore hand for our second workshop.
    • The legs are pretty complicated with several possibilities to put things together the wrong way.

    Improvements to the chassis since:

    • New driven ankle now uses a servo horn
    • Simplified main switch position
    • Simplified the legs a bit

View all 3 project logs

  • 1
    Cutting the Chassis

    While Boxes.py allows setting any thickness this is really meant be be cut in 3mm plywood with the exception of servo mounts in the body (the two top most parts) which should be cut from 5mm plywood to get the right depth for the servos. Material with different but similar thickness should also work just fine. Check that the (body) servos will poke through the two layers. Always measure the actual thickness as it often differs from the nominal value. Baltic birch has worked well for us. Poppler is a bit weak but may work now as some weak points in the model have been addressed.

    For the head you do not need to change any settings except the burn value. It depends on the properties of the laser cutter and material you are using. It is possible to cut the parts stiff enough that most joints do not need to be glued together. But then you may need a hammer, vice or press to get things together. If you use brittle material as acrylic this is not an option and you have to use a smaller burn value to get a more loose fit.

    For the legs you have a few settings to consider. The anklebolt diameters are meant for a M3 screw that get threaded directly into the wood. If you are using a different screw size you need to adjust these two.

    The default leg length is 37mm. But we found the robot to be a bit less prone to falling over with shorter legs. 34mm being the minimum - which is what we used in our workshop.

    Note that you may want to add some logo at the side of the head before cutting the head. Just edit the resulting file in your vector graphics / CAD program e.g. Inkscape.

    Depending on your laser cutting software it may be necessary to manually select the order of the parts cut. For the head the rectangular holes in the hinges need to be cut first. Then all the other holes and the outer border of the parts last.

  • 2
    Assemble The Head

    Check if you have all parts


    Start with the top part.

    The hole for the USB port must be on the left of the robot (on the right when you are looking at it from the front)

    When assembling the bottom part put the top part in place before adding the side pieces.


    Glue in the servo mounts and screw in the first two servos.

  • 3
    Solder the electronics


    Solder the pin headers to the Arduino Nano.
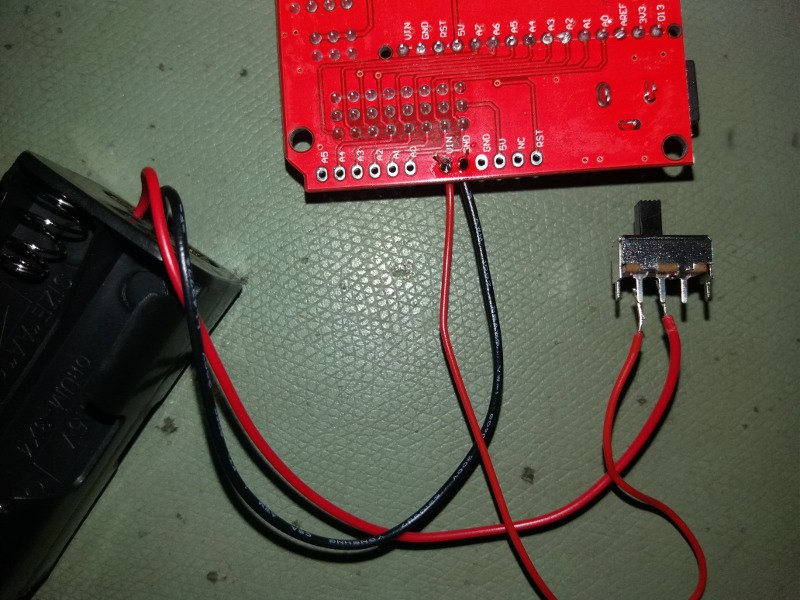
    Solder the sliding switch between the battery holder and the break out board using the red wire. Also solder the black ground wire of the battery holder to the breakout board.

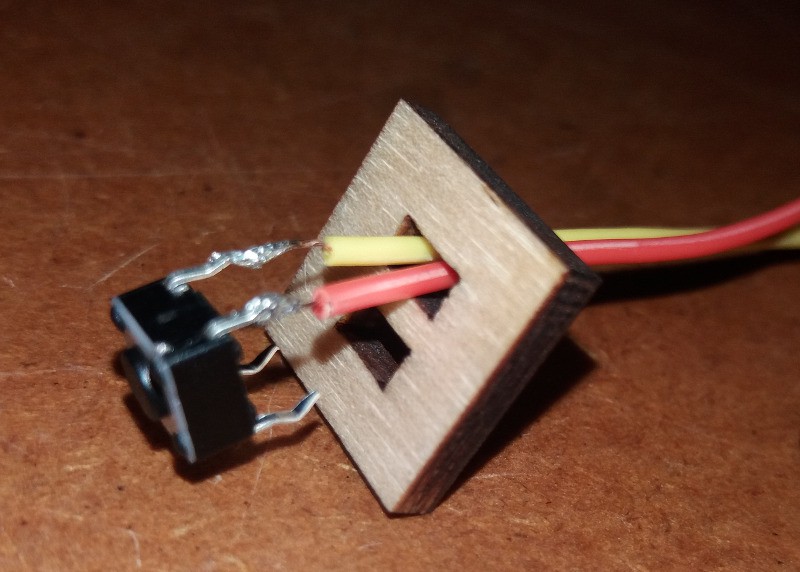
    Cut off the headers of two jumper wires leaving female connectors at the other ends. Put them through the push switch mounting plate and solder them to the push switch on the other side:

    Then press the pins of the switch into the holes of the plate.

View all 6 instructions

Enjoy this project?

Share

Discussions

Marc wrote 02/20/2024 at 17:49 point

I'd love a DXF file too.  I'm a teacher and I'd love to be able to use this for my classes.

  Are you sure? yes | no

Marc wrote 02/20/2024 at 17:49 point

I'd love a DXF file too.  I'm a teacher and I'd love to be able to use this for my classes.

  Are you sure? yes | no

mhein2 wrote 10/24/2019 at 21:02 point

Where can I download a DXF file for the laser please?

  Are you sure? yes | no

Patrícia wrote 04/12/2019 at 09:36 point

I did not understand the thickness of the wood. most of it is 3mm, but which part exactly is 5mm? Thanks

  Are you sure? yes | no

Camilo Parra Palacio wrote 10/25/2017 at 02:57 point

great improvement from last one, thanks for sharing!

  Are you sure? yes | no

Similar Projects

Does this project spark your interest?

Become a member to follow this project and never miss any updates