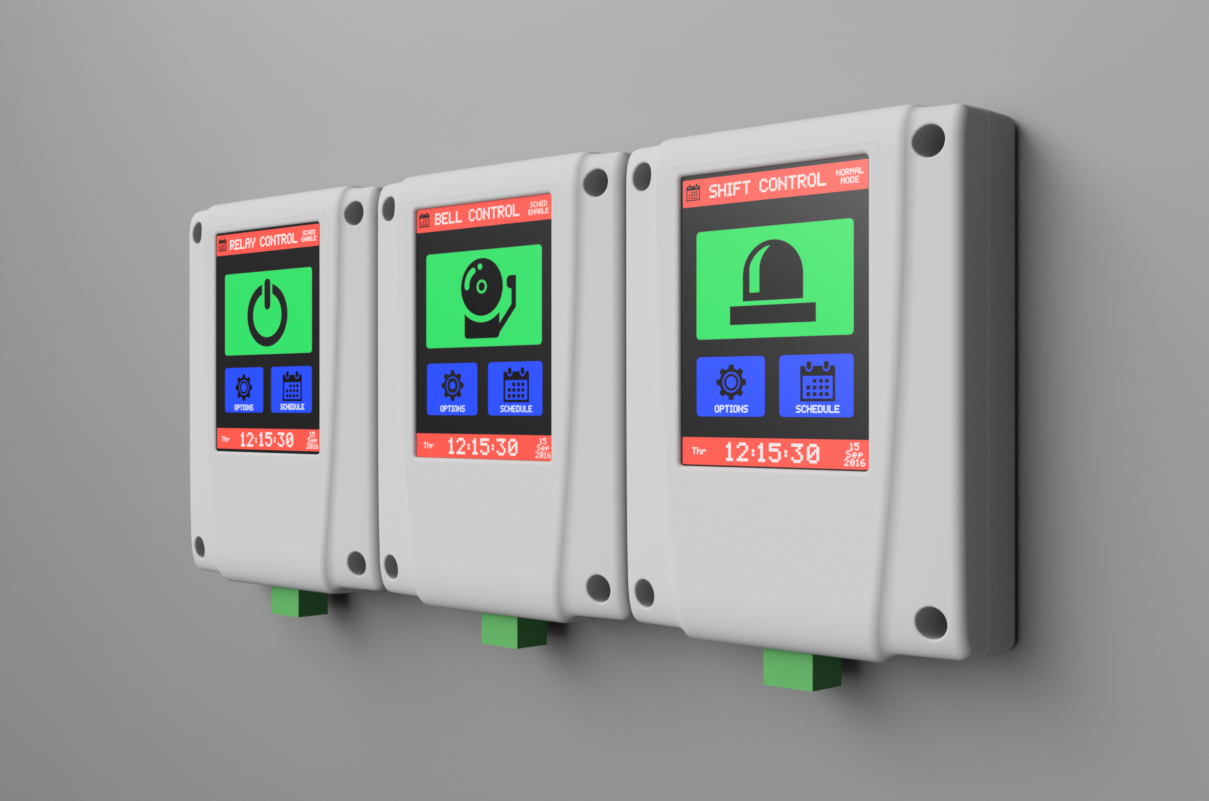
Close
0%
0%

Tick Tock Timer

The Tick Tock Timer is a School Bell timer packed with features

Similar projects worth following
The Tick Tock Timer is an advanced touch screen driven 7 day single channel timer suitable for use in Schools & Factories to automate bells & sirens.

3 schedules with up to 40 relay control events can be created including 5 holiday periods.

Included is a very accurate Real Time Clock, WiFi, NTP, Multiple schedules, WebGUI and Auxiliary relay output.


Features

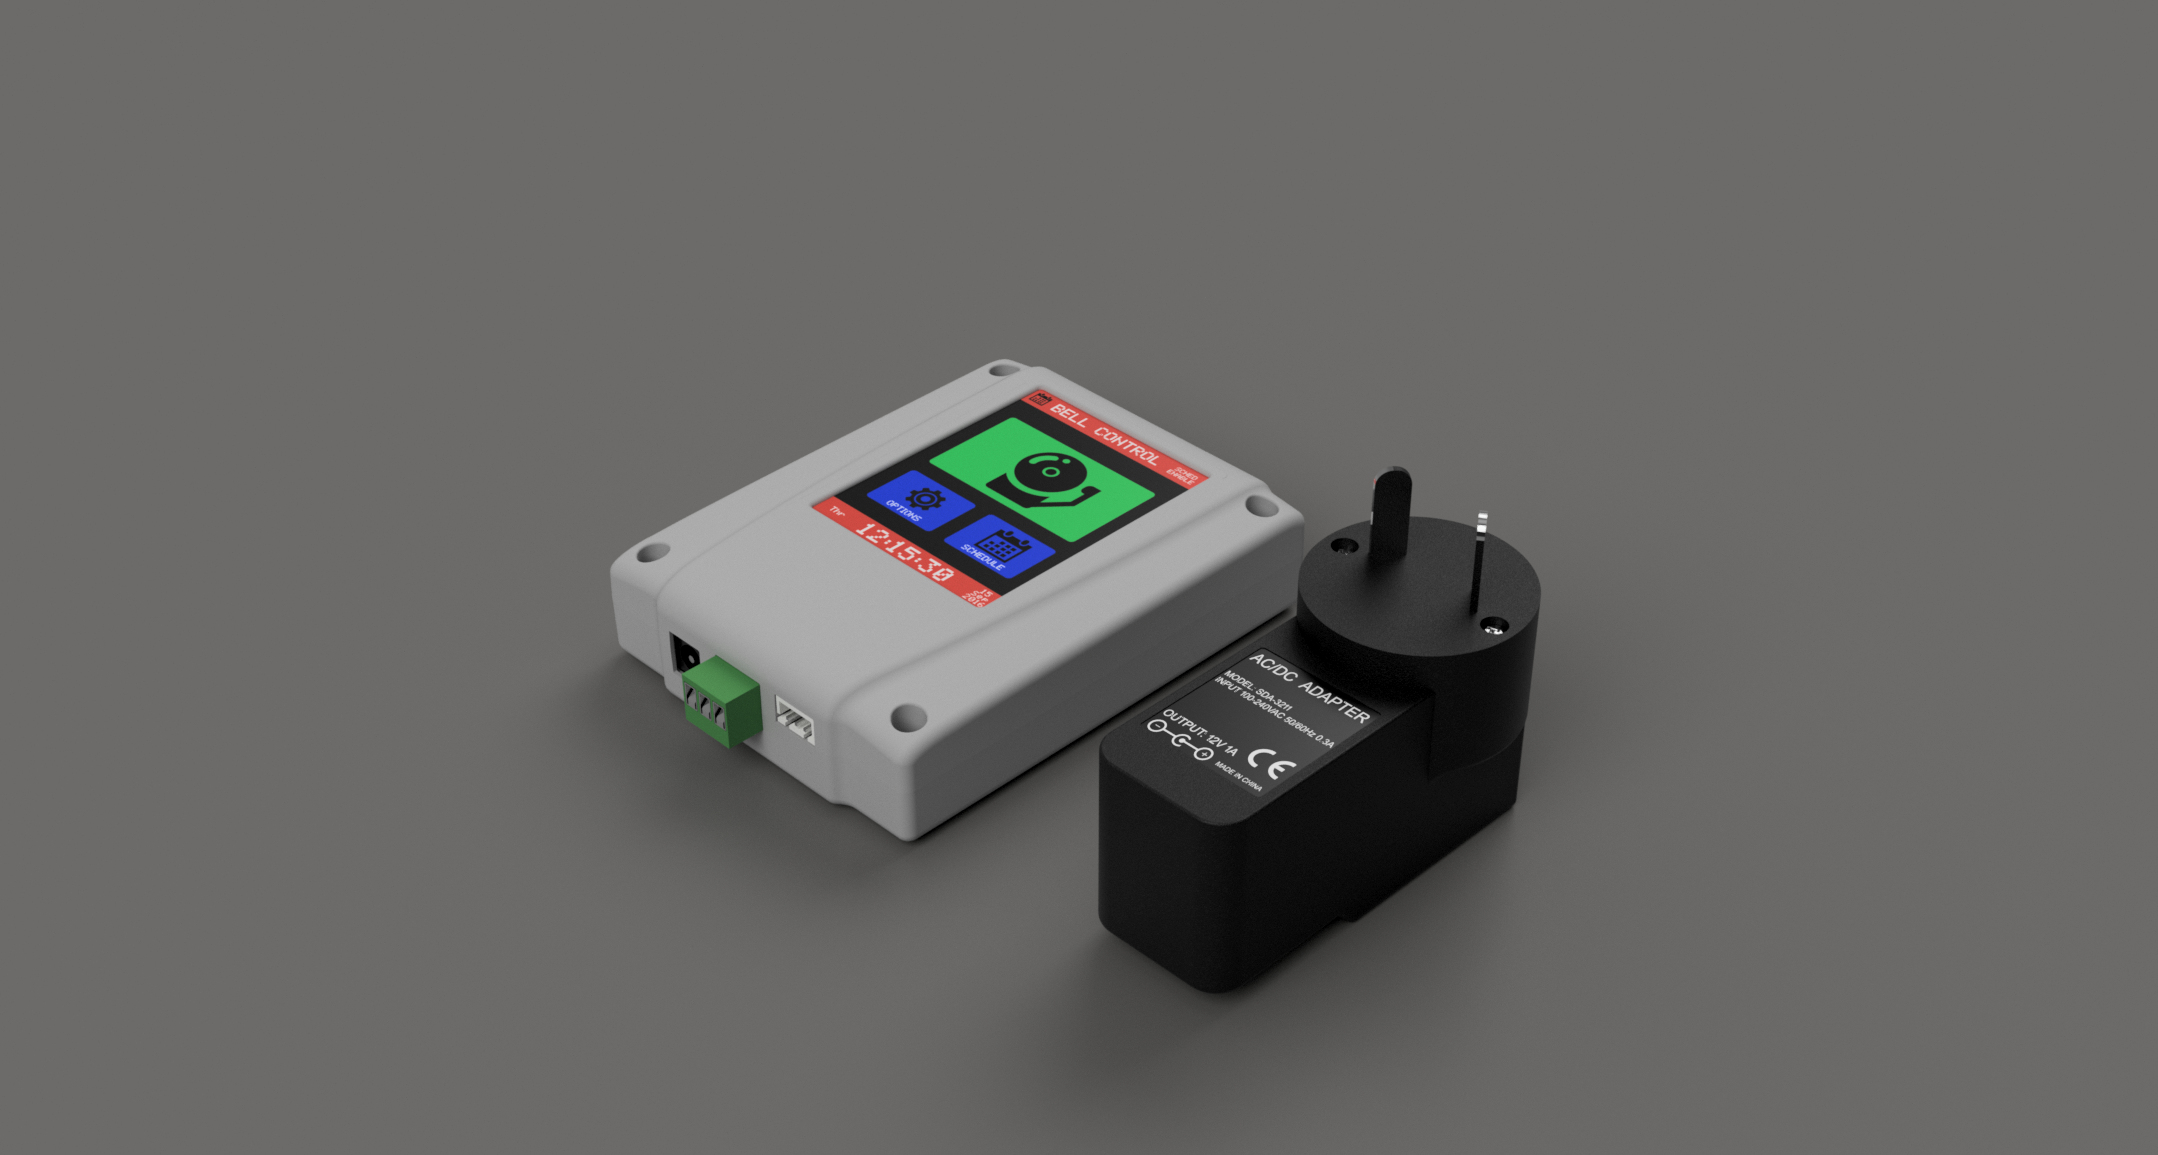
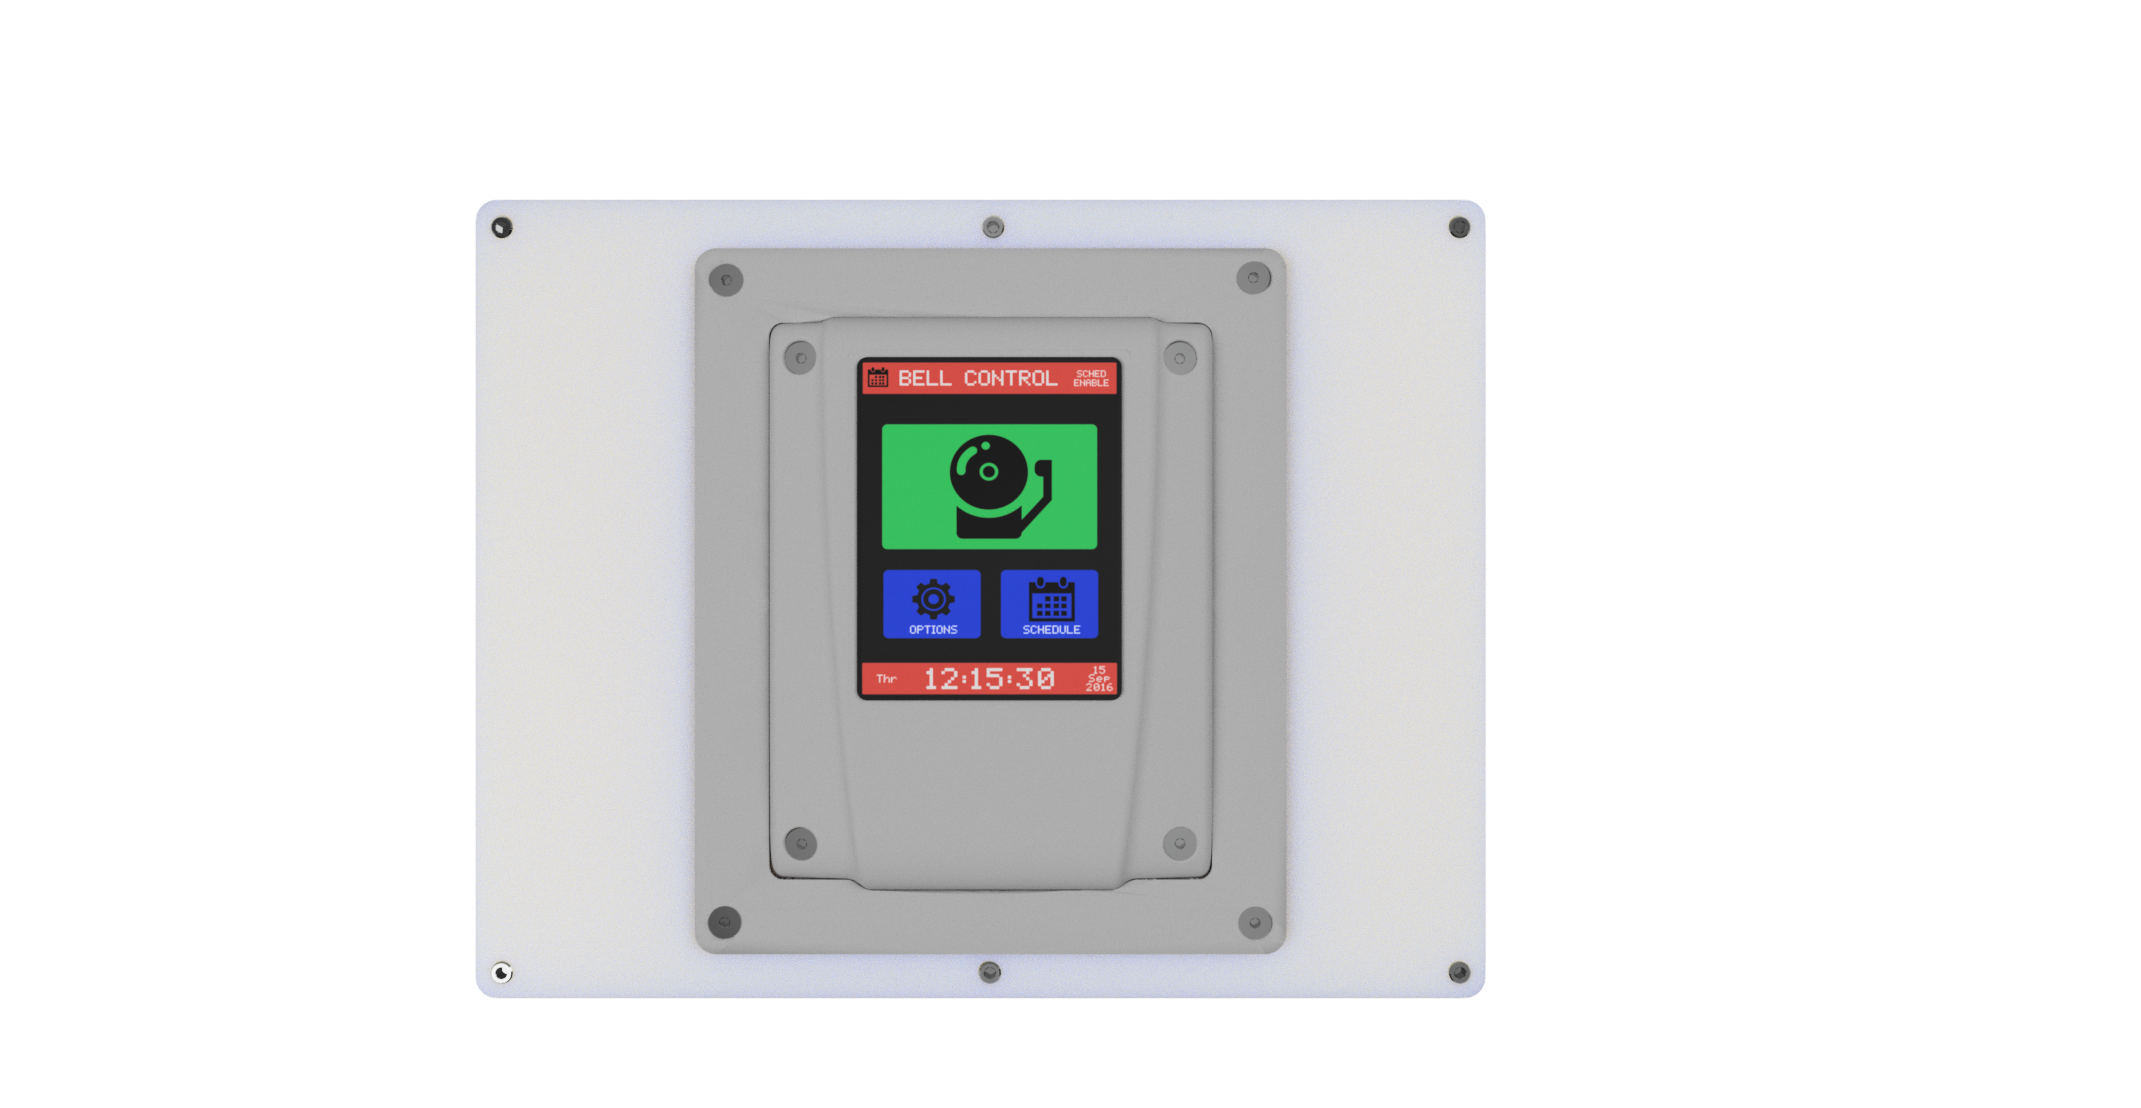
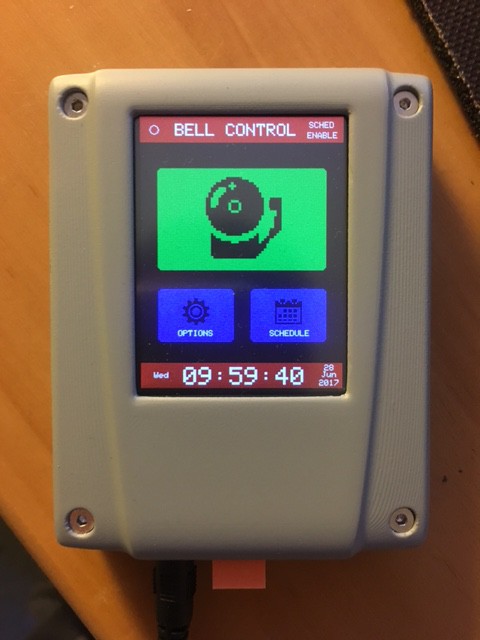
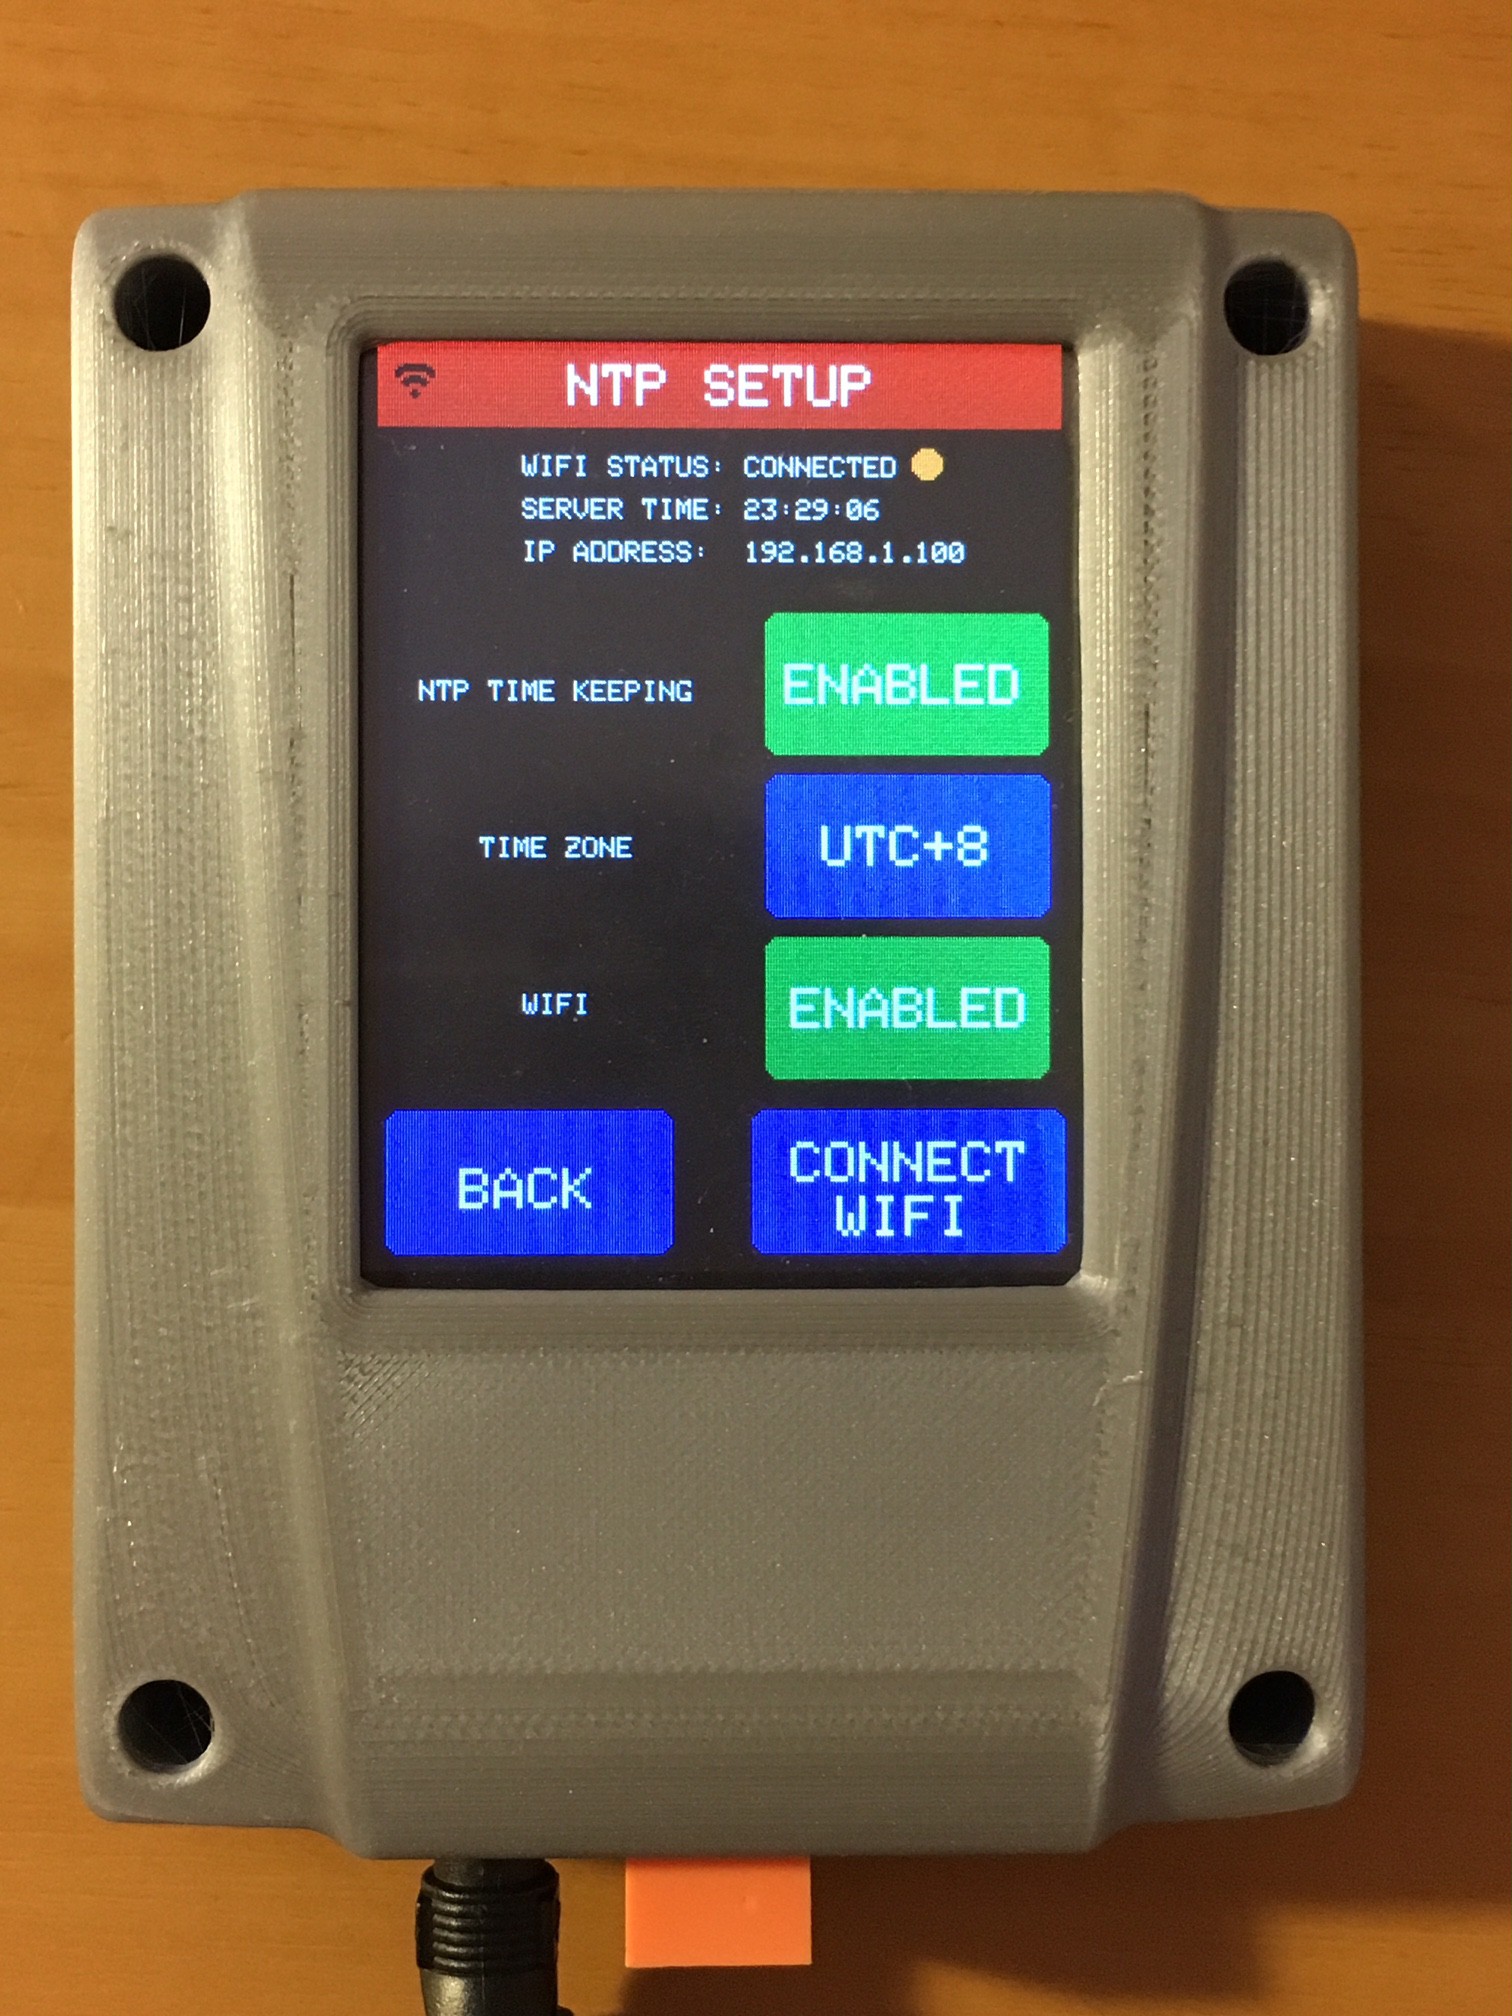
  • 2.8' SPI ili9341 Touch Screen display
  • ESP8266 MCU
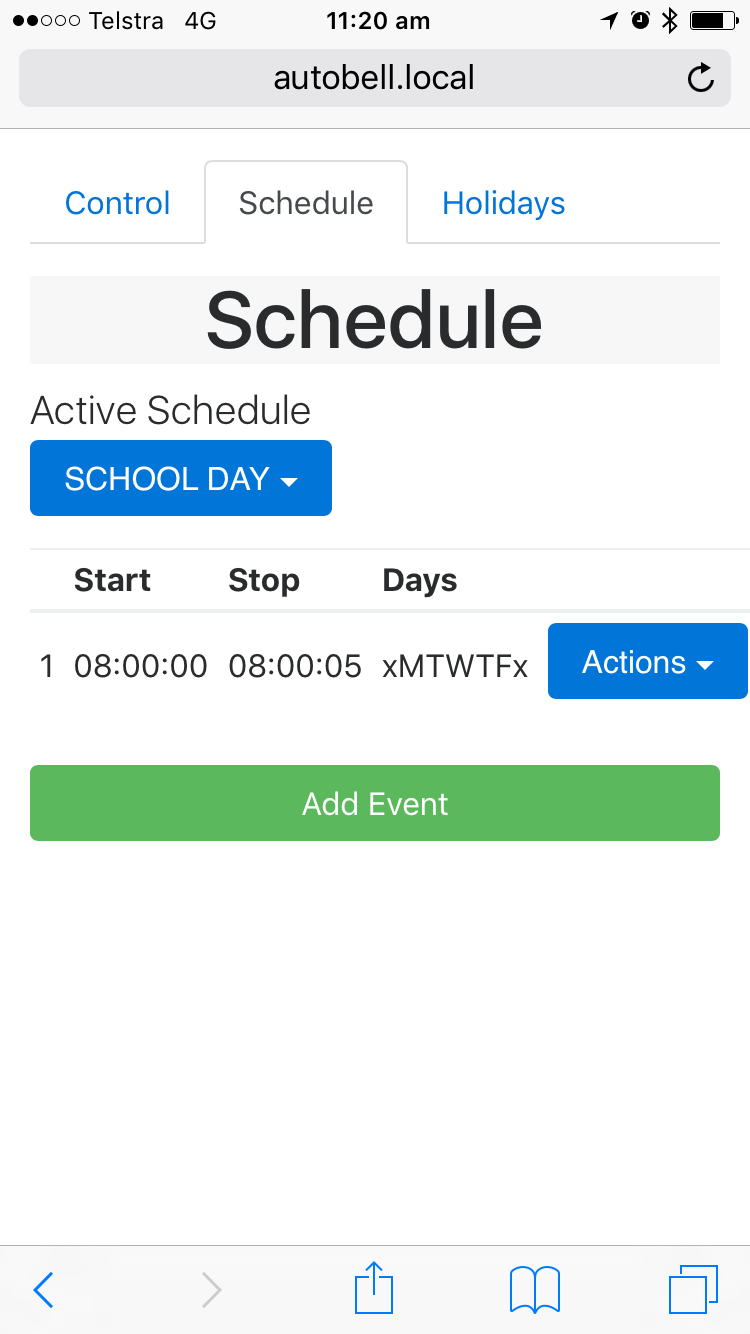
  • 40 Programmable events with 5 Holiday Periods
  • 3 Schedule which can be named/saved/loaded
  • Lunch & Break Manual countdown timer mode
  • Accurate DS3231 RTC and Daylight Savings adjustments
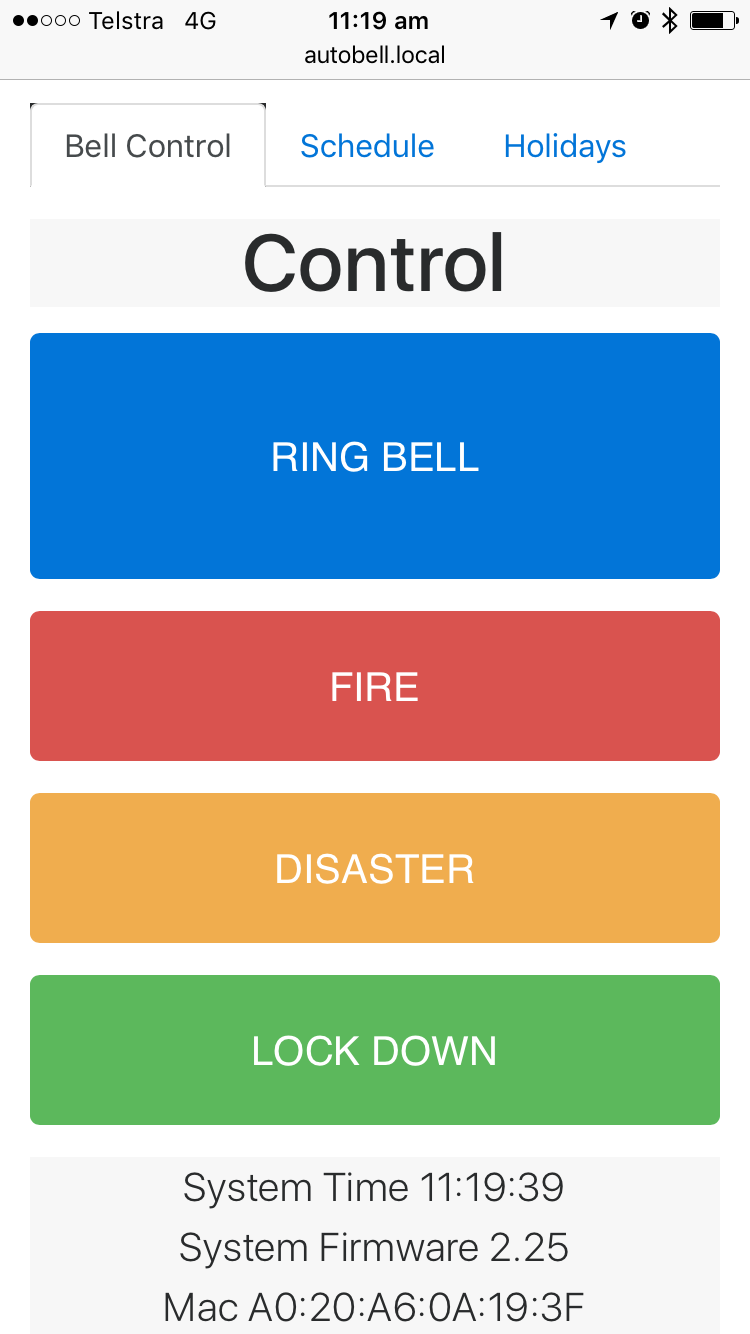
  • Configurable event action (onboard relay & external pin high/low)
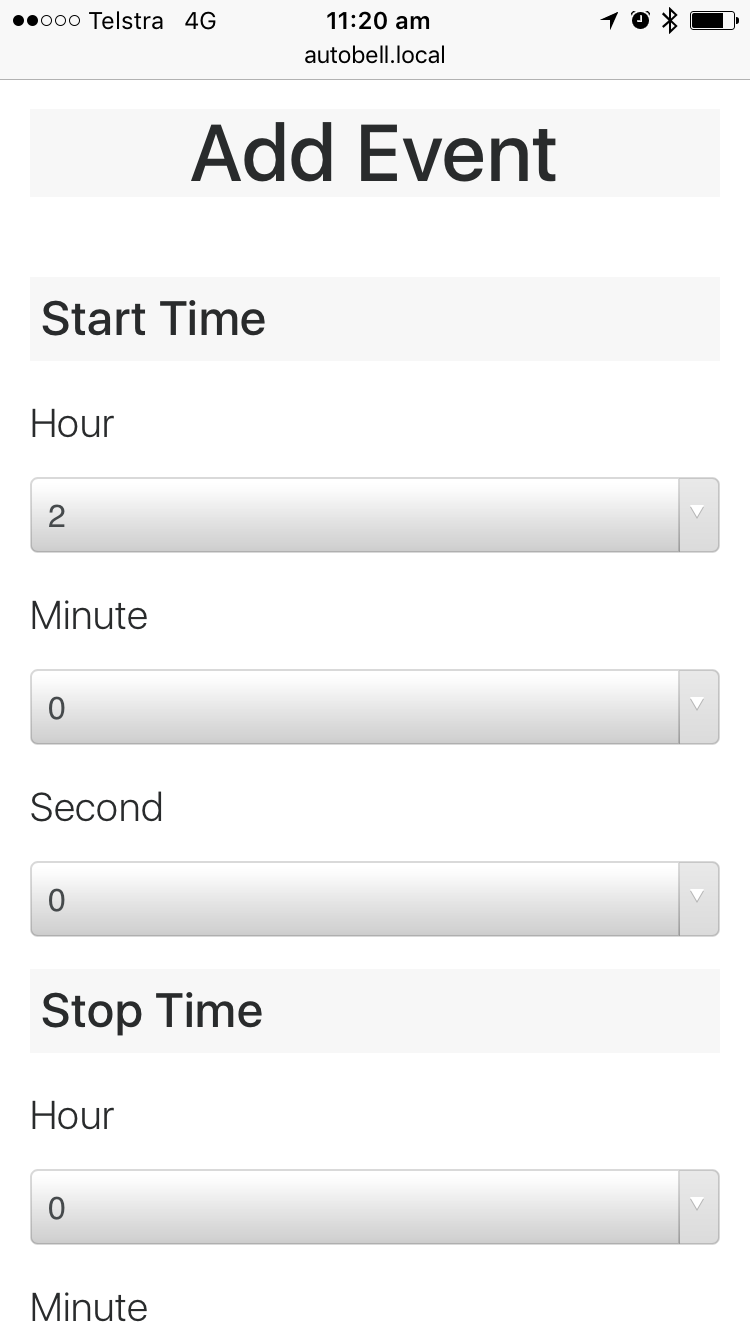
  • Events able to be set to the second on per day based
  • Configurable Disaster/Lockdown/Fire drill pattern
  • Wifi based NTP
  • WebGUI for triggering bell or drill patterns
  • OTA Firmware Updating


Event & Holiday Configuration

  • Events - Relay Close/Open time (to the second)
  • Holidays Period - Start/Stop date with no event


System Modes

  • Customize the GUI - Relay/School/Factory/Lunch&Break
  • Lunch & Break - Set lunch/Break countdown timers

Use Cases

  • School Bell Timer
  • Factory Bell Timer
  • Lunch & Break Timer

The Team

  • Firmware - Jasper
  • PCB Design - Leo
  • Enclosure Design - Jasper
  • Prototype- Jasper
  • Manual Design - Mark
  • Distribution - BellTimers.com / ECP Timers


Where are we at?
The conversion over to ESP8266 is complete and first 60 units have been produced

Belltimers.com / ECP Timing Equipment is now the official re seller for USA/CAN

Shelly Primary School in Perth, WA is the fist Australian school to have the tick tock timer installed.

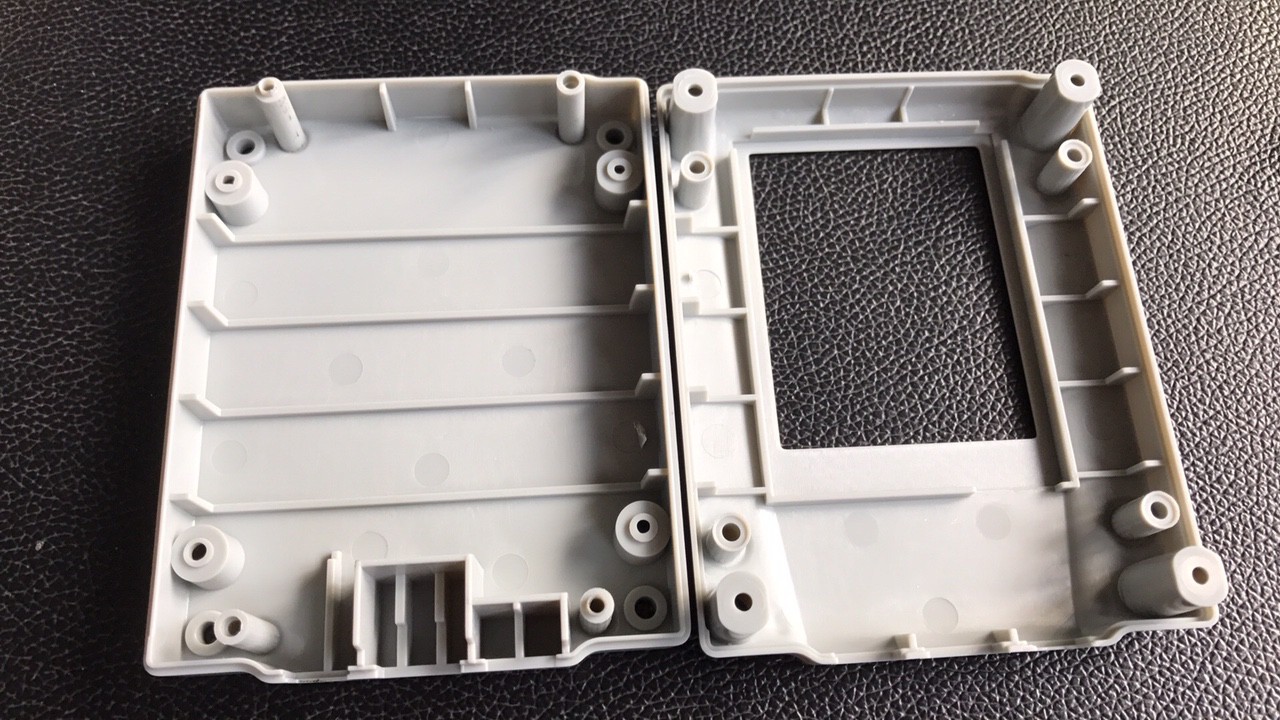
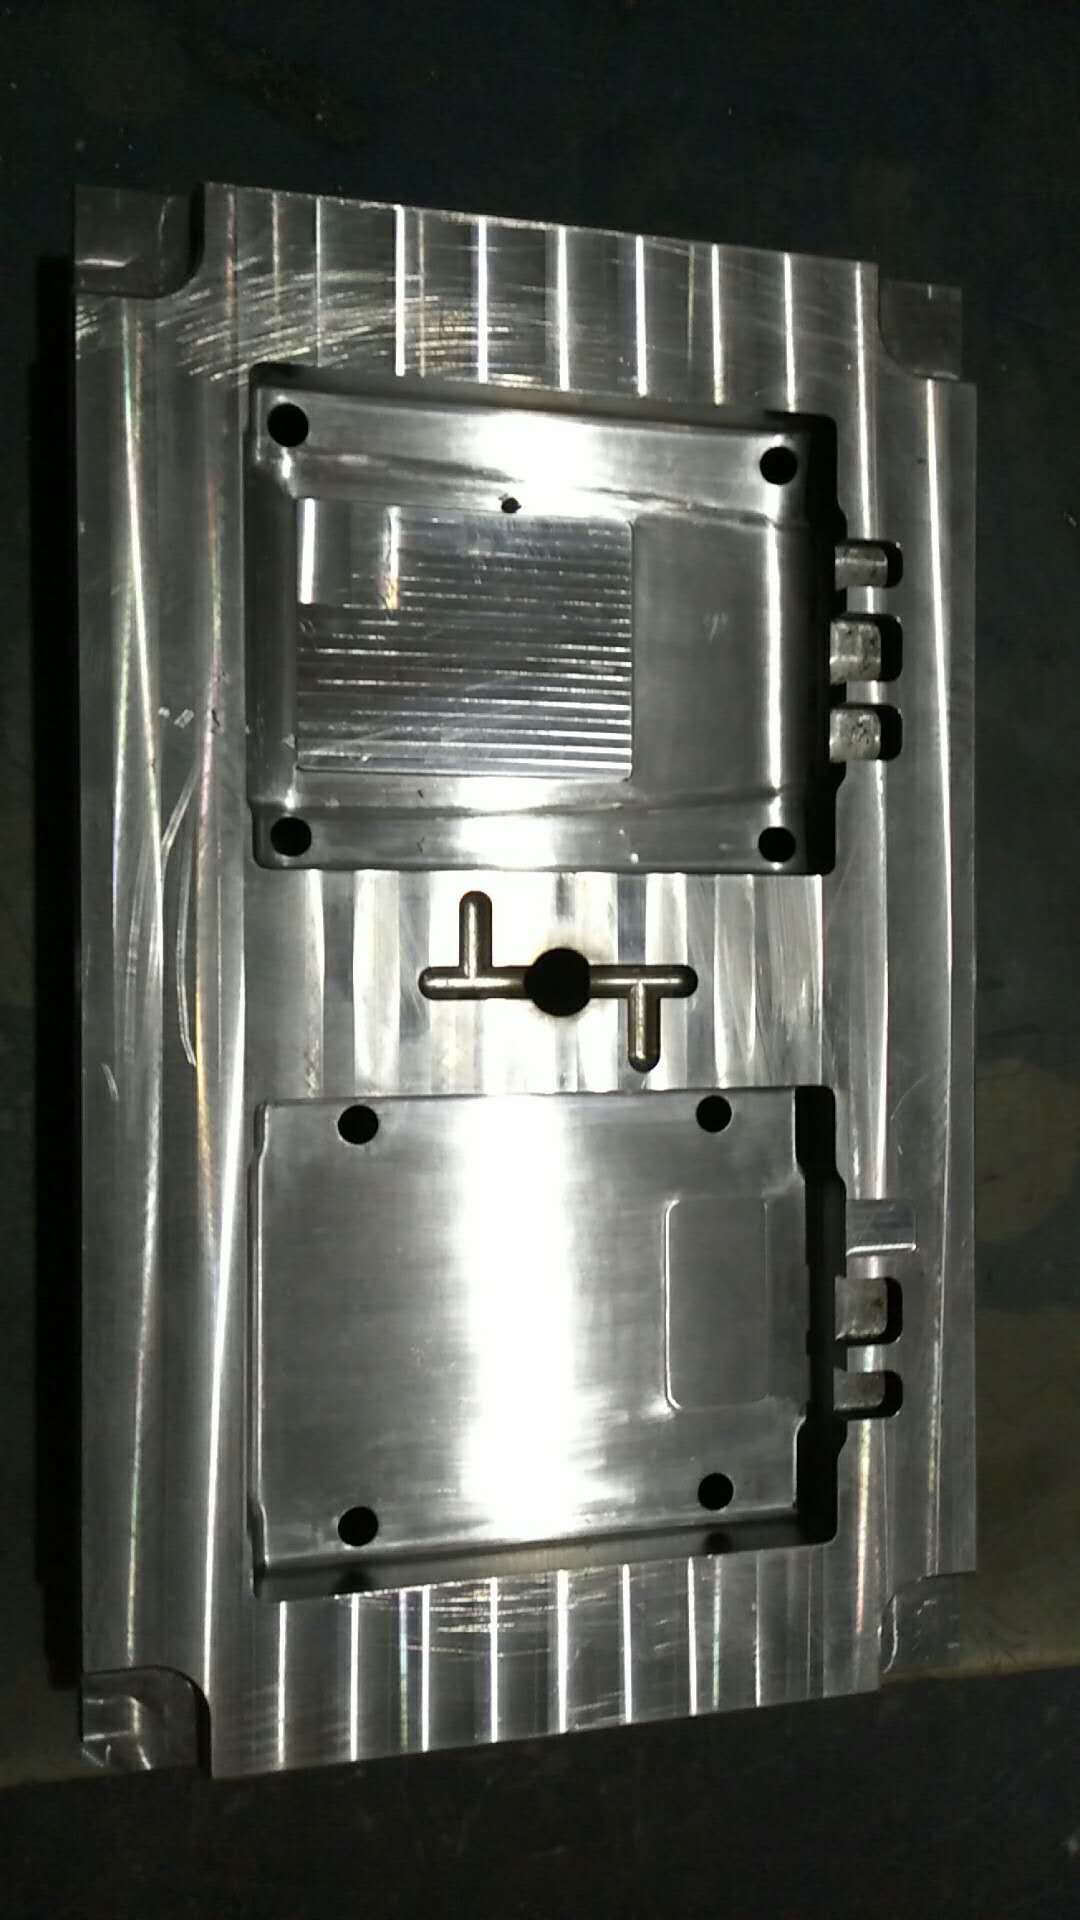
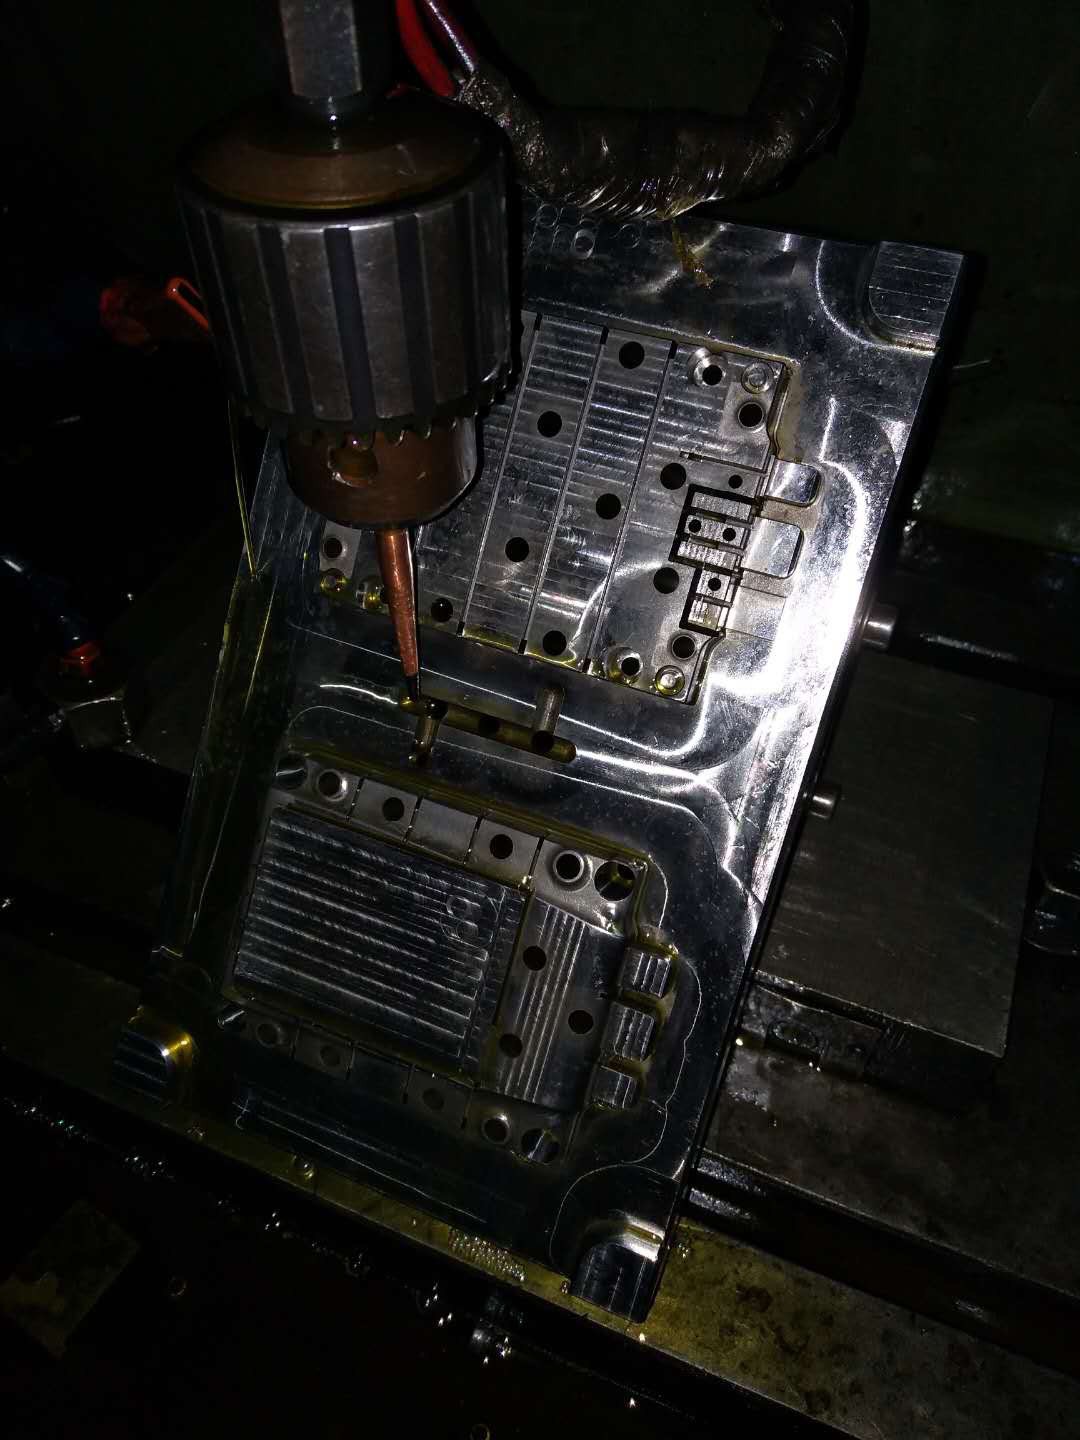
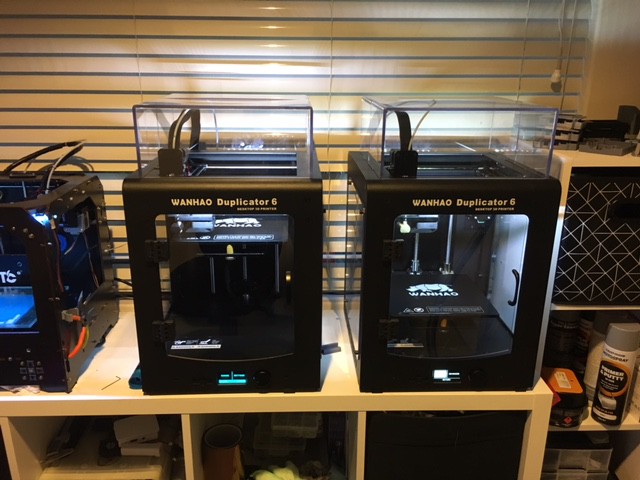
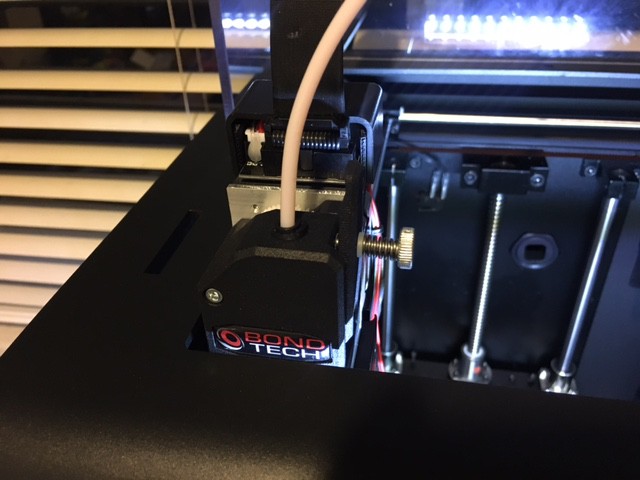
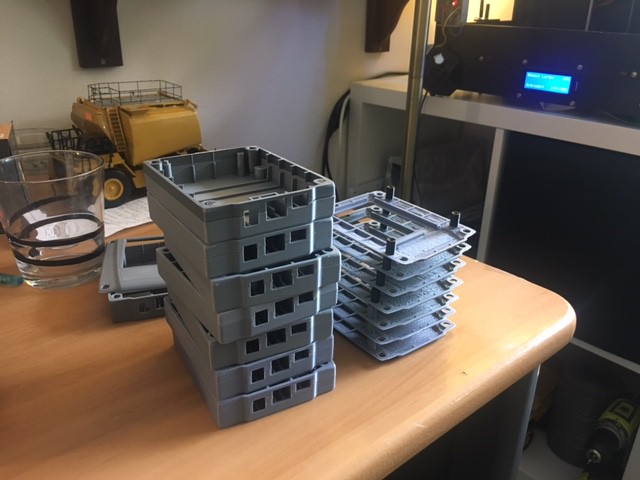
Once I have enough money though the proceeds of sales I will be switching from 3D printing to Injection Molding for the enclosure. All money from the project has been re invested into the product development.


Video Overview

  • 1 × ESP8266 (Formally MEGA2560)
  • 1 × DS3231 Real Time Clock
  • 1 × Single Channel Relay
  • 1 × 2.8' TFT Display ili9341 SPI
  • 1 × 3D Printed Enclsoure PLA printed in 3 Pices with some gluing

  • Project Update: Whats new?

    Jasper parker03/22/2018 at 15:26 0 comments

    Its been quite a while since I posted a project update so here is whats been going on.

    Whats New

    Further Firmware Development (New Features & Bug Fixes

    • New firmware version binaries are copied onto my NAS which will deploy the firmware OTA to any timers int he world requesting an update
    • New Audio Output Feature about to be released. Using SoftwareSerial I have been able to turn the ESP8266 Rx pin which is exposed as the middle pin of the external white connector for simple digital pin toggle of external relays, into a Tx pin for sending serial commands to an external wav/mp3 module containing an SD card with bell tones. When in Tone Output mode the events allow you to choose which bell sounds will play. This feature is intended for use with school or factories using PA based signal systems instead of electric bells.


    Switching to Injection Molded cases has been fantastic. These are my current production steps

    • Cases produced in China and shipped to another location in China
    • Electronics are produced and installed in the cases with 2 screws
    • Cases are shipped to me (finally damage free)
    • I open the cases and update the firmware to latest production version
    • Battery installed in each unit for the RTC
    • Each timer is tested for 24 hours being assembled in the cases with all 8 screws
    • Timers are either shipped in orders of 10-30 to distributor in Canada or sold individually online

    New Website in development

    Feel free to take a look and provide feedback. Load speeds will be slow, my ADSL upload speed is about .8Mbps and I am hosting it on a raspberry pi while developing it. All images have been produced with Fusion360 / Photoshop.

    http://59.167.111.135:8881/index.html

    Some of the 3D renders done in Fusion 360


  • First Injection Moulded Cases

    Jasper parker12/04/2017 at 03:45 0 comments

    Some pictures of the first injection moulded cases.

    They are still in China, they will be checking the PCB fit for me before sending samples.

    I went with a light grey colour to keep a light and friendly look as the darker case protoypes I made such as black just didnt have the feel I was looking for.

  • Inejection Moulded Cases

    Jasper parker11/27/2017 at 12:21 0 comments

    After spending countless hours maintaining 2 Wanhao D6 3D printers churning out cases, gluing the case parts together and installing PCBs I have saved up enough money through the proceeds of sales (around 120 units) to have the tooling made for injection moulding the case.


    The first samples should be in my hands within a few weeks. In the meantime here are some pictures of the tooling.


  • Post Processing 3D Printed case for Premium Finish

    Jasper parker09/16/2017 at 04:13 0 comments

    I have developed a way to get a premium finish on the 3D printed cases.

    Currently I am only using the premium cases when selling direct to Australian schools/business's, not for bulk wholesale orders to re sellers overseas because of the time it takes to do and lower sales value.

    The process involves Automotive High Fill Primer and Sandpaper

    My process is as followed

    • Spray 3 coats and allow to dry
    • Sand under dripping tap with 1000 grit sand paper
    • Spray 2 more coats
    • Sand under tap with 2000 grit, very lightly


    Raw untouch 3D print. Typical layer lines visible.


    3 coasts of filler primer with a light sand. Layer lines all filled with original plastic showing though on some edges.

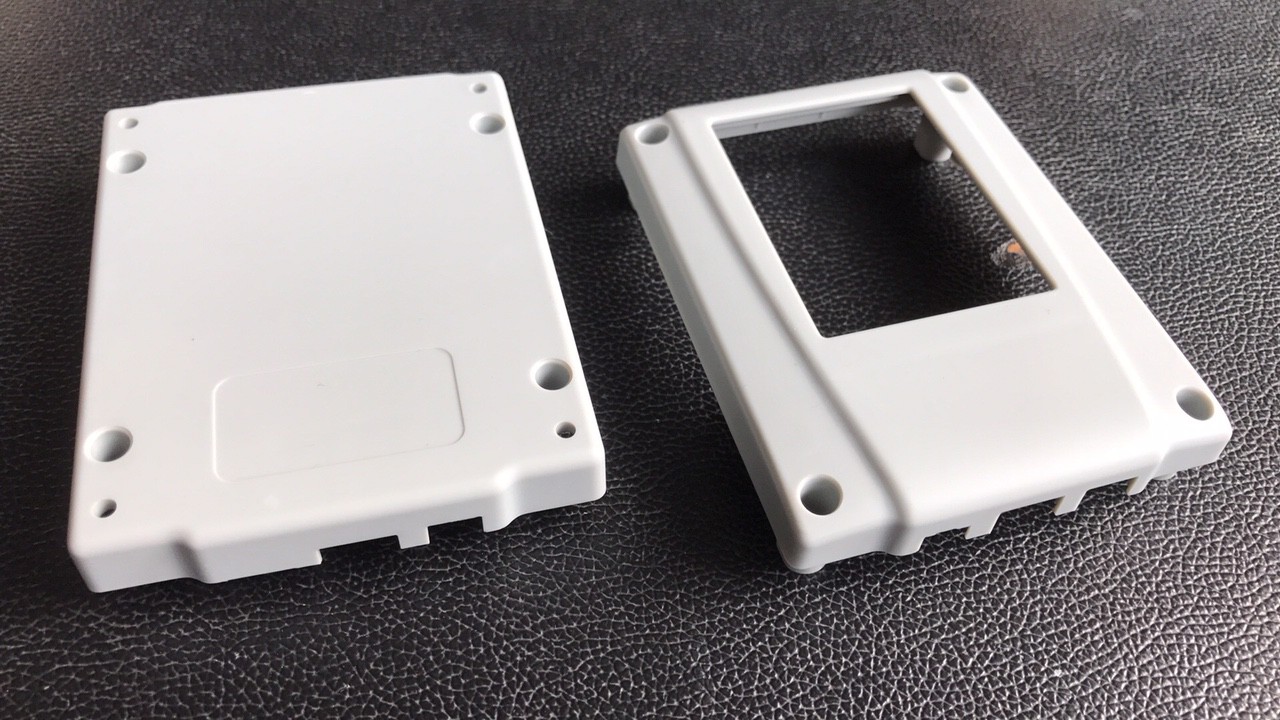
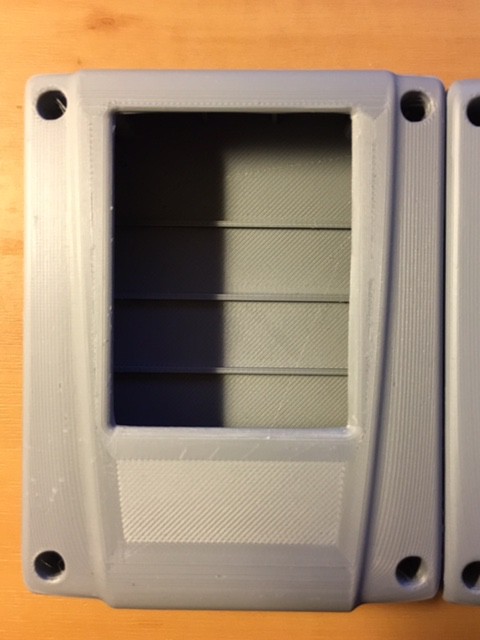
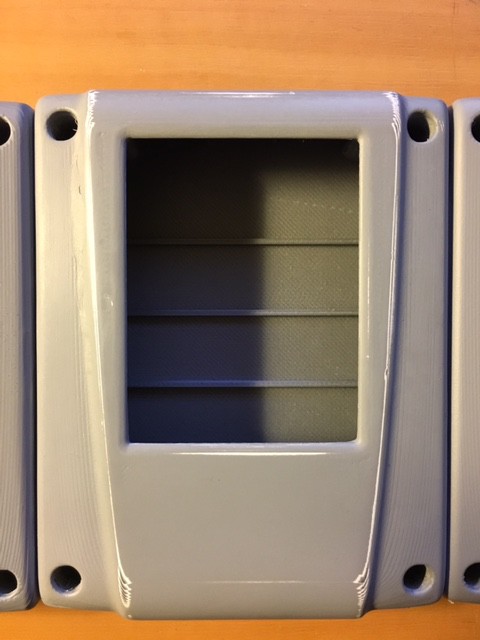
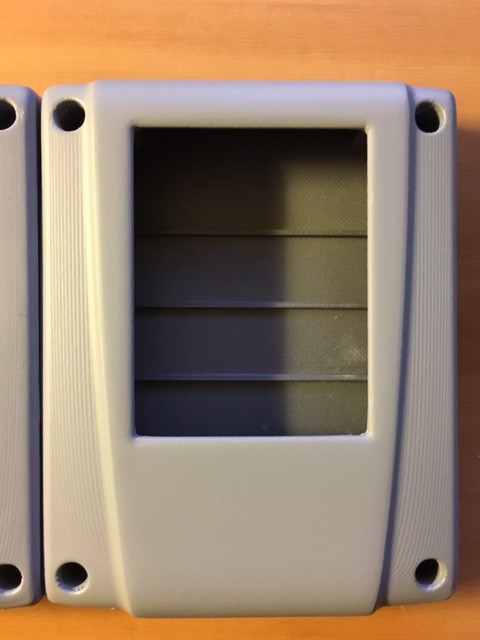
    2 more coats of filler primer with very light sand. All surfaced are now filled and polished looking. Actually feels and looks better than low cost injection molded plastics.
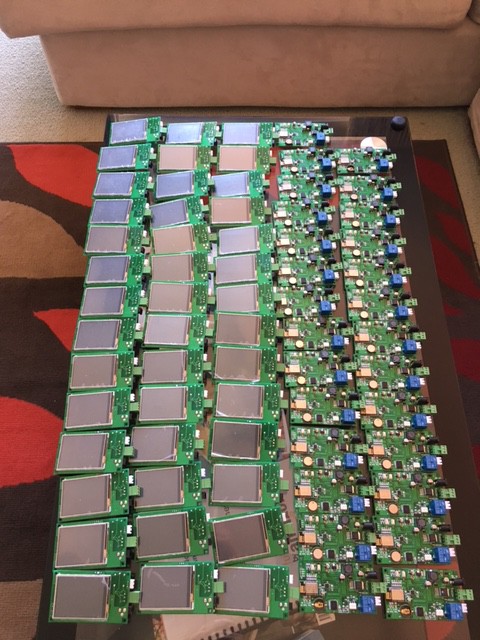
  • New shipment of 80 Timers arrived..some broken.

    Jasper parker09/16/2017 at 04:03 0 comments


    A shipment of 80 timers arrived last week. 5 timers had broken screens. It looks customs may have gone to town on the box poorly re wrapping the PCBs afterwards.

    I will send them back to the factory for replacement down the track.


  • Excellent Sales for Month of August

    Jasper parker09/16/2017 at 04:00 0 comments

    Just a small update, the month of August was a great month with 41 Tick Tock Timers sold.

    These sales have been a huge help, allowing me to purchase a second 3D printer (Duplicator 6) as well as upgrade both of the extruders and nozzle to Bondtech BMGs with Swiss All Metal hot ends.

    Reliability is key for my printers.

    Producing the Tick Tock Timer cases at 40+ a month is a lot of work, anyone running 24x7 printers would be able to relate to this.

    (The truck in the background is a 1/50 scale mining truck I 3D printed / painted which I am doing for a Perth company as a side income)

  • New Responsive Design WebGUI

    Jasper parker09/16/2017 at 03:51 0 comments

    The most requested features from customers has been a way to use the timer with a smart phone and PC.


    After considering development times for iPhone/Android/Windows apps I decided a small light weight responsive webgui would be the best cross platform solution.

    In developing the WebGui I came accross the following challenges

     - Running out of RAM on the ESP8266

     - Bugs in the Web Server Library

    I ended up having to modify the WebServer library to get Chunked Encoding to work properly as serving up the webgui using a traditional HTML transfer with a Content-length entry in the header was not possible, causing End Of Heap RAM reboots not matter what I did.

    I really felt I was running the little ESP past its limits however after many many hours of work I have a stable responsive webGui being served up from the Tick Tock Timer.

    --This functionality is now available though OTA firmware update--


    The WebGUI supports the following

    • Trigger the Bell (Relay)
    • Trigger a Disaster mode (Pre defined relay pule patterns)
    • Add / Remove / Edit events
    • Add / Remove / Edit holidays
    • Deployed Icon when saving WebGUI link to Home Screens

    Interface designed using Boot Strap and Pingendo.


  • New Lib = Stupidly Fast Draw Speed

    Jasper parker04/03/2017 at 14:57 0 comments

    After updating the firmwares ili9341 LCD display library to Adafruits latest release I was please to discover a nice 25% draw speed increase!!! But that was just the beginning....

    The test I was using was the timers main screen draw which was taking 560ms to draw, brought down to just 450ms with the library updates. I was really pleased with that!

    HOWEVER...

    I decided to hunt around for any new developments for the ESP8266/SPI/ili9341 and discovered an ABSOLUTE GAME CHANGER.

    Its called TFT_eSPI > https://github.com/Bodmer/TFT_eSPI

    Its a SUPER CHARGED version remake of the Adafruit driver.

    After compiling this into the Tick Tock Timer firmware the main screen now draws in just 76ms and is looks as instant as your smart phone.

    Thats over a 700% increase in draw speed...outstanding.

    Anyone who has worked with arduino/esp and all the cheap LCDs that go with that know screen draws are quite slow, but you just live with it. This driver changes all of that.


    This really opens up the ESP8266 / ili9341 to the possibility of some decent Wifi Enabled EmBedGames-BoyDuinO style projects.

    I really encourage anyone with the hardware to download the library and be blown away by the draw speed, just check out some of the examples included!

  • New Feature: Save / Load up to 3 schedules !

    Jasper parker02/23/2017 at 09:14 0 comments

    After exploring the ESP8266 SPIFFS library I have decided to use it for saving / loading of the schedules, allowing you to save schedule for different things such as school day, exam day, interview day, etc.

    The way it works is like this

    • Active schedule still resides in EEPORM like format, left over from the original MEGA2560 implementation
    • 3 save blocks are available for saving schedules into, writing them to files using SPIFFS.
    • When saving a schedule you can choose one of many useful names
    • When a schedule is LOADED from SPIFFS it is brought back into the EEPROM structure and flaged active

    I put a video on Youtube to show how the feature works.


  • Continued Firmware Work

    Jasper parker01/27/2017 at 15:39 0 comments

    Over the past few weeks I have been spending allot of time doing further work on the Tick Tock Timer firmware

    The list of changes and bug fixes is HUGE, if anyone wants to read them let me know in the comments section. (I don't actually expect anyone to really be interested in them)

    Most noticeable additions

    • Web based user Interface added which can trigger the Manual button as well put the system in any of the 3 disaster pattern modes
    • Further refinement of the Wifi / NTP UI screen including live signal indicator in the form of a colored dot

    I have also noticed the lines of code have reached just under 14,000....and that does not include the 19 ESP8266 / Arduino libraries. Im STILL using the Arduino IDE and using the tabs to break the firmware down into 16 tabs. Getting quite large.


    Other statistics (ESP8266)

    • 460400 bytes (44%) of program storage space. Maximum is 1044464 bytes
    • 50984 bytes (62%) of dynamic memory, leaving 30936
    • Binary File is 454KB
    • Firmware work began on 4/12/2014
    • 2 Prototypes (MEGA2560+ESP8266) | 4 Hardware revisions (MEGA+ESP)

    Wifi Connection Screen

    Current WIFI/NTP GUI. Wifi strength indicated with GREEN ORANGE or RED circle. Live display including server time.


    Anyone interested in how I have structured the MAIN LOOP here it is

    void loop() {
    //Check if we need to make daylight savings adjustment.
    checkDaylightSaving(EEPROM.read(988));

    yield();

    //Check to see if we need to flag system as on holiday
    checkHoliday();

    yield();

    //Return to screensaver
    screensaver();

    yield();

    //Check if next event arrays need to be updated
    calculateNextEvent();

    yield();

    //Watch for touch commands
    readTouchInput();

    yield();

    //Service Touch Screen GUI draws
    navigation();

    //Print the current system time
    updateClock();

    yield();

    //Check if its time to trigger relay
    eventCheckRuntime();

    yield();

    //Pulse time sync check
    pulseTimeSync();

    yield();

    //Relay pulse timing service
    relayPulseService();

    yield();

    //Special Functions
    specialFunctions();

    yield();

    //Menu and security Timeout
    menuTimeout();

    yield();

    //Keep Follow Up Pulse timer ticking
    followUpTimerTicker();

    yield();

    //Service Time Drift Compensation
    timeDriftCompensation();

    yield();

    //NTP Service
    syncClockWithNet("TIMER");

    yield();

    //Check Wifi connection status
    checkWifiConnection("INTERVAL");

    yield();
    //Handle backlight dimming
    backlightFadeOutTimer();

    yield();
    //Handle HTTP server
    handleWebServer();

    yield();
    }

View all 26 project logs

Enjoy this project?

Share

Discussions

Peter Jetson wrote 10/09/2022 at 10:41 point

Hi, Jasper.  Is the Tick Tock Timer available in Australia to Australian buyers?

  Are you sure? yes | no

Marc wrote 04/01/2020 at 19:46 point

Wauw this is amazing great job and good luck selling!

  Are you sure? yes | no

Jasper parker wrote 04/01/2020 at 23:13 point

Thanks marc, the product has been selling consistently for the past 18 months. 

  Are you sure? yes | no

Badbabyboyo wrote 06/05/2019 at 16:39 point

If you don't mind, could you tell me what language/libraries you used for this? Was it NodeMCU Lua scripting, Arduino, plain C, or something else? Awesome product btw. Something designed to do one thing and do it well, love it.

  Are you sure? yes | no

Jasper parker wrote 04/01/2020 at 23:15 point

Libraries used are all Arduino based. Thanks for the feedback!

  Are you sure? yes | no

Santira243 wrote 02/09/2018 at 13:33 point

Excellent!!! Congrats!

  Are you sure? yes | no

Jasper parker wrote 11/27/2017 at 12:14 point

Thanks Ryan. Its been a lot of work. All of the proceeds from sales go straight back into the project.  Iv just had the tooling done for injection molding of the case. I'm about to to do a blog post about it. 

  Are you sure? yes | no

ryanhall8 wrote 11/27/2017 at 08:49 point

Good job! Great idea!

Spanish dictionary

  Are you sure? yes | no

Similar Projects

Does this project spark your interest?

Become a member to follow this project and never miss any updates