Close
0%
0%

Hand Drive

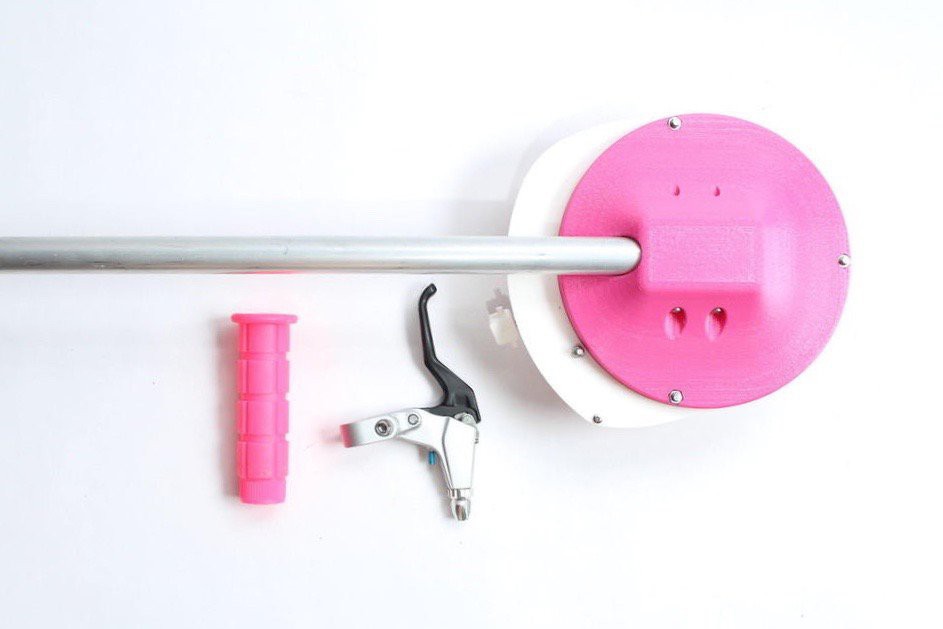
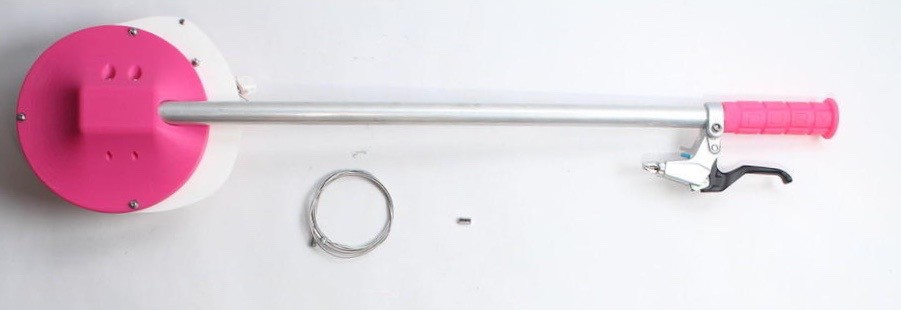
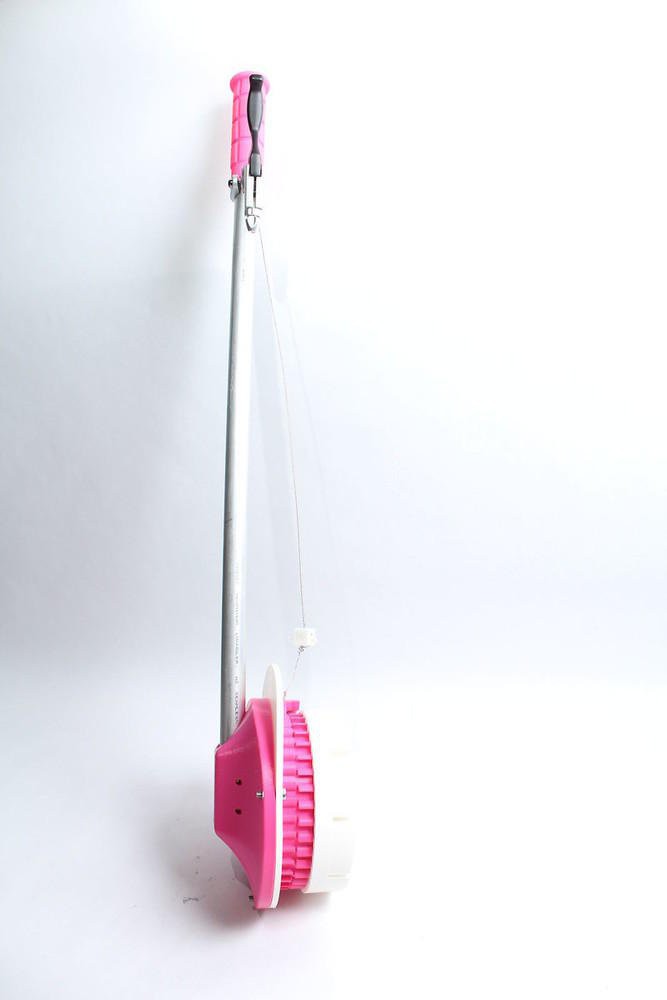
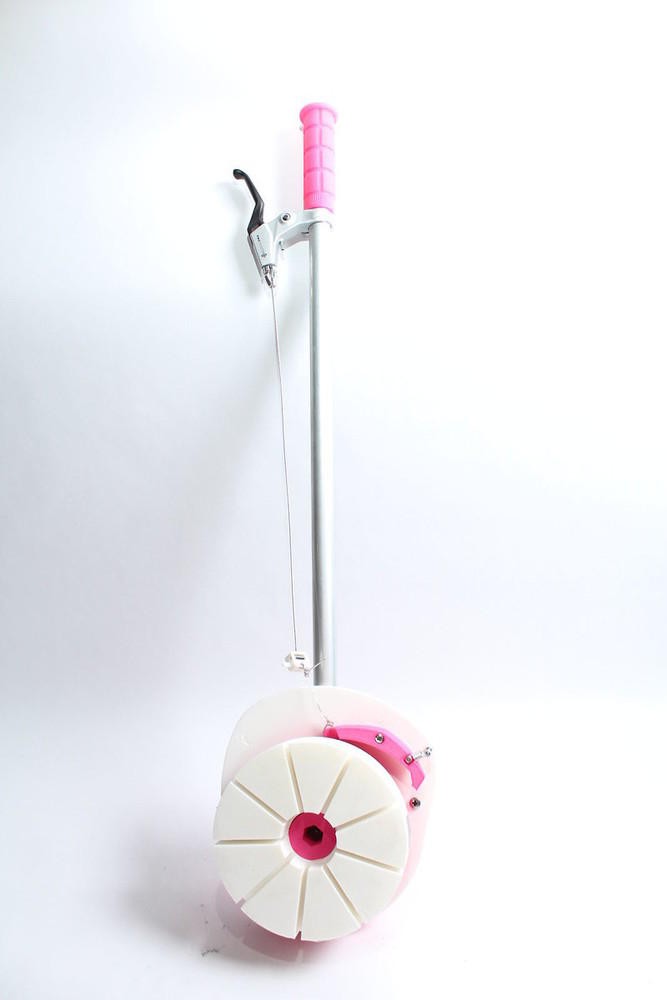
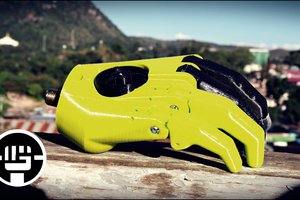
A wheelchair attachment that allows any wheelchair to be powered in a rowing motion. It is 3D printable, open source, and available to all.

Similar projects worth following
We were given the challenge to hack a wheelchair and make it better. Through research, we discovered that lever-powered wheelchairs were proven to be a better physical motion for the user. We also discovered how expensive they were—anywhere from $2,000-$10,000.

Instead of redesigning the wheelchair, we came up with the idea of a Hand Drive wheelchair attachment that could make lever-powered wheelchairs more accessible to everyday users. Our attachment is almost entirely 3D printable, it’s completely open source, and costs only $40 to make, which is less than 1% of the cost of its competitors on the market.

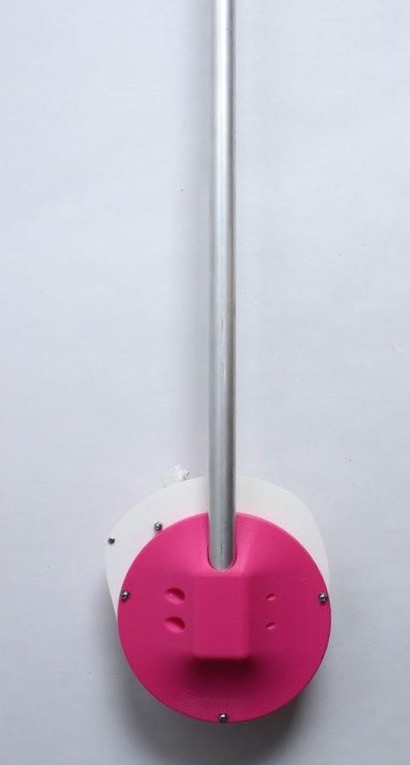
The Hand Drive wheelchair attachment can be attached to any wheelchair and allows it to be powered in a rowing motion. This motion is better for your back, as it uses bigger muscle groups, and it keeps your hands cleaner. Because of our price point and the adaptability of the Hand Drive, all wheelchair users now have access to a lever-powered wheelchair.

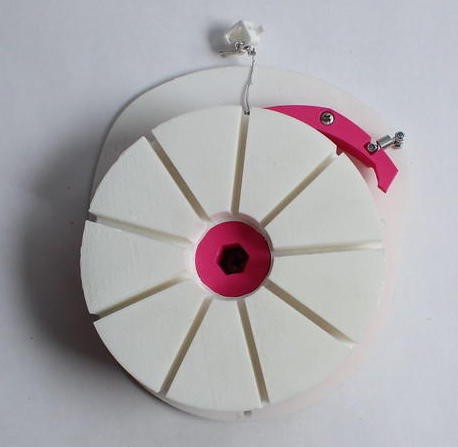
Our Hand Drive wheelchair attachment uses a dual ratchet mechanism. One ratchet is naturally engaged by a spring and moves the wheelchair forward as you pump the handles. To move backwards, the user squeezes the brake on the handlebar which disengages one ratchet and engages the other, and the wheelchair moves backwards.

Because it is open source, it can be adapted for individual user's needs. For instance, if the user is a child and they have smaller hands, they can adjust the handles and handlebar length to fit. If the user has unusual wheels on their wheelchair, then they can adapt the attachment piece so it can fit snugly on their wheel as well.

  • 10 × 3D printed parts $10
  • 13 × 5/16 inch ball bearings $4
  • 5 × M3 30mm bolts
  • 6 × M3 lock nuts
  • 1 × M3 20mm bolts

View all 18 components

  • Testing it out

    Kate Reed09/21/2015 at 00:47 0 comments

    I went to test out the Hand Drive this week and it went really well. I took the Hand Drive to an assisted living home nearby called, the Village of Duxbury, in Duxbury, Massachusetts, and ooh boy, were they excited! I had about ten people test out the Hand Drive, and they were very impressed and enthusiastic. Almost every one of them said, “You should go on Shark Tank!”

    I was impressed with how well the Hand Drive held its own. This was the first time we really just “let it go” for people to test. The testers were pretty brutal with it, but it didn’t show any wear and tear. They were banging it around, going in circles and dropping it all over the place, but the Hand Drive was strong and did not give in.

    It was interesting having people try it and hearing their instant feedback. One comment kept popping up over and over again- they kept saying how easy it was and how great their back felt. A lot of the older people had some back trouble in their past, and were hunched over, so they just kept saying how relaxed they felt. It was very inspirational for me because I felt we had made something that really could change people’s lives. I was just watching one face light up after another as people tried it. The testers really got it, and that was awesome.

    One observation in testing was that the height of the bar really depends on height of the person, and it is really a personal thing. The height of the bar also determines the posture of the user, for instance if the bar is shorter, the user has to lean forward more. A lot of the older people were small, and the Hand Drive did look a little big, but this is the beauty of it being a do-it-yourself project. The Hand Drive is 100% customizable.

    Another observation had to do with the brake lever and the age of our testers. Many of the older users couldn’t imagine a brake lever being anything other than a brake lever. On our Hand Drive, the brake lever reverses the direction. It was funny watching them reverse direction over and over again as they reached for the brake! When we had originally thought of the Hand Drive concept we hadn’t really thought of it helping older wheelchair users too, but now we can totally see why it makes perfect sense for this to be a considerable chunk of the market. With the Hand Drive using bigger muscle groups it’s less tiring, and many of the older people get fatigued easily. That hunched over look you often see in elderly people comes from leaning over a walker or wheeling a wheelchair in the traditional way.

    Overall, it was an incredibly inspiring day - to get out in the world and have people try the Hand Drive. We’ve been working in a bubble for so many months, guessing and supposing what a user’s needs might be. Having live feedback, and such positive feedback, was both helpful and energizing!

  • Gearing Up, Round Two

    Kate Reed09/02/2015 at 22:15 2 comments

    We always want to keep our big picture goal in mind of keeping the Hand Drive wheelchair accessible to all. With this particular model we would need to replace each wheelchair axle to give the gear something to hold onto, and that would make this design much more complicated and costly for the user. We came up with a redesign that just uses the natural axle of the wheel instead of replacing it.

    This new design has a fixed sun instead of the planets. The fixed sun is much easier because it is already in the center of the wheel, so we just have to give it a little divot so that it can lock onto the center of the axel. Now we have the planetary gears attached to the stacked gears and the annular gear attached to the spider, with a fixed sun gear. In technical terms, we are driving the planets now. The challenge of this design is that it would need a Lazy Susan bearing to hold it all together, because if not the entire system could just pull apart. The Lazy Susan would be attached on the annular gear as well as the stacked spider gear.

    After making all the models for this newest version of the Hand Drive, we did some research and looked for a Lazy Susan. The Lazy Susan’s were not as accessible as we thought they would be. They only come in a few sizes, all of which are too large for our model, and they are square based and our Hand Drive is circle based, which would just look ugly if we incorporated this Hand Drive. We ended the day knowing we had to move on from this idea.

    In trying to solve the dilemma of keeping the Hand Drive together, we needed to isolate various problems, the first being both the parts of the Hand Drive have to rotate separately with almost to no resistance in between. The second problem is that, in an ideal world, the user would crank the Hand Drive in a perfect straight line, but realistically the user would have some slop in their cranking and wiggle it a little. The wiggle that the user would naturally produce would create friction and potentially pull part of the Hand Drive right out if the connection was not strong enough.

    Our first solution was to try and create a series of tabs so the two sides of the Hand Drive could slide into one another. This wouldn’t work because both parts of the Hand Drive are circles, so there really is no way that we could slip the two pieces together.

    Our next solution was having one side have tabs sticking up and the other side having a track to receive the tabs, but this was a very messy solution, and wouldn’t work because it is relying on the flexibility of the plastic and essentially the weakness of the plastic to hold it in place, so it would likely break off quickly. This solution got us thinking in the right direction though.

    Our next solution involved loose bearings. In this solution, each of the two pieces of the Hand Drive would have a track for a bearing in a semicircle channel. The two pieces would fit together with just enough space for a bearing in between. Then you would slide the bearings in through the side, then put a screw in to lock it in place. This would both lock the two pieces in place, but also allow them to spin freely from one another.

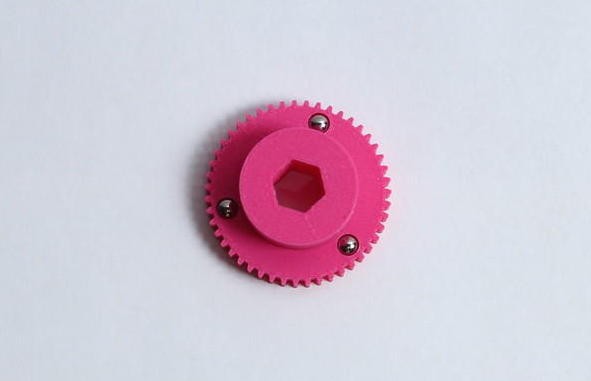
    With the planetary gears it is crucial that everything stay aligned. We also added three bearings to the sun gear and a track on the stacked gear to insure there is no friction between all the layers. This design adds an extra 12 mm to the Hand Drive, which is not ideal, but should not disrupt too much. We think we can lose the height in some other areas of the Hand Drive, so we are staying right on track!

  • Gearing Up

    Kate Reed09/02/2015 at 22:04 0 comments

    Now we are working on speed. Moving forward, we realize that using the bike hub as a model to gear up the Hand Drive is much too complicated. We came to the conclusion that although it would be nice, there is actually no reason for the Hand Drive to be able to switch gears. We are working on a design that allows the Hand Drive to be geared up all the time. While doing this we are learning a few things about planetary gears.

    Planetary gears are pretty much the only way to gear up for circular motion. To open our minds to other possibilities though, we looked at different ways of gearing up for all motion and explored all sorts of pulleys and actuators. We didn’t find anything that would work for our design though, because the different ways of gearing up require a different kind of motion. In most cases this would involve the lever on each side of the Hand Drive being offset from the center, which would give us a whole different set of problems and complicate things substantially.

    Even though we didn’t want to, we settled on planetary gears again, but this time we took a much deeper look. Planetary gears have three parts. There is the sun gear in the center, the planet gears that orbit the sun gear, and the annular gear that encloses the other gears. Although it would be nice if just adding these gears to the design would fix our dilemma, it is not that simple. Each of the three parts of the planetary gears has to have a different role. The most important part, which we didn’t realize before, is that one of the parts of the planetary gears has to be fixed.

    In our case we have the sun gear fixed to the wheel, being driven by the annular gear that is fixed to the handle, and then the planets are fixed to the axle of the chair, and are not rotating. The hardest part about this design is fixing the planet to the axle. By fixing the planets to the axle, we have to extend the axle of the chair and add a nut to lock onto. With this new design, our Hand Drive is geared up with a one to five ratio which is pretty hefty, if we do say so ourselves.

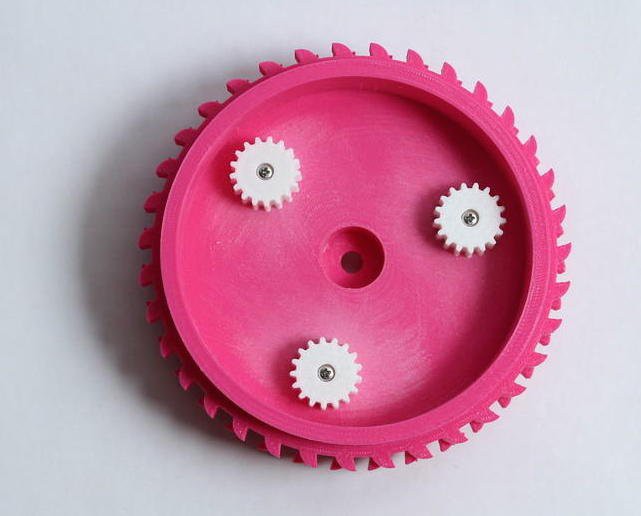
    We want our Hand Drive to be as thin as possible. The more the Hand Drive sticks out the more torque there is to deal with. It is also inconvenient to have something sticking out like that, and it’s ugly. We have come up with a very elegant solution that makes it both thinner, and prettier. Before we had a stacked gear that had to be thick so that it could absorb the force of the ratchet, but with this new design, we have made the stacked gear larger and hollowed it out. Now the planetary gears fit inside the stacked gear, thus taking out 20 mm of extra space that the planetary gears would require. We have the model and it looks beautiful!

  • Rewinding

    Kate Reed09/02/2015 at 21:54 0 comments

    We decided to take a step back to look at all of our previous prototypes and have a conversation. When we started this project, we had absolutely no idea how to use the software or even 3D model. With so many different prototypes completed, it’s time to take a step back and really evaluate them. This is that winding path we call the creative process, and we are used to this.

    We agreed that one of our earlier prototypes had more possibility, so we want to work on that particular prototype some more to see where it can go. This is the prototype that has two double ratchets, and was actually the prototype that we took to the White House. Now with a few months passed and a few prototypes later, we feel we have more skills then we did before and can take this particular prototype to the next level.

    We decided to keep the same basic design for this prototype, but instead of having two ratchets we are planning to use a double ratchet, something we discovered in one of our recent prototypes. With the double ratchet, we will have fewer variables to worry about. Because we have been working for a few months with the 3D printers, we also have a better sense of how much we can combine our design with the strength of the 3D printer filament before the Hand Drive will break.

    This redesign of the Hand Drive is stronger, smaller, and prettier. Now we have a really solid prototype of the Hand Drive that works at one speed, and does not break. Our next step is making it faster.

  • Overview

    Kate Reed08/14/2015 at 18:43 0 comments

    So far we have been through five major prototypes and dozens of sub-prototypes. It's been a long process but we finally feel like we are getting somewhere significant. We now have three final stages of the Hand Drive, one with a single double ratchet, one with three double sided ratchets, and one with planetary gears incorporated into it. Although we have gotten each design to a high level of functioning, we are still working and still trying to improve our designs.

    In the big picture, one of our goals is to work towards a design where the planetary ratchets can be 3D printed instead of milled. We never want to lose sight of our goal to make the Hand Drive affordable and accessible for all. Wheelchair user statistics inform us that wheelchair users are very unlikely to have jobs and, partly as a consequence, are substantially more likely than the remainder of the population to live in poverty. At all ages, income levels for mobility device users tend to be low. If we can pull this Hand Drive off we can significantly improve the quality of life for many- at a price point they can handle, and with the personal satisfaction of building their Hand Drive themselves with their own specifications.

  • Planetary Gears

    Kate Reed08/14/2015 at 18:32 0 comments

    Through long debate and lots of headaches we came up with a solution that would work. It is a combination of our two previous solutions. This solution involves a set of planetary ratchets with a ratchet on both the top and the bottom, with the ratchets facing opposite directions. The ratchets and planetary gears move as a unit either up or down when the clutch is pulled. The entire unit of ratchets and gears is inside an outer shell. The outer shell has the gear that the ratchets latch onto. When the clutch is pulled it pulls the entire set of gears and ratchets into the reverse direction, and when it is released it has a spring to pull it back into the forward position.

    So far we have modeled the planetary gears, the gear cage and the ratchets. We are thinking that we are going to end up milling a lot of the parts out of aluminum, but reuse as many of the bike parts as we can. We are starting to feel the time pressure of the end of school and are working hard!

  • New Design

    Kate Reed08/14/2015 at 18:26 0 comments

    New Design

    Once we had the center ratchet design almost working, it was time to face the facts. Although the planetary ratchets allowed for the Hand Drive to stay in one piece, it still didn’t fix a big picture concept that we wanted to address. The Hand Drive is slow, and we feel we can make it more useful to the user if we address this. To make it faster we have to use planetary gears. In trying to learn about planetary gears and how they work, we met with a bike mechanic, Jason, from Broadway Bike. We realized that what we wanted to do was very similar to how a bike works. With Jason, we took apart a bike hub, and he showed us step by step what each part does.

    We learned that with one set of planetary gears you can have three different speeds depending on what gear you’re driving- “driving” meaning which gear is being spun. You can drive the planetary gears, which is high gear and the fastest gear. If you drive both the planetary gears and the annular gear (the ring gear) together that is considered neutral, meaning it’s a 1 to 1 ratio between pedaling and the wheel. Driving just the annular gear is the slowest gear combination and is considered gearing down.

    The bike hub works with a clutch that moves up and down pulled by a cable. The cable is under tension so that when you click to switch gears it pulls the clutch at just the right tension to engage either the planets, the planets and annular, or just the annular gear.

    Knowing all this caused us to completely rethink our entire design, again. Learning about the concept of a clutch really changed our mindset, and we came up with two different variations of the Hand Drive involving the planetary gears.

    The first was the same as our current planetary ratchet design but with a clutch instead of the detent, as well as planetary gears embedded into the base. The idea was that when the clutch is down, it engages the bottom ratchet and locks into the planetary gears, but when the clutch is up, it unlocks from the planetary gears and switches the ratchets into reverse. In this design the Hand Drive was only geared in the forward position.

    The second design involved an extremely similar mechanism to the bike hub. It had a set of planetary gears in the middle and a ratchet mechanism on either side. One ratchet mechanism was always engaged with the planetary gears and the other would engage when the clutch was pulled. The ratchets would be in opposite directions.

    In the end neither of these solutions worked. The first didn’t work because the planetary gears weren’t actually doing anything, because the gears were not connected right. The second solution didn’t work because the ratchets ended up locking each other in place so the wheelchair wasn't able to move.

  • Moving Forward

    Kate Reed08/14/2015 at 18:25 0 comments

    Moving Forward

    The Hand Drive went to the White House. Whoa. Although meeting the president was super-duper crazy cool, we are not done with this project yet. The Hand Drive broke when President Obama tried it at the White House.The reason it broke was because the brake was on when the president tried to use the hand drive, and this caused way too much force to be on just one ratchet piece, so it snapped off. Believe it or not, we were expecting this to happen, just not when the president tried it. This has been a problem that we have been struggling with in our design. As soon as we got back from the White House, we started a redesign.

    When we sat down for our redesign, we came up with the idea of a planetary ratchet system, which means the force could be distributed throughout three ratchets as opposed to one. This works by having the ratchets on the inside of the gear rather than the reverse. When we figured out the mechanics of it, it worked out so that we could make both the top and bottom ratchet have the same rotation point. We thought about having them be on two different planes, but our epiphany came with the idea of combining the two ratchets into one. This way we still end up having the stacked gear as we did before so it can still go both forward and backward, but the entire unit is much more compact.

    We had one main design change in figuring out how to make the ratchet mechanism. In our previous design, squeezing the bike handle would disengage one ratchet and engage the other. This was a little weird because instead of having a spring to push the ratchet down giving it resistance, the ratchet was relying on human error of the person squeezing the bike handle to have some give in their grip. Although this worked, it was not ideal. Nonetheless, we know more now and have come up with a better solution.

    With the inner ratchets, we came up with a solution that involves a centerpiece in the center of the gear and the ratchets. It has three springs sticking out the sides that push outwards. The ratchets are designed with a curved back. When you twist the center piece, it pushes the springs to one side of the ratchets or the other, thus engaging either the top or bottom ratchets. It is a very elegant solution. We like elegant.

  • Tweaking

    Kate Reed08/14/2015 at 18:20 0 comments

    Right Side

    We realized that we had too many ratchet problems at once, so we decided to isolate each of the problems and deal with them one at a time. We started working on the individual pieces of the ratchet as opposed to the entire ratchet mechanism.

    We were having a hard time getting the springs to work on the ratchets, and having them do what we wanted them to do. We realized that we needed longer springs, so that they would distribute the pressure, and have more springing power. We also realized that we needed to redesign the actual ratchet, so it would have space for the bicycle nark, which is the part that secures the end of the cables.

    We made all these changes and it seems as if the right ratchet is set to go.

    Force

    Part of the reason we had such a hard time making the ratchets is because the angle that the ratchet locks into the gear has to be very precise. If the angle is wrong, the ratchet has rotational force, and doesn’t actually lock into a stop. It is harder to place the ratchet that is in the upright position naturally, because we have to place the holes for the ratchet as if the ratchet is down. We are doing the guess and check method.

    Back Tracking

    We have been working on the placement of the ratchets and the springs and getting them just right. We went through and tried every single one of our prototypes again and really analyzed each one of them. It was good to see them all together. We decided that the sides should be as symmetrical as possible for the ratchets and it would be simplest to go back to the normal springs.

    The steel springs are officially too unpredictable and hard to work with. We had the concept down and how the mechanism should work theoretically, but the steel springs were simply too unpredictable and were slowing us down, so we abandoned them.

  • New Springs

    Kate Reed08/14/2015 at 18:18 0 comments

    The new springs came in. They are the same as the steel springs only less intense. We had to remodel our mechanism to take into account the new springiness and angles of the springs. We found that it was faster to just 3D print the pieces extruded from the base rather than print the whole base again and again. We used laser cut wood to replace the base in our prototyping.

    We also redesigned the spider attachment for the wheelchair. We made it so it uses less material but still has the same structural integrity.

    Tape

    We added double sided tape to our gear to soften the sound of the ratchet. The lighter spring makes the system a little quieter, but the double tape seals the deal.

    We are still chugging right along, and making progress. We are closing in on the details. Almost done!

View all 12 project logs

  • 1
    Step 1

    Hand Drive Assembly Instructions

    Print out the parts

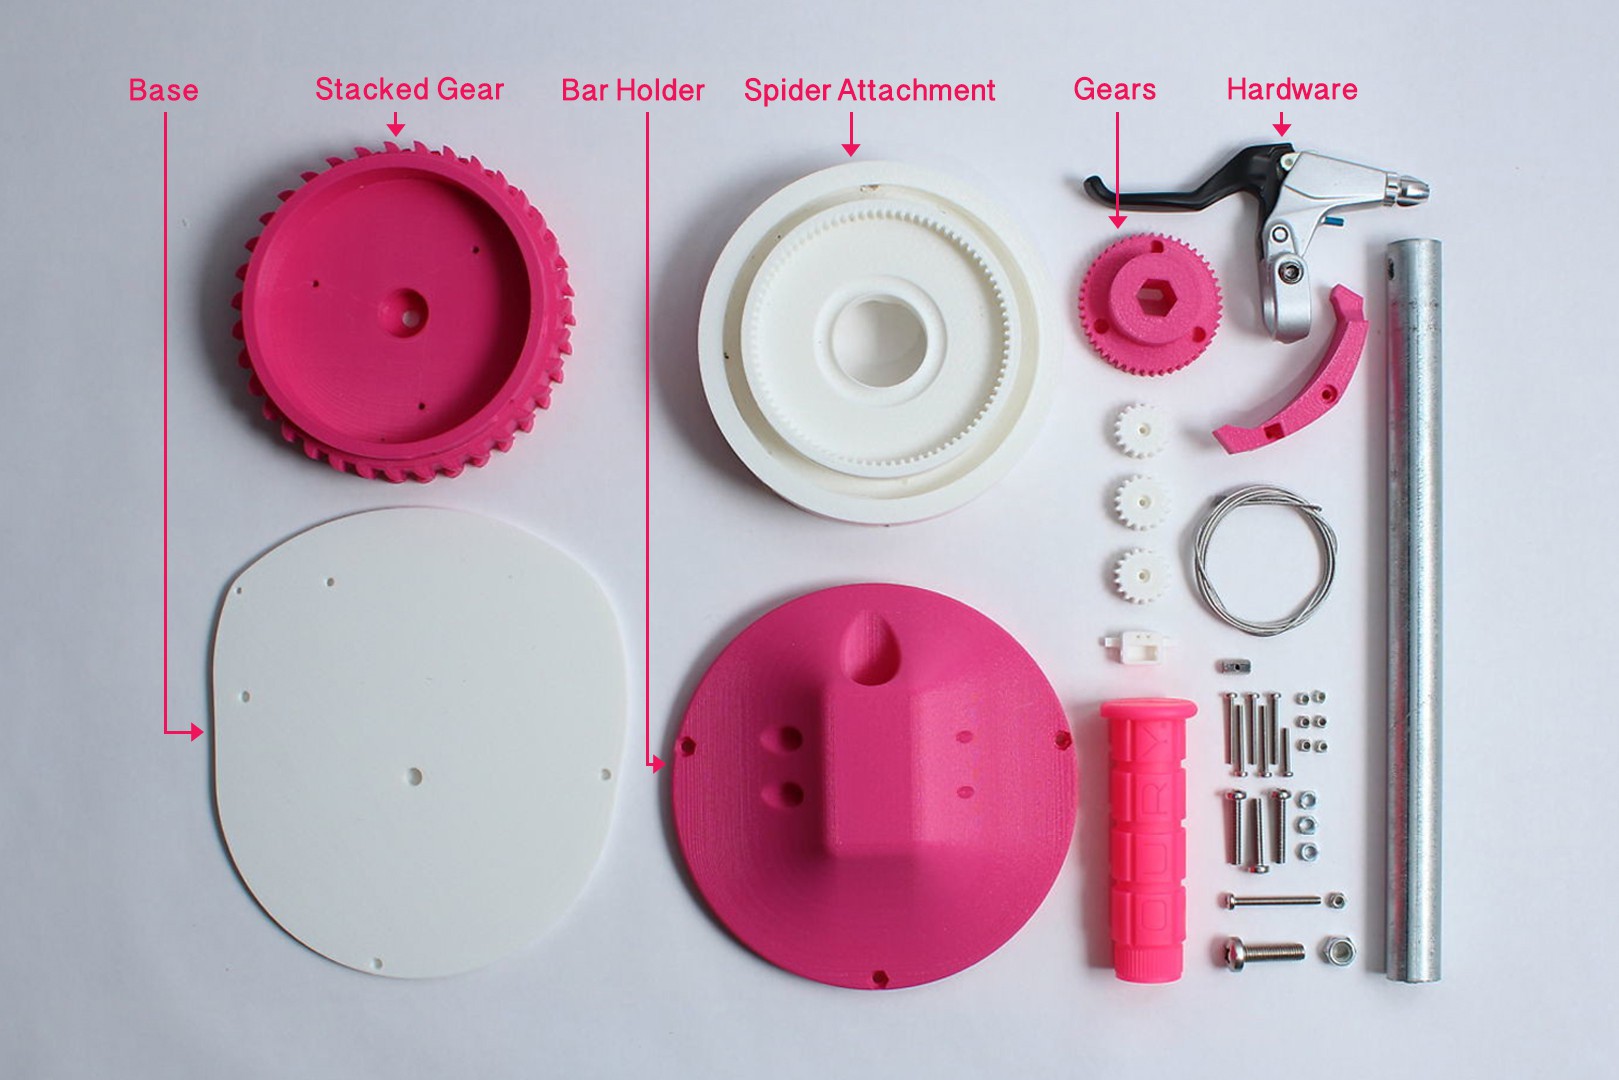
    (1) Annular gear

    (1) Bar Holder

    (1) Base

    (1) Knarp Tensioner

    (3) Planet Gear

    (1) Ratchet

    (1) Stacked Gear

    (1) Sun Gear

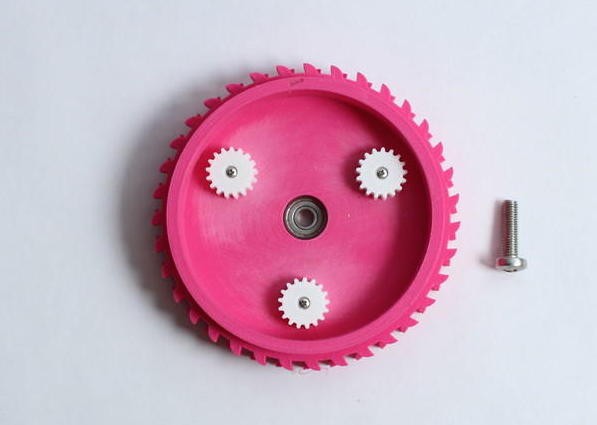
    • 1)Hammer in three 5/16 inch bearings into underside of the sun gear.
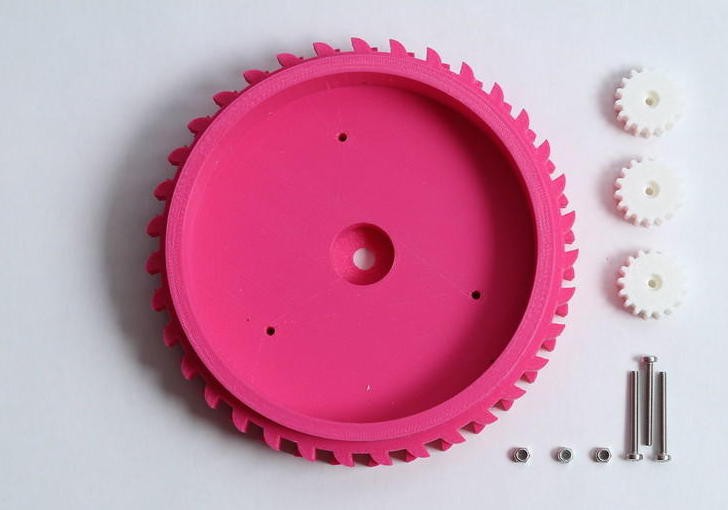
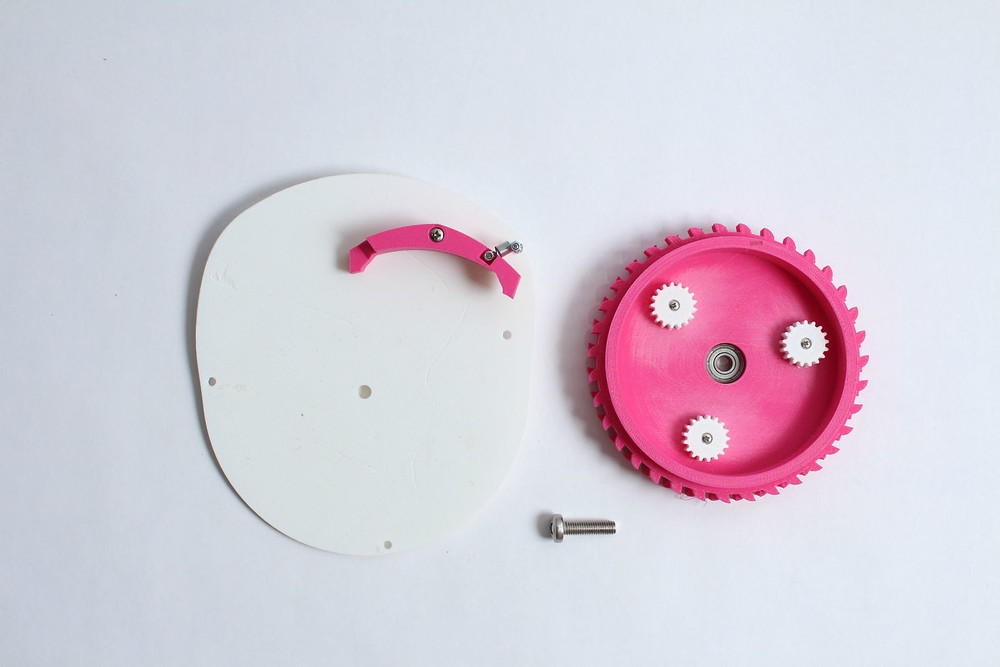
    • 2)Attach three planet gears to stacked gear using three M3 30mm screws and three M3 lock nuts.
    • -Make sure not to tighten lock nuts too tight as the planets must be able to spin freely.
    • -30mm screws are too long so the ends need to be dremeled off so the surface is flat (or other lengths of screws can be used accordingly.)
    • 3)Take one M3 20 mm and put it through the ratchet. Sandwich the spring in between the ratchet and the M3 lock nut on top.
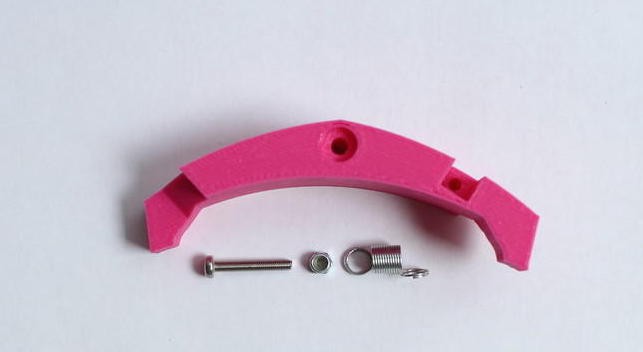
    • 4)Put one M3 30 mm screw through the base to reciprocate spring, and one M3 lock nut, screwed tight to the base.
    • 5)Sandwich other side of the spring between the first lock nut and lock nut on the M3 screw.
    • 6)Once the ratchet is loosely attached to the spring, use one M4 40 mm screw to attach the ratchet to the base. Use one M4 lock nut to secure it.
      -Make sure the screw is not to tight, so the ratchet can swing freely.
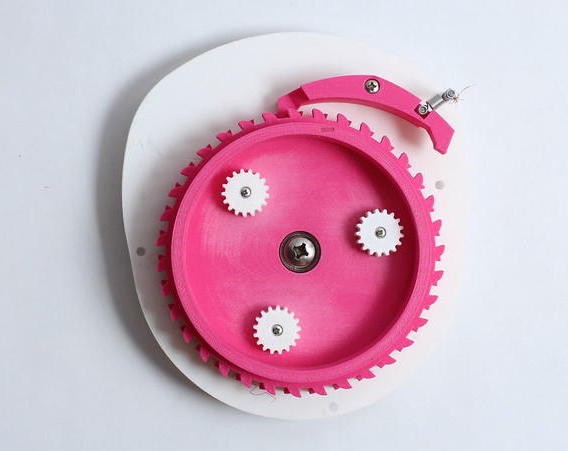
    • 7)Put one M3 30 mm bolt through stacked gear and bearing. Secure with one M8 lock nut on the other side of the base.
    • –The bolt sticks out of the base. It either needs to be dremeled off flat to the lock nut, or use a shorter screw.
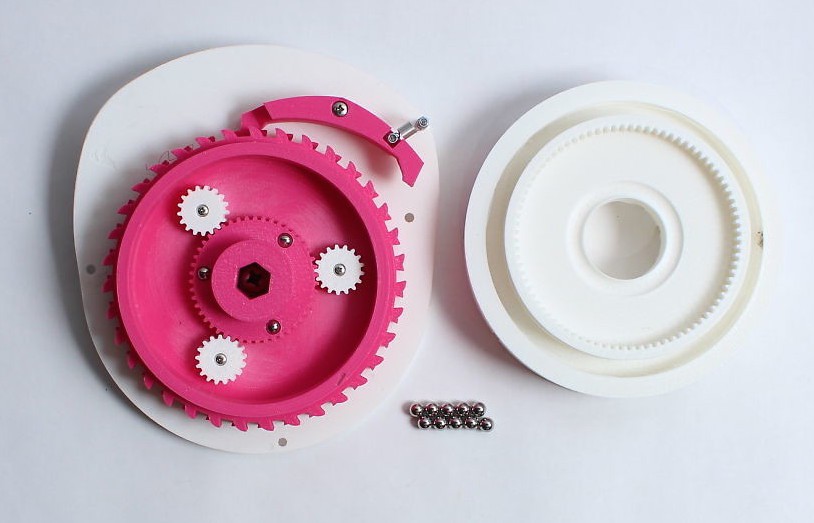
    • 8)Put the sun gear in the planetary gears so it meshes.

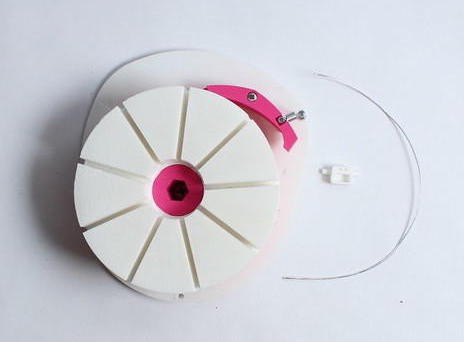
    9) Put the annular gear spider inset into the stacked gear so the gears are meshed.

    10) Slip ten 5/16 inch bearings in the annular gear/spider through hole.

    -The stacked gear has spaces to accommodate the bearings, so put a bearing in, spin the annular gear/spider, then put the next bearing in again, and repeat.

    - If the bearings need to be removed it is easiest to do this with a magnet.

    11) Seal off the bearing hole with tape or glue.

    12) Thread the steel cable through the ratchet and attach to the knarp tensioner.

    -You may need to drill out knarp tensioner holes depending on the thickness of your cable.

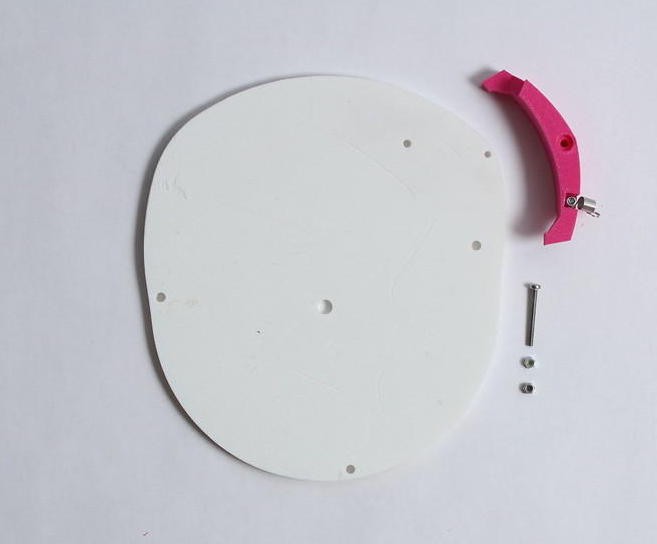
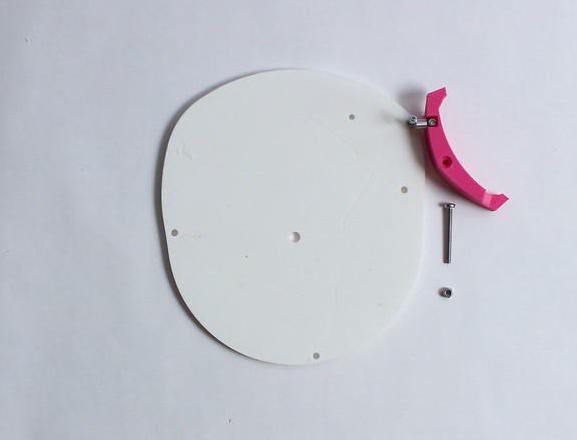
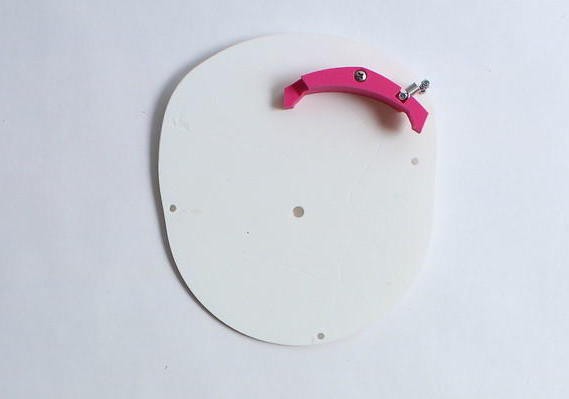
    13) Attach the bar holder to back of base with three M5 20 mm bolts and three M5 nuts. (lock nuts are optional)

    -Make sure the bar is facing up.

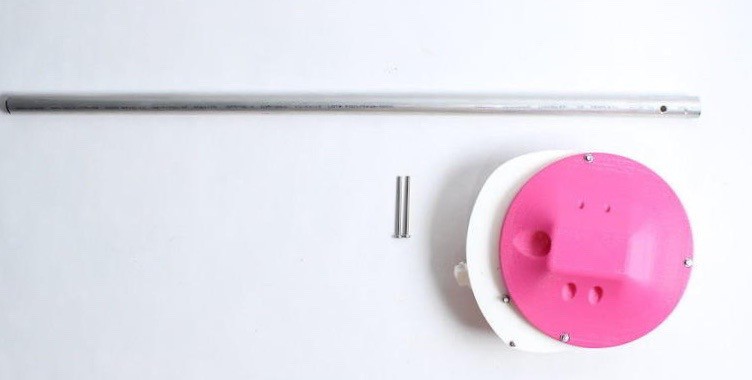
    14) Test the bar in the bar holder and put the Hand Drive on the chair. Mark the bar on a height that feels comfortable and cut it down to that length.

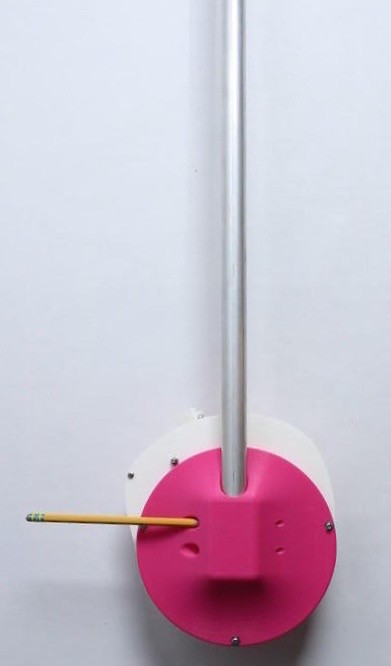
    15) Put the correct size bar in the bar holder, and mark the two holes for the screw to go through horizontally.

    -Mark with either a pencil or a drill bit.

    16) Drill holes through bar for corresponding horizontal screws.

    17) Use two M4 60mm screws to go through the bar and attach it to the bar holder.

    18) Attach break levers and handle grip to the bar.

    -Make sure the brake isn’t upside down.

    -Make sure the brake lever is in the right position (lever forward).

    19) Attach the brake cable and knarp to the tensioner, and tension the cable so that when the cable is pulled the ratchet switches engagement.

View all instructions

Enjoy this project?

Share

Discussions

p31k.reusables wrote 12/07/2020 at 05:24 point

How exactly does it connect to the chair? I have mountain bike tires on my chair (but with rims and quick release axels) and wondered if I need to modify.

  Are you sure? yes | no

chrisbernardovelaz wrote 05/27/2020 at 07:56 point

Hi Kate,

I'm doing an academic project on how to improve the folding systems of a wheelchair. Because of the systems, I can't put in the typical propulsion rings and I need to use your device. The work is only for academic purposes but the teachers require me to do a feasibility study and I need you to clarify if this invention being an open resource, I could consider it as a company and I want to market it together with my chair? Would it be legal?
I have seen what it says that it is worth 40 dollars, that is the approximate price that it would cost to print it at home or what the device is worth in case they want to buy it already made.

Greetings from Spain,

Christian 

  Are you sure? yes | no

wayne thompson wrote 10/17/2019 at 11:13 point

How do you attach it to the chair? We have two chairs and can't seem to figure it out

  Are you sure? yes | no

dasnj1 wrote 03/20/2019 at 05:10 point

Has anyone been able to download and print any of the files for the wheelchair? I have not. 

  Are you sure? yes | no

wayne thompson wrote 10/17/2019 at 11:13 point

Yes, from thingiverse.com

  Are you sure? yes | no

Eugene Rowell wrote 10/16/2018 at 11:51 point

Kate! 3-4 months ago I was able to download some, but not all the files. I would love to get files for the planet and stacked gears. I work for 3D Systems and am a member of the South Carolina Spinal Cord Injury Association. I'm trying to create a program to produce these on a large scale. erowelliv@gmail.com

  Are you sure? yes | no

ArcadeCodex wrote 04/17/2018 at 14:49 point

Tip: Create a video on how to assemble this product.

Where do I find the download link?

  Are you sure? yes | no

KristyGodoy wrote 10/31/2017 at 18:02 point

I research on propulsion biomechanics; I would like to know about experiences of people that printed and used the prototype.

If you are one, please email me at krstygodoy@gmail.com

  Are you sure? yes | no

ziyadood wrote 08/20/2017 at 23:35 point

hi Kate

my name is Ziyad Halawani im a wheelchair user and im very interested in what you developed, im also wondering if you sell the Hand Drive? 

  Are you sure? yes | no

Kate Reed wrote 07/06/2017 at 23:41 point

Hello Everyone,

So sorry for the wait on the Hand Drive files to print, we were having some formatting issues and needed to take the files down temporarily. As of now the files are back up and ready for you to print! We encourage everyone to hack these files and make them your own! 

Enjoy :)

Kate and Nathaniel

  Are you sure? yes | no

Eugene Rowell wrote 11/20/2018 at 21:37 point

Hi Kate, I would really appreciate it if you could upload the files again. I'm trying to launch a project through a non-profit to print these on a large scale. I work for a 3d printer manufacturer and would love to talk with you.

erowelliv@gmail.com

8643534156

  Are you sure? yes | no

Janet King wrote 07/05/2017 at 18:52 point

Kate - Is this going to be available commercially? I use a wheelchair and am finding it more and more difficult to propel myself due to arthritis in my hands. My wheelchair is pretty basic so this would be great! But I can't do it myself so would have to buy it as a finished product.

  Are you sure? yes | no

Glyn Allinson wrote 07/03/2017 at 22:29 point

So some fantastic person has created 3D printable files, Link below

https://www.thingiverse.com/thing:2407804

edit 4 July

Sadly this thing:2407804 has been taken down, I've contacted the author, hopefully she'll contact me.

  Are you sure? yes | no

heidigillett wrote 06/23/2017 at 15:48 point

Hello Kate,

My 49 year old brother suffered a severe stroke 8 months ago.  He only has the use of his left side and he has not been out of the hospital since the stroke occurred.  He is recovering, but very, very slowly.  In the process of searching for one-arm drive wheelchairs, I found a solution for driving the wheels with one arm.  In addition, I came across your lever solution which is wonderful for him since he is very weak.  It is a perfect complement to my brother's needs.  We have a Stratsys location very close to our home in San Diego where we can print the materials.  I have seen that your files are listed as open source, but I have been unable to locate them.  If you could please direct me where to find them so I can send them to print, I would be extremely grateful!  If you need to reach me for any discussion please feel free to do so.  My phone number is 858-774-5009.  I have seen several of your videos and you are a very impressive young woman!  Thank you for being such a forward thinking individual - the world needs people like you!

Heidi Gillett

  Are you sure? yes | no

mirrishadow wrote 06/19/2017 at 16:01 point

how well would this device work for bariatric folks? is it durable enough?

  Are you sure? yes | no

tunder26 wrote 06/04/2017 at 05:35 point

Hi!


I really like the concept of the project. It's even aesthetically nice to look at! Is it possible to share your files with me? If you have dwg file for autodesk inventor, that'll awesome!

tunder262004@hotmail.com

  Are you sure? yes | no

Sheena Ashby ♿ wrote 05/30/2017 at 15:37 point

This looks awesome!

I am desperate to get a lever operated wheelchair because years of using a manual wheelchair has damaged my shoulders to the point that I struggle to wheel myself around. Cheapest options here in the UK are between £2,000+ for just the lever system or over £4,000 for a mountain trike.  So it would be great if I could get this here in England.

  Are you sure? yes | no

dansteck wrote 05/30/2017 at 05:08 point

Awesome project!

  Are you sure? yes | no

pdoubled11 wrote 04/02/2017 at 16:03 point

I volunteer for the Tetra society.  We help people with disabilities by providing them with adaptive devices.  My client has only the use of one arm, and needs a device that can move a wheelchair in any direction with one arm.  Your device looks like it is designed for use with two arms correct?  Could it be modified to work with one arm?

Thanks   Paul

  Are you sure? yes | no

Rebecca Staško wrote 03/19/2017 at 21:38 point

Hi Kate,

You have no idea how excited I was to come across your project. I've been trying to get together a wheelchair that I can actually get around in in hilly Seattle. I have an old 50 lb clunker that I bought off Craig's List, but I can't make it around on my own with it. I'd figured out how to get a lighter weight wheelchair, and I was excited about the push levers that I had seen on YouTube, until I found only two on the market, one that cost half a year's rent, and the other not available in the USA. So when I saw your project it made my day!

My DH is a Chemical Engineer (and woodworker) and has a good friend who is a mechanical engineer and they are wanting to customize it to my new wheels (and someday to a crazy off road chair we would like to buy or build so our family can go hiking and the like. So hubby asked me to ask you for your source files. My husband is hoping to be able to print it out of metal, and plans to make my bars out of hard wood which he'll beautify as one of a kind.

Would you help me out with the files? I would so appreciate it, This is such a kindness!

Rebecca 

  Are you sure? yes | no

ericjmansfield wrote 03/18/2017 at 03:01 point

This is awesome! Where can I get all the files so I can get the parts printed? The range I get out of my power chair makes it hard to enjoy outings when I'm worried about my batteries running out. This would be a life changer if I could add these to my manual chair!

  Are you sure? yes | no

Glyn Allinson wrote 01/23/2017 at 13:50 point

Hi 

Does anyone know where I can acquire all the files for this project. I'm wanting to get parts printed for my son. Any and all help would be greatly appreciated.

  Are you sure? yes | no

Does this project spark your interest?

Become a member to follow this project and never miss any updates