0%
0%
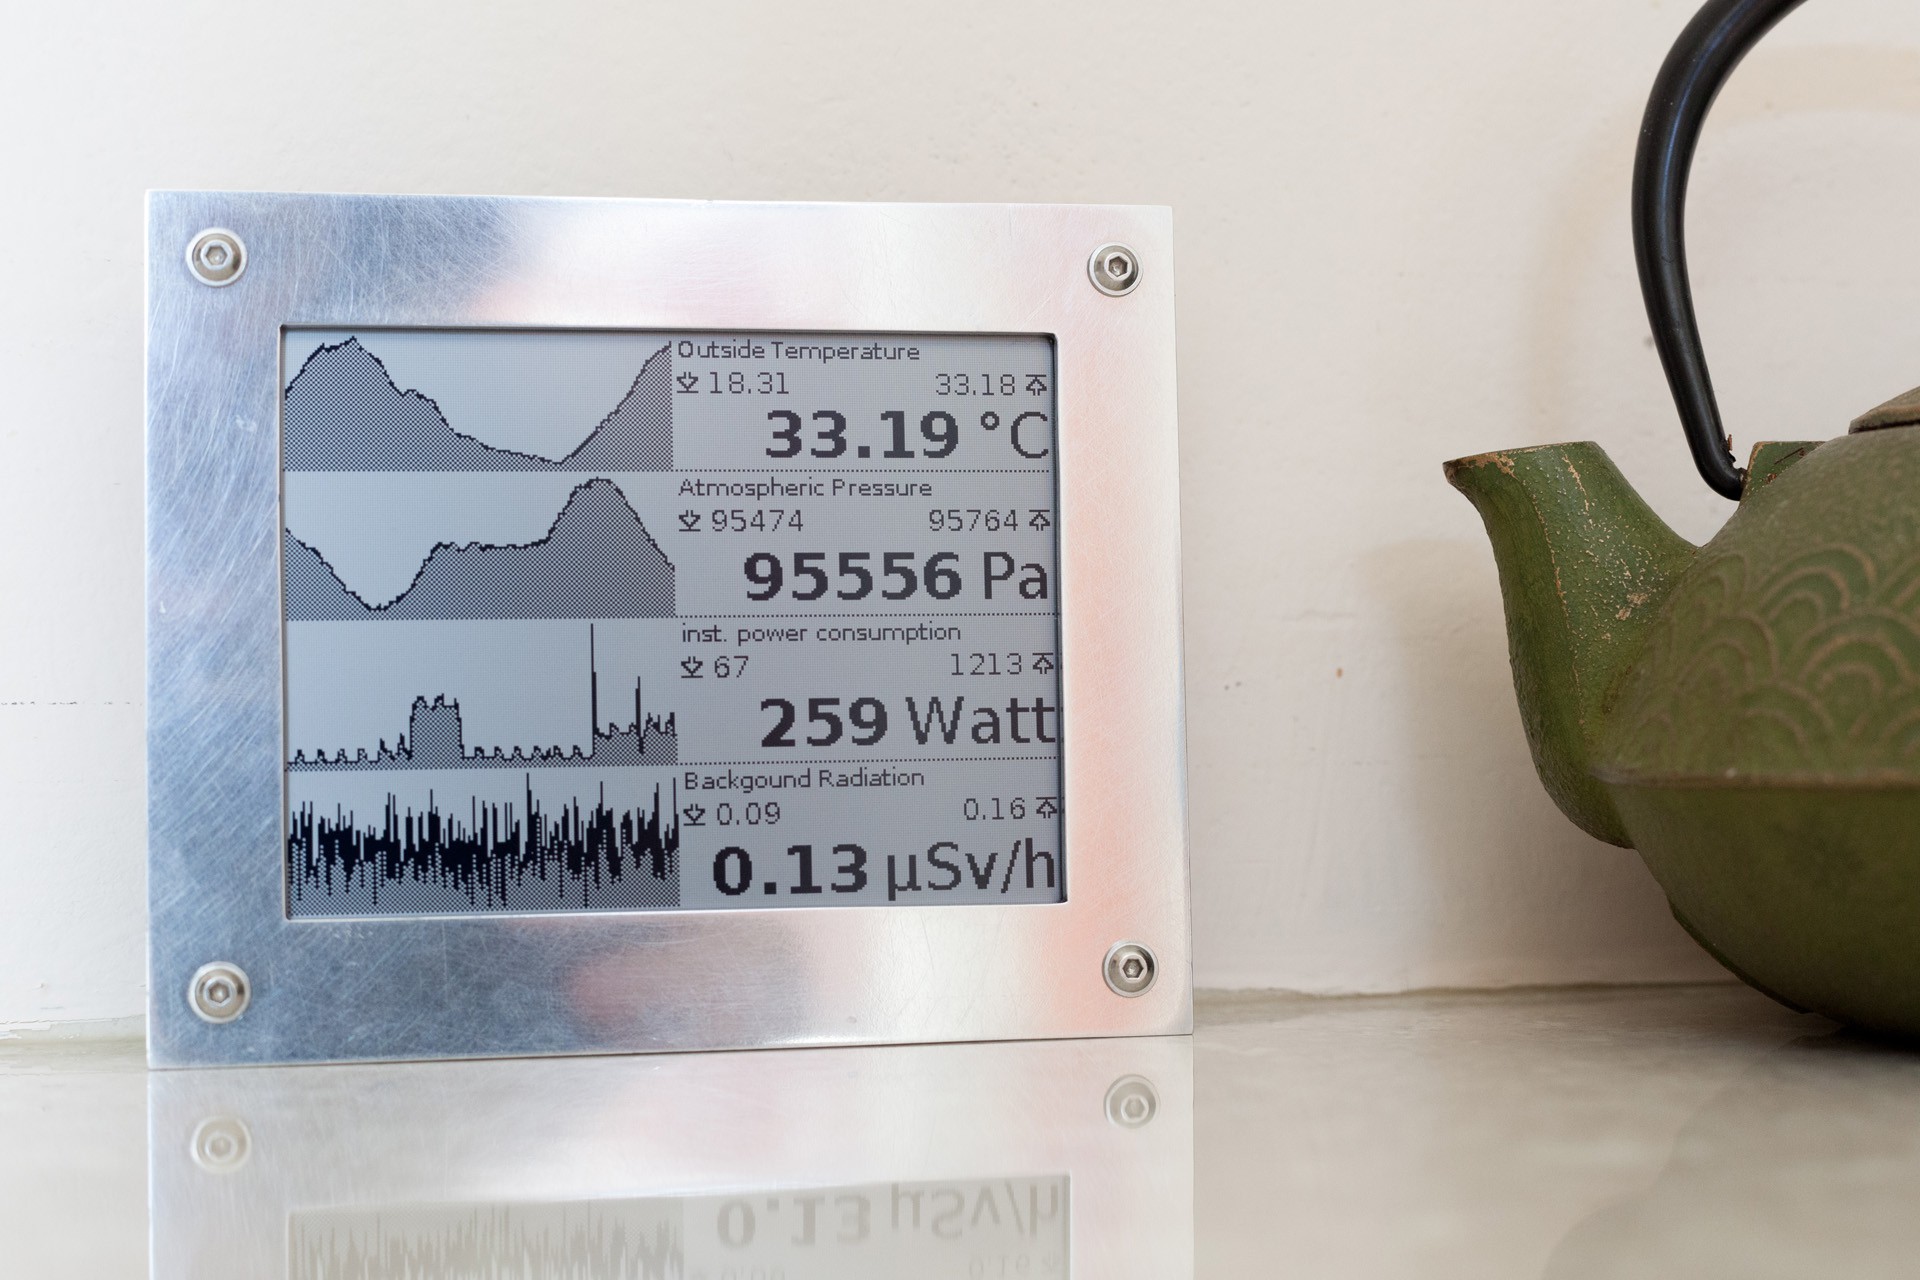
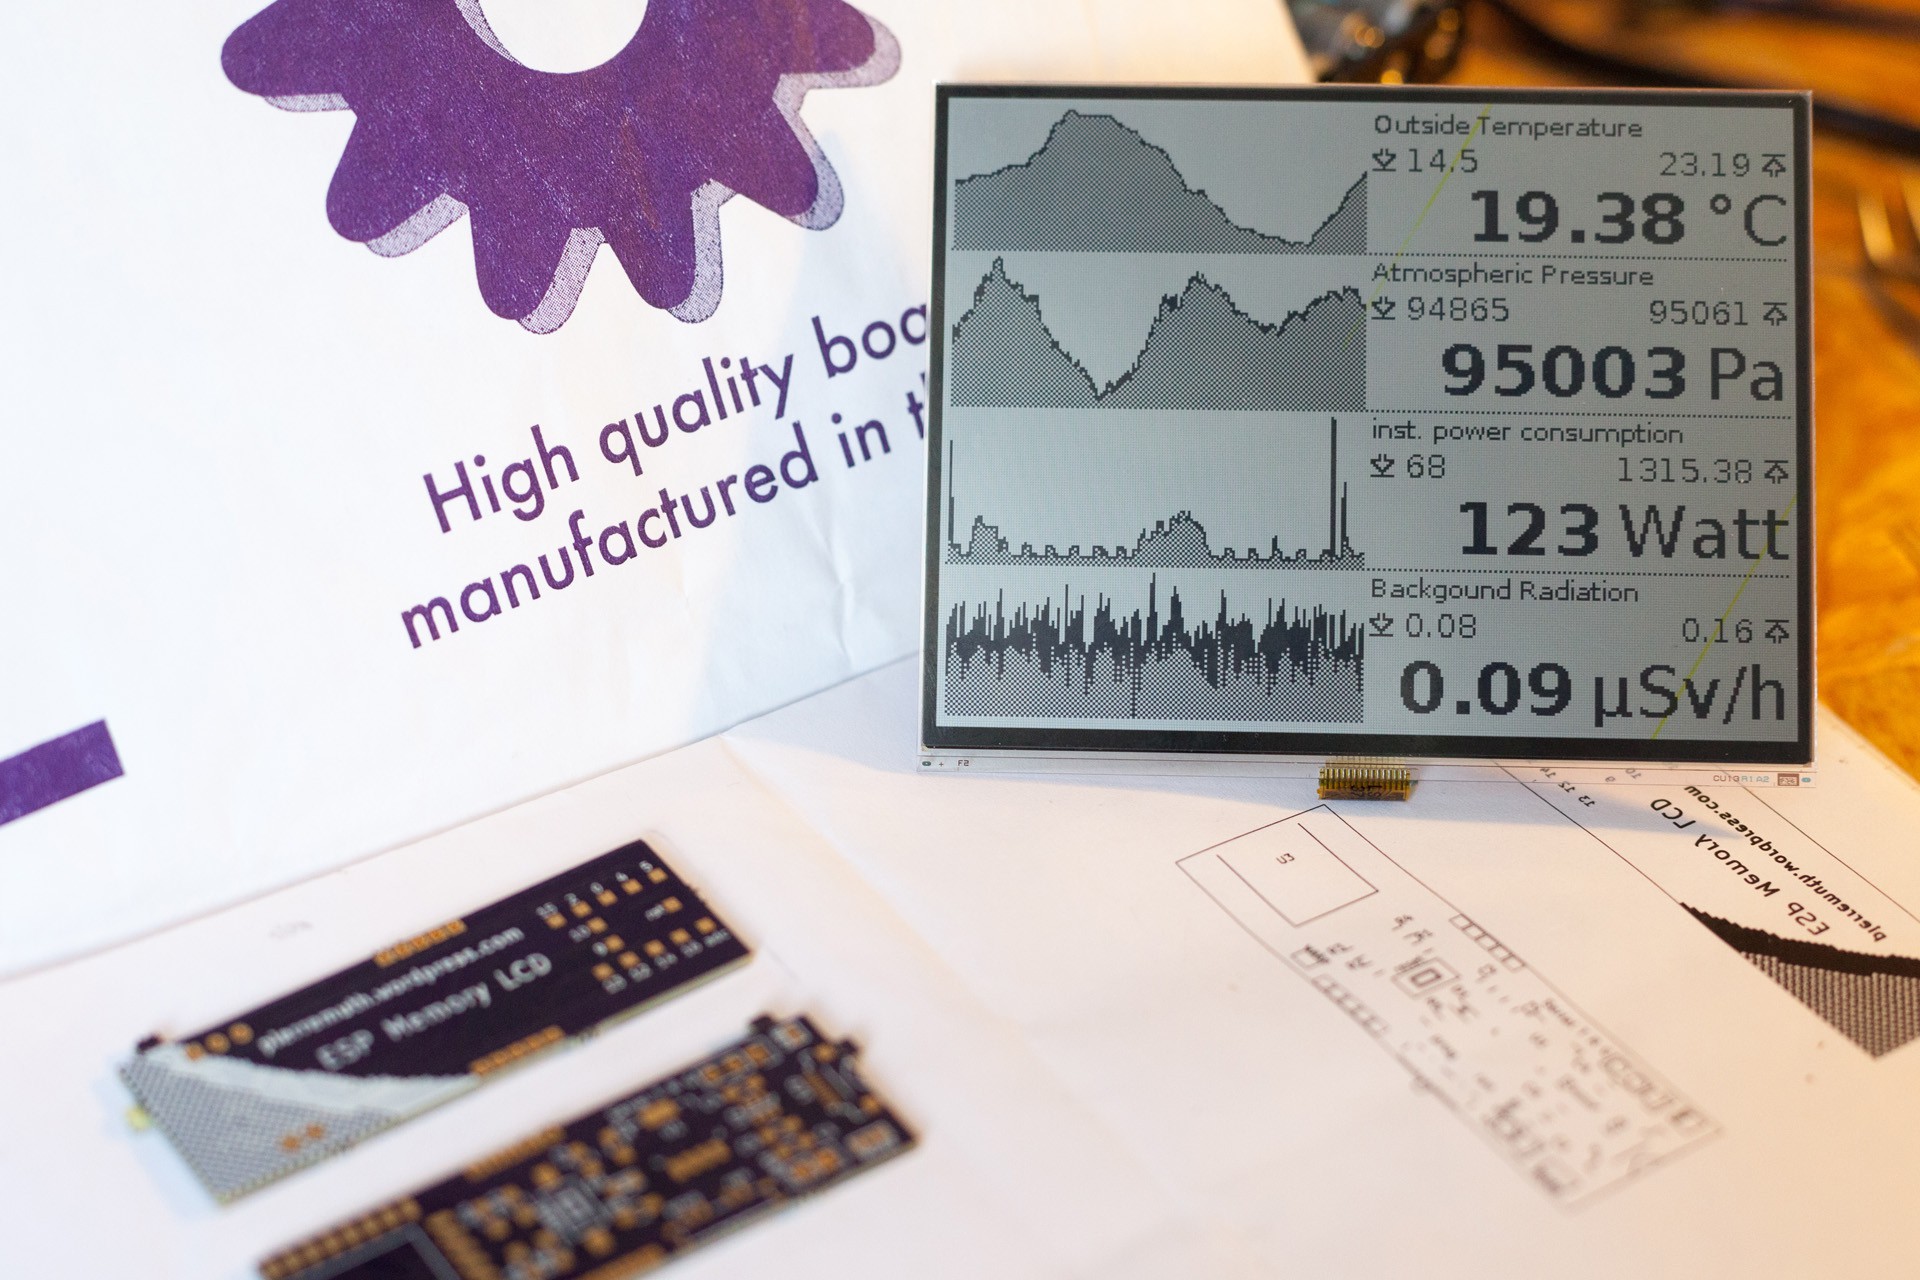
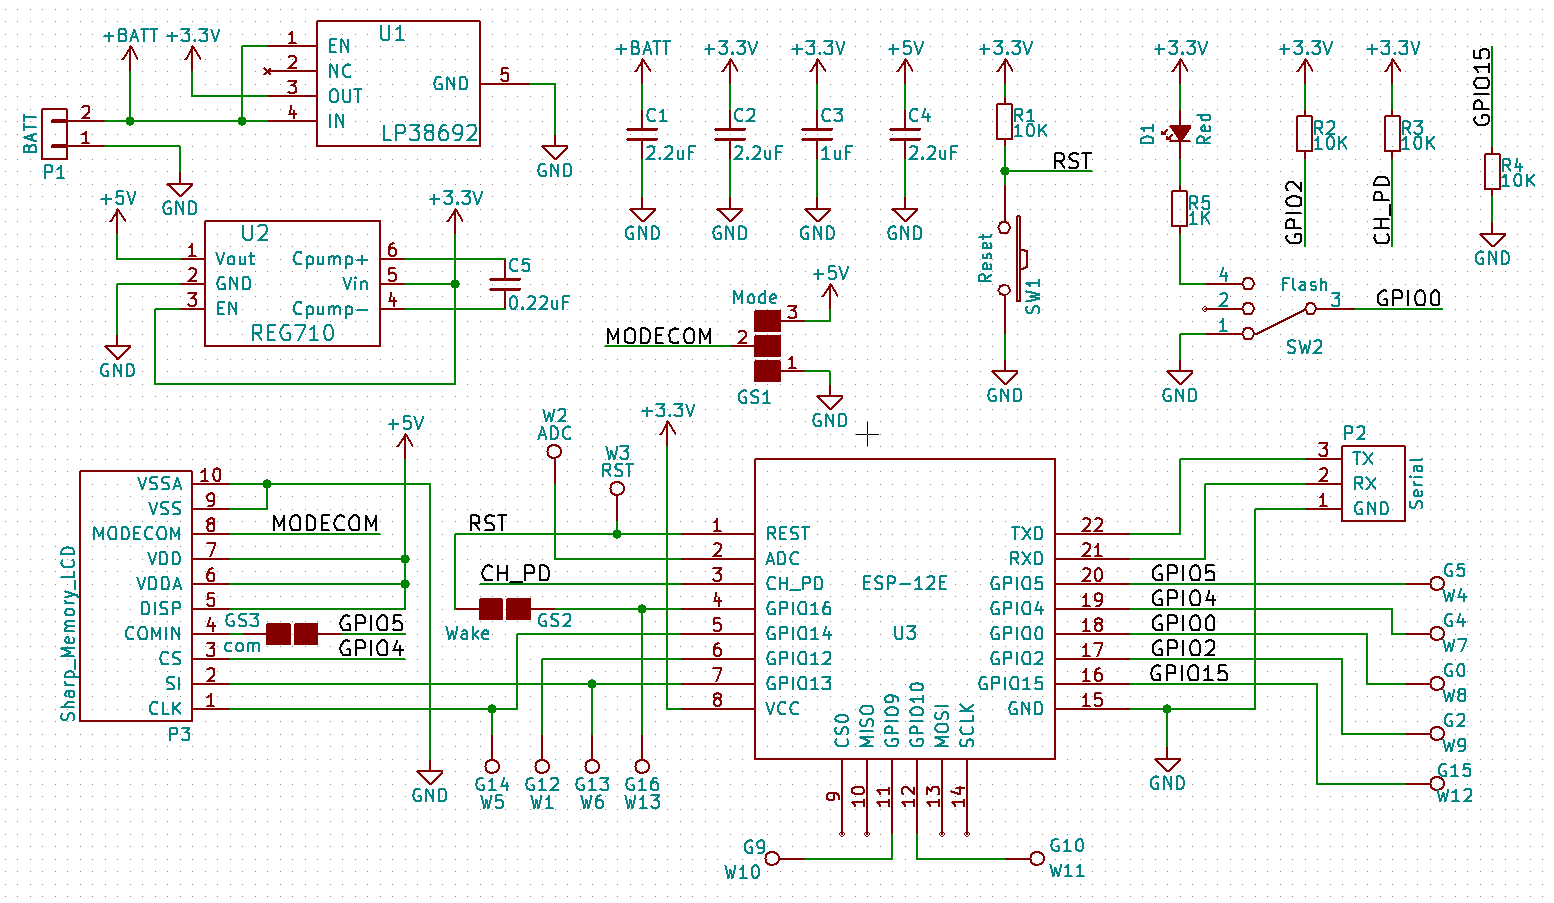
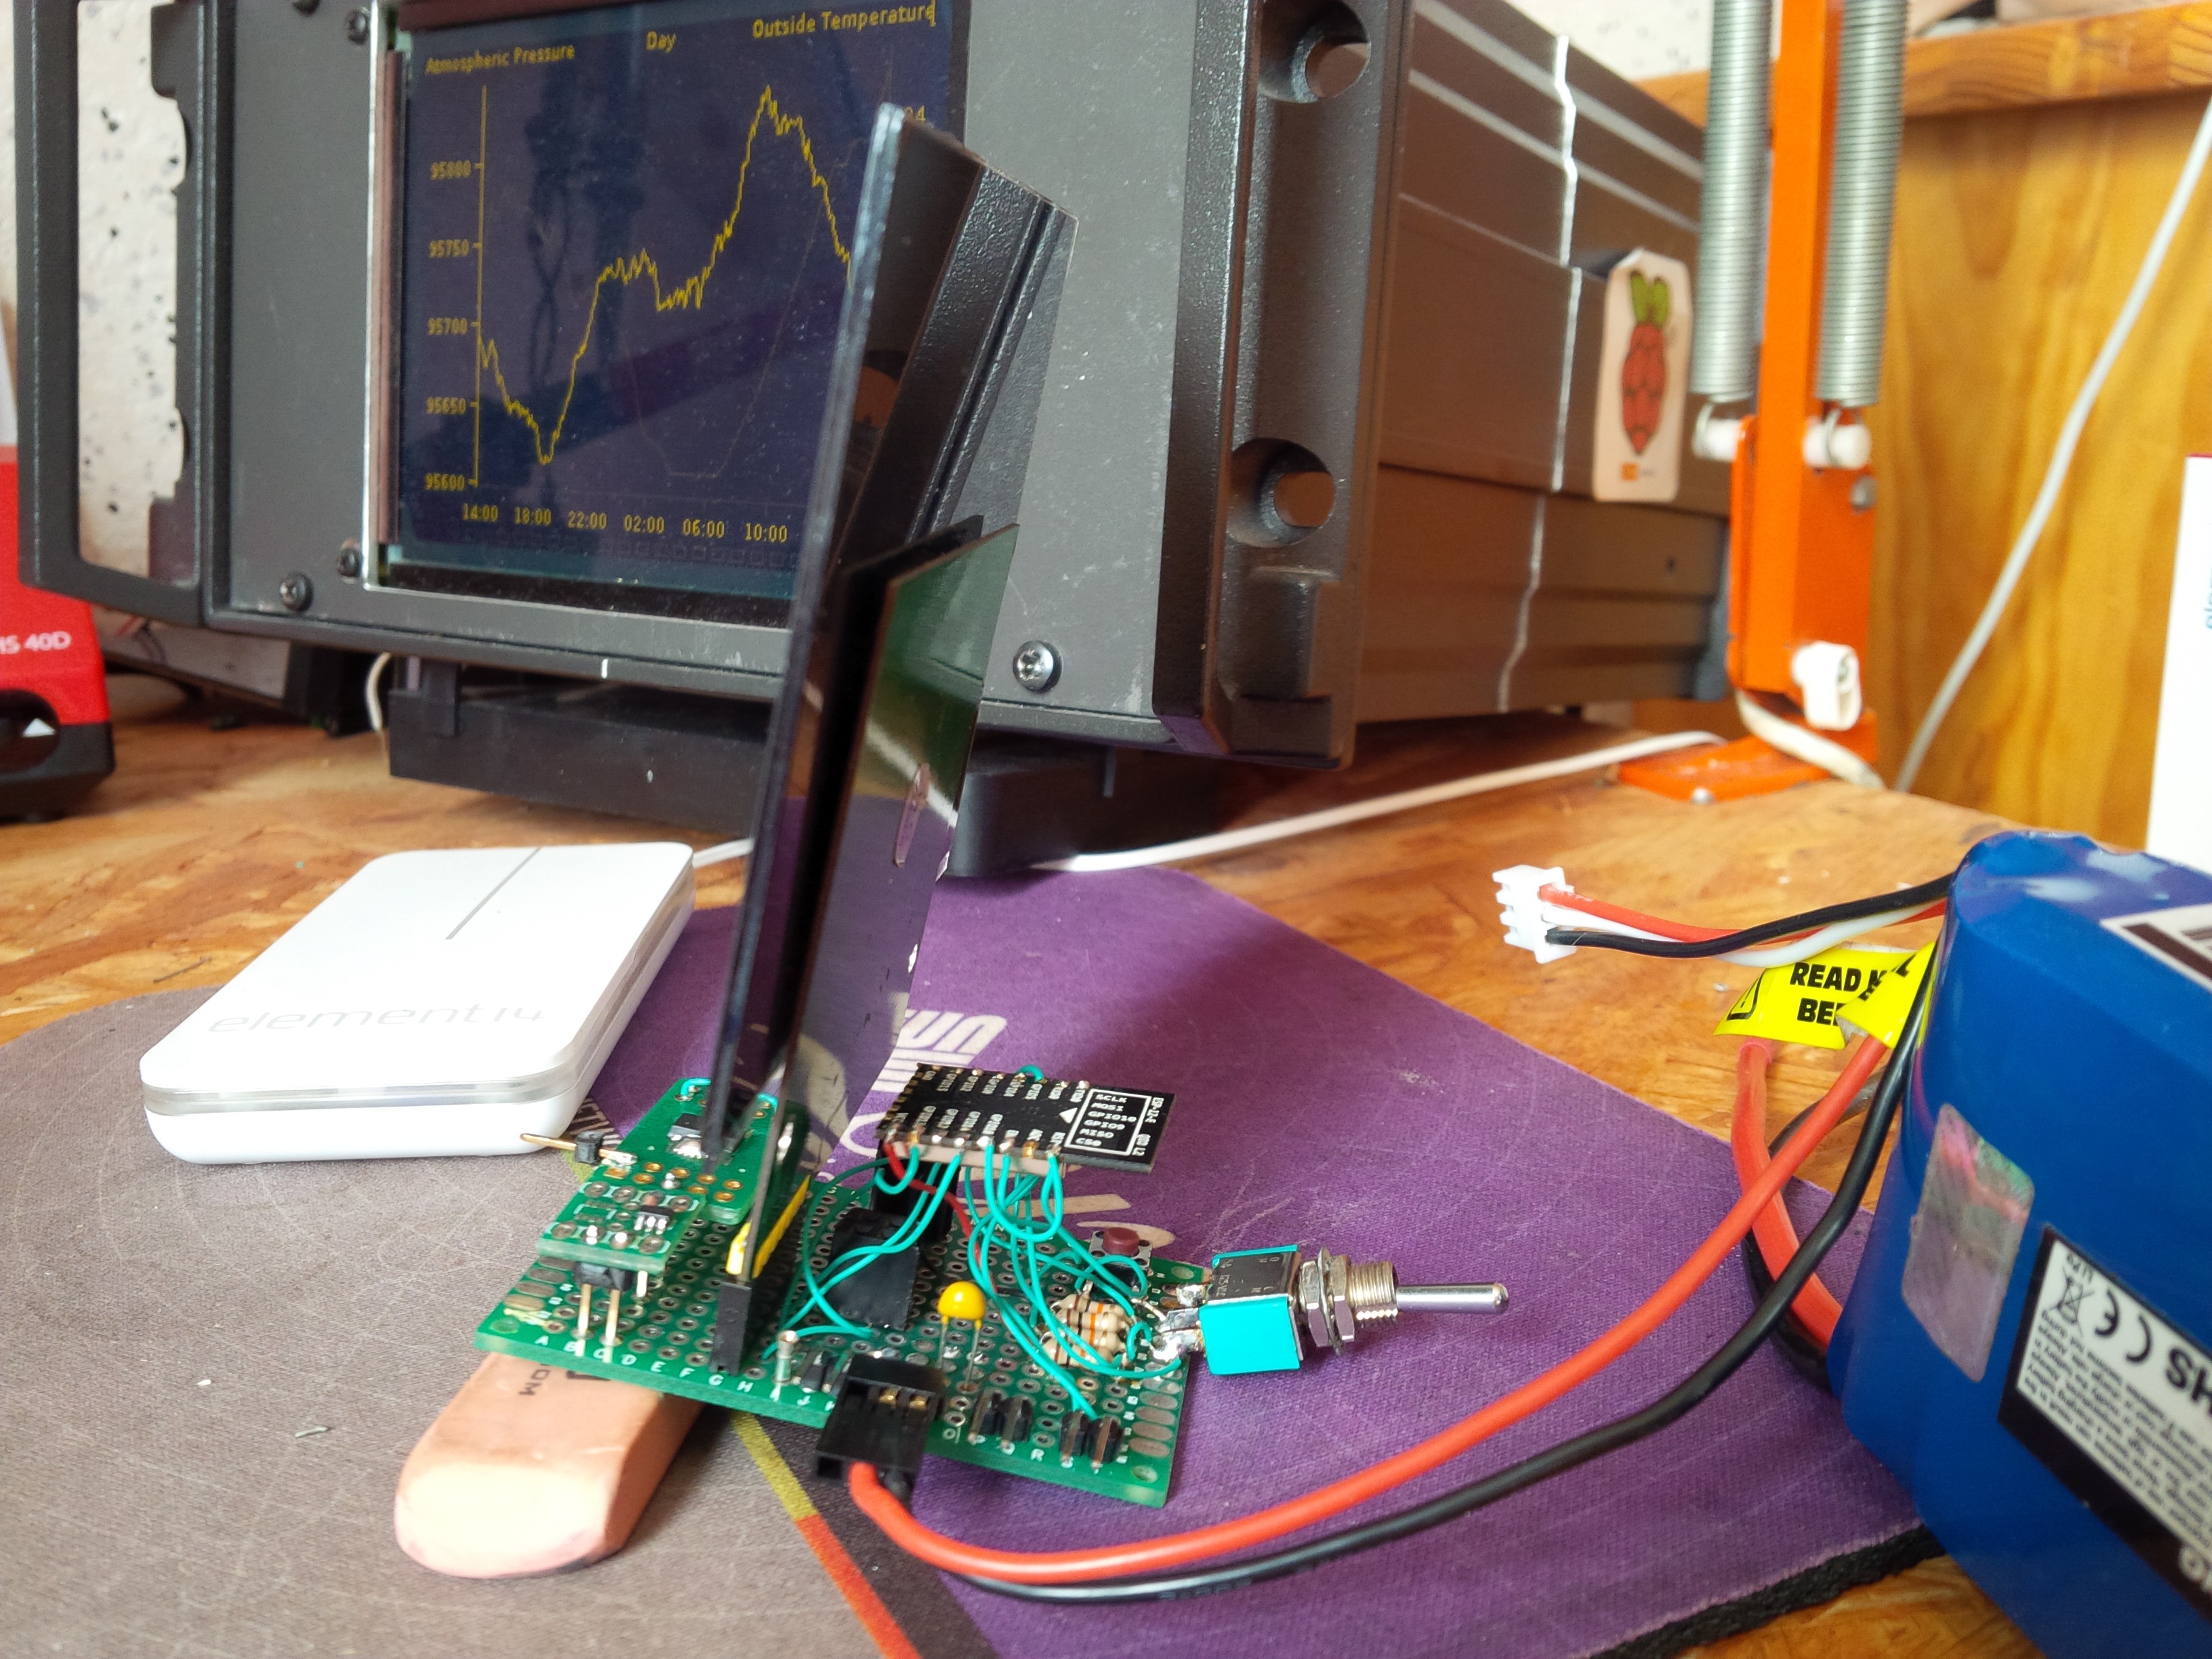
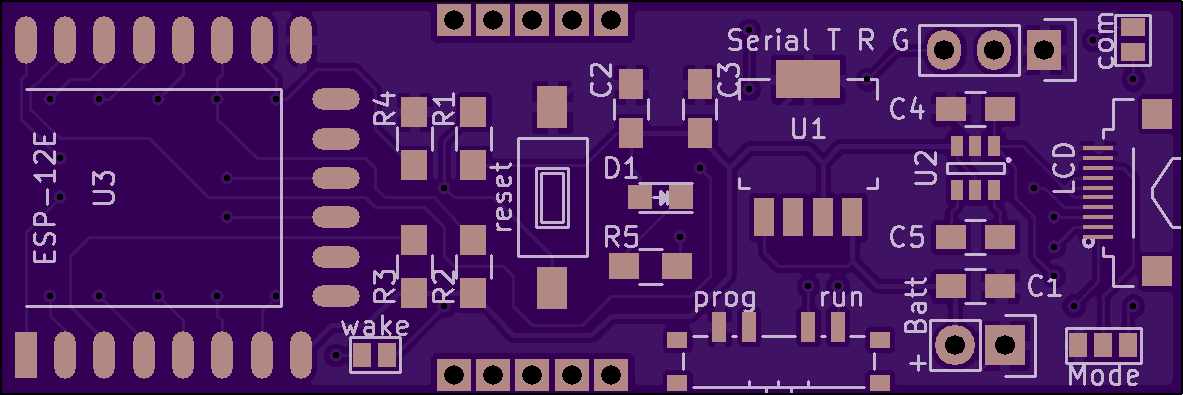
Wireless remote LCD
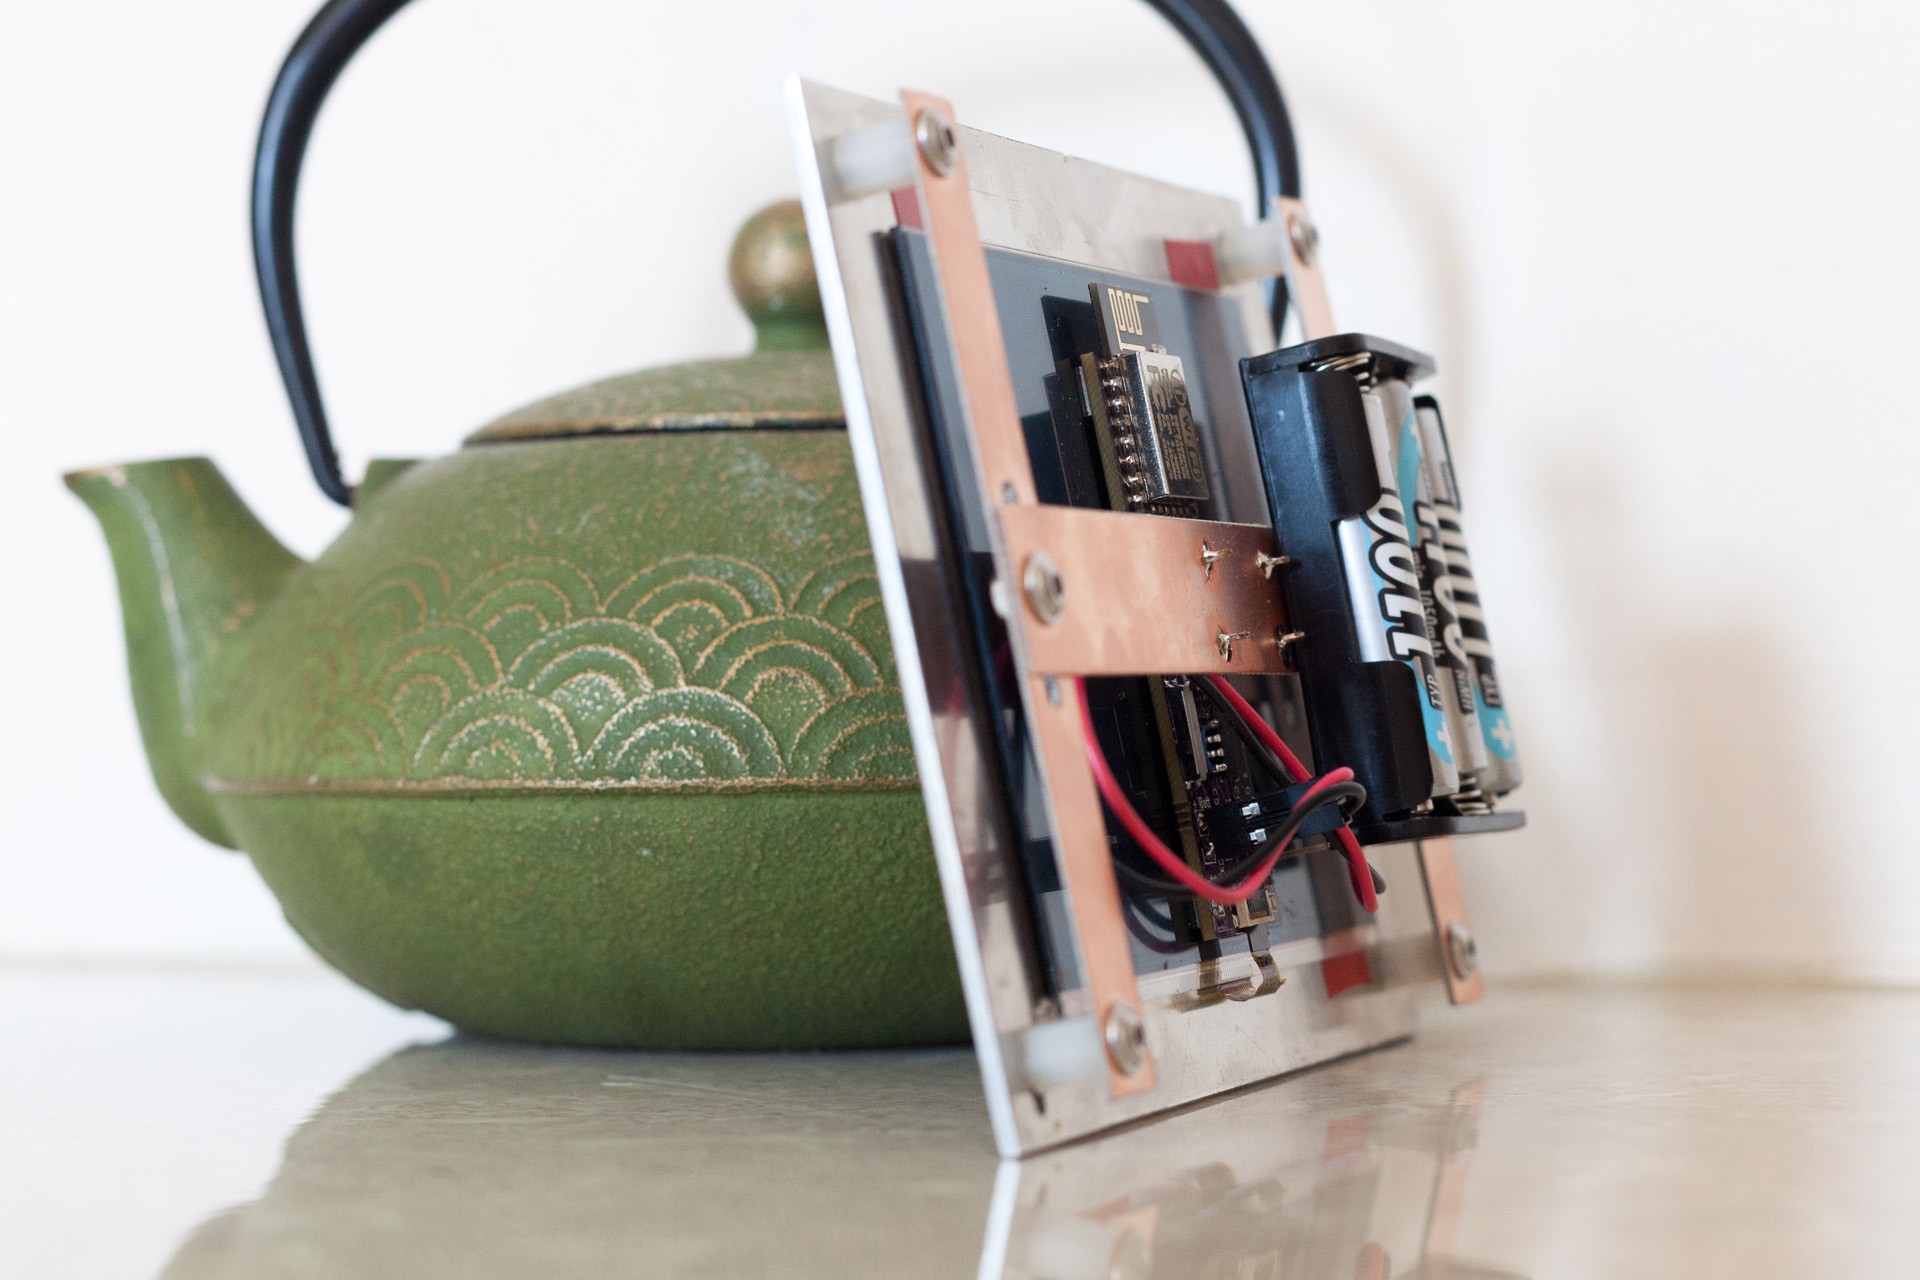
Battery powered remote display for logging station
 Muth
MuthBecome a Hackaday.io member
Already have an account? Log in.
Just one more thing
To make the experience fit your profile, pick a username and tell us what interests you.
Pick an awesome username
hackaday.io/
Your profile's URL: hackaday.io/username. Max 25 alphanumeric characters.
Pick a few interests
Projects that share your interests
People that share your interests


 Signals Everywhere/KR0SIV
 lion mclionhead
 agp.cooper
 Bruce Land
Hey, this project is awesome! I'm considering using the same 4.4" memory LCD screen in a project of mine. I want to hook it up to a Raspberry Pi Zero. What did you use to break out the ribbon cable that comes out of the display? (I'm new to this stuff—sorry!)