Close
0%
0%

'Thor' robot with addons and GUI

Thor robot based on the author AngelLM

Similar projects worth following
THOR robotic arm with some extra's :) based from the original design of AngelLM, thanks mate for this nice piece of work!
Trying to do something more... follow me to see the addon's and lots of improvements.

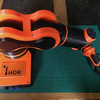
This project is based on the THOR robotic arm project from AngelLM and will be a version with lots of add-ons and especially modified for a wide range of 3D printers with a smaller print area.
Also it is my intention to improve a lot of things to the robot his hardware and software.

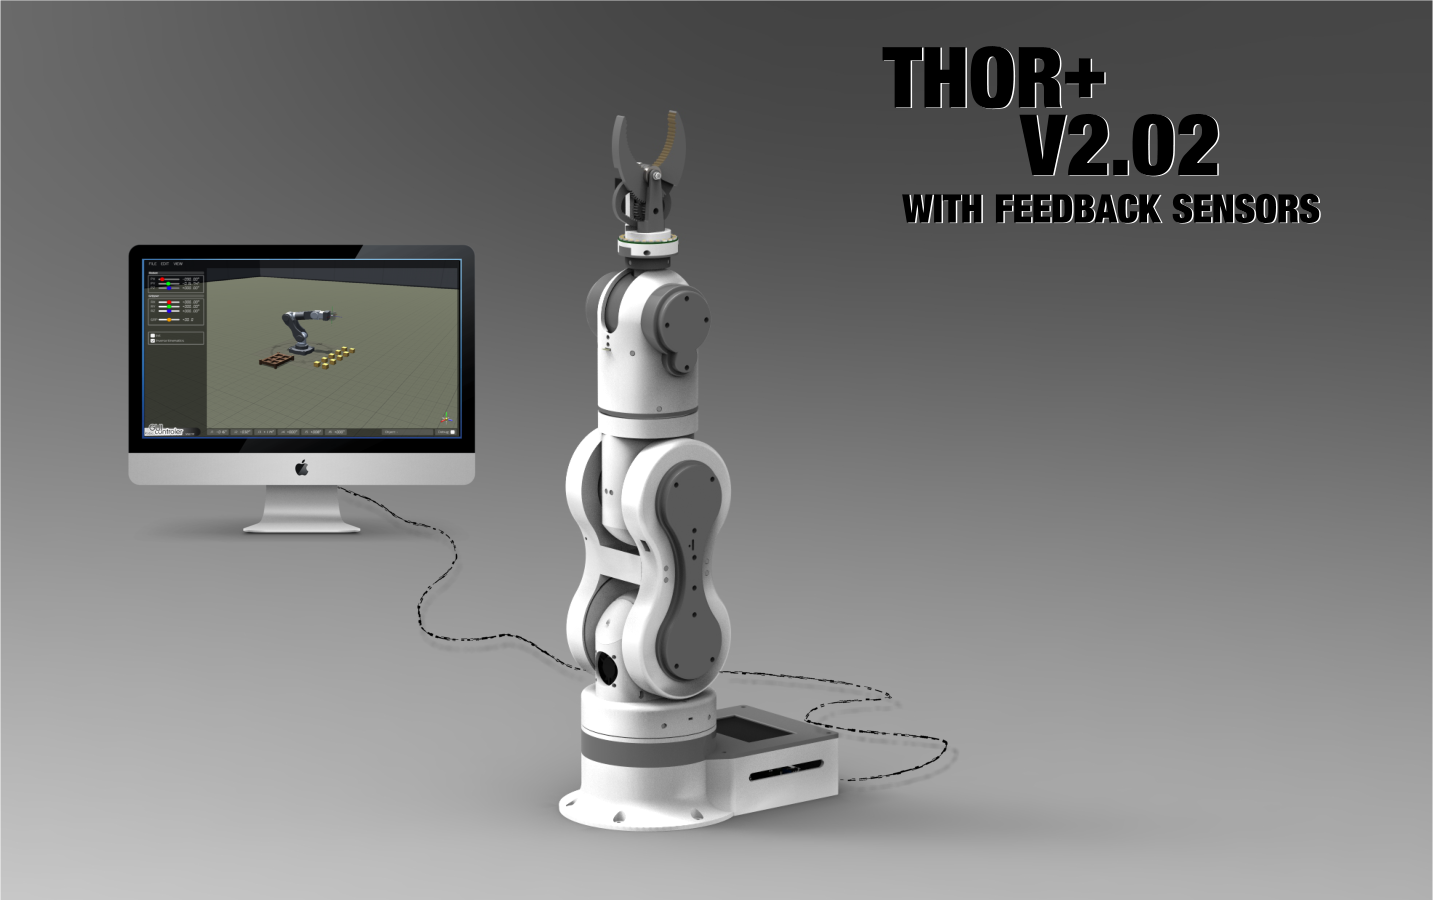
I am working on a graphical controller that works on PC,MAC and later on mobile devices.
You will have the possiblity to make al the movements on the controller without the need of the robot.
Ones everything is working on the GUI controller it can be transfered to the robot arduino controller
board, with the press of a button and some digital inputs you can run the sequences you programmed in the GUI controller.
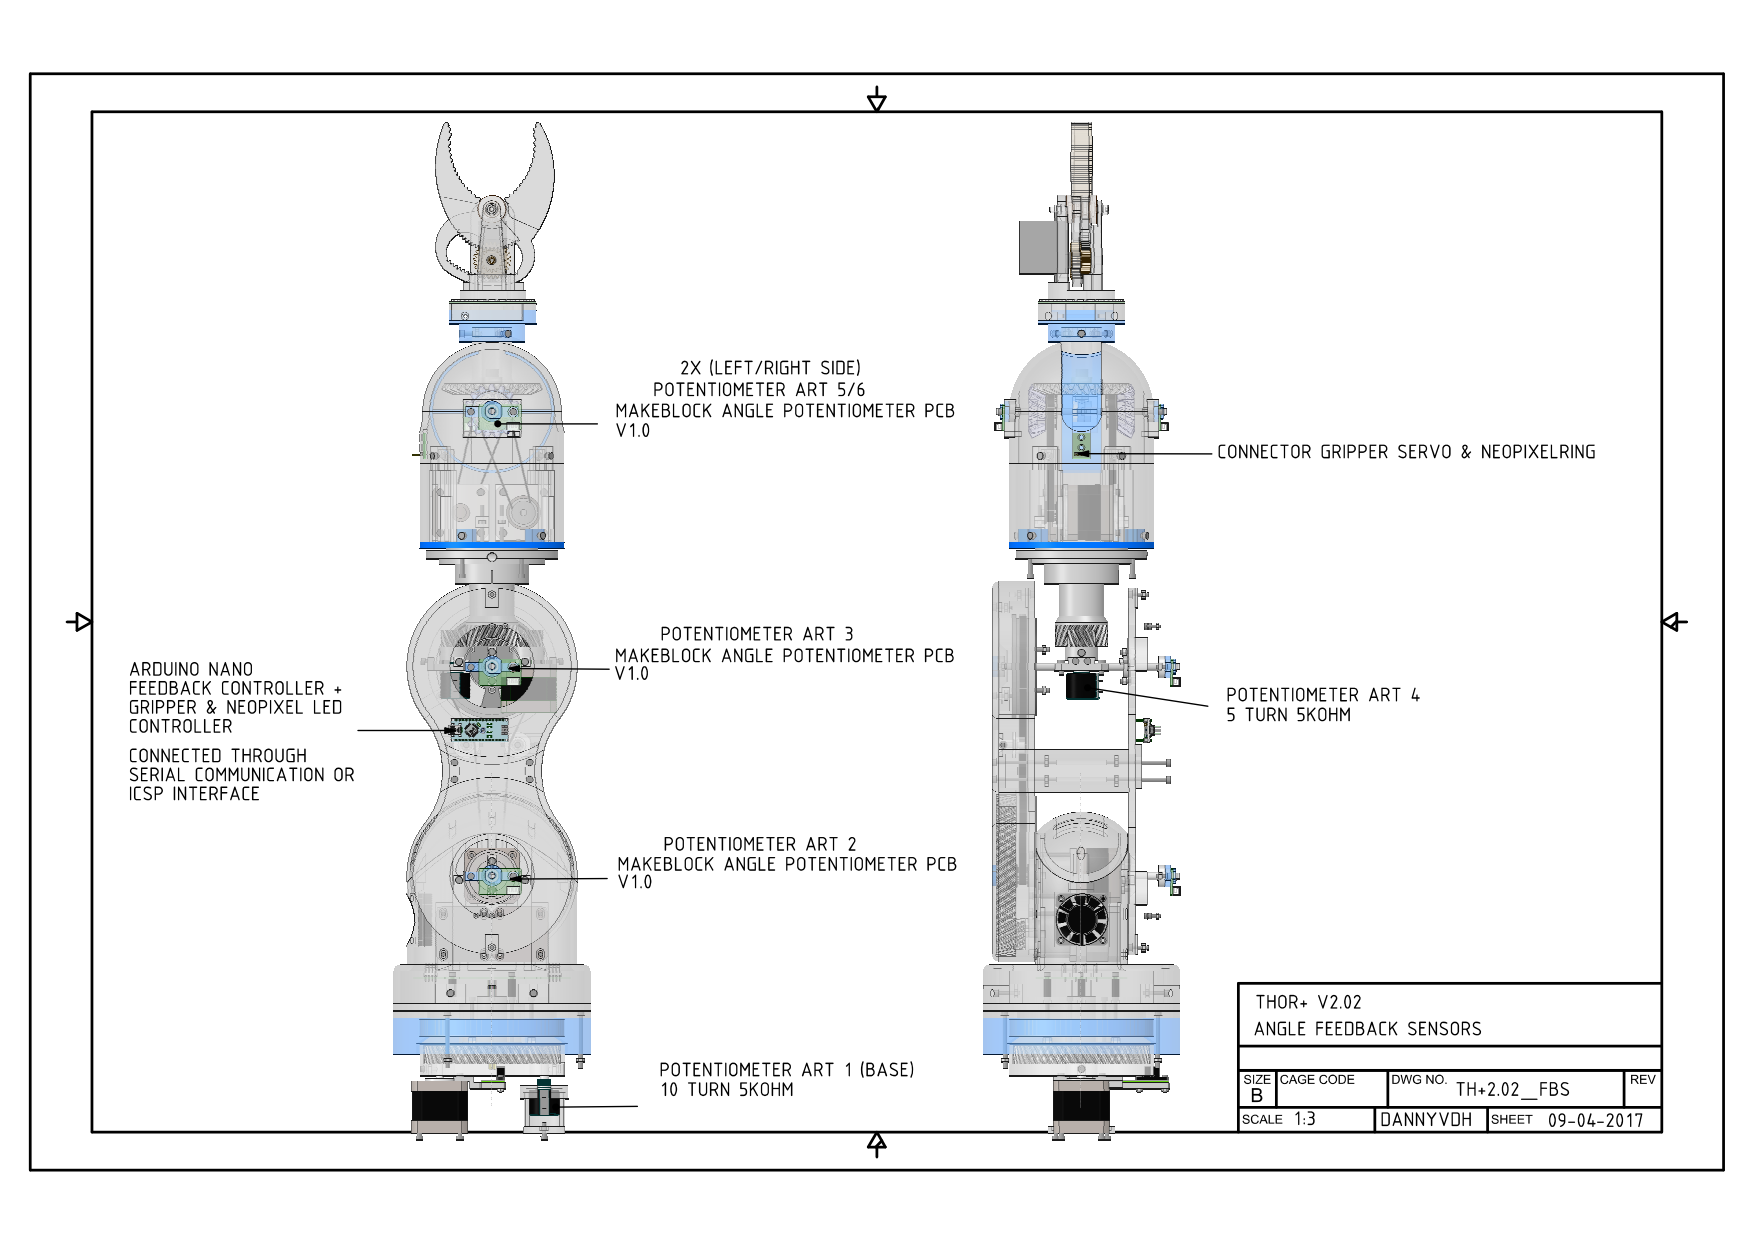
There will be a hand controller to move the robot manually and store the points, afterwards you can send these points to the graphical controller. It will be bi-directional programming.
In a further stage the axis will be recorded into the controler so movements can be simulated be moving the robot by hand and can be replayed afterwards.
It's a lot but this will be my challange in the next comming days...months :-)

Any feedback is welcome!

I will send my regards to AngelLM for the original nice designed robot called 'THOR' , without him I could not started this SUPER project!

Everything stays open source, like everything should be...One for All, All for One
All software programs to build the robot are free to download

STL_V2.04.rar

Upgrade STL parts from V2.03 to V2.04 Overall stability feedback add-ons, extra fans added and design improvements.

RAR Archive - 3.17 MB - 09/24/2017 at 08:27

Download

ROBOT_THOR_V2.04.rar

Step design Thor+ V2.04

RAR Archive - 10.31 MB - 09/24/2017 at 08:26

Download

STL_V2.03_BASE-VERTICAL-HOLES.rar

Base with fan and vertical hols Thor+ V2.03

RAR Archive - 292.74 kB - 09/02/2017 at 00:05

Download

THORV2_03.rar

Step design file Thor+ V2.03

RAR Archive - 10.26 MB - 08/29/2017 at 05:48

Download

STL_V2.02.zip

THOR+ V2.02 All STL Files Feedback sensors add-on

Zip Archive - 40.59 MB - 08/05/2017 at 20:39

Download

View all 22 files

  • 1 × 3D printer to print the parts UPrint SE plus Stratasys
  • 1 × GUI software controller Unity personal
  • 1 × Ultratronics V1.0 Pro main board The main controller for the robot
  • 1 × Arduino mini board The controller inside the robot Art2 to control IO/Gripper/Leds/Feedback sensors, etc...
  • 1 × Programming software arduino arduino plugin + visual studio community 2015

View all 6 components

  • UPGRADE THOR+ V2.04

    dannyvandenheuvel09/23/2017 at 20:27 7 comments

    Upgrade Thor+ V2.04 ... Feedback stability improvements, Added extra fans and changed some design. (By Sepio & Danny)

    All STL and STEP files online!

  • VENTILATED BASE

    dannyvandenheuvel08/15/2017 at 13:28 6 comments

    Add some cooling ribs in the base and added fan 40x40x10 inside

  • THOR+ V2.02 WITH FEEDBACK SENSORS!

    dannyvandenheuvel08/05/2017 at 21:07 11 comments

    Finally! It's here, Thor+ V2.02 with integrated feedback sensors :-)

    STL files all online.
    For users how have printed V2.01 all files marked with a leading underscore are new or changed in V2.02.

    Happy printing!
    Thor+ V2.02 is based from the original idea & design of AngelLM

    The difficult part in assembling the robot parts will be the feedback sensor joints, be carefully how they have to rotate around there axis. I will make a manual later on. All the rest is very clear the same as AngelLM his version.


  • Robo GUI controler 'Progress status 07-2017'

    dannyvandenheuvel07/07/2017 at 21:18 3 comments

    I wasn't prepared enough, so sorry for my bad english :-( , I hope you understand it a little bit, anyway it's funny...

  • UPDATE THOR+ ROBOT_GUI CONTROLLER

    dannyvandenheuvel04/30/2017 at 12:54 3 comments

    Now loading and saving opportunities. Playing has been more fun now because we can save and load! Yeahhh.

    Now you can play with it! Next will be save and load senarios and connection with real robot arm through ethernet. Try to upload new version in a couple of days :)


    Some progress Thor robot arm embedded, almost running inverse kinematics routine :)

    At this moment I build a recorder into the Thor robot gui controller, following will be save and load recorded movements. Then TCP socket to communicate with the real robot arm! will be continued :) I used a other model to test the routine, it's temporary :). Thanks to Luca Filippini for helping me with the Inverse kinematics scripting!

  • UPCOMMING THOR+ V2.02 WILL HAVE ABSOLUTE FEEDBACK SENSORS ON ALL AXIS

    dannyvandenheuvel04/08/2017 at 14:44 6 comments

    Thor+ Feedback sensors for Art2 and Art3
    All feedback sensors, gripper servo and neo pixel ledring will be controlled by build-in arduino nano
    serial connected to the main controller board.

    Sheet all feedback sensors integrated into Thor+
    Sensors:
    4 x Makeblock Angular sensor V1.0
    1 x 10 turns potentiometer 5Kohm (burns)
    1 x 5 turns potentiometer 5Kohm (burns)

    Controller:
    1 x Arduino Nano controller

  • THOR+ V2.0 ALL STL PARTS ONLINE!!!

    dannyvandenheuvel03/30/2017 at 12:51 1 comment

    Good news! All stl parts online V2.0
    Start printing : - )

  • 'ADDING SLIPRING TO THOR+'

    dannyvandenheuvel02/19/2017 at 14:47 1 comment

    Finally get my slipring from ebay! It's going to connect my 6 stepper motors and arduino mini.
    I didn't like the many wires hanging around.

    Making room in the base, I have a motor with position sensor and feedback potentiometer wired, now it's time to add the slipring to it : -)

    Build my slipring into a ring that can be attached on the turning base.

    Attached pcb and connectors on it

    6 steppers and 0V,5V,TX,RX for my arduino mini connectors, just to add all connectors in the controller box, very secure work adding all these small pins.

    My helping tool :-)

    Finnished! every wire has his connection, hoooraaayyy.

    No wire to find! That's what I wanted!

    Up to the next part, see ya!

  • 'ELECTRONIC SHEET THOR+'

    dannyvandenheuvel02/11/2017 at 16:49 2 comments

    I made a complete electronic sheet of my THOR+ robotic arm
    Components used:
    1x Main controller board Ultratronics Pro V1.0 based on arduino due
    6x Polulu stepper driver 8825 cooled max 2A - 24V
    1x Logic shifter 3V3 <> 5V 8 channels
    1x USB Host PCB with flashed software PS4 controller to TTL serial connection
    1x Bluetooth dongle 4.0
    1x Slipring 24 wires max.2A for each wire
    1x Arduino Nano
    1x Neo pixel ring (gripper)
    1x Servo motor (gripper)
    1x Stepper motor (base) 17HS16-2004S1 (2A) 24V
    3x Stepper motor geared 17HS13-0404S-PG5 (400mA) 24V
    3x Stepper motor 17HS13-0404S (400mA) 24V
    2x Fan 24V 40x40x10mm

    It becomes time to assemble it! So next week I'll try to put it all togetter.
    In the meanwhile I'm gone put all drawings and stl files online this weekend.
    And after all these works I finnaly can program back on my GUI controller software :-)
    In the next comming weeks I will have a real moving robotic arm, Yeah...

    UPDATE!!!

    Drawing has been changed, I had problems to connect to the mini arduino so had to change the communication to a real serial port. I did move my usb host to I2C.

    The base potentiometer has been moved to another analog point, don't need the extra zero potentiometer anymore.

    Removed the stepdown pcb and feed arduino mini directly with 5V and used a fan at 5V.

    Don't use de extra zero potentiometers at the other axis on arduino mini anymore.

    UPDATE LIST

    1x Fan 24V 40x40x10mm
    1x Fan 5V 40x40x10mm
    1x Potentiometer 10 Turns 10Kohm
    1x Opto board (init base) https://reprapworld.com/products/electronics/endstops/opto_endstop/

    5x Makeblock angular sensor V1 http://www.makeblock.com/me-angular-sensor

    Did some testing to use the SDA SCL at the right side on the unitronics board, a little bit tricky but it works now for 100%.
    Needed pullup resistors 1.5Kohm between SDA,SLC lines to VCC. Edit the 'ps4_i2c.h' source and changed all the words 'Wire' into 'Wire1'. Added Wire1.begin() in setup function.
    Now everything is working like I wanted it! Got a spare serial port for connection on my arduino nano.
    Don't forget to attach the usb host module on TTL/USB module and set 'SERIAL OFF' to avoid latency problems. Read the documentation very carefully from the vendor.

  • 'STANDING CONTROLLER BOX FOR THOR ROBOT ARM'

    dannyvandenheuvel02/04/2017 at 19:00 11 comments

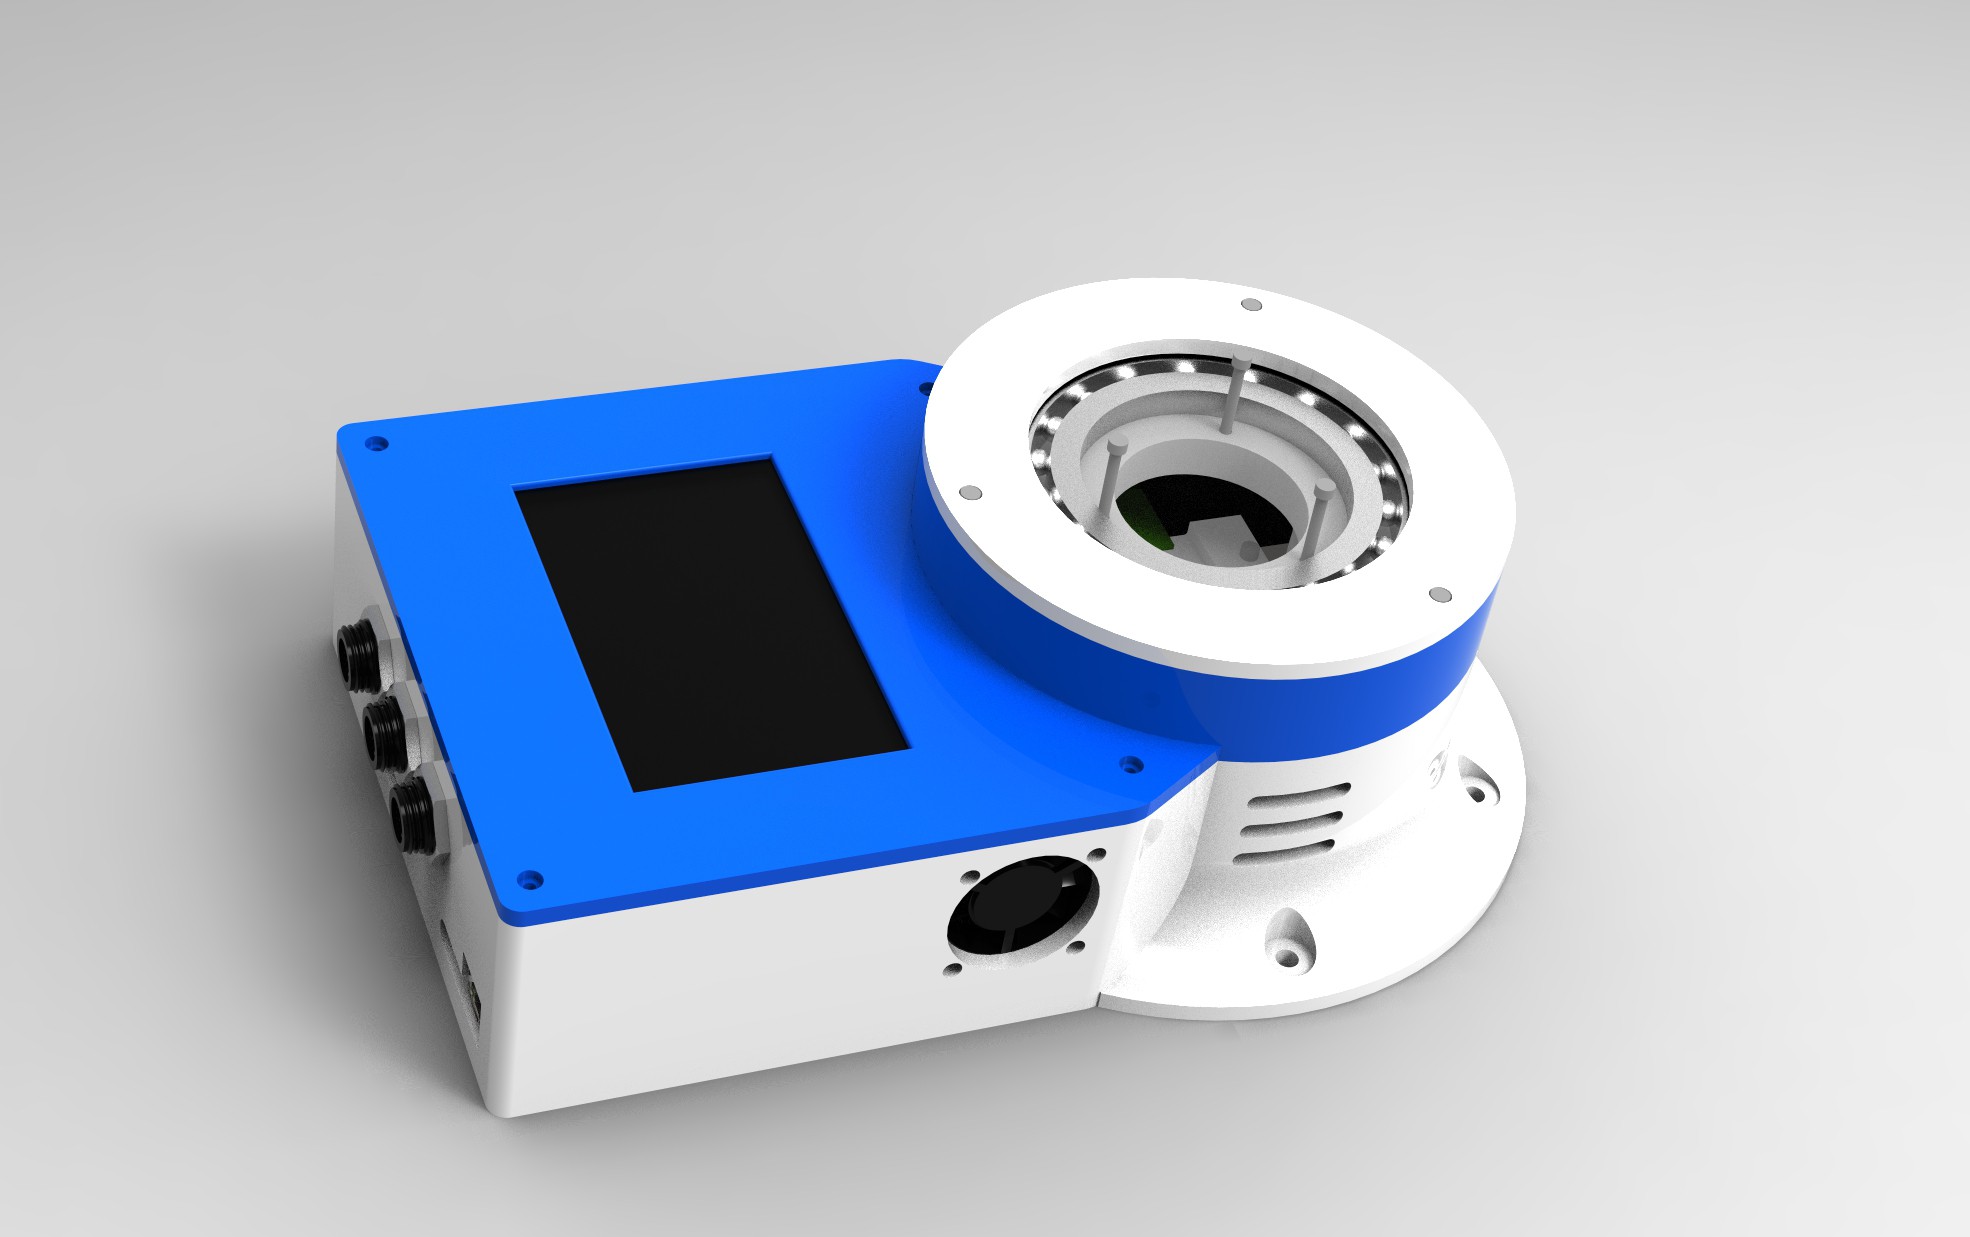
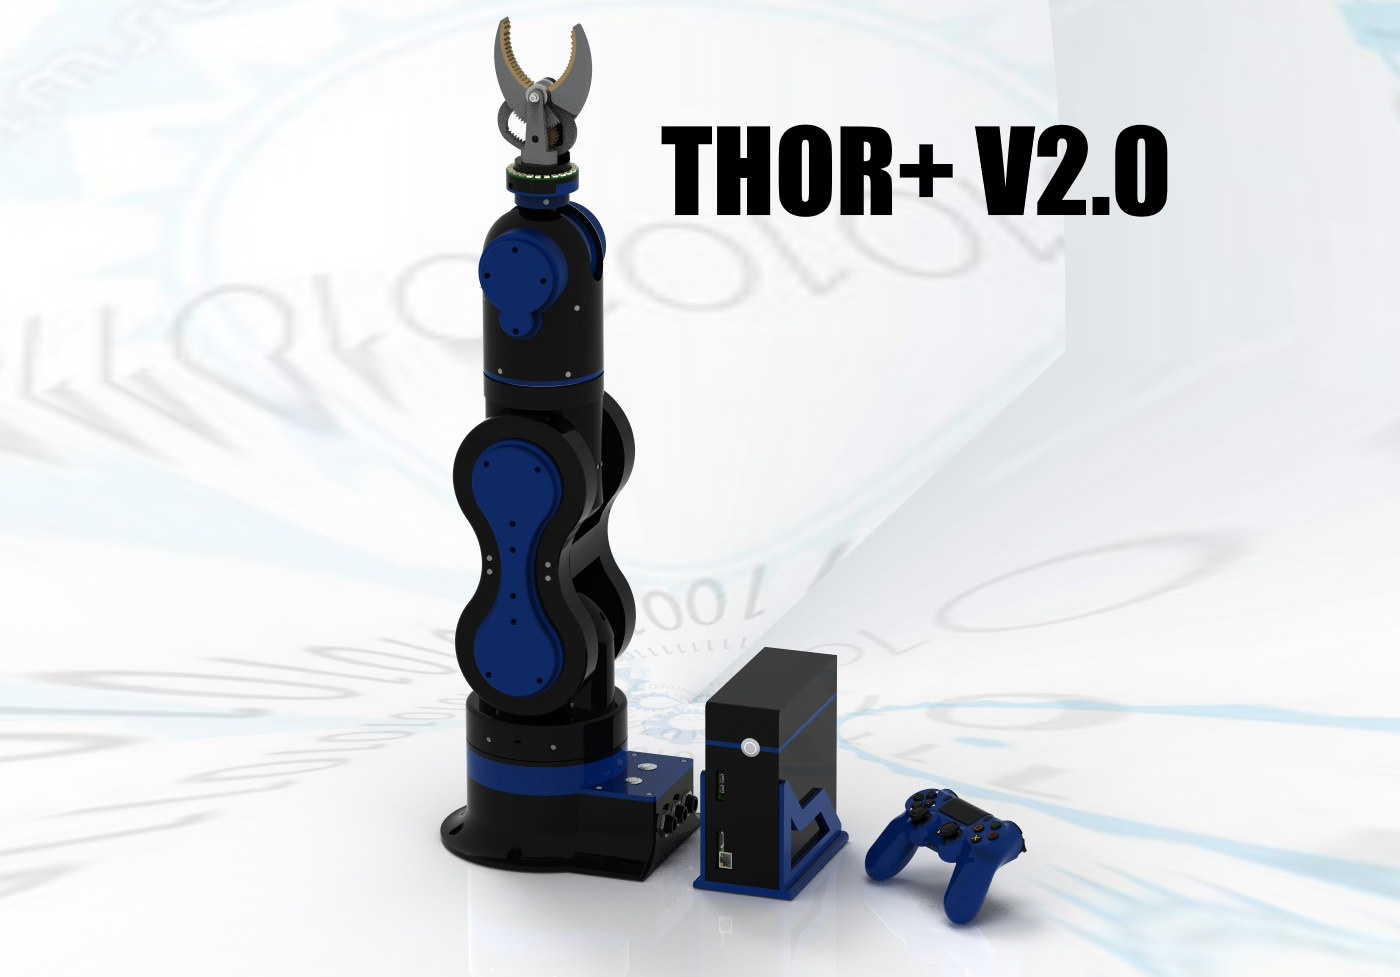
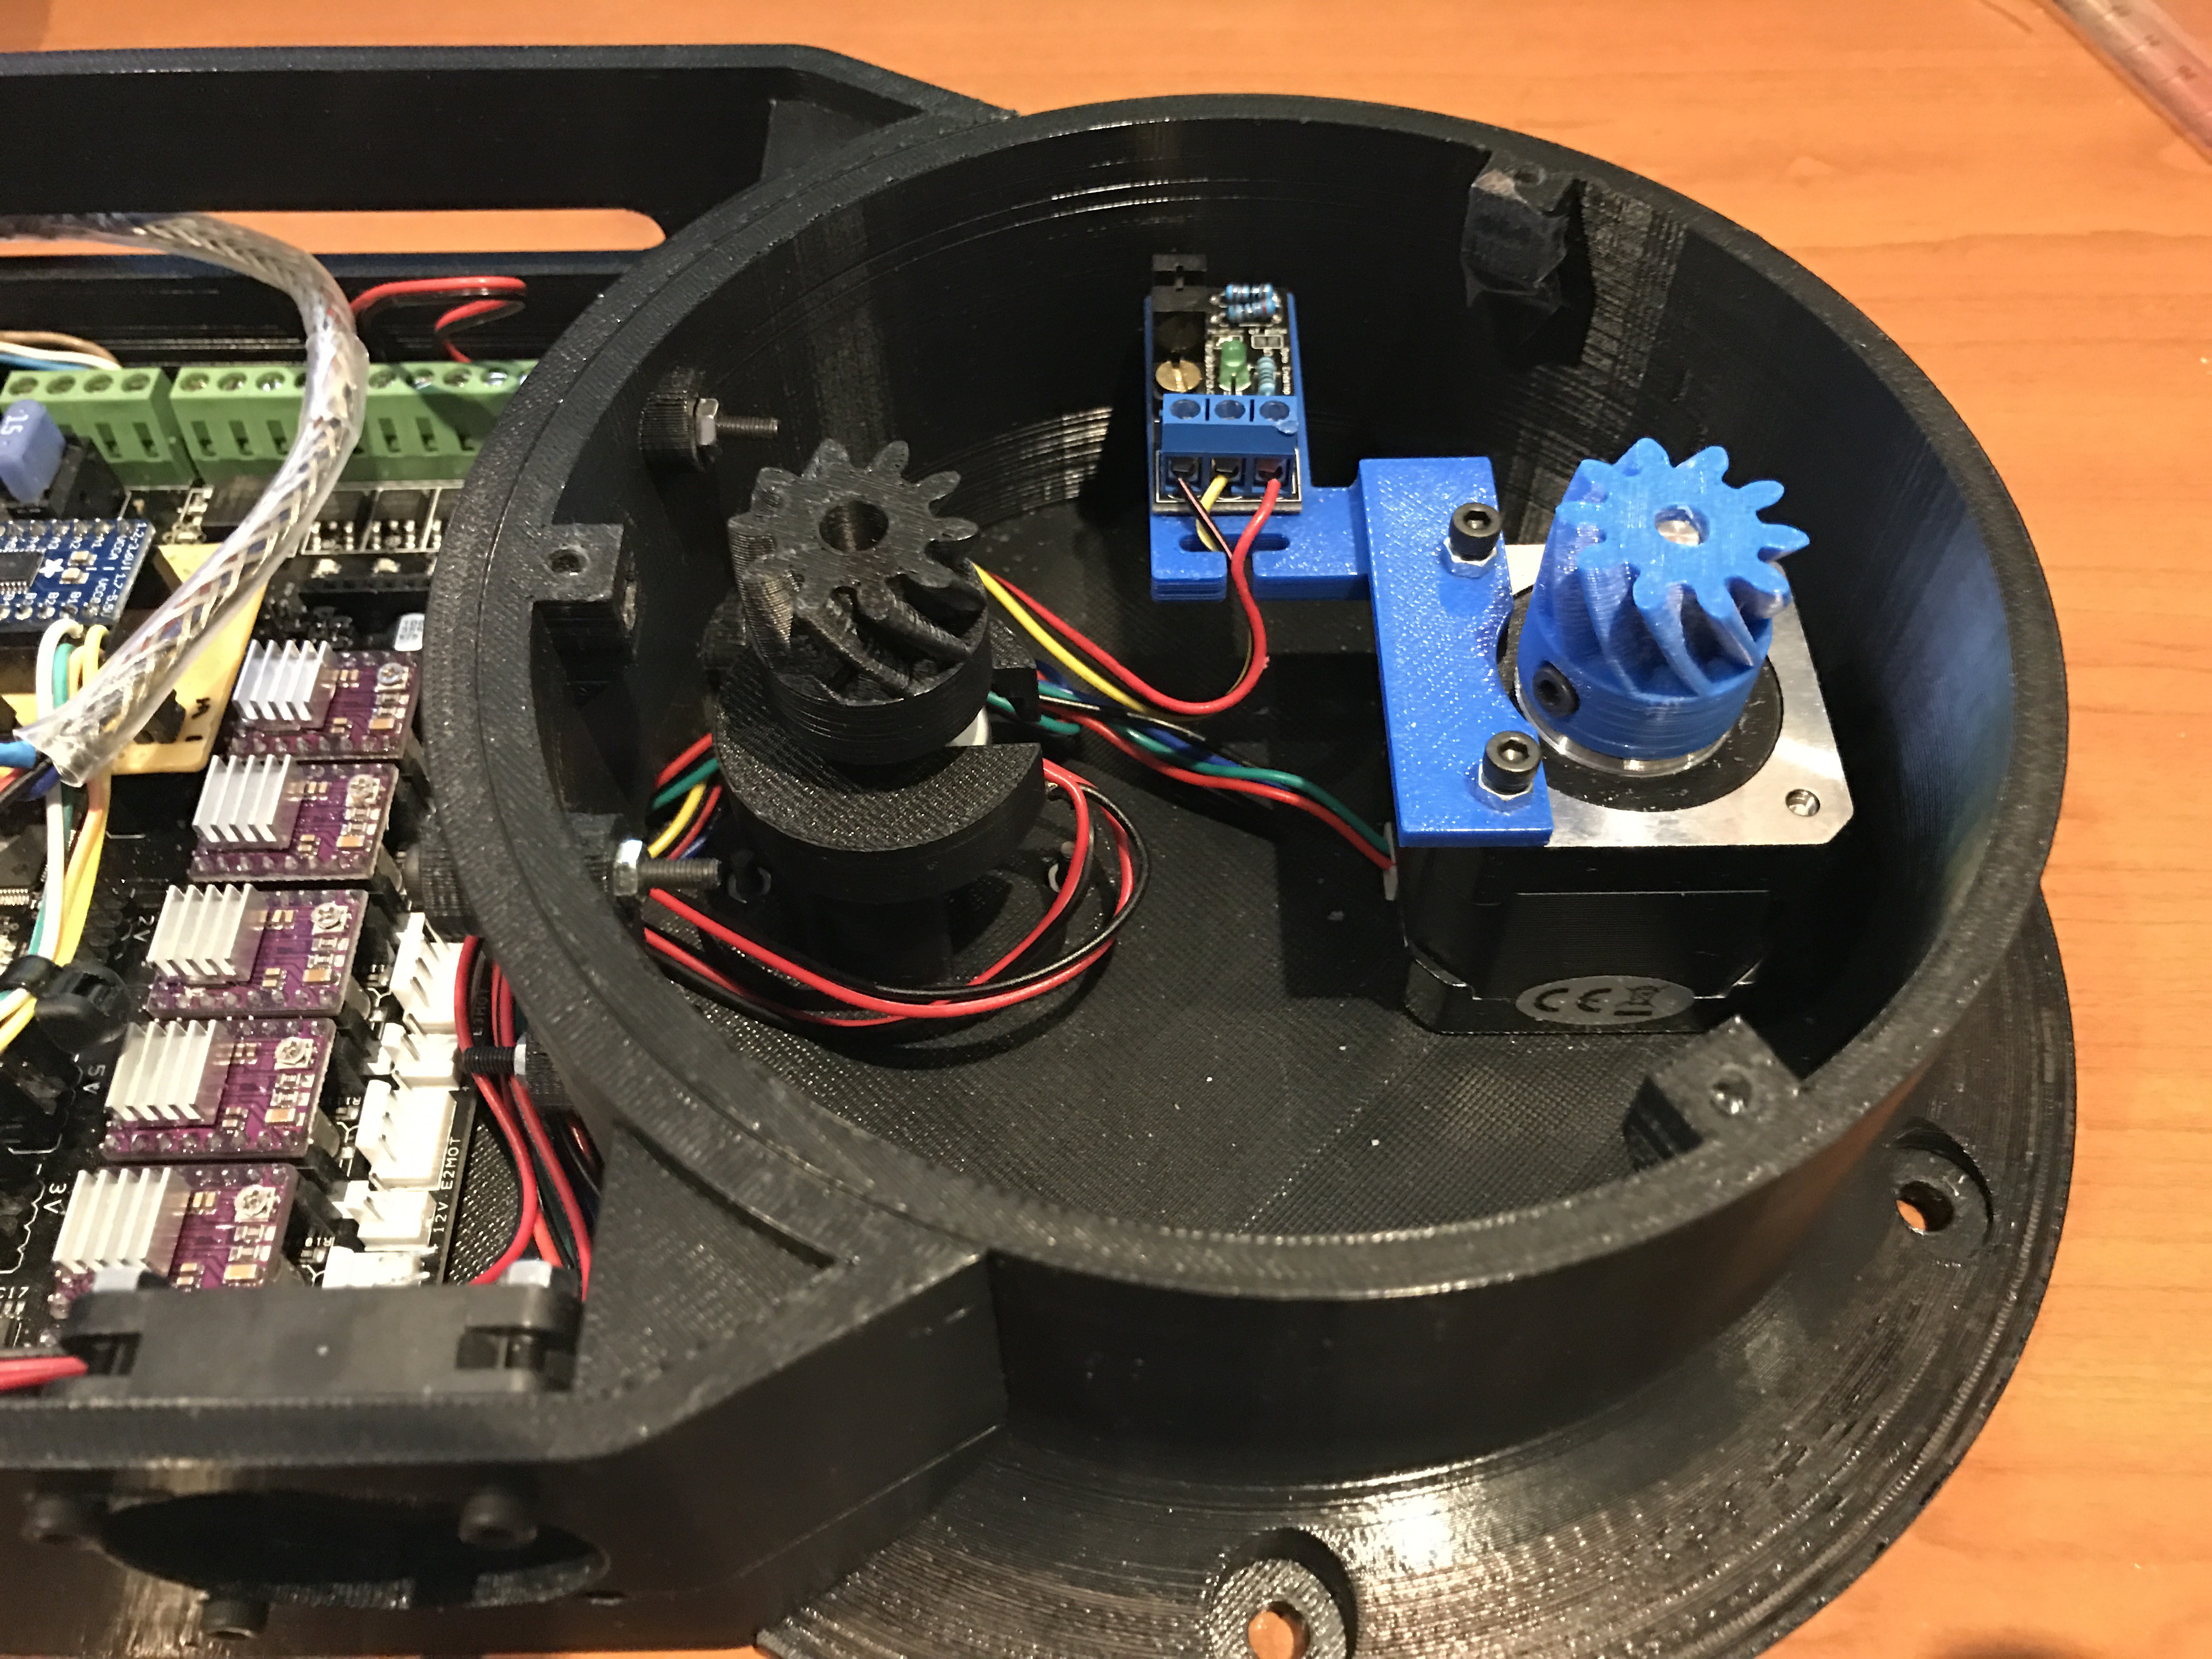
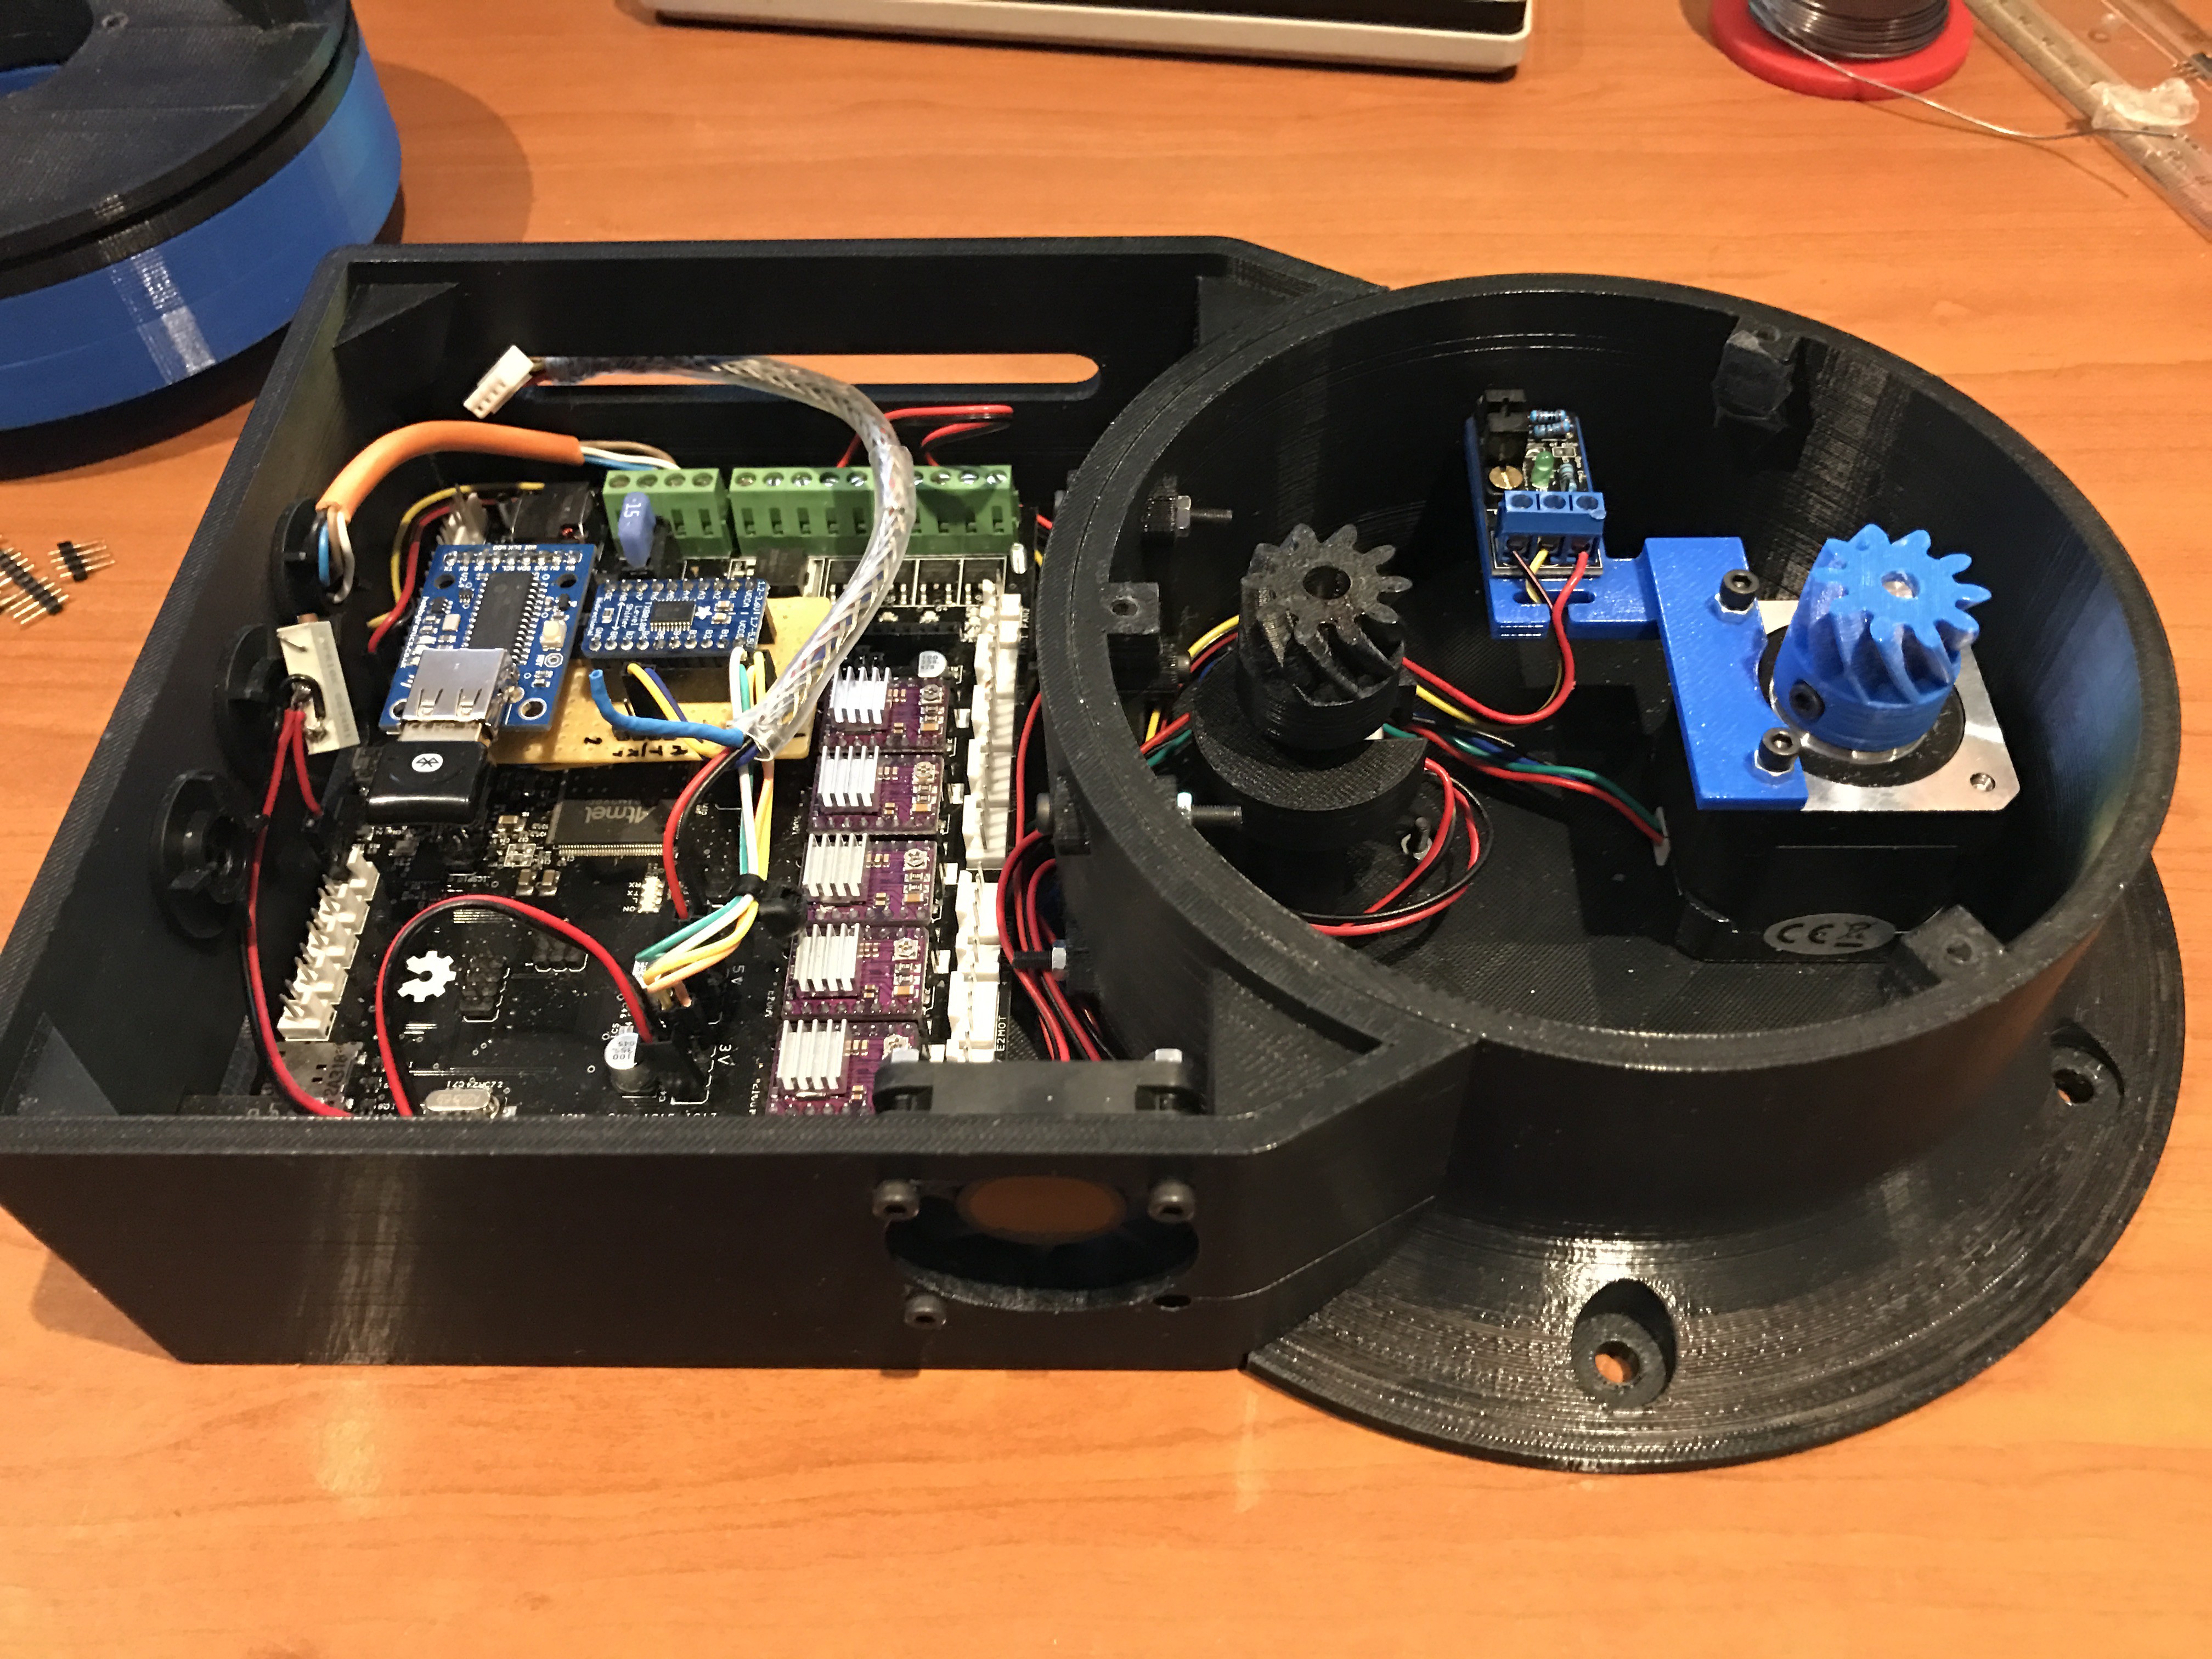
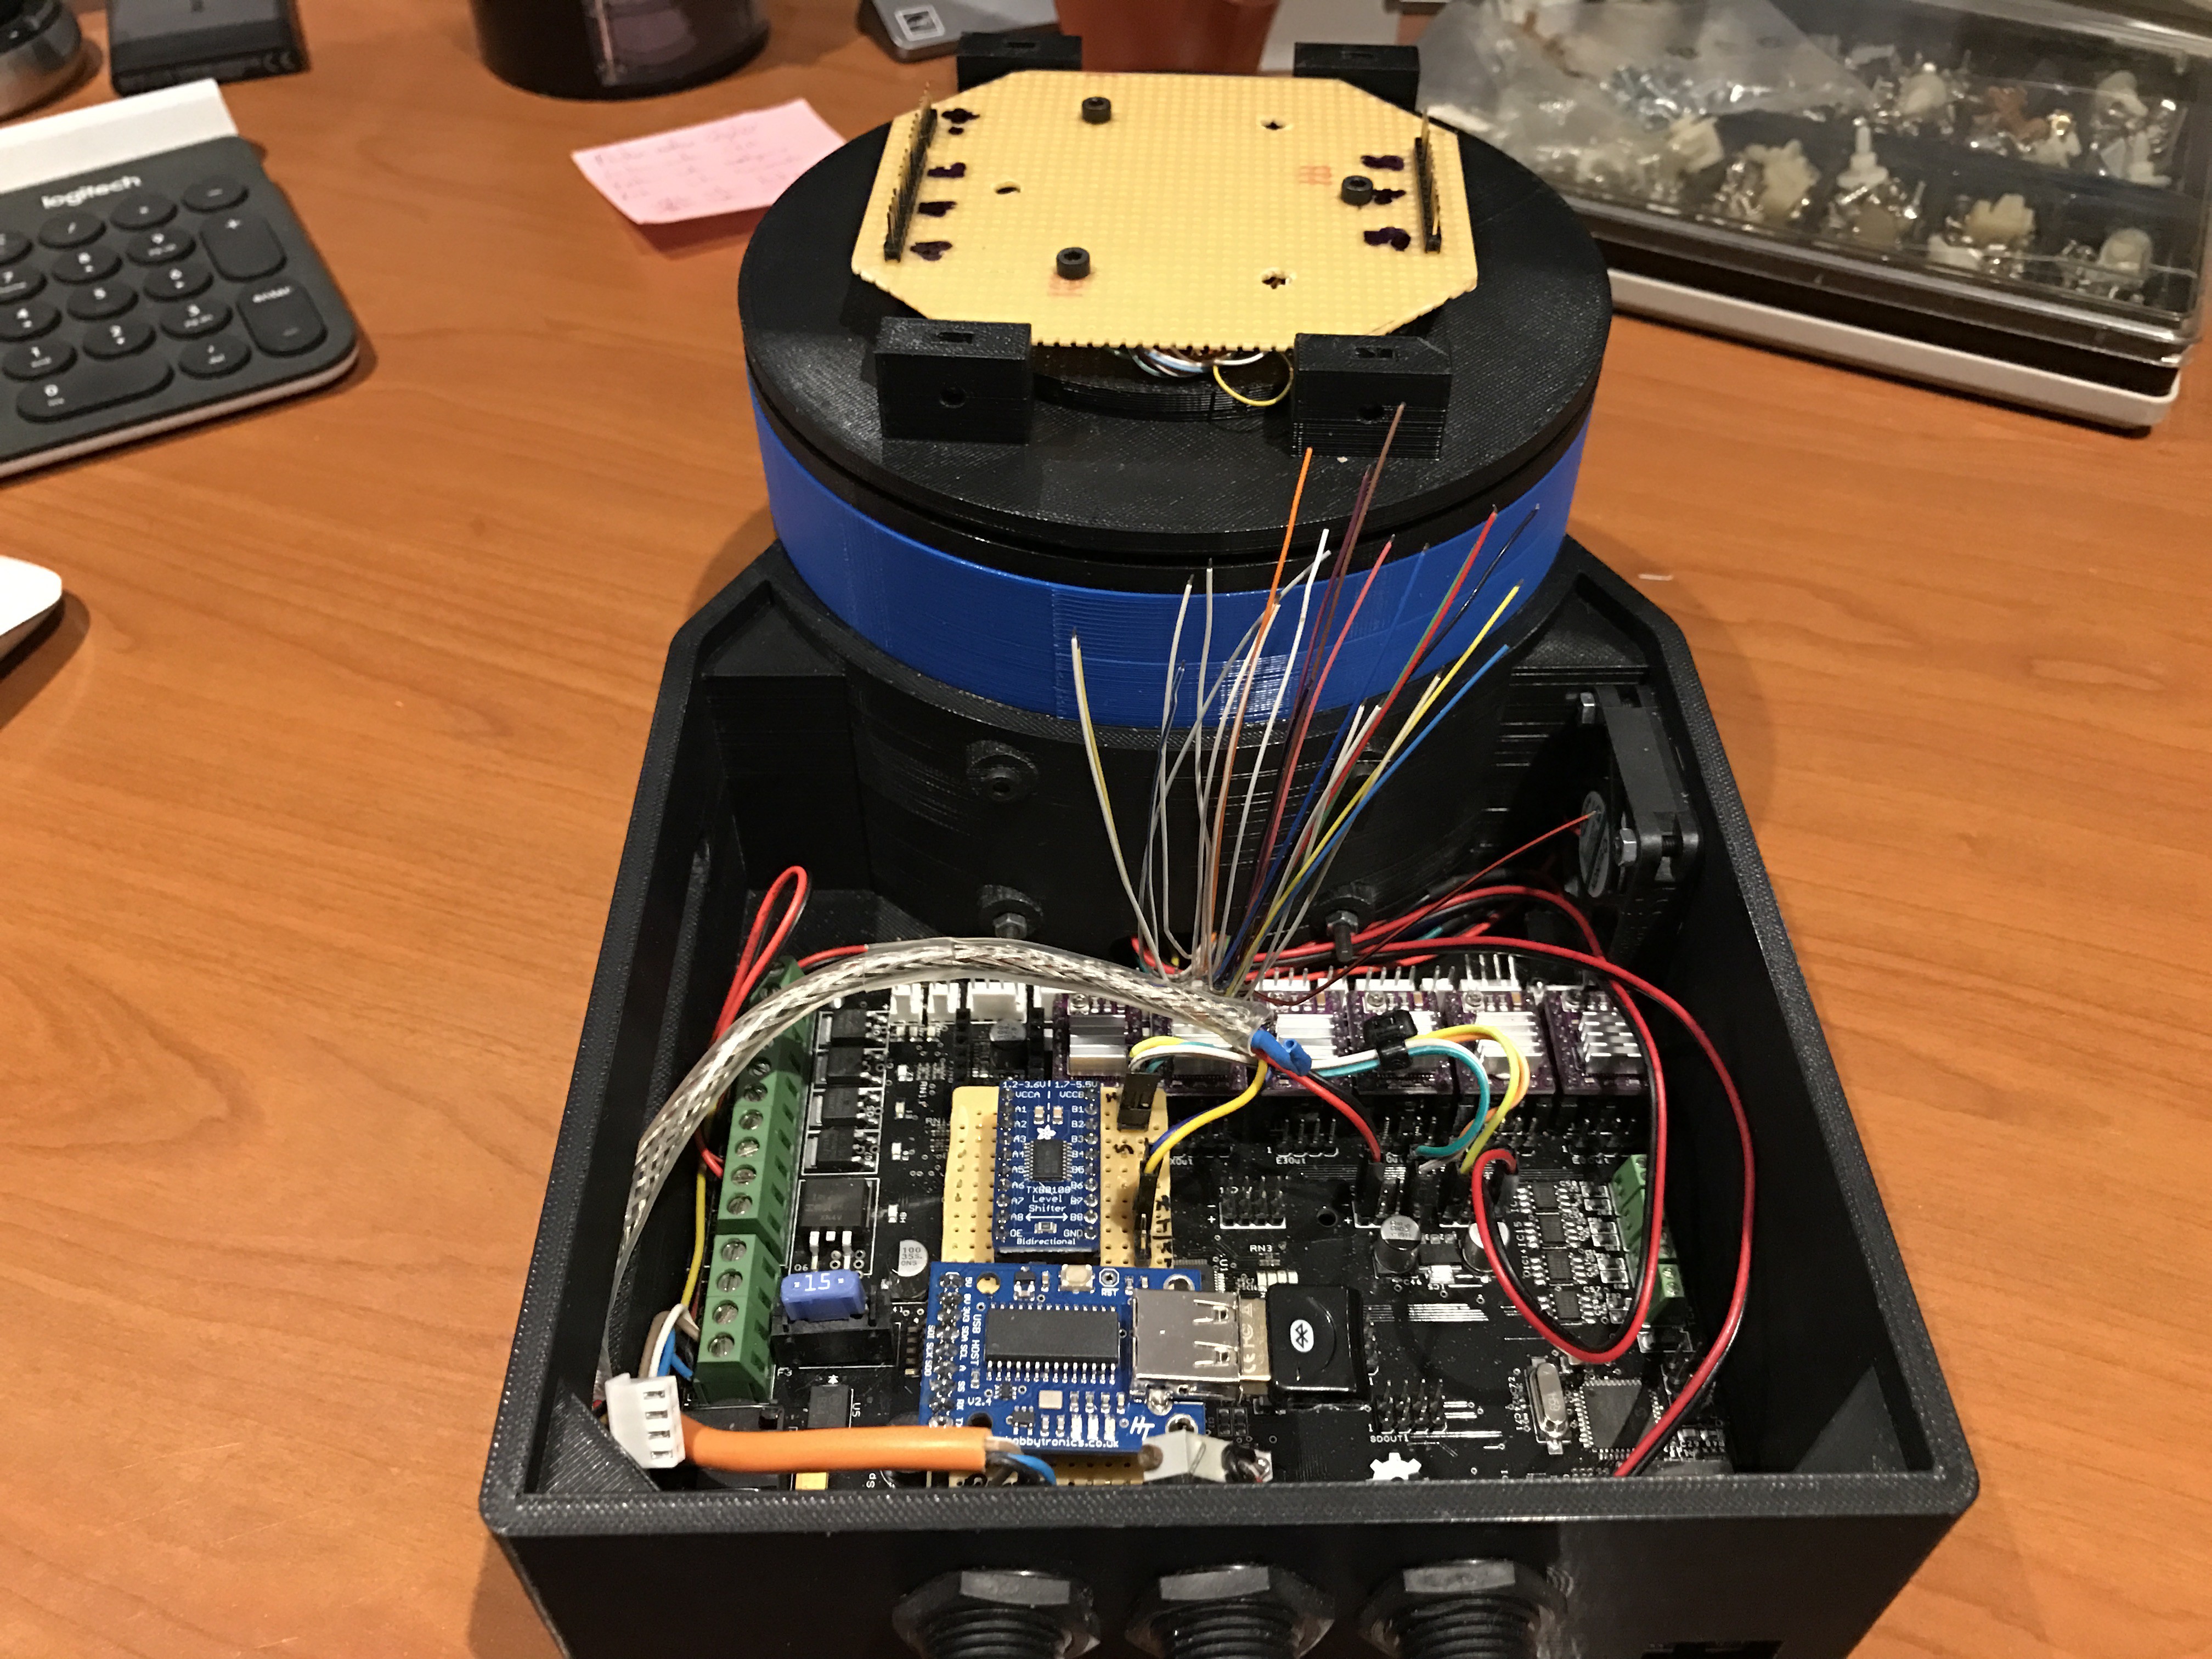
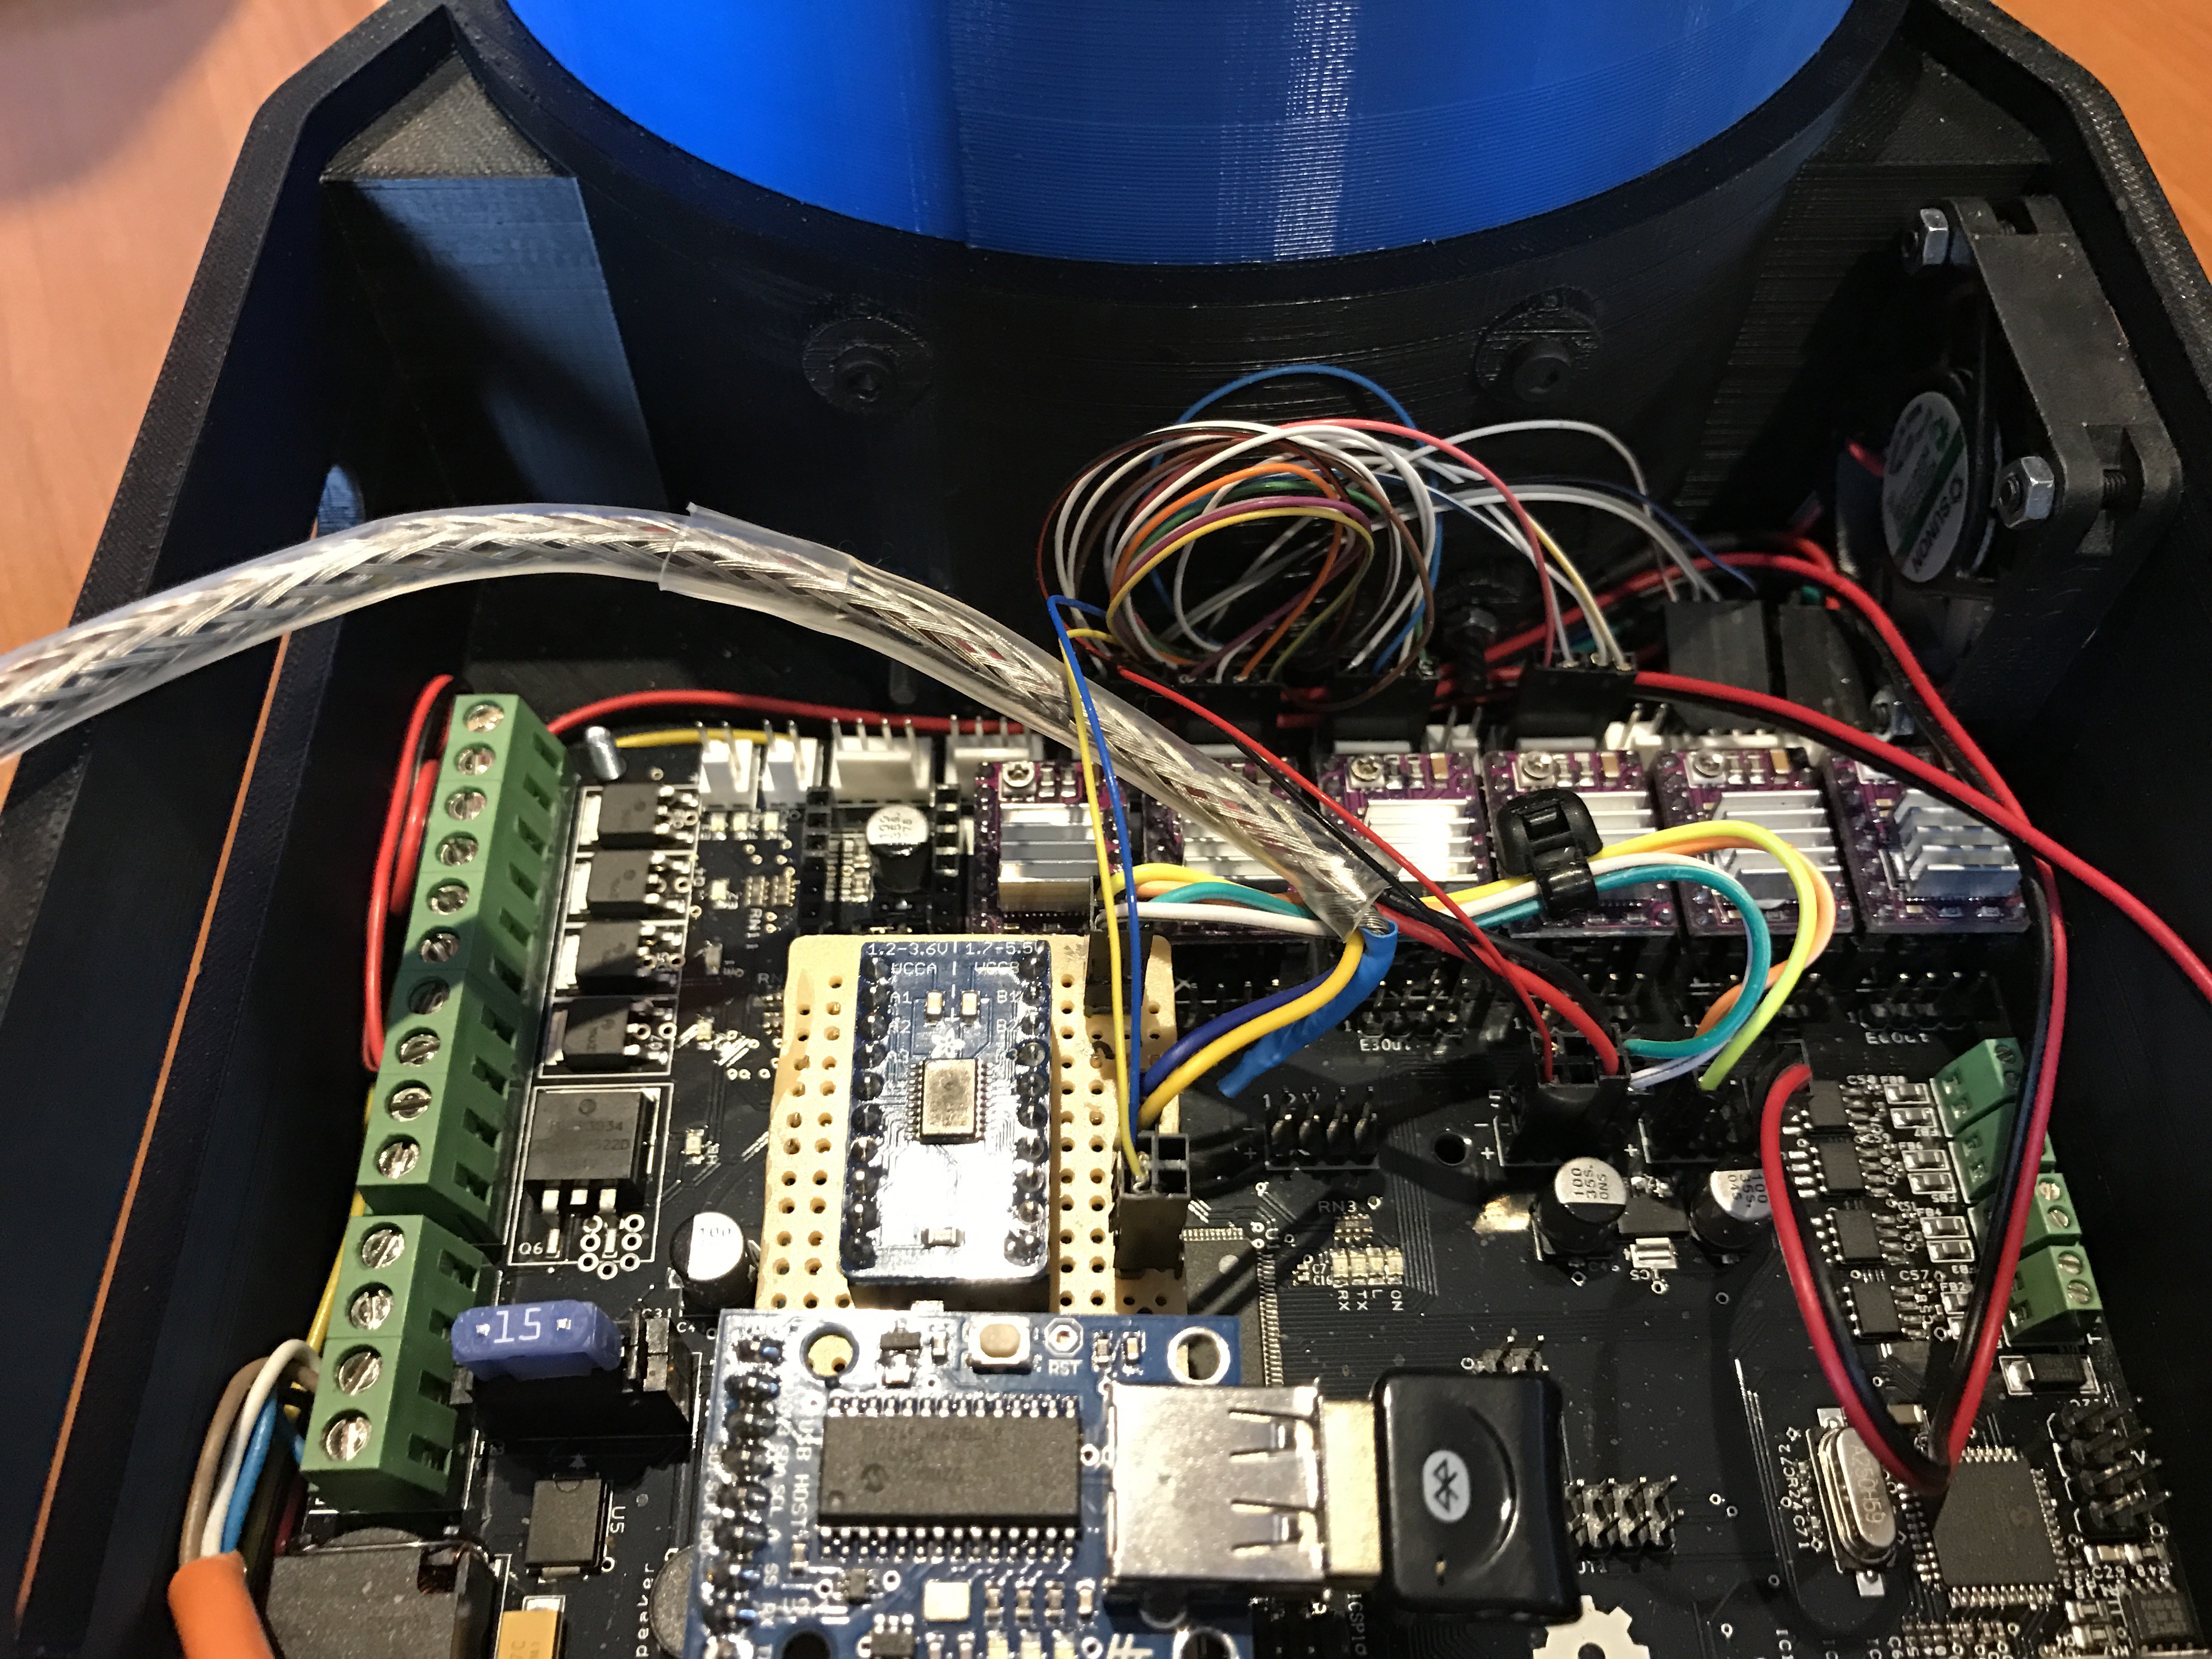
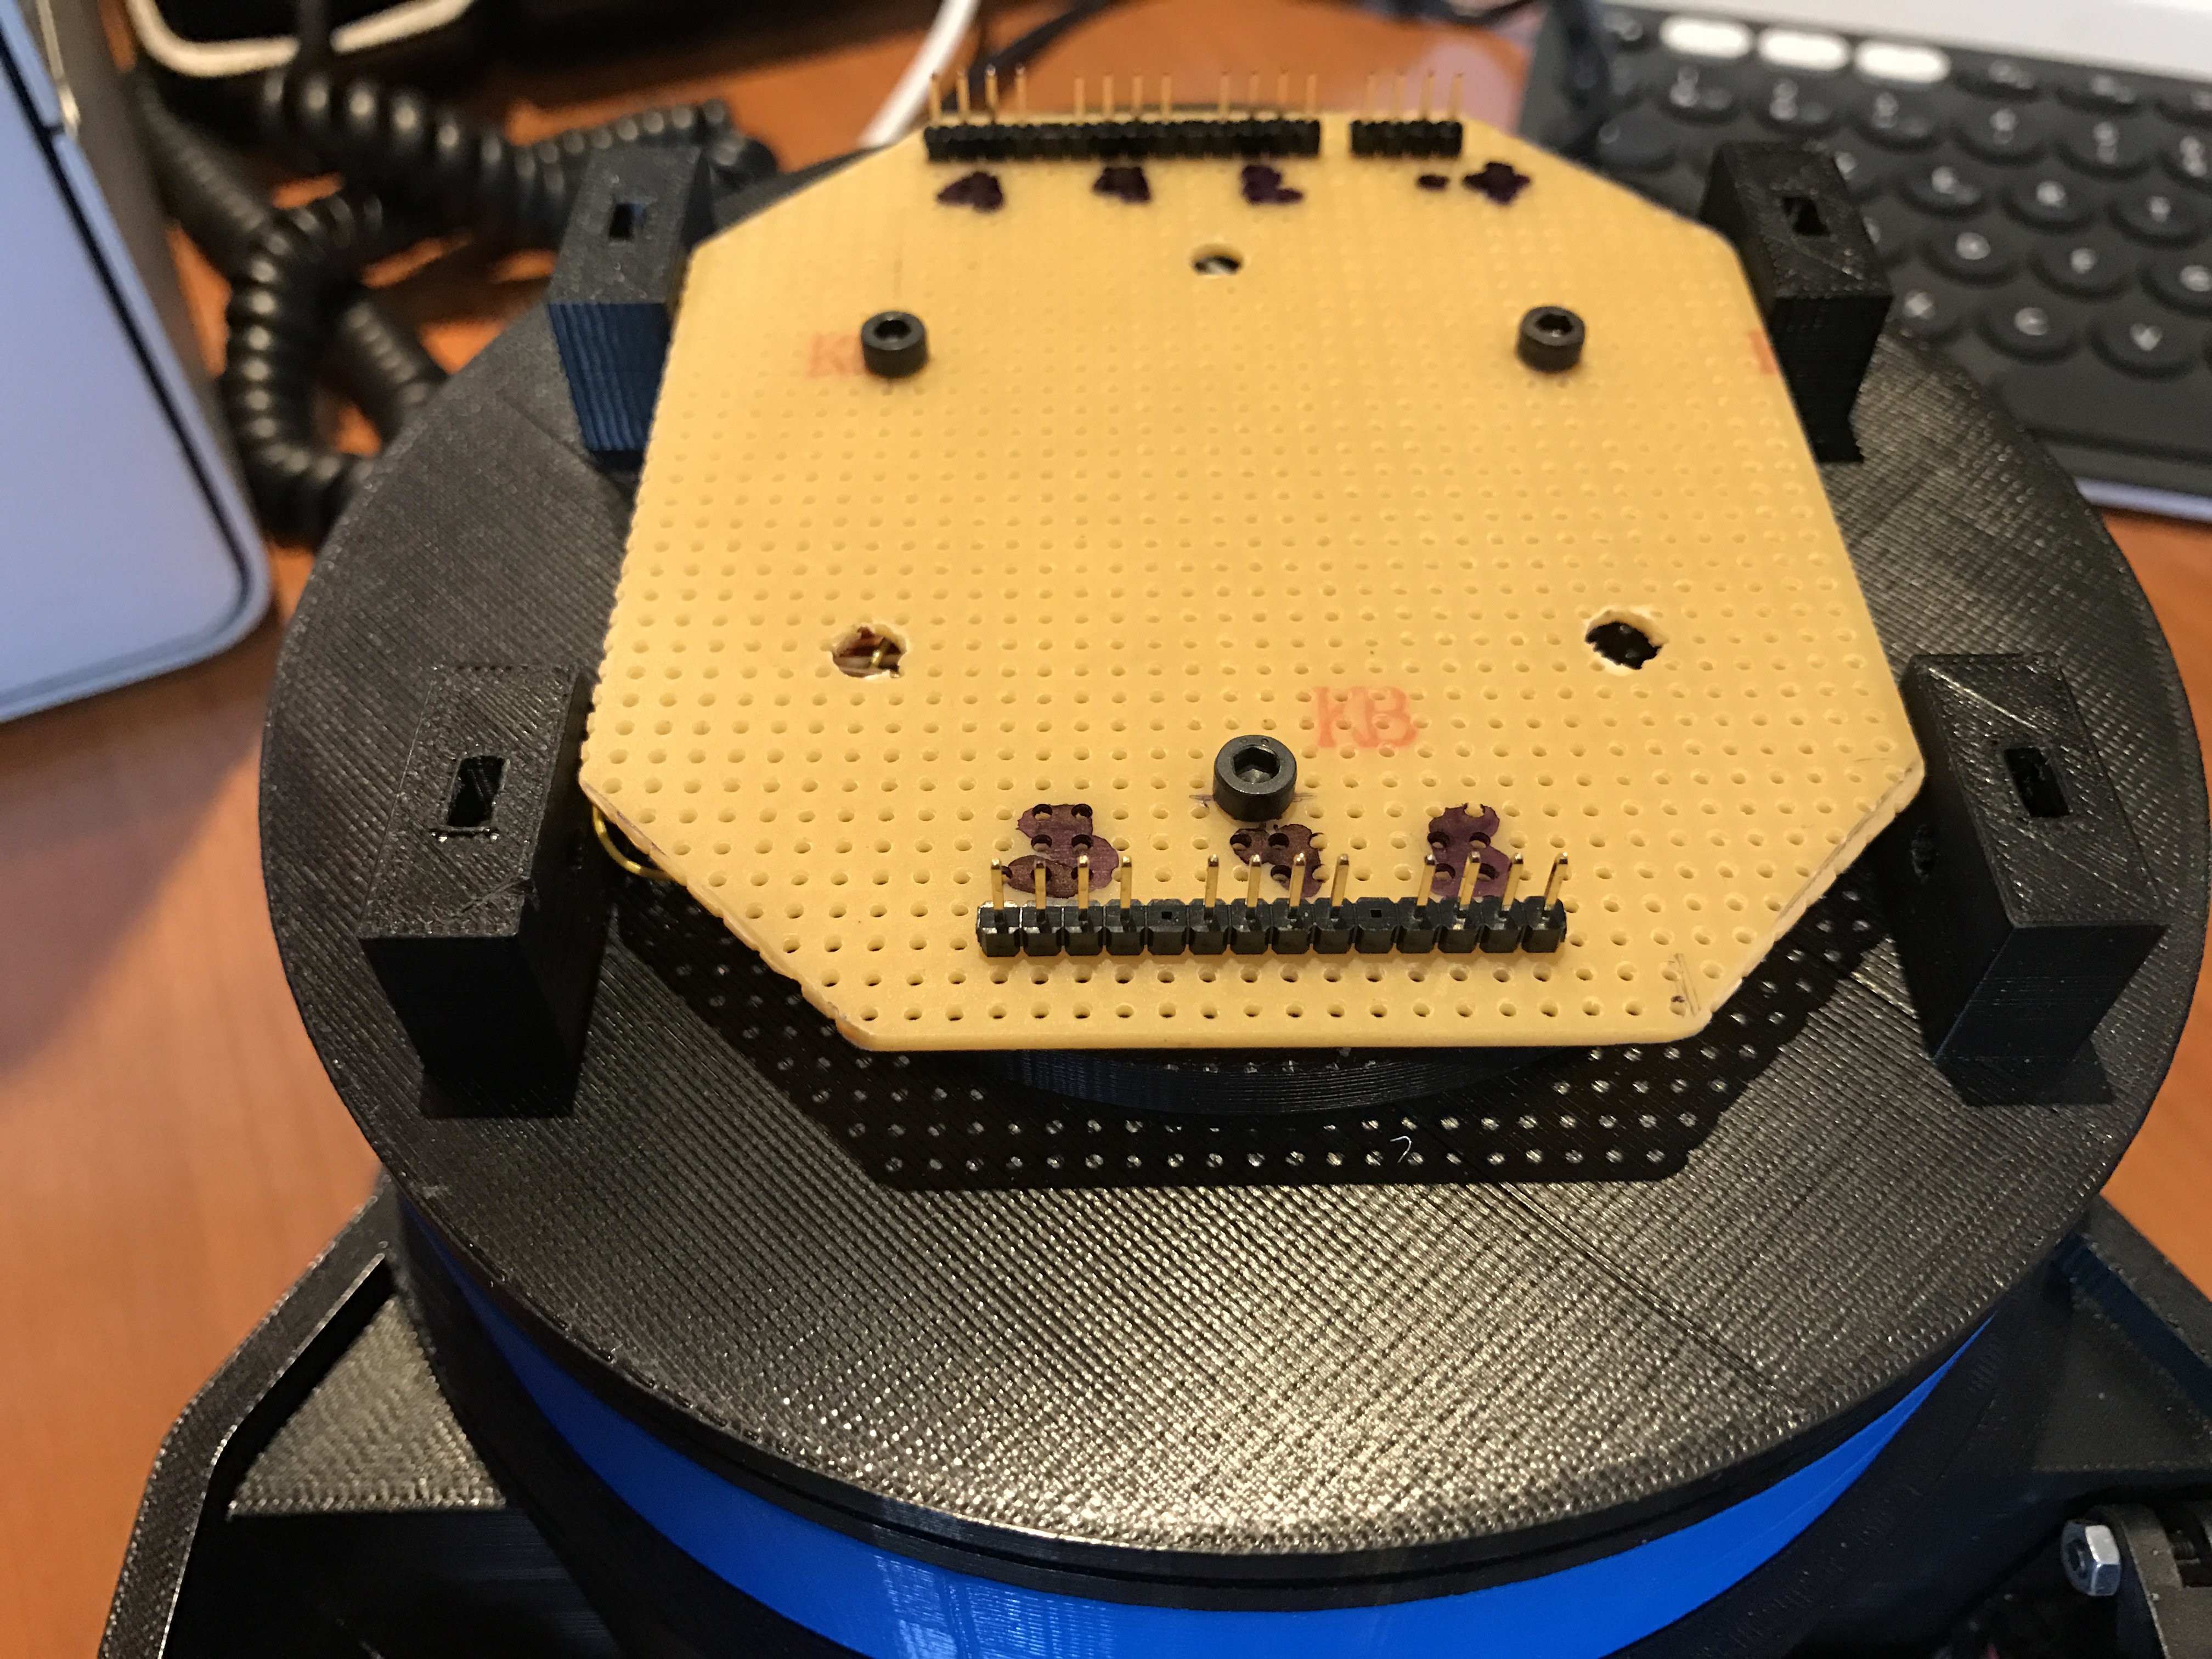
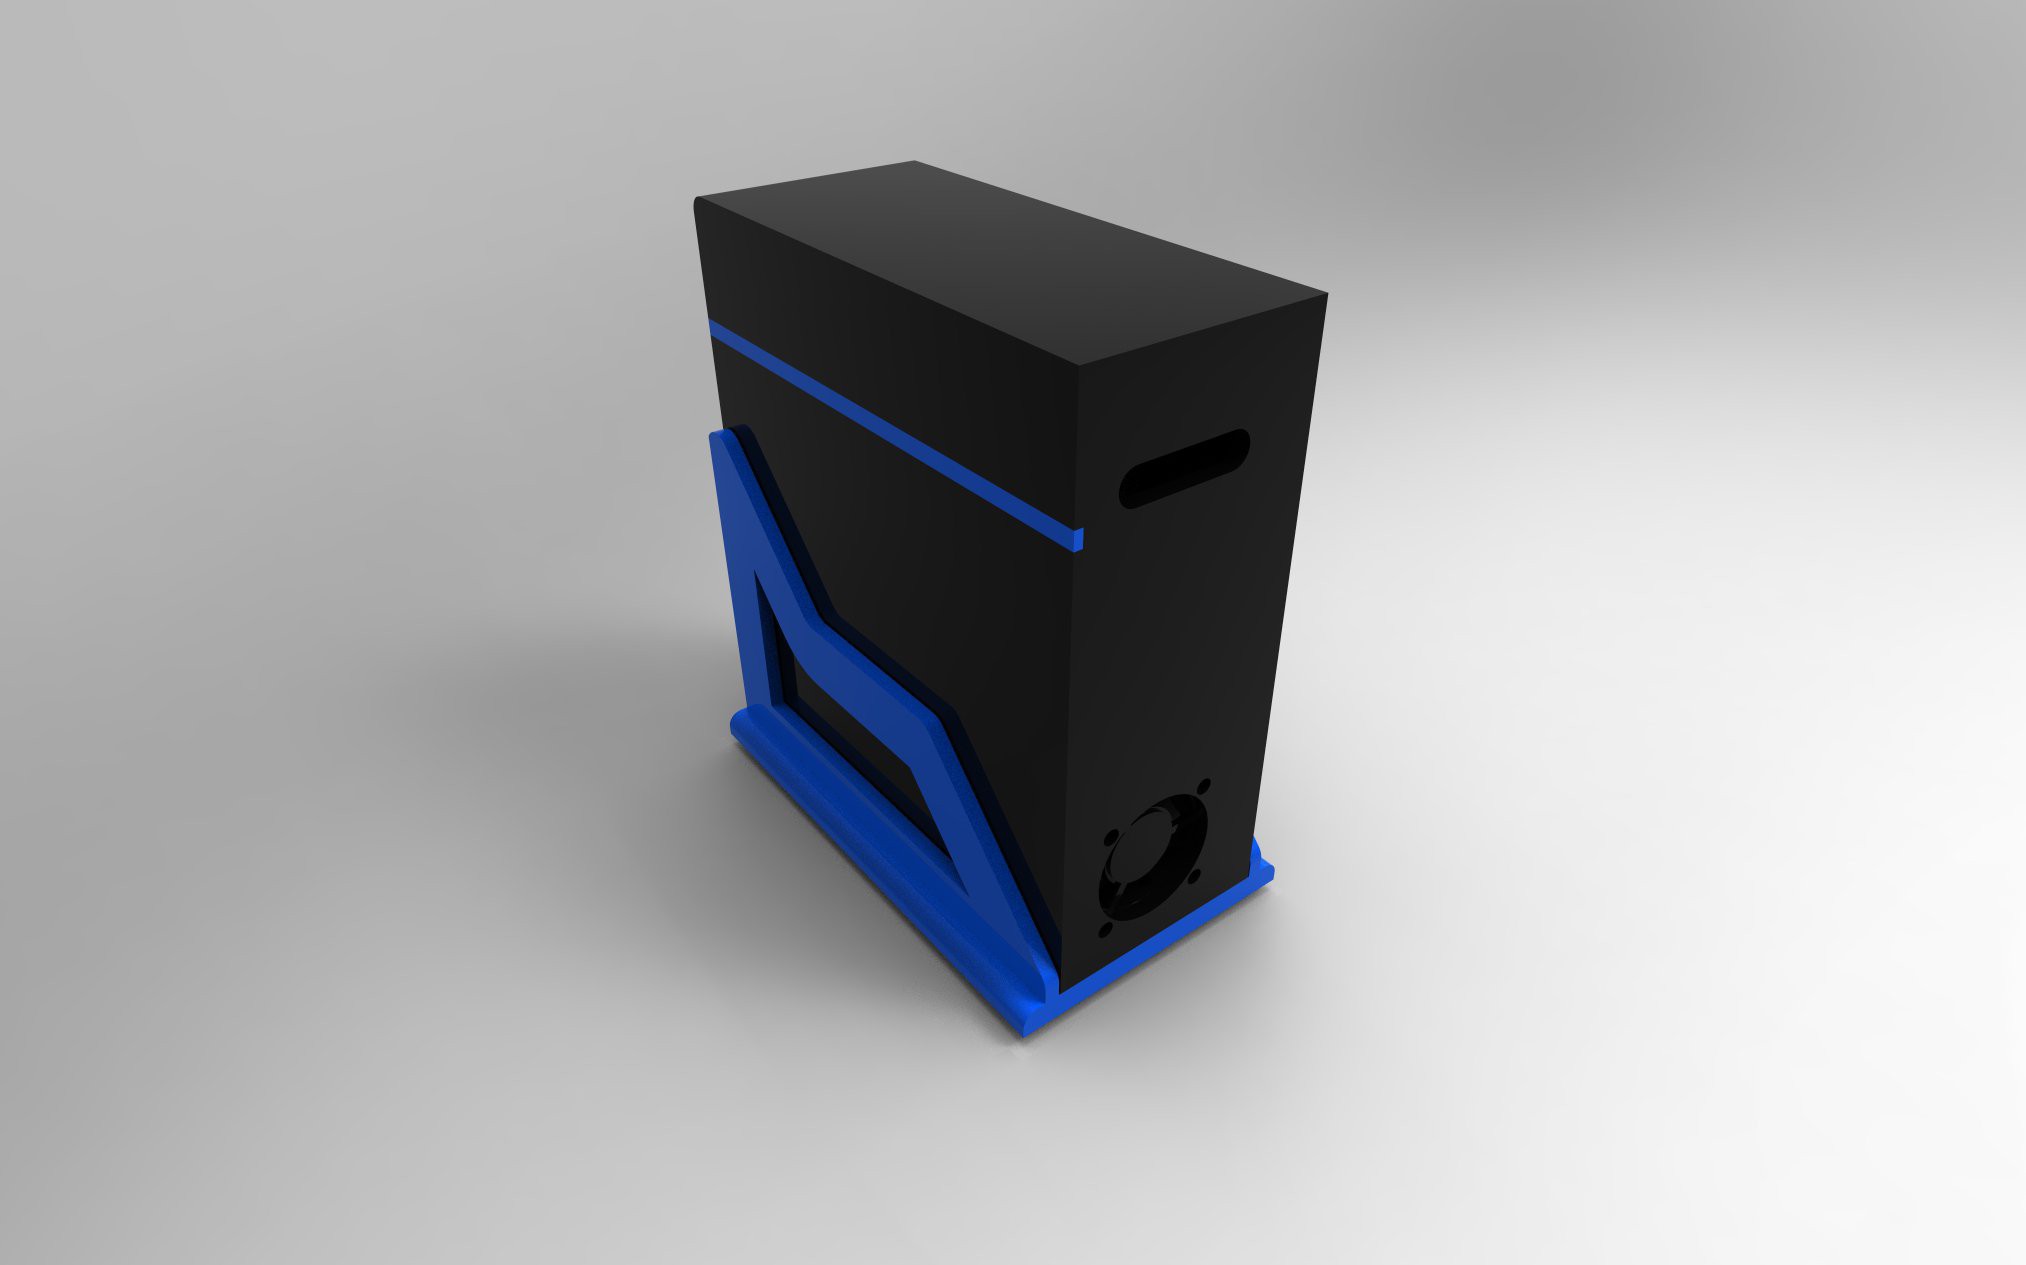
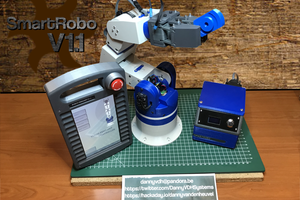
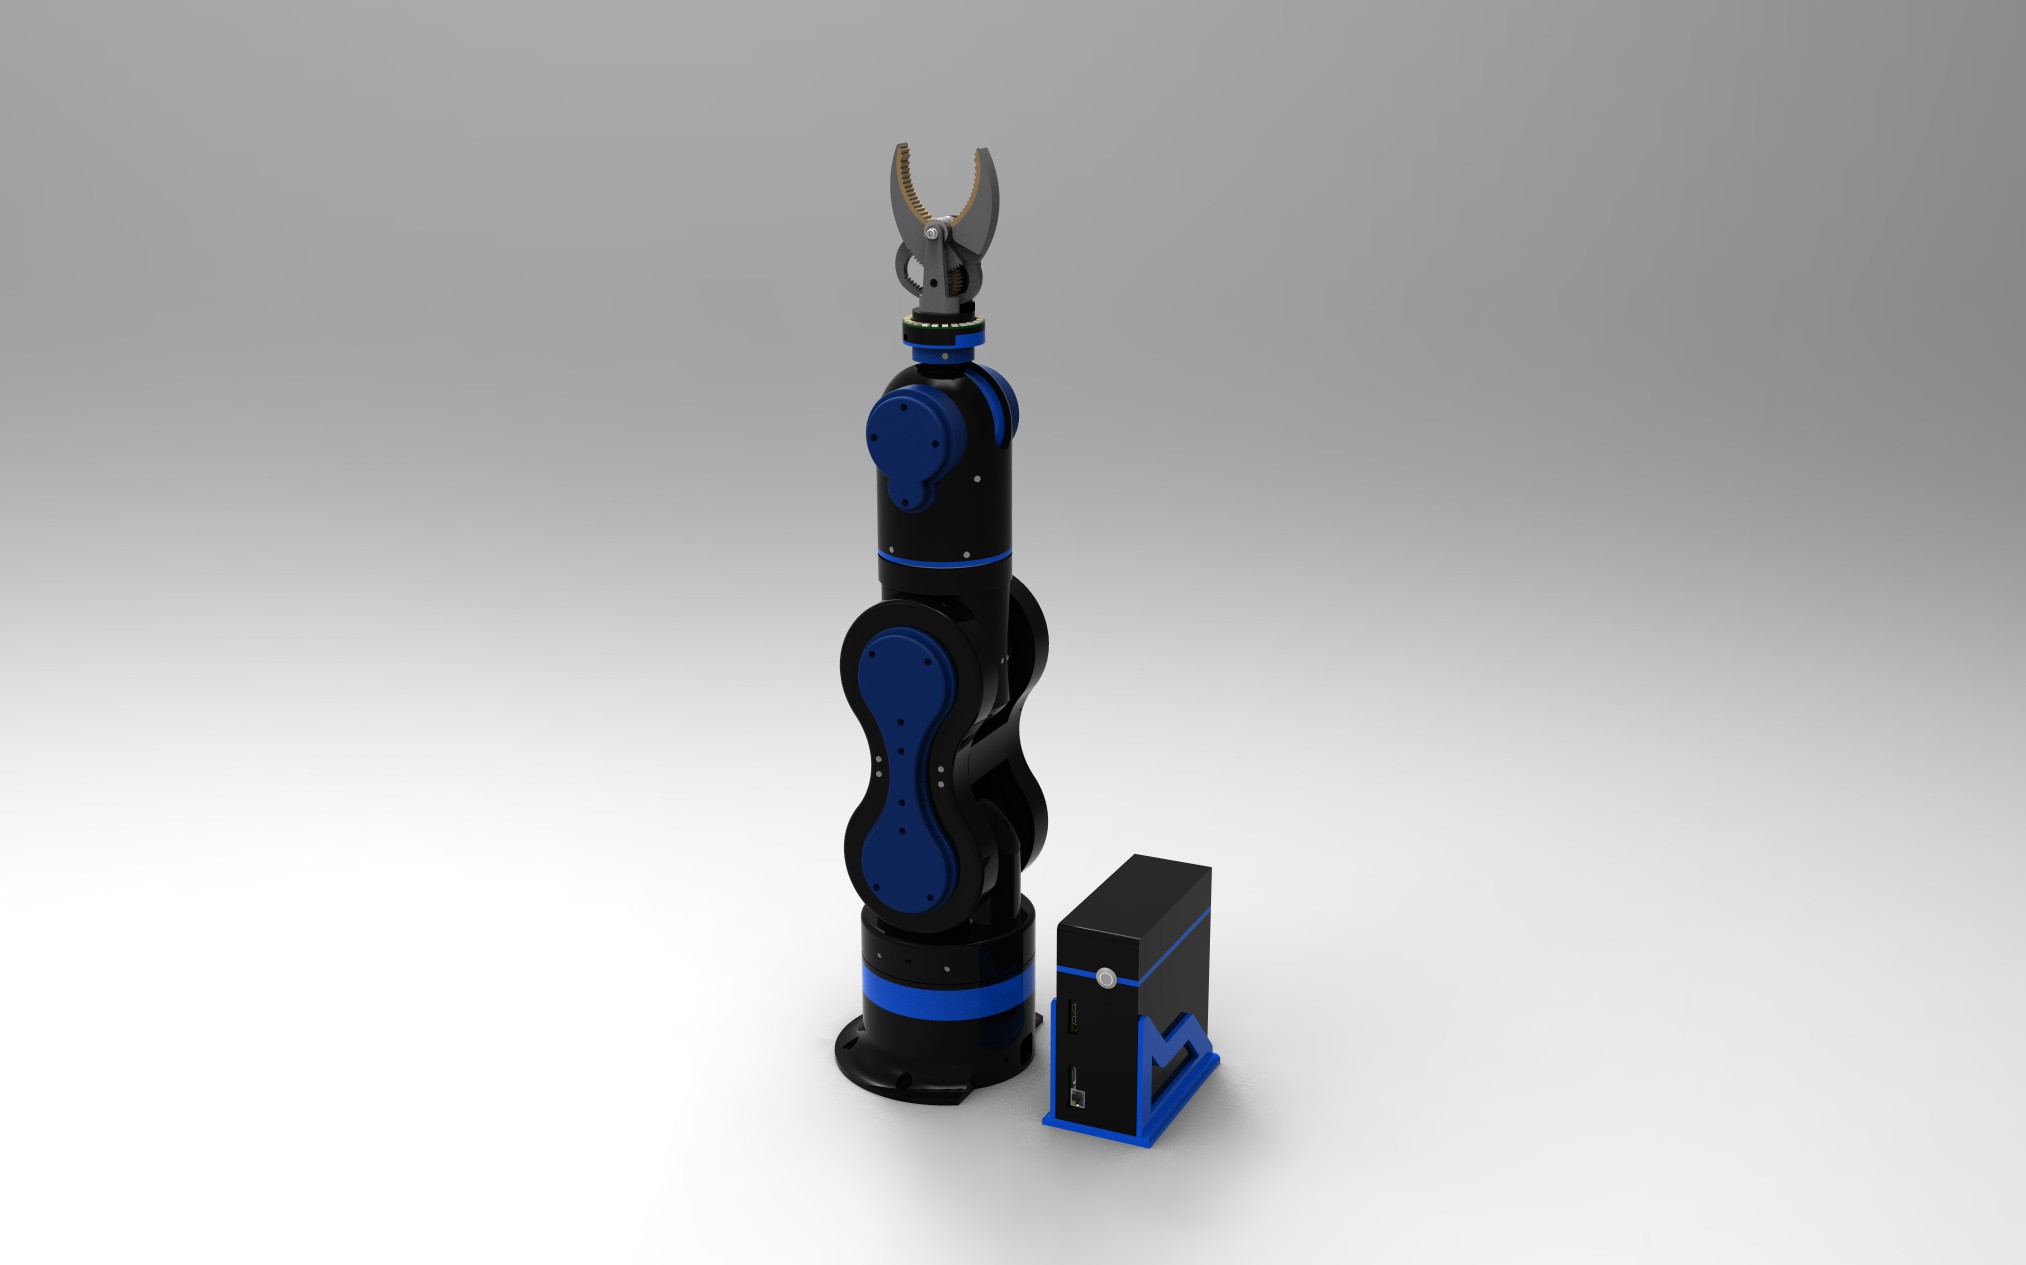
    For all those wanted a seperate controller box, there's room enough for the ultratronics pro V1.0 board, if you want a empty holes box, just ask!

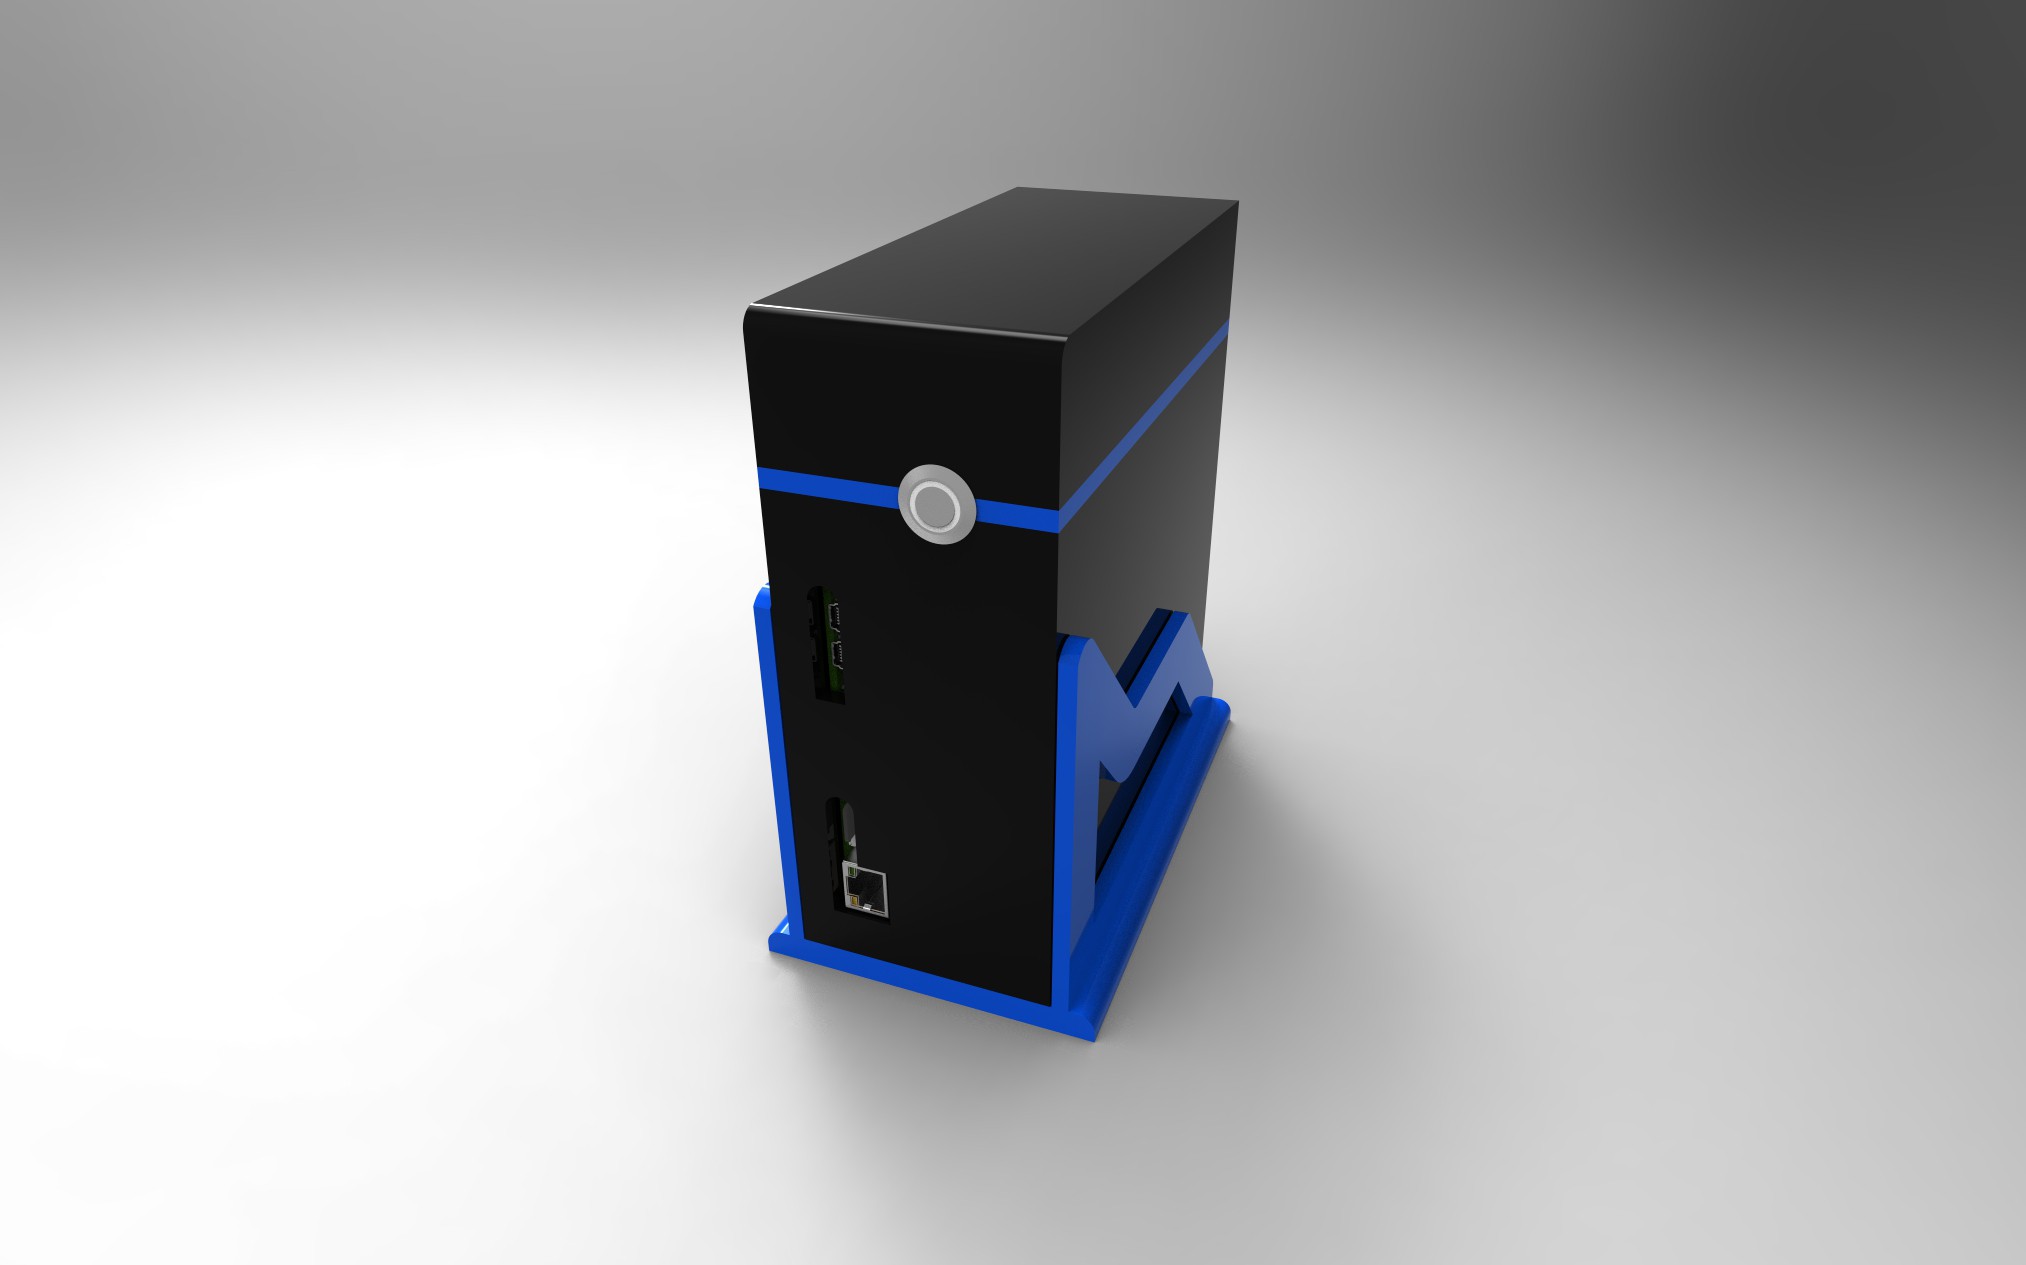
    If you want some dimensions, no problem :-)
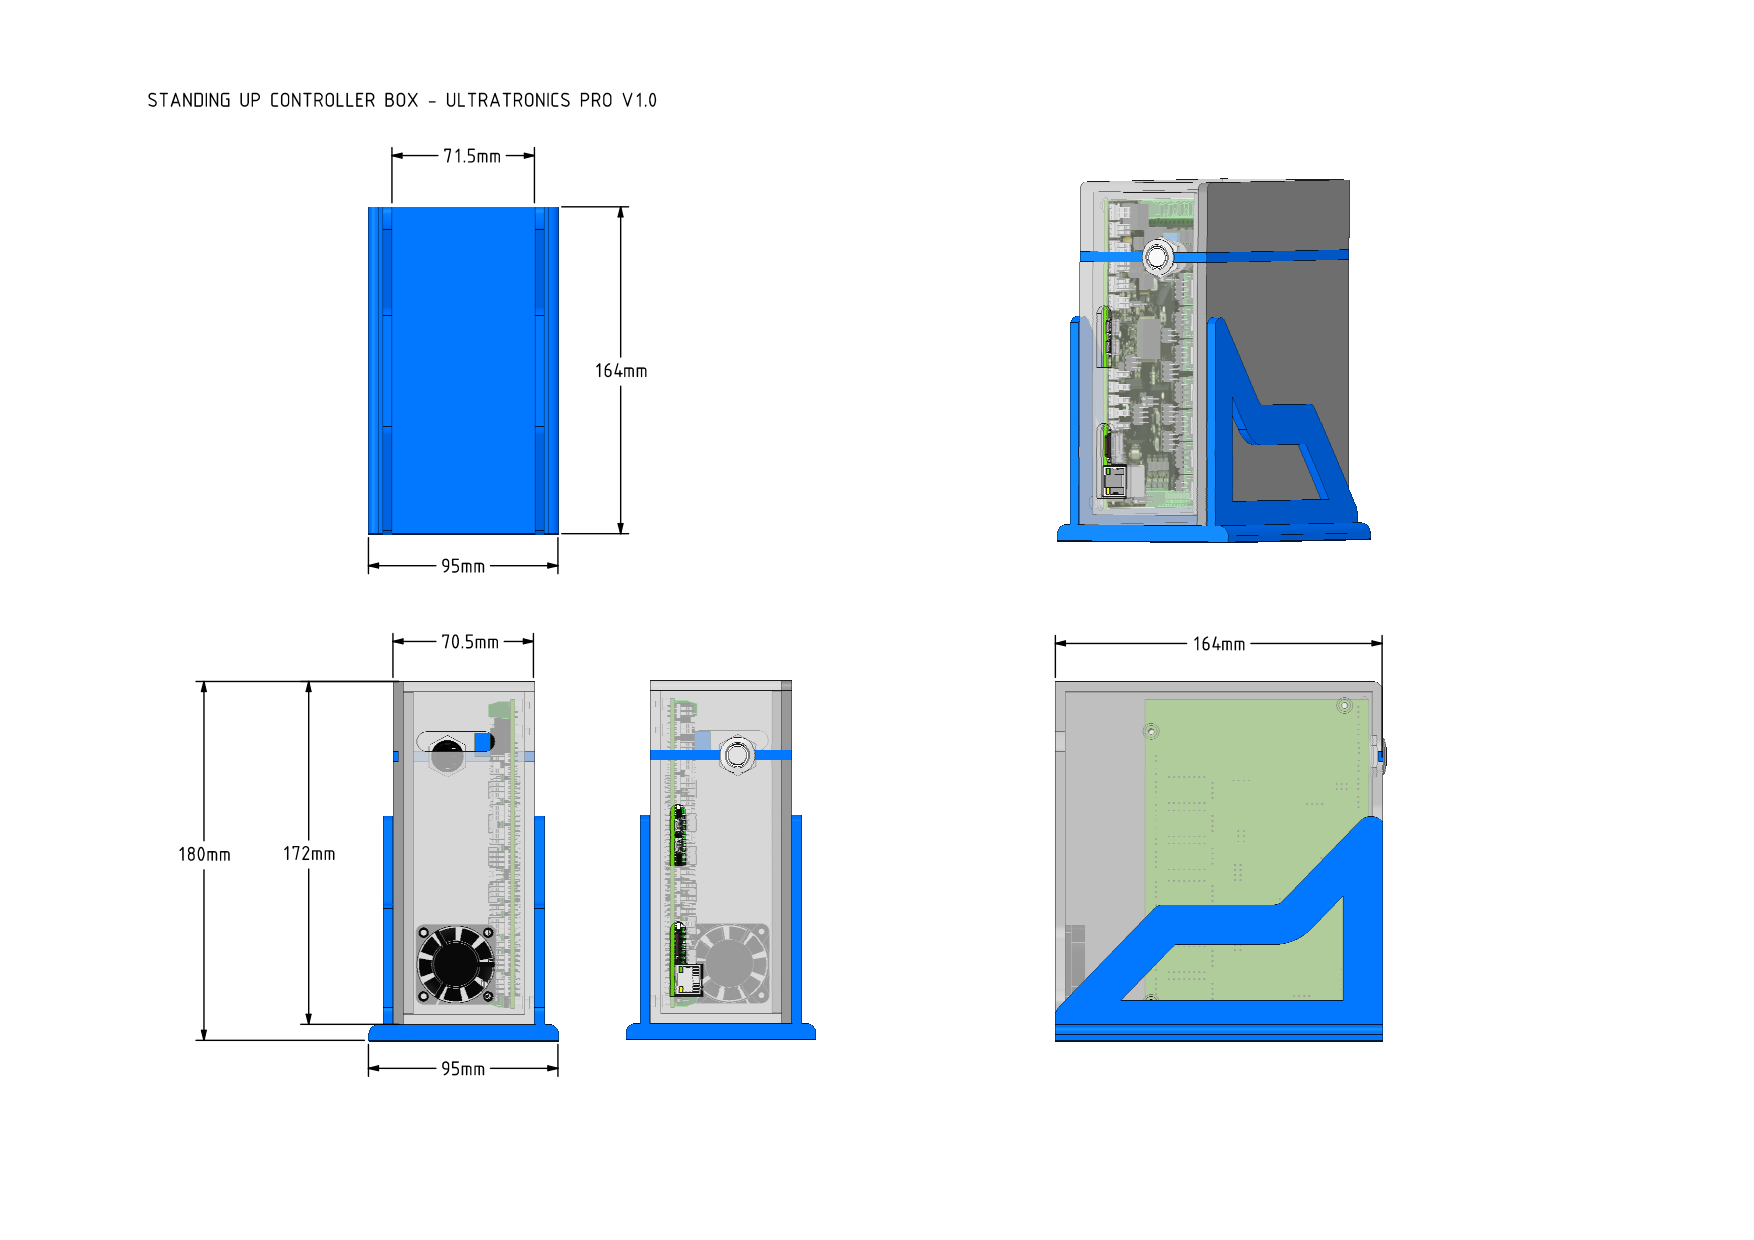
    Hope you like it! (for some personal modifications just sent me a comment!)

View all 36 project logs

  • 1
    Step 1

    Everything has been printer with stratasys Uprint SE, because some pieces where to big I changed some 3D parts, you can find them on my Github page if you have the same problem. I made them to be as strong as the originals. Feel free to ask me if you get in trouble printing it. :)

  • 2
    Step 2

    All parts has been printed, in a couple of days I will assemble THOR and make a movie and instruction list of the build!

  • 3
    Step 3

    I'am working on a graphical controle with Unity, more will be updated in the coming weeks!

View all 4 instructions

Enjoy this project?

Share

Discussions

l.larose wrote 12/03/2017 at 20:33 point

Hi all, I find this projet really interesting!

Have you some information for accuracy on V2?

Thanks!

  Are you sure? yes | no

dannyvandenheuvel wrote 12/12/2017 at 07:30 point

All specs can be found by the original founder AngelLM, visit his page for more info.

  Are you sure? yes | no

Thalles Machado wrote 11/24/2017 at 12:30 point

Hello,

I've been wondering if you guys did some kind of instruction guide for this project.
We're are currently having some issues with the grbl and gcode. Normally we send some simple coordinates and the serial monitor returns either error 20 or error 2 (both are related to unavailable commands or irregular values). We even tried sending G0 A0 B0 C0 D0 X0 Y0 Z0, but it returned error 20.
Is this because we are not working with the micro end stop connected to the pcb or is this because another issue?

With best regards,
Thalles Machado

  Are you sure? yes | no

dannyvandenheuvel wrote 11/26/2017 at 09:00 point

I never used grbl ,angelLM works with these software.You have to ask him. I have a own software to move manually and automatic works with my graphical GUI pc controler software which isn't finnished for public at the moment. sorry for that, I am still working on it.

  Are you sure? yes | no

amjadalsarhi wrote 04/29/2019 at 12:42 point

Hello Mr.Danny, have you released your pc controller software to public or still not 

  Are you sure? yes | no

drew wrote 11/22/2017 at 17:30 point

Danny, if you're going to modify the BASE.stl file could you add a bit of sideways adjustment to the screw holes that mount the stepper motor? This would allow for setting the engagement of INNER_GEAR.stl to the drive gear. If you're not reworking the base I'll make the changes myself.

  Are you sure? yes | no

dannyvandenheuvel wrote 11/26/2017 at 09:03 point

Sorry for the delay, I will make a update soon, if you will change it earlier you can do the modification by yourself and put the step file on your page. I will collect everything together for the new release :-)

  Are you sure? yes | no

drew wrote 10/13/2017 at 23:04 point

Danny,  Are you interested in a slightly modified ART1BODY_P2? I added a bit of material back onto the side of the part that had been removed to make sliding in the steppers easier. Since you changed the part so the upper stepper can be installed from the top there's no need for clearance below the upper stepper. I feel this makes for a stronger part. I have an stl and Fusion 360 file if you want it although I'm sure you could make the same change quicker.

  Are you sure? yes | no

dannyvandenheuvel wrote 10/13/2017 at 23:46 point

Hi Drew,

You may post the stl file so I can see what you changed, then I update my part as well.
You can post it to wetransfer at dannyvdh@pandora.be.

Thanks for keeping to project alive and kicking :-)

  Are you sure? yes | no

drew wrote 10/14/2017 at 00:05 point

posted to wetransfer. are the source files from you cad program. I imported the step files into fusion but the timeline doesn't seem to be very useful.

  Are you sure? yes | no

donskit30 wrote 09/20/2017 at 02:01 point

Any suggestion on where to go to get my control PCB printed and may be settings may be

  Are you sure? yes | no

dannyvandenheuvel wrote 10/01/2017 at 14:21 point

Electronics came from https://reprapworld.com/, it is based around arduino due. step drivers came from https://www.pololu.com/

Hope it helps :-)

  Are you sure? yes | no

Gaëtan wrote 09/15/2017 at 14:12 point

Hello,

I am looking into building a 6DOF robot, but I am still pretty new to it (bought my 3D printer today). As you seem to be much involved into these 3D printed robots, besides the Thor robot arm you probably already have seen BCN3D's Moveo robotic arm, and its 6DOF remix.(https://www.thingiverse.com/thing:1693444)

Is there a reason why you would recommend to build the Thor robot instead of Moveo?

Anyone having some experience with both designs?

  Are you sure? yes | no

dannyvandenheuvel wrote 10/01/2017 at 14:18 point

Hi, sorry for the late reaction, to answer your question, I think both robots are almost equal to each other. The community around Thor will be more alive I think.

  Are you sure? yes | no

Sepio wrote 08/08/2017 at 11:20 point

Hi Danny,

The last few days I have received the Ultratronics Pro board. I made some connectors and a pcb for the level shifter. I also started printing the base. Today I set the correct amperage of the polulu drivers. Wich micro stepper resolution do you use?

SOURCE CODE / FIRMWARE:

I was looking for the firmware for the Utratronics board. On the reprapworld.nl site there are multiple firmwares for this board. Do I have to install one of these firmwares? I expect there is a lot of custom source code involved.

Where can I find the software (and sources) for the Nextion, the Ultratronics and the arduino inside the arm? I have downloaded al the Files on this site and looked at your github account but I was unable to find it. The only thing I found is https://github.com/AngelLM/grbl. This contains the things AngelLM has developed. Is this compatible with the Ultratronics? (Because it has another processor).

POTENTIOMETER:

In your "Thor+ v2.02 Angle Feedback Sensors Sheet" you talk about potentiometer 5 turn 5KOhm. Do you have a link to this item. I only found a 10 turn 5KOhm potentiometer on eBay. https://www.ebay.com/sch/i.html?_nkw=5+turn+potentiometer+5k

I also ordered the 10K 10 turn version. Is this also the version you used?

CAD FILES:

Is it possible for you to share the design files of the BASE.stl. I would like to add a fan to the base. I tried to do this with the .stl file in Fusion 360 but that isn't possible. I converted the .stl to a body but then it becomes to slow because of the many vertexes. 

PS. I am a software developer. In my freetime I did some Arduino development. I don't have much experience controlling the stepper motors but I really want to learn this.

  Are you sure? yes | no

dannyvandenheuvel wrote 08/13/2017 at 19:57 point

Hi Sepio,

For the ultraboard I didn't any firmware upgrade, it's the original V1.0
The software controler for all steppers and nextion hmi panel and the bluetooth dongle with usb host spi interface I wrote them all by myself.
Because I didn't had the time so far it's not uploaded yet, but if you wish I could do it the next comming days togetter with all step files. I have to bundle everything togetter and it takes me some time. Step files can be imported in almost every 3D program. If you want I could do the work to put the fan into the base, It's no big deal for me, I'll do it in no time :-) . Nobody ask it from me, that's why it had no priority.
The potentiometer for the base has been changed to 10K 10 turns and is working well. You can use a 10K 5 turns for the 4th joint. The reason for the 5 turns or less , the 4th joint do everything within 1 turn, the base needs 5 turns from the stepper motor to do the 360°. By doing this the analog resolution will still be fine.
The potentiometers came from 'conrad'.
For best results working with all stepper motors togetter will be 8 microsteps.

Be carefull that you power the nextion display with 5V, I destroyed one by putting it on the 24V, it was very stupid but I did it :( , and don't forget your logic shifter between nextion and ultraboard serial connection, it can handle only 3V3!

You could use a small stepdown pcb for the 5V that you can extract from your main 24V power supply.

Your nextion serial connection between the serial port on the ultraboard needs to be shielded! That solved all my communication problem I had in the past.

I used the display with my combined power supply and took the 5V from there, it works with the intern 5V but the power divider was getting to hot.

If you don't won't to mess up your wires I advice you to use a slipring, every wire can handle 2Amps, because the base motor don't have to go through the slipring it will be strong enough. I haven't any problems till now. You gone have an arduino mini inside the side cover of art.2 to attach all feedback pots, the gripper and neopixel ledring.

I try to do my best to keep my promises to you the next comming days, don't shoot me if I couldn't do it within this time :=)

  Are you sure? yes | no

Sepio wrote 08/14/2017 at 07:42 point

Thank you for the al the information. I have ordered the slipring a week ago. I already used one in a wind turbine project.

I would appreciate it if you could upload the steps files and software.

And if you could add a fan and ventilation holes to the base it would be nice also. AngelLM’s base version is an nice example. It uses a 40mm fan.

  Are you sure? yes | no

Olaf Baeyens wrote 08/13/2017 at 20:59 point

Hello,

for the Nextion I created a step example how to use it on the Ultratronics v1.0 board.  The Ultratronics  v1.0 board is basically an Arduino Due. Which have give me some headaches since this It is a bit different than an Arduino Uno or Mega.

https://hackaday.io/project/16483-building-the-thor-robot/log/62421-programming-the-nextion-7-panel

Connecting the Nextion display I also provided some steps. 

https://hackaday.io/project/16483-building-the-thor-robot/log/62419-connecting-the-nextion-7-panel

The Nextion display needs a lot of current the Arduino board could not deliver in my case. If you connect it and it flashes and then reboots, it means not enough current. I know resolved it by adding a Buck converter that converts the 24V to 5V. The blog post was before I had this Step down bucks converter.

Here I posted a how to use the Ultratronics v1.0 in the Arduino editor

https://hackaday.io/project/16483-building-the-thor-robot/log/50484-ultratronics-pro-v10-programming-setup

This blog post I mapped the Ultratronics board pins to the Polu drivers. This is an Arduino Due so the code that you normally find on the Internet is for the Arduino Uno/mega and does not work for this Due.

https://hackaday.io/project/16483-building-the-thor-robot/log/60372-development-controlling-the-stepper-motors

  Are you sure? yes | no

Sepio wrote 08/14/2017 at 07:50 point

Thank you for all the info. I’m going to study it. FYI I started a buildlog. https://hackaday.io/project/26341-building-the-thor-robot-arm

  Are you sure? yes | no

Olaf Baeyens wrote 08/14/2017 at 23:19 point

The stepper resolution is interesting. More steps means less noisy gear but also slower moving parts. When you enable the motor then it jumps to its nearest full step. This effect is tiny but it means that you have a small error.

The maximum speed of the motor depends on the number of steps per second you can produce. And you have to realize that the Polu driver needs a minimal pulse down (1.9 µs)  and up (1.9 µs) time so 3.8µs per step.

This seems fast but don't forget that you also have a big gear that drives the base. So you may want to deduce the number of micro-steps depending on the speed you want the parts to move. It may be different for different parts. This is where the fun goes, discovering what the best settings are :-)

  Are you sure? yes | no

Sepio wrote 08/04/2017 at 07:59 point

Hi Danny,


The last few days I have looked at al the great work you have done. I have desided that I am going to print your version of the Thor+ Robotic arm. Yesterday I ordered most of the hardware for the big case version with display.

I haven’t bought the Bulging 400 series Buccaneer connectors yet. There are 3 holes in the case. Do you use al three connectors? How many pins do you use of each connector? I would like to replace the one for the power cable with a 2pin 8A rated connector.

I will start printing today. Can you tell me which parts are safe to print an which parts will change in v2.02?

Best regards from the Netherlands

  Are you sure? yes | no

dannyvandenheuvel wrote 08/05/2017 at 19:17 point

Hi Sepio,

sorry for the late reaction, to busy :(
I'm trying to put version v2.02 online today, I am almost finnished with putting all stl togetter. It will be in a couple of houres.

  Are you sure? yes | no

dannyvandenheuvel wrote 08/05/2017 at 21:14 point

V2.02 online! also added case with or without connector holes so you can decide the connector you want to use :-) happy printing!

  Are you sure? yes | no

Sepio wrote 08/06/2017 at 09:12 point

Thank you for the new version. I really like this design. 

I tried to run the unzipped MAC_ROBO_GUI_V0.1.11.2016.rar. But it isn’t a valid app. Do I have to do anything extra?

  Are you sure? yes | no

dannyvandenheuvel wrote 08/06/2017 at 17:32 point

You have to go to terminal mode.
right click on app and  select 'show package contents', double click on contents, then double click on MacOS.

type in terminal chmod 777 and press spacebar

now drag file MAC (in map MaxOS) to terminal en press enter.

Now double clieck on app, it will open now because it has enough rights.

Sorry for that problem, will be fixed in next release.

  Are you sure? yes | no

dannyvandenheuvel wrote 08/06/2017 at 20:55 point

If it still won't run you have to validate the program, go to security and privacy and set permissions for this app.

Have fun!

  Are you sure? yes | no

kurtanskyrene wrote 07/18/2017 at 14:30 point
Hi Danny - really like the work you've done to this project.

How is V2.02 going along? When can we expect the updated files for 3D printing and closed loop systems to be uploaded?

  Are you sure? yes | no

dannyvandenheuvel wrote 07/18/2017 at 17:32 point

Hello kurtanskyrene,
Little changes has to be done, I have been programming a while on the GUI controler. Soon I will pickup and after the global testing it will be published.

Best regards.

  Are you sure? yes | no

Marc Peter wrote 07/18/2017 at 18:18 point

Hi Dany, I'm ready to print, it's my favorite next project. And many thanks for your works! Best regards from Swiss

  Are you sure? yes | no

dannyvandenheuvel wrote 07/18/2017 at 18:34 point

Thanks

  Are you sure? yes | no

dannyvandenheuvel wrote 08/05/2017 at 19:18 point

Like I mension it at upper comment, I'm trying to get everything online today.

  Are you sure? yes | no

dannyvandenheuvel wrote 08/05/2017 at 21:15 point

V2.02 online! happy printing!

  Are you sure? yes | no

kurtanskyrene wrote 08/07/2017 at 09:13 point

Excellent, thank you Danny! How many months did this take you, because the  GUI controller looks like some really quality stuff. I will finish another project I am working on and then start with this. I'll report my progress.

  Are you sure? yes | no

dannyvandenheuvel wrote 08/07/2017 at 10:10 point

I started programming of the GUI controller from the start of this project, don't remember it exactly, it's in my free time and that has up and downs. Around 30 full days of programming all togeter I supose. I'm working on the recorder/player , it will work like a graphical programming enviroment like 'blockly' from google.
The hardware will get an extension with inputs and outputs so you can command or decide when to command the robot arm. I have a lot of ideas so inspiration enough!
Hope you like it so much like I did by building it :-)
The difficult part in assembling the robot parts will be the feedback sensor joints, be carefully how they have to rotate around there axis. I will make a manual later on. All the rest is very clear the same as AngelLM his version.
Software is another part, it's not ready finnished because my version will work with the Graphical GUI in the making. Because I'm working on a second robot arm I will make them compatible with eatch other. On the other hand you can make your own software in the arduino to move it around and later on you can upgrade it with my controller, the choice is yours! I'm sure you will need time to build it, I have assemble and disassembled it a lot of times, It has to be perfect when I finnish this project.

  Are you sure? yes | no

saedna42 wrote 06/04/2017 at 09:55 point

hi danny :) have some silly question

ima working on build tor
h/w part(printing,replace) is almost finished, ultra sonic board is shipping now..
(also my pocketmoney is 0..)
but .. i do not have experience for s/w like c or arduino etc.. im stuck at s/w

is there any follow the s/w work flow?

sorry for my english,  im 17years old just start learning english
Thanks for all

  Are you sure? yes | no

dannyvandenheuvel wrote 06/09/2017 at 03:02 point

Hello Seadna42,

I'm working on hardware manual en necessary documentations, in the next comming days it will be published. It becomes a very clearly defined documentation.
Still working very hard on graphical GUI controller, it is progressing very well at the moment so watch out , it will be released very soon.

Best regards.

  Are you sure? yes | no

rurikovich wrote 05/18/2017 at 18:38 point

Hello:) can I use arduino due + ramps-fd instead of  Ultratronics Pro V1.0 ?

Will it fit in the bottom of the arm ?

  Are you sure? yes | no

dannyvandenheuvel wrote 05/18/2017 at 19:19 point

Hi Rurikovich,

You can, but you lose some extra's like ethernet, SD card. It all depends what you want to reach. If you want to connect with the graphical interface you need ethernet and SD card. If you make your own controller or someone else you don't. It's up to you :-) Will it fit in the bottom, no way, to near inside of the base. You could use the addon case, there is plenty of room in it. If you want some modified piece you can ask, if I have the time I will do the modifications for you.

  Are you sure? yes | no

rurikovich wrote 05/18/2017 at 19:28 point

thank you for the answer. I understand.

  Are you sure? yes | no

guiducci.alessandro wrote 05/10/2017 at 14:34 point

Hi people,

silly question, Ultratronics Pro V1.0 board is >100 euro?or i can't find the right seller... is there a cheeper option?

  Are you sure? yes | no

dannyvandenheuvel wrote 05/10/2017 at 15:26 point

Hi Alessandro,
I know the board isn't cheap but everything except the drivers are on this board. If you take a arduino mega with ethernet shield and a driver shield you will pay allmost the same prize. The ethernet will be needed when you want to command it with my graphical Thor GUI controller in the near future. You need 7 additional stepper drivers.
You find the drivers at Pololu site. https://www.pololu.com/category/154/drv8825-stepper-motor-driver-carriers-high-current and the main board at https://reprapworld.com/products/electronics/ultratronics/ultratronics_pro_v1_0/

The PCB has a compatible arduino DUE on board and has the advantage that it is 3 times faster than arduino Mega board.
It has a lot of extra's on board ! I've added a bluetooth host to command it with a PS4 controller for manual movements. http://www.hobbytronics.co.uk/ps4-controller-bluetooth

Hopefully you understand why I chose this solution.

  Are you sure? yes | no

guiducci.alessandro wrote 05/10/2017 at 16:05 point

Thank you Danny, very clear! Last question, where can i find a wiring diagram and instructions for all the electronic parts?

  Are you sure? yes | no

dannyvandenheuvel wrote 05/10/2017 at 16:19 point


This is the latest electronic sheet from my project.
https://hackaday.io/project/16665-thor-robot-with-addons-and-gui/log/53204-electronic-sheet-thor
There are some addons around the main board but not needed, all depends what you wanted to achieve.
There will be a more detailed drawing comming soon.

  Are you sure? yes | no

Olaf Baeyens wrote 05/10/2017 at 18:51 point

Hello Guiucci, I want to point out that this Ultratronics board v1.0 is an Arduino Due. which operate at 3.3V.  Be careful when you want to hook up 5V sensors, you need a way to convert it to 3.3V

The other thing you must know is that this board can handle 12V or 24V. IF you choose to connect 24V to it then realize that every 12V mark on that board is actually 24V. So you must use 24V fans instead.

  Are you sure? yes | no

kfriesth wrote 04/22/2017 at 21:41 point

For your coding and control have a look at what our group is doing. 

https://github.com/ros2/ros2/wiki
http://wiki.ros.org/rviz
http://wiki.ros.org/gazebo

  Are you sure? yes | no

dannyvandenheuvel wrote 04/11/2017 at 13:17 point

People are asking me a lot of questions how to build my version of Thor and the electronic parts.

For the moment there are 2 versions I have made upon the original Thor robot from AngelLM.

Version V2.01 has all the 3D printed parts without angle feedback sensors buildin.

Version V2.02 has all the 3D printed parts with angle feedback sensors buildin, these files are not ready online. I'm testing this pieces and at the end of this week they will be public.

The software has a total makeover and I try to finishing it in the next comming weeks.

The basic software can move the robot manualy into all directions with or without a PS3/PS4 controller. It's open source so you can decide to make your own controller or the one I have developed. This project hasn't finished yet, it's still in development! but you can start printing if you wish, if you want angle feedback, just wait for a few days when version V2.02 has been uploaded to my page. You can find all the electronic parts at one of my pages, look for electronic sheet! . There's also a video in the making how to assemble everything and how to build the electronics.

Building the robot is near the same as the original from AngelLM, except a few modified pieces.
If you want angle feedback and did not started printing V2.01 wait until V2.02 has been uploaded, for the people that have printed V2.01 you will see that in version V2.02 some parts have to be re-printed again, sorry for that but like a said, it is still in development.
Version V2.02 will be having all the electronics that I wanted so far, electronics software will be arriving very soon to the public.

  Are you sure? yes | no

Towi wrote 05/02/2017 at 14:39 point

Hey Danny.

Thanks for all your hard work you are doing and the time spent/you are spending.

Since a while I am printing V2.01 parts.

When you release V2.02 would it be possible for you to provide a list containing all parts that would need to be re-printed? Would be awesome.

I am totally new at this (robots) and the only thing I am doing so far is printing, printing, printing.

I am wondering if I can make this actually work.

When do you think the assembly video will be available?

  Are you sure? yes | no

dannyvandenheuvel wrote 05/02/2017 at 15:21 point

Hay Towi,

Version 2.02 will only have effect on the feedback at all axis, I printed them all (about 2 days printing, I know printing is very slow :-( . I used one spool (1kg) on printing the new pieces) . I hope to release it next week. (will have a upgrade list)
For the video, I have to disassemble my robot because I wanted to make the video from the beginning to the end. After that video there will be one for the electronics. I have to do it in spare time and sometimes it's very frustrating to have less time after a heavy bussiness day :-( . I try to do my best to finnish the robot asap. I'm also working on the graphical GUI controller, this will be part of this project and will have a big impact. This will be the big difference between all the robot projects on the web.

I wish you good luck in printing all the parts, be very patient and hope that every
part will be successively printed! I use a very proffesional printer because I use it for bussiness to. Some hobby printers have troubles with overhangs etc... . All my parts are perfectly printed. :-)

See ya!

  Are you sure? yes | no

dannyvandenheuvel wrote 04/02/2017 at 19:22 point

Did some testing to use the SDA SCL at the right side on the unitronics board, a little bit tricky but it works now for 100%.
Needed
pullup resistors 1.5Kohm between SDA,SLC lines to VCC. Edit the
'ps4_i2c.h' source and changed all the words 'Wire' into 'Wire1'. Added
Wire1.begin() in setup function.
Now everything is working like I wanted it! Got a spare serial port for connection on my arduino nano.
Don't
forget to attach the usb host module on TTL/USB module and set 'SERIAL
OFF' to avoid latency problems. Read the documentation very carefully
from the vendor.

  Are you sure? yes | no

Wilmer wrote 04/02/2017 at 06:35 point

Hello Danny again, I am sorry, but now I am seeing a new part for me: ART1TOP_RING. 

I have not seen it in your pictures. Did I skip someone? or just in case,  Could you tell me where is it located?. Thanks 

  Are you sure? yes | no

dannyvandenheuvel wrote 04/02/2017 at 10:03 point

Hi Wilmer,
This is one of the new addons , look at https://hackaday.io/project/16665-thor-robot-with-addons-and-gui/log/53541-adding-slipring-to-thor and you will see that it's needed when you want to place a slipring.

  Are you sure? yes | no

M3adrock wrote 03/31/2017 at 17:23 point

Thank you very much. I just have to print the clip and wait for the electronics I'm impatient to see how it moves. The truth that is a very good project with the latest contributions is impressive jejeje. Thanks to the promoters invest all the time

  Are you sure? yes | no

Wilmer wrote 03/31/2017 at 13:40 point

Hello Danny, I have printed the first parts of arm, now I am printing the Art1Body P2 and P3, but i have a question here, How do you fasten the Art1BodyP2 to Art1BodyP3?, There is no holes or cutouts on the brackets of Art1BodyP2. Thanks for updating the STL files...

  Are you sure? yes | no

dannyvandenheuvel wrote 03/31/2017 at 13:55 point

Hi Wilmer,

Art1Body was a hard piece to print in one run, that's the reason I splited it into 3 parts, Part 3 is the roof and it will be attached on Part 2 with self-tapping screws. It's also a better solution bringing in the 3th motor from above.

  Are you sure? yes | no

Wilmer wrote 03/31/2017 at 15:36 point

Ohhh I see. This was a clever solution. So many thanks for your quick answer. What do you think about uploading the freecad-src?

  Are you sure? yes | no

dannyvandenheuvel wrote 03/31/2017 at 19:29 point

I will be uploading the compleet source in the next comming weeks, The main reason, I don't work in freecad, I exported the origenal files from AngelM to step files and imported it into Spaceclaim, this is what I use in my bussiness days, It will be ported back to freecad so that it will become the sources back into freecad. Spaceclaim can be downloaded as Designspark Mecanical, the free version of this powerfull software package.  Take a look at it! Try it yourself. I will put the source files of spaceclaim also on my page.
https://www.rs-online.com/designspark/mechanical-software

  Are you sure? yes | no

Wilmer wrote 04/01/2017 at 10:57 point

Thanks, now I understand. Is good from you to share your files. I will to see Design Mechanical, good advise. Thanks for your time... 

  Are you sure? yes | no

M3adrock wrote 03/25/2017 at 18:52 point

Thanks for the project to Angel and you, I am currently building I do not have problems of impression or assembly but I do not understand of programming my question is publish the programming for the movement? thanks greetings

  Are you sure? yes | no

dannyvandenheuvel wrote 03/31/2017 at 13:57 point

All source to make movements will be on line in the next comming days, I'm still working on it to improve the software.

  Are you sure? yes | no

Towi wrote 03/13/2017 at 12:14 point

Hi Danny.

First let me thank YOU and AngleLM for all your hard work. Looks pretty amazing.

AngelLM's original Thor is suppose to cost about 350 Euros. With all your add-ons do you know what the improved Thor cost?

I haven't looked through all posts and stuff but do you have all files listed to make this robot or do I have to look through yours and AngelLM's files?

Thanks a lot.

  Are you sure? yes | no

dannyvandenheuvel wrote 03/24/2017 at 19:58 point

Hi, sorry for the late response. Had a few hard bussiness weeks, you can build the whole robot with add-ons. I didn't put all the files online but will do it this weekend.

  Are you sure? yes | no

Towi wrote 03/27/2017 at 20:29 point

Would be great. I think I have everything printed that is offered (except the boxes. Not sure yet which...

  Are you sure? yes | no

Towi wrote 04/04/2017 at 11:50 point

Hey Danny.

It looks like all STL files are uploaded now.

Is this correct?

  Are you sure? yes | no

dannyvandenheuvel wrote 04/04/2017 at 15:03 point

Every 3D STL part of the robot arm has been online, take V2.01 if your starting it from the beginning. You can make a choice what kind of controller you want to use, you've got a controller box or a connector box when you are planning to build your controller outside of the robot. I've made a seperate controller box for the one that will make a seperate electronic controller.
I'm just working on the feedback sensors, this will be in the next release be added, I'll try to build it as a addon upon the allready made 3D parts.

  Are you sure? yes | no

dannyvandenheuvel wrote 03/27/2017 at 22:34 point

Try to put every file on line this week from the moment I have a little bit of spare time, sorry for delay.

  Are you sure? yes | no

dehmel-martin wrote 03/30/2017 at 10:20 point

I also don't quite understand which files to choose additionally from AngelLM. Would be very nice if you could put up all STL files you need here on the project page. :-)

  Are you sure? yes | no

dannyvandenheuvel wrote 03/30/2017 at 12:54 point

THOR+ V2.0 All files online!!!

  Are you sure? yes | no

dehmel-martin wrote 03/31/2017 at 09:59 point

Thank you, helps me out a huge amount!

  Are you sure? yes | no

Similar Projects

Does this project spark your interest?

Become a member to follow this project and never miss any updates