 Michael Gardi
Why Another Turing Machine Project?
This started with a comment made by Newspaperman5: "Sweet! I would love a smaller and/or more capable version of [TMD-1] as a desk toy!", and it made me realize that I did too! I loved messing around with TMD-1. The tile interface is fun to use. There is enough there for educational purposes but I found that I am wanting more.
In this next iteration I will try to bring forward the simple to use, easy to understand, principles from TMD-1, but the emphasis will definitely be on increasing the overall functionality.
I'm thinking a 6-state / 6-symbol machine would be a good target. With it for instance, you could explore the 5-state / 2-symbol "busy beaver" problem for which there is still no definitive solution. Pretty cool.
So that's the why, and a little bit of the what, so now I just have to figure out the how.
Keeping the Tile Interface?
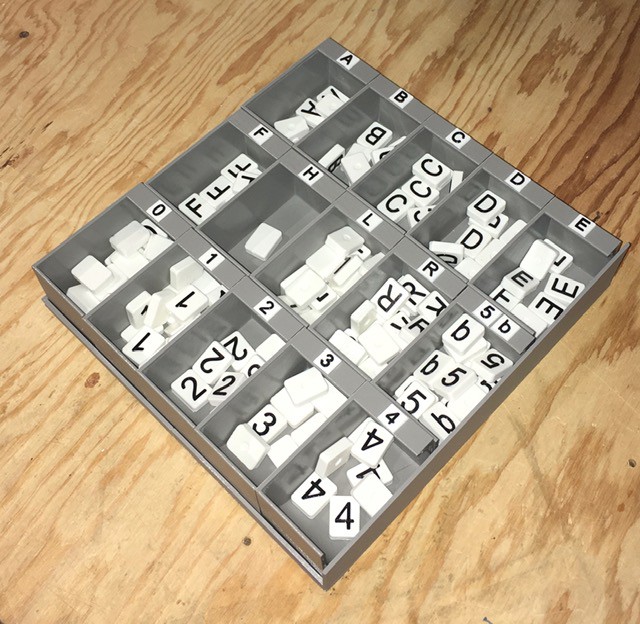
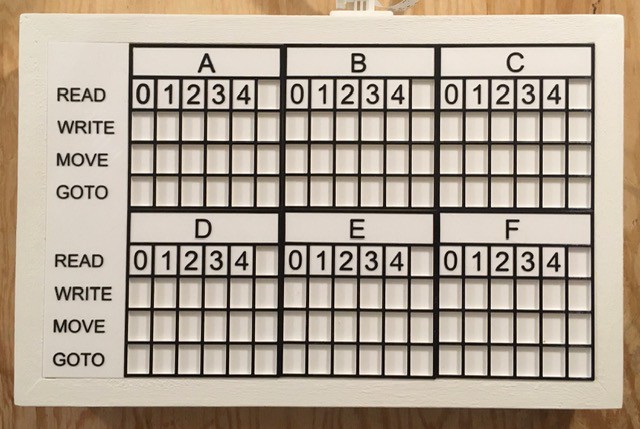
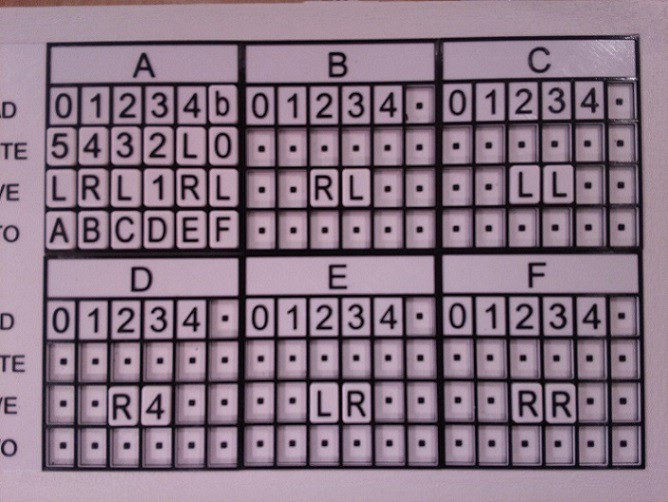
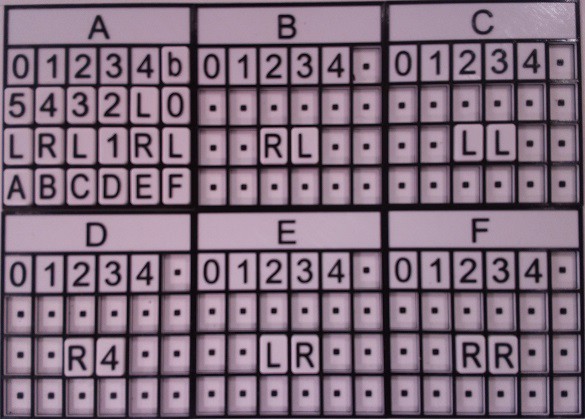
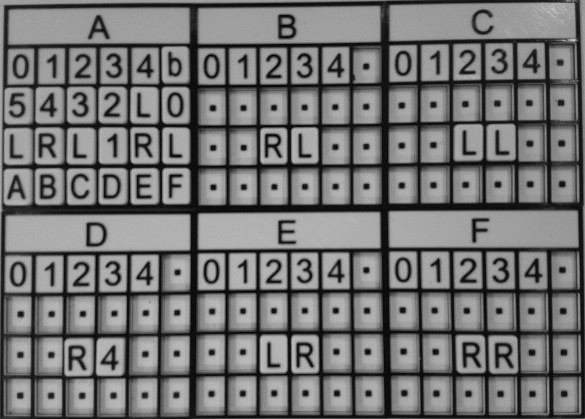
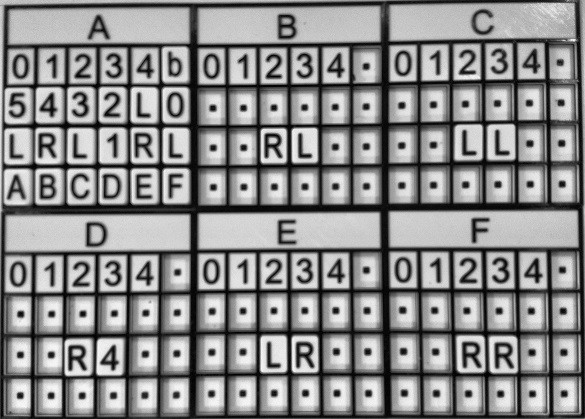
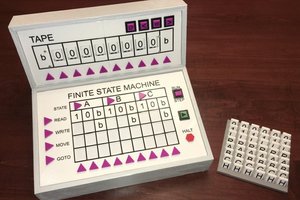
IMHO the best part of TMD-1 is the tile interface. Programming the machine by filling out the State Transition Table with "special" tiles feels natural, something about the tactile nature of the process I guess. It's also a lot of fun. I've had a few people run through the Quick Start Guide on my TMD-1 and they all agree: easy and fun. So if at all possible I would like to keep using tiles.
Keeping the tile interface with the larger machine does have some serious issues however, the biggest of which is that the technology that I used to "read" the tiles does not scale well. It took 33 Hall Effect Sensors to interpret the 24 tiles on the State Transition Table for TMD-1. A 4-state / 4-symbol machine would require 88 sensors, and my 6-state / 6-symbol machine would need 252 sensors. At about $2 apiece it adds up pretty quick, not to mention the wiring nightmare. Clearly this will not work. I need a better way.
To keep the State Transition Table layout down to a reasonable size with a 6-state / 6-symbol machine, the tiles themselves will have to be significantly smaller that those on TMD-1, as much as one quarter the size perhaps. I think that this would rule out something like NFC or RFID. The tags would just be too close together and even if they were not, you would have to implement a mechanism to move a reader across each tile. Still need a better way I think.
Newspaperman5: suggested: "My only viable solution would be to place 2 electrodes on each block with a resistor in it, and then reading the resistance, but that makes block-production pretty complicated compared to just placing a magnet or 2 in them, and I’m not sure how reliable it would be". Interesting idea, but I must say that I agree with his comments about block-production and reliability. Also for larger machine you would still have to somehow route 150 inputs into analog pins on the controlling CPU.
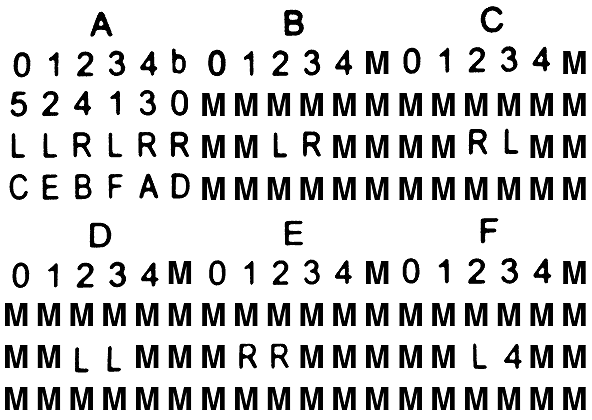
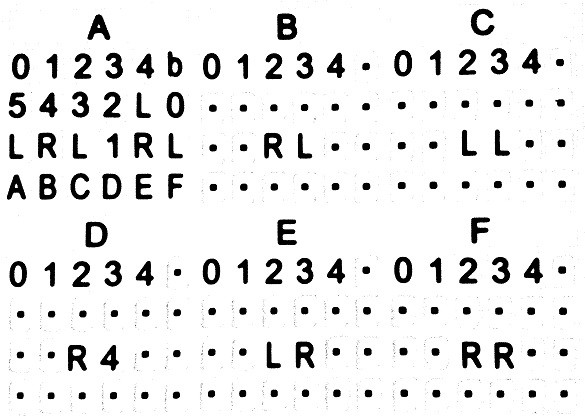
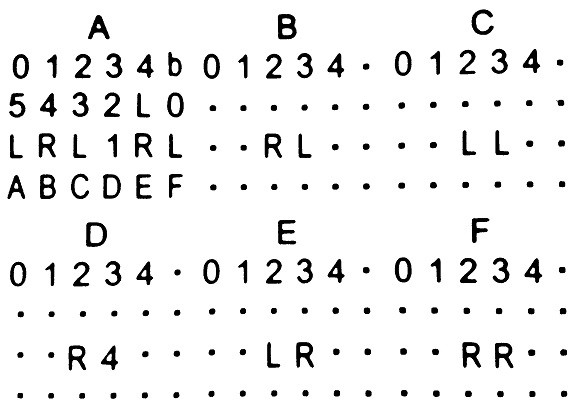
About the only thing that I can think of that might work is Optical Character Recognition (OCR). Mount a camera above the State Transition Table matrix, take a picture, and process the resulting image. In a past life I had the opportunity to work with Tesseract. An OCR engine originally developed by Hewlett-Packard as proprietary software in the 1980s, Tesseract was released as open source in 2005 and development has been sponsored by Google since 2006. Having used the software, I am fully aware of its limitations. While it works quite well at deciphering and extracting the text from say the page of a book, a letter, or other similar documents, one often gets poor results when trying to read from a structured layout like say a "State Transition Table". Still I am pretty confident that I can get it to work.
What Technologies?
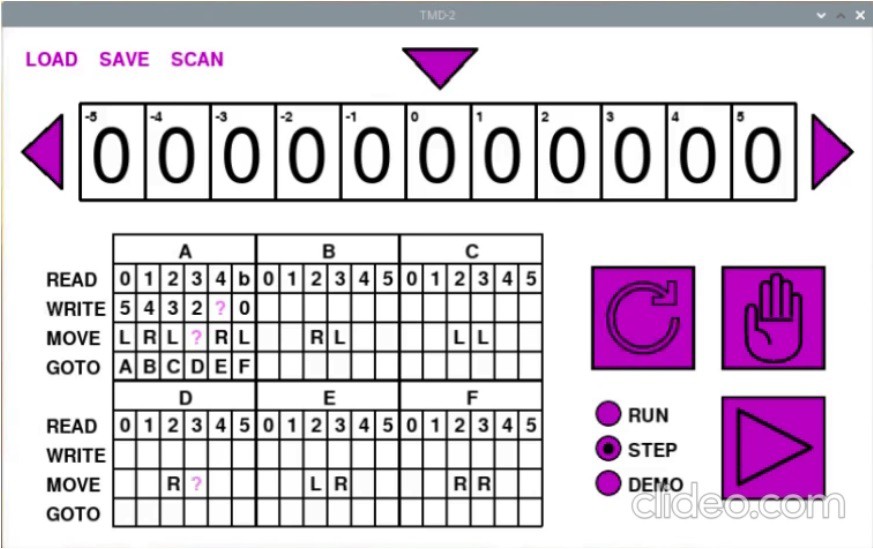
Having decided to at least try using OCR, and Tesseract specifically, I need to decide what I'm going to run my new machine on. Throw in the requirement that, if all goes well, I will have to take a picture of the State Transition Table of my larger machine to apply...
Read more »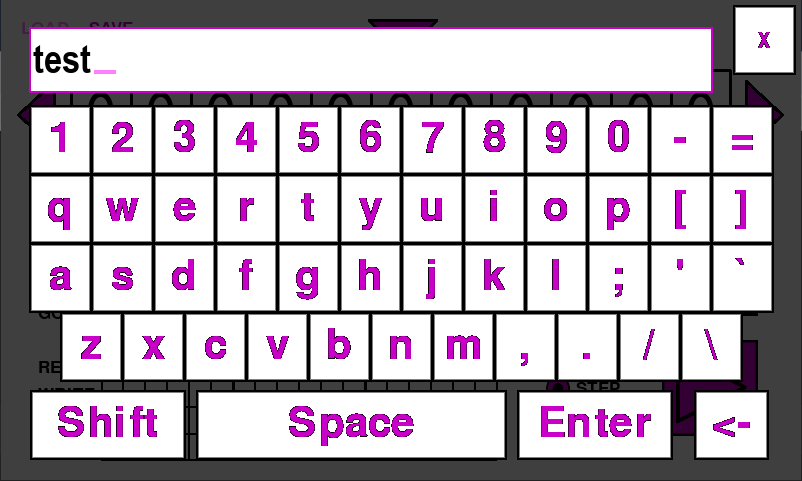


 Al Williams
 Bruce Land
 Tim Wilkinson
Hi Mike, another great build. I wrote up an article on this, should publish soon. Great job, and thanks for tipping us off!