

 Luke Beno
-
How to get CA ETo data with Electric Imp
10/11/2015 at 04:27 • 2 commentsWriting this quick post for @Reinier van der Lee and his #Vinduino, a wine grower's water saving project project.
He is starting to use Electric Imp to connect his Vineyard and one of the tasks it tor retrieve ETo data. I recommended Electric Imp because it's Agent is really good at doing REST API requests and parsing the results. IMO this would be much much more difficult and resource intensive in Arduino. So here we go.
Step 1) You must get your API key from CIMIS, so register at this page.
Step 2) Check your email and do as requested by CIMIS.
Step 3) Login to CIMIS at this page.
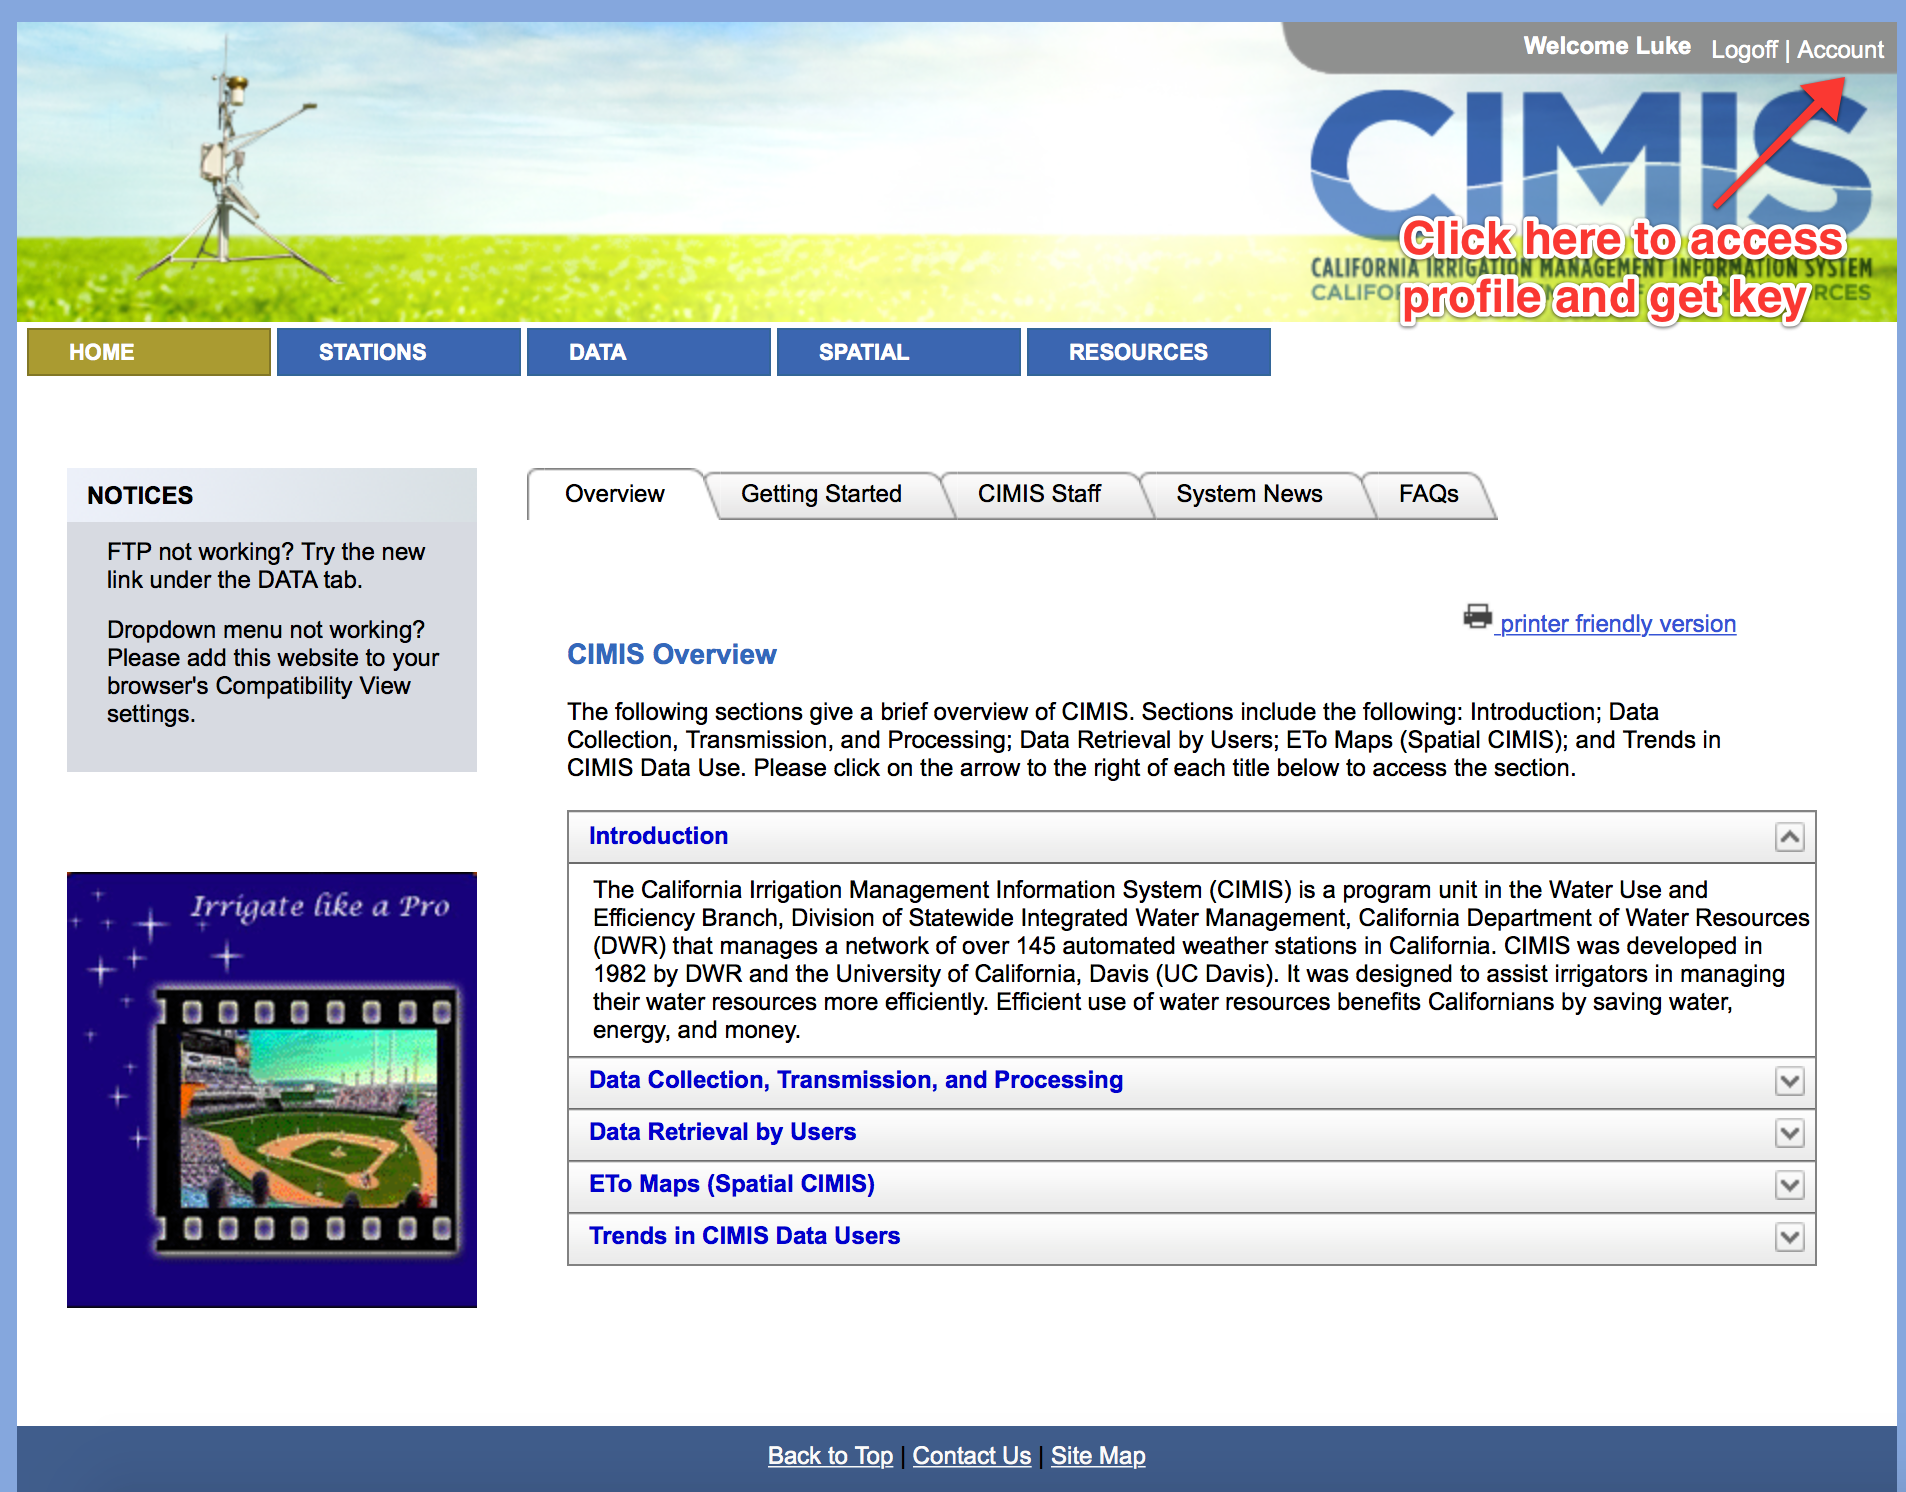
Step 4) click on the "Account" link in the upper right corner as shown below
Step 5) Scroll down to the "Application Key (optional)" Section. Follow instructions in image below.
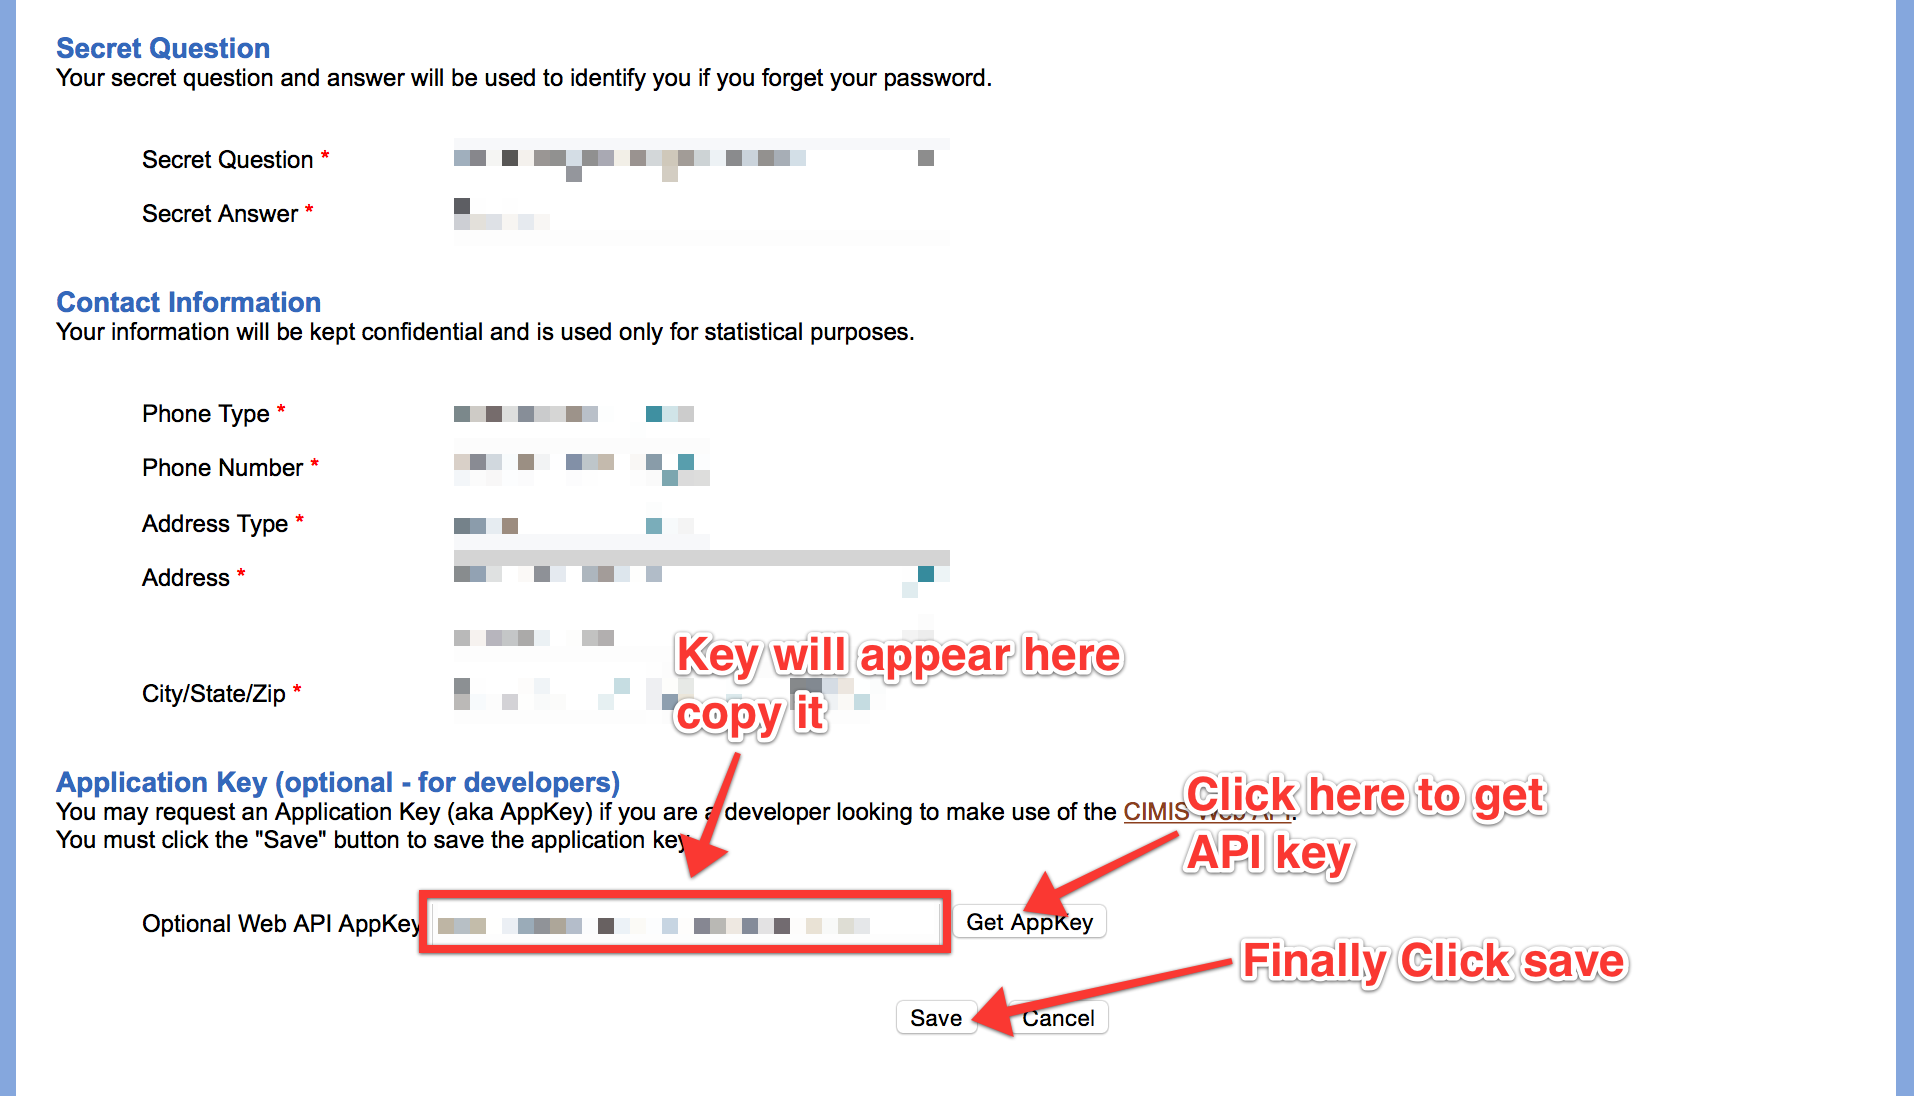
Ok now you have a AppKey, here's the code for the Electric Imp Agent:
function whatWasYestedaysDateAgain() {
  // Get Epoch time in seconds
  local now_GMT = time()
  // Correct for Pacific Time Zone (UTC-8)
  local now_PST = now_GMT - (8*60*60)
  // Subtract 1 day
  local yesterday_PST = now_PST - (24*60*60)
  // Convert epoch to a date object
  local yday = date(yesterday_PST)
  // Extract the year, month and day from date object
  // Remember for some lame reason months are listed 0-11 so add 1
  return yday.year.tostring()+"-"+(yday.month+1).tostring()+"-"+yday.day.tostring()
}

function getETo(zip) {
  local yesterday = whatWasYestedaysDateAgain()
  local apiKey = "Paste AppKey Here"
  local url = "http://et.water.ca.gov/api/data?appKey="+apiKey+"&targets="+zip+"&startDate="+yesterday+"&endDate="+yesterday
  local request = http.get(url, {});
  return http.jsondecode(request.sendsync().body)["Data"]["Providers"][0]["Records"][0]["DayAsceEto"]["Value"].tofloat()
}

server.log(getETo("92592"))
Paste your AppKey into the second line of the "getETo" function and you are good to go, the getETo function will return a float value of yesterdays ETo for the specified zipcode.
More info on the REST API can be found here: http://et.water.ca.gov/Rest/Index
-
How to Flash NodeMCU on Mac OS X Yosemite
09/14/2015 at 07:23 • 2 commentsWorking with ESP8266 and NodeMCU can be very easy, or very challenging! I’ve been fortunate to have good luck but I’ve fielded may questions from people that have been having trouble.
If you are on a Mac (or Linux), unfortunately there are not as many GUI options as there are on Windows. There is however one solid option that has been my go to method.
Setting up the software environment
First things first, think about the hardware, it is important to know what UART interface that you plan to program with. I’m a FTDI guy, I’ve always had good luck with the parts, they might no be the cheapest but I’ve found that they keep there drivers up to date, and overall have great quality. (no comments on FTDI Gate)
ALWAYS be sure to update your drivers. Especially on Yosemite because Apple’s default is to use their own version of libftdi instead of the official FTDI VCP drivers. This for certain does not work with the FT232X series parts.
You may download the FTDI VCP drivers here and install them:
Other drivers that might be useful if you are not using FTDI are:
SiLabs
Prolific
Be advised that some low cost boards (including the official NodeMCU dev board) use a very cheap USB to UART chip, the driver can be found here:
Once you know that your UART is working, now it is time to install esptool.py
You may download esptool here:
Once downloaded, create a folder and place esptool.py inside
open the terminal application and navigate to this folder using cd
You will also need to download the latest NodeMCU firmware binary from here:
There are two options for NodeMCU builds, one which includes floating point and one that does not. I highly recommend the binary without floating point because it does not leave much memory space for running code.
After download, place this bin file in the same folder.
esptool is written in python, as such it requires a working python environment. Luckily, OS X comes with Python pre-installed. pySerial is one dependency is not included but can be easily added using PIP.
You may install pySerial with the following command
pip install pySerialPreparing the ESP8266
ESP8266 has a built in UART boot loader that is used to program new binaries. The boot loader is entered if GPIO0 is tied to GND when ESP8266 comes out of reset or is powered on. Most modules either have a push button or a pad where a wire my be soldered to. Use this pin/pad or button to tie GPIO0 to ground and power on the module.
CH_PD must be tied to VCC to be functional, this is equivalent to "Chip Power Down”.
Some ESP8266 modules including ESP-03 also require GPIO15 to be tied to ground at all times for proper function.
Flashing
With the software environment setup and the ESP8266 in bootloader mode, its time to finish the flashing process.
You will need to find the path to the UART. In OS X these are typically in the /dev/ path and typically begin with “tty.”. List these paths with:
ls /dev/tty.*
For FTDI based chips it is typically “tty.usbserial-xxxxxxxx”, find the correct path for your UART and copy it to the clip board.
The final step is to program the chip. To do this, use the following command to flash. Be sure to replace “/dev/tty.usbserial-FTSMF90L” with the path to your UART and “nodemcu_integer_0.9.6-dev_20150406.bin” with the name of the firmware file that you wish to download.
sudo python esptool.py -p /dev/tty.usbserial-FTSMF9OL write_flash 0x000000 nodemcu_integer_0.9.6-dev_20150406.binEnter your password for Sudo and with some luck, you’ll see a message that looks something like this:
There you have it, any questions on this process, the ESP8266 forum is a great resource. How to Flash NodeMCU on Mac OS X Yosemite
My Lists
My Pages
Things I've Built
TS3633-CM1
TS3633-CM1 is designed to be an easy to use module for anyone looking to get started with SteamVR tracking. It uses the TS3633 IC from Triad semiconductor and has all of the necessary external components.
 Andreas Hoelldorfer
 Dan Royer
 Lutetium
 Reinier van der Lee
 zakqwy
 Philip
 Chris Low
 David
David Nathan Peterson
 Mar Bartolome
 Mike Turvey
 Mahesh Venkitachalam
 Jasmeet Singh
 AndyMac
 AlfredC
 Matt
Matt
Hi Luke, I left a question on the Tundra-Labs about the TL448K6D-GP-HDK reference design, but never got a response. You guys must be busy. Anyway, what I want to know is what is the output of this sensor kit ( TL448K6D-GP-HDK). Is it just the pulses of the light sensors or timestamps of pulses or maybe even the information encoded in the length of the pulses. I'm presently using some Triad sensors to catch timestamps with a micro controller, but especially the cabling to the sensors causes me headaches. Your reference design could potentially take that burden away as well as other concerns such as the interrupt response times. Can you explain what the reference design provides in terms of signals and processing capacities. Maybe you even have a datasheet that I can look at. Thanks much. Tony